1
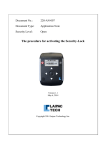
Document No.: 233-UM-002 Document Type: User Manual S911 Personal Locator V4 Utility & Quick Start Manual (Preliminary) Version 2.0 May 18, 2012 Copyright 2012 Laipac Technology Inc. Laipac Technology Inc. Release History Revision 1.0 Date 2012/04/12 Content It is initial release 1.1 2012/04/13 Add section “activation and inactivation of your unit” 1.11 2012/04/16 1.20 2012/04/25 Revise section 2.2 to add more description for charging process introduction to “setupAIO20120425” 2.0 2012/05/18 Introduction to new utility “setupAIO20120511” 50 West Beaver Creek Rd., Richmond Hill Ontario L4B 1G5 Canada Tel: 905-762-1228 | Fax: 905-763-1737 | E-mail: [email protected] | http://www.laipac.com 2 Laipac Technology Inc. Content 1. Knowing about your S911 Personal Locator V4 2. Getting Started 3. Un-install of previous utility 4. Installation of Utility “setupAIO” 5. Installation of USB driver 6. How to start configuration of your unit? 7. Quick configuration of your unit 8. Know more about configuration of unit 9. Go to LocationNow 10. Introduction to function buttons 11. LED indicator and unit’s working status 50 West Beaver Creek Rd., Richmond Hill Ontario L4B 1G5 Canada Tel: 905-762-1228 | Fax: 905-763-1737 | E-mail: [email protected] | http://www.laipac.com 3 Laipac Technology Inc. 1. Knowing about your S911 Personal Locator V4 The following illustrations show the locations and names of the physical features with this product A H. Power On/Off B. Button 1 B C G. Button 2 J. Button 3 I. ShiftWhen being pressed in conjunction with Button 1, 2, or 3, the S-911 V4 performs alternate operations associated with those combinations of buttons. F. Battery Charging LED Indication D E F G H I J L M E. GPS LED Indication D. GSM/GPRS LED Indication A. GPS Antenna C. Speaker L. Microphone M. USB connector for charging/Data Port 50 West Beaver Creek Rd., Richmond Hill Ontario L4B 1G5 Canada Tel: 905-762-1228 | Fax: 905-763-1737 | E-mail: [email protected] | http://www.laipac.com 4 Laipac Technology Inc. 2. Getting Started 2.1 Requested by the configuration of unit 2.2 AC-DC power adapter USB charging/programming Cable PC running Windows O.S. An activated SIM card with the requested GSM/GPRS service plan Charging the Battery Non-Contact Battery inhibiter slip Before using the S-911 PL V4, user needs charge his unit’s battery. Be sure to open the unit first and remove the inhibiter slip covering the on-board contacts to connect battery. In user’s daily use, to speed up the unit’s charging process, it is recommended that user should turn off the unit first, then, connect AC-DC power adaptor to unit through USB cable. To charge the unit, plug the AC-DC adaptor into a wall outlet, then plug the charger’s cable into the USB connector of the S-911, as shown in the picture. The Battery Status LED will turn to solid RED during charging and turn off when battery is fully charged. The whole charging process may last 3 to 4 hours to have the battery to be fully charged. Note: If unit keeps flashing its 3 LEDs, it means that this unit has not been configured after its leaving factory 50 West Beaver Creek Rd., Richmond Hill Ontario L4B 1G5 Canada Tel: 905-762-1228 | Fax: 905-763-1737 | E-mail: [email protected] | http://www.laipac.com 5 Laipac Technology Inc. 2.3 Installation of the SIM Card A valid SIM (Subscriber Identity Module) card must be provided by the user in order to use this device. Check with your GSM Mobile phone carriers carefully to ensure the SIM card coming with your contract or service plan, signed with carriers, is able to meet the requests from your GPS tacking service provider. The SIM card must be a 3V SIM. The S-911 personal locator is not compatible with the older 5V version SIM cards. Notes: Your provider for location based service may supply you with an S-911 Personal Locator which has a SIM card already inside. If so, do not open the case or the warranty may be void. The S-911 Personal Locator is designed to be a robust and anti-vandalism personal safety device. It is unlike a cell phone where the battery may be easily removed. The user will find that in most situations, the SIM card has been installed by the distributor or service provider along with a warranty seal. If you need to insert a SIM card into your unit, follow the steps below: Step1. Remove the main screw Main Screw Step 2. Use your fingers to open the case as shown in the picture below 50 West Beaver Creek Rd., Richmond Hill Ontario L4B 1G5 Canada Tel: 905-762-1228 | Fax: 905-763-1737 | E-mail: [email protected] | http://www.laipac.com 6 Laipac Technology Inc. Step 3. Follow the pictures for the placement of the SIM card 50 West Beaver Creek Rd., Richmond Hill Ontario L4B 1G5 Canada Tel: 905-762-1228 | Fax: 905-763-1737 | E-mail: [email protected] | http://www.laipac.com 7 Laipac Technology Inc. Step 4. Close the top and bottom cases carefully and tie them with the main screw. 50 West Beaver Creek Rd., Richmond Hill Ontario L4B 1G5 Canada Tel: 905-762-1228 | Fax: 905-763-1737 | E-mail: [email protected] | http://www.laipac.com 8 Laipac Technology Inc. 3. Un-installation of the utility If the PC or Laptop has installed the previous S911 PL V4 utility software, such as, “Laipac Platform BE”, or “setupAIO20120425”, user has to uninstall them before he installs the utility “setupAIO20120511”. Otherwise, user can jump to next section now. User should select Windows’ “All Program Laipac Platform BE uninstall Laipac Platform BE” to complete the un-installation. Or, select Windows’ “All Program Laipac Platform AIO uninstall Laipac Platform AIO” to complete the un-installation. Note: For this part of user, after going through the installation of “setupAIO” utility, he/she can skip the installation procedure of USB driver described in section 5. 50 West Beaver Creek Rd., Richmond Hill Ontario L4B 1G5 Canada Tel: 905-762-1228 | Fax: 905-763-1737 | E-mail: [email protected] | http://www.laipac.com 9 Laipac Technology Inc. 4. Installation of Utility “setupAIO” 4.1 Introduction to setupAIO “setupAIO” is a stand-alone utility package for Laipac’s GPS tracking products below ● S911 Personal Locator V4 (S911-PL-V4) ● Starfinder Lite 201(SF-Lite 201) Its first formal release version is “setupAIO20120511”, which is able to provide the two major functions below ● Configuration ● Firmware Update 4.2 How to get setupAIO User can download “setupAIO” to your PC by using the web link provided by Laipac. This utility package is a compressed file with suffix “.7z” or “.zip”, such as, “setupAIO20120511.7z” or up Decompress it to get the executable program “setupAIO20120511.exe” 4.3 Installation of utility Run “setupAIO20120511.exe”. Follow “Setup Wizard” instruction, click “Next”, step by step, you will complete the installation of configuration. 50 West Beaver Creek Rd., Richmond Hill Ontario L4B 1G5 Canada Tel: 905-762-1228 | Fax: 905-763-1737 | E-mail: [email protected] | http://www.laipac.com 10 Laipac Technology Inc. 5. Installation of USB driver 5.1 Installing USB driver on Windows XP 5.1.1 Pre-installation Go to Start All Program Laipac Platform Install Driver Click “Install”, then close the installation menu to complete pre-installation 5.1.2 Installation of USB driver To connect your S-911 PL V4 unit with charged battery and activated SIM card through the USB cable. Reset S911 V4 by pressing both + buttons about 2 seconds If you get a “Found New Hardware” message, click the “Yes, this time only” then click “Next”. This is for the configuration of the USB interface. 50 West Beaver Creek Rd., Richmond Hill Ontario L4B 1G5 Canada Tel: 905-762-1228 | Fax: 905-763-1737 | E-mail: [email protected] | http://www.laipac.com 11 Laipac Technology Inc. If the Wizard appears again select “Install the software automatically” then click “Next”. This is for the configuration of the virtual COM port. The device will be detected and will come up with another Windows digital signing warning message just click “Continue Anyway” then click “Finish”. 5.2 Installing USB driver on Windows 7 or Windows Vista The procedure below is for Windows 7. It could be used as reference for Windows Vista. 5.2.1 Pre-installation Go to Start All Program Laipac Platform Install Driver, then, right click to get menu below select “Run as administrator” 50 West Beaver Creek Rd., Richmond Hill Ontario L4B 1G5 Canada Tel: 905-762-1228 | Fax: 905-763-1737 | E-mail: [email protected] | http://www.laipac.com 12 Laipac Technology Inc. Click “Install” Select “Install this driver software anyway” 50 West Beaver Creek Rd., Richmond Hill Ontario L4B 1G5 Canada Tel: 905-762-1228 | Fax: 905-763-1737 | E-mail: [email protected] | http://www.laipac.com 13 Laipac Technology Inc. 5.2.2 Installation of USB driver To connect your S-911 PL V4 unit with charged battery and activated SIM card through the USB cable. Reset S911 V4 by pressing both + buttons about 2 seconds If PC screen’s bottom right corner displays hint bubble below, it means USB driver has been installed successfully. 50 West Beaver Creek Rd., Richmond Hill Ontario L4B 1G5 Canada Tel: 905-762-1228 | Fax: 905-763-1737 | E-mail: [email protected] | http://www.laipac.com 14 Laipac Technology Inc. 6. How to start Configuration of your unit? 6.1 Enter into setupAIO There are 2 ways below to enter into setupAIO utility’s platform menu, see Fig. 6.1-1 a. Double click icon “Laipac Platform AIO on PC” on PC’s desktop, or b. Go to Windows’ Start All Programs Laipac Platform AIO Laipac Platform AIO Fig. 6.1-1 Then, click “Run Utility” button to enter into setupAIO utility’s Cover Menu, Fig. 6.1-2 Fig 6.1-2 50 West Beaver Creek Rd., Richmond Hill Ontario L4B 1G5 Canada Tel: 905-762-1228 | Fax: 905-763-1737 | E-mail: [email protected] | http://www.laipac.com 15 Laipac Technology Inc. 6.2 Action on S911 PL V4 (unit) (1) Connect SF-Lite unit to PC by using mini USB cable (2) Reset S911 V4 by pressing both + buttons about 2 seconds 6.3 If unit is not with consistent firmware Under conditions below, user is able to see Fig. 6.3 a. The connection between unit and utility is OK b. Unit is not with the consistent firmware version requested by this utility. Such as, for utility package setupAIO20120511, S911 PL V4 consistent firmware version is V1.10. If unit is with the previous version Firmware V1.02 Fig. 6.3 In this case, use needs to update the unit’s firmware first, then, do the configuration on the unit. For Firmware Update operation procedure, user can refer to another document, 251UM-004, “S911 PL V4 Utility & Firmware Update Manual V2.0” 50 West Beaver Creek Rd., Richmond Hill Ontario L4B 1G5 Canada Tel: 905-762-1228 | Fax: 905-763-1737 | E-mail: [email protected] | http://www.laipac.com 16 Laipac Technology Inc. 6.3 If unit has been activated (unlocked) and with consistent firmware Under conditions below, user is able to see Fig. 6.3-1 a. The connection between unit and utility is OK b. Unit has the consistent firmware version requested by this utility. Such as, for utility package setupAIO20120511, S911 PL V4’s consistent firmware version is V1.10 c. Unit has been activated (unlocked) Fig. 6.3-1 User can click “Configuration” button to enter into Configuration Main Menu Fig. 6.3-2. Or, wait a while, automatically, user will be brought into Configuration Main Menu Fig. 6.3-2. Fig. 6.3-2 50 West Beaver Creek Rd., Richmond Hill Ontario L4B 1G5 Canada Tel: 905-762-1228 | Fax: 905-763-1737 | E-mail: [email protected] | http://www.laipac.com 17 Laipac Technology Inc. 7. Quick Configuration of your unit 7.1 General setting menu Fig. 7 Fig. 7 shows General setting menu. The setting items listed in this menu are those most basic setting for unit to be capable of accessing a remote location based service platform through certain GSM/GPRS network. If user completes this menu properly and save those settings to unit, see section 6.3, he should be able to access his desired service platform now, refer to section 9. Device ID: Specific unit identifier that identifies your device for online tracking. You can locate the Device ID on your Identity Leaflet or more accurately in your user account on the website www.LocationNow.com. Password: Used to protect the S911 PL V4 from other people affecting its operation with SMS commands. You can locate the Password on your Identity Leaflet. 50 West Beaver Creek Rd., Richmond Hill Ontario L4B 1G5 Canada Tel: 905-762-1228 | Fax: 905-763-1737 | E-mail: [email protected] | http://www.laipac.com 18 Laipac Technology Inc. GPRS APN: The Access Point Name is used by your SIM card to connect to the GPRS network. The Access Point is the carrier’s server through which the traffic becomes converted from GSM to GPRS Internet traffic. Check with your SIM Card provider for this item. GPRS APN User Name: The user name authorises your SIM card to access your carrier’s Access Point. It could be blank in most of case. GPRS APN Password: The password authenticates your SIM card to access your carrier’s Access Point. It could be blank in most of case. Domain Name 1a: This is the domain name of the remote www.LocationNow.com, use ‘laipgw1.com’. Port 1a: This is the Port used by the remote server with Domain Name 1a. For www.LocationNow.com , it should be ‘1688’. 50 West Beaver Creek Rd., Richmond Hill Ontario L4B 1G5 Canada Tel: 905-762-1228 | Fax: 905-763-1737 | E-mail: [email protected] | http://www.laipac.com server. For 19 Laipac Technology Inc. 7.2 Read the unit’s existing configuration Click “Read Setting from Device” button, utility will read back the current configuration from unit. If this operation is successfully done, user should see a popon window to indicate “Read current setting … Success”. See Fig. 7.2. Note: If the unit has never done configuration before, this operation will be fail. Fig. 7.2 50 West Beaver Creek Rd., Richmond Hill Ontario L4B 1G5 Canada Tel: 905-762-1228 | Fax: 905-763-1737 | E-mail: [email protected] | http://www.laipac.com 20 Laipac Technology Inc. 7.3 Save unit’s configuration A. Click “Save All Setting to Device” button B. Utility will write the edited configuration into unit and read it back to double check if this writing process is successful. If it is OK, operator should see “Writing new setting … Success”. See Fig. 7.3 below. Fig. 7.3 50 West Beaver Creek Rd., Richmond Hill Ontario L4B 1G5 Canada Tel: 905-762-1228 | Fax: 905-763-1737 | E-mail: [email protected] | http://www.laipac.com 21 Laipac Technology Inc. 8. Know more about configuration of unit If user wants to know more about how to use his S911 PL V4, it is necessary for him to understand some key setting items are described in this section. It will be great helpful for him to configure and use his unit properly. 8.1 SETUP Device ID & Password Fig. 8.1 50 West Beaver Creek Rd., Richmond Hill Ontario L4B 1G5 Canada Tel: 905-762-1228 | Fax: 905-763-1737 | E-mail: [email protected] | http://www.laipac.com 22 Laipac Technology Inc. 8.2 SETUP Service selection Wireless Data Plan This section governs the default GSM connection settings or what the unit will connect to first. GPRS: If you are using LocationNow tracking services, this must be enabled. GPRS mode tells the device it will be transmitting its information across the internet. SMS: If you are tracking service based on Short Message System rather than LocationNow, SMS mode should be enabled. It tells the device to transmit its information to another SMS device. Wireless Voice Plan This section initializes the voice option in theS911 PL V4. Voice: Originally, this setting is designed to tell unit if the existing SIM card is with voice calling enabled. Currently, unit has always enabled this setting actively. Of course, if you are using SIM card without Voice Plan, no calling or voice communication can be accomplished. 50 West Beaver Creek Rd., Richmond Hill Ontario L4B 1G5 Canada Tel: 905-762-1228 | Fax: 905-763-1737 | E-mail: [email protected] | http://www.laipac.com 23 Laipac Technology Inc. 8.3 SETUP Network setting Wireless Carrier This section covers the information required by the unit to access your carrier’s Access Point. GPRS APN: The Access Point Name is used by your SIM card to connect to the GPRS network. The Access Point is the carrier’s server through which the traffic becomes converted from GSM to GPRS Internet traffic. Check with your SIM Card provider for this item. The user name authorises your SIM card to access your carrier’s Access Point. It could be blank in most of case. The password authenticates your SIM card to access your carrier’s Access Point. It could be blank in most of case. User Name: Password: Server Domain Name 1a: Port 1a: This section governs the destination end point for the GPRS traffic This is the domain name of the remote server. For www.LocationNow.com use ‘laipgw1.com’. This is the Port used by the remote server with Domain Name 1a. For www.LocationNow.com , it should be ‘1688’. 50 West Beaver Creek Rd., Richmond Hill Ontario L4B 1G5 Canada Tel: 905-762-1228 | Fax: 905-763-1737 | E-mail: [email protected] | http://www.laipac.com 24 Laipac Technology Inc. 8.4 System Report REAL TIME REPORT Report and its setting: This option allows you to specify how frequent the unit will send a position update. You can specify the report by time value in hours, minutes, and seconds. You can specify the report by distance value in kilometers, miles, or yards. 50 West Beaver Creek Rd., Richmond Hill Ontario L4B 1G5 Canada Tel: 905-762-1228 | Fax: 905-763-1737 | E-mail: [email protected] | http://www.laipac.com 25 Laipac Technology Inc. 8.5 System Phone Book Assistance Number: When user presses the button + , the following actions will be executed. J. Send SOS/Panic alert message to remote server. K. Send a SMS message to phone with Emergency No.1 L. Dial the phone with Assistance Number Emergency No.1: When user presses the button with Emergency No.1 , unit will dial the phone Emergency No.2: When user presses the button with Emergency No.2 , unit will dial the phone SMS Base Station: The SMS Base Station Number is used when the unit is operating in SMS mode. All of the waypoints and alert messages will be sent to the SMS Base Station Number. This number aslo can belong to a cell phone, an SMS modem or any SMS device. 50 West Beaver Creek Rd., Richmond Hill Ontario L4B 1G5 Canada Tel: 905-762-1228 | Fax: 905-763-1737 | E-mail: [email protected] | http://www.laipac.com 26 Laipac Technology Inc. 8.6 System Server Query Server Query: Used as a GSM keep alive and tests the connection status of the S911 PL V4. This setting must be enabled first. Query Interval: The actual interval in which the S911 PL V4 tests the connection between the GPRS server and itself. If there is no server response to the message the S911 PL V4 sends out, the unit will reset and try to resynchronize. 50 West Beaver Creek Rd., Richmond Hill Ontario L4B 1G5 Canada Tel: 905-762-1228 | Fax: 905-763-1737 | E-mail: [email protected] | http://www.laipac.com 27 Laipac Technology Inc. 8.7 System Data/Time Time Zone: Use this to select your time zone so that the device knows your local time. Note: The other setting items not mentioned here could be left as using their default setting at user’s first try. For their detail definition, user can refer to S911 PL V4 user manual. 50 West Beaver Creek Rd., Richmond Hill Ontario L4B 1G5 Canada Tel: 905-762-1228 | Fax: 905-763-1737 | E-mail: [email protected] | http://www.laipac.com 28 Laipac Technology Inc. 9. Go to LocationNow Now, you can use your S911 V4 to access your location based service platform, such as Laipac’s LocationNow, http://www.locationnow.com/location/ 9.1 Logo in LocationNow Click here to logo in Input your User name and Password 50 West Beaver Creek Rd., Richmond Hill Ontario L4B 1G5 Canada Tel: 905-762-1228 | Fax: 905-763-1737 | E-mail: [email protected] | http://www.laipac.com 29 Laipac Technology Inc. 9.2 Request your unit’s position Locate device Select Tracking Device pick your unit from the pull down list Click “Position” to find your unit on the Map 50 West Beaver Creek Rd., Richmond Hill Ontario L4B 1G5 Canada Tel: 905-762-1228 | Fax: 905-763-1737 | E-mail: [email protected] | http://www.laipac.com 30 Laipac Technology Inc. 10. Introduction to function buttons H. Power On/Off B. Button 1: Father Key G. Button 2 J. Button 3: Mother Key I. ShiftWhen being pressed in conjunction with button 1, 2, or 3, the S-911 performs alternate operations associated with those combinations of buttons. B G H I J 50 West Beaver Creek Rd., Richmond Hill Ontario L4B 1G5 Canada Tel: 905-762-1228 | Fax: 905-763-1737 | E-mail: [email protected] | http://www.laipac.com 31 Laipac Technology Inc. Button Father Key Mother Key Function Description Mode Power Power on/off the unit hold 3 seconds Reset unit Press these 2 keys together SMS GPRS Speed Dial Press emergency SMS GPRS *Increase Volume During phonce call, press this key To increase volume of speak Speed Dial Press to call emergency number 2 *Decrease Volume During phonce call, press this key To decrease volume of speak Hang up for to call number 1 Answer an incoming call, press Press followed by to send an emergency report to assistance number To set/clear the user Geo-Fence, press followed by SMS GPRS Phone call SMS GPRS Phone call SMS GPRS SMS GPRS SMS GPRS To send a text message with your position, press followed by SMS Send a position report to the control centre GPRS Note: *During phone call, to reduce the echo, user should set the volume of speaker properly. 50 West Beaver Creek Rd., Richmond Hill Ontario L4B 1G5 Canada Tel: 905-762-1228 | Fax: 905-763-1737 | E-mail: [email protected] | http://www.laipac.com 32 Laipac Technology Inc. 11. LED indicator and unit’s working status D E F D. Battery Charging LED Indication When unit is under working condition, this red LED will be lighted on periodically When unit is being charged, it should be solid on E. GPS LED Indication F. GSM/GPRS LED Indication 50 West Beaver Creek Rd., Richmond Hill Ontario L4B 1G5 Canada Tel: 905-762-1228 | Fax: 905-763-1737 | E-mail: [email protected] | http://www.laipac.com 33 Laipac Technology Inc. LED Function Battery charging status Battery charging status GPS Indication GPS Indication GPS Indication GSM/GPRS Indication GSM/GPRS Indication GSM/GPRS Indication GSM/GPRS Indication GSM/GPRS Indication LED Color Unit’s working status Solid Red Battery is being charged until it reaches its maximum capacitance *Off Battery has been fully charged Solid Green Unit has got its valid position Flashing Green Solid Green with Red Flash Unit is trying to locate its position Unit is with Instance Geo-Fence enabled and has got its valid position Solid Red No SIM card / Wrong frequency network / no GSM signal Flashing Red Flashing Green and Flashing Red Solid Green with Red Flash Off Unit has registered to GSM network. It is able to work if under SMS mode. Attempting to connect to GPRS Connected to GPRS GSM modem disabled *Note: When unit is in its normal working condition and without any operation of its buttons for about 15 seconds, all LEDs will be turn off except in order to save power. If user presses any of the buttons, and will be lighted on to indicate the unit’s current working status. 50 West Beaver Creek Rd., Richmond Hill Ontario L4B 1G5 Canada Tel: 905-762-1228 | Fax: 905-763-1737 | E-mail: [email protected] | http://www.laipac.com 34 Laipac Technology Inc. 50 West Beaver Creek Rd., Richmond Hill Ontario L4B 1G5 Canada Tel: 905-762-1228 | Fax: 905-763-1737 | E-mail: [email protected] | http://www.laipac.com 35