1
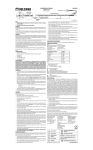
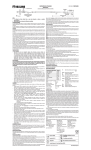
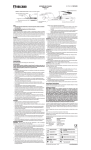
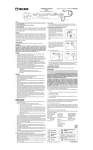
Volcano Revo Option
For use with the Volcano s5™/s5i® Series Systems
Operator’s Manual
Software Version Level 3.3.X
Complies with the Council Directive 93/42/EEC.
Volcano systems meet TUV’s safety requirements.
Attention: Read Operator’s Manual and Instructions For
Use prior to using this device. Please contact your local
Volcano representative for translated versions.
This device contains mercury; dispose according to
state/local laws.
Do not dispose of this device or its components.
Improper disposal may be harmful to the environment
and human health. Please refer to
www.volcanocorp.com for instructions on disposal.
Manufactured by:
Volcano Corporation
2870 Kilgore Road
Rancho Cordova, CA 95670 USA
Phone: 916.638.8008
Phone: 800.228.4728 (USA and Canada)
Fax: 916.638.8112
www.volcanocorp.com
Authorized European Representative:
Volcano Corporation Europe BVBA/SPRL
Excelsiorlaan 41
B-1930 Zaventem, Belgium
Phone: +32.2.679.1076
Fax: +32.2.679.1079
© 2012 Volcano Corporation. All rights
reserved. No part of this manual may be
reproduced in any form without the
written permission of Volcano
Corporation.
Revision Date: November 2012
Page 2 of 22
505-0100.14/002
Table of Contents
WARRANTY.................................................................................................................................. 4
PATENTS AND TRADEMARKS................................................................................................ 5
PATENTS .................................................................................................................................... 5
TRADEMARKS .......................................................................................................................... 5
WARNINGS AND PRECAUTIONS ........................................................................................... 6
FOR USE ONLY BY TRAINED MEDICAL PERSONNEL ..................................................... 6
READ AND REVIEW MANUAL BEFORE OPERATION....................................................... 6
CONTACT INFORMATION ....................................................................................................... 7
CHAPTER 1: OVERVIEW .......................................................................................................... 9
DEVICE DESCRIPTION ............................................................................................................ 9
INTENDED USE ....................................................................................................................... 10
INSTALLATION ....................................................................................................................... 10
CATHETERS ............................................................................................................................. 10
CHAPTER 2: PREPARING FOR A CASE .............................................................................. 11
CONNECTING SPINVISION (PIMR) TO THE SYSTEM...................................................... 11
PREPARING SPINVISION (PIMR) FOR USE ........................................................................ 11
CHAPTER 3: IMAGING ............................................................................................................ 13
SETTING PULLBACK SPEED ................................................................................................ 14
USING TIME-GAIN COMPENSATION (TGC) ...................................................................... 14
USING HI-QTM FEATURE........................................................................................................ 15
PERFORMING AN AUTOMATIC PULLBACK .................................................................... 16
PERFORMING A MANUAL PULLBACK .............................................................................. 17
POST-IMAGING PROCEDURE .............................................................................................. 17
CHAPTER 4: TROUBLESHOOTING ..................................................................................... 19
POTENTIAL IMAGING ARTIFACTS..................................................................................... 19
CHAPTER 5: TECHNICAL SPECIFICATIONS.................................................................... 21
SPINVISION (PIMR) DIMENSIONS AND WEIGHTS .......................................................... 21
CATHETER SPECIFICATIONS .............................................................................................. 21
MEASUREMENT ACCURACY .............................................................................................. 22
PACKAGING ............................................................................................................................ 22
505-0100.14/002
Page 3 of 22
Warranty
NOTICE: Manufacturer’s Specifications and Policies Subject to Change. Volcano Corporation
reserves the right to make changes in the products described in this manual in order to improve
design or performance. Reproduction or distribution of any portion of this manual without the prior
written consent of Volcano Corporation is prohibited.
LIMITED WARRANTY
Subject to the conditions and limitations on liability stated herein, Volcano Corporation (“VOLCANO”)
®
warrants that the Volcano PIMr (SpinVision ) (the “System”) as so delivered, shall materially conform
to Volcano’s then current specifications for the System, for a period of one year from the date of
delivery. ANY LIABILITY OF VOLCANO WITH RESPECT TO THE SYSTEM OR THE
PERFORMANCE THEREOF UNDER ANY WARRANTY, NEGLIGENCE, STRICT LIABILITY OR
OTHER THEORY WILL BE LIMITED EXCLUSIVELY TO SYSTEM REPAIR, REPLACEMENT OR, IF
REPLACEMENT IS INADEQUATE AS A REMEDY OR, IN THE OPINION OF VOLCANO,
IMPRACTICAL, TO REFUND OF THE PRICE PAID FOR THE SYSTEM. EXCEPT FOR THE
FOREGOING, THE SYSTEM IS PROVIDED “AS IS” WITHOUT WARRANTY OF ANY KIND,
EXPRESS OR IMPLIED, INCLUDING WITHOUT LIMITATION, ANY WARRANTY OF FITNESS,
MERCHANTABILITY, FITNESS FOR A PARTICULAR PURPOSE OR NON-INFRINGEMENT.
FURTHER, VOLCANO DOES NOT WARRANT, GUARANTEE, OR MAKE ANY
REPRESENTATIONS REGARDING THE USE, OR THE RESULTS OF THE USE, OF THE SYSTEM
OR WRITTEN MATERIALS IN TERMS OF CORRECTNESS, ACCURACY, RELIABILITY, OR
OTHERWISE. Buyer understands that VOLCANO is not responsible for and will have no liability for
any items or any services provided by any persons other than VOLCANO. VOLCANO shall have no
liability for delays or failures beyond its reasonable control.
Additionally, this warranty does not apply if:
1. The System is operated in other than a manner prescribed by Volcano Corporation in
the Operator’s Manual, and/or supplements.
2. The System is operated in a manner that is not in conformance with purchase
specifications and specifications contained in the Operator’s Manual, and/or
supplements.
3. The System is not maintained in accordance with procedures in the Operator’s Manual,
and/or supplements.
4. The System is repaired, altered, or modified in any way by other than Volcano
Corporation authorized personnel, or without Volcano Corporation authorization.
Contact Volcano Corporation Field Service for instructions and issuance of a Return Material
Authorization if claims under this warranty become necessary and if the System or components of the
System are to be returned. The System or components will not be accepted for warranty purposes
unless the return has been authorized by Volcano Corporation.
System parts or components repaired or replaced under warranty bear the same warranty expiration
date as the original equipment. Consumable parts (data disks, batteries, among others) are
warranted only against defects in materials and workmanship. System parts purchased outside the
original warranty period are warranted for a period of 90 days, subject to all of the restrictions
contained in this Limited Warranty. Use of unauthorized replacement parts may void the warranty. In
all cases, Volcano Corporation will be the sole judge as to what constitutes warrantable damage.
Page 4 of 22
505-0100.14/002
Patents and Trademarks
Patents
This product, and the use thereof, may be covered by one or more of the following U.S. and
international patents:
7074188
8104479
JP 2005537052
7215802
8105237
JP 2007105450
7359554
EP 1534137
JP 2007518488
7463759
EP 1534139
JP 2007526083
7627156
EP 1536727
JP 2008526387
7789834
EP 1703842
JP 2008543511
7874990
EP 1732461
JP 2009530068
7899224
EP 1903944
JP 2011036680
7927275
EP 1933711
JP 2011245326
7930014
EP 1996080
JP 2011521730
7940969
EP2291121
JP4700622
7978916
JP 2005536265
JP4773092
7988633
JP 2005536289
JP4481824
Other U.S. and international patents are pending.
Trademarks
The following are trademarks of Volcano Corporation:
Volcano and the Volcano logo are trademarks of Volcano Corporation and are registered in
the United States and other countries.
Revolution is a registered trademark of Volcano Corporation.
Hi-Q
TM
is a trademark of Volcano Corporation.
TM
®
s5 is a trademark of Volcano Corporation. S5i is a registered trademark of Volcano
Corporation.
SpinVision is registered in the United States and is a trademark in the European Community
and Japan.
In-Line Digital is a trademark of Volcano Corporation and is registered in the European
Community.
505-0100.14/002
Page 5 of 22
Warnings and Precautions
WARNINGS are used to indicate the possibility of severe personal injury. Follow the
instruction or procedure correctly to avoid injury to the operator, patient, or other
personnel.
The warnings are identified by the exclamation symbol.
CAUTIONS are used to indicate the possibility of damage to the equipment. Follow the
instruction or procedure correctly to avoid damage to the equipment.
For use only by trained medical personnel
CAUTION: FEDERAL LAW RESTRICTS THIS DEVICE TO SALE BY OR ON THE ORDER
OF A PHYSICIAN (OR PROPERLY LICENSED PRACTITIONER)
Read and review manual before operation
Carefully read and review the entire Volcano system operator’s manual. Refer to the section
“Warnings and Precautions”.
VOLCANO Corporation makes no warranty, representation or condition of any kind,
expressed or implied (including any warranty of merchantability, suitability or fitness for a
particular purpose) respecting the misuse of the system, software or catheter. VOLCANO
Corporation assumes no responsibility or liability for incidental or consequential damages
which may result from re-use or misuse of the system, software or catheter.
WARNING: Always ensure that SpinVision (PIMr) is placed in a stable location and is
clear from items that may interfere or prevent smooth movement during use. The
SpinVision weight will transfer as the device performs a pullback.
WARNING: SpinVision’s (PIMr) cable may be damaged if equipment is rolled on it. Do
not pull on the cable, place the cable in a high traffic area, or use excessive force as
the strain relief ends may be damaged. Do not use the system if the outer case or
wires appear damaged.
WARNING: Do NOT advance SpinVision (PIMr) while the catheter is imaging.
NOTE: SpinVision (PIMr) complies with the fluid ingress requirements of IEC 60529 IPX4
when configured for normal use. SpinVision (PIMr) should be located under a sterile drape
when configured for normal use.
Page 6 of 22
505-0100.14/002
NOTE: Please refer to the Volcano system operator’s manuals for detailed information about
the operation of the Volcano system. Pay careful attention to all Cautions and Warnings.
CAUTION: Do not use a damaged catheter. Do not re-sterilize the catheter. Catheters
are shipped sterile for single use. In the event of damage, contact Volcano Corporation
personnel.
CAUTION: The top surface of SpinVision (PIMr) Models 808884001 and 808884001-R
can become hot to the touch during prolonged periods of use.
Contact Information
United States:
Volcano Corporation
2870 Kilgore Road
Rancho Cordova, CA 95670 USA
Phone: 916.638.8008
Phone: 800.228.4728 (USA and Canada)
Fax: 916.638.8112
www.volcanocorp.com
Authorized European Representative:
Volcano Corporation Europe BVBA/SPRL
Excelsiorlaan 41
B-1930 Zaventem, Belgium
Phone: +32.2.679.1076
Fax: +32.2.679.1079
505-0100.14/002
Page 7 of 22
This page is intentionally blank for pagination purposes.
Page 8 of 22
505-0100.14/002
Chapter 1: Overview
This manual is intended to provide information specific to the Volcano Revo option for use on
the Volcano system. Please refer to the Volcano system operator’s manuals for information
regarding the system and its functionality.
Device Description
The Volcano-Revo option kit is a required accessory to the Volcano system when using the
®
Revolution 45MHz Rotational Imaging Catheter for intravascular ultrasound imaging. This
option consists of a Patient Interface Module (PIM) called SpinVision, (PIMr) which can be
simply connected to the existing Volcano system PIM cable.
Figure 1.
Volcano-Revo Option Patient Interface Module (SpinVision/PIMr)
The ability to perform an automatic or manual pullback is integrated into the SpinVision
(PIMr) pullback device. The controls available on SpinVision (PIMr) include the following
buttons:
•
•
•
•
•
Reset: Resets the LED distance display to zero
Image: Press once to begin imaging. Press a second time to stop imaging. The
Revolution catheter will rotate while in imaging mode.
Pullback: Press to begin an automatic pullback. Press again to stop the pullback.
Auto: Offers two automatic pullback rates (1.0 and 0.5 mm/sec)
Manual: Offers manual control of pullbacks
505-0100.14/002
Page 9 of 22
Intended Use
The Volcano Revo option is used for qualitative and quantitative evaluation of vascular
morphology in the coronary arteries and vessels of the peripheral vasculature. It is used as
an adjunct to conventional angiographic procedures to provide an image of the vessel lumen
and wall structures. The pullback feature of the PIMr withdraws the Revolution catheter’s
imaging core within the protective sheath for a maximum of 15cm.
Installation
To ensure proper operation and warranty coverage, the Volcano system must be installed
and tested by following the Device Installation and Operational Qualification that
accompanies each device.
Catheters
Revolution 45MHz Rotational Imaging Catheter 89000
Note: The Revolution® catheter is intended for the intravascular ultrasound
examination of coronary arteries. Intravascular ultrasound imaging is indicated in
patients who are candidates for transluminal interventional procedures.
Page 10 of 22
505-0100.14/002
Chapter 2: Preparing for a Case
Refer to the Volcano system operator’s manuals for the general instructions on preparing for
an IVUS case.
Connecting SpinVision (PIMr) to the System
SpinVision (PIMr) excites the catheter’s transducer element to transmit ultrasonic energy to
the surrounding tissue. It then amplifies and processes the resulting echo signals from the
transducer and sends them to the system through the connection on the system’s rear panel.
1. Connect the PIM cable to the rear of SpinVision (PIMr). Orient the marker on the cable
connector to align with the marker on the PIM connector, then slide the connector in. If
you need to remove the cable from SpinVision (PIMr), rotate the collar on the
SpinVision (PIMr) cable connector counterclockwise a quarter turn and then pull back.
2. SpinVision (PIMr) performs a diagnostic self-test and displays any errors on the system
screen.
3. The SpinVision (PIMr) connection will be confirmed in the lower right hand section of
the screen. A green light with the words “Rotational” will display once SpinVision
(PIMr) is connected.
WARNING: SpinVision’s (PIMr) cable may be damaged if equipment is rolled on it. Do
not pull on the cable, place the cable in a high traffic area, or use excessive force as
the strain relief ends may be damaged. Do not use the system if the outer case or
wires appear damaged.
Preparing SpinVision (PIMr) for Use
1. Remove the sterile equipment drape from the Revolution box.
2. While maintaining sterility, remove the sterile drape from its protective packaging.
3. This step requires two people. The sterile person opens the sterile drape on the side
with the green arrows, placing his or her hands in the back of the fold(s) to keep it
open. The second person places SpinVision (PIMr) into the sterile drape as far as it will
go in the direction of the green arrow on the drape.
4. Unfold and pull the drape all the way out. This will cover SpinVision’s (PIMr) cable far
enough to extend out of the sterile field.
5. Once the catheter has been prepped per the Instructions for Use (IFU), insert the
sterile drape catheter port into the SpinVision (PIMr) catheter port.
6. Remove the sterile barrier sticker from the drape so you can insert the catheter.
7. Insert the catheter into the SpinVision (PIMr) port with the black marks on the catheter
and SpinVision (PIMr) port aligned, then lock it in place by rotating it 30° clockwise. A
message on the Volcano system screen reads “Catheter detected”. The system is
ready for imaging once the “Press Image to Begin Imaging” message displays.
8. With the catheter telescope in the most distal position, clip the telescoping hub into the
SpinVision’s (PIMr) catheter arm.
9. Press the Image button on SpinVision (PIMr) or the Image On (Live) button on the
system Home screen. The image appears on the system screen.
505-0100.14/002
Page 11 of 22
WARNING: Always ensure that SpinVision (PIMr) is placed in a stable location and is
clear from items that may interfere or prevent smooth movement during use. The
SpinVision (PIMr) weight will transfer as the device performs a pullback.
CAUTION: The IVUS PIM, SpinVision (PIMr) and the FFR Pimmette are strongly
attracted to the magnetic field of Stereotaxis units. The user should observe caution
in handling these devices when less than 110cm from the center of these fields in
order to prevent damage to the device or personal injury should these devices become
free inside these very strong magnetic fields.
For reliable operation, SpinVision (PIMr) must be further than 110cm from the center of
the magnetic field of a Stereotaxis unit. Inside of this limit the image may become
frozen on the monitor until the unit is moved to outside this limit. Placement of the
SpinVision (PIMr) inside this limit may damage the SpinVision (PIMr).
Page 12 of 22
505-0100.14/002
Chapter 3: Imaging
Once the Revolution 45MHz catheter and SpinVision (PIMr) device are connected, the
system will display the following on the Home screen.
Figure 2.
Main System Screen – Image Off
Select Image On (Live) button on the system screen or the IMAGE button on SpinVision
(PIMr) to begin imaging. The SpinVision (PIMr) motor will begin spinning, and the Revolution
image will appear on the system screen.
Figure 3.
505-0100.14/002
Image On
Page 13 of 22
Setting Pullback Speed
The current pullback speed is indicated in the bottom of the ILD section. You can change the
pullback speed by selecting the radio button at the bottom of the ILD section on the system or
by selecting the SpinVision (PIMr) button for the desired speed (0.5mm/sec, 1.0mm/sec or
Manual).
Using Time-Gain Compensation (TGC)
After selecting the Adjust Image button in the Home screen shown above, the Time Gain
Compensation (TGC) feature shown below increases or decreases the gain of the input
signal with respect to distance from the transducer. This feature is only available with the
Revolution catheter. Six TGC profiles are available. Each can be adjusted to a user’s need.
Figure 4.
Time-Gain Compensation Dialog Box
To set the TGC:
1. Select the TGC button in the Adjust Image screen. Note that you must be imaging
with a Revolution catheter for the TGC feature to be enabled.
2. Select from one of the preset profiles using the drop down box or arrow keys.
3. Move the sliders or use the arrows to set the gain for each desired region (as indicated
by the number of mm shown to the left of each slider).
4. Click Close to save your settings and close the dialog box. If you do not want to save
any changed settings, click Reset. The settings will be restored to the default settings.
Page 14 of 22
505-0100.14/002
Using Hi-QTM Feature
The Hi-Q feature allows selection from multiple Revolution imaging options to provide an
option that best allows the user to differentiate between blood speckle and tissue along
lumen border. It must be enabled in the Adjust Image screen before recording images.
Figure 5.
Hi-Q Settings
Hi-Q has three Revolution imaging mode settings:
• Off:
Imaging equivalent to systems with software versions prior to 3.3.X
• Level 1: Imaging with a darker and finer blood speckle appearance than in Off
mode (default setting)
•
Level 2: Imaging with a darker and finer blood speckle appearance than in Level 1
Mode
To enable Hi-Q, select Level 1 or Level 2 from the Hi-Q drop-down menu.
NOTE 1: The selection of Hi-Q settings should occur before recording video loops.
NOTE 2: In Level 1 or Level 2 mode, diameter choices are limited to 8mm and 10mm. The
Off mode allows the user to use the full range of catheter Diameters: 8mm, 10mm, 12mm,
and 14mm. Diameter controls the depth of field view in which ultrasound data is displayed.
Selecting Level 1 and Level 2 using unsupported diameters results in the message displays
shown below.
For example, if Level 1 or Level 2 is selected and then Diameter is set to12mm or 14mm, the
following message displays:
505-0100.14/002
Page 15 of 22
Figure 6.
Disable Hi-Q Message
Conversely, if Diameter is set to 12mm or 14mm and then Level 1 or Level 2 is selected, the
following message displays:
Figure 7.
Enable Hi-Q Message
Disable Hi-Q by selecting Off from the Hi-Q drop-down menu.
When the Hi-Q feature is set to Off, a visual indicator, Hi-Q Off, appears under the LIVE text,
located on the upper left-hand corner of the Home screen image.
Performing an Automatic Pullback
1. Using the .014” guide wire, advance the catheter to the most distal portion of the target
lesion according to standard intervention procedures.
2. Select the pullback speed by pressing the AUTO button on SpinVision (PIMr), which
toggles between 0.5 mm and 1.0 mm per second. To zero the distance counter, press
RESET.
3. Select Image on SpinVision (PIMr) or the Image On (Live) button on the system
screen to begin imaging. The SpinVision (PIMr) motor will begin spinning, and the
Revolution image will appear on the system screen. The absolute movement of the
transducer will be displayed on the digital readout on SpinVision (PIMr). The Image Off
(Freeze), Save Frame, Record (Pullback), and Adjust Image buttons become visible
on the system screen.
4. To stop imaging at any time, simply select the IMAGE button on SpinVision (PIMr) or
the Image Off (Freeze) button on the system. The image currently displayed on the
screen remains there. Note: Starting or stopping imaging also starts or stops the
rotation of the catheter.
NOTE: If an image artifact is observed, it may be necessary to flush the imaging core with a 3
cc syringe of heparinized saline attached to the Revolution catheter port.SpinVision (PIMr)
5. Press PULLBACK on SpinVision (PIMr) or Record (Pullback) on the system. Pullback
begins at the selected speed, and the Volcano system begins to record the video loop.
NOTE: SpinVision (PIMr) can accommodate a maximum pullback distance of 15 cm, after
which it stops the pullback.
Page 16 of 22
505-0100.14/002
NOTE: The pullback distance may be limited to 9 cm if the acquisition rate is set at 30
frames/sec and a pullback rate of 0.5 mm/sec is used. Adjust the acquisition rate to 15 f/s or
pullback rate to 1.0 mm/sec to obtain the entire 15 cm.
6. Once the desired pullback distance is reached, you may stop the pullback by pressing
the PULLBACK button on SpinVision (PIMr), or by pressing the Stop button on the
system or software.
Performing a Manual Pullback
1. Select MANUAL on SpinVision (PIMr). SpinVision (PIMr) unlocks from the sled so that
you can move it by hand.
2. Select IMAGE on SpinVision (PIMr) or the Image On (Live) button on the Home
screen.
3. Select PULLBACK on SpinVision (PIMr) or Record (Pullback) on the Home screen.
4. Gently pull SpinVision (PIMr) back at the desired speed. Utilize the rubber grips on the
side of SpinVision (PIMr) to enhance control.
5. Press STOP on the Home screen to stop recording the video loop.
NOTE 1: The digital display can be reset at any time to give the absolute position.
NOTE 2: If the SpinVision (PIMr) motor drive is left stationary for more than 30 seconds while
in Manual mode, the system will switch to Auto mode and lock the sled into place.
WARNING: Do NOT advance SpinVision (PIMr) while the catheter is imaging.
Post-Imaging Procedure
1. Remove the Revolution catheter using standard interventional procedures.
2. Detach the catheter from SpinVision (PIMr) by rotating the port counterclockwise 30° to
unlock it and removing the telescoping hub from the SpinVision (PIMr) arm.
3. Dispose of the Revolution catheter.
4. Remove SpinVision (PIMr) from the sterile drape ensuring that no blood or fluid comes
into contact with it.
5. Dispose of the sterile drape.
NOTE: After the SpinVision (PIMr) is removed, the screen area will continue to display the
appropriate information for the last type of PIM used.
505-0100.14/002
Page 17 of 22
This page is intentionally blank for pagination purposes.
Page 18 of 22
505-0100.14/002
Chapter 4: Troubleshooting
These error messages are displayed on the right hand side of the SpinVision (PIMr) message
display. Use the following table to read the description and recommended action.
Display
Meaning
Suggested User Manual Text
SpinVision (PIMr) passed self-test
This code displays briefly after the unit is powered
on and indicates that the unit is ready.
E1
Unable to read RFID
The catheter may be faulty or may not be fully
rotated into place. Ensure the catheter is fully
rotated into place. Try another catheter. If these
do not resolve the problem, call Volcano Technical
Support.
E2
TGC memory failure
The unit has failed. Call Volcano Technical
Support.
E3
Analog high voltage failure
The unit has failed. Call Volcano Technical
Support.
E4
One of the pulse width control pins is
stuck low
The unit has failed. Call Volcano Technical
Support..
Catheter motor failure
Catheter rotation has stalled. Ensure the catheter
has been prepared and flushed per the catheter
IFU. If this does not correct the problem, call
Volcano Technical Support.
E6
Pullback motor driver failed
Ensure the pullback has not come to the end of its
travel. Check the cable for binding and the
catheter for excessive drag in the body. If these
do not correct the problem, call Volcano Technical
Support.
E7
EEPROM data error
The unit has failed. Call Volcano Technical
Support.
E0
E5
Potential Imaging Artifacts
Artifact
Cause
Resolution
Degraded image due to
shadowing
Air surrounding the IVUS
transducer within the catheter
sheath
Flush with heparinized saline per
IFU
Non-Uniform Rotational
Distortion (NURD)
Excessive tightening of the
hemostasis valve
Loosen the hemostasis valve
Excessive bending of the
catheter
Make sure catheter is not bent
between SpinVision (PIMr) and
hemostasis valve. Flushing with
heparinized saline may also help.
Air surrounding the IVUS
transducer within the catheter
sheath
Flush with heparinized saline per
IFU
Ring artifact in image
505-0100.14/002
Page 19 of 22
This page is intentionally blank for pagination purposes.
Page 20 of 22
505-0100.14/002
Chapter 5: Technical Specifications
NOTE: Refer to Volcano system operator’s manuals for system specifications.
SpinVision (PIMr) Dimensions and Weights
SpinVision
(PIMr)
Height
Width
Depth
Weight
806071026
3.9 in
9.9 cm
4.0 in
10.2 cm
14.4 in
36.6 cm
~3.2 lb
1.5 kg
808884001
3.9 in
9.9 cm
4.0 in
10.2 cm
14.4 in
36.6 cm
2.9 lb
1.3 kg
Catheter Specifications
Imaging catheter - Revolution 45MHz Rotational IVUS Imaging Catheter
Transducer type
Piezoelectric
Frequency
Revolution 45MHz Rotational IVUS Imaging Catheter 360° view,
single-element rotating transducer
Lumen characteristics
coaxial, guide wire lumen
Catheter
Revolution
Catheter
Revolution
Crossing Profile at
Transducer
3.2F (1.07 mm)
Maximum guide
wire
0.014” (0.36 mm)
Minimum ID guiding
catheter clearance
6F (1.63 mm) ≥ .064”
Length, cm
135
NOTE: Refer to “Instructions for Use” (IFU) that accompanies each catheter or go to
www.volcanocorp.com to view detail catheter use, specifications, and acoustic output.
505-0100.14/002
Page 21 of 22
Measurement Accuracy
Measurements obtained with the Revolution 45MHz Rotational IVUS Imaging Catheter are
subject to the following measurement inaccuracies due to variations in tissue speed of sound
and display limitations. The measurement precision is limited in both relative and absolute
ranges:
Distance Measurement:
–4.5%, +7.0% of measured value (± 0.10mm)
2
Area Measurement:
–9%, +14% of measured value (± 0.10mm )
These uncertainties apply to the entire range of measurement achievable with the Revolution
45MHz Rotational IVUS Imaging Catheter. These are worst case measurement uncertainties
and represent situations where the ultrasound signals are entirely within tissue, such as
muscle, which has a very different speed of sound than blood. For measurement of luminal
boundaries, where the ultrasound only traverses through blood, the inaccuracy is:
Distance Measurement:
± 1% of the measurement (± 0.10mm)
2
Area Measurement:
± 5% of the measurement (± 0.10mm )
NOTE: A slight difference in total pullback length displayed on SpinVision (PIMr) and
ILD may exist due to the latent response in initiation/termination of the pullback
relative to recording. This discrepancy only exists in the most proximal and distal
1mm of the video loop.
In-Line Digital measurement accuracy
•
•
•
•
Two distance measurements on the longitudinal display (ILD)
Maximum Loop Distance (Z axis length) @ 0.5 mm/sec pull back & 30fps, limited by
memory of 5400 frames: 90 mm
Maximum Loop Distance (Z axis length) @ 1.0 mm/sec pull back, limited by device
dimension: 150 mm
Accuracy (including software and SpinVision (PIMr) accuracy): ± 4% of the
measurement
NOTE: In rare situations, the actual pullback speed may differ from the expected value.
This could result in erroneous length information derived from the ILD. This can be
caused by restricted motion of the PIMr or simultaneous activation of the speed
controls on the PIMr and system.
Packaging
Catheters are shipped sterile for single use. In the event of damage, contact Volcano
Corporation personnel.
CAUTION: Do not use a damaged catheter. Do not re-sterilize the catheter.
Page 22 of 22
505-0100.14/002