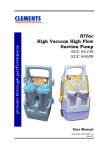
1
DAC UNIVERSAL User Manual English DAC UNIVERSAL – USER MANUAL 729050 - Version 20 S 2 510010-20B 04.2013 DAC UNIVERSAL – USER MANUAL 729050 - Version 20 S CONTENT 1. Introduction to the DAC UNIVERSAL ......................................................................................... 5 1.1 Safety and technical Information .......................................................................................... 8 1.1.1 ESD protective measures ......................................................................................................................................8 1.1.2 About the physics of electrostatic charges .............................................................................................................8 1.1.3 Technical description .............................................................................................................................................9 1.1.4 Electromagnetic emission ....................................................................................................................................10 1.1.5 Interference immunity ..........................................................................................................................................10 1.1.6 Working clearances .............................................................................................................................................11 1.2 Functioning........................................................................................................................... 12 1.3 Cleaning of non-wrapped instruments ............................................................................... 12 1.4 Lubrication of non-wrapped instruments ........................................................................... 12 1.5 Sterilization of non-wrapped instruments .......................................................................... 13 1.6 Sterilization of wrapped instruments .................................................................................. 13 1.7 Processing handpieces and turbines ................................................................................. 13 2. Installation of the DAC UNIVERSAL ......................................................................................... 15 2.1 Requirements concerning placing ...................................................................................... 15 2.2 How to install the DAC UNIVERSAL? ................................................................................. 15 2.2.1 Mounting of adapters ...........................................................................................................................................16 2.2.2 Choice of display language ..................................................................................................................................18 2.2.3 Installation of sterile-filter for wrapped instruments and for instruments used for invasive surgical treatments ...18 2.2.4 Connection of the DAC UNIVERSAL to a printer .................................................................................................18 2.2.5 Connection of the DAC UNIVERSAL to a logger system.....................................................................................19 2.3 Before using the autoclave - important! ............................................................................. 19 2.4 Heating the autoclave .......................................................................................................... 23 2.5 Perform installation testing with Biological- /Chemical Indicators after machineinstallation ............................................................................................................................ 23 3. Operating the DAC UNIVERSAL ............................................................................................... 24 3.1 Use of the basket.................................................................................................................. 27 3.2 Use of the wrapped lid ......................................................................................................... 28 3.2.1 3.2.2 3.2.3 3.2.4 Compatibility .................................................................................................................................................28 Safety ...........................................................................................................................................................28 Operation instructions ...................................................................................................................................28 Drying ...........................................................................................................................................................29 3.3 Choice of program ............................................................................................................... 30 3.4 Special program requirements ............................................................................................ 30 3.5 Routine monitoring .............................................................................................................. 30 3.6 Reading the display ............................................................................................................. 32 3.7 Using the menu system ....................................................................................................... 32 3.8 Resetting the menu system ................................................................................................. 34 4. Errors ......................................................................................................................................... 35 5. Reports....................................................................................................................................... 38 6. Cleaning and maintenance ....................................................................................................... 39 6.1 Handling the DAC UNIVERSAL ........................................................................................... 44 7. Safety, service, warranty, certificates & approvals ................................................................. 44 7.1 Safety .................................................................................................................................... 44 510010-20B 04.2013 3 DAC UNIVERSAL – USER MANUAL 729050 - Version 20 S 7.2 Service .................................................................................................................................. 44 7.3 Warranty ............................................................................................................................... 45 7.4 Certificates............................................................................................................................ 45 7.5 Approvals ............................................................................................................................. 45 Appendix 1: DAC UNIVERSAL with description .......................................................................... 46 Appendix 2: Connection to an external water treatment system ............................................... 47 4 510010-20B 04.2013 DAC UNIVERSAL – USER MANUAL 729050 - Version 20 S 1. Introduction to the DAC UNIVERSAL CAUTION: U.S. federal law restricts this device to sale by or on the order of a licensed healthcare professional. Operator training a) All personnel who operate or maintain the DAC UNIVERSAL MUST be trained in the operation and safe use of the DAC UNIVERSAL. The praxis shall point out a person responsible for training all personnel operating and maintaining the DAC UNIVERSAL. b) All personnel who operate or maintain the DAC UNIVERSAL must comprehend the process with vapour and the relevant methods for safe use, and methods to detect escape of the agent. c) All personnel who operate or maintain the DAC UNIVERSAL must receive training including emergency procedures for any toxic, flammable, explosive or pathogenic material released into the environment. Records of attendance at training are maintained, and evidence of understanding demonstrated. Retention of documentation It is very important to make sure that this manual is stored together with the DAC UNIVERSAL so that it will also be available at any time in the future. In case the DAC UNIVERSAL is sold or the right to use it is transferred to a different owner, make sure that the manual always remains located near the DAC UNIVERSAL. This is necessary to ensure that the new owner can use the DAC UNIVERSAL properly and has all required information. Read carefully before starting! These instructions serve to promote safety. Be sure to read them carefully before installing and using the DAC UNIVERSAL. This symbol is located on the rating plate to remind the user to observe the manual. Medical electrical devices may be used only with reference to the risk of electrical shock, fire or mechanical hazards according to IEC 60601-1. Disclaimer The manufacturer assumes no liability whatsoever in cases involving: work or repairs performed by any personnel not authorized by the manufacturer or importer. an application which does not correspond to the ones described in this manual. the use of non-OEM components or any components not described in the section 6 entitled Cleaning and maintenance. Electromagnetic compatibility In order to prevent possible risks caused by electromagnetic interference, no electro medical or other such devices should be used near the DAC UNIVERSAL. The DAC UNIVERSAL complies with the currently valid directives concerning electromagnetic compatibility (IEC 60601-1-2). Only medical devices which comply with the IEC 60601-1 standard may be connected to the DAC UNIVERSAL. Any nonmedical devices connected also must comply with the IEC 60601-1-1 standard for medical devices. The DAC UNIVERSAL does not cause any harmful interference. It can, however, pick up interferences from other devices, including interferences which cause undesirable operation. Intended use The DAC UNIVERSAL is intended to clean, lubricate and steam sterilize dental handpieces. The DAC UNIVERSAL is intended to clean and steam sterilize solid dental instruments, which are suitable for steam sterilization. Steam sterilization at 134C and 3.1 bar absolute for 3 minutes. Maximum load is six (6) dental handpieces (high-speed handpieces, and/or attachments) or five (5) dental instruments. Sterility of devices is compromised on exposure to a non-sterile environment. Contraindications The DAC UNIVERSAL is not intended to sterilise instruments, liquids, cloth loads, biomedical waste or other devices or materials, which are not compatible with steam sterilization. The DAC UNIVERSAL is not intended to clean other 510010-20B 04.2013 5 DAC UNIVERSAL – USER MANUAL 729050 - Version 20 S instruments than dental handpieces with a suitable original DAC UNIVERSAL adapter. The processing of such articles may result in incomplete cleaning and/or sterilization, damage to the incompatible articles, and/or damage to the DAC UNIVERSAL. Warnings This product is intended for use by licensed healthcare professionals only. Before operating the DAC UNIVERSAL, carefully read and follow these instructions and save them for future reference. Observe all cautions and warnings. Precautions Oil, water and hot steam are discharged through the drain from the autoclave. Heat Note that the instruments are hot after the cycle has ended. Allow them to cool before handling. Ventilation Operate the steriliser in a well-ventilated area. Ventilation requirements will vary with room size, frequency of use, etc. Oil NOTE: Do not use any other liquid than the Nitram Oil. Water Periodically, it is necessary to add water to the DAC UNIVERSAL. It is important to make sure that the water is added to the water tank, cf. appendix 1. To ensure long durability of the instruments and the autoclave, it is important only to use demineralised or distilled water in the DAC UNIVERSAL. Tap water contains a very high level of calcium/lime scale that will damage both the instruments and the autoclave. The DAC UNIVERSAL requires a maximum water conductivity of 3.0 S/cm. Drying If the instruments are to be stored for a longer period (e.g. during the weekend), it is important that they are blown through with compressed air (max. 3.2 bar) to remove the condensate water from the instruments. Condensate water can cause corrosion on instruments. Compressed air The compressed air to the DAC UNIVERSAL must be dry and must not contain any oil remains. Please contact the supplier of your compressed air unit, if you have any questions regarding this issue. It is necessary to install an air filter before the DAC UNIVERSAL in order to prevent particles from the air to be let into the DAC UNIVERSAL. Please contact your supplier regarding Sirona air filter ( 60 78 575). Power supply The DAC UNIVERSAL is operated with an AC-input power supply of 90-120 / 190-240 volt, 50/60 Hz, grounded outlet – 1100 W. As the manufacturer, Sirona Dental A/S provides on written request qualified technical personnel, wiring diagrams, parts lists, and other useful information for the repair and maintenance of those parts which the manufacturer considers to be repairable. Maximum load The maximum load is either six (6) dental handpieces (high-speed handpiece and/or attachment), or five (5) dental instruments. Sterility Devices are rendered non-sterile once the lid is raised to the cooling position. Safety ring The DAC UNIVERSAL is equipped with a safety ring that prevents the operator’s fingers from getting crushed between the adapter lid and the chamber. If you accidentally touch the edge of the chamber while the lid is on the way down, the autoclave stops immediately. Then the lid will go up for 5 seconds and error code 86 is shown. Please do as follows: 1. Press ”Clear” to reset the DAC UNIVERSAL. The lid goes up. 2. When the lid is up, it is possible to restart the autoclave. Instruments Dental handpieces, attachments, and motors placed on the adapters should not have clogged oil and water passages and should not be bagged – or rinsing/flushing, lubrication, and sterilization may be impeded. 6 510010-20B 04.2013 DAC UNIVERSAL – USER MANUAL 729050 - Version 20 S The instruments placed on the adapters must not be sealed. If an instrument is partly sealed then it must be checked after each cycle whether it gets sufficient oil. There must be flow through the instruments. The six adapter positions on the adapter lid are each marked with dots, which symbolises the adapter-position-number on the adapter lid. On position 1 on the lid the instruments must not be longer than 145 mm (total length of instrument and adapter). The maximum length on position 2-6 is 160 mm (total length of instrument and adapter). Solid instruments are placed in the basket considering the opening and the closing. NOTE: The basket is only intended for solid instruments. Do not process any hinged instrument that cannot be fully opened when placed in the basket. Wrapped instruments are placed on the special lid for wrapped instruments. NOTE: See section 3.2 for exact use of the wrapped lid. NOTE: The special lid for wrapped instruments is only intended for wrapped instruments. Do not process any unwrapped instruments on this lid! Moreover, it is important to respect the directions of the manufacturer of the instruments to ensure that the instruments are properly cared for. Surrounding environment The DAC UNIVERSAL is to be used indoor only under the following conditions: - Maximum relative humidity 80% for temperature up to 31ºC decreasing linearly to 50% relative humidity at - 40ºC. Altitude up to 2000 m above sea level. Ambient Temperature 16°C to 26°C Mains supply voltage fluctuations not to exceed ±10% of the nominal voltage. Transient over voltages according to installation category II Pollution degree 2 Disposal It generally applies that any disposal of this product must comply with the relevant national regulations. Please observe the regulations applicable in your country. Within the European Economic Community, Council Directive 2002/96/EU (WEEE) requires environmentally sound recycling/disposal of electrical and electronic devices. Your product is marked with the adjacent symbol. Disposal of your product with domestic refuse is not compatible with the objectives of environmentally sound recycling/disposal. The black bar underneath the "garbage can" symbol means that it was put into circulation after Aug. 13, 2005. (See EN 50419:2005) Please note that this product is subject to Council Directive 2002/96/EU (WEEE) and the applicable national law of your country and must be recycled or disposed of in an environmentally sound manner. Please contact your dealer if final disposal of your product is required. Warning Symbols Be aware of high voltage Be aware of heat 510010-20B 04.2013 7 DAC UNIVERSAL – USER MANUAL 729050 - Version 20 S Warning Placed on the back plate of the DAC UNIVERSAL next to the: - COM PORT: External computing devices connected to communication interface port marked “COM of the equipment has to comply with the standards, UL 1950 and IEC/EN 60950 and only connected to SELV circuits” Please read the section regarding reports. See section 2.2.1 and section 5. - Connections for water, air and drain: Please read the section regarding how to install the DAC UNIVERSAL. See section 2.2. Purpose of this manual The purpose of this manual is to provide the user with sufficient information about the DAC UNIVERSAL in order to use it effectively in the dental clinic immediately after delivery. We recommend that you study appendix 1 thoroughly before using the DAC UNIVERSAL the first time. In this way you will have a better understanding of how the DAC UNIVERSAL functions. It is not allowed to use the DAC UNIVERSAL in another way than described in this instruction for use. 1.1 Safety and technical Information If dismantling the DAC UNIVERSAL, be aware of ESD protection precautions. 1.1.1 ESD protective measures ESD stands for ElectroStatic Discharge. CAUTION: Connector pins or sockets bearing ESD warning labels must not be touched or interconnected without ESD protective measures. ESD protective measures include: Procedures for preventing electrostatic charge build-up (e.g. air conditioning, air moistening, conductive floor coverings and non-synthetic clothing) Discharging the electrostatic charges of your own body on the frame of the DAC UNIVERSAL, the protective ground wire or large metallic objects Connecting yourself to ground using a wrist band. We therefore recommend that all persons working with this system be instructed on the significance of this warning label. Furthermore, they also should receive training in the physics of electrostatic discharges which can occur in the practice and the destruction of electronic components which may result if such components are touched by electrostatically charged USERS. 1.1.2 About the physics of electrostatic charges ESD stands for ElectroStatic Discharge. Electrostatic discharge must be preceded by electrostatic charging. Static electric charges generally build up whenever two bodies are rubbed against each other, e.g. when walking (shoe soles against the floor) or driving a vehicle (tires against the street pavement). The amount of charge depends on several factors: Thus the charge is higher in an environment with low air humidity than in one with high air humidity; it is also higher with synthetic materials than with natural materials (clothing, floor coverings). The following rule of thumb can be applied to assess the transient voltages resulting from an electrostatic discharge. An electrostatic discharge is: 8 perceptible at 3,000 V or higher audible at 5,000 V or higher (cracking, crackling) visible at 10,000 V or higher (arc-over) 510010-20B 04.2013 DAC UNIVERSAL – USER MANUAL 729050 - Version 20 S 1 nanosecond = 1 / 1,000,000,000 second = 1 billionth of a second The transient currents resulting from these discharges have a magnitude of 10 amperes. They are not hazardous for humans because they last for only several nanoseconds. Voltage differentials exceeding 30,000 volts per centimetre may lead to a charge transfer (electrostatic discharge, lightning, arc-over). Integrated circuits (logical circuits and microprocessors) are used in order to implement a wide variety of functions in dental/X-ray/CEREC systems. The circuits must be miniaturized to a very high degree in order to include as many functions as possible on these chips. This leads to structure thicknesses as low as a few ten thousandths of a millimetre. It is obvious that integrated circuits which are connected to plugs leading outside of the DAC UNIVERSAL via cables are sensitive to electrostatic discharge. Even voltages which are imperceptible to the user can cause breakdown of the structures, thus leading to a discharge current which melts the chip in the affected areas. Damage to individual integrated circuits may cause malfunction or failure of the system. To prevent this from happening, the ESD warning label next to the plug warns of this hazard. 1.1.3 Technical description Supplier: Model: Sirona Dental A/S DAC UNIVERSAL 53cm (H open), 35cm (H closed), 38cm (W), 37cm (D) with lid standard Anodized aluminium and plastic 23 kg / 51 pounds 25 kg / 55 pounds <65 dBA 90 – 120 and 190 - 240 VAC +/- 10% Max 50/60 Hz 10A/5A 1,1 kW ll NA NA Never use the DAC UNIVERSAL in the presence of inflammable anaesthetics or gases 16 – 27 min. continuously Temperature: 16°C to 26°C The DAC UNIVERSAL must NOT be stored in minus temperature (Celsius scale) Ordinary 11a Temperature: –40 °C / +65 °C Relative humidity: 20 - 90% Air pressure: 500 -1060 hPa Dimensions: Material: Cover Weight (net without packaging): Weight (gross with packaging): Noise: Supply voltage: Current fluctuations: Frequency: Nominal current at 110/230 VAC: Nominal power: Electric class: Type: Type BF applied part: Safety class: Mode of operation: Operating conditions: Protection against harmful ingress of water: Degree of protection: Transport and storage conditions: External carton:: 65°C -40°C 0123 0088 510010-20B 04.2013 This product bears the CE marking in accordance with the provisions of the Council Directive 93/42/EEC of June 14, 1993 concerning medical devices. 9 DAC UNIVERSAL – USER MANUAL 729050 - Version 20 S 1.1.4 Electromagnetic emission The DAC UNIVERSAL is intended for operation in the electromagnetic environment specified below. The customer or user of the DAC UNIVERSAL should make sure that it is used in such an environment. Emission measurement HF emission according to CISPR 11 Conformity Electromagnetic environment guidelines The DAC UNIVERSAL uses HF energy only for its internal function. The HF emission is therefore very low, and it is improbable that nearby electronic devices might be disturbed. The DAC UNIVERSAL is intended for use in all facilities, including residential areas and in any facilities connected directly to a public power supply providing electricity to buildings used for residential purposes. Group 1 HF emission according to CISPR 11 Class B Harmonics according to IEC 61000-3-2 not applicable Power output < 50 W Voltage fluctuations/Flicker according to IEC 61000-3-3 not applicable no significant flicker 1.1.5 Interference immunity The DAC UNIVERSAL is intended for operation in the electromagnetic environment specified below. The customer or user of the DAC UNIVERSAL should make sure that it is used in such an environment. Interference immunity tests IEC 60601-1-2 test level Compliance level Electromagnetic environment guidelines Electrostatic discharge (ESD) according to IEC 61000-4-2 Electrical fast transient /burst according to IEC 61000-4-4 Surge voltages according to IEC 61000-4-5 ± 6kV contact discharge ± 6kV contact discharge ± 8kV air discharge Floors should be wood, concrete, or ceramic tile. If floors are covered with synthetic material, the relative humidity should be at least 30 %. ± 1kV for input and output lines ± 2kV for power cables ± 1kV for input and output lines ± 2kV for power cables Mains power quality should be that of a typical commercial or hospital environment. ± 1kV push-pull voltage ± 2kV push-pull voltage ± 1kV push-pull voltage ± 2kV push-pull voltage < 5 % UT for ½ period (> 95 % dip of UT) 40% UT for 5 periods (60% dip of UT) 70 % UT for 25 periods (30 % dip of UT) < 5 % UT for 5 sec. (> 95 % dip of UT) < 5 % UT for ½ period (> 95 % dip of UT) 40% UT for 5 periods (60% dip of UT) 70 % UT for 25 periods (30 % dip of UT) < 5 % UT for 5 sec. (> 95 % dip of UT) Voltage dips, short interruptions and variations of the power supply according to IEC 61000-4-11 ± 8 kV air discharge Magnetic field of power frequencies 3 A/m 3 A/m (50/60 Hz) according to IEC 61000-4-8 NOTE: UT is the AC supply voltage prior to application of the test level. Mains power quality should be that of a typical commercial or hospital environment. Mains power quality should be that of a typical commercial or hospital environment. If the user of the DAC UNIVERSAL requires it to continue functioning following interruptions of the power supply, it is recommended to have the DAC UNIVERSAL powered by an uninterruptible power supply or a battery. Power frequency magnetic fields should be at levels characteristic of a typical location in a typical commercial or hospital environment. Portable and mobile radio equipment must not be used within the recommended working clearance from the DAC UNIVESAL and its cables, which is calculated based on the equation suitable for the relevant transmission frequency. Recommended working clearance: Conducted HF interference 10 3Veff 1 150 kHz to 80 MHz 3Veff d = [1,2] P 510010-20B 04.2013 DAC UNIVERSAL – USER MANUAL 729050 - Version 20 S IEC 61000-4-6 d = [1,2] P at 80 MHz to 800 MHz d = [2,3] P at 800 MHz to 2,5 GHz Radiated HF interference IEC 6000-4-3 3V/m 1 80MHz to 800MHz 3Veff 3V/m 1 800MHz to 2,5GHz 3Veff where P is the nominal transmitter output in watts (W) specified by the transmitter manufacturer and d is the recommended working clearance in meters (m). The field strength of stationary radio transmitters is based on a local investigation for all 2 frequencies less than the conformance level for all 3 frequencies . Interference is possible in the vicinity of equipment bearing the following graphic symbol. 1. The higher frequency range applies at 80MHz and 800MHz. 2. The field strength of stationary transmitters such as the base stations of radio telephones and land mobile services, amateur radio stations as well as AM and FM radio and television broadcasting stations cannot be accurately predetermined. An investigation of the location is recommended to determine the electromagnetic environment resulting from stationary HF transmitters. If the field strength measured at the DAC UNIVERSAL location exceeds the conformance level specified above, the DAC UNIVERSAL must be observed with respect to its normal operation at each application site. If unusual performance characteristics are observed, it may be necessary to take additional measures such as reorientation or repositioning of the DAC UNIVERSAL. 3. A frequency range of 150kHz to 80MHz results in a field strength of less than 3V/m 1.1.6 Working clearances Recommended working clearances between portable and mobile HF communication devices and the DAC UNIVERSAL: The DAC UNIVERSAL is intended for operation in an electromagnetic environment, where radiated HF interference is checked. The customer or the user of the DAC UNIVERSAL can help prevent electromagnetic interference by duly observing the minimum distances between portable and/or mobile HF communication devices (transmitters) and the DAC UNIVERSAL. These values may vary according to the output power of the relevant communication device as specified below. Nominal transmitter Working clearance according to transmission frequency [m] output [W] 150 kHz to 80 MHz 80 MHz to 800 MHz 800 MHz to 2,5 GHz d= [1,2] P d= [1,2] P d= [2,3] P 0,01 0,12 0,12 0,23 0,1 0,38 0,38 0,73 1 1,2 1,2 2,3 10 3,8 3,8 7,3 100 12 12 23 For transmitters whose maximum nominal output is not specified in the above table, the recommended working clearance d in meters (m) can be determined using the equation in the corresponding column, where P is the maximum nominal output of the transmitter in watts (W) specified by the transmitter manufacturer. NOTE: The higher frequency range applies at 80 MHz and 800 MHz. NOTE: These guidelines may not be applicable in all cases. The propagation of electromagnetic waves is influenced by their absorption and reflection by buildings, objects and persons. 510010-20B 04.2013 11 DAC UNIVERSAL – USER MANUAL 729050 - Version 20 S 1.2 Functioning According to EN13060 the DAC UNIVERSAL is classified as a Class S autoclave for handpieces, turbines and solid instruments which fit in the basket. The DAC UNIVERSAL automatically cleans, lubricates and sterilises turbines, handpieces and contra-angles (in the following designated instruments). In approx. 16 minutes 6 instruments will be cleaned, lubricated and sterilised and are ready for use again after cooling down. A basket (auxiliary equipment) for flushing and sterilization of solid instruments is available. The DAC UNIVERSAL reduces the risk of cross-contamination and ensures optimum maintenance of the instruments. Maximum length of handpieces and turbines: The six adapter positions are each marked with dots, which symbolise the adapter-position-number on the adapter lid. On position 1 on the lid the instruments must not be longer than 145 mm (total length of instrument and adapter). The maximum length on position 2-6 is 160 mm (total length of instrument and adapter). The DAC UNIVERSAL Autoclave contains an absolute pressure sensor. The absolute pressure sensor means that the pressure shown in the display (see description 1 in section 3), when the machine is open, is equal to the actual pressure in the surrounding environment. When the autoclave is on, but inactive, the pressure indicated in the display always will be about 1 bar at ocean level. At high barometric pressure the pressure will be about 1.03 bars and at depression it will be about 0.98 bars. NOTE: The autoclave will adjust itself to differences in the surrounding pressure. 1.3 Cleaning of non-wrapped instruments The instruments are cleaned internally as well as externally. When using the basket for solid instruments, the instruments are only cleaned externally. Internal cleaning The internal cleaning ensures that the spray channels of the instruments are cleaned. The instruments are cleaned, by flushing the internal spray channels with water and air pressure to ensure, that no dirt is left in the channels. The internal spray channels are flushed 4 times during the internal cleaning. External cleaning The DAC UNIVERSAL uses a cleaning procedure called pulse wash. The pulse wash uses water under pressure. The DAC UNIVERSAL autoclave cleans 3 times with cold water and 1 time with warm water, thereby removing biofilm on the instruments easier and more quickly. It is possible to increase the number of washes to 6 times via the menu system. Solid instruments are cleaned externally by means of the pulse cold wash. Cleaning tablets are only recommended for the cleaning of the empty chamber and the internal tubes of the DAC UNIVERSAL. This should be done when needed or as a minimum during the weekly Check & Clean procedure. The NitraClean tablet ( 60 53 842) is to be placed into the empty chamber before the standard cycle is started with disabled oil function, moreover the lid must be without any instruments attached. For further reference see section 6.0 or the Check & Clean procedure. Do not use a NitraClean tablets in cycles involving Sirona SIROPure or other oil-free instruments. Do not place the tablet in the water tank! 1.4 Lubrication of non-wrapped instruments Prior to the sterilization cycle the drive channels are cleaned and lubricated. When using the basket for solid instruments the lubrication cycle should be omitted. Once the cycle has finished the lubrication cycle is automatically switched on again. NOTE: The amount of oil that is supplied to each instrument during a DAC UNIVERSAL cycle is designed for the instrument undergoing a DAC cycle between each patient. NOTE: Please note that when running your DAC UNIVERSAL loaded with less than 6 instruments, you might experience potential oil expel from the remaining non-loaded adapter positions. To avoid the inconvenience of getting greasy instruments surface, we recommend that you load the lid with instruments on all 6 positions on every cycle. In addition make sure that the instrument tops do not have an angle pointing towards other instruments. 12 510010-20B 04.2013 DAC UNIVERSAL – USER MANUAL 729050 - Version 20 S 1.5 Sterilization of non-wrapped instruments At the beginning and the end of the sterilization, the instruments are exposed to both an internal and an external sterilization cycle. During the cycle of internal sterilization, a very high level of pressure of saturated steam is generated in the autoclave chamber which is extracted backwards through the drive and spray channels of the instruments. The flow of steam-pressure is repeated 16 times in total, throughout the cycle. This cycle is called back-flush. In addition to this, an external sterilization of the instruments is carried out. Here the instruments are exposed to the temperature and steam pressure as chosen in the program. It is possible to choose between three different sterilization programs: 121C with a sterilization time of 15 minutes, 134C with a sterilization time of 3 minutes and 134C with a sterilization time of 18 minutes. Sterilization control system: The sterilization control system works by regulating the pressure and at the same time controlling the corresponding temperature. This means that if the temperature or the pressure is below or above the limit values of the sterilization an error will appear in the display. 1.6 Sterilization of wrapped instruments See section 3.2 ‘Use of the wrapped lid’. 1.7 Processing handpieces and turbines The DAC UNIVERSAL is made for immediate use of handpieces and turbines. This means that the handpieces/turbines are transported directly from the dental chair to the DAC UNIVERSAL where they are introduced into the machine. It is recommended to pre-clean the instruments if the handpieces and turbines are very dirty or if the handpieces and turbines have been left to dry before processing in the DAC UNIVERSAL. During the time of handling the handpieces/turbines the dirt, blood etc. will dry and will increase the need for pre-cleaning. After the process in the DAC UNIVERSAL and after cooling down, the handpieces/turbines are ready for immediate use in all dental treatments. In case the instruments are not to be used immediately it is recommended to bag the handpieces/turbines in e.g. dental wrapping bags, which clearly indicates date and time and that the instruments have been processed in the DAC UNIVERSAL and that they are not to be used for surgical procedures. NOTE: Please always follow the demands of your own specific country. The procedure is described more in detail below: Pre-processing information: 1. Take the used/soiled instruments off the dental chair using normal handling procedure. 2. Bring the soiled instrument to the “NOT clean area”/”infected area” in the sterilization room. 3. If the outside of the handpieces/turbines are visual dirty – please perform a pre-cleaning – before step no. 4. 4. Load the handpieces/turbines into the DAC UNIVERSAL and start the cycle of cleaning, lubrication and sterilization. Post processing information: 5. After the DAC UNIVERSAL has finished the cycle, allow the handpieces/turbines to cool down before handling, as they are hot after a cycle. 6. NOTE: The chuck of the instruments should be lubricated after a mechanical cleaning according to the recommendations of the manufacturer of the instruments. 7. After cooling down either - bag the handpieces/turbines in dental wrapping bags, which clearly indicates date and time and that the instruments have been processed in the DAC UNIVERSAL and that they are not to be used for surgical procedures. NOTE: Please always follow the demands of your own specific country. or - bring the handpieces/turbines directly to the dental chair to be used immediately. 510010-20B 04.2013 13 DAC UNIVERSAL – USER MANUAL 729050 - Version 20 S 8. If the handpieces/turbines are bagged - place the date and time of sterilization on the bag and name which steriliser was used and store it. NOTE: Please always follow the demands of your own specific country. Please contact your DAC UNIVERSAL dealer if you have any further questions! The graph below is a process overview, which shows the temperature and pressure as a function of time. Appendix: Section 1.3-1.7 Sterilization cycle type S Type test Wrapped load Solid Load Handpieces Air leakage x x x Dynamic chamber x Empty chamber x x x x x x x Solid load, unwrapped Solid load, single wrapped x Dryness, solid load, unwrapped Dryness, solid load, single wrapped x Non-condenseble gasses x x x Microbiological test MBI x x x 14 510010-20B 04.2013 DAC UNIVERSAL – USER MANUAL 729050 - Version 20 S 2. Installation of the DAC UNIVERSAL The purpose of this chapter is to provide the user with information about how the installation of the DAC UNIVERSAL should take place. It is recommended that the instruction manual be examined thoroughly before the installation is carried out. Please note that the autoclave must be left to warm to the ambient temperature before it is connected. o The DAC UNIVERSAL must NOT be stored in temperatures lower than 1 C. NOTE: Only Sirona trained technicians with a Sirona training certificate are qualified to perform the installation, service, repair and maintenance of the DAC UNIVERSAL. 2.1 Requirements concerning placing The DAC UNIVERSAL should be placed in an open space on a horizontal position/surface. Place the DAC UNIVERSAL in a well ventilated area on a level heat resistant counter top near both compressed air and an electrical source. Recommended minimum space to the wall: 10 cm. Furthermore, there must be enough space to allow the autoclave to open (upright). The minimum height should be 70 cm, to prevent any bodily harm when opening the lid. Total height of the DAC UNIVERSAL when open: 53 cm. When closed the autoclave is 35cm x 38cm (H x W). For your information the mains disconnecting device is the appliance coupler. Please see more about safety, service, warranty, certificates and approvals in section 7. 2.2 How to install the DAC UNIVERSAL? Before the DAC UNIVERSAL is ready for use the following connections are required: AC input: 90-120 and 190-240 volt 50/60 Hz, grounded outlet – 1100 W The DAC UNIVERSAL is supplied with a main lead with plug, which must be connected to the autoclave (see figure 1 in section 2.2.3). When the DAC UNIVERSAL is connected to electricity the lid will then open and error 92 can possibly occur; in this case press “C” on the display to reset the autoclave. Compressed air 5-8 bar; flow: 60 litres/2.1 cubic ft pr. min. A tube size 6/4mm is required for the connection between the DAC UNIVERSAL and the external compressor. The compressed air tubing is inserted in the top screw coupling (see figure 1 in section 2.2.4). The tube must be held in while simultaneously the nut is fastened with a 12mm wrench. To dismantle the tube the nut is unfastened and the tube can easily be drawn away. The DAC UNIVERSAL has a built-in pressure regulator, therefore the autoclave will function at any level between 5 and 8 bar. The compressed air is used during the cleaning and lubrication cycle. The compressed air is specifically used for flushing the spray channels during internal cleaning and for the pulse wash during the external cleaning. Furthermore the compressed air is used for distributing the oil during the lubrication cycle. The compressed air to the DAC UNIVERSAL must be dry and must not contain any oil remains. Please contact the supplier of your compressed air unit, if you have any questions regarding this issue. NOTE: It is necessary to install an air filter ( 60 78 575) (20 microns) before the DAC UNIVERSAL, in order to be sure that the air is clean for the protection of the machine. Drain for used water, steam and oil Residual water emerges through the drain outlet. Therefore the drain outlet (the middle screw coupling - see figure 1 in section 2.2.4) must be connected with a drain tank ( 60 78 526 – includes 3 meter of PFTE (heat resistant) tube 6/4mm and mounting instructions) in order to collect the residual water. For this connection you must use a 6/4mm PTFE tube. 510010-20B 04.2013 15 DAC UNIVERSAL – USER MANUAL 729050 - Version 20 S The PTFE tube must not be longer than 3 meter. The installation and the removal of the drain tube is accomplished in the same way as the connection of compressed air – see above under the paragraph in section 2.2 called “Compressed air”. The tube must be connected without pressure to the drain. When connecting the DAC UNIVERSAL to the drain it is important to fix the connecting piece thoroughly. When connecting the PTFE tube to the drain tank, it is important to push the drain tube into the quick-coupling and to ensure that the tube is securely fastened. When dismounting the tube from the drain tank you must press on the quick-coupling ring when you pull the tube from the drain tank. . Be aware not to handle the drain tube when it is hot or the machine is running. The waste from the drain should be handled following Universal Precautions as well as any applicable waste disposal regulations. CAUTION: Oil, water and hot steam are discharged through the drain from the autoclave. Drain tube is hot during cycle and must not be touched until it is cooled down, which takes approximately 15 minutes. If using another type of tube than the PFTE tube, the tube must be steam resistant at approx. 134º C. How to supply water to the water-tank One of the following connections must be made: A) Constant connection to demineralised/ distilled water Dismantle the stopper on the water inlet. The constant connection of demineralised/distilled water is through a 6/4mm tube connected to the bottom screw coupling (see figure 1 in section 2.2.4). NOTE: It is necessary to install a water filter (20 microns) ( 63 12 214) before the DAC UNIVERSAL, in order to be sure that the water is clean for the protection of the machine. The fitting and the dismantling of the tube are done in the same way as the connection of compressed air. Maximum water pressure: 6 bars. In order for the autoclave to work with an automatic connection to demineralised/distilled water the autoclave has to be put in an “automatic water inlet mode”. This is done through the menu system (see section 3.7 under Settings). When using the constant connection, please empty the drain tank once a day or when full See section 6. (1. Clean the drain tank). NOTE: A maximum water conductivity of 3.0 S/cm is required. or B) Manual supply of demineralised/distilled water Leave the stopper on the water inlet. All functions (cleaning and sterilization) of the DAC UNIVERSAL require demineralised or distilled water. Therefore, it is necessary to frequently supply the internal water tank with water if the constant connection is not chosen. 0 1 filled water tank = approx. 2 complete cycles, with the use of the standard 3 min. 134 C sterilization program. Total volume in water tank: 2.0 litres/0.44 UK gallons. 0 Minimum water charge in water tank: 0.45 litres/0.1 UK gallons, with the use of the standard 3 min. 134 C sterilization program. NOTE: A maximum water conductivity of 3.0 S/cm is required. 2.2.1 Mounting of adapters Adapters The DAC UNIVERSAL has room for 6 instruments at a time. You can combine up to 6 different adapters depending on your clinic’s requirements. If the combination of instruments in your clinic changes, it is possible to change the adapters on the adapter lid. Adapters are attached to the lid by two small screws. 16 510010-20B 04.2013 DAC UNIVERSAL – USER MANUAL 729050 - Version 20 S A gasket is placed between each adapter and the lid during installation to seal the flow of air, water, steam and oil between each adapter and the lid. Maximum length of handpieces and turbines: The six adapter positions on the adapter lid are each marked with dots, which symbolises the adapter-position-number on the adapter lid. On position 1 on the lid the instruments must not be longer than 145 mm (total length of instrument and adapter). The maximum length on position 2-6 is 160 mm (total length of instrument and adapter). To mount the adapters onto the lid 1. Place the enclosed gasket on the lid so that the gasket fits over the screw holes and the holes for drive and spray channels. NOTE: Please use the screws, which are delivered with the adapter. 2. Attach the adapter to the lid using the two provided screws. Use the 1½ mm allen key provided with the DAC UNIVERSAL to tighten the screws holding the adapter to the lid. Picture 1. Picture 2. Below please find the different kind of adapters available. Description 60 51 648 60 51 655 60 51 663 60 51 671 60 51 689 60 51 697 60 51 705 60 51 713 60 51 762 60 51 804 60 51 812 60 51 838 60 51 846 60 51 853 60 51 861 60 51 887 60 51 903 60 51 911 60 51 929 63 23 831 60 85 745 Complete handpiece click adapter, E-type Complete KaVo turbine adapter Complete KaVo handpiece head adapter Complete W&H turbine adapter Complete W&H turbine adapter - for TA-98LW/96LW high-speed instruments only ! Complete Sirona turbine adapter Complete Sirona CLASSIC/TE adapter Complete Bien Air turbine adapter Complete Castellini turbine adapter Complete NSK turbine adapter Complete NSK VIP II/ Pana QD adapter Complete Lares turbine adapter Midwest/ ISO 4/5 hole, w. quick-connect swivel turbine adapter Midwest/ ISO 4/5 hole, fixed connection turbine adapter Complete Borden 2/3 holes adapter (with fixed back-end) StarDental HiFlo turbine adapter 60 51 945 MicroMega 35 ST/STL turbine adapter Midwest Rhino/Shorty adapter for turbines Complete Morita (PAR-DI) turbine adapter Complete Morita (PAR-O) turbine adapter Yoshida turbine adapter Complete OSADA OFJ-MZL turbine adapter 63 08 360 Adapter for Osada HL-C 60 85 752 Adapter EMS Scaler without light 63 07 214 Adapter EMS Scaler with light All adapters are delivered inclusive a small gasket and 2 fixation screws. 510010-20B 04.2013 17 DAC UNIVERSAL – USER MANUAL 729050 - Version 20 S NOTE: When using Sirona CLASSIC TE adapters ( 60 51 705) you must not apply any force when mounting the handpiece on the adapter. The handpiece must be easy to click onto the adapter. If it is not easy to click the handpiece onto the adapter, the handpiece may be damaged. Sirona Dental A/S does not cover any handpieces thus damaged. NOTE: Please at any time handle your instruments as recommended in the Instruction manuals from the supplier of the instruments. 2.2.2 Choice of display language It is recommended that language corresponding to the main-language in your country or the language most familiar to the user of the DAC UNIVERSAL is chosen as display language. The explanation of how to do this - please see section 3.7 Using the menu system. Please note that there are six language options: English, German, French, Spanish, Italian and Swedish. 2.2.3 Installation of sterile-filter for wrapped instruments and for instruments used for invasive surgical treatments NOTE: It is necessary to install a sterile-filter before the DAC UNIVERSAL, in order to be sure that the air from the compressor is adequate for use in DAC UNIVERSAL together with the lid for wrapped-instruments or for instruments used for invasive surgical treatments. The sterile-filter replaces the normal air-filter for DAC UNIVERSAL (mentioned in section 2.2 How to install the DAC UNIVERSAL - Compressed air). A tube size 6/4mm is required for the connection between the DAC UNIVERSAL air-inlet (see figure 1 in section 2.2.4) and the external compressor. The sterile-filter must be mounted on this tube maximum 1 meter away from the DAC UNIVERSAL. Mounting to be performed as described in section 2.2 for Compressed air installation. 2.2.4 Connection of the DAC UNIVERSAL to a printer The DAC UNIVERSAL is prepared for connection to a printer in order to print autoclave reports (auxiliary equipment). Please refer to section 5. Reports. Figure 1: Installation Com Connect to printer or logger Drain filter The water runs through the filter when it is led from the chamber. The filter must be cleaned weekly and changed every 4 weeks (based on 10 cycles per day!). See section 6. (2. Clean the drain filter). 18 Power supply Connect to 90-120 and 190-240 volt 50/60 Hz Air Air inlet - Connect to compressed air Drain outlet - Connect to drain Drain Water Water inlet - Connect to demineralised/distilled water – optional 510010-20B 04.2013 DAC UNIVERSAL – USER MANUAL 729050 - Version 20 S 2.2.5 Connection of the DAC UNIVERSAL to a logger system It is possible to connect a USB data-logger system to the DAC UNIVERSAL. Every cycle is written on a USB stick and can on a daily basis be transferred to a computer in the clinic where the cycles can be digital signed. The logger can be connected at the COM Port (RS 232) to the DAC UNIVERSAL – see 2.2.4 Figure 1. The logger, which is auxiliary equipment, can be bought at company Comcotec in Munich (www.comcotec.org). Furthermore a larger network product called „SEGOSOFT“, also auxiliary equipment, can be bought also at company Comcotec in Munich (www.comcotec.org). „SEGOSOFT“ is compatible with most clinic-software-programs. 2.3 Before using the autoclave - important! Before handling the autoclave, please be aware that the weight of the machine is approx. 23 kilograms/51 pounds. Therefore when lifting the machine, please use a lifting technique adjusted to the weight of the machine. For more information regarding handling please refer to section 6.1. CAUTION: The bottom plate of the DAC can be hot. In order to be able to use the machine please go through steps 1-6. 1. Connect the machine to a power supply. The use of power for the autoclave is maximum 1100 Watt during the cycle. Installation category for mains supply is . 2. Starting the DAC UNIVERSAL: (please see section 3 for further instruction) The machine will be turned on and be in standby mode when connected to a power supply. 3. Turning off the DAC UNIVERSAL: Press the clear-button ‘C’ for more than 2 seconds, and the machine will go into standby mode. If you want to start up the machine from standby mode – press the start button. Or if wanted, disconnect the machine from power supply and the DAC UNIVERSAL will be completely switched off. 4. Introducing and changing the oil can There is no oil bottle mounted in the DAC UNIVERSAL when it is delivered. To ensure that the DAC UNIVERSAL can lubricate the first time it is activated, the oil bottle must be mounted and the oil is led through the tubes by use of the manual controls – see section 6. (7. Check the oil entering the chamber). The oil can holds approximately 200 ml /0.043 UK gallons of oil. The DAC UNIVERSAL uses max. 1 ml./0.00022 UK gallons of oil per cycle, which is enough for approximately 230 cycles. NOTE: Do not use any other liquid than the Nitram Oil.. No toxic, harmful or dangerous gasses are produced by handling, use and removal of the oil. The oil is filled directly from the oil can into the DAC UNIVERSAL. Follow all handling instructions and general safety regulations for your specific lubricant when introducing the oil can. Do NOT handle the oil cans close to open fire. Storage and handling o must be below 50 C. Follow all applicable lubricant warnings on handling, use, and disposal of the lubricant. The use o of flammable lubricants is allowed so long as the vapour point of the lubricant is above -8 C. If a flammable lubricant is used, smoking is not permitted within 3 meter of the DAC UNIVERSAL or its drain tank. The DAC UNIVERSAL does not accept aerosol lubricants. Please refer to the safety data sheet for the used oil product. In case of fire: The maximum amount of oil is only 200 ml/0.043 UK gallons. There is no danger that dangerous / harmful gasses will be created in the case of fire. Description of how to change the oil-bottle: To change the oil-bottle open the oil tank cover and follow the description a. – d. below Picture a: Turn the empty oil-bottle counter clockwise and remove it. 510010-20B 04.2013 19 DAC UNIVERSAL – USER MANUAL 729050 - Version 20 S Picture b: Remove cap from new oil-bottle. Picture c: Introduce the oil-can upside down into the machine. NOTE: The oil- bottle must meet the matching oil- bottle attachment in order to be fastened. Picture d: Turn the oil-bottle clockwise and gently tighten until you meet resistance. NOTE: The oil-bottle can be damaged if tightened too hard. After installation There is no oil-bottle in the DAC UNIVERSAL when it is delivered. To ensure that the DAC UNIVERSAL can lubricate the first time it is activated, the oil-bottle must be placed into the DAC UNIVERSAL and the oil must be led through the tubes by use of the manual controls – see section 6. (7. Check the oil entering the chamber). The oil bottle must be replaced, when the message ”Low oil” is visible in the display or if error 81 occurs. Error 81 is removed by pressing C. The message “low oil” automatically disappears, when the oil bottle has been replaced with a new bottle. It is possible to remove an oil-bottle that is not empty and re-use it in the machine at a later time. Increasing oil expel If the instruments are too oily in the drive channel, it is possible to increase the oil expel time by means of the menu system. 1. 2. 3. 4. 5. 6. 20 Enter the menu system by touching the “Menu/Enter” button. Press the “Up” or the “Down” button until you reach “Settings”. Press the “Menu/Enter” button to select “Settings” mode. Press the “Up” or the “Down” button until you reach “Oil Expel”. Press the “Menu/Enter” button to select “Oil Expel” mode. Press the “Up” or the “Down” button to choose the level of oil expel. 510010-20B 04.2013 DAC UNIVERSAL – USER MANUAL 729050 - Version 20 S Default is set at level 1. It is possible to choose between the level 1, 2, 3, 4, and 5. These levels indicate a multiplication level of the oil expel. Level 2 is 2 times as much oil expel as level 1, level 3 is 3 times as much oil expel as level 1 and so on! Increasing the level of oil expel will increase the time of the total cycle. 7. Press the “C” button until the normal display appears. 5. Filling the water tank The water tank has a capacity of approximately 2.0 litres (0.44 UK gallons) of water. ° This quantity of water is sufficient for approximately 2 cycles of the standard 3 min. 134 C sterilization program. It is necessary to use distilled or demineralised water of max. 3 S/cm. NOTE: Please note that the water should be poured carefully into the tank. Otherwise, the water may run in between the tank and the autoclave itself, resulting in water on the table or in worst-case, water on the main board of the autoclave, which can cause a short circuit. Water The water must be free of foreign bodies. Water is led through the tubes in either way: 1. The lid must be up 2. Press the rinse/flush symbol on the display for more than 1 sec., and hold until the water is automatically led through the tubes into the chamber. 3. When water is introduced to the chamber through the bottom adapter stop pressing the rinse/flush symbol on the display. Or, 1. 2. 3. 4. 5. 6. The lid must be up Enter the menu system by pressing the “Menu/Enter” button Press the “Up” or the “Down” button until you reach “Manual”. Press the “Menu/Enter” button to select “Manual” mode. Press the “Up” or “Down” button in order to reach “Water” in the menu. When “Water” is marked you can press “Menu/Enter” in order to start pumping water into the tubes. 7. When water becomes visible in the chamber there is water in the tubes. The water will continue being pumped into the chamber until the “Menu/Enter” button is touched again to stop the water pump. 8. Press “C”-button until the normal display appears There is now water in the tubes. The water tank must be filled when the message ”Low water” is visible in the display or if error 81 occurs. Error 81 is removed by pressing C. The message “Low water” automatically disappears when the water tank is filled. Remember to empty the drain tank when filling the water tank. When you have ensured that there is both oil and water in the tubes, the instruments are placed on the adapters on the lid and the autoclaving cycle can be started (see section 3. Operating the DAC UNIVERSAL). If the adapters are not mounted on the lid when the machine is delivered, please refer to section 2.2.1 (Mounting of adapters). 510010-20B 04.2013 21 DAC UNIVERSAL – USER MANUAL 729050 - Version 20 S 6. Resetting the lid-holder: NOTE: The autoclave must not be started without the adapter-lid being mounted. Remember always to place the adapter-lid in the holder before pressing start. In case the autoclave is being started without the adapter-lid in the holder, and the holder has pressed down the safety ring and is unable to go up - please follow below procedure: 1. Put in the adapter key in this hole to reset and open the machine. 2. Press carefully the adapter key in the hole until you hear a little click. The lid-holder will open up-wards (will take about 5 seconds – and error 86 will be displayed). Afterwards press C to open the lid-holder completely. The autoclave can now be used again. 7. Increasing expel of water If the user desires to increase the amount of time that air is blown through the instruments after the sterilization process - i.e. to increase water expel, it is possible to do so by means of the menu system. 1. 2. 3. 4. 5. 6. Enter the menu system by touching the “Menu/Enter” button. Press the “Up” or the “Down” button until you reach “Settings”. Press the “Menu/Enter” button to select “Settings” mode. Press the “Up” or the “Down” button until you reach “Expel”. Press the “Menu/Enter” button to select “Expel” mode. Press the “Up” or the “Down” button to choose the level of blowing time. Default is set at level 0. It is possible to choose between level 0, 1, 2 and 3. Level 0 disables the water expel function, level 1 blows out air for 50 sec., level 2 blows out air for 100 sec. and level 3 blows out air for 150 sec. Increasing the level of water expel will increase the time of the total cycle. NOTE: For nearly all instruments of brand W&H, KaVo, NSK and most other brands we recommend to set the water expel level at 1. For instruments of brand Sirona TE or Classic we recommend water expel level set at 3. However please always be sure to act in accordance with the user manual/instructions from the manufacturer of the instruments. 22 510010-20B 04.2013 DAC UNIVERSAL – USER MANUAL 729050 - Version 20 S 2.4 Heating the autoclave When starting the DAC UNIVERSAL (e.g. in the morning) approximately 10-12 minutes will pass before the autoclave has warmed up sufficiently. During the heating-up the display shows “Heating” and the remaining temperature in %. If the autoclave is activated before the chamber is properly warmed up, nothing will happen. The autoclave is not ready to be used before it says “ready” in the display. The heating-up process is automatically activated if the machine has been disconnected from electricity (e.g. during the night) and is connected to electricity again. The heating-up process is a matter of heating-up the steam generator in order to be able to start a cycle at any time. From the display it is possible to monitor the chamber temperature. The chamber temperature can vary from time to time without effecting the sterilization cycle. If the time between each cycle is short, the temperature of the chamber will be high. If the time between each cycle is long, the temperature in the chamber drops to around ambient temperature. 2.5 Perform installation testing with Biological- /Chemical Indicators after machine-installation Before using your DAC UNIVERSAL after installation or major repairs, it is recommended to perform a sterilization process test using a biological or a chemical indicator (class 5) depending on the regulatory requirements in your country. For additional details about the procedure refer to section 3.5. 510010-20B 04.2013 23 DAC UNIVERSAL – USER MANUAL 729050 - Version 20 S 3. Operating the DAC UNIVERSAL We recommend you to study the following information before this chapter is examined. It shows a visual description of the display of the DAC UNIVERSAL. 1. 2. 3. 4. 5. 6. 7. 8. 9. 10. Display/button Description 1. Display The temperature and pressure in the autoclave chamber is constantly shown. The pressure is displayed as an absolute value. (Includes surrounding air pressure). This button gives access to the menu system. It also functions as an entry/confirmation button when managing the menu system. This button is used to manage the menu system. This button is used to manage the menu system. This button is used if the autoclave indicates an error. By touching this button the error is cleared. When holding this key down for a short while (more than 2 sec.), the machine goes in standby mode. A blue light will illuminate when the cycle is active. Pressing the symbol for wash toggles the washing cycle on and off. When the blue light is off, the washing cycle is deactivated. A blue light will illuminate when the cycle is active. Pressing the symbol for lubrication toggles the lubrication cycle on and off. When the blue light is off, the lubrication is deactivated. This button activates the autoclave. A blue light will illuminate when the cycle is active. Pressing the symbol for wrapped cycle - the wrapped cycle will be activated. When the blue light is on, the wash and lubrication has been deactivated. When this light is on, an error has occurred. The error code can be read in the display. It is important always to check the error if an error occurs. If the light is flashing without an error code and the light (alarm) flashing does not stop when pressing “C”-button – then it is time for biennial service. 2. Menu/Enter 3. Up 4. Down 5. Clear 6. Rinse/Flush 7. Lubricate 8. Symbol for start 9. Wrapped 10. Alarm 24 510010-20B 04.2013 DAC UNIVERSAL – USER MANUAL 729050 - Version 20 S To activate a complete sterilization cycle at 134º C the following needs to be done: 1. Go through 1-5 in section 2.3 2. Place the steam indicator strip into the clip on lid (see section 2.5). NOTE: Please ensure to follow the instruction manual from the according manufacturer whenever using a biological/chemical indicator. 3. Manually clean up to six (6) instruments and/or attachments, and visually inspect all internal channels for blockage as instructed by the manufacturer. 4. Place instruments and/or attachments onto their respective adapters on the lid. Depending on the type of device and its adapter, you may need to push the article onto its adapter, manipulate a click-lock on the adapter, or tighten a threaded ring onto the article. Please be sure that you hear a small ‘click’ when you push an instrument onto an adapter. After having placed an instrument onto an adapter – please slightly pull the instrument to make sure that it is properly fastened onto the adapter. 5. Load the adapter-lid in the lid holder of the autoclave. (See below picture 1.) Make sure to push the adapter-lid all the way back to fit the lid holder properly. NOTE: The autoclave and or instruments can be damaged if the lid is not placed correctly. NOTE: Make sure that the instruments mounted on the adapters are not too long - see section 2.2.1 NOTE: When using any adapter - no force must be applied when mounting the instrument to the adapter. The handpiece/turbine/scaler/spray nozzle must be easy to mount onto the adapter. If it is not easy to click or screw the instrument onto the adapter it is possible to damage the instrument. Sirona Dental A/S does not cover any of these damaged handpieces/turbines/scalers/spray nozzles. NOTE: When using Sirona CLASSIC TE adapters ( 60 51 705) you must not apply any force when mounting the handpiece on the adapter. The handpiece must be easy to click onto the adapter. If it is not easy to click the handpiece onto the adapter, the handpiece may be damaged. Sirona Dental A/S does not cover any instruments thus damaged. Picture 1. Please make sure that the heads of the instruments are within the chamber dimension. To make sure that this is the case, please check by inserting the lid into the chamber manually. When the heating-up process in the DAC UNIVERSAL is finished (the heating-up process only takes place after connecting the autoclave to electricity - see section 2.4), the machine can be started. Remember to place a biological/chemical indicator (holder for indicator 60 51 788) in the chamber. 6. Before pushing the start button, please ensure that the small lamps next to the corresponding symbols are illuminated: Please be aware to press the Lubrication button in case the basket is used for sterilization of static/solid instruments. This will leave out the lubrication cycle for this one cycle only! If the lamp is out (no blue light) then there will be no lubrication cycle. When choosing Wrapped button, the cleaning and lubrication cycle is automatically left out, i.e. the lamps are out (no blue light) next to the buttons. See section 3.2 Use of wrapped lid. 510010-20B 04.2013 25 DAC UNIVERSAL – USER MANUAL 729050 - Version 20 S Cleaning cycle Lubrication cycle Sterilization cycle for Wrapped instruments Before pressing the start button please make sure that no error codes are displayed. NOTE: Please check and ensure that the chamber is empty before starting the cycle. 7. Press the start button and press safety ring as indicated in the display (see appendix 1). If the safety ring is not pressed within 20 seconds – you must once again press the start button. When the safety ring has been activated, the adapter lid of the DAC UNIVERSAL will go down and close after which the autoclave automatically goes through the cycles: cleaning, lubrication (if not de-selected) and sterilization. It is possible constantly to monitor which cycle the autoclave is going through by looking at the display. For example the standard program at 134 º C takes approximately 16 minutes after which the lid automatically opens up a little bit. 8. The display indicates what part of the cycle the DAC UNIVERSAL is currently performing. When the cycle has been completed the message “cycle complete” will appear in the display. Then the lid automatically reopens and raises approximately half way out of the chamber. 9. “Cycle complete – press C to unload” will appear in the display. To fully raise the adapter-lid with the instruments for removal and use, press the C button as indicated in the display and the lid will raise completely. This procedure is also confirming that the cycle was completed without errors and the instruments are ready for use. 10. Remove the lid and place it on the countertop or in the optional holder. Remove each instrument from the adapter lid. Use normal wrapping procedure – see section 3.2. CAUTION: do not hold your head directly over the autoclave when it opens, as a little bit of steam will come out of the machine during opening. And do not hold on to the lid while the machine opens up. CAUTION: When the adapter-lid is raised halfway or fully, the instruments are still hot. Please let the instruments be cooled off before handling them. When handling/placing the adapter lid for cooling, it is important only to hold on the blue part of the adapter lid. NOTE: During the cooling off, the heads of the instruments should be turned upwards to avoid corrosion. It is possible to use a special holder for the adapter-lid ( 62 59 109) in order for the adapter-lid to be cooled down in the right position. It is now possible to insert a new adapter lid in the DAC UNIVERSAL to start a new cycle. Extra lid can be ordered separately ( 60 51 739). NOTE: If the instruments are to be stored for a longer period (e.g. during the weekend), it is important that they are blown through (horizontal) manually with compressed air in order to remove condensation in the instruments – as condensation can cause corrosion in the instruments. NOTE: Be sure to use compressed air at pressure-level (bar) in accordance with the user manual/instructions from the manufacturer of the instruments. 26 510010-20B 04.2013 DAC UNIVERSAL – USER MANUAL 729050 - Version 20 S 3.1 Use of the basket To sterilise solid instruments in the DAC UNIVERSAL you must purchase a complete basket ( consists of a metal basket and a special lid. See picture below. Complete basket – 61 26 200), which 61 26 200 Operation instructions: 1. Remove the lid for handpieces from the autoclave. 2. Pre-clean all static/solid instruments according to the instructions form the manufacturer instructions before placing the instruments in the basket for the DAC UNIVERSAL. 3. Open up the snap-lock on the basket, get hold of the stub on the small lid and remove the small lid from the basket. Place up to 5 solid instruments in the basket – if possible with the pointed ends downwards. Please note if the small lid unobstructed can be replaced on the basket, i.e. the instruments are not stuck in any way. Instruments with hinges, which cannot be opened up completely, when they are placed in the DAC UNIVERSAL basket, should not be treated in the autoclave. 4. Get hold of the stub on the small lid and place the lid on the basket – lock on the lid with the snap-lock. NOTE: the stub of the small lid must turn up-/outwards. 5. Place the basket/the blue lid in the holder for the lid (semi-circle). It is important to push the blue lid COMPLETELY back, to fit in the holder. NOTE: The autoclave and/or the basket and/or the instruments can be damaged, if the lid is not placed correctly. 6. Before starting the autoclave please ensure that no instruments can get jammed during closing. 7. Omit the lubrication by pressing the ”Lubricate”-button – i.e. the small blue light next to the button is turned off. (See also section 3.4 Leaving out parts of the cycle) Ensure that the lamp next to the corresponding symbol is illuminated and no error codes are displayed. Cleaning cycle NOTE: Please check and ensure that the chamber is empty before starting the cycle. 8. Start the autoclave by pressing the start-button and then (within 20 seconds) the safety ring. The DAC UNIVERSAL autoclave will automatically go through the washer- and sterilization cycles. For instance the standard program at 134C, takes approximately 16 minutes. On the display of the machine is shown which part of the program the autoclave is going through. 9. “Cycle complete – press C to unload” is shown in the display. To lift the lid completely – press “C”, as shown in the display. 10. Remove the basket/the blue lid from the lid holder (semi-circle) after the cycle. And place it on the table or in the holder for lid. CAUTION: The blue handle of the basket can be hot. 11. When the instruments are cold, they should eventually be re-proceeded as sterilized wrapped (see section 3.2). 12. After the cycle the autoclave automatically activates lubrication for the next cycle. 510010-20B 04.2013 27 DAC UNIVERSAL – USER MANUAL 729050 - Version 20 S 3.2 Use of the wrapped lid To sterilise wrapped instruments (solid or rotating) in the DAC UNIVERSAL you must purchase a lid for wrapped instruments and a sterile-filter ( 62 59 092). The order no consists of a sterile-filter and a special lid for wrapped instruments. See pictures below. Sterile-filter and lid for wrapped instruments – 3.2.1 62 59 092 Compatibility The lid for wrapped instruments can be used with the following DAC UNIVERSAL serial numbers and software versions: Serial number > 104000 (14000) From software version 3.4.31 If your DAC UNIVERSAL has a lower software version installed than mentioned above, a software update is required. To do this, please contact your local supplier. 3.2.2 Safety NOTE: The instruments you will process in the DAC UNIVERSAL Wrapped cycle MUST just prior have been washed and sterilised in one of the three standard non-wrapped cycles - see section 3. and 3.1. 3.2.3 Operation instructions 1. Remove the lid for handpieces from the autoclave. 2. Wrap three (3) instruments – each separately. NOTE: Packing-/wrapping material used with the lid for wrapped instruments in the DAC UNIVERSAL must be in accordance with EN868. Sealable paper bags and sealable transparent bags or tubes made of porous material and plastic composite film must be filled to only 3/4 of their total volume. NOTE: Overfilling may strain the seams. There must be at least 30 mm space underneath the sealing rim between the sterilised product and the seam to be sealed 3. Place up to maximum three (3) instruments – each in a wire-holder. Slide the wrapped instrument in between the two main wires and fix the wrapped instrument with the spring-wire at the bottom of each wire-holder. NOTE: If it is wrapped rotating instruments – you must place them so the heads of the instruments are the first to slide downwards between the wires and onto the lid. Be sure that the instrument is firmly stuck between the wires – in order for it NOT to be sliding off the wires during cycle. After having placed the bagged instrument onto the lid wires – please slightly pull the instrument to make sure that it is properly fastened between the wires.. 4. Place the blue lid in the holder for the lid (semi-circle). It is important to push the blue lid COMPLETELY back, to fit in the holder. NOTE: The autoclave and/or the lid and/or the instruments can be damaged, if the lid is not placed correctly. 5. 28 Before starting the autoclave please ensure that no instruments can get jammed during closing. 510010-20B 04.2013 DAC UNIVERSAL – USER MANUAL 729050 - Version 20 S 6. Choose Wrapped cycle by pressing the Wrapped button. When choosing Wrapped button the cleaning and lubrication cycle is automatically left out – i.e. the lamps are out (no blue light) next to the buttons. Cleaning cycle Lubrication cycle Sterilization cycle for Wrapped instruments Before pressing the start button please make sure that no error codes are displayed. NOTE: Please check and ensure that the chamber is empty before starting the cycle. 7. Start the autoclave by pressing the start button. 8. The display will now ask you to confirm your choice of wrapped cycle by asking you to press the M button. Confirm your choice by pressing the M button. 9. Start the autoclave by pressing the safety ring. (Step 7., 8. and 9. must be performed within 20 seconds.) The DAC UNIVERSAL autoclave will now run a normal 134C program, where wash and lubrication are left out. Sterilization time 3 minutes. Total cycle time app. 31 minutes. On the display of the machine is shown which part of the program the autoclave is going through. 10. “Cycle complete – press C to unload” is shown in the display. To lift the lid completely – press “C”, as shown in the display. 11. Remove the blue lid from the lid holder (semi-circle) after the cycle. And place it on the table or in the holder for lid. CAUTION: The blue handle of the lid can be hot. 12. When the instruments are cold, they are ready for storage and/or use. NOTE: After the wrapped cycle – please check the sealed paper-bags and ensure that these are completely dry and firmly closed 13. After the cycle the autoclave automatically deselects the previous wrapped cycle – and goes back to standard mode. 3.2.4 Drying The most effective way to dry especially hollow instruments in the DAC UNIVERSAL is by blowing air through them. The air is supplied through the air filter further through the pressure regulator and the “Expel-Unit” within the DAC UNIVERSAL. To avoid cross contamination, this Expel-Unit-valve (V12) is isolated from the channels connected to the chamber. During expel the drain valve 8 is opened, creating ventilation in the sterilization chamber. 510010-20B 04.2013 29 DAC UNIVERSAL – USER MANUAL 729050 - Version 20 S 3.3 Choice of program The DAC UNIVERSAL autoclave has three different programs, which can be used according to the needs. The three programs with corresponding cycle times are listed below: Temperature 134C Pressure 3.1 bar Sterilization time 3 minutes Total cycle time 16 min. 121C 2.1 bar 15 minutes 28 min. Standard care program For instruments that do not stand high temperature. 134C 3.1 bar 18 minutes 32 min. Standard prion program Specification Standard program You can choose between the different programs in the menu system (see section 3.7). The latest chosen program will be remembered by the DAC UNIVERSAL, after it has been switched off - this is also the case if all power in the clinic has been shut off. NOTE: The maximum temperature that can be reached inside the chamber during the different sterilization programs is described as the below: 137C for both“Standard” and “Standard prion” programs 124C for the Standard care program Locked Programs (programs not possible to use) In connection with validations at the clinic – it is possible to neglect i.e. lock DAC UNIVERSAL programs not used at the clinic. Please contact your supplier if such a ‘lock’ of programs should either be implemented or opened. Only a certified and trained technician must handle this issue. 3.4 Special program requirements It is possible to get the DAC UNIVERSAL autoclave to run a special program. Please see below. Leaving out parts of the cycle If parts of the cycle should be left out, you have to push the button that indicates the part of the cycle, which you want to leave out. When the blue light is out, you have left out, the cycle in question. E.g. you must press the Rinse/Flush button if the cleaning cycle should be left out – the blue light will turn off immediately. E.g. you must press the Lubricate button if the lubrication cycle should be left out – the blue light will turn off immediately. Activate the DAC UNIVERSAL as usual. Please note that it is not possible to leave out the sterilization program. The DAC UNIVERSAL automatically activates a complete cycle when a cycle has finished. This way accidental omission of cleaning and/or lubrication in the next cycle is prevented. When using the basket for solid instruments, the lubrication cycle should be omitted, as these instruments do not need any lubrication. 3.5 Routine monitoring Follow appropriate and country specific sterilization monitoring guidelines for your office/clinic. For routine monitoring of the DAC UNIVERSAL, it is necessary to use certified spore tests or biological or chemical indicators (class 5) depending on the regulatory requirements in your country. NOTE: Please ensure to follow the instruction manual from the according manufacturer whenever using a biological/chemical indicator. Daily monitoring: For every sterilization process it is important to use a chemical indicator (class 5). See instructions 1. to 7 below. Weekly monitoring: Once a week - or in accordance with your country specific demands - use a biological indicator to ensure proper sterilization. This biological indicator can either be shaped as a cylinder (e.g. Rapid Readout Biological Indicator 3M Attest 30 510010-20B 04.2013 DAC UNIVERSAL – USER MANUAL 729050 - Version 20 S TM for gravity steam), an envelope or similar, which can be placed inside the Spore-/PCD-Tester - see instructions 1. to 7. below. In some countries biological tests are not required, but always follow the demands of your own specific country. 1. When testing the sterilization result of instruments used for surgical, invasive treatments place the biological/chemical indicator into the process challenging device PCD ( 60 51 820). Mount the PCD afterwards onto the ISO/INTRAmatic adapter ( 60 51 648) on the lid. Picture 2. Spore-/PCD-tester Mounted on lid Picture 1. Spore-/PCD-tester 60 51 820 2. When testing the sterilization result of instruments used for non-invasive treatments you have the following two alternatives: a) Place the biological/chemical indicator in the indicator holder (see picture 3 below) and clamp the indicator holder on the lid in the carved area (see picture 4 below). b) Place the biological/chemical indicator onto the lid by using the holder for indicator (see picture 4 below for placement Picture 3. indication). Picture 4. Indicator placing Spore-/PCD-tester 60 51 820 3. Place instruments (handpieces and/or attachments) onto the corresponding adapters of the DAC UNIVERSAL lid. You should select those instruments, which are representative of your routine practice. Usually, this will mean that you place instruments on all six adapters. 4. Run the DAC UNIVERSAL unit through a normal cleaning, lubrication and sterilization cycle. 5. Allow the chamber to cool. Remove the biological/chemical indicator from the lid and process it according to the instructions of the indicator manufacturer. 6. For installation testing, please repeat this testing at least one time. 7. If you routinely process solid instruments in the optional basket, similarly perform an indicator-test by placing the biological/chemical indicator in the basket, along with five (5) representative static/solid instruments. CAUTION: If the biological indicator has a positive result (i.e. not all spores were killed) respectively the chemical indicator shows reject, do not use the instruments which were processed since the last cycle with successful biological/chemical indicator results. Do not use your DAC UNIVERSAL machine. Contact your authorised dealer 510010-20B 04.2013 31 DAC UNIVERSAL – USER MANUAL 729050 - Version 20 S 3.6 Reading the display During normal operation, the display will continuously show the current time, chamber temperature in C, and chamber pressure. Chamber pressure is displayed in bar (atmospheres), absolute pressure. The display will show the current system status as follows: Status “Ready 121 C” “Ready 134 C” “Ready 134 C 18 min” “In progress” “Door locked” “Internal flush” “Lubrication” (when selected) “Cold rinse” (when selected) “Hot rinse” “Heating” “Stabilizing” “Back-flush” “Sterilization” “Expel” (when set at level 1, 2 or 3) “Cycle complete” “Cycle complete – press C to unload” “Press safety ring!” “Start wrapped cycle? Inst. treat in std. cycle before wrap? Press “M” to confirm” “Service needed. Press safety ring!” (simultaneously 2 seconds of acoustic alarm is given) Description The machine is ready for a 121 C, 15 minutes program. The machine is ready for a 134 C, 3 minutes program. The machine is ready for a 134 C, 18 minutes program. The operation has been started and lid is moving down. Indicates that the adapter lid is secure to begin cycle. Indicates internal flush of spray channels. Oil is internally added to the instruments Filling chamber with water for external rinse and pulse wash of instruments – and oil expel. 0 Start of steam-pump and heat up the chamber to 120 C Chamber warming up to chosen program temperature and pressure. Stabilising to chosen temperature and pressure. Steam is being pushed through the handpiece channels before and after the sterilization cycle. Count down of the sterilization time - corresponding to the chosen program. Water expel - by air being blown through the instruments. Opening procedure (see section 3. point 9. regarding opening procedure) Indicates that the cycle has been completed. Press “C” to open the DAC UNIVERSAL. Start button has been pressed and cycle will start when safety ring is pressed and tested. Indicates that “Wrapped”-button has been pressed and reminds the user that instruments must be treated in standard cycle before wrapping and using the special lid for wrapped instruments. Indicate that two years or 3000 cycles have passed since start of use or last service performed. Reminds the user that service is recommended. Please contact your supplier. 3.7 Using the menu system The DAC UNIVERSAL has a menu system, which gives the user different options. The different options and how to use the menu system will be explained below. To enter menu level 1, press the menu button, press Up or Down button until the desired option is selected, and press Enter to select. At each menu level, press Up/Down until the desired option is selected, and press Enter to select. 32 510010-20B 04.2013 DAC UNIVERSAL – USER MANUAL 729050 - Version 20 S Menu level 1 Program Manual Menu level 2 134 C 121 C 134 C, 18 min Open Close Menu level 3 Water Drain tank Drain chamber Settings Printer Rinse cycles On Off Rinse cycles (4-6) Oil expel Oil expel (1-5) Language UK D F SP I S Expel (0-3) Expel Set time/date Automatic water Oil settings 510010-20B 04.2013 Set year (00-99) Set month (01-12) Set day (01-31) Time scale (12h/24h) Set hour (01-24) Set min (00-59) On Off Oil settings (1-3) Result/action Sterilization program 134 Celsius for 3 minutes Sterilization program 121 Celsius for 15 minutes Sterilization program 134 Celsius for 18 minutes Opens chamber lid Closes chamber lid (remember to place the lid into the holder (semi-circle) of the autoclave) Pumps water into the chamber Drains the water tank out through the water inlet. Drains the chamber into the drain outlet. Remember to place the lid into the holder (semi-circle) before the use of this function. App. 60 sec. after having chosen Drain Chamber and pressed Menu/Enter - the lid goes up, and the chamber should be empty. The function can be repeated, if the chamber is not empty, after previous attempts. Turns on printer reporting Turns off printer reporting Default is set at 4 pulse washes/ rinse cycles, but it is possible to increase it up to 6, if this is required. (please note that more than 4 Rinse cycles are prolonging total time of cycle) Default is set at level 1, but it is possible to choose up to level 5, if a longer time for blowing air through the instruments is required. (please note that this is before sterilization and is prolonging total time of cycle) English is selected as display language German is selected as display language French is selected as display language Spanish is selected as display language Italian is selected as display language Swedish is selected as display language Default is set at level 0 – (NO water expel), but it is possible to choose up to level 3, if a longer time for blowing air through the instruments is required. Level 0: Expel off Level 1: 50 sec. effective blowing time Level 2: 100 sec. effective blowing time Level 3: 150 sec. effective blowing time (please note that this is after sterilization and is prolonging total time of cycle) NOTE: If processing instruments for invasive surgical treatments, Expel function CANNOT be used without prior installation of a sterile-filter ( 63 00 623). See section 2.2.3 for further instructions. Please note that use of Expel function will prolong the total cycle time. Sets year Sets month Sets day Sets time format Sets hour Sets minute The lowest sensor controls the water level. The water level in the tank is manually controlled. Default is set at level 1 – (oil adjustment), but it is possible to choose up to level 3, if a larger amount of oil/lubrication for the instruments is requested. Level 1: default amount Level 2: 25% more than level 1 Level 3: 50% more than level 1 33 DAC UNIVERSAL – USER MANUAL 729050 - Version 20 S Menu level 1 Menu level 2 Ambient sensitivity History Cycles Error buffer Service needed Menu level 3 Ambient sensitivity (0 -4) User Maintenance Result/action Level 0: ambient temperature sensitivity disabled Level 1: low ambient temperature sensitivity Level 2: medium ambient temperature sensitivity Level 3: high ambient temperature sensitivity Level 4: maximum ambient temperature sensitivity If the temperature in the clinic is low, it is recommended to increase the ambient sensitivity level - see also section 2.4. Please notice that increasing the sensitivity level will potentially lead to increased total cycle time, water and energy consumption. Displays number of cycles run in total Displays last machine errors w/Up & Down buttons Displays when the machine is due for the Next Service – listed both as number of cycles left until next service and as the date (M-D-Y) for the next service. th Displays every 4 week or 200 cycles Remember Check & Clean Low Water Displays after every 50 runs that Check&Clean needs to be performed Displays when water is needed Low Oil Displays when oil is needed Bad water quality Displays when the water quality is insufficient About Displays machine serial no. and software version 3.8 Resetting the menu system Should you need to reset the menu – back to factory settings: 1. The display must state “Ready 134 C” 2. Press the “Wrapped” button and keep it down as you also press “Menu/Enter” Your menu is now reset with the following features: 0 Program: 134 C Printer: Off Language: UK Oil Expel: 1 Oil settings: 1 Rinse cycles: 4 Expel: 0 34 510010-20B 04.2013 DAC UNIVERSAL – USER MANUAL 729050 - Version 20 S 4. Errors If the DAC UNIVERSAL shows an error in the display, it is important to find out exactly, what this error means and what action to take. Below you will find a list of the error codes. If the DAC UNIVERSAL displays an error, you cannot be sure that a complete cycle has been carried out and therefore the instruments are not sterile, you must start a new complete cycle. If an error occurs during sterilization, the display will show so when the lid opens. In order to clear this error and start a new complete cycle, you need to press the “M”-button together with the “C”-button (this will also be indicated in the display). If the error light is flashing without giving an alarm signal, it is because the machine has reached 3000 cycles or it has been 24 months since the last service. Contact your supplier in order to do a biennial service on the DAC UNIVERSAL autoclave. Meanwhile, the machine can still be used if ‘only’ the error light is flashing and no other error codes are visual in the display. In case of an error, an alarm will sound and the error will be displayed visually. Please note the error code before resetting the alarm. Pressing C resets the alarm. When pressing C the lid will raise itself for approximately 2 seconds and then stop until the temperature is below 104 C after which it will open completely. It is, however, possible to force the lid to open completely by pressing C repeatedly. For every press on C, the lid will continue opening for 2 seconds. We do not recommend this feature to be used. CAUTION: Do not open if the temperature is more than 104 C; hot steam might come out of the chamber. Error Description 60 This error will occur if the chamber temperature and the theoretical steam temperature deviate more than 2°K Please contact your supplier This error will occur if the signal from the steam generator temperature sensor hasn’t changed in three minutes (can occur if a wire in the sensor is broken) Please contact your supplier The right temperature for building up pressure for sterilization has not been reached within 7.5 minutes Increase “Ambient sensitivity” level settings Pour in water if low level If the autoclave is placed in a cold spot remove it to surroundings at room temperature Press C to reset and then restart Please contact your supplier The safety system has been activated Press C Restart the autoclave. The safety system is defective Please contact your supplier. The temperature during sterilization was too high Please contact your supplier. The time of sterilization has been less than 3 minutes The instruments should be sterilized again Please contact your supplier if this error appears more than once. The pressure is too high during pressure test Please contact your supplier The pressure level in the chamber does not decrease fast enough after pressure test Empty the chamber for water Clean or change the filter Check that the drain tube is not blocked, broken or bent (note that the drain tube must be of heat resistant material, e.g. PTFE) Empty the drain tank if full Please contact your supplier. The autoclave blocks due to use of bad water Empty the water tank if necessary Pour in fresh demineralized or distilled water (below 3.0S/cm) The closing system was blocked as the lid was on its way up Remove possible blocking for the lid Please contact your supplier The sterilization temperature has not been reached fast enough during the backflush Pour demineralized or distilled water into the water tank if the water level is too low Press C to reset and then restart the cycle Please contact your supplier The right temperature for building up pressure for sterilization has not been reached fast enough Pour demineralized or distilled water into the water tank if the water level is too low Increase the “Ambient sensitivity” level settings Press C to reset and then restart the cycle Please contact your supplier The right sterilization temperature has not been reached fast enough Pour demineralized or distilled water into the water tank if the water level is too low Increase the “Ambient sensitivity” level settings If the autoclave is placed in a cold spot move it to a surrounding at room temperature Press C to reset and then restart the cycle Please contact your supplier Valve error Please contact your supplier or try with only 5 instruments on the lid (please be aware of section 1.4). The autoclave does not lubricate Please contact your supplier Valve error Please contact your supplier or try with only 5 instruments on the lid (please be aware of section 1.4). Valve error Please contact your supplier or try with only 5 instruments on the lid (please be aware of 61 62 64 65 66 67 68 70 71 72 73 74 75 76 77 78 79 510010-20B 04.2013 35 DAC UNIVERSAL – USER MANUAL 729050 - Version 20 S 81 82 83 84 85 86 87 88 89 90 91 92 93 94 95 96 97 section 1.4). Low level in either the water tank or the oil bottle Pour demineralized or distilled water into the water tank or change the oil bottle Please contact your supplier The temperature in the steam generator is too high Please contact your supplier Temperature in chamber is too high Please contact your supplier The sterilization temperature has not been maintained during sterilization Pour demineralized or distilled water into the water tank if needed Please contact your supplier Inlet pressure is too high Adjust the “air inlet” to maximum 8 bar Please contact your supplier The safety ring has been activated Press C to reset the autoclave and then restart the machine Remove potential dirt on the spindle and the safety ring Make sure that the handle is correctly placed in the holder Please contact your supplier The safety ring has been disconnected Please contact your supplier The steam pressure is too low during sterilization Pour demineralized or distilled water into the water tank in case of low water level Press C to reset, and then restart Please contact your supplier The steam pressure is too high during sterilization Check that the drain tube is not blocked, broken or bent (note that the drain tube must be of heat resistant material, e.g. PTFE) Empty the drain tank if full Press C to reset the autoclave and then restart the cycle Please contact your supplier The pressure during pressure test was too low Check that your compressor is turned on Check the gasket on the lid Remove potential dirt It is important to make sure that the lid is placed correctly in the lid holder Check if the O-ring for the filter house is mounted correctly Change the O-ring if damaged Check if pressure connected to the air inlet of the DAC UNIVERSAL is 5-8 bar (if the pressure is dropping drastically during use, please contact the supplier of the compressor) Make sure that the lid is placed correctly in the holder Mount the lid for the filter house correctly Clean the big black rubber gasket on the lid (put your thumb under the inner edge of the gasket and push it upwards all the way around) Replace the gasket on the lid (see section 6) Please contact your supplier The pressure fell during the pressure test Check the gasket on the lid Remove potential dirt It is important to make sure that the lid is placed correctly in the lid holder Check if the O-ring for the filter house is mounted correctly Change the O-ring if damaged Make sure that the lid is placed correctly in the holder Mount the lid for filter house correctly Clean the big black rubber gasket on the lid (put your thumb under the inner edge of the gasket and push it upwards all the way around) Replace the gasket on the lid (see section 6) Please contact your supplier The power supply to the autoclave has been cut out, or the C button has been pressed during the cycle Press C to reset the machine and then restart the cycle Please contact your supplier The steam generator is superheated Disconnect the autoclave immediately and contact your supplier Oil consumption during standby Disconnect power from the autoclave and wait 10 seconds Reconnect the autoclave to the power and then restart Please contact your supplier. This error can only occur if the autoclave is connected to an automatic water supply. The autoclave has “asked” for water more than 7 times during standby Check that water is being supplied to the autoclave Check if the autoclave has a leakage If so, cancel the water supply to the autoclave and contact your supplier. The pressure, during expel, was too low Please contact your supplier No water during external wash Press C to reset If there is water in the chamber, check if there has been an error 74 prior to error 97 in the error code list If so, empty the chamber (see section 3.7 Drain Chamber) and see the error list regarding trouble shooting error 74 If there is not water in the chamber, check water level in water tank (fill in demineralized or distilled water if necessary) Press the Rinse/Flush button until water appears in the bottom of the chamber If so, empty the chamber (see section 3.7 Drain Chamber) If no water appears in the chamber, please contact your supplier If the waste water tank is full Empty waste water tank Clean or exchange the drain filter Make sure that the drain tube is not blocked, broken or bent Try to start a new cycle If this is not possible, please contact your supplier 98 Lid did not close Press C to reset and wait until the lid is in top position Make sure that the lid is placed correctly in the lid holder (look for things that might obstruct complete closure and remove these) Start the machine again If this error occurs again, please contact your supplier 99 Please contact your supplier Leakage Wipe up possible spilled water after filling If there is still a leakage, please contact your supplier. NOTE that if the water is filled into the tank too abruptly or the tank is overfilled, the water may leak onto the table. Water in chamber after cycle Clean or change the filter Check that the drain tube is not blocked or broken Empty the drain tank if full Please contact your supplier Condensation in instruments If the instruments are to be stored for a longer period (e.g. during the weekend), it is important that they are blown through (horizontally) manually with compressed air in order to remove condensation in the instruments - as condensation can cause corrosion in the instruments. NOTE: Be sure to use compressed air at pressure-level (bar) in accordance with the user manual/instructions from the 36 510010-20B 04.2013 DAC UNIVERSAL – USER MANUAL 729050 - Version 20 S Loose adapters Wrong liquid Sterilization OFF Press safety ring! (simultaneously a long acoustic alarm is given) Resetting the Lid Holder 510010-20B 04.2013 manufacturer of the instruments. After the instruments have been blown through they must be wrapped. Tighten the adapter with the enclosed Allen key If other liquids than demineralised or distilled water has been filled into the water tank , then the DAC UNIVERSAL must not be used Please contact your supplier Your DAC UNIVERSAL technician has been running a special-program. VERY IMPORTANT: Disconnect the power-cable of the DAC UNIVERSAL – and connect it again. NOTE: If this is not done, the sterilization phase will NOT take place! Press carefully the adapter key in the hole on the back of the machine until you hear a little click. The lid holder will open upwards (this will take about 5 seconds and error 86 will be displayed). Afterwards, press C to open the lid holder completely. The autoclave can now be used again. 37 DAC UNIVERSAL – USER MANUAL 729050 - Version 20 S 5. Reports Sterilization To ensure sterilization, the instruments must be exposed to saturated steam at a certain temperature for a certain period of time. Sterilization method The DAC UNIVERSAL sterilises by means of saturated steam. To ensure that the saturated steam is present during the entire holding time, the pressure and the temperature is continuously checked during the cycle. Printer The printer for the DAC UNIVERSAL (see below picture 1.) can be purchased as accessory for monitoring the temperature and pressure during the cycle and after the cycle. Picture 1: Printer for the DAC UNIVERSAL Description: DAC UNIVERSAL thermal printer (WP-T610) by Sirona Dental A/S 60 51 770 Availability of wall mount Power input at 10V/DC Paper auto loading Dimensions: 125Wx205Dx115H mm. In order to connect the printer to the DAC UNIVERSAL, please do as follows: 1. Connect the printer to the DAC UNIVERSAL by means of a serial cable (through the RS232 port) – see figure 1: Installation, in section 2.2.4. 2. Press “Menu/Enter” button on the DAC UNIVERSAL. 3. Use the “Up” or “Down” button in order to find “Settings”. Press Menu/Enter. 4. Use the “Up” or “Down” button in order to find “Printer”. Press Menu/Enter. 5. Use the “Up” or “Down” button in order to find “on” or “off” mode. Press the Menu/Enter. 6. Press “Clear” until the normal display appears. The below figure 2 shows a transcript from the printer. The information from the printer is the following: Serial number of the DAC UNIVERSAL Date and time (start) During sterilization time, temperature and pressure will be measured and printed every 30 seconds. This way, it is possible to monitor the sterilization cycle. Minimum and maximum temperature Minimum and maximum pressure A statement saying that the “Cycle parameters were met” or “Sterilization failed”. If sterilization failed, “Sterilization failed”, ERROR and error code will be printed on the label. See section 4. Errors for error-description. Below you can see three examples of transcripts from the printer. Figure 2: Transcripts from the printer (auxiliary equipment) 38 510010-20B 04.2013 DAC UNIVERSAL – USER MANUAL 729050 - Version 20 S 6. Cleaning and maintenance After every 50 cycles the DAC UNIVERSAL will for 2 seconds give an acoustic alarm and the display will show the following information: “Remember Check & Clean – Press safety ring” - this to remind the user of the need to cleaning and maintenance of the DAC UNIVERSAL. Below please find the detailed service/maintenance schedule for the DAC UNIVERSAL. In the table it is indicated how often the cleaning/maintenance should be carried out. If you follow the schedule below, you will ensure optimal maintenance and performance of your DAC UNIVERSAL. Frequency* Task Every week 1. Clean the drain tank 2. Clean the drain filter 3. Clean the adapter lid 4. Check the adapters & matching O-rings 5. Clean the machine externally 6. Clean the chamber 7. Check for oil entering the chamber 8. Check the water entering the chamber 9. Cleaning of empty chamber and tubes with NitraClean tablet 10. Check the safety ring 11. Drain the water tank 12. Change the drain-filter 13. Clean the water tank 14. Change the O-rings on the adapters 15. Change the filter in the Sterile-filter (IF a Sterile-filter is installed on the air-tube) 16. Change the O-rings in expel unit 17. Change the O-ring on the filter housing 18. Change the O-rings on the bottom adapter (in chamber) 19. Change the O-rings at each guiding tube in the lid. 20. Change the gasket on the lid 21. Change the O-rings in the valves 22. Change the gasket in the valves 23. Change the gasket under each adapter 24. Change internal O-ring on the adapters (only applies some adapters, see list below) Check & Clean X X X X X X X X X Every th 4 week Every rd 3 month User mainte nance X X X X X X X X X X X X X X Once a year Every second year in connection with the biennial service or after 3000 cycles X X X X X X X X X X X X X X X * The above frequency is based on approx. 10 complete cycles per day. If you use your DAC UNIVERSAL more often than this, adjust your service frequency accordingly. NOTE: Only authorized technicians may perform the steps 16 to 24 in connection with annual and biennial services. Spare parts for the DAC UNIVERSAL can be purchased from your local supplier. 1. Clean the drain tank Safety instructions CAUTION: Do not use the DAC UNIVERSAL if it is not connected to the drain tank or the drain. Wear gloves when handling the drain tank. Danger of burning! During re-processing the hose, the damper, the drain tank and the drain get very hot. It takes approx. 15 minutes to cool down. 510010-20B 04.2013 39 DAC UNIVERSAL – USER MANUAL 729050 - Version 20 S Emptying and cleaning NOTE: It is recommended to empty and clean the drain tank on a weekly basis and/or when the drain tank is full (i. e. the level has reached the top mark on the label of the drain tank). 1. 2. 3. 4. 5. 6. 7. Unscrew the lid and take out the drain damper. Empty the drain tank NOTE: To empty the drain tank, dispose of the contents of the tank according to local or national guidelines and/or regulations. Rinse the tank thoroughly with hot water and then empty it again. Clean the external surfaces of the drain damper and the drain tank with a towel soaked in hot water. Fill the tank to the first mark on the label with water. Thereafter fill it up to the second mark with isopropyl alcohol. Re-install the drain damper and lid. Place the drain tank at a lower level than the DAC UNIVERSAL (max. 3 m from the DAC UNIVERSAL). Drain tank Damper 2. Clean the drain filter CAUTION: The filter cap and filter may be hot, so The DAC UNIVERSAL should be turned off and cooled down before cleaning the drain filter. CAUTION: Please make sure to wear gloves during this procedure. 1. Unscrew the lid of the filter-housing with the supplied filter key. 2. Unscrew the filter from the housing with the filter key. 3. Clean the filter thoroughly under running tap water. 4. If possible hold the filter in a paper towel and blow compressed air through the filter from the direction shown. . 5. Gently mount the filter into the housing with the filter key. 6. Tighten the lid of the filter-housing back on with the filter key. NOTE: The filter must be replaced with a new filter every 4 weeks, based on approx. 10 cycles per day. Cleaning direction 3. Clean the adapter lid Clean the adapter lid with isopropyl alcohol or warm water. NOTE: The adapter lid must not be cleaned with a product containing chlorine. 4. Check the adapters & matching O-rings Check the attachment of the adapters to the lid, by gentle tugging in each adapter. If any adapters are loose, tighten the screws holding down the adapters with the supplied Allen key. NOTE: If you determine that any of the O-rings on the adapters are damaged or missing, please immediately go to point 14 on the following page. 5. Clean the machine externally Clean the outside of the DAC UNIVERSAL with isopropyl alcohol or warm water. 6. Clean the chamber Clean the chamber with isopropyl alcohol or warm water. NOTE: The chamber must not be cleaned with a product containing chlorine. 7. Check the oil entering the chamber Remove the adapter lid from the DAC UNIVERSAL lid holder, so that view into the chamber is unobstructed. Oil is led through the tubes in the following way: 1. Press the lubricate button and hold it down. 2. After a few seconds you will hear the oil dispenser start pumping and shortly after oil will enter the chamber from the bottom adapter. When oil enter the chamber, immediately stop pressing the lubricate button. 40 510010-20B 04.2013 DAC UNIVERSAL – USER MANUAL 729050 - Version 20 S 3. The display of the DAC UNIVERSAL will now indicate the number of shots from the oil dispenser. If this number is 60 or above, or if no oil enters the chamber at all, please call your supplier. The oil indication disappears automatically from the display after a few moments. 8. Check the water entering the chamber Remove the adapter lid from the DAC UNIVERSAL lid holder, for unobstructed view. Procedure A) Water is led through the tubes in the following way: 1. Press the Rinse/Flush button on the display for more than 1 sec., and hold until the water is automatically led through the tubes into the chamber. 2. Through visual control, check that water appears in the chamber through the bottom adaptor. or Procedure B) 1. Press the Menu/Enter button. 2. Use the up/down arrows until “Manual” is selected, then press Menu/Enter. 3. Use the up/down arrows until “Water” is selected, then press Menu/Enter again. Water should flow into the chamber through four small holes in the bottom of the chamber. 4. Press Clear to stop the water pump. NOTE: It is very important to see the water enter the chamber, if there is no water, the instruments are not washed. Contact your supplier, if water does not enter the chamber. 9. Cleaning of empty chamber and tubes with NitraClean tablet 1. Make sure that the lid you are about to use for this procedure is unloaded as no instrument shall be attached. 2. Put a NitraClean tablet inside the empty chamber and run a standard program 10. Check the safety ring Press Start, and then press the safety ring (within 20 seconds) to start a cycle. While the lid is closing, press and release the safety ring. The lid retracts for 5 seconds and Error 86 is shown on the display. Press Clear to return to normal operation (lid opens completely). 11. Drain the water tank If an automatic ’external’ water supply is installed - PLEASE remember to CLOSE this water supply – before performing one of the following procedures. Procedure A) At the DAC UNIVERSAL Water Inlet fitting, disconnect the water tube from the water supply. Connect a length of 4/6 mm tubing to the Water Inlet connection of the DAC UNIVERSAL and place the end of this tubing into a sink or bucket, at a height below the DAC UNIVERSAL. This tube will be used to drain the DAC UNIVERSAL water tank. 1. Press the “Menu/Enter” button. 2. Use the “Up” or “Down” button in order to find “Manual”. Press Menu/Enter. 3. Use the “Up” or “Down” button in order to find “Drain Tank”. Press Menu/Enter. The valve between the water tank and the Water Inlet connection will open, and water will empty from the tank through the tubing into the sink or bucket. Note that it takes approximately five to ten minutes to completely drain a full water tank. 4. Await the water tank to be completely empty. 5. Press the “Menu/Enter” button – to stop the draining. Reconnect the water tubes as they were prior to this procedure. If an automatic ’external’ water supply is installed - PLEASE remember to OPEN this water supply again. If an automatic ’external’ water supply is NOT installed – manually fill the water tank with demineralised or distilled water. or Procedure B) NO need to disconnect the water tube from the water supply. 1. Remove lid from DAC UNIVERSAL lid holder so that view into chamber is unobstructed. 2. Press the “Menu/Enter” button. Use the “Up” or “Down” button in order to find “Manual”. Press Menu/Enter. 3. Use the “Up” or “Down” button until “Water” is selected. Press Menu/Enter again. Water should flow into the chamber through the center bottom adapter. 4. When the water from the water tank has filled the chamber half way up – Press the “Menu/Enter” button to stop the water pump. 5. Replace the lid in the lid holder. 510010-20B 04.2013 41 DAC UNIVERSAL – USER MANUAL 729050 - Version 20 S 6. Press the “Up” or “Down” button until “Drain Chamber“ is selected - then press Menu/Enter. 7. When the machine has closed (is done automatically), after 60 seconds the lid will open up automatically. Repeat step 1.-7. until water tank and chamber are completely empty. If an automatic ’external’ water supply is NOT installed – manually fill the water tank with demineralised or distilled water. 12. Change the drain-filter (see Figure 1: Installation, section 2.2.4) CAUTION: The DAC UNIVERSAL should be turned off and be cold before changing the filter. CAUTION: Please make sure to wear gloves during this procedure. Unscrew and loosen the filter-housing lid with the filter key. Unscrew the old filter, and dispose of it. Screw in the new filter with the filter key, and then tighten the filter-housing lid with the filter key. 13. Clean the water tank Drain the tank (see step 10.). Remove power-plug from the autoclave – i.e. disconnect the DAC UNIVERSAL from power. Remove the filter at the top of the water tank. Lift up the water tank. The tank and the filter can now be cleaned with hot water (max. 50C). GENTLY clean the bottom adapter of the water tank (which is attached on the machine) with a damp cloth. Remember to dry the tank and filter with a clean towel, after wash. When cleaned, put the tank back on the bottom adapter. Press the water tank down over the water tank adapter and be very careful not to damage the water sensor or the conductivity sensor pins. Put back the filter on top of the water tank – and fill in water of 3.0 S/cm Reconnect the power-plug to the autoclave. 14. Change the O-rings on the adapters Remove the O-rings on the adapters using a dental pick or another instrument. Place new O-rings onto grooves; ensure to place each O-ring into the proper groove. NOTE: If the O-rings on the adapters are not placed correctly, this might damage the instruments or the O-rings and compromise the sterilization. NOTE: If you have an adapter with internal O-ring, please see instructions below under section 24. 15. Change the filter in the Sterile-filter (if a Sterile-filter is installed instead of an air-filter on the air-tube) 1. Unscrew the filter-shield of the Sterile-filter by pressing down the black button and simultaneously turn the filter-shield approx. 1/8. (Fig. 1) 2. Pull down the filter-shield. 3. Screw out (counter clock-wise) the filter. (Fig. 2) 4. Screw in (clock-wise) a new filter. 5. Screw back the filter-shield in the Sterile-filter. Figure 1 42 Figure 2 Figure 3. 510010-20B 04.2013 DAC UNIVERSAL – USER MANUAL 729050 - Version 20 S Sparepart list for maintenance Description 60 78 583 60 79 532 60 79 508 63 67 739 60 79 631 60 79 854 60 79 839 60 79 912 60 79 888 63 54 406 60 79 672 60 79 748 6079748 60 79 698 60 85 547 60 80 043 60 80 035 60 79 961 60 80 027 60 80 001 60 80 050 60 80 068 63 52 954 63 52 913 60 79 920 60 79 797 60 79 938 60 80 019 60 79 995 60 79 987 60 94 051 60 79 789 60 79 763 63 47 293 63 47 319 61 98 118 60 79 979 60 79 953 60 79 516 62 63 045 Drainfilter for filterhouse (6 pcs) O-ring for filter house O-ring for bottom adapter (small) O-ring for bottom adapter (large) Gasket for lid O-ring for Bien Air turbine (large) O-ring for Bien Air turbine (small) O-ring for Castellini turbine (large) O-ring for Castellini turbine (small) O-ring for EMS Scaler adapter w/light O-ring for ISO/INTRAmatic adapter O-ring for KaVo turbine & Osada OFJ adapter (large) O-ring for KaVo turbine (small) O-ring for KaVo/Bien Air Heads & Osada OFJ adapter (small) O-ring for Midwest adapter – 60 51 846 (large) O-ring for Midwest adapter – 60 51 846 (small) O-ring for Midwest fixed back-end (large) O-ring for Midwest fixed back-end (small) O-ring for Midwest Rhino/shorty O-ring for Morita CP4 adapter (large) O-ring for Morita CP4 adapter (small) O-ring f Morita CP4 turbine (large) From version 2 O-ring f Morita CP4 turbine (small) From version 2 O-ring for NSK turbine (small) O-ring for Sirona & Yoshida turbine O-ring for Sirona CLASSIC/TE & / NSK turbine (large) O-ring for STAR attachment O-ring for STAR Swivel adapter (large) O-ring for STAR Swivel adapter (small) O-ring for Stylus (large) ) O-ring for W&H turbine (large) (for adapter-version 1) O-ring for W&H turbine (small) O-ring for W&H turbine (large) O-ring for W&H turbine (medium) O-ring for W&H (large) US model O-ring for XGT/Stylus adapter (large) O-ring for XGT/Stylus adapter (small) Gasket for adapter (6 pcs.) Replacement filter for Sterile-filter Tools for maintenance Description 60 78 591 6078591 60 78 518 Filter key Special allen key for adapters 6078591 Articles of consumption 6078591 Description 60 86 628 62 59 118 Nitram Oil, 1 box with 6 bottles Nitram Oil #2 (blue), 1 box with 6 bottles 510010-20B 04.2013 43 DAC UNIVERSAL – USER MANUAL 729050 - Version 20 S 24. Change internal O-ring on the adapters The below adapters have an inner O-ring which must be changed. Your DAC UNIVERSAL service technician must maintain this adapter at the biennial service. When changing the inner O-ring, the instructions attached to the O-ring must be followed. For further reference, see the service manual. Description 60 51 663 60 51 671 60 51 804 60 51 846 60 51 853 60 51 903 62 23 831 Complete KaVo handpiece head adapter Complete W&H turbine adapter Complete NSK turbine adapter Midwest/ ISO 4/5 hole, w. quick-connect swivel turbine adapter Midwest/ ISO 4/5 hole, fixed connection turbine adapter Midwest Rhino/Shorty adapter for turbines Yoshida turbine adapter 6.1 Handling the DAC UNIVERSAL CAUTION: When handling the DAC UNIVERSAL it is important to grab the autoclave underneath the machine with two hands. It is important to get a firm hold of the machine, as it is quite heavy. It is not recommended to lift the DAC UNIVERSAL and carry it over a long distance. Carrying the DAC UNIVERSAL over a short distance can cause problems for persons who are not used to lift objects as heavy as the DAC UNIVERSAL. The DAC UNIVERSAL weighs approx. 23 kilograms/51 pounds. Separately, the lid (incl. 6 adapters) weighs approx. 1.7 kilograms/3.75 pounds. . 7. Safety, service, warranty, certificates & approvals This chapter deals with safety, service and warranty issues. We recommend the DAC UNIVERSAL user to thoroughly read this chapter before using the DAC UNIVERSAL. 7.1 Safety It is very important that the DAC UNIVERSAL is operated as described in this manual to ensure a high safety level and high efficiency of the autoclave. In addition to this, some precautions should be considered when using the DAC UNIVERSAL. These precautions are described in section 1. Mechanical safety: The safety valve is designed according to norm EN4126-1 and calibrated according to norm EN764-7 Safety valve in the DAC UNIVERSAL – will open if the pressure is more than 3.6 bar relative in the chamber. Electrical safety: Electrical safety test is performed according to EN61010-1 by UL-International. Watchdog relays in the DAC UNIVERSAL. If the DAC UNIVERSAL microprocessor does not send a signal to the two watchdog relays, they will switch off the power to the pumps, valves, motor and heater. Safety ring on the DAC UNIVERSAL - see photo on the following page. There are 9 contacts in the safety ring, which are checked, before start of a cycle. The circuit will always be checked, when the power is on. If the ring is pressed – the motor for the lid will instantly stop. Fuses are installed in the mainboard for protection against electricity overload. Software safety: The software is supplied with error codes which will stop the process if the pressure, temperature etc. fail during the cycle see error code list in chapter 4. Errors. 7.2 Service Sirona Dental A/S assures you quick assistance, should this be needed for your DAC UNIVERSAL during the warranty period. Please contact your DAC UNIVERSAL supplier, who will repair your DAC UNIVERSAL on the spot or place a machine for loan, at your disposal while your DAC UNIVERSAL is repaired at a workshop. 44 510010-20B 04.2013 DAC UNIVERSAL – USER MANUAL 729050 - Version 20 S NOTE: Only Sirona trained technicians with a Sirona training certificate are qualified to perform the installation, service, repair and maintenance of the DAC UNIVERSAL. 7.3 Warranty Sirona Dental A/S guarantees that the delivered product (the DAC UNIVERSAL) has gone through a complete quality test before it is sent from the factory. A warranty of 12 months is granted on the DAC UNIVERSAL counting from the day of delivery. The warranty covers manufacturing and material faults and includes spareparts and labour. The warranty does not cover: 1. Defect products which are serviced by other service technicians than the ones connected to Sirona Dental A/S or, 2. If the product has been neglected, distressed or has been exposed to an accident or, 3. If the product is used in another way than described in the instructions or, 4. If the prescribed rules concerning maintenance of the autoclave have not been observed, or 5. If the autoclave does not work because the water conductivity exceeds a level of 3.0 S/cm, or 6. If non-original spare parts have been used Sirona Dental A/S reserves the right to make improvements/alterations on a product built or sold by Sirona Dental A/S, without being obliged to make the same improvements/alterations on products previously built or sold by Sirona Dental A/S. 7.4 Certificates Sirona Dental A/S is certified by Lloyds in the UK. The DAC UNIVERSAL is UL listed (E231164). Sirona Dental A/S is certified according to ISO 9001and ISO 13485. The Sirona autoclave is CE-marked according to European regulations. For technical assistance please contact your local supplier. 7.5 Approvals DAC UNIVERSAL is approved by several manufactures of handpieces and turbines, as well as by national organizations. For more information, please contact Sirona Dental A/S. 510010-20B 04.2013 45 DAC UNIVERSAL – USER MANUAL 729050 - Version 20 S Appendix 1: DAC UNIVERSAL with description Adapter lid Oil bottle Water tank Display Safety Ring 46 510010-20B 04.2013 DAC UNIVERSAL – USER MANUAL 729050 - Version 20 S Appendix 2: Connection to an external water treatment system The DAC UNIVERSAL is prepared for connection of automatic water supply (see section 2.2.4 Constant connection to demineralised/distilled water). Make sure that you use a 6/4 mm tube, from the external water treatment system, to the DAC UNIVERSAL. NOTE: A maximum water conductivity of 3.0 S/cm is required. 510010-20B 04.2013 47 We reserve the right to make any alterations which may be due to technical improvements. ® Sirona Dental A/S 04.2013 Sirona Dental A/S Sindalsvej 36 DK-8240 Risskov Denmark www.sironahygiene.com Bestell-Nr. Order No N. di codice No. de code Nro de pedido 510010-20B