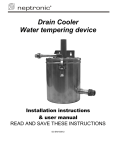
1
Technical Manual
Neuro-MS/D
Magnetic Stimulator
TM058.01.003.000
(17.09.2013)
Neurosoft Ltd. © 2014
5, Voronin str., Ivanovo, 153032, Russia
P.O. Box 10, Ivanovo, 153000, Russia
Phone: +7 (4932) 24-04-34 Fax: +7 (4932) 24-04-35
E-mail: [email protected] Internet: www.neurosoft.ru
Contents
Contents .................................................................................................................... 3
Introduction ............................................................................................................... 5
1.
Description ......................................................................................................... 6
1.1. Function ....................................................................................................... 6
1.2. Contraindications.......................................................................................... 7
1.3. Warnings and Precautions ........................................................................... 8
1.4. Main Specifications .................................................................................... 11
1.5. Delivery Set ................................................................................................ 14
1.6. Structure and Operation ............................................................................. 18
1.7. Description of Controls, Connectors and Indicators .................................... 23
1.7.1. Controls, Connectors and Indicators of Main Unit ............................ 23
1.7.2. Controls, Connectors and Indicators of Expansion Unit ................... 29
1.7.3. Controls, Connectors and Indicators of Cooling Unit ....................... 32
1.7.4. Controls, Connectors and Indicators of Extra Power Supply Unit .... 34
1.7.5. Coil Controls, Connectors and Indicators......................................... 35
1.8. Synchronization .......................................................................................... 36
1.9. Main Unit Service Menu ............................................................................. 37
2.
Assembly and Installation............................................................................... 38
2.1. Requirements to Personnel Conducting Stimulator Assembly and
Installation .................................................................................................. 38
2.2. Room Selection and Placement ................................................................. 38
2.3. Unpacking and Delivery Set Check ............................................................ 40
2.4. Assembly and Connection of Stimulator ..................................................... 40
2.4.1. General Requirements to Assembly ................................................ 40
2.4.2. Preparation of Cooling Unit to Operation ......................................... 41
2.4.3. Assembly and Connection of Main Unit, Expansion Unit and
Cooling Unit .......................................................................................... 41
2.4.4. Assembly and Connection of Main Unit, Extra Power Supply Unit
and Cooling Unit ................................................................................... 43
2.4.5. Assembly and Connection of Main Unit and Cooling Unit ................ 44
2.4.6. Assembly and Connection of Main Unit and Expansion Unit............ 45
2.4.7. Assembly and Connection of Main Unit and Extra Power Supply .... 46
2.4.8. Assembly and Connection of Main Unit ........................................... 47
3.
Proper Use ....................................................................................................... 48
3.1. Operating Order ......................................................................................... 48
3.2. Troubleshooting.......................................................................................... 51
3.3. Operation in Stand-alone Mode .................................................................. 53
3.4. Operation in USB Control Mode ................................................................. 54
3.5. Operation in Control Mode via Trig-in ......................................................... 54
3.6. Operation in Syncronization Mode with External Device via Trig-out .......... 55
3.7. Actions in the Emergency ........................................................................... 55
4.
Servicing .......................................................................................................... 55
4.1. General Requirements ............................................................................... 55
4.2. Maintenance Service .................................................................................. 56
4.3. Conservation .............................................................................................. 56
4.4. Life Time .................................................................................................... 56
Neuro-MS/D (Technical Manual)
5.
Packing and Transportation ........................................................................... 56
6.
Utilization ......................................................................................................... 57
7.
Delivery Set and Package Data ....................................................................... 57
8.
Acceptance Certificate .................................................................................... 58
9.
Delivery Certificate .......................................................................................... 58
10. Storage Regulations ........................................................................................ 58
11. Warranty ........................................................................................................... 59
12. Reclamation Data ............................................................................................ 60
13. Repair Data ...................................................................................................... 62
Appendix 1. Electromagnetic Emissions and Immunity ...................................... 63
References .............................................................................................................. 67
4
Introduction
Introduction
This technical manual (hereinafter referred to as “manual”) is the combined document
describing operation and servicing of Neuro-MS/D magnetic stimulator (hereinafter referred to as “stimulator”).
This manual is the document which certifies the stimulator specifications guaranteed
by the manufacturer.
Do not start working with stimulator before you have read this document!
You can send your responses and recommendations to Neurosoft Company by
the following address:
P.O. Box 10, Ivanovo, 153000, Russia
or by e-mail:
[email protected].
You can find additional information on Neurosoft products in the Internet:
www.neurosoft.ru
or ask questions by phones:
+7 (4932) 24-04-37 (Service department),
+7 (4932) 24-04-34.
You can also contact SAS Neuromed Company, Authorized European Representative
of Neurosoft Company (to Mr. Pierre Scholl) by the following address:
Chemin du tomple
84330 Le Barroux, France
Phone: +490-650-470, +622-748-384
Fax: +490-650-470
E-mail: [email protected]
5
Neuro-MS/D (Technical Manual)
1.
Description
1.1.
Function
The stimulator is intended for diagnostic (together with digital EMG systems) and
therapeutic impacts by magnetic pulses to motor zone of cerebral cortex and peripheral nervous system.
The stimulator uses the magnetic pulses of short duration which can easily penetrate
through clothes, cranium bones and soft tissues. They exert influence upon deep peripheral nerves, cerebrum and spinal cord, which are inaccessible for other kinds of
stimulation.
The stimulator can be applied in psychiatry, neurology, epileptology, pulmonology,
pediatrics, ophthalmology, traumatology and orthopedy and other areas of medicine
for:
• noninvasive diagnostics of: demyelinating diseases of nervous system, vascular
diseases of brain, traumatic injuries of spinal cord, injures of cranial nerves, motor
neuron diseases, myelo- and radiculopathies, Parkinson disease, Alzheimer's disease, mental diseases, epilepsy, migraine, neurourological disorders, localization of
speech center;
• treatment: motor skills disorders, depression, spasticity, pain syndromes, Parkinson
diseases, auditory hallucinations, obsessive-compulsive disorders, schizophrenia
exacerbation, genetic degenerative diseases.
The stimulator can be used in patient care institutions, diagnostics centers, neurosurgical clinics, experimental laboratories of scientific and research institutes.
6
Description
1.2.
Contraindications
In each individual case if the harm risk caused by the stimulator use
exceeds the possible positive effect, the medical personnel should
make an independent decision concerning the reasonability of its
application.
It is prohibited to apply the device for the stimulation of head, neck
and abdomen of pregnant woman.
It is prohibited to apply the device for the stimulation of patients
with implanted pace makers, cochlear implants and other
electronic implants as far as the electromagnetic field emitted by
the stimulator can disable them.
Repetitive transcranial stimulation can provoke the epileptic seizures.
The general contraindications for the stimulator application: severe
arterial hypotension, systemic blood diseases, bleeding propensity,
thrombophlebitis, recurrent thromboembolism, fractures before
immobilization, diffuse goiter (III stage), acute inflammatory purulent
processes, abscesses and phlegmons before lancing and draining of
cavities, cholelithiasis, epilepsy, febrile states and also transcranial
magnetic stimulation of patients suffering from the arterial hypertension
(III stage, the diagnosis is confirmed).
7
Neuro-MS/D (Technical Manual)
1.3.
Warnings and Precautions
Do not start working with stimulator before you have read this
document!
The stimulator must be used by the qualified medical personnel
trained to operate on it and knowledgeable of magnetic stimulation
application.
During the work on the stimulator it is required to observe the
working regulations concerning the safety rules while operating on
electrical installations.
High voltages (1500V) are presented within the stimulator.
To provide safety measures and exclude the hazard of
medical staff’s or patient’s electric shock, the medical staff is
PROHIBITED:
• to use the stimulator which was mounted and installed
incorrectly, without following this manual instructions;
• to eliminate faults connected with opening of the components included in the delivery set;
• to work with the stimulator when the electronic unit box,
computer or other devices used together with the stimulator are open.
Always check the stimulator and coils for the absence of
cracks and other defects.
Before the stimulation make sure, that there are no patient cables or
electrodes connected to a patient and also metal parts contacting with
a patient in impact area (within 5 cm and less from the coil) as far as
the electromagnetic field can create the electrical current leaking
through a patient.
Do not allow the coil to come into close proximity (less than 1
meter) with electronic equipment (monitor, computer, etc.) and also
the magnetic carriers (credit cards, floppy disks, etc.). The magnetic
field emitted by the coil can result in its damage and information
loss.
8
Description
It is prohibited to immerse the coil in water, ice or refrigerate to
cool it off.
It is prohibited to use cooled coils without cooling unit. It can cause
coil surface overheating (even after the stimulation stop), patient’s
burn and magnetic stimulator damage.
It is recommended to use the ear tips to protect from the acoustic
noise when delivering more than 10000 stimuli per day.
The stimulus evoked by the stimulator generates a loud click that can
frighten a patient. Tell a patient about the stimulation beginning or
give her/him the ear tips.
The stimulator must not be used together with the anaesthetic gases
as far as it can inflame.
The operator must be protected from the continuous impact of the
magnetic field. It is recommended to use the holder to fix the coil.
If the coil heats over 41°C, the magnetic stimulator stops the
stimulation and indicates the overheating. As far as the coil
temperature on its surface still grows even after the stimulation stop
owing to the thermal lag, it is required to remove immediately the coil
from the patient surface to avoid the patient’s burn and discomfort.
To protect a patient from excessive impact by the electromagnetic
field, generate the minimal required number of pulses.
The general principles of safety regulations are stated in:
• “Risk and safety of repetitive transcranial magnetic stimulation: report and suggested guidelines from the International Workshop on the safety of repetitive magnetic
stimulation, June 5-7. 1996” by Eric M. Wassermann (accepted for publication: 23
May 1997).
9
Neuro-MS/D (Technical Manual)
• “Safety of different inter-train intervals for repetitive transcranial magnetic stimulation and recommendations for safe ranges of stimulation parameters” by Robert
Chen, Christian Gerloff, Joseph Classen, Eric M. Wassermann, Mark Hallet, Leonardo G. Cohen (accepted for publication: 23 May 1997).
The information in Table 1 and Table 2 is related to recommended train parameters
while performing the repetitive transcranial magnetic stimulation and cited from “Safety of different inter-train intervals for repetitive transcranial magnetic stimulation and
recommendations for safe ranges of stimulation parameters” [1].
Table 1. Table of safe train duration (s)/number of pulses for single trains of rTMS in normal volunteers
currently in use at NINDS
Frequency
(Hz)
rTMS intensity (% of motor threshold)
100
110
120
130
140
150
160
170
180
190
200
210
220
1
>270/270a >270/270a 180/180b 50/50c 50/50c 50/50c 50/50c 20/20 8/8
8/8
6/6
5/5
4/4
5
10/50c
10/50c
10/50c
10/50c 5.7/28 3.9/19 2.7/13 1.95/9 1.8/9 1.2/6 1.1/5 1.2/6 0.9/4
10
5/50c
5/50c
3.2/32
2.2/22 1.0/10 0.6/6
0.7/7
0.6/6
0.4/4 0.5/5 0.3/3 0.2/2 0.2/2
20
1.5/30
1.2/24
0.8/16
0.4/8
0.3/6
0.2/4
0.2/4
0.1/2
0.2/4 0.2/4 0.2/4 0.1/2 0.1/2
25
1.0/25
0.7/17
0.3/7
0.2/5
0.2/5
0.2/5
0.2/5
0.1/2
0.1/2 0.1/2 0.1/2 0.1/2 0.1/2
a)
Based on Chen et al. (1997) [2].
Based on Wassermann et al. (1996), [4].
c)
No spread of excitation or post-TMS EMG activity was observed at these train durations.
Based on Pascual-Leone et al. (1993), [3].
b)
The safe train duration in seconds and the number of stimuli in the single train while
performing the repetitive transcranial magnetic stimulation are provided in the Table 1.
The maximum safe train duration (s) is shown followed by the number of pulses. See
also the table in “Risk and safety of repetitive transcranial magnetic stimulation: report
and suggested guidelines from the International Workshop on the safety of repetitive
magnetic stimulation” by Eric M. Wassermann [5, page 10].
Table 2. Safety recommendations for inter-train intervals for 10 trains of rTMS at < 20 Hz
Inter- train
interval (s)
Stimulus intensity (% of MT)
100%
105%o
110%
120%
5
Safe
Safe
Safe
Insufficient data
1
Unsafe (3)
Unsafea
Unsafe (2)
Unsafe (2)
a
Unsafe (2)
Unsafe (3)
0.25
a
Unsafe
Unsafe
a)
These stimulus parameters are considered unsafe because adverse events occurred with
stimulation of lower intensity or longer inter-train interval, but no adverse event was observed
with these parameters.
The minimum number of trains that caused spread of excitation or post-TMS EMG activity are indicated in the parentheses. The maximum duration/number of pulses for
individual rTMS trains at each stimulus intensity should not exceed that listed in Ta10
Description
ble 2. Stimulus parameters produced by reducing a set of parameters that is considered safe (reduction in stimulus intensity, train duration, or increase in inter-train interval) is also considered safe. rTMS at 25 Hz, 120% of MT (0,4 s duration) is unsafe at
inter-train intervals of 1 s or less. The safety of longer inter-train intervals at 25 Hz has
not been determined.
1.4.
Main Specifications
Table 3. Main Specifications of Stimulator
Parameters
Values
Stimulation Parameters
Peak magnetic field at 100% output (depends on coil)
Pulse duration:
•
standard biphasic
•
power biphasic
0–4.0 T
250–330 µs
360–450 µs
Maximum frequency at maximum power
•
without extra power unit
•
with extra power supply unit
1
5 Hz
1
20 Hz
Power Supply
Supply voltage
(220±22)/(230±23) V
50 or 60 Hz
Maximum power consumption during the stimulation:
•
main unit
•
expansion unit
•
cooling unit
•
extra power supply unit
≤1000 V·A
≤1000 V·A
≤1000 V·A
≤2400 V·A
Trig-in/out
Trig-in
TTL/CMOS
Trig-out
TTL/CMOS
≥ 200 µs
Trig-in pulse width
Stimulus delay relative to trig-in signal
Trig-out pulse width (user defined)
100...200 µs
10 µs…50 ms
General Specifications and Parameters
Interface
Safety
Work parts
Cooling unit tank volume while filling up to the maximal level
Type of cooling agent
Ingress protection
Operation temperature
Relative air humidity
1
USB
I
BF type
3.5 l
Silicone oil 5 cSt
IP20
(10–35)º C
≤80%
Depends on coil type (the data is given for RC-02-150 coil).
11
Neuro-MS/D (Technical Manual)
Table 3. Continued
Parameters
Values
Dimensions:
•
main unit
− NSFT 058201.005
− NSFT 058201.001
•
expansion unit
•
cooling unit
•
extra power supply unit
Weight:
•
•
•
•
460×215×520 mm
360×170×520 mm
460×215×520 mm
470×215×520 mm
360×170×520 mm
main unit
expansion unit
cooling unit filled with cooling agent
extra power supply unit
not more than 24 kg
not more than 15 kg
not more than 27 kg
not more than 12 kg
Cooling agent pressure in coil while cooling unit operating
not more than 0.15 MPa
Number of coil fills at complete filling of cooling unit
2
Table 4. Range of Controlled Parameters and Frequency Step
Parameter
Range of Permissible
Values
Frequency Step
Stimulation Parameters
Stimulation frequency in repetitive stimulation
mode
0.1–30 Hz
0.1 Hz (0.1–9.9 Hz),
1 Hz (10–30 Hz)
100 Hz
1 Hz
Train duration
0.5–100 s
0.5 s
Intertrain interval (pause)
0.5–300 s
0.5 s
Session duration
0.5–30 min
0.5 min
Interpulse interval at paired stimulation
2–990 ms
1 ms
Stimulation frequency in burst* mode
Capacitor Charge Control
Delay for the capacitor charge start (analysis
epoch)**
0–9.90 s
0.01 s (0–0.99 s),
0.1 s (1.00–9.90 s)
10 µs, 1 ms–50 ms
1 ms
Trig-out
Trig-out pulse width
*The burst mode is available only if you use Neuro-MS.NET software.
**To avoid the noise impact from the power supply while joint operation with EMG equipment
during the response acquisition, the delay of capacitor charge start is provided in single pulse
mode.
Table 5. Stimulation Modes
Stimulus Type
Biphasic
+
Biphasic burst
+
Power biphasic
12
Only Main Unit
Main Unit with
Expansion Unit
+
Description
Table 5. Continued
Stimulus Type
Only Main Unit
Main Unit with
Expansion Unit
Power biphasic burst
+
Monophasic
+
Power monophasic
+
Paired monophasic
+
The specifications of coils are provided in the technical manual concerning these
coils.Table 6. Dependence of Maximal Stimulus Amplitude on Stimulation Frequency
While Working with/without Extra Power Supply Unit with Use of RC-02-150 Big Ring
Coil
Stimulation Frequency, Hz
Maximum Power
Without Extra Power
Supply Unit
With Extra Power
Supply Unit
5
100%
100%
10
69%
100%
15
53%
100%
20
43%
100%
25
37%
89%
30
30%
79%
Safety and Electromagnetic Compatibility.
Electromagnetic compatibility (EMC) is provided by conformance to international
standard IEC 60601-1-2:2007 requirements.
The magnetic stimulator is intended for operation in electromagnetic environment, as
specified in Appendix 1.
As for safety, magnetic stimulator satisfies IEC 60601-1:2005 requirements, it is referred to class I and has BF type work parts corresponding to IEC 60601-1:2005.
Interpretation of Symbols on Electronic Unit:
− attention: consult operational documentation.
− work parts of BF type according to IEC 60601-1.
− mark of conformance to Russian standards requirements.
− mark of conformance to 93/42/EEC “Concerning Medical Devices” directive.
− mark of conformance to 2002/96/EC “On waste electrical and electronic equipment
(WEEE)” directive.
13
Neuro-MS/D (Technical Manual)
1.5.
Delivery Set
The delivery set includes the electronic units with the set of coils and cables. The delivery set of the stimulator corresponds to Table 7 and Table 8.
The figures in “Quantity, pcs.” column of Table 7 and Table 8 indicate:
1 — Neuro-MS/D magnetic stimulator (delivery set variant 1 – diagnostic).
2 — Neuro-MS/D magnetic stimulator (delivery set variant 2 – therapeutic).
3 — Neuro-MS/D magnetic stimulator (delivery set variant 3 – advanced therapeutic).
4 — Neuro-MS/D magnetic stimulator (delivery set variant 4 – advanced research).
The complete delivery set of the stimulator (delivery set variant 4) is given on Fig. 1:
4
2
6
1
5
10
7
8
9
3
Fig. 1. The external view of assembled magnetic stimulator (with NSFT 058201.001 main unit).
14
Description
1.
Cooled angulated figure-of-eight coil 100 mm AFEC-02-100-C (the cooled coil is
used together with the cooling unit);
2.
Coil holder;
3.
Trolley with custors for magnetic stimulator (4 shelves)
4.
Touchscreen computer;
5.
Touchscreen computer holder;
6.
Main unit;
7.
Expansion unit;
8.
Cooling unit;
9.
Extra power supply unit;
10. Neuro-MEP-Micro digital EMG system (Neuro-EMG-MS delivery set).
Table 7. Base Delivery Set
Document name or
main specifications
Name
Quantity, pcs.
1
2
3
4
Main unit
NSFT 058201.005
1
1
1
1
Expansion unit
NSFT 058201.002
–
–
–
1
Cooling unit
NSFT 058201.003
NSFT 058201.007
–
1
1
1
Extra power supply unit
NSFT 058201.004
NSFT 058201.011
–
–
1
1
Neuro-MEP-Micro (Neuro-EMG-MS delivery set)
NSFT 034999.004
–
–
–
1
Coil holder
NSFT 058998.003
(CH-5)
1
1
1
1
End cap
NSFT 058105.001
1
1
1
1
Big ring coil 150 mm
NSFT 058304.002
(RC-02-150)
1
–
–
–
Small ring coil 100 mm
NSFT 058304.001
(RC-02-100)
1
–
–
–
Figure-of-eight coil 100 mm
NSFT 058304.013
(FEC-02-100)
1
–
–
–
Cooled angulated figure-of-eight coil 100 mm
NSFT 058304.012
(AFEC-02-100-C)
–
1
1
1
NSFT 058103.033
–
–
–
1
NSFT 058103.035
NSFT 058103.070
–
1
1
–
Coils:
1)
Cables:
HV (high-voltage) cable for Neuro-MS/D expansion
unit connection
2,3)
Control cable for Neuro-MS/D cooling unit
15
Neuro-MS/D (Technical Manual)
Table 7. Continued
Document name or
main specifications
Name
Quantity, pcs.
1
2
3
4
Control cable for Neuro-MS/D cooling and
2,3)
expansion units
NSFT 058103.036
NSFT 058103.071
–
–
–
1
HV cable for extra power supply unit connection to
Neuro-MS/D
NSFT 058103.058
–
–
1
1
NSFT 058103.032-050
–
1
2
3
IEC C13 – IEC C14 mains supply cable
(to connect cooling unit)
220 V, 10 A, 1,8 m
(3G×0.75 sq.mm.)
–
1
1
1
СЕЕ 7/7 – IEC C13 mains supply cable
220 V, 10 A, 1,8 m
(3G×0.75 sq.mm.)
1
1
2
3
3m
1
1
1
1
FISSO flexible arm
NSFT 016998.012
(H-3)
–
–
1
1
Flexible arm
NSFT 016998.002
(CH-1)
–
1
–
–
NSFT 059998.002
(T-2)
–
1
1
1
1
1
1
1
–
1
1
1
Equipotential cable
USB (A→B) cable
Holders:
Trolleys:
Trolley with custors for magnetic stimulator
(4 shelves)
Spare Parts and Accessories:
Quick connect coupling
NS 4D42006 3/8’’
Software on CD:
without complementary
modules
Neuro-MS.NET software
Operational Documentation:
Neuro-MS/D technical manual
TM 058.01.002.001
1
1
1
1
“Coils for Magnetic Stimulator” technical manual
TM 058.02.001.001
1
1
1
1
Neuro-MS.NET user manual
UM 058.01.003.000
-
1
1
1
1
1
1
1
Package:
Cardboard package (set)
–
Note:
1) Depending on the customer requests either figure-of-eight coil 100 mm FEC-02-100 or angulated figure-of-eight coil 100 mm AFEC-02-100 can be included in the base delivery set.
2) NSFT 058201.035 and NSFT 058201.036 cables are supplied with NSFT 058201.001
main unit
3) NSFT 058201.070 and NSFT 058201.071 cables are supplied with NSFT 058201.005
main unit.
16
Description
Table 8. Additional Equipment, Accessories and Software
Document code or
main specifications
Name
Neuro-EMG-MS digital neurophysiological system
for EMG
Trigger unit
Quantity, pcs.
1
2
3
4
NSFT 034999.004
1
1
1
–
NSFT 990201.007
TU-2
1
1
1
1
–
1
1
1
Coils:
Cooled big ring coil 150 mm
NSFT 058304.003
(RC-02-150-C)
Big ring coil 150 mm
NSFT 058304.002
(RC-02-150)
–
1
1
1
Small ring coil 100 mm
NSFT 058304.001
(RC-02-100)
–
1
1
1
NSFT 058304.013
(FEC-02-100)
–
1
1
1
1
1
1
1
1
1
1
1
Figure-of-eight coil 100 mm
1)
Angulated figure-of-eight coil 100 mm
1)
NSFT 058304.014
(AFEC-02-100)
Small figure-of-eight coil 50 mm
NSFT 058304.005
(FEC-02-50)
Angulated figure-of-eight coil 100 mm (placebo)
NSFT 058304.009
(AFEC-02-100-P)
1
1
1
1
Figure-of-eight coil 100 mm (placebo)
NSFT 058304.004
(FEC-02-10-P)
1
1
1
1
Cooled figure-of-eight coil 100 mm
NSFT 058304.010
(FEC-02-100-C)
-
1
1
1
NSFT 058304.011
(AFEC-02-100-C-P)
-
1
1
1
Control cable for Neuro-MS/D expansion unit
NSFT 058103.034
–
–
1
–
Trig-in cable for synchronization via electrical
stimulator: DIN8 DIN5 (240°)
NSFT 014103.032
1
1
1
1
Trig-in cable for synchronization via electrical
stimulator: DIN8 DIN5 (180°)
NSFT 014103.033
1
1
1
1
Trig-in cable: DIN8 BNC
NSFT 014103.039
1
1
1
1
Trig-out cable: DIN8 BNC
NSFT 014103.047
1
1
1
1
Flexible arm
NSFT 016998.002
(CH-1)
1
–
1
1
Touchscreen computer holder
NSFT 016998.010
(H-2)
1
1
1
1
FISSO flexible arm
NSFT 016998.012
(H-3)
1
1
–
–
Cooled angulated figure-of-eight coil 100 mm
(placebo)
Cables:
Holders:
17
Neuro-MS/D (Technical Manual)
Table 8. Continued.
Document code or
main specifications
Name
Quantity, pcs.
1
2
3
4
1
–
–
–
TC 4013-0031321815802011
• Functional
• Elegance
• Elite
1
1
1
1
LCD 19’’, VESA holder,
built-in power supply
unit
1
1
1
1
IEI Afolux 12A
1
1
1
1
Laser or jet
1
1
1
1
without complementary
modules
1
–
–
–
1
1
1
1
Trolleys:
Trolley with custors for magnetic stimulator
(3 shelves)
NSFT 059201.001
(T-1)
2)
Computer and Electronic Equipment :
System unit
3)
Monitor
Touchscreen computer
Printer
Software on CD:
Neuro-MS.NET software
Operational Documentation:
“Trigger unit TU-2” technical manual
TM990.01.001.000
Note:
1) Depending on the customer requests either figure-of-eight coil 100 mm FEC-02-100 or angulated figure-of-eight coil 100 mm AFEC-02-100 can be included in the base delivery set.
2) All the computer equipment must comply with CISPR 22 for B class.
3) It is allowed to supply system with another PC which specifications are not lower that stated
in the user manual for magnetic stimulator software.
1.6.
Structure and Operation
The block diagram of the units included in the stimulator complex and their connections are represented on Fig. 2. The block diagram of the main unit of the magnetic
stimulator (Fig. 2) consists of the control circuitry, capacitor, capacitor charging circuitry intended for the capacitor charge up to achieving the voltage specified by the control circuitry and the high-voltage electronic switch.
Magnetic stimulator principle of operation is based on discharge of high voltage capacitor (1.5 kV) through stimulation coil made of copper wire at the moment of electronic switch opening. At this time the discharge current (up to 8 kA) generates the
magnetic field. This field induces the current in body tissues located near which causes nerve impulse as during usual electrical stimulation.
Maximum achieved intensity of magnetic field depends on stimulation frequency and
decreases with its increase. This dependence is caused by limited capability of capacitor charge circuit to charge the capacitor to required voltage during the pause between stimuli. If you set higher stimulus amplitude than stimulator can deliver at speci18
Description
fied stimulation frequency, the first train stimulus (series of stimuli) can be delivered
with the specified amplitude; the amplitudes of next stimuli will decrease to maximal
achieved one at stated frequency.
Extra power supply unit is intended for joint use with main unit and allows obtaining
maximal stimulus amplitude with 100% intensity at higher stimulation frequency (see
Table 6).
The current flowing through the coil provokes its heating. The higher is the stimulus intensity and stimulation frequency, the quicker is the heating of the operating surface of
the coil. The contact with this heated surface can evoke the hyperaemia or burn. To
control the temperature, the coils are equipped with the temperature sensors. The indications of these sensors are controlled by the stimulator control system. In case the
coil heats up to 41º C, the stimulation is stopped and the stimulator notifies a user
about it.
The use of coils with the force cooling allows to increase the time of the continuous
operation without overheating. In this type of coils the coil winding is made of copper
tube where the cooling liquid (cooling agent) circulates. The cooling process occurs in
the cooling unit.
The cooling unit provides the forced circulation of cooling agent and heat rejection using the cooling elements (Thermoelectric Cooler). The control system regulates the
temperature of the cooling agent and switches off the cooling at the temperature decrease to exclude the condensate formation on the coil surface.
19
Neuro-MS/D (Technical Manual)
~220 V
~220 V
Capacitor
additional
charging circuitry
Capacitor
charging circuitry
Indication
Capacitor
~220 V
USB Synchronization
Control circuitry
Indication and
control
Control circuitry
Capacitor
charging circuitry
Indication and control
Capacitor
Electronic switch
Electronic switch
Extra power
supply unit
Main unit
Expansion unit
Coil
Cooling unit
Cooling
elements
Pump
Indication
Control circuitry
Power supply
Power supply
Control
High voltage , 220 V
Cooling agent
Fig. 2. Neuro-MS/D block diagram.
To expand the number of the base stimulator functions, the expansion unit can be
used. It allows increasing the stimulus intensity and obtaining the additional stimulus
waveforms and stimulation modes.
The expansion unit contains the charging circuitry intended to charge the high-voltage
capacitor, the system of high-voltage electronic switches and the control circuitry. Depending on the operation mode, the high-voltage capacitor of the expansion unit is
connected on parallel to the capacitor of the main unit to produce the power pulses or
is used to generate the second stimulus in the paired stimulation mode.
The pulse width in the power mode is extended with approximately 40% relative to the
standard mode.
20
Description
The magnetic stimulator generates the following stimulus waveform:
• Monophasic stimulus (with expansion unit only) – the stimulus when the current
flows through the coil in one direction increasing by sine law and decreasing by exponent (Fig. 3).
Fig. 3. Monophasic stimulus.
• Biphasic stimulus – the stimulus when the current waveform in the coil is characterized by one period of damped sinusoid (Fig. 4).
Fig. 4. Biphasic stimulus.
• Biphasic burst stimulus (in USB control mode only) – the biphasic stimulation
when the series of the biphasic pulses with high frequency (up to 100 Hz) and decreasing amplitude are generated instead of single pulse (Fig. 9). The amplitude of
the first pulse is specified for this stimulus. After obtaining this stimulus the residual
charge of the capacitor is used to generate the next stimulus.
Fig. 5. Biphasic burst stimulus.
21
Neuro-MS/D (Technical Manual)
• Paired monophasic stimulus (with expansion unit only) – two stimuli with the
specified interpulse interval and amplitude specified for each stimulus independently (Fig. 6).
Fig. 6. Paired monophasic stimulus.
The magnetic stimulator can operate in several modes:
1.
Stand-alone mode:
• single pulse of the specified amplitude;
• in repetitive stimulation mode – the series of stimulation trains and pulses during
some period of time (session time). These trains have certain duration and specified pauses between them.
22
2.
Under control of digital EMG and EP systems manufactured by Neurosoft Ltd. At
that, the electronic unit of the stimulator is connected with USB port of the personal computer using the removable interface cable included in the delivery set.
3.
Under control of digital EMG systems produced by other manufacturers via the
trigger in/out.
4.
Under control of specialized Neuro-MS.NET software allowing to perform the
therapeutic medical procedures. At that, the electronic unit of the stimulator is
connected with USB connector of the personal computer using the removable interface cable included in the delivery set.
Description
1.7. Description of Controls, Connectors and
Indicators
1.7.1.
Controls, Connectors and Indicators of Main Unit
1
2
3
4
5
6
8
10
9
7
18
17
16
15
14
12
13
11
Fig. 7. The front panel of the main unit.
The control layout of NSFT 058201.001 and NSFT 058201.005 units are identical.
The front panel of the main unit contains the following (Fig. 7):
1.
“Coil connector” high-voltage connector intended for the coil attachment.
2.
“Coil change” button combined with “High voltage” indicator.
The “High voltage” indicator highlights yellow when the stimulator is switched on
and 1500 V high voltage is supplied inside the stimulator. As far as the high
voltage is supplied to coil connector at the moment of stimulus delivery, it is
dangerous to disconnect the coil. To replace the coil, press “Coil change” button
which switches off the internal high-voltage power supply and discharges instantly
the high-voltage capacitor to the safe voltage. After that the “High voltage” indicator
stops illuminating. If you press the button again, the high-voltage power supply
switches on and the capacitor charging up to the specified voltage is started. The
“High voltage” indicator highlights yellow. In case you press the “Coil change”
button during the repetitive stimulation, the stimulator will stop the stimulation. After
the coil replacement the next pressing of this button will resume the stimulation
from the stop moment. The given function is used to replace the “overheated” coil
to the “cool” one to continue the repetitive stimulation.
3.
“Coil temperature” indicator.
“Coil temperature” indicator (Fig. 7) is a 5-segment three-colored temperature
scale. The segments of this scale highlight one by one after achieving the
following temperature:
23
Neuro-MS/D (Technical Manual)
First green segment — at less than 30º C temperature.
Second green segment – at coil temperature from 30º up to 34ºC.
First yellow segment – at coil temperature from 34º up to 38ºC.
Second yellow segment – at coil temperature from 38º up to 41ºC.
Red segment – if the coil temperature exceeds 41ºC, at that “Start” button and
stimulus delivery commands from all the external devices are disabled.
4.
“Coil” indicator.
“Coil” indicator glows green when the coil is connected and ready for operation.
When the coil is overheated, it starts blinking red.
5.
“Pulse” button combined with “Ready” indicator.
“Ready” indicator highlights green, if the stimulator is ready to produce the pulse
of the specified amplitude. The single pressing of “Pulse” button activates the
single or repetitive stimulation depending on the current operation mode. To
stop the repetitive stimulation, press “Pulse” button again. This button is
duplicated with “Pulse” button located on the coil.
6.
“Amplitude” knob.
“Amplitude” knob allows increasing/decreasing the current value of the
amplitude by rotating the knob clockwise or counterclockwise correspondingly.
7.
“MT detection” button.
“MT detection” button is intended to fix the amplitude of motor threshold
(MT). If the threshold is not set, the button does not highlight. In case you
press the button, the current amplitude value is taken as 100% and it is
displayed on “Amplitude” indicator. The button and “MT” indicator are
highlighted green.
8.
“Amplitude” indicator.
Depending on the stimulator state it indicates:
• the stimulus amplitude in percents from the maximal value or from MT. After the
stimulator switching off the current amplitude is stored in the memory and is indicated at the next switching on. The amplitude adjust is performed with the use of
“Amplitude” knob;
• information concerning the fault presence;
• information concerning the overheating.
24
Description
9.
“MT” icon.
“MT” icon is intended to indicate the mode of amplitude detection of the motor
threshold (MT). It is highlighted green in the active mode.
10. “On/Off” button and “Power” indicator.
“On/Off” button toggles the operational mode of the stimulator. On initial
application of mains power, the stimulator enters the standby mode. This is
indicated by the yellow light of “Power” indicator. Pushing the “On/Off” button
in the standby mode will set the stimulator into the operational mode. This is
indicated by green light of the “Power” indicator. All indicators and symbols will
illuminate within a period of 3 seconds. After the expiring of 3 seconds the
stimulator switches to the single pulse mode. At the end of the session the
stimulator can be returned to its standby condition by pushing the “On/Off”
button.
11. “Single pulse” button.
After the power supply switching on the stimulator stands in the “Single pulse”
mode, at that “Single pulse” button and “Delay” icon are highlighted green. In
this mode the “Stimulation parameters” indicator displays the current delay for
the beginning of the stimulator charge process after each stimulation. To
adjust the delay, use the “Stimulation parameters” knob. In this mode press
“Pulse” button to produce the single pulse. After the stimulus obtaining the
pushing of this button once again is ignored during the period of the capacitor
charge delay.
If you press “Single pulse” button, the stimulator switches to the repetitive
stimulation mode in the specification of repetitive stimulation frequency, at that
“Single pulse” button does not illuminate and “Frequency” button and icon
highlight green. In case you press “Single pulse” button again, you will switch
to the single pulse mode.
12. “Stimulation parameters” indicator.
Depending on the stimulator operation mode the indicator displays:
• in Single pulse mode – the delay for stimulator capacitor charge.
• in Stimulation frequency setting mode – the stimulation frequency;
• in Train duration setting mode – the train duration;
• in Pause setting mode – the pause duration;
• in Session duration setting mode – the session duration;
• in Error indication mode – the error code;
25
Neuro-MS/D (Technical Manual)
• in Stimulator overheating mode – the information concerning the overheated
component.
The parameters can be changed using “Stimulation parameters” knob (14).
13. “Delay” icon.
The icon is highlighted green in the single pulse mode. At that the “Stimulation
parameters” indicator displays the delay for stimulator capacitor charge and
the “Stimulation parameters” knob is used to change this delay.
14. “Stimulation parameters” knob.
The “Stimulation parameters” knob is intended to set the stimulation parameters.
The selection of the specified parameter is carried out by pressing the corresponding button: “Single pulse”, “Frequency”, “Train”, “Pause” or “Session” and
allows to specify the following:
• in Single pulse mode – the delay for stimulator capacitor charge.
• in Stimulation frequency setting mode – the stimulation frequency;
• in Train duration setting mode – the train duration;
• in Pause setting mode – the pause duration;
• in Session duration setting mode – the session duration.
The value of the changed parameter is displayed on “Stimulation parameters” indicator (12).
15. “Session” button.
If the mode is disabled, the button is not highlighted. In case you press
“Session” button, the stimulator switches to the session duration setting
mode for the repetitive stimulation. At that, this button is highlighted green.
In this mode “Stimulation parameters” indicator displays the current session
duration. To adjust the session duration the “Stimulation parameters” knob
is used. If you press “Pulse” button in the mode, you will start the repetitive
stimulation, the “Session” button will start blinking green and the
“Stimulation parameters” indicator will show the time left before the
stimulation stop.
16. “Pause” button.
If the mode is disabled, the button is not highlighted. In case you press
“Pause” button, the stimulator will switch to pause duration setting mode.
You can set pauses between the trains during the repetitive stimulation, and
the button will highlight green. In this mode “Stimulation parameters”
indicator displays the current value of pause between trains. To adjust the
26
Description
pause, use “Stimulation parameters” knob. If you press “Pulse” button in
this mode, you will run the repetitive stimulation. The “Session” button will
start blinking green and “Stimulation parameters” indicator will display the
time left before the stimulation stop.
17. “Train” button.
If the mode is disabled, the button is not highlighted. In case you press
“Train” button, the stimulator will switch to train duration setting mode. At
that, the button will highlight green. In this mode “Stimulation parameters”
indicator displays the current train duration. To adjust the pause, use
“Stimulation parameters” knob. If you press “Pulse” button in this mode, you
will run the repetitive stimulation. The “Session” button will start blinking
green and “Stimulation parameters” indicator will display the time left before
the stimulation stop.
18. “Frequency” button.
If the mode is disabled, the button is not highlighted. In case you press
“Frequency” button, the stimulator will switch to the repetitive stimulation
frequency setting mode. At that, the button will highlight green. In this mode
“Stimulation parameters” indicator displays the current frequency of the
repetitive stimulation. To adjust the frequency, use “Stimulation parameters”
knob. If you press “Pulse” button in this mode, you will run the repetitive
stimulation. The “Session” button will start blinking green and “Stimulation
parameters” indicator will display the time left before the stimulation stop.
1
3
10
2
9
8
4
7
5
6
5
Fig. 8. The rear panel of main unit.
The rear panel of main unit contains (Fig. 8):
1.
Connector for mains supply cable attachment.
2.
“Mains power” switch.
27
Neuro-MS/D (Technical Manual)
I
0
3.
To connect the mains supply to the magnetic stimulator, turn “Mains power”
switch to On (I) position. To disconnect from the mains supply, set the “Mains
power” switch to Off (0) position.
USB connector.
The connector is intended to attach the stimulator to the computer using
USB cable.
4.
High-voltage connector for the expansion unit. The high-voltage connector is intended to attach the high-voltage communication cable to the expansion unit. If
you use the main unit without the expansion one, plug in and fix the end cap on
this connector using two screws.
5.
Cooling fans output.
The fans provide the air circulation inside the main stimulator unit. The air is
sucked through the holes located on the bottom panel and blown out via the
cooling fan outlet, at the rear panel.
6.
Marking.
7.
“Trig in/out” connector.
“Trig in/out” connector is intended to synchronize the stimulator with other
devices (see chapter 1.8 “Synchronization”).
8.
“Control” connector.
“Control” connector is intended to attach the communication cable to
expansion unit and cooling unit.
9.
The connector for the attachment of mains cable for cooling unit. When you
switch on the operational mode using “On/Off” button, the mains voltage is supplied to this connector.
10. Equipotential connector.
The connector for the attachment of equipotential cable connecting the cases of
units included in the system.
28
Description
1.7.2.
Controls, Connectors and Indicators of Expansion
Unit
1
3
2
5
4
11
10
9
8
7
6
Fig. 9. The front panel of expansion unit.
The front panel of the expansion unit contains the following (Fig. 9):
1.
“Ready” indicator.
“Ready” indicator highlights green when the unit is charged up to the specified
level.
2.
“Amplitude” knob.
“Amplitude” knob allows increasing/decreasing the current amplitude value
of the second stimulus in the paired stimulation mode by rotating the knob
clockwise and counterclockwise correspondingly.
3.
The “Amplitude” indicator. The “Amplitude” indicator represents the current value
of the amplitude of the second stimulus in percents from the maximal value or
relative to MT in the paired stimulation mode. After the stimulator switching off the
current amplitude is stored in the memory and is indicated at the next switching
on. The amplitude adjust is performed with the use of “Amplitude” knob.
4.
“MT” icon.
“MT” icon is intended to display the mode of motor threshold (MT) fixation. If
MT is fixed, it is highlighted green.
5.
“Power” indicator.
The “Power” indicator lights yellow in the stand-by mode and green in the
operating mode. The stimulator switches from the stand-by mode to the
operating one and back if you press “On/off” button on the main unit.
6.
“Interpulse interval” displays the current value of the interpulse interval in the
paired stimulation mode.
29
Neuro-MS/D (Technical Manual)
7.
“Interpulse interval” knob.
It specifies the interpulse interval in the paired stimulation mode, in ms.
8.
“Paired stimulation” button.
If you press this button, the stimulator will switch to the paired stimulation
mode. When you press “Pulse” button on the main unit the stimulator
produces two stimuli with the specified interpulse interval and specified
amplitude for each stimulus in this mode. The interpulse interval is set using
the “Interpulse interval” knob and this current value is displayed on
“Interpulse interval” indicator. The amplitude of the first stimulus is set on the
main unit, the one of the second stimulus is specified on the expansion unit.
The amplitude setting is carried out with the use of “Amplitude” knob and is
displayed on “Amplitude” indicator on the corresponding unit. The switch to
the paired stimulation mode is possible only in case the single pulse mode is
set on the main unit.
9.
“Standard monophasic” button.
If you press this button, the stimulator will switch to the standard monophasic
stimulation mode. The switch to this mode is possible only in the single or
repetitive stimulation mode.
10. “Power monophasic” button.
If you press this button, the stimulator will switch to the power monophasic
stimulation mode. The switch to this mode is possible only in the single or
repetitive stimulation mode.
11. “Power biphasic” button.
If you press this button, the stimulator will switch to the power biphasic
stimulation mode. The switch to this mode is possible only in the single or
repetitive stimulation mode.
30
Description
1
2
8
3
7
4
5
6
5
Fig. 10. The rear panel of the expansion unit.
The rear panel of the expansion unit contains the following (Fig. 10):
1.
Connector for mains supply cable attachment.
2.
“Mains power” switch.
I
0
3.
To connect the mains supply to the expansion unit, turn “Mains power” switch to
On (I) position. To disconnect from the mains supply, set the “Mains power”
switch to Off (0) position.
“Control” connector.
“Control” connector is intended to attach the communication cable to main
unit and cooling unit.
4.
High-voltage connector to attach the main unit. The high-voltage connector is intended to attach the high-voltage communication cable to the main unit.
5.
Cooling fans output.
The fans provide the air circulation inside the main stimulator unit. The air is
sucked through the holes located on the bottom panel and blown out via the
cooling fan outlet, at the rear panel.
6.
Marking.
7.
USB connector.
The connector is intended to attach the stimulator to the computer using
USB cable.
8.
Equipotential connector.
The connector for the attachment of equipotential cable connecting the cases of
units included in the system.
31
Neuro-MS/D (Technical Manual)
1.7.3.
Controls, Connectors and Indicators of Cooling Unit
1
2
3
4
5
6
Fig. 11. The front panel of the cooling unit.
The front panel of the cooling unit contains the following (Fig. 11):
1.
Quick connect coupling of cooling agent input for coil connection;
2.
Quick connect coupling of cooling agent output for coil connection;
3.
Measuring tube to indicate the cooling agent level with minimum (min) and maximum (max) marks;
4.
“Cooling” indicator;
The indicator highlights when the cooling elements are switched on and
blinks when they are off.
5.
“Coil is not connected” indicator;
It is highlight red if the coil is not connected or the cooling agent does not
circulate.
6.
“Fault” indicator.
It does not illuminate if the system is in working order.
It blinks red if the fault is detected during the operation.
It highlights red if after the switching on the self-diagnosis system detected a
fault.
32
Description
1
3
2
6
5
3
3
4
Fig. 12. The rear panel of the cooling unit.
The rear panel of the cooling unit contains the following (Fig. 12):
1.
“Mains power” switch.
I
0
2.
To connect the mains supply to the cooling unit, turn “Mains power” switch to On
(I) position. To disconnect from the mains supply, set the “Mains power” switch to
Off (0) position.
“Control” connector.
“Control” connector is intended to attach the communication cable to main
unit and expansion unit.
3.
Cooling fans output.
The fans provide the air circulation inside the main stimulator unit. The air is
sucked through the holes located on the bottom panel and blown out via the
cooling fan outlet, at the rear panel.
4.
Marking.
5.
Connector for mains supply cable attachment.
6.
Equipotential connector.
The connector for the attachment of equipotential cable connecting the cases of
units included in the system.
33
Neuro-MS/D (Technical Manual)
1.7.4.
Controls, Connectors and Indicators of Extra Power
Supply Unit
1
Fig. 13. The front panel of extra power supply unit.
The front panel of extra power supply unit contains (Fig. 13):
1.
“Power” indicator.
Depending on mode “Power” indicator lights:
• orange – standby mode;
• red (blinks) – overheat;
• green – extra power supply unit is switched on and
functions properly.
2
1
4
6
3
4
5
Fig. 14. The rear panel of extra power supply unit.
The rear panel of extra power supply unit contains the following (Fig. 14):
34
1.
Connector for mains supply cable attachment.
2.
“Mains power” switch.
Description
I
0
To connect the mains supply to this unit, turn “Mains power” switch to On (I)
position. To disconnect from the mains supply, set the “Mains power” switch to
Off (0) position.
3.
High-voltage connector to attach the main unit. The high-voltage connector is intended to attach the high-voltage cable to the unit and opposite part of this cable
is plugged into the main unit.
4.
Cooling fans output.
The fans provide the air circulation inside the main stimulator unit. The air is
sucked through the holes located on the bottom panel and blown out via the
cooling fan outlet, at the rear panel.
5.
Marking.
6.
Equipotential connector.
The connector for the attachment of equipotential cable connecting the cases of
units included in the system.
1.7.5.
Coil Controls, Connectors and Indicators
5
1
2
3
4
Fig. 15. Cooled coil.
The cooled coil contains the following (Fig. 15):
1.
Coil power connector;
2.
Quick connect couplings for cooling unit connection;
3.
Hoses to connect to the cooling unit;
4.
“Ready” indicator duplicating the “Ready” indicator located on the front panel of
the main unit;
35
Neuro-MS/D (Technical Manual)
5.
The “Pulse” button functioning is analogous to the “Pulse” button on the front
panel of the main unit.
1.8.
Synchronization
The “Trig in/out” connector is used for stimulator synchronization with other EMG
equipment. It is located on the rear panel of stimulator. The pinout is given on the
Fig. 16, and the functions of these pins are described in the table (Table 9).
Fig. 16. The pinout.
Table 9
36
Pin
number
Name
Function
Note
1
+5 V
Output +5 V
2
GROUND
Ground
4
TRIG-IN
Trigger input
Application of a signal (TTL/CMOS logical
level) of either polarity (see POLARITY pin)
to TRIG-IN input will result in the stimulation
being triggered. This signal must be active for
at least 200 µs.
The trigger pulses are ignored by the
stimulator:
• in USB control mode;
• if there are some faults;
• if the coil is overheated;
• if the internal components of the
stimulator are overheated.
5
TRIG-OUT
Trigger output
The “TRIG-OUT” supplies a synchronization
signal to the external EMG equipment. A
TTL/CMOS logical level pulse (width and
polarity are user-defined) (see POLARITY
pin) is provided at this output whenever the
stimulator is discharged (on every pulse).
8
POLARITY
Input of polarity With POLARITY being connected to the
selection.
Ground or being not connected, the
stimulator requires a rising edge trigger pulse
and produces a falling edge trigger output
pulse wherever it is discharged.
With POLARITY being connected to +5V, the
stimulator requires a falling edge trigger
pulse and produces a rising edge trigger
output pulse wherever it is discharged.
Description
You can set the duration of trigger pulses within the range from 10 µs up to 50 ms (for
more details see chapter 1.9).
1.9.
Main Unit Service Menu
Main unit service menu is meant for the control of service functions, such as trigger
pulse duration, turn on/off the cooling unit control.
1. To open the service menu press and hold “Stimulation
frequency” button and press “On/Off” button located on
the front panel when the stimulator is in stand-by mode.
2. The trigger pulse duration setup mode is activated. The
symbol appears on “Amplitude” indicator and the
trigger pulse width (in ms) (from 0 to 50, 0 position
correspond to 10 µs pulse duration) is displayed on
“Stimulation parameters” indicator. The duration is set by
“Stimulation parameters” knob.
3. To activate the cooling unit control mode press
“Stimulation frequency” button once more. The
“Amplitude” indicator displays
and “Stimulation
parameters” indicator displays setting state (
—
control is on,
— control is off). To change the
state, use “Stimulation parameters” knob. If you use the
stimulator with NSFT 058201.003 cooling unit, change
setting to
. If you use the stimulator with NSFT
058201.007 cooling unit, change setting to
position.
4. To return into the mode of trigger pulse duration setup
press “Stimulation frequency” button once more. To save
settings and quit the service menu press “On/off” button
on the front panel of the main unit.
Fig. 17. Main unit service menu.
37
Neuro-MS/D (Technical Manual)
2.
Assembly and Installation
2.1. Requirements to Personnel Conducting
Stimulator Assembly and Installation
The stimulator should be installed by the person who is authorized by the manufacturer or the technical personnel of the medical institution which is going to use it. It is
necessary to know that safety and quality of operation depend on the proper assembly of the magnetic stimulator. Further assembly and installation requirements which
define the product safety will be marked by bold and italic font in the text.
2.2.
Room Selection and Placement
Before assembly and setting of stimulator, it is necessary to select a place for it, taking into consideration power wiring and protective ground in the room, and also to
read the following requirements and recommendations:
Requirements concerning room selection and equipment placement:
• The device has been designed for indoor use at room temperatures between +10°C
and +35°C 80% maximum relative humidity.
• When placing the electronic unit of stimulator in the immediate vicinity of any electronic equipment, see the schemes given on Fig. 18 and Fig. 19.
Fig. 18. The scheme drawing of stimulator placement when connecting to digital EMG systems manufactured by Neurosoft Ltd.
38
Assembly and Installation
Fig. 19. The scheme drawing of stimulator placement when connecting to digital EMG systems produced
by other manufacturers.
The following abbreviations are used on the figures:
• EMG – electronic unit of digital EMG system;
• C – patient chair;
• M – monitor;
• MS – magnetic stimulator;
• P – printer;
• SU – PC system unit;
• T – isolation transformer which corresponds to IEC 60601-1 standard requirements;
•
– power cables 220/230 V;
•
– signal cables.
• To provide the normal cooling of the internal components during the stimulator operation, the stimulator should be placed on a firm surface. The clearance from the
cooling fan output up to the wall (not less than 50 mm) should be provided. The
fans provide the air circulation inside the main stimulator unit. The air is sucked
through the holes located on the bottom panel and blown out via the cooling fan
outlet, at the rear panel.
• The patient environment (within 1.5 meters) should contain only the electronic units being the medical device with the required safety level. The fact is
that the safety level of the computer equipment is insufficient for the use in
the patient environment. Hence, a patient must not contact with the metal
parts of computer equipment cases and the personnel must not touch simultaneously these parts and patient body. The computer equipment used in the
39
Neuro-MS/D (Technical Manual)
system should correspond to IEC 60601-1 or be connected via the isolation
transformer (specialized power supply unit – for notebook PC) corresponding
to above-mentioned requirements.
Requirements to mains:
• To avoid electrical shock, magnetic stimulator mains plug must only be inserted in an appropriate mains socket outlet provided with a protective earth
(ground) contact.
• The use of multi-socket electric mains extenders without additional protective
actions is prohibited. The fact is that the probable break of the protective
ground circuit of the multi-socket electric mains extender can lead to summation of leakage current in all connected units on their metal parts to dangerous values.
• Before the magnetic stimulator placement, the electrician must check the
quality of standard tripolar sockets and the integrity of the protective ground
circuit.
• In case the stimulator components are connected to several tripolar sockets,
make sure they are grounded to the same protective ground circuit. Otherwise, there is a danger of several tens of Ampers leveling current leakage
through the system connecting cables that leads to the equipment breakdown.
• Any interruption to the protective ground conductor inside or outside the device is likely to make the device dangerous. Intentional interruption is prohibited. The protective ground conductor should be checked regularly.
2.3.
Unpacking and Delivery Set Check
If the box with the stimulator was under conditions of the excessive moisture or low
temperature which differs sharply from working conditions, it is necessary to place it in
the room and leave for 24 hours in normal conditions.
Unpack the box and extract the stimulator components. The delivery set should correspond to the packing report list.
Check visually the stimulator components to make sure that there is no visible damage.
2.4.
2.4.1.
Assembly and Connection of Stimulator
General Requirements to Assembly
Place desktop PC-based system and magnetic stimulator according to the composed
plan and connect computer equipment according to operational documentation for the
corresponding devices.
40
Assembly and Installation
If you purchase the stimulator together with the personal computer (PC), it is supplied
with the installed and configured program. If you purchase the stimulator separately,
install the software from the compact disk included to the delivery set.
The software must be installed before the first connection of stimulator to
PC! Read carefully the corresponding chapter of the user manual.
Placement of the units, performing of inter-unit connection and connection to the
mains is carried out only when the “Mains power” switch of all units is switched off (“0”
position of the power switch).
If you use the main unit together with the expansion unit and/or cooling unit, it is recommended to use the trolley for the magnetic stimulator allowing to provide the stable
fixation of the units and facilitating the system move.
2.4.2.
Preparation of Cooling Unit to Operation
The liquid level for the normal operation of the cooling unit should be within minimum
(min) and maximum (max) marks.
The filler for the cooling agent filling is located in the recess on the top cover of the
unit in the left back corner. The lid should be screwed tightly before the transportation
and the operation.
If the level of the cooling agent is below the min mark, screw off the lid and add the
cooling agent up to the max level (not more) using the funnel. The lid should be
screwed tightly.
The silicone oil (polydimethylsiloxane) 5 cSt is used as a cooling agent for
the cooling unit. The use of other liquids is prohibited!
NSFT 058201.005 main unit has the communications interface with
NSFT 058201.007 cooling unit. It controls the cooling unit pump in different modes
and to display messages about cooling unit malfunctions on the main unit.
You can switch cooling unit control on/off use service menu commands (for more details see chapter 1.9).
2.4.3.
Assembly and Connection of Main Unit, Expansion
Unit and Cooling Unit
If you use the main unit, the expansion unit and cooling unit, the placement of these
units is carried out on the different shelves of the trolley according to Fig. 1.
The units are connected with the use of the connecting cables (Fig. 20) and are attached to the mains by mains cables.
41
Neuro-MS/D (Technical Manual)
4
1
2
6
5
3
Fig. 20. The connection of the main unit, expansion unit and cooling unit.
1.
Control cable;
2.
HV cable;
3.
Equipotential cable;
4.
Mains supply cable for the main unit;
5.
Mains supply cable for the expansion unit;
6.
Mains supply cable for cooling unit.
The connected cables should be fixed by the specified screws.
It is prohibited to use the system if the connection cables are not fixed.
42
Assembly and Installation
2.4.4.
Assembly and Connection of Main Unit, Extra
Power Supply Unit and Cooling Unit
If you use the main unit, the extra power unit and cooling unit, the placement of these
units is carried out on the different shelves of the trolley according to Fig. 1.
The units are connected with the use of the connecting cables (Fig. 21) and are attached to the mains by mains cables.
4
2
5
1
6
3
3
Fig. 21. The connection of main unit, extra power supply unit and cooling unit
1.
Control cable;
2.
HV cable;
3.
Equipotential cable;
4.
Mains supply cable for the main unit;
5.
Mains supply cable for the cooling unit;
6.
Mains supply cable for extra power supply unit.
The connected cables should be fixed by the specified screws.
It is prohibited to use the system if the end cap is not fixed by the screws.
43
Neuro-MS/D (Technical Manual)
2.4.5.
Assembly and Connection of Main Unit and Cooling
Unit
If you use main unit and cooling unit, the placement of these units is carried out according to Fig. 1. The main unit is placed on the cooling unit. In case you use the trolley for the magnetic stimulator, the units are placed on the different shelves in the
same order. The units are connected with the use of the connecting cables (Fig. 22)
and are attached to the mains by mains cable. The end cap is placed on the HV connector located on the rear panel of the main unit and is fixed by the screws.
4
3
1
2
5
Fig. 22. The connection of the main unit and cooling unit.
1.
Control cable;
2.
End cap;
3.
Equipotential cable;
4.
Mains supply cable for the main unit;
5.
Mains supply cable for cooling unit.
The connected cables should be fixed by the specified screws.
It is prohibited to use the system if the end cap is not fixed by the screws.
44
Assembly and Installation
2.4.6.
Assembly and Connection of Main Unit and
Expansion Unit
If you use the main unit and expansion unit, the placement of these units is carried out
according to Fig. 1. The main unit is placed on the expansion unit. In case you use the
trolley for the magnetic stimulator, the units are placed on the different shelves in the
same order.
The units are connected with the use of the connecting cables (Fig. 23) and are attached to the mains by mains cable.
4
2
1
3
5
Fig. 23. The connection of main unit and expansion unit.
1.
Control cable;
2.
HV cable;
3.
Equipotential cable;
4.
Mains supply cable for the main unit;
5.
Mains supply cable for the expansion unit;
The connected cables should be fixed by the specified screws.
It is prohibited to use the system if the connection cables are not fixed.
45
Neuro-MS/D (Technical Manual)
2.4.7.
Assembly and Connection of Main Unit and Extra
Power Supply
If you use the main unit and extra power supply unit, the placement of these units is
carried out according to Fig. 1. The main unit is placed on extra power supply unit. In
case you use the trolley for magnetic stimulator, the units are placed on the different
shelves in the same order.
The units are connected with the use of the connecting cables (Fig. 24) and are attached to the mains by mains cable.
Fig. 24. The connection of main unit and extra power supply unit.
1.
Equipotential cable;
2.
Mains supply cable for main unit;
3.
Mains supply cable for extra power supply unit;
4.
HV cable.
The connected cables should be fixed by the specified screws.
It is prohibited to use the system if the connection cables are not fixed.
It is prohibited to use cooled coils that are not connected to cooling system
or if the cooling system does not function.
46
Assembly and Installation
2.4.8.
Assembly and Connection of Main Unit
If you use the trolley for the magnetic stimulator, the main unit is placed on the top
shelf. The unit is connected to the mains with the mains cable. The end cap is placed
on HV connector located on the rear panel of the case and is fixed by the screws.
1
2
Fig. 25. The connection of the main unit.
1.
Mains cable for the main unit;
2.
End cap.
It is prohibited to use the system if the end cap is not fixed by the screws.
47
Neuro-MS/D (Technical Manual)
3.
Proper Use
3.1.
Operating Order
Before the stimulator switching on it is required to perform the assembly and the connection of the units according to chapter 2 “Assembly and Installation”. All the stimulator units should be connected to the mains.
It is required to make sure that the electronic units of the stimulator do not have the
visible mechanical failures which can be dangerous.
The order of operation:
48
1.
Connect the coil required for the operation to the stimulator. Make sure that the
coil connector is inserted firmly and the spring-lock is locked. In case of incorrect
fixation, the burning-out of the power connector pins is possible. If you use the
cooling unit, connect the cooling agent hoses of the cooled coil to the cooling unit
using the input and output quick-connect couplings on the front panel of the cooling system. Pay attention to the color marking.
2.
Using the “Mains power” switch located on the rear panel of main unit, connect
the power supply to the magnetic stimulator by turning it to “I” position. At that,
the “Power state” indicator located on the front panel will highlight yellow.
3.
If expansion unit is included in the stimulator delivery set, than using the “Mains
power” switch located on the rear panel of this unit, connect the power supply to
the magnetic stimulator by turning it to “I” position. At that, the “Power state” indicator located on the front panel will highlight yellow.
4.
If extra power supply unit is included in the stimulator delivery set, than using
the “Mains power” switch located on the rear panel of this unit, connect the power
supply to the magnetic stimulator by turning it to “I” position. At that, the “Power
state” indicator located on the front panel will highlight yellow.
5.
If cooling unit is included in the system, connect the power supply to the cooling
unit by turning it to “I” position using the “Mains power” switch located on the rear
panel of the cooling unit.
6.
If the stimulator is used together with the digital EMG and EP systems manufactured by Neurosoft Ltd., connect the corresponding equipment to the computer
according to the technical manual recommendations.
7.
If the stimulator is used with EMG devices produced by third-party manufacturers,
the connection of the corresponding equipment should be performed according to
the requirements described in chapter 1.8 “Synchronization”.
8.
If the stimulator is used with Neuro-MS.NET software, the program must be installed before the first connection of the stimulator to the computer. Connect the
Proper Use
main unit to the computer using the USB cable. If the window represented on
Fig. 26 appears after magnetic stimulator connection to computer, press
button, without inserting the installation disk.
Fig. 26. “Found New Hardware Wizard” dialog box.
“New hardware wizard” will perform the stimulator installation. After the installation
completion the dialog box given on the Fig. 27 will appear on the screen. Press the
button and start using the stimulator.
Fig. 27. “Found New Hardware Wizard” dialog box after the installation completion.
The stimulator on/off and setting of the stimulation parameters is performed using the
corresponding program. As soon as you finish, pass to p. 11.
9.
Press “On/Off” button to switch on the stimulator. At that, the “Power state” indicator of the main unit and expansion unit will glow green.
49
Neuro-MS/D (Technical Manual)
10. All the indicators highlight for 3 seconds which allows controlling its operability.
During this period the stimulator is in self-diagnosis mode. After that period the
stimulator switches to the single biphasic stimulation mode.
or
inscription ap11. If during the self-diagnosis the fault is detected,
pears on “Amplitude” indicator of the main unit and the error code displays on the
“Stimulation parameters” indicator. The error indication is accompanied with the
beep. In this case a user should refer to 3.2 “Troubleshooting” chapter. The stimulator should be switched off using “On/Off” button.
12. After the end of operation, switch off the stimulator using “On/Off” button.
13. Using “Power switches” located on the rear panels of the main unit, the expansion unit and the cooling unit, switch off power supply of these the units.
If during the stimulation the red segment of “Coil temperature” indicator lights up, it
means that the coil has overheated and the stimulation start is impossible. You should
wait till the coil cools down or replace it.
To replace the coil, press “Coil change” button and wait till the indicator goes out. After that you can replace the coil. The next pressing of “Coil change” button will switch
the stimulator to the previous mode set before. If the repetitive stimulation is performed, the session will continue from the moment it was stopped.
It is prohibited to disconnect the coil from the stimulator being in the operating mode.
During the continuous use of the stimulator the overheating of internal components of
the main unit and the expansion unit are possible. If any component is overheated,
inscription appears of the “Amplitude” indicator,
inscription appears on
“Stimulation parameters” indicator during the overheating of the main unit,
-
during the overheating of the expansion unit and
- during the overheating of
the extra power supply unit. Wait for about an hour till the internal components cool
down.
50
Proper Use
3.2.
Troubleshooting
The list of stimulator possible troubles is given in Table 10.
Table 10. Troubleshooting
Trouble Symptom
Cause
Way of Removal
If you use the stimulator
The faulty USB cable is used to
operating in USB control
connect to computer.
mode, the program displays
the message concerning
the data exchange error
with the stimulator or
stimulator missing. In
stand-alone mode the
stimulator operates
regularly.
Replace USB cable. It is
recommended to use the
cable included in the
stimulator delivery set.
The stimulator is controlled
by Neuro-MEP.NET or
Neuro-MS.NET program
manufactured by Neurosoft
Ltd. via USB. After the
finishing of the operation
with the program and its
Switch off and then on the
“Mains power” switch located
on the rear panel.
The failure has occurred during
the finishing of operation of
Neuro-MEP.NET or NeuroMS.NET program manufactured
by Neurosoft Ltd.
closing,
inscription
still illuminates on
“Stimulation parameters”
indicator.
The stimulator is equipped with self-diagnosis system which controls the operability of
the main elements while power switching on and during the operation. In case the
fault is detected, the stimulator stops the stimulation, initiates the beep and indicates
the fault type on “Amplitude” indicator and fault code on “Parameters” indicator. The
faults detected by the stimulator are divided into two groups:
• User – emerging in the result of incorrect connection of the stimulator or incorrect
actions of the personnel and indicated as
by a user.
. The given faults can be removed
• Service – emerging when the electronic components of the stimulator break down.
The given type of errors is indicated as
vice center of Neurosoft Ltd.
. If this fault emerges, address to ser-
The list of possible troubles is given in Table 11. In case you can not eliminate the
trouble by yourself, you should address to service center of Neurosoft Ltd. (5, Voronin str., Ivanovo, 153032, Russia).
51
Neuro-MS/D (Technical Manual)
Table 11. Troubleshooting
Code
Cause
Way of Removal
The “Pulse” button is pressed for a
long time (button sticking).
1. Check the “Pulse” buttons located on
stimulator case and on the coil. These
buttons should switch on/off without any
sticking.
2. The coil is placed so the “Pulse” button
is pressed.
The coil is not connected or is
connected incorrectly.
Check if the coil connector is attached
properly.
Incorrect connection of the power
cable/end cap of the main unit.
Check the connection to the power
connector located on the rear panel of the
main unit (depends on the system delivery
set):
• if the expansion unit is not
connected, the end cap should be
fixed.
• if the expansion unit is used, the
power cable connected to the
expansion unit should be attached.
Incorrect connection of the power
cable of the expansion unit.
Check HV cable connection to the
expansion unit and main unit.
Data loss while transferring via
USB.
It can happen when the faulty USB cable
is used. Only the cable supplied together
with the stimulator should be used.
USB disconnection during the
operation.
It is not recommended to disconnect the
USB connector from the computer during
the operation.
Invalid control data (the control
cable to the expansion unit is not
connected).
Check the connection of control cable to
the expansion unit and the main unit.
Missing data from the expansion
unit (the control cable for the
expansion unit is not connected).
Check the connection of control cable to
the expansion unit and the main unit.
Missing data from the cooling unit
Check the connection of control cable to
(the control cable for the cooling unit the expansion unit and the cooling unit.
2
is not connected) .
Check the type of the control cable (it
should be NSFT 058103.070 or NSFT
058103.071).
If you use NSFT 058201.003 cooling unit,
disable the cooling unit control interface
(see chapter 2.4.2).
Invalid data from the cooling unit
Check the connection of control cable to
(the control cable for the cooling unit the expansion unit and the cooling unit.
2
is not connected) .
Check the type of the control cable (it
should be NSFT 058103.070 or NSFT
058103.071).
If you use NSFT 058201.003 cooling unit,
disable the cooling unit control interface
(see chapter 2.4.2).
2
52
Only for NSFT 058201.005 main unit.
Proper Use
3.3.
Operation in Stand-alone Mode
In stand-alone mode of operation the stimulator can produce:
•
the single pulses;
•
perform the repetitive stimulation by trains.
After the power supply switch on, the stimulator stands in the “Single stimulation”
mode, at that, the “Single pulse” button highlights green. If you press “Single pulse”
button, the stimulator will switch to the setting mode of repetitive stimulation frequency. At that, the “Single pulse” button does not illuminate and “Frequency” button is
highlighted green. The next pressing of “Single pulse” button switches the stimulator
to single pulse mode.
While operating with digital EMG and EP system, the delay of the capacitor charge
start is provided in single pulse mode to exclude the noise impact from the power
supply during the response acquisition. The delay value is displayed on “Stimulation
parameters” indicator. To adjust the delay, use “Stimulation parameters” knob. Each
time you press “Pulse” button on the coil or the stimulator case, the stimulus will be
generated. The “Ready” indicator shows the readiness to the next stimulus. After the
stimulus producing the “Pulse” button is ignored for the time being equal to the delay
for capacitor charge start.
The parameters of the repetitive stimulation are specified before the stimulation beginning. To do this, press “Session”, “Pause”, “Train” or “Frequency” button to select
the corresponding mode. To adjust the corresponding parameter, use “Stimulation parameters” knob. This current value will be displayed on “Stimulation parameters” indicator. The range of the specified values and the frequency step are given in chapter
1.4 “Main Specifications”.
If you press “Pulse” button on the coil or on the stimulator case when one of the buttons: “Frequency”, “Train”, “Pause” or “Session” is highlighted, the repetitive stimulation will be run. During the repetitive stimulation “Session” button and “min” indicator
blink. The “Stimulation parameters” indicator displays the countdown of the session
duration. When the session time is expired, the stimulation is stopped.
In case you press “Pulse” button on the coil or the stimulator case during the stimulation, the session will be stopped.
The use of the expansion unit allows producing the additional pulse types. To do this,
select the required pulse type by pressing the corresponding button on the expansion
unit.
When you select “Paired stimulation” mode, the amplitude of the first stimulus is set
on the main unit. The amplitude of the second stimulus and interpulse interval is set
on the expansion unit. The “Ready” indicator shows the readiness to the stimulus producing of the specified amplitude.
The paired stimulation is available in the single pulse mode only.
53
Neuro-MS/D (Technical Manual)
3.4.
Operation in USB Control Mode
The stimulator can operate under control of digital EMG and EP systems manufactured by Neurosoft Ltd. and also under control of Neuro-MS.NET software. In this
mode the stimulator is connected to PC via USB and controlled by the corresponding
software. The order of the stimulator connection to PC and the process of software installation are described in the chapter 2. “Assembly and Installation”.
In USB control mode the “Amplitude” knob allows to adjust the required amplitude
value, and all the rest stimulation parameters are set in the software.
The stimulus producing is invoked by the pressing of “Pulse” button on the coil or on
the stimulator case or by specifying menu command in the digital system software.
The delay of capacitor charge start is provided in the single pulse mode when you
work with the digital EMG system. It is done to exclude the noise impact from power
supply unit during the response acquisition. The delay time is specified in the software
for the corresponding digital system (the procedure of working with the program is described in “User Manual” for the corresponding digital system).
3.5.
Operation in Control Mode via Trig-in
The stimulator trigger input is used for synchronization with digital EMG systems
produced by third-party manufacturers.
The principle of operation in this mode is analogous to the stand-alone operation in
single pulse mode (see chapter 3.3 “Operation in Stand-alone Mode”). The only difference is that the stimulus start is performed by the external device via trig-in. To do
that, the pin “TRIG-IN” (see chapter 1.8 “Synchronization”) in “Trig in/out” connector is
used. Often the electrical stimulator of digital EMG system provides the synchro signal
for that purpose.
Neuro-MS/D stimulator is connected to output of electrical stimulator of digital EMG
system using the special communication cable. The cable connects “Trig in/out” connector of the magnetic stimulator to output of electrical stimulator of digital EMG system.
On digital EMG system set the following stimulus parameters: electrical current +10
mA and pulse width 200 µs. The stimulus is produced in 100…200 µs after the electrical stimulus start. To acquire the responses on digital EMG system, EMG software is
used typically.
54
Servicing
Typical schematic for the stimulator connection to digital EMG system via the electrical stimulator output is given on Fig. 28.
Fig. 28. Trigger cable schematic for the stimulator connection to digital EMG system via the electrical
stimulator.
3.6. Operation in Syncronization Mode with
External Device via Trig-out
The stimulator trigger out can be used for synchronization with digital EMG systems
produced by third-party manufacturers (see chapter 1.8. “Synchronization”).
The principle of operation in this mode is analogous to the operation in stand-alone
mode with single pulse stimulation (see chapter 3.3 “Operation in Stand-alone Mode”).
In this operation mode the stimulator trigger output is connected to trigger input of
EMG device using the special communication cable.
The stimulus is producedd by the pressing of “Pulse” button located on the coil or on
the stimulator case. At that, the “Trig-out” signal in “Trig in/out” connector is generated
for each stimulus (see chapter 1.8. “Synchronization”).
3.7.
Actions in the Emergency
In the cases of electrical insulation disturbance of any component included in the
magnetic stimulator set which causes the emergency (fire, mechanical failure, flood,
medical staff evacuation) and threat of patient or staff electrical shock, it is necessary
to de-energize the magnetic stimulator completely.
4.
Servicing
4.1.
General Requirements
Safety measures when magnetic stimulator servicing conforms to the ones described
in the chapter 3 “Proper Use”.
55
Neuro-MS/D (Technical Manual)
Qualification requirements to the medical staff are listed in chapter 2.1 “Requirements
to Personnel Conducting Stimulator Assembly and Installation
Servicing of the bought articles included in the magnetic stimulator delivery set is conducted according to user and technical manuals or typical rules.
When detecting the troubles it is recommended to use the information given in “Troubleshooting” section. If the troubles can’t be eliminated using magnetic stimulator control units or by restart, it should be switched off and checked by the specialist.
Type, volume and periodicity of the servicing except specified in this chapter, are not
determined.
The delivery set should correspond to the packing list of the medical equipment.
4.2.
Maintenance Service
Magnetic stimulator servicing in the process of operation includes the external examination, check of connectors and cables setting, removal of contaminations from the
units’ surface using wet fabric.
4.3.
Conservation
The magnetic stimulator components including accessories and operational documentation should be packed in separate plastic sachets and then placed in a manufacturer
package.
4.4.
Life Time
The stimulator life time is 5 years starting from the shipment date to a user. The life
time of coils included in the delivery set is 1 year starting from the shipment date to a
user. The manufacturer is obliged to provide the technical service of a stimulator and
coils during its life time.
5.
Packing and Transportation
The package should conform to the accepted one when manufacturing and delivering.
In case the factory package is damaged, but the long-term stimulator storage and
transportation is expected, respect the following recommendations:
• The stimulator with operational documentation should be packed in plastic sachets
and cardboard boxes.
• The cardboard boxes should be covered by the paper tape or pressure sensitive
adhesive tape.
56
Utilization
The stimulators can be transported by all kinds of covered carries (except non-heated
airplane pods) according to rules of goods transportation for each mode of transport at
temperature varying from -50 up to +50 C.
6.
Utilization
The device utilization is performed according to the current legislation of the area
where the equipment is used. Special requirements to device utilization are not provided by the manufacturer.
7.
Delivery Set and Package Data
Neuro-MS/D magnetic stimulator:
main unit
serial number __________________________
expansion unit
serial number __________________________
cooling unit
serial number __________________________
extra power supply unit
serial number __________________________
is collected and packed according to TC 9442-009-13218158-2008.
Package report number _______________________
Package report date _______________________
The detailed information about the delivery set is described in the package report
which is an integral part of the present document and should be kept along with it.
57
Neuro-MS/D (Technical Manual)
8.
Acceptance Certificate
The magnetic stimulator corresponds to TC 9442-009-13218158-2008 and is ready
for operation.
DC representative ___________________
signature
9.
Delivery Certificate
The magnetic stimulator is delivered to a customer
________________________
date
System was handed _______________________
signature
System was accepted _____________________
signature
10. Storage Regulations
The magnetic stimulator should be stored in the manufacturer package in an enclosed
room at from +5 up to +40°С and 80% maximum relative humidity (measured at 25°С
temperature). The room air should be free from any dust, acid vapors, alkali vapors,
corrosive gases and other injurous admixtures which can cause the corrosion.
The magnetic stimulator should be put on the shelves not more than in four lines.
Information about the magnetic stimulator storage before and in the process of operation is registered in Table 12.
58
Warranty
Table 12. Storage Data
Date of
beginning of
storage
Storage conditions
end of storage
Position, name
and signature of
person
responsible for
storage
11. Warranty
11.1. The manufacturer guarantees the magnetic stimulator quality conformance to
TC 9442-009-13218158-2008 requirements if the rules of operation, storage, transportation and mounting prescribed in the operational documentation are observed.
11.2. Warranty period is 24 months from the delivery date to the customer (chapter 9).
There is no warranty for consumables.
The warranty period can be prolonged for the period from reclamation submission up
to repair completion (chapters 12,13).
11.3. The operation of guarantee commitment is stopped if:
• the rules of operation, storage, transportation and mounting prescribed in
the operational documentation are not observed;
• the warranty period is expired;
• a user brakes the seal without permission of the manufacturer.
11.4. The manufacturer is obliged to repair the equipment in case of breakdown during the warranty period free of charge. The repair is carried out in the service center of
59
Neuro-MS/D (Technical Manual)
Neurosoft Company (5, Voronin str., Ivanovo, 153032, Russia) only if this registration
certificate is provided.
You can also contact SAS Neuromed Company, Authorized European Representative
of Neurosoft Company (to Mr. Pierre Scholl) by the following address:
Chemin du tomple
84330 Le Barroux, France
Phone: +490-650-470, +622-748-384
Fax: +490-650-470
E-mail: [email protected]
12. Reclamation Data
12.1. In case of system breakdown or faultiness in the period of warranty and also
product defect detected when primary acceptance, the consumer should send written
notification to Neurosoft Ltd., authorized European representative or nearest distributor. The actual list of Neurosoft Ltd. distributors is represented on the web site:
http://www.neurosoft.ru/eng/useful/links.aspx. This notification should contain the following information:
• the consumer’s name and the address;
• the serial number of the system (see chapter 7 of the present manual or the system
marking);
• the copy of chapter 9 of this manual or the number and the date of the invoice or other
document confirming the system purchase.
• the detailed description of failures. If it is possible indicate the reasons and circumstances preceding the fault detection (in addition it is recommended to add the test
report, the exam data, photos and other materials allowing to solve the problem as
soon as possible).
12.2. In case of system return to the service center for the repair or the replacement,
the following rules should be observed:
• it should be packed so to exclude the possibility of its damage during the transportation;
•
60
the notice (see item 12.1) and the present manual must be added to the system
being returned.
Reclamation Data
12.3. All the reclamations, its description and taken measures should be registered in
Table 13.
Table 13. Reclamation Data.
The date of
failure or
trouble
appearance
Brief description of
the trouble
The date of
reclamation
sending
Taken measures
Note
61
Neuro-MS/D (Technical Manual)
13. Repair Data
Table 14. Repair Data.
Name and
code of faulty
unit
62
Degree of
imperfection
Date
completion of
repair
arrival
Name of
repair works
Position,
name, signature of
person
Carried out Accepted
the repair
after the
repair
Appendix 1. Electromagnetic Emissions and Immunity
Appendix 1. Electromagnetic Emissions and
Immunity
Guidance and manufacturer’s declaration – electromagnetic emissions
The magnetic stimulator is intended for use in the electromagnetic environment specified below. The customer or
the user of the magnetic stimulator should assure that it is used in such an environment.
Emissions test
Compliance
Electromagnetic environment — guidance
RF emissions
CISPR 11
Group 2
The magnetic stimulator uses RF energy only for
its internal function. Therefore, its RF emissions
are very low and not likely to cause any
interference in nearby electronic equipment.
RF emissions
CISPR 11
Class В
Harmonic emissions
IEC 61000-3-2
Class A
The magnetic stimulator is suitable for use in all
establishments,
including
domestic
establishments and those directly connected to
the public low-voltage power supply network that
supplies buildings used for domestic purposes.
Voltage fluctuations' flicker
emissions
IEC 61000-3-3
Complies
63
Neuro-MS/D (Technical Manual)
Guidance and manufacturer’s declaration – electromagnetic immunity
The magnetic stimulator is intended for use in the electromagnetic environment specified below. The customer or
the user of the magnetic stimulator should assure that it is used in such an environment.
Immunity test
Electrostatic discharge
(ESD)
IEC 61000-4-2
Electrical fast
transient/burst
IEC 61000-4-4
IEC 60601 test level
Compliance level
±6 kV − contact
±6 kV
±8 kV − air
±8 kV
±2 kV − for power
supply lines
±2 kV
±1 kV − for
input/output lines
Surge
IEC 61000-4-5
Voltage dips, short
interruptions and voltage
variations on power supply
input lines
IEC 61000-4-11
Power frequency
magnetic field
IEC 61000-4-8
±1 kV
±2 kV common mode
±2 kV
<5% UT
(>95% dip in UT) for
0,5 and 1cycle
20 ms
40% UT (60% dip in
UT) for 5 cycles
100 ms
70% UT (30% dip in
UT) for 25 cycles
500 ms
Mains power quality should be
that of a typical commercial or
hospital environment.
Mains power quality should be
that of a typical commercial or
hospital environment.
Mains power quality should be
that of a typical commercial or
hospital environment. If the
user of the magnetic stimulator
requires continued operation
during power mains
interruptions, it is
recommended that the
magnetic stimulator be
powered from an
uninterruptible power supply or
a battery.
500 ms
<5% UT
(>95% dip in UT) for
5s
5000 ms
3 A/m
3 A/m
Note: UT – is the a.c. mains voltage prior to application of the test level.
64
Floors should be wood, concrete
or ceramic tile. If floors are
covered with synthetic material,
the relative humidity should be at
least 30%.
±1 kV
±1 kV differential
mode
120% UT (20% dip in
UT) for 25 cycles
Electromagnetic environment guidance
Power frequency magnetic
fields should be that of a
typical commercial or hospital
environment.
Appendix 1. Electromagnetic Emissions and Immunity
Guidance and manufacturer’s declaration – electromagnetic immunity
The magnetic stimulator is intended for use in the electromagnetic environment specified below. The customer or
the user of the magnetic stimulator should assure that it is used in such an environment.
Immunity test
IEC 60601 test
level
Compliance level
Electromagnetic environment guidance
Portable and mobile RF
communications equipment
should be used no closer to any
part of the magnetic stimulator,
including cables, than the
recommended separation
distance calculated from the
equation applicable to the
frequency of the transmitter:
Conducted RF
IEC 61000-4-6
3 Vrms 150 kHz to
80 MHz outside
ISM bands 1)
3V
Radiated RF
IEC 61000-4-3
3 V/m
80 MHz to 2.5 GHz
3 V/m
d = 1.17 P
d = 1.17 P
(80 MHz to 800 MHz);
d = 2.33 P
(800 MHz to 2.5 GHz).
Field strengths from fixed RF
transmitters, as determined by
an electromagnetic site survey1),
should be less than the
compliance level in each
frequency range2). Interference
may occur in the vicinity of
equipment marked with the
following symbol:
1)
Field strengths from fixed transmitters, such as base stations for radio (cellular/cordless) telephones and
land mobile radios, amateur radio, AM and FM radio broadcast and TV broadcast cannot be predicted
theoretically with accuracy. To assess the electromagnetic environment due to fixed RF transmitters, an
electromagnetic site survey should be considered. If the measured field strength in the location in which the
magnetic stimulator is used exceeds the applicable RF compliance level above, the magnetic stimulator
should be observed to verify normal operation. If abnormal performance is observed, additional measures
may be necessary, such as re-orienting or relocating the magnetic stimulator.
2)
Over the frequency range 150 kHz to 80 MHz, field strengths should be less than 3 V/m.
Notes:
1. At 80 MHz and 800 MHz, the higher frequency range applies.
2. These guidelines may not apply in all situations. Electromagnetic propagation is affected by absorption and
reflection from structures, objects and people.
65
Neuro-MS/D (Technical Manual)
Recommended separation distances between portable and mobile RF communications
equipment and magnetic stimulator
The magnetic stimulator is intended for use in an electromagnetic environment in which radiated RF
disturbances are controlled. The customer or the user of the magnetic stimulator can help prevent
electromagnetic interference by maintaining a minimum distance between portable and mobile RF
communications equipment (transmitters) and the magnetic stimulator as recommended below, according to
the maximum output power of the communications equipment.
Separation distance according to frequency of transmitter, m
Rated maximum output
power of transmitter, W
150 kHz up to 80 MHz
outside ISM bands
80 MHz to 800 MHz
800 MHz to 2.5 GHz
d = 1.17 P
d = 1.17 P
d = 2.23 P
0.01
0.117
0.117
0.233
0.1
0.369
0.369
0.738
1
1.167
1.167
2.333
10
3.689
3.689
7.379
100
11.667
11.667
23.333
Notes:
1. At 80 MHz and 800 MHz, the separation distance for the higher frequency range applies.
2. These guidelines may not apply in all situations. Electromagnetic propagation is affected by absorption and
reflection from structures, objects and people.
3. For transmitters rated at a maximum output power not listed above, the recommended separation distance
d in meters (m) can be determined using the equation applicable to the frequency of the transmitter, where
Р is the maximum output power rating of the transmitter in watts (W) according to the transmitter
manufacturer.
66
References
References
1.
Chen R., Gerloff C., Classen J., Wassermann E.M., Hallett M. and Cohen L.G.
Safety of different inter-train intervals for repetitive transcranial magnetic stimulation and recommendations for safe ranges of stimulation parameters (accepted
for publication: 23 May 1997).
2.
Chen R., Classen J., Gerloff C., Celnik P., Wassermann E.M., Hallett M. and Cohen L.G. Depression of motor cortex excitability by low frequency transcranial
magnetic stimulation. Neurology, 1997a, 48: 1398–1403.
3.
Pascual-Leone A., Houser C.M., Reese K., Shotland L.I., Grafman J., Sato S.,
Valls-Sole´ J., Brasil-Neto J.P., Wassermann E.M., Cohen L.G. and Hallett M.
Safety of rapid-rate transcranial magnetic stimulation in normal volunteers. Electroencephalogr. Сlin. Neurophysiol., 1993, 89: 120–130.
4.
Wassermann E.M., Grafman J., Berry C., Holnagel C., Wild K., Clark K. and
Hallett M. Use and safety of a new repetitive transcranial magnetic stimulator.
Electroencephalogr. Clin. Neurophysiol., 1996b, 101:412–417.
5.
Wassermann E.M. Risk and safety of repetitive transcranial magnetic stimulation:
report and suggested guidelines from the International Workshop on the safety of
repetitive transcranial magnetic stimulation, June 5–7, 1996 (accepted for publication: 23 May 1997).
67