1
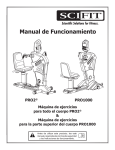
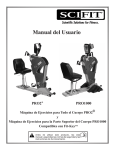
Touchscreen Owner’s Operation Manual PRO2® PRO1000 PRO2® Total Body Exerciser & PRO1000 Upper Body Exerciser Before Using this product, read this manual and follow all safety rules and operating instructions. table of contents safety information 1 introduction 2 SPECIFICATIONS 3-4 SET-UP & INSTALLATION 5 ASSEMBLY 6-16 PRODUCT OVERVIEW 17 KEYPAD FUNCTIONS 18 BIOMECHANICAL POSITIONING 19 ADJUSTMENTS 20-22 HEART RATE TRANSMITTER STRAP 23 PROGRAM INSTRUCTIONS 24- 33 Additional Key features 34 MAINTENANCE & SERVICE 35 WARRANTY 36-40 CERTIFICATION 41-42 WARRANTY CARD 43 Order on line 24/7 at www.SCIFIT.com SCIFIT • Scientific Solutions for Fitness • SCIFIT • Scientific Solutions for Fitness • SCIFIT safety information The purpose of safety symbols is to attract your attention to possible dangers. The safety or attention symbols and their explanations deserve your careful attention and understanding. The warnings do not, by themselves, eliminate any danger. The instructions or warnings they give are not substitutes for proper accident prevention measures. Look for these symbols to point out safety precautions or important information. CAUTION Warning ATTENTION Read all instructions before using your SCIFIT exercise machine. Save these instructions for future reference. Close supervision is necessary when the exercise machine is being used by or near children or individuals with disabilities. Keep children away from extended hand and foot supports. Use the exercise machine only for its intended use as described in this manual. Do not use attachments not recommended by the manufacturer. Never drop or insert any object into any opening. Do not use outdoors or in a harsh environment where water is present (i.e. pool or spa areas). 1 SCIFIT • Scientific Solutions for Fitness • SCIFIT • Scientific Solutions for Fitness • SCIFIT introduction Guidelines for Healthy Adults The American College of Sports Medicine (ACSM) and the American Heart Association (AHA) are continuously updating guidelines and recommendations for physical activity. Thank you for your purchase of the SCIFIT PRO2 total body exerciser or PRO1000 upper body exerciser. We have incorporated the finest technology and ergonomic design into this machine to assist you in achieving your fitness goals. However, for your safety, please adhere to the following recommendations before you begin to exercise. The current basic recommendations from ACSM and AHA is: The SCIFIT PRO2/PRO1000 are both designed for Class “S” (Commercial) and Class “A” (High Accuracy). The PRO2 is also designed for Class “II a” (Medical Device Directive) applications. The intended uses are for Cardio & Pulmonary rehabilitation as well as sports medicine, physical therapy, physical conditioning and strength training. The PRO2/ PRO1000 are suitable for placement in fitness, medical rehab, sports performance and recreational facilities. Both machines have 200 levels of console controlled resistance, which ensures that users of all fitness levels will be able to get a challenging but not overwhelming workout. Do moderately intense cardio 30 minutes a day, five days a week. OR Do vigorously intense cardio 20 minutes a day, three days a week. AND Do eight to ten strength-training exercises, eight to twelve repetitions of each exercise twice a week. Moderate-intensity physical activity means working hard enough to raise your heart rate and break a sweat, yet still being able to carry on a conversation. It should be noted that to lose weight or maintain weight loss, 60 to 90 minutes of physical activity may be necessary. The 30 minute recommendation is for the average healthy adult to maintain health and reduce the risk for chronic disease. Consult Your Physician Consult your physician or medical specialist before participating in any exercise program, especially if you are pregnant, or if you are suffering from: heart disease, respiratory disease, diabetes, hypertension, high blood pressure, elevated cholesterol, arthritis, or any other diseases and physical complaints. To review the latest guidelines and recommendations, visit the American College of Sports Medicine website: www.acsm.org Adult Usage SCIFIT equipment are designed and intended for adult usage and children of appropriate ages while being supervised. Young children should be kept a safe distance away from equipment. Warning Stop exercising immediately if you feel nausea, dizziness, sharp pain, or any other physical discomfort. Failure to stop exercising can result in injury or death to yourself. Cool Down To prevent muscle injuries and soreness, you should always cool down (at least 5 minutes) by doing a series of stretches after each workout. Train Intelligently To ensure a future of good health, you should always eat well balanced meals, drink plenty of fluid/water during a workout, and stay fit by exercising intelligently. Always follow training guidelines that are specific for your own physical condition. caution Always stretch after a workout session to reduce the risk of personal injury. Failure to stretch properly may result in injury to yourself. Warning 2 Injuries to health may result from incorrect or excessive training. Failure to stop exercising can result in injury or death to yourself. SCIFIT • Scientific Solutions for Fitness • SCIFIT • Scientific Solutions for Fitness • SCIFIT specificationS Weight Max User Weight Power Resistance System Work Load Accuracy Class Warranty PRO2 - 223 lbs (101 kg) Swivel - 450 lbs (204 kg) Fixed - 500 lbs (227 kg) Bariatric - 600 lbs (272 kg) Self generating w/auto recharge battery back-up. Standard Low Voltage AC adapter. Electromagnetic Self Generating Bi-directional Resistance Manual, Fit Quik, Constant Workout, ISO-Strength, 7 Pre-programmed Hills profiles, Heart Rate, Power Fit, Heart Fit, Stress Test and Random Class A Within U.S. & Canada 3 years parts, 1 year labor Outside U.S. 3 years parts, no labor 61” 1524 mm 30” 762 mm 61.5” 1562 mm 3 SCIFIT • Scientific Solutions for Fitness • SCIFIT • Scientific Solutions for Fitness • SCIFIT specificationS Weight Max User Weight Power Resistance System Work Load Accuracy Class Warranty PRO1000 - 220 lbs (100 kg) Swivel - 450 lbs (204 kg) Fixed - 500 lbs (227 kg) Bariatric - 600 lbs (272 kg) Self generating w/auto recharge battery back-up. Standard Low Voltage AC adapter. Electromagnetic Self Generating Bi-directional Resistance Manual, Fit Quik, Constant Workout, ISO-Strength, 7 Pre-programmed Hills profiles, Heart Rate, Power Fit, Heart Fit, Stress Test and Random Class A Within U.S. & Canada 3 years parts, 1 year labor Outside U.S. 3 years parts, no labor 61” 1524 mm 30” 762 mm 61.5” 1562 mm 4 SCIFIT • Scientific Solutions for Fitness • SCIFIT • Scientific Solutions for Fitness • SCIFIT set-up & installation Placement of Cardiovascular Machine To aid in the placement of the machine, two wheels are located at the front of the unit. Movement of machine should be done with two people. Carefully lift the rear of unit until wheels are engaged with the floor, then position the unit in the desired location. 40” (1 M) Safety Space Position the unit in a location that has a stable and level sub-floor. Equipment should be positioned in a location that is not in direct sunlight, in areas of extreme temperature and humidity, or where the equipment may be splashed with water or fluids. This machine is intended for indoor use only. Endcap Endcap Equipment should be positioned with a safety perimeter of 40” or 1 meter around unit. Warning Failure to place the equipment on a stable and level sub-floor with a safety perimeter can result in injury to yourself and others. 40” (1 M) Safety Space 40” (1M) Safety Space Level Cardiovascular Machine If the sub-floor is unlevel, the unit is equipped with leveling end caps. The endcaps are designed with the recess of end cap off centered. This allows you to rotate the endcaps to a position that will level the machine. After adjustment, check and make sure the end caps are fully seated against base frame tubes. Offset Endcap 40” / 1 Meter Safety Space Proper Supervision Close supervision is required when the exercise machine is being used by or near individuals with disabilities. Keep unsupervised children outside the safety perimeter. Cleaning Never clean the machine with organic solvents, alcohol or bleach based cleaners. To promote a healthy environment, wipe any sweat off of unit with a commercially manufactured wipe designed for the fitness industry, or a damp cloth. 5 SCIFIT • Scientific Solutions for Fitness • SCIFIT • Scientific Solutions for Fitness • SCIFIT assembly Mounting The Monocoque Frame To The Base Frame (Reference diagram below) 1. With the aid of a second person, lift and set the main frame onto the base frame, aligning the threaded holes with the mounting holes located at the front of the frame. CAUTION Monocoque Frame is top heavy. Two people are required to position frame in place. Failure to support frame properly may result in injury to yourself and others. 2. Starting on the right side, insert a long needle point center punch (A) through one of the front mounting holes of the base frame to hold the main frame in place. Required Tools: Torque wrench with range above 576 in/lbs (65 N/m) Long Needle Point Center Punch 5/16” (8mm) Hex Bit 3. Slide (item #2) 3/8” split washer (Qty.1), then (item #3) 3/8” flat washer (Qty.1) onto two of (item #1) 3/8” bolts. 4. Push up on monocoque frame to align the holes, then loosely thread the bolts into the two open mounting holes. Required Parts: (Qty. 6) Item #1: #93305 - Bolt,3/8” x 1”, Socket Cap (Qty. 6) Item #2: #33893 - Washer, Split, 3/8” (Qty. 6) Item #3: #1133815 - Washer, Flat, 3/8” 5. Repeat step 3 for the last bolt, then return to center punch (A) and pull it out to loosely thread in the last remaining bolt. 6. Repeat steps 2 thru 5 for the left side. 7. Use the torque wrench to tighten all bolts to 576 in/lbs (65 n/m). 3 2 A 1 6 SCIFIT • Scientific Solutions for Fitness • SCIFIT • Scientific Solutions for Fitness • SCIFIT assembly SWIVEL SEAT ASSEMBLY Step 1: Pull upward on the yellow T-handle of the seat adjustment lever, then lift and slide the seat post onto the frame track making sure the roller guide rail is between the top and bottom wheels of the base. Roller guide Step 2: Attach the handlebar plate to the seat post with (Qty. 4) of items #1, #2, #3 and #4 as shown on the drawing below. #1 Tools Required: 3/16” (5mm) Hex Bit 1/2” (13mm) Wrench or socket #2 #3 #4 Item #1 (#94256) 5/16-18 x 1 Socket Flat Head Screw Item #2 (#33080) 5/16 Flat Washer Item #3 (#1133892) 5/16 Split Washer Item #4 (#1136104) 5/16 Nut Hex 7 SCIFIT • Scientific Solutions for Fitness • SCIFIT • Scientific Solutions for Fitness • SCIFIT assembly SWIVEL SEAT ASSEMBLY CONT’D Step 3: (Bucket Seat Assembly ) a. Align the front holes of the bucket seat with the 3rd set of holes from the front of the handlebar plate, (see diagram), then loosely screw in (Qty. 1) of item #1 into one of the front holes of the seat. b. Align the other three holes and insert the other three screws loosely. c. Tighten all four screws to secure the bucket seat. Front holes of the bucket seat Tools Required: 1/2” (13mm) Wrench or socket Item #1(#19919) 5/16-18 x 1.25 Serrated Screw #1 Rear holes of the bucket seat Step 3a: (2-Piece Seat Assembly) a. Align the front two holes of the seat mount plate with the 1st set of holes of the handlebar plate (see diagram), then insert (Qty. 1) of item #1 into one of the front holes to hold the seat mount plate in place. b. Align the front hole of the bottom seat pad with the inserted screw and loosely screw it into the seat pad. c. Align the other front hole of the seat pad and loosely screw in (Qty. 1) of item #1 screw. d. Slide (Qty. 1) item #3, then (Qty. 2) item #4 onto (Qty. 1) item #2, then loosely screw into the rear holes of the seat pad. e. Tighten all four screws to secure the bottom seat pad and plate mount Tools Required: 1/2” (13mm) Wrench or socket Item #1 (#19919) 5/16-18 x 1.25 Serrated Screw Item #3 (#1133892) 5/16 Split Washer Item #2 (#110120325) 5/16-18 x 1 Hex Head Screw Item #4 (9900264) 5/16 Flat Washer Front seat plate mounting holes Rear seat plate mounting holes 8 SCIFIT • Scientific Solutions for Fitness • SCIFIT • Scientific Solutions for Fitness • SCIFIT assembly FIXED SEAT ASSEMBLY Step 1: Pull upward on the yellow knob of the seat adjustment lever, then lift and slide the seat post onto the frame track making sure the roller guide rail is between the top and bottom wheels of the base. Roller guide Step 2: (Bucket Seat Assembly) a. Align the front two holes of the bucket seat and handlebar plate with the front set of holes on the fixed seat mount (see diagram), then insert (Qty. 1) of item #1 into one of the seat holes and loosely tighten into place. b. Align the second front hole of the seat and loosely tighten with (Qty. 1) item #1 screw. d. Insert and loosely tighten the remaining two rear holes with (Qty. 2) item #1 screws. e. Tighten all four screws to secure the seat to the fixed seat mount. Align holes of seat with these holes on the fixed seat mount Tools Required: 1/2” (13mm) Wrench or socket Item #1 (#19919) 5/16-18 x 1.25 Serrated Screw Front Rear (Item #1) 9 SCIFIT • Scientific Solutions for Fitness • SCIFIT • Scientific Solutions for Fitness • SCIFIT assembly FIXED SEAT ASSEMBLY CONT’D Step 2a: (2-Piece Seat Assembly) a. Align the front two holes of the seat mount plate with the 1st set of holes of the fixed seat mount. (see diagram), then insert (Qty. 1) of item #1 into one of the front holes to hold the seat mount plate in place. b. Align the front hole of the bottom seat pad with the inserted screw and loosely screw it into the seat pad. c. Align the other front hole of the seat pad and loosely screw in (Qty. 1) of item #1 screw. d. Align, then loosely screw in (Qty. 2) of item #1 into the two remaining rear holes. e. Tighten all four screws to secure the bottom seat pad and plate mount. Tools Required: 1/2” (13mm) Wrench or socket Item #1 (#19919) 5/16-18 x 1.25 Serrated Screw (Item #1) Align bottom seat pad holes with these four hole locations 10 SCIFIT • Scientific Solutions for Fitness • SCIFIT • Scientific Solutions for Fitness • SCIFIT assembly Verify Upper Cranks Are Secure During shipment it is possible that the two set screws securing the crank hub to the shaft may become slightly loose. It is strongly recommended that these set screws be checked before attaching the crank handles. The following steps will explain this procedure. Tools Required • 5/16” (8mm) Hex bit • Torque wrench set for 480 in/lbs (54 n/m). Step 1: Starting on the left side, use a 5/16 hex bit to remove the 1st set screw #P3110 (5/8-18 x .5 Socket) and place to the side (Fig. 1). Fig. 1 Step 2: Using a 5/16 hex bit and torque wrench insert the bit into the crank hub to reach the 2nd set screw #P3111 (5/8-18 x .75 Socket) and TIGHTEN to 480 in/lb (54 n/m) (Fig. 2). Note: The wrench will click when it has reached the 480 in/lb (54 n/m) setting. Fig. 2 Step 3: Again using a 5/16 hex bit and torque wrench, reinsert the set screw removed in step 1 into the crank hub hole and TIGHTEN to 480 in/lb (54 n/m) (Fig. 3). Step 4: Repeat steps 1 thru 3 for the right side. Fig. 3 11 SCIFIT • Scientific Solutions for Fitness • SCIFIT • Scientific Solutions for Fitness • SCIFIT assembly Verify Upper cranks Are Secure (Cont’d) Step 5: Starting on the right side, lift up on the yellow spring flange adjustment knob on the hub and slide the crank into the hub, then release the knob at the selected position (Fig. 4). Fig. 4 Step 6: Use a 5/32” (4mm) hex bit to secure the crank with a 1/4” flat washer (#10537-08370) and 1/4-20 x .5 socket cap screw (#94049) on the end of each rod (Fig. 5). Fig. 5 Step 7: Repeat steps 5 & 6 for the left side 12 SCIFIT • Scientific Solutions for Fitness • SCIFIT • Scientific Solutions for Fitness • SCIFIT assembly Verify Lower Adjustable Cranks Are Secure (PRO2 Only) During shipment it is possible that the two set screws securing the crank hub to the shaft may become slightly loose. It is strongly recommended that these set screws be checked before attaching the crank handles. The following steps will explain this procedure. Tools Required: • 5/16” (8mm) Hex bit • Torque wrench set for 480 in/lbs (54 n/m) Adjustable Lower Cranks (PRO2 Only) Step 1: Starting on the left side, use a 5/16 Hex bit to remove the 1st set screw #P3110 (5/8-18 x .5 Socket) and place to the side (Fig. 1). Fig. 1 Step 2: Using a 5/16 hex bit and torque wrench insert the bit into the crank hub hole to reach the 2nd set screw #P3111 (5/8-18 x .75 Socket) and TIGHTEN to 480 in/lb (54 n/m) (Fig. 2). Note: The wrench will click when it has reached the 480 in/lb (54 n/m) setting. Fig. 2 Step 3: Again using a 5/16 hex bit and torque wrench, reinsert the set screw removed in step 1 into the crank hub hole and TIGHTEN to 480 in/lb (54 n/m) (Fig. 3). Step 4: Repeat steps 1 thru 3 for the right side. Fig. 3 13 SCIFIT • Scientific Solutions for Fitness • SCIFIT • Scientific Solutions for Fitness • SCIFIT assembly Verify Lower Adjustable Cranks Are Secure (Cont’d) Step 5: Starting on the right side, lift up on the yellow flange spring pin knob of the hub and slide the crank into the hub, then release the knob at the selected position (Fig. 4). Fig. 4 Step 6: Use a 5/32” (4mm) hex bit to secure the crank with a 1/4” flat washer (#10537-08370) and 1/4-20 x .5 socket cap screw (#94049) on the end of each rod (Fig. 5). Fig. 5 Step 7: Repeat steps 5 & 6 for the left side 14 SCIFIT • Scientific Solutions for Fitness • SCIFIT • Scientific Solutions for Fitness • SCIFIT assembly Verify LWR Fixed Cranks Are Secure (PRO2 ONLY) 3/4” between the frame (inside the cover) and the inside edge of the hub. Your machine may have the lower fixed crank hub option, these hubs are usually removed for shipment purposes. If this is the case, attaching them is very simple. The following will explain the steps necessary to attach the hubs. Tools Required: • 5/16” (8mm) Hex bit • Torque wrench set for 480 in/lbs (54 n/m) Fig. 1 Step 1: Starting on the right side, slide the hub onto the lower shaft of the machine, allowing 3/4” between the frame and the end of hub. Align the set screw hole over the flat surface area of the shaft (Fig. 1). Step 2: Place the set screw #P3111 (5/8 X .75 Socket) in the hub hole, then using a 5/16 hex bit and torque wrench set at 480 in/lbs (54 n/m), secure the set screw to the shaft (Fig. 2). Fig. 2 Note: The wrench will click when it has reached the 480 in/lb (54 n/m) setting. Step 3: Place the set screw #P3110 (5/16-18 x .5) in the same hole as the previous set screw from step 2, then use a 5/16 hex bit and torque wrench to secure it on top of #P3111 at 480 in/lbs (54 n/m) (Fig. 3). Step 4: Slide the lower foot crank into the hub so the desired hole placement on the rod aligns with the hole on the hub, then insert the set screw #P4394 (5/8-11 x .5 Socket) and use a 5/16 hex bit and torque wrench to tighten the set screw to 480 in/lbs (54 n/m) (Fig. 4). Fig. 3 Note: The wrench will click when it has reached the 480 in/lb (54 n/m) setting. Fig. 4 15 SCIFIT • Scientific Solutions for Fitness • SCIFIT • Scientific Solutions for Fitness • SCIFIT assembly Verify LWR Fixed Cranks Are Secure (CONT’D) Step 5: Take the second #P4394 (5/8-11 x .5) set screw and place it in the hub hole on the underside, then secure the set screw with a 5/16 hex bit and torque wrench set at 480 in/lbs (54 n/m) (Fig. 5). Step 6: Use a 5/32” (4mm) hex bit to secure the crank with a 1/4” flat washer (#10537-08370) and 1/4-20 x .5 socket cap screw (#94049) on each rod (Fig. 6). Fig. 5 Step 7: Repeat steps 1 thru 6 for the left side. Fig. 6 16 SCIFIT • Scientific Solutions for Fitness • SCIFIT • Scientific Solutions for Fitness • SCIFIT product overview PRO2 PRO1000 Console: Intelli-Fit Touchscreen Console Console: Intelli-Fit Touchscreen Console Upper Cranks: Adjustable or Fixed Upper Cranks: Adjustable or Fixed Lower Cranks: Adjustable or Fixed Molded Foot Rests: Yes, Removable Seat Assemblies: Adjustable, Fixed or Bariatric Seat Assemblies: Adjustable, Fixed or Bariatric Foot Pedal Assist: Adjustable Seat Assembly Only Foot Pedal Assist: Adjustable Seat Assembly Only Front End Transport Wheels: Yes Front End Transport Wheels: Yes Leveling Endcaps: Yes Leveling Endcaps: Yes Wheelchair Tie Down Anchors: Yes Wheelchair Tie Down Anchors: Yes 17 SCIFIT • Scientific Solutions for Fitness • SCIFIT • Scientific Solutions for Fitness • SCIFIT KEYPAD FUNCTIONS ATTENTION The tactile keys on the membrane switch are fully functional and may still be used for Data Entry, Workout selection, etc., if so chosen. Pause Clear Enter Quick Start WORKOUT SELECTION The operator can choose up to twelve different workouts. WARNING! Heart rate monitoring systems may be inaccurate. Over exercise may result in serious injury. If you feel faint or pain stop exercising immediately PAUSE/CLEAR This key pauses the workout at anytime. Three choices then become available: 1. Continue the workout 2. Change data entry information 3. Stop the workout QUICK START Begins a pre-programmed workout session. UP/DOWN ARROWS These keys increase or decrease values of workout parameters. SCIFIT • Scientific Solutions for Fitness • SCIFIT • Scientific Solutions for Fitness • SCIFIT ENTER This key confirms the operator’s category value selection in the data entry screen. 18 SCIFIT • Scientific Solutions for Fitness • SCIFIT • Scientific Solutions for Fitness • SCIFIT BIOMECHANICAL POSITIONING Swivel, Fixed Seat and Wheelchair Use Adjust the seat or wheelchair forward or backward to a comfortable location for the upper body movement. A slight torso rotation is desired on extension. Avoid locking arms at extension by adjusting the seat position or arm crank radius. Adjust the height of the cranks to a comfortable position that encourages proper posture or at the desired angle for specific training or rehabilitation movements. Such movements and adjustments should be under the guidance and supervision of a fitness or medical professional. If your PRO2 or PRO1000 features a seat with height adjustment, you may adjust either seat height to obtain the desired axis of rotation and body position. caution Always follow medical professionals guidelines to reduce the risk of personal injury. Failure to follow their directions may result in injury to yourself. Console Adjustment The console should be positioned so it is eye level or in direct line of sight of the user. The console can be repositioned by pushing backwards or pulling forward to the desired position (Fig. 1). Fig. 1 19 SCIFIT • Scientific Solutions for Fitness • SCIFIT • Scientific Solutions for Fitness • SCIFIT ADJUSTMENTS Crank Length Adjustment Adjust the foot and crank arm radius to a desired length. The longer the crank arm length the larger the circle the user will experience when exercising. Generally a larger circle will result in broader muscle recruitment and greater torso rotation. 8” Radius Comfort is a key issue and these guidelines may be helpful. Users Height: 5’ 6” and under = shortest crank settings 5’ 7” to 5’10” = middle crank settings 5’ 11” and taller = longest crank setting 2nd Hole Position Important Note: When using this product for medical or rehabilitation purpose, the crank radius, seat height and distance should be set by the attending therapist or medical professional based on the specific needs of the user. Fig. 4 7” Radius To adjust the crank arm position, pull outward on the yellow flanged spring loaded knob locking pin and align with the predrilled holes on the crank rod to a new position (Fig. 2 thru 6). 3rd Hole Position Fig. 5 6” Radius 4th Hole Position Fig. 2 Reversing The Crank For a Rowing Motion The upper crank arms can be easily adjusted to work in unison (rowing motion). 1. Remove the screws and washers from both ends of the right side crank. 2. Pull the yellow flange adjustment knob outward and remove the right crank. 3. Turn the crank upside down and reinsert it into the hub, then reinstall the screws and washers. 9” Radius 1st Hole Position Fig. 6 It is important to know that the rowing function can not work in conjunction with the lower body movement of the PRO2. Fig. 3 20 SCIFIT • Scientific Solutions for Fitness • SCIFIT • Scientific Solutions for Fitness • SCIFIT ADJUSTMENTS Foot Crank Adjustment Foot crank pedals can be adjusted to accommodate user height, achieve proper bio-mechanical positioning and work different muscle groups. To adjust foot crank position, pull outward on the yellow flange adjustment knob and move the foot crank to the desired hole position (Fig. 1 thru 4). 5.60” Radius Fig. 1 4.35” Radius 6.85” Radius 1st Hole Position Fig. 3 2nd Hole Position Fig. 2 3rd Hole Position 21 SCIFIT • Scientific Solutions for Fitness • SCIFIT • Scientific Solutions for Fitness • SCIFIT Fig. 4 ADJUSTMENTS Swivel Seat Assembly Adjustments Vertical Adjustment - Pull up on the yellow paddle shaped handle to raise or lower the seat. NOTE: No weight should be on the seat when raising. Horizontal Adjustment - The seat can be adjusted in 1” (25.4mm) increments and is held in place with a spring loaded adjustment pin. This is done by pulling upward on the T-handle yellow knob or stepping on the foot assist pedal, then slide the seat assembly forward or back to the desired position. PRO2 - Adjust the seat assembly so both the arms and legs have a slight bend at full extension. Pull up for vertical adjustment PRO1000 - Adjust the seat assembly so the arms have a slight bend at full extension. The feet can be located in the most comfortable area on the flat surface of the foot rest. Swivel Adjustment - Push down on the yellow paddle shaped handle to rotate the seat. The seat will lock into place at each 90 degree position. Yellow T-handle Foot Assist Push down to rotate seat 22 SCIFIT • Scientific Solutions for Fitness • SCIFIT • Scientific Solutions for Fitness • SCIFIT HEART RATE TRANSMITTER STRAP Calculating Target Heart Rate Zone Your approximate Maximum Heart Rate (MHR) is equal to 220 minus your age. The upper limit of your target zone is equal to 0.85 times your MHR. The lower limit of your target zone is equal to 0.60 times your MHR. Heart Rate Transmitter Strap The optional wireless heart rate transmitter accessory is a useful device if you desire continuous feedback on your current heart rate during a workout. In addition the PRO1 includes a heart rate control program which requires use of the strap. For Example: Your age is 40: 220 - 40 = 180 180 x .85 = 153 (max MHR) 180 x .60 = 108 (min MHR) The heart rate control programs enables the user to setup a target heart rate. Through real-time monitoring of the user’s heart rate, the console maintains the user’s heart rate at or below this established target rate by decreasing the workload if the user’s heart rate exceeds the target. These values are based upon averages, always consult your physician to establish the proper heart rate zone for your individual health condition. Activating & Deactivating Transmitter Heart rate transmitter straps come in a variety of styles and manufacturers. To properly activate, secure strap to the chest and to deactivate follow the instructions that come with the transmitter strap. Note: The heart rate program will maintain your HR within a 10 BPM range of your set target. This variable may depend upon maintaining a constant RPM (Cadence). caution Always follow manufacturers instructions for proper care and use. Failure to follow manufacturers instructions may result in injury to yourself. warning Heart Rate monitoring systems may be inaccurate. If you feel faint, stop exercising immediately. Over exercising may result in serious injury or death. 23 SCIFIT • Scientific Solutions for Fitness • SCIFIT • Scientific Solutions for Fitness • SCIFIT PROGRAM INSTRUCTIONS Programs SCIFIT products have 200 levels of computer controlled resistance, which ensures that users of all fitness levels will be able to get a challenging but not overwhelming workout. Because the resistance is adjustable in .1 increments, it is easy for the user to track progress. SCIFIT products feature one of the highest resistance capabilities available on any cardio equipment. The PRO2/PRO1000 are self-generated and has an extremely low starting resistance. One pedal movement activates the console and the screen will remain lit at the most minimal levels of movement. When a workout program has been selected, the console will then advance to the “Data Entry” mode where additional information is entered prior to the workout commencing. The user will have two options of entering data as each category is displayed on the screen. A. Using the numerical touchscreen keypad (No. #1). Note: The “Delete” key will remove the last digit entered from the keypad (right to left). The “Back” key will return you to the previous screen The PRO2/PRO1000 have a battery back up which will keep the screen lit for a short period after the workout is completed or if the user stops. This varies between 0 seconds and 3 minutes and can change with the amount of use each product gets. B. Using the “+” or “-” arrow keys (No. #2). C. When the correct information has been entered, touching the “Accept” button will save the data and advance to the next category or begin the workout if it is the last category (No. #3). If you prefer the console to remain lit at all times, an optional AC adapter can be plugged into the machine to accomplish this. This is common in medical settings and with Fit-Key Programs. (#2) Touchscreen Touchscreen allows the user to select any program or key feature on the console with just a finger tip touch of the screen. The PRO2/PRO1000 offer workout program options that can be selected from the touchscreen display (Menu screen example shown below). Six programs are shown on the screen at one time, additional programs can also be viewed by touching the “More” key on the screen. (#1) (#2) (#3) 24 SCIFIT • Scientific Solutions for Fitness • SCIFIT • Scientific Solutions for Fitness • SCIFIT PROGRAM INSTRUCTIONS Programs The PRO2/PRO1000 machines offer twelve workout programs (Not including Quick Start). The following is a summary. Using the data entry options described on page 24: Enter the workout duration: Quick Start Allows the user to get on the machine and go. Touching the “Quick Start” key at the main screen begins a workout with no set time limit. The intensity level can be changed by pressing the “Menu” key on the screen to view additional key features. Touch the Time 15:00 key. Touch the Select the level intensity: Changing The Intensity Level: Touch the key. key. Level 1.0 Additional key features will appear at the bottom of the screen. Touch the Touching the “Increase or Decrease” keys will change the workout intensity level. key. Enter the user weight: Manual Workout Allows the user to set the intensity at any level. This level will not change unless the user manually increases or decreases the intensity. Weight 150 Touch the key. Touch the and begin the workout. 25 SCIFIT • Scientific Solutions for Fitness • SCIFIT • Scientific Solutions for Fitness • SCIFIT key PROGRAM INSTRUCTIONS Constant Work Workout resistance is automatically adjusted to compensate for any change in speed (RPM), thus the amount of work will remain constant at any given (Watts) setting. Enter the user weight: Weight Touch the 150 key. Enter the workout duration: key. Touch the and begin the workout. Time 15:00 Touch the ISO-Strength Program ISO-Strength is a isokenitic program, meaning that the unit will resist your movements in order to force you to stay at a set speed. This type of strength workout will not cause excessive soreness. The console will adjust resistance to keep the user at the target RPM speed. key. Touch the Enter the target watts: key. Enter the workout duration: Target 20 Time 5:00 Touch the key. Touch the 26 SCIFIT • Scientific Solutions for Fitness • SCIFIT • Scientific Solutions for Fitness • SCIFIT key. PROGRAM INSTRUCTIONS ISO-Strength Cont’d Enter the target RPM: Select the course profile: Target 60 Course key. Touch the Touch the Enter user weight: key. Enter the workout duration: Weight Time 150 15:00 key. Touch the Touch the and begin the workout. key. Select the level intensity: Hills Program Allows the user to select from seven different Hill profiles set at various pre-programmed intensities. The following profiles are available: Course, Sprints, Twin Peaks, Peak, Progressive, Multi-Peaks and Ramp. Touch the Level 1.0 key. Touch the 27 SCIFIT • Scientific Solutions for Fitness • SCIFIT • Scientific Solutions for Fitness • SCIFIT key. PROGRAM INSTRUCTIONS Enter the user weight: If the signal continues to be undetected the program will exit and return to the main screen. Weight 150 Touch the key. Enter the workout duration: Touch the key. and begin the workout. Time 15:00 Heart Rate Program A heart rate transmitter chest strap is required for this program. Refer to page 23 for a complete instruction on using the strap and to understand how to calculate your target heart rate. • Place the transmitter strap on your chest Touch the key. Enter the target heart rate: ATTENTION Target 120 If you are not wearing a transmitter belt or the belt is not sending a signal correctly, after a short period of time the following message will appear. Touch the 28 SCIFIT • Scientific Solutions for Fitness • SCIFIT • Scientific Solutions for Fitness • SCIFIT key. PROGRAM INSTRUCTIONS Heart Rate Cont’d More Pressing this key will change the screen to show an additional six more pre-programmed workouts. Enter the user weight: Weight 150 Touch the key. Touch the and begin the workout. Random Program This program randomly displays different workout profiles each with its own level of difficulty. The user only has to choose the type of profile, length of workout time and the level difficulty. Fit Quik Allows the user to select a two stage program of cardiovascular work with ISO-strength (Isokinetic). Work loads and time durations are preset within the Set-Up mode. The following category is only seen when Manual, Hills or Constant Work is selected in the “Set-up mode”. R Touch the key. Note: The highest column of the profile represents the highest workout level you selected. Columns below it are percentages of the level selected. Touch the key. key. Select the course profile: Enter the user weight: Weight 150 Touch the Random key. Touch the and begin the workout. 29 SCIFIT • Scientific Solutions for Fitness • SCIFIT • Scientific Solutions for Fitness • SCIFIT key. PROGRAM INSTRUCTIONS Random Cont’d Stress Test A designed stress test to be used as a training program or use with other diagnostic devices (if applicable). The user sets a target wattage with timed intervals and preset wattage increments. Enter the workout duration: Time 15:00 Touch the Touch the key. Enter the wattage target for the initial step: Select the level intensity: First Target Level 50 1.0 Touch the key. key. Touch the Enter the user weight: key. Enter the wattage increments of change for the next steps: Weight 150 Touch the Increments 5 key. Touch the and begin the workout. 30 SCIFIT • Scientific Solutions for Fitness • SCIFIT • Scientific Solutions for Fitness • SCIFIT key. PROGRAM INSTRUCTIONS Stress Test Cont’d Power Fit Test This test is based on a pre-programmed workout designed to evaluate your “Power Drop %”, which gives a fitness indication of power and strength using wattage as the main measurement. Enter the time of intervals at each step : Interval 5:00 Touch the key. and begin the workout. Touch the Power Fit Training Specifically designed preset wattage training programs based off the user’s “Power Fit” test evaluation. Three programs and four levels (Beginner, Intermediate, Advanced and Sport performance) are available. key. Enter the user weight: Weight 150 Touch the key. Select 1 of 3 programs (3 being the most difficult): Touch the key. and begin the workout. Program 1 Touch the 31 SCIFIT • Scientific Solutions for Fitness • SCIFIT • Scientific Solutions for Fitness • SCIFIT key. PROGRAM INSTRUCTIONS Power Fit Training Cont’d Enter 1 of 4 the intensity levels (4 being the most difficult): ATTENTION If you are not wearing a transmitter belt or the belt is not sending a signal correctly, after a short period of time the following message will appear. Level Beginner Touch the Enter 1 of 4 the intensity levels (4 being the most difficult): key. Enter the user weight: Level Beginner Weight 150 Touch the Touch the key. Enter the user weight: key. and begin the workout. Weight Heart Fit Test This program is based on a pre-programmed workout designed to evaluate your heart rate recovery. The user can select from 1 to 4 levels (Beginner, Intermediate, Advanced and Sports Performance). Touch the 150 Touch the key. and begin the workout. 32 SCIFIT • Scientific Solutions for Fitness • SCIFIT • Scientific Solutions for Fitness • SCIFIT key. PROGRAM INSTRUCTIONS Heart Fit Training. Designed training programs based on the user’s evaluated Heart Fit test. A training schedule with retesting is recommended. The user has three programs and four levels (Beginner, Intermediate, Advanced and Sports performance) to choose from. Enter 1 of 4 the intensity levels (4 being the most difficult): Level Beginner Touch the key. Touch the ATTENTION If you are not wearing a transmitter belt or the belt is not sending a signal correctly, after a short period of time the following message will appear. key. Enter the user weight: Weight 150 Select 1 of 3 programs (3 being the most difficult): Touch the and begin the workout. Program 1 Touch the key. 33 SCIFIT • Scientific Solutions for Fitness • SCIFIT • Scientific Solutions for Fitness • SCIFIT key. ADDITIONAL KEY FEATURES This activates two 3-speed cooling fans (Low, Medium, High) at anytime during the workout. Each touch of the key will change the fan airflow speed. The SCIFIT touchscreen console also includes extra user friendly key features that may be accessed during a workout. Once a workout commences, the word “Menu” will appear in the lower right corner of the screen. This feature increases resistance for a short duration of time during the workout when activated. Touching this key will activate the feature and a short count down will be seen on the screen to prepare the user. The duration length of the “Power Burst” can be increased or decreased in the “Set-up” mode. Just a touch of the “Menu” icon activates a pop-up menu that appears at the bottom of the screen for additional selections. Touch the key. Only seen when the “Random” program is selected. It allows the user to change the current workout profile at the bottom of the screen to a different one by touching the “Change Profile” key anytime during the workout. Pop-up menu with additional key features appear. Key Descriptions Allows the user to change the viewing format of the workout profile and data displayed on the screen during the workout. Allows the user to change the intensity of the workout. Pauses the workout program at anytime. The screen then changes providing the user with three options as shown below. Change Returns to the data entry screen where the information previously entered can be changed. Continue Restarts the workout program at the point where the user had paused it. Stop Exits the workout and returns to the main screen. 34 SCIFIT • Scientific Solutions for Fitness • SCIFIT • Scientific Solutions for Fitness • SCIFIT MAINTENANCE & SERVICE Maintenance The PRO2 and PRO1000 are virtually maintenance free. After training, always wipe down your SCIFIT exercise product. Perspiration that continuously settles on the frame, upholstery, casings, and control console may eventually cause rust or damage. Damage resulting from lack of maintenance is not covered under warranty. UNITED STATES CUSTOMER SERVICE For assistance in the service of SCIFIT products; phone : +1 (918) 359-2000 fax : +1 (918) 359-2045 e-mail: [email protected] The Product Support department is available by means of email. A voice mail service is available 24 hours a day for recording messages to request technical support and to order replacement parts. Our mailing address is: If defective components are identified and require replacement, the equipment should be put out of service until repaired. SCIFIT Systems Inc. 5151 S. 110th E. Ave. Tulsa, OK 74146 USA caution Always follow manufacturers instructions for proper care and use. Failure to follow manufacturers instructions may result in injury to yourself. UK & EUROPEAN CUSTOMER SERVICE PRO2/PRO1000 Maintenance Schedule phone : +44 1344 300022 fax: +44 1344 868838 e-mail: [email protected] Any mechanical or electrical work conducted within the main body of a medical CE class IIa unit MUST BE RECALIBRATED. The generic maintenance schedule below should be applied to medical CE and non-medical CE products COMPONENT Covers, Seat, Handlebars USE WHEN SCIFIT LTD (UK) Lexham House Forest Road Binfield Berkshire, RG42 4HP UK BY WHOM Damp Cloth Daily Club Maintenance LCD TV Screen Weekly Club Maintenance Every 6 Months Club Maintenance Chain Lubricant Tighten When Bimonthly Club Maintenance Damp Cloth Monthly Club Maintenance Voltmeter Every 6 Months Club Maintenance and Console LCD Screen Company Number: 5970624 (UK) soft cleaning cloth Chains Lightly Applied Nuts and Bolts *COUNTRIES OUTSIDE OF UK & EUROPE PLEASE USE USA CONTACT NUMBERS* Necessary Base Roller Guide Track Battery CAUTION Contact your local waste management agency for specific requirements concerning recycling and disposal locations of batteries. Order online 24/ 7 at www.SCIFIT.com 35 SCIFIT • Scientific Solutions for Fitness • SCIFIT • Scientific Solutions for Fitness • SCIFIT WARRANTY It is very important that your SCIFIT machine is registered. This can be done online at http:/www.SCIFIT.com/warrantyregistration.shtml/ or fill out and mail the registration form on the back of this manual. SCIFIT Statement of Warranty SCIFIT warranties new products against defective workmanship and/or materials under normal and proper use subject to the following limitations: (a) SCIFIT’s obligation to the original purchaser shall apply within the United States and Canada to both parts and the cost of labor required to replace or repair a defective product, at SCIFIT’s option, for a period of one (1) year from user/dealer purchase date as documented by *warranty card and if warranty card has not been returned by user/dealer, then date of shipment from the factory. Thereafter, for a period of two (2) years, such obligation shall extend only to the supply of replacement parts with any labor costs associated with such replacement or repair to be at buyer’s expense. Refer to clause (e) for components outside this policy clause. Outside the United States and Canada SCIFIT will repair or replace defective product with no labor included for a period of three (3) years from user purchase date as documented by *warranty card and if warranty card has not been returned by user then date of shipment from factory. However these warranty periods for sales outside the United States and Canada are subject to modification by local SCIFIT sales dealers. *Note: Original purchaser must register their purchased products either by warranty card return, web site registration or fax to activate warranty period or shipment date is extant for start of warranty period. A ninety (90) day period is to be given for warranty registration to allow stock rotation and showroom stock thereafter registration will be shipment date for the start of the warranty period. (b) SCIFIT’s obligation shall be limited to repairing or replacing defective parts. No allowance shall be granted for repairs made by Buyer without SCIFIT’s prior written approval. The decision to replace or repair shall be solely at SCIFIT’s discretion. SCIFIT reserves the right to require return of warranty parts, or payment, in some cases. See “Return of Parts” below. (c) SCIFIT’s warranty does not apply to parts requiring replacement or repair due to normal and abnormal wear and tear, improper use, corrosion (perspiration), improper maintenance, improper installation, improper rated, grounded or dedicated electrical circuits or improper storage, nor it apply where all or part of the product has been altered from its original state by Buyer or a third party. (d) THIS WARRANTY IS IN LIEU OF ALL OTHER WARRANTIES, EXPRESSED OR IMPLIED, ARISING BY LAW OR OTHERWISE INCLUDING WARRANTY OR MERCHANTABILITY OF FITNESS FOR PARTICULAR PURPOSE, AND IS IN LIEU OF ALL OTHER LIABILITIES OF SCIFIT INCLUDING DIRECT, INDIRECT, SPECIAL AND CONSEQUENTIAL DAMAGES OR PENALTIES EXPRESSED OR IMPLIED WHETHER ARISING OUT OF CONTRACT, NEGLIGENCE OR OTHER SORT. 36 SCIFIT • Scientific Solutions for Fitness • SCIFIT • Scientific Solutions for Fitness • SCIFIT WARRANTY SCIFIT STATEMENT OF WARRANTY (e) The below listed items have the following warranty coverage unless determined to be defective. These items include, but are not limited to: Treadmill AC5000/AC5000M DC1000 (6hr. per day usage) Warranty Period Treadmill belts 12 months Treadmill decks 12 months Treadmill structure & frame 5 years Treadmill drive system inclusive of motor & inverter 5 years Treadmill handrails & handles 3 years Treadmill heart rate grips 12 months Treadmill water bottle holders 90 days Treadmill trays 90 days Rotary Products Warranty Period Upholstery 12 months Saddles/seats 12 months Rotary pedals 12 months Rubber grips 12 months Heart rate grips 12 months Rotary structure & Frame 5 years Rubber foot pads (BioFlex) 12 months Rotary water bottle holders 90 days Rotary trays Battery 90 days 1 year Accessories Products Warranty Period Pedal straps Normal wear & tear Heart rate receiver/transmitter 90 days Low support boots 12 months High support boots 12 months Assist gloves 90 days USB keys and Lanyards 90 days (f) Fires, floods, and acts of God, are not covered under this warranty. 37 SCIFIT • Scientific Solutions for Fitness • SCIFIT • Scientific Solutions for Fitness • SCIFIT WARRANTY Freight and Shipping All SCIFIT products have displayed on the outside packaging “STOP – UPON DELIVERY INSPECT MERCHANDISE THOROUGHLY NOTING ANY DAMAGE ON RECEIVING PAPERWORK PRIOR TO SIGNING”. .............................................................................. Shipping and Installation SCIFIT is not responsible for the repair or replacement of any unit or part damaged during transit or installation. The customer is responsible for inspection of each unit and part for shipping damage at the time of installation. If the customer signs an unqualified receipt for freight or damage goods, the customer is solely responsible for the cost of the repair or replacement for such freight damage. .............................................................................. Software, Trademarks, Copyrights and Patents If an order includes computer software, such software is transferred by SCIFIT to the customer pursuant to a single user license, the royalty terms and conditions of that are set forth on or in the package accompanying the software. SCIFIT has trademarked several names to uniquely identify its business and products. These names must not be used by other entities and remain the exclusive right of SCIFIT. SCIFIT’s decals, user manuals, and service manuals are copyrighted and may not be copied without prior written approval from SCIFIT. SCIFIT owns patents on designs and features that are unique to its products. SCIFIT will defend these patents against those who attempt to utilize these features and designs in other products. 38 SCIFIT • Scientific Solutions for Fitness • SCIFIT • Scientific Solutions for Fitness • SCIFIT WARRANTY Maintenance After using, always wipe down your SCIFIT exercise product. Perspiration that continuously settles on frame, upholstery, casings and control panels may eventually cause rust or damage. Damage resulting from lack of maintenance WILL NOT be covered under warranty. To clean upholstery, use mild soap and warm water, then dry with a clean towel. Refer to the machine maintenance schedule. .............................................................................. Product Support Assistance for the service of SCIFIT products is available by • • • • Fax: +1 (918) 359-2045 Phone: +1 (918) 359-2040 Toll Free: +1 (800) 745-1373 Email: [email protected] The product support department is staffed from 7 AM to 5 PM US Central Time Monday through Friday. A voicemail service is available 24 hours daily for recording messages to request technical support and to order replacement parts. Our goal is to return every voicemail call within 30 minutes of when it is placed during our normal business hours. Some parts may be ordered online using a credit card at: www.SCIFIT.com Please have the following information prior to calling technical support: • Model number of equipment • Serial number of equipment • Point of contact name and phone number • Detailed description of symptoms encountered. .............................................................................. Parts Shipment During the first 30 days warranty parts will be shipped via overnight delivery. Determination must be made before 2:00 PM US Central Time on any given weekday for next day delivery. During the remainder of the first year warranty period, parts requirements will be filled via ground shipment. The customer will have the option to request overnight or 2nd day parts shipping, but will be charged the difference between the ground shipment cost and the overnight or 2nd day cost. 39 SCIFIT • Scientific Solutions for Fitness • SCIFIT • Scientific Solutions for Fitness • SCIFIT WARRANTY Return of Parts SCIFIT is committed to continual improvement in the equipment we market. In order to meet this commitment, the rapid return of defective parts is essential. The examination of the parts by our engineering department leads to changes that insure the same problem does not re-occur. Thank you in advance for your assistance! When requested by SCIFIT, defective parts must be returned to the SCIFIT factory within 20 days of receipt of replacement part. SCIFIT reserves the right to invoice buyer and collect for parts where SCIFIT has requested the parts be returned and buyer has refused to do so. Please follow these three easy steps for returning parts. Step 1 Keep the box and packing material in which the new parts arrived. Step 2 A prepaid return label will be in the parts box for only those parts that need to be returned. If no prepaid return label is enclosed contact SCIFIT product support at • • • Phone: +1 (918) 359 - 2040 Toll Free: +1 (800) 745 -1373 Email: [email protected] When ALL of the parts are received and inspected at the factory, a credit will be issued for the original parts invoiced. Attention service companies – Labor invoices will NOT be paid until the defective parts are returned to the factory. Step 3 Wrap the defective part, place it in the box and affix the return label for a safe return. ....................................................................... Service Labor Where applicable, the SCIFIT product support personnel will arrange a local field service technician to provide field support. Every effort will be made to schedule service during 48 business hours (8 hours per business day) following notification of a problem or as soon as repair parts are available to the field service technician. Where possible, parts will be supplied in advance of the field service technicians so that the product is repaired with one call. ....................................................................... Purchased Parts All purchased parts will carry a 12 month warranty. Refer to purchased parts shipments and installation for more information. . This Limited Commercial Warranty supersedes the Limited Commercial Warranty printed in the “Owner’s Operation Manual” for all SCIFIT Systems, Inc. products. If you have questions or require additional information, please contact SCIFIT Systems, Inc. at: • • • Phone: +1 (918) 359 - 2040 Toll Free: +1 (800) 745 - 1373 Email: [email protected] 40 SCIFIT • Scientific Solutions for Fitness • SCIFIT • Scientific Solutions for Fitness • SCIFIT CERTIFICATIONS DECLARATION OF CONFORMITY Address: DECLARATION OF CONFORMITY SCIFIT Ltd (UK) Lexham House, Forest Road Binfield, Berkshire, RG42 4HP United Kingdom Address: SCIFIT Ltd (UK) Lexham House, Forest Road Binfield, Berkshire, RG42 4HP United Kingdom EU Support: +44 1344 300022 Email: [email protected] Web: www.scifit.uk.com EU Support: +44 1344 300022 Email: [email protected] Web: www.scifit.uk.com Manufacturer: SCIFIT Ltd (UK) Manufacturer: SCIFIT Ltd (UK) Product: Product: PRO2 Arm and Leg cycle Class A (high accuracy class) per EN957-1:2005 Class S (commercial use class) per EN957-1:2005 PRO1000 Arm cycle Class A (high accuracy class) per EN957-1:2005 Class S (commercial use class) per EN957-1:2005 We, SCIFIT Systems, Inc., hereby declare that the product listed above is in conformity with the following standards and/or normative documents: We, SCIFIT Systems, Inc., hereby declare that the product listed above is in conformity with the following standards and/or normative documents: ISO 9001:2008 EN 957-1:2005 EN 957-5:2009 EN 60601-1-2:2006 EN 60601-1: A1 1993. A2 1995 ISO 9001:2008 EN 957-1:2005 EN 957-5:2009 EN 60601-1-2:2006 EN 60601-1: A1 1993. A2 1995 Steve Wright European Business Development Director January 4, 2012 Steve Wright European Business Development Director January 4, 2012 0434 DECLARATION OF CONFORMITY Address: SCIFIT Ltd (UK) Lexham House, Forest Road Binfield, Berkshire, RG42 4HP United Kingdom If your PRO2 machine has CE on the label followed by “0434”, it is a medical machine. The label will be located at the front of the machine next to the serial number. EU Support: +44 1344 300022 Email: [email protected] Web: www.scifit.uk.com Manufacture: Product: SCIFIT Ltd (UK) PRO2 – Total Body Exerciser Class IIa device per rule 10 of Annex IX of 93/42/EEC. Class A (high accuracy class) per EN957-1:2005 Class S (commercial use class) per EN957-1:2005 We, SCIFIT Systems, Inc., hereby declare that the product listed above is in conformity with the essential requirements of the EC Council Directive 93/42 EEC Medical Device Directive, as amended by 2007/47/EC and is in conformity with the following standards and/or normative documents: ISO 13485:2003 ISO 9001:2008 EN 957-1:2005 EN 957-5:2009 EN 60601-1-2:2006 EN 60601-1: A1 1993. A2 1995 Steve Wright UK Managing Director 17 January, 2012 41 SCIFIT • Scientific Solutions for Fitness • SCIFIT • Scientific Solutions for Fitness • SCIFIT CERTIFICATIONS 42 SCIFIT • Scientific Solutions for Fitness • SCIFIT • Scientific Solutions for Fitness • SCIFIT 43 SCIFIT SCIFIT SCIFIT SCIFIT Serial Number Business Phone (_____) Comment www.SCIFIT.com Thank You For Choosing P2278 Rev. B Referred by SCIFIT User Saw at ____________________ Tradeshow Other Introduced by SCIFIT Dealer Saw in ______________________ Magazine Please Check the appropriate box(s) on how you were introduced to SCIFIT: ____Features____Quality____Price____Dealer___User Friendly___Appearance Please rank the following reasons (1 through 6) for selecting SCIFIT with 1 being most important: City/State Entity Purchased From Date Received Model Purchased Home Phone (____) City/State/Zip Address Contact Name Company Name Register online at http://www.SCIFIT.com/warrantyregistration.shtml or complete this form, fold it and return it to SCIFIT. We request you send this card within 2 weeks after your equipment has been delivered to insure proper warranty registration. SCIFIT® Warranty Card From SCIFIT 5151 South 110th East Avenue Tulsa, OK 74146 Important: Please keep this page for “Recalibration records” Model Number: Serial Number: Date of Purchase: Calibration Date Medical Units: Supplied By: SCIFIT Systems Inc. User Manual: #A5602A (7/2013) club or DATE certification location tech certified service company 1st Recalibration 2nd Recalibration 3rd Recalibration 4th Recalibration 5th Recalibration Please make extra blank copies for future use initials Order online 24/7 at www.SCIFIT.com