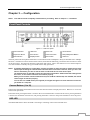
1
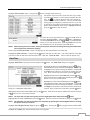
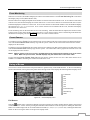
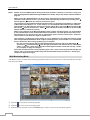
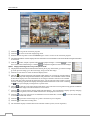
16-Channel Digital Video Recorder
Panic
Selecting
Selecting
(Panic) in the Live Monitoring menu starts panic recording of all cameras, and displays
again stops panic recording. It is the same as pressing the PANIC button.
on the screen.
Setup
Selecting
(Setup) in the Live Monitoring menu enters the Main Setup screen. Refer to Chapter 3 ─ Configuration
for detailed descriptions of system setup.
Search Mode
(Search Mode) in the Live Monitoring menu exits the live monitoring mode and enters the search mode.
Selecting
It is the same as pressing the SEARCH button.
Login/Logout
(Login) in the Live Monitoring menu accesses the Login screen, and you will be asked to select a User
Selecting
and enter the password to log into the system. Selecting
(Logout) in the Live Monitoring menu displays the Logout
screen asking you to confirm whether or not you want to log out the current user.
Active Cameo Mode
You can enter the Active Cameo mode by selecting Edit Group in the menu displayed when clicking the right mouse
button or pressing and holding the MENU button for three seconds or longer in any multi-view format. The yellow outline
surrounding the video indicates the active cameo, and pressing the arrow buttons moves the active cameo. Selecting
Exit Group Edit in the menu displayed when clicking the right mouse button in any multi-view format, or pressing the
(Play/Pause) button exits the Active Cameo mode. Selecting Exit Group Edit in the cameo menu displayed when
pressing the MENU button also exits the Active Cameo mode. The active cameo mode will remains in effect for 15
seconds if there is no further operation.
In active cameo mode, press the button for the camera you want to display in the active cameo. After setting the camera
number to active cameo, the DVR moves the active cameo to the next cameo. When the camera number exists on the
current screen, the active cameo is changed with the existing camera number. When the camera number does not exist
on the current screen, the active cameo is replaced by the camera number. You can change the screen layout in this way.
Zoom Mode
You can enlarge an area of the video by pressing the ZOOM button. For a few seconds after pressing the ZOOM button,
a rectangle displays on the screen. A rectangle shows the area that will be enlarged. You can move the rectangle around
using the arrow buttons. Pressing the (Play/Pause) button in the Zoom mode enlarges the area in rectangle. Exit
the Zoom mode by pressing the ZOOM button. While in the Zoom mode, the icon displays if Zoom is selected in
the Display setup screen (OSD tab).
PTZ Mode
If a user who has PTZ Control authority logs into the system, the user can control PTZ cameras. The DVR will control
cameras with Pan, Tilt and Zoom capabilities. Press and hold the PTZ button for three seconds or longer to display
the PTZ camera menu and enter the PTZ mode, and press the button again to exit the PTZ mode.
Select the PTZ camera you wish to control by selecting it from the menu. The icon
screen.
displays on the PTZ camera
47