1
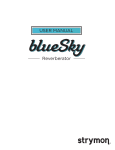
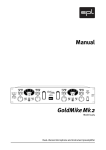
USER MANUAL
®
Deco - Tape Saturation & Doubletracker User Manual
®
Front Panel
SATURATION
BLEND
LAG TIME
Sets the amount of tape
drive by adjusting the
preamp gain. At low
levels, a subtle harmonic
enhancement occurs,
increasing the dynamic
compression and
distortion as the knob is
turned up.
Sets the relative mix level of the
two tape decks.Turn lower to
blend in more of the Reference
Deck, which can serve to tame
your doubletracking effect. Turn
higher to blend in more of the
delayed Lag Deck. At 12:00, both
decks are equally mixed to the
output.
Sets the delay offset between
the Reference Deck and the
delayed Lag Deck, creating a full
range of doubletracking tape
effects. Transition from tape
flange on the first half of the
knob, to tape chorus, slapback,
and then tape echo with a
maximum 500mS delay.
Tape Chorus
Slapback
Tape Flange
Tape Echo
LAG TIME
VOLUME
WOBBLE
Controls the output
volume of the Saturation.
Adds a random speed
modulation element to the
delayed Lag Deck. At lower
settings, the variations are
mild, covering the speed
changes that a recording
engineer might use to create
time-varying flange effects. At
higher settings the variations
become more extreme.
BLEND TYPE
Achieve subtle differences
in tonality and low-end by
adjusting internal phase
and routing.
Sum - Decks are in phase.
Invert - The Lag Deck is
phase-inverted.
Bounce - Right channel
of the Lag Deck is phaseinverted and bounced
to the left channel input
creating a ping-pong-like
stereo effect, or a doublerepeat effect when using a
mono output.
Engages and
bypasses Deco’s
Tape Saturation
effect.
Engages and
bypasses Deco’s
Doubletracker
effect. Press and
hold to engage the
instant Auto-Flange
feature.
See page 10 for indepth explanation of the
Auto-Flange feature.
pg 2
Deco - Tape Saturation & Doubletracker User Manual
®
Secondary Functions
HIGH TRIM
Controls a shelving
filter for subtle high
frequency tailoring.
Full bandwidth at
minimum setting.
DOUBLETRACKER
BOOST/CUT
Boosts or cuts the
Doubletracker effect by up to
3dB to allow for precise level
matching. Full boost at max,
unity gain at 12:00.
AUTO-FLANGE TIME
Sets the sweep time for the
press-and-hold Auto-Flange
feature. Low settings are faster,
and higher settings are slower.
See page 10 for in-depth explanation
of the Auto-Flange feature.
WIDE STEREO MODE
Generates a wide stereo
image. Turn past 12:00 to send
the Reference Deck to the Left
Out and the delayed Lag Deck
to the Right Out. Disable by
turning to left of 12:00. The
Blend control then acts as a
Pan control by adjusting the
relative levels of the decks.
Automatically disabled with
mono output. If the input is
stereo it is summed to mono.
LOW TRIM
Controls a high pass
filter for subtle low
frequency tailoring.
Full bandwidth at
minimum setting.
OFF
ON
Press and hold both footswitches
simultaneously while turning the desired knob
to access the secondary functions.
pg 3
Deco - Tape Saturation & Doubletracker User Manual
®
Tape Chorus
Lag Time Ranges
Slapback
Tape Flange
Tape Echo
LAG TIME
TAPE FLANGE
-.3 to 3 ms
• Set the Blend to 50/50 (12:00) for the most pronounced flange effects.
Very short Lag times produce
a moving comb-filter/flange
effect that goes ‘throughzero’ when the lag time is
set less than zero. A static
filter effect is achieved when
the Wobble is turned to
minimum.
• Through-zero effects are more intense when using distorted guitars or high-bandwith
input signals. Add some Saturation to enhance a clean guitar input. Experiment with the
difference between Sum and Invert modes in this area for very different experiences.
• For an inverted flange that doesn’t cancel completely, try setting the Blend lower than
12:00 to favor the Reference Deck, or turn the Lag Time to around 10:00 so the delayed
Lag Deck doesn’t cross through zero.
• Try minimum Lag Time and set Blend to maximum (no reference deck mixed in) for a
random vibrato when Wobble is at maximum.
TAPE CHORUS
3 to 50 ms
Longer Lag times result in a
thicker sound as if there are
two performers playing the
same part. Increasing the
Wobble control adds more
movement and separation
between the two decks.
• For a more subtle effect, reduce the Blend knob to favor the Reference Deck.
• Changing from Sum to Invert mode will change the response of the low frequencies
for another tonal possibility.
• Increase Lag Time to get a wider chorus sound.
SLAPBACK
50 to 150 ms
First heard in the rock ‘n roll
records of the ‘50s, slapback
echo produces the sound of a
performance in a large space
where the echo is reflecting
back from an opposing wall.
• With the Blend past 12:00, the slap can be louder than the input. Try this with shorter
slap times.
• Try slap echoes with the Blend Type in the Invert position. This represents a true
physical reflection where the sound waves invert as they bounce off a wall. It can add a
‘3D’ feel. Add some mild modulation to create subtle movement in the echo sound.
• Try Bounce mode for a thicker slap that has two distinct repeats.
TAPE ECHO
150 to 500 ms
Longer Lag times can create
delays suitable for soloing
or adding some ambience
or rhythmic effects to your
playing.
• Try lower Blend settings for a distant echo effect. Add some Wobble for a random
modulation-delay effect.
• Bounce mode will create two repeats to further fill out the soundfield.
pg 4
Deco - Tape Saturation & Doubletracker User Manual
®
Saturation Ranges
The Saturation knob allows for a wide range of input signals to provide
a nicely saturated tape effect. The overall range of Tape Saturation is rig
dependant. Depending on your application and your input signal level, the
affect of the tape saturation will vary. Below are some general guidelines.
INSTRUMENT LEVELS - LOWER OUTPUT
When using Deco in front of an amp, lower output single coil guitar pickups
will experience a rich harmonic enhancement and a lighter overdrive effect.
Subtle
Tape Saturation
& Compression
Upper Limits of
the Tape Machine
Transparent
Tape Overdrive
SATURATION
INSTRUMENT LEVELS - HIGHER OUTPUT
When using Deco in front of an amp, higher output humbucker pickups
will experience heavier overdriven harmonics when the Saturation knob is
turned to maximum.
Upper Limits of
the Tape Machine
Subtle
Tape Saturation
& Compression
Transparent
Tape Overdrive
SATURATION
LINE LEVELS
Deco accepts up to +8dBu of input signal. When using Deco in a hot effects
loop of a guitar amp, or when driving Deco with a hot output from a synth
or mixer insert, turn on Studio Mode (see page 9 for details).
pg 5
Deco - Tape Saturation & Doubletracker User Manual
®
Rear Panel
INPUT
EXP
LEFT OUT
RIGHT OUT
9VDC
+
-
INPUT
STEREO OUTPUTS
POWER
High impedance input.
Default configuration is
mono input. Can be used
as TRS stereo input by
flipping internal jumper
switch.
Use LEFT OUT for mono signal
output. If using Wide Stereo
Mode, left out is the Reference
Deck, right out is the Lag Deck.
Maximum 9 volts DC center
negative, with a minimum of
250mA current.
See page 10 for TRS stereo
input information.
OR
TRS
®
TAP / FAVORITE SWITCH
EXPRESSION PEDAL
Connect an standard
TRS expression pedal for
continuous control over any
one knob with your foot.
Connect an external tap switch to tap in your
Lag Time. Tapping quarter notes sets the
Lag Time to 8th notes. Or plug in a Favorite
switch to save and recall a favorite preset.
See page 7 for EXP jack setup.
See page 7 for EXP jack setup.
pg 6
Deco - Tape Saturation & Doubletracker User Manual
®
Expression Input Modes
The EXP jack on your Deco is set up for Expression Pedal from the factory.
To change the Expression Input mode, hold down both Saturation Bypass
and Doubletracker Bypass switches while powering up. While holding
down, turn the Saturation knob to one of three ranges shown below.
EXPRESSION PEDAL
Set to Expression pedal mode
and connect a standard TRS
expression pedal for control over
any knob.
To assign the knob controlled
by the expression pedal: Power
down your pedal. Hold the TAPE
SATURATION BYPASS footswitch
during power up, while turning
the knob you’d like to assign.
The maximum position the knob
is turned up to becomes the
expression pedal “toe down”
maximum value.
TAP SWITCH
Set to Tap switch mode
and connect an external
tap switch to tap in your
Lag Time. Tapping quarter
notes sets the Lag Time to
8th notes.
FAVORITE SWITCH
Set to Favorite switch mode and
plug in a Favorite switch to save
and recall a favorite preset. To
save a favorite setting, press and
hold the Tape Saturation Bypass
button.
HOLD BOTH AT POWER UP while turning the
SATURATION knob to set Expression Input Mode
pg 7
Deco - Tape Saturation & Doubletracker User Manual
®
Bypass Modes
Deco is set up for True Bypass from the factory. To change this mode,
hold down both Saturation Bypass and Doubletracker Bypass switches
while powering up. While holding down, turn the Blend knob to one of two
ranges shown below.
TRUE BYPASS
Set here to use our True
Bypass circuit, which is simply
a mechanical relay to switch
the input signal directly to
the output, with absolutely no
components attached.
BUFFERED BYPASS
Set here to use our high-quality Analog Buffered
Bypass. This circuit features a 1Meg input
impedance, keeping the character of your guitar
pickup unaltered. The output impedance is 100
Ohms and can drive hundreds of feet of cable
without coloring your sound.
HOLD BOTH AT POWER UP while turning the
BLEND knob to set Bypass Mode
pg 8
Deco - Tape Saturation & Doubletracker User Manual
®
Input Modes
Deco provides two input modes to tailor the range of Tape Saturation for
your input signal. To change this mode, hold down both Saturation Bypass
and Doubletracker Bypass switches while powering up. While holding
down, turn the Lag Time knob to one of two ranges shown below.
NORMAL MODE
Set here to use Normal Mode, which is
calibrated for a wide range of guitar and
instrument level inputs. Normal Mode is
recommended when using Deco on your
pedalboard in front of an amp.
STUDIO MODE
Set here to use Studio Mode, which tailors the
Saturation range to be best suited for hotter input
signals. Studio Mode is recommended when
using Deco with DAWs, mixer inserts, line level
synths, or hot effects loops in guitar rigs.
HOLD BOTH AT POWER UP while turning the
LAG TIME knob to set Input Mode
pg 9
Deco - Tape Saturation & Doubletracker User Manual
®
Auto-Flange Feature
Press and hold the Doubletracker Bypass
footswitch to achieve a recording studio-inspired
Auto-Flange effect. This engages a “virtual audio
engineer” manning the faders and tape reels to
create a smooth and predictable through-zero
flange experience on the fly.
When the Doubletracker Bypass footswitch is
held down, the delayed Lag Deck is set just a bit
behind the Reference Deck. Then, the Blend and
Lag controls are simultaneously varied as the Lag
Deck ‘catches up’ to the Reference Deck at a speed
controlled by the Auto-flange Time setting. After
releasing the footswitch, the controls are smoothly
returned to their previous settings.
Press and hold to engage the
instant Auto-Flange feature.
Release to return the controls
to their previous settings.
TRS Stereo Input
The 1/4” input can be set for either mono input or
TRS stereo input. The pedal ships in mono input
configuration from the factory. Here’s how to
change the input configuration:
Remove the back cover of your pedal. On the left
side of the circuit board, you’ll see a jumper that
can be set in two positions. Place the jumper on the
left 2 pins for TRS stereo input. Place the jumper
on the right 2 pins for mono input.
In order to use the TRS stereo input,
you’ll need a TRS stereo input adapter
like the one shown below.
RING
RING
TIP
RIGHT 1/4” INPUT
T
LEF
Stereo input
”
1/4
UT
INP
SLEEVE
TIP
Mono input
pg 10
Deco - Tape Saturation & Doubletracker User Manual
®
Sample Settings
(All examples have both Saturation and Doubletracker engaged)
Subtle Chorus
Slappy
Leads
Zero
Warped Space
Wobbly
Fat Slap
Thick Chorus
pg 11
Deco - Tape Saturation & Doubletracker User Manual
®
Features
SOUND DESIGN
• Detailed recreation of the mechanics of two vintage studio reel-to-reel tape decks and their interactions
• Nuanced sonic delivery of the classic saturation effects of the tape record/playback process
• Simple and intuitive Lag Time knob allows for slapback delays, tape echoes, tape flanging, tape chorusing
• Two Tape Saturation adjustment and tone shaping knobs: Saturation, Level
• Three Doubletracker adjustment and tone shaping knobs: Lag Time, Blend, Wobble
• Three Doubletracker blend types to tailor doubletracked sound: Sum, Invert, Bounce
• Five secondary parameters: High Trim, Low Trim, Auto-Flange Time, Wide Stereo Mode, +/- 3dB Boost/Cut
• Press and hold studio-inspired Auto-Flange effect
INS, OUTS, & SWITCHES
• High impedance mono input (internal jumper enables selectable TRS stereo input)
• Stereo output
• Two signal routing modes: Standard, Wide Stereo Mode
• Individual Tape Saturation Bypass and Doubletracker Bypass footswitches
• Expression pedal input allows the connection of either an expression pedal (for selectable control over any
knob parameter), external tap pedal (for remote time control of Doubletracker), or Favorite switch (to save a
Favorite preset)
MORE
• Tape Saturation controls provide 40dB of volume compensated gain
• +8dBu maximum input level easily handles instrument and line signals
• Premium analog front end and output section
• Super high performance SHARC DSP in a compact form factor
• 32-bit floating point processing
• Strong and lightweight electroless nickel plated aluminum chassis
• Designed and Built in the USA
Specifications
Input Impedance
Output Impedance
Signal to Noise
A/D & D/A
Max Input Level
DSP performance
Bypass Switching
Dimensions
1Meg Ohm
100 Ohm
110 dB
24-bit 96kHz
+8dBu
1596 MegaFLOPS
True Bypass (electromechanical relay switching)
or high-quality, transparent Analog Buffered Bypass (selectable)
4.5” deep x 4” wide x 1.75” tall
Power Requirements
Input Voltage
Maximum 9V DC
PolarityCenter Negative
Required Current
Minimum 250mA
pg 12
Deco - Tape Saturation & Doubletracker User Manual
®
Strymon Non-Transferrable Limited Warranty
Warranty
Strymon warrants the product to be free from defects in material and workmanship for a period of one (1) year
from the original date of purchase. If the product fails within the warranty period, Strymon will repair or, at our
discretion, replace the product at no cost to the original purchaser.
Exclusions
This warranty covers defects in manufacturing discovered while using this product as recommended by
Strymon. This warranty does not cover loss or theft, nor does the coverage extend to damage caused by misuse,
abuse, unauthorized modification, improper storage, lightning, or natural disasters.
Limits of Liability
In the case of malfunction, the purchaser’s sole recourse shall be repair or replacement, as described in the
preceding paragraphs. Strymon will not be held liable to any party for damages that result from the failure of
this product. Damages excluded include, but are not limited to, the following: lost profits, lost savings, damage
to other equipment, and incidental or consequential damages arising from the use, or inability to use this
product. In no event will Strymon be liable for more than the amount of the purchase price, not to exceed the
current retail price of the product. Strymon disclaims any other warranties, express or implied. By using the
product, the user accepts all terms herein.
How to Obtain Service Under this Warranty
For North American customers: Contact Strymon through our website at http://www.strymon.net/support for
Return Authorization and information. Proof of original ownership may be required in the form of a purchase
receipt.
For International Customers: Contact the Strymon dealer from which the product was purchased from in order
to arrange warranty repair service.
Strymon® is a division of Damage Control®, LLC.
REVC 10.23.14
pg 13