1
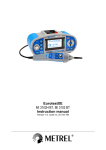
E V E N T I D E
CLOCKWORKS
For Macintosh ® Pro Tools ® Systems
L E G A C Y
®
U S E R
G U I D E
© Copyright 2003, Eventide, Inc. P/N 141075 Rev 1
Eventide, Eventide Clockworks Legacy, Harmonizer, Instant Flanger, Instant Phaser, and Omnipressor
are registered trademarks of Eventide, Inc.
Digidesign and Pro Tools are trademarks of Digidesign, a division of Avid Technology and names and
logos are used with permission.
Macintosh is a trademark of Apple Computer, Inc.
All other trademarks contained herein are the property of their respective owners.
Eventide, Inc. • One Alsan Way • Little Ferry NJ 07643 • (201) 641-1200
www.eventide.com
Contents
Introduction ............................................................................... 5
1
Installation ................................................................................ 7
What’s On the CD? • Installing Software • Allocating Memory
2
• After Installation is Complete • Navigating the Plug-Ins
Instant Phaser ........................................................................ 11
3
Instant Flanger ........................................................................ 13
4
Omnipressor ........................................................................... 17
5
H910 Harmonizer ................................................................... 21
6
H949 Harmonizer ................................................................... 23
7
8
Working with the Harmonizers ................................................ 29
Pro Tools Reference ............................................................... 31
Standard Pro Tools Plug-In Controls • Enabling Automation
• Automation of Clockworks Legacy Controls • Saving and
Recalling Clockworks Legacy Settings
Eventide
4
Clockworks Legacy User Guide
Introduction
Thank you for your purchase of the Eventide Clockworks Legacy plug-ins. The
products recreated in this set of five plug-ins were among the first introduced by
Eventide – and among the world’s first commercially available professional
recording products. For over 30 years, innovative products like these have made
Eventide an industry leader, and we are extremely proud that they continue to be
in demand today.
The original Eventide products that were re-created as the Clockworks Legacy Plug-ins.
5
Eventide
This package includes stunning recreations of the very first Harmonizers, the
H910 and H949, as well as three important analog products, the Instant Flanger,
the Instant Phaser and the Omnipressor.
We’ll get into more depth on these products soon but, before you forget, please
take a few minutes to fill out and mail in the registration card – or note the serial
number on the card, click on the registration link (included on the CD), and register online. This helps us keep you informed of any important software updates,
and any special offers that may only be available to registered users.
About This Manual
We’re confident you’ll be able to use your new plug-ins without the manual – but
you might miss out on some very interesting things. So, please have a quick look
through it. You’ll find all the information you need to let you fully explore the
capabilities of each plug-in.
We won’t bore you with too much detail either. Actually, we won’t cover much at
all about the Digidesign Pro Tools environment or even how to use the Macintosh,
as you should be able to find out everything you need to know about those
products in their own user manuals.
6
1
Clockworks Legacy User Guide
Installation
The Clockworks Legacy plug-ins are designed to arun on either OS9 or OSX
(not in the Classic environment of OSX). If you are installing on a dual-OS
computer, note that the Installer auto-detects the running OS and installs the
appropriate files. So, if you want to use the plug-ins on OS9, you must run
the installer with OS9 running. Likewise, to run the plug-ins on OSX, you
must run the Installer while OSX is running.
What’s on the CD?
•
Clockworks Legacy Installer Double-click to run the Installer and place the
five plug-ins in the Plug-ins folder on your hard drive. The installation also
includes many useful presets for each plug-in, and installs them into the
Plug-in Settings folder. Refer to the Installer Log for exact file locations.
•
Clockworks Legacy User Manual This manual in pdf file format.
•
Original User Manuals We’ve included the original user manual for each of
the plug-ins for your reference. Some fun reading.
•
Registration Info Print this out and mail it in to register your product – or
follow the Online Registration link to register directly on our website.
•
Adobe Acrobat Reader Required to view and print any of the .pdf files on
the CD.
•
Read Me Be sure to check this out for any late-breaking information.
7
Eventide
Installing Software
Insert the Installation CD into your computer. A Clockworks Legacy Folder will
open on your desktop. This folder will contain an Installer, a Read Me file and a
pdf of this manual. (You will need Acrobat Reader to view the pdf – in case you
don’t already have it, we’ve included it on the CD.) We’ve also included pdfs of
the original user guides for the Instant Phaser, the Instant Flanger, the
Omnipressor, and the H910 and H949 Harmonizers, as a reference to the
original hardware versions of your new plug-ins.
To get started, first open the Read Me file to check for any late-breaking
information and software notes. Then, double-click on the Installer icon to
automatically install the Clockworks Legacy application and place its associated
files into the appropriate folders on your system.
On OS9: The Clockworks Legacy Plug-Ins are installed in
System Folder/DAE Folder/Plug-Ins Folder
A library of Clockworks Legacy presets is installed in
System Folder/DAE Folder/Plug-In Settings Folder
On OSX: The plug-ins are installed on the system drive at:
Library/Application Support/Digidesign/Plug-ins Folder
The presets are installed on the system drive at:
Library/Application Support/Digidesign/Plug-in Settings Folder
Allocating Memory in Pro Tools Mix Systems
If you are running OS9, plugins with extensive graphic displays (like the
Clockworks Legacy models) may require increasing your DAE memory allocation to ensure that there is sufficient memory for both Clockworks Legacy and
the rest of your DAE setup to run optimally.
To do this:
• Quit Pro Tools or any other DAE-enabled applications.
•
•
8
Open your System Folder, then open the DAE Folder .
Locate and select the icon for the DAE application.
Clockworks Legacy User Guide
•
With the DAE icon selected, pull down the File menu and select Get Info
•
Select Preferred Size and increase it by 3000K.
If necessary, you can also save memory by running your monitor at 256 colors
(rather than “thousands of colors” which is recommended for optimal Clockworks
Legacy graphic display). This will reduce the memory requirements for
Clockworks Legacy graphics in the DAE memory partition. Your monitor setup is
controlled by the Monitors or Monitors & Sound Control Panel in the Apple
menu. Refer to your Macintosh and Digidesign documentation for more
information about monitor setup and/or additional system requirements.
After Installation is Complete
Be sure to have your Pace Interlock smart key inserted into an available USB
port on the computer. Pop the GSM card portion out of the included license card,
insert it into the iLok smart key and authorize when prompted.
Once you’ve completed the installation, the plug-ins should be available. If the
plug-ins do not show up in the plug-in list within Pro Tools, check to be sure they
are properly placed on the hard drive. If they are properly placed and still do not
appear:
•
You are not running a Mix or HD system on a Macintosh computer,
•
the Eventide Helper and Eventide Library extensions are not in the
Extensions Folder, or
•
you are trying to instantiate the Instant Flanger or Instant Phaser on a stereo
track. These two plug-ins are mono-in/stereo out only, so they can only be
inserted on a mono track.
9
Eventide
Navigating the Plug-Ins
The Clockworks Legacy panels are designed with graphic knobs and buttons
that resemble the controls on the original units – but we’ve enhanced them for
intuitive mouse control.
Knobs are easily adjusted with either an up-and-down or a left-and-right motion
of the mouse. Click on any knob you want to adjust, then drag upward, or to the
right, to increase the setting, and downward, or to the left, to decrease it. (It is not
necessary to try to move the mouse in a circular motion to “turn” the knobs.)
While a knob is selected, the value of the parameter will appear in the center of
the knob graphic.
Command click on the knobs to activate “fine” control.
Buttons are generally designed for single-click operation. Simply click on a
button to change from one state to another. The graphic display will indicate
whether or not a button is pressed.
10
Clockworks Legacy User Guide
2
Instant Phaser
Production Dates
1971 – 1977
While designing a solution to the costly and tedious job of setting up and
implementing the special effect known as flanging, we discovered a new effect,
now known as phasing. The Instant Phaser allowed this new effect to be created
quickly and easily, and its innovative design allowed the effect to be varied by an
Envelope Follower, Oscillator or Remote control. The left and right outputs were
also out-of-phase with respect to one another, resulting in a great stereo effect.
The Clockworks Legacy model of the Instant Phaser recreates these subtle
details and enhances the original by allowing full automation and the ability to
manipulate the Phaser remotely using supported control surfaces and/or
common MIDI implementation. Simply set the Function knob to Remote and send
Mod Wheel (MIDI Controller #1) information on the Phaser’s MIDI channel to
manually “move” the phaser.
Phasing was originally produced by mixing the slightly delayed outputs of
two tape recorders containing the same program material. In 1971, when
the Instant Phaser was introduced, the cost of the hardware necessary to
create this effect was prohibitive for most musicians. The affordable Instant
Phaser not only made this effect widely popular, it also offered an ideal
number of phase networks that tracked very well with each other, providing
very deep phasing without destroying the original tone.
11
Eventide
Instant Phaser Controls
Mono In Stereo Out
DEPTH lets you determine the mix of phased and direct signal. At the minimum
setting the signal is 100% phased; at the maximum setting, the wet/dry mix is
50/50.
FUNCTION Select Manual, Oscillator, Envelope or Remote as the current mode
of operation. A lamp will light under the selected controller to indicate it is active.
The LED over the Manual knob always shows the phaser position.
MANUAL activates the ∆Φ (phase change) control to let you control the phase
effect manually.
OSCILLATOR activates a phasing oscillator and lets you set its frequency
from 0.1-10 Hz. Slow speeds will give a fading effect; high speeds (with Depth
fully counterclockwise) produce vibrato and Doppler effects.
ENVELOPE gives you automatic phasing triggered by input.
THRESHOLD sets the input signal level which triggers phasing.
RELEASE determines the phase decay time (0.01 to 10 seconds).
REMOTE When Remote is selected, MIDI Controller 1 (Mod Wheel)
controls phasing.
TIP: You can select Functions directly by clicking on the lamp beneath each
one.
12
Clockworks Legacy User Guide
3
Instant Flanger
Production Dates
1976 – 1984
The Instant Flanger, released in 1976, was designed to simulate true tape
flanging. As its time delay circuit produced many more “nulls” and offered a much
deeper flanging effect than anything previously available, it was widely used on
many legendary recordings. The Instant Flanger even simulated the “Bounce” of
motor or servo movement which occurred as the tape machine changed speeds
during flanging. And its phase-reversed and variable-delay outputs, created a
heavy stereo effect.
One of the more interesting features of the Instant Flanger model is its ability to
combine Function controls simply by pressing any combination of the front panel
“IN” buttons. For example, you can cause the flange to move constantly, but be
sped up on peaks by pressing both the Oscillator and Envelope Follower
buttons. Or, you can use either the Manual knob or Mod Wheel to control the
flange by pressing Manual and Remote.
13
Eventide
Instant Flanger Controls
Mono In Stereo Out
EFFECT MODIFIER
FEEDBACK Available on some vintage production units, this control allows
you to add output audio back into the input.
Use caution when setting this control fully clockwise, as the effect will
become very unstable and may cause unwanted distortion.
BOUNCE simulates the “hunting” effect of an AC or servo motor changing
speed. When this control is set fully clockwise, only changes in the control
signal will affect flanging.
DEPTH allows you to add direct signal to the effected signal output. At either
extreme, the mix at the selected output is 50/50. When the knob is centered
(on Doppler) the direct signal is cancelled and the signal is 100% flanged.
The following table shows the effect present at each output at various
settings.
14
DEPTH Setting
Left Output
Right Output
Fully CCW
In-phase cancellation
Low frequencies present
at short delays
Out-of-phase cancellation
Low frequencies missing
at short delays
Centered (Doppler)
No flanging effect until frequency varied by control change
Fully CW
Out-of-phase cancellation
Low frequencies missing
at short delays
In-phase cancellation.
Low frequencies present
at short delays
Clockworks Legacy User Guide
OSCILLATOR The button activates an internal oscillator; the knob lets you
adjust the oscillator rate from 20 seconds (0.05Hz, Slow) to 50 ms (20 Hz, Fast).
MANUAL ∆Φ gives you manual control over the flange effect.
ENVELOPE gives you automatic flanging triggered by input.
THRESHOLD sets the input signal level which triggers flanging.
RELEASE determines the flange decay time (5 ms to 10 seconds).
REMOTE When Remote is selected, MIDI Controller 1 (Mod Wheel) controls
flanging.
15
Eventide
16
4
Clockworks Legacy User Guide
Omnipressor
Production Dates
1971 – 1984
Originally described as a “professional-quality dynamic modifier”, the Omnipressor
rapidly became a very popular studio dynamics piece. Its unique Function knob
allowed the engineer to move from Noise Gate effects through dynamic reversal
– an effect that reverses a sound’s envelope making loud sounds quiet, and
quiet sounds louder. This control, combined with unique gain and attenuation
controls, lets you produce extremely aggressive dynamics with very little
tweaking. A cymbal, for example, can be made to sound “reversed” by setting a
fast Attack and setting Function near its CW limit. The diagram below illustrates
the wide ranging Function control.
Omnipressor Capabilities
OUTPUT dB
(referenced to Threshold)
A
B C
D
E
F
0
A: DYNAMIC REVERSAL An input level of 10 dB above
the threshold (+10 dB) results in an output of 10 dB below
the threshold (-10 dB). An input level of 10 dB below the
threshold results in an output of 10dB above the
threshold.
B: GATE As the signal increases above the threshold, the
device gain rapidly goes to maximum.
C: EXPANSION A 40 dB input range results in a
60 dB output range.
D: CONTROL CENTERED Input level equals output level.
E: LIMITING Gain is unity until input is equal to the threshold. Above the threshold, a 30 dB change in input produces a 6 dB output change. (Line is offset for clarity.)
-30
0
INPUT dB
(referenced to Threshold)
F: INFINITE COMPRESSION Output level remains
unchanged regardless of input level.
17
Eventide
Omnipressor Controls
Mono In Mono Out
INPUT CAL switches allow you to reduce the level feeding the effect by 10 dB,
20 dB, or 30 dB (when both switches are pressed).
INPUT THRESHOLD sets the gain crossover point. For example, when the
system is in Compression mode, an input signal below the threshold will have its
amplitude increased and signals above the threshold will have their amplitude
reduced.
BASS CUT/NOR determines the frequency response of the level detector
circuit. Set to NORMAL to match the frequency response to the gain control
section. Set to BASS CUT to attenuate bass signals and reduce their effect on
the overall compression/expansion operations.
ATTACK TIME determines the time in which the system responds to a change in
input level. Assuming a 10 dB step increment in input level, the attack time is
numerically equal to the time required for the level detector to reach its final state
with respect to the new input level.
RELEASE TIME determines the time in which the system responds to a
decrease in input level. Assuming a 10 dB step increment in input level, the
attack time is numerically equal to the time required for the level detector to
reach its final state with respect to the new input level.
METER FUNCTION allows you to select meter monitoring of Input, relative Gain
or Output. These functions control only the meter display – they have no effect
on the signal processing. All level readings are in dBFS.
FUNCTION is the main Omnipressor control. When set fully counterclockwise,
gain varies sharply from full attenuation to maximum gain as the Input Threshold
is exceeded. As the control is rotated clockwise, this action becomes less sharp
until the gain varies only a few dB from no input to full input.
At the knob’s centerpoint, the gain is constant, regardless of input level. As the
knob is turned clockwise, gain begins decreasing with increasing input level.
More rotation produces substantial compression until the point of infinite
18
Clockworks Legacy User Guide
compression is reached and the gain decreases 1 dB for each dB of signal
increase, thus keeping the output level constant regardless of input. Rotation
past this point produces dynamic reversal, in which a high level input produces a
lower output than does a low level input. Full clockwise rotation results in full
output attenuation above the Input Threshold.
Two LEDs alert you to the gain state of the Omnipressor. A green ATTEN LED
illuminates to indicate that the Omnipressor is in gain reduction mode. A red
GAIN LED illuminates in gain increase mode. Relative brightness of the LEDs
indicates the amount of gain reduction or increase. Operation of these LEDs is
instantaneous, so that peak limiting is indicated even when the meter has
insufficient time to respond.
OUTPUT/CAL These switches allow you to increase the output level of the
Omnipressor without affecting compression ratios or other operating parameters.
This is useful, for example, when the unit is being used in extreme modes of
compression or dynamic reversal, and the input signal is large enough to cause
large amounts of consistent gain reduction. In such cases, you can select to
increase the gain of the output stage by selecting +10dB, +20 dB, or both for
30 dB of Gain.
ATTEN LIMIT limits the maximum attenuation of the Omnipressor from 30 dB to
approximately 1dB. This control overrides the action of FUNCTION.
GAIN LIMIT limits the maximum gain of the Omnipressor from 30 dB to
approximately 1 dB. This control overrides the action of FUNCTION.
SIDECHAIN INPUT (denoted by a key symbol in the plug-in header panel)
allows the Omnipressor’s level detect to be driven by another audio source.
19
Eventide
20
Clockworks Legacy User Guide
5
H910 Harmonizer
Production Dates
1975 – 1984
The Eventide Clockworks H910 was the world’s first harmonizer – and one of the
first commercially-available digital audio products. It offered built-in delay, manual
adjustment of ± 1 octave and even had an “Anti-Feedback” mode which helped
to eliminate feedback between a mic and speaker by constantly “riding” room
modes.
Today’s Clockworks Legacy model captures all the realism of the original,
including its “glitching” as it modifies the pitch. The original HK940 keyboard
option is replaced with more modern MIDI control that allows you to “play” the
desired pitch using MIDI notes or bend it via pitch wheel. Simply assign the
connected controller to the H910’s MIDI channel (See page 29: Working with the
Harmonizers for more detail.).
21
Eventide
H910 Harmonizer Controls
Mono In Mono Out
INPUT LEVEL and Limit Indicator The Input LED will light at -0.5 dBFS. (Note
that the Limit Indicator is “after” the Input Level and Feedback controls, so it will
illuminate when internal clipping is about to occur due to excessive input level or
feedback.) Adjust Level so that the Limit Indicator flashes only on input peaks.
PITCH CONTROL SELECT The three switches in this group allow you to
activate the Anti-Feedback function, or to select whether you want manual or
MIDI control over the pitch change functions of the Harmonizer.
MAN This switch activates the MANUAL control knob. When fully counterclockwise, the output pitch is decreased by 1 octave (ratio=.5). When
centered, the ratio is unity. When fully clockwise, the output pitch is increased
by 1 octave (Ratio=2). Intermediate settings produce fractional octave ratios
with the changes “band spread” around unity.
A-F This switch activates the ANTI-FEEDBACK knob, allowing you to add
small amounts of an up-and-down frequency shift to the output signal. This
serves to decrease the effect of room resonance peaks on the signal which
ultimately returns to the microphone. Note that higher settings will make the
effect more audible, so care should be taken to find a setting which provides
adequate feedback reduction with minimal audience/performer disturbance.
MIDI When selected, pitch ratio is determined by receipt of MIDI Note On and
Pitch Bend messages. (See Working with the Harmonizers on page 29.)
PITCH RATIO The display shows the numerical pitch ratio.(See also Pitch Ratio
Readouts for Various Musical Relationships on page 30.) Note that, just as in the
original unit, when the knob is set between two values, the display will “jitter”
between the two. This is visual jitter only, and does not affect the audio.
DELAY controls allow you to insert additional delays before the output. Select
delay times in 7.5 ms increments to a maximum of 112.5 ms. (7.5+15+30+60).
FEEDBACK is used to determine the decay time of the output delay. Clockwise
rotation increases decay time until feedback reaches unity, at which time the
system will begin to oscillate.
22
Clockworks Legacy User Guide
6
H949 Harmonizer
Production Dates
1977 – 1984
The Eventide Clockworks H949, which debuted shortly after the H910, was the
world’s first “de-glitched” Harmonizer product. – and may even have been the
world’s first multi-effect audio product. It not only offered 3 octaves of pitch change,
but also featured Micro and Random pitch, Delay only, Flange and unique
Reverse modes. When used with a tape recorder, it also made time expansion
and compression possible for the first time ever.
All of the original features and sound are recreated in the Clockworks Legacy
model. Spend some time with the controls, as you’ll find a wide range of sound
effects can be created using the few front panel controls. Also, audition the two
pitch algorithms provided for the variety of sources you may feed into it.
23
Eventide
H949 Harmonizer Controls
Mono In Mono Out
INPUT LEVEL is used to set the optimum operating level for the system. The
knob acts as a conventional volume control.
Five Level Indicators provide visual cues as to the actual level of the incoming
signal. In normal operation, the yellow LED indicates that a low-level signal
(-60dBFS) is being applied to the input. The 3 green NORMAL LEDs illuminate
in sequence (-12dBFS, -6dBFS, -3dBFS) to indicate a minimal driving signal,
and increasing levels within the normal range. The red LIMIT LED lights within
0.5 dB of clipping. Note that all of these indicators are peak-responsive and will
light on “peaky” material even if the average signal level is quite low. The ideal
setting will drive all of the green LEDs, with no flashes of the red LED.
Note that the Level Indicators are “after” the feedbacks, i.e. they measure
Input+Main Feedback+Delay Only Feedback, to indicate any digital clipping at
the pitch shifter input.
REPEAT This locking pushbutton is used to capture and repeat audio segments.
Pressing it captures the last 400 ms of audio and re-circulates it until Repeat is
pressed again.
In Repeat mode the LEVEL LEDs light in reverse order (with red indicating
low-level signals, and yellow indicating clipping). This provides continuing
indication of signal level, while reminding you that Repeat mode is active and the
actual signal input is being disregarded.
Remember that the signal segment captured when REPEAT is pressed is
the current content of memory at the instant the switch is pressed. If you are
listening to a delayed output, part or all of the segment heard immediately
before pressing REPEAT may be lost. To avoid this, monitor either the input
signal or an nondelayed output when attempting to capture precise segments.
24
Clockworks Legacy User Guide
FEEDBACK The Feedback controls route a portion of the output signal back to
the input. The output of these controls is mixed with the input signal, but is
independent of the gain adjustment provided by INPUT LEVEL. Gains are
normalized so that, with EQ controls approximately centered, the feedback level
varies from 0 to 100% (loop gain of unity or “infinite” sustain) as the FEEDBACK
LEVEL knob is advanced from OFF to MAX.
MAIN LEVEL adjusts the feedback from the system output to the input.
DLY ONLY adjusts the level of the Delay Only output delays in the Delay/
Reversal modes.
LOW EQ adjusts the relative level of bass frequencies present in the
feedback mix. When the knob is turned counterclockwise, lows are cut; when
turned clockwise, lows are boosted.
HIGH EQ adjusts the relative level of high frequencies in the feedback mix,
cutting them when the knob is turned counterclockwise, and boosting them
when the knob is turned clockwise.
When both EQ knobs are centered, the frequency response of the feedback
chain is approximately flat.
Use caution when adjusting these controls until you are fully familiar
with their interaction. They can easily be set to a point where loop gain
exceeds unity at various frequencies, and create uncontrolled
oscillation.
PITCH CONTROL/READOUT This block of controls is associated primarily with
manual/remote control of the output pitch ratio vs. the input signal.
MANUAL adjusts the pitch ratio from 2 octaves down to 1 octave up, and
also determines the rate of delay change in Flange and Random modes.
PITCH RATIO is indicated on a 4-digit display showing the numerical pitch
ratio between input and output. Note that, just as in the original unit, when the
knob is set between two values, the display will “jitter” between the two. This
is visual jitter only, and does not affect the audio.
25
Eventide
MIDI This switch allows remote control via MIDI. When selected, the pitch
ratio will be determined by receipt of MIDI Note On and Pitch Bend
messages. (See Working with the Harmonizers on page 29.)
FUNCTION SELECT The FUNCTION button and the 4 switches to its right allow
you to select the basic operating modes of the H949. When pressed IN, the 4
switches function as labeled in red below each switch. When the FUNCTION
button is OUT, the switches function as labeled in green above the switches.
LEDs indicate which switch is selected and show (by lighting red or green) which
function is active.
The functions controlled by these switches fall into two major groups: Pitch Change
effects (activated when the FUNCTION button is IN) and Delay/Reversal effects
(activated when the FUNCTION button is OUT). Note the effect in Reverse and
Extended modes is most apparent with large delay times.
Pitch Change Functions
(FUNCTION button IN; Red switch labels apply)
NORM places the H949 in its normal pitch change mode. Adjusting MANUAL
over its full range gives pitch ratios from 0.25 (2 octaves down) to 2.0
(1 octave up).
EXTEND permits extension of the length of the audio segment over which
pitch change will be effected up to the full extent of the H949 memory
(400 ms). The length of the audio segment is determined by the Main Delay
setting. Note that Main Output Delay is not available in Extend mode – the
buttons are simply used to select the length of the extension.
µPC (MICRO PITCH CHANGE) SHARP and FLAT modes operate in a
manner similar to normal Pitch Change, except that the range of pitch ratios
is restricted to about 1:1.07 (SHARP) and 1:0.93 (FLAT). In these modes,
pitch ratio is closest to 1:1 when the MANUAL knob is fully counterclockwise.
In SHARP, clockwise rotation increases the pitch, in FLAT, clockwise rotation
decreases the pitch.
26
Clockworks Legacy User Guide
Delay/Random/Flange/Reverse Functions
(FUNCTION button OUT; Green switch labels apply)
DELAY These switches allow you to add successive amounts of delay before
the main output. Select delay times in 6.25 ms increments to a maximum of
393.75 ms. (6.25+12.5+25+50+100+200).
RANDOM causes the output delay to vary between its limits of 0-25 ms at a
constant rate of change. This simulates the random variations of doubletracking, or of multiple musicians or singers performing simultaneously,
without the “mechanical” sound of a fixed delay. The desirable effect of having performers slightly out of tune is automatically achieved due to the fact
that the pitch alters slightly as the delay changes, but you can also reduce
the degree of pitch change with MANUAL.
FLANGE This switch sets the H949 into automatic flanging mode. Flanging
is the effect created by frequency cancellations when a delay signal with a
varying delay is added to another, constant, delay signal. The lowest frequency affected is roughly reciprocal of the time delay (0-10 ms), so a 1ms
delay causes a cancellation at 1kHz and multiples thereof. In this mode,
MANUAL controls SWEEP, the rate at which the variable delay changes.
REVERSE causes short signal segments (up to the 400 ms memory capacity of the system) to be played back in time-reversed order. In this mode, the
main DELAY switches are used to select the length of the reversed segment. Note that in Reverse mode the Main Outpu Delay is not available –
these buttons are used simply to select the reverse segment length.
ALGORITHM SELECT The H949 allows you to select one of two pitch change
algorithms in order to support optimal pitch change with a variety of source
material. In general, Algorithm 2 is glitch free, but will add varying degrees of
coloration to the signal, and is more suitable for extreme pitch ratios. Algorithm 1
may cause glitches with increasing frequency as the pitch ratio deviates from
1:1, and is generally more appropriate for smaller pitch ratios.
We recommend experimentation to determine which algorithm is most
appropriate for any given program material and pitch ratio. The two algorithms
converge in audible effect as pitch ratios approach an octave in either direction,
and both will perform identically at these extremes.
27
Eventide
28
7
Clockworks Legacy User Guide
Working with the Harmonizers
Playing the Harmonizers with a MIDI Keyboard
A MIDI keyboard set to send MIDI on the H910 or H949’s MIDI Channel can be
used to control the pitch ratio in discrete musical steps. Middle C on the keyboard will set Unison on the Harmonizers; 1.00 on the display. Playing the E
above Middle C will produce a harmony of a Major 3rd. Playing the E-Flat above
Middle C will produce a Minor 3rd and so on. Refer to the graphic below and the
chart on the following page.
H910
Minor
Fifth
C2
Minor
Third
C3
–23
–21
–18
–16
–14
1:–.25
Two
Octaves
–22
–20
–19
–17
–15
–13
Minor
Third
Minor
Fifth
+3
+6
C4
–11
1:–.5
Octave
–10
–9
–6
–8
–7
–4
–5
Major
Fifth
–2
–3
Major
Third
C5
+1
–1
1:1
Unison
+2
+4
Major
Third
+5
+8
+7
+10
+9
+11
1:2
Octave
Major
Fifth
H949
The Harmonizers respond to MIDI Note On and Pitch Bend messages. The bend
range covers two octaves, fro, 0.5 to 2.0.
The MIDI response for all plug-ins is OMNI, i.e. messages received on *any* of
the 16 channels will be accepted.
29
Eventide
Pitch Ratio Readouts for Various Musical Relationships
–3/4
–1/2
–1/4
Note
Relationship
Note
+1/4
+1/2
+3/4
.958
.972
.986
1.000
Unison
1.000
1.015
1.029
1.044
.904
.917
.930
.944
–1
+1
1.060
1.075
1.091
1.106
.853
.866
.878
.891
–2
+2
1.123
1.139
1.155
1.172
.805
.817
.829
.841
–3
+3
1.189
1.207
1.224
1.242
.760
.771
.782
.794
–4
+4
1.260
1.278
1.297
1.316
.717
.728
.738
.749
–5
+5
1.335
1.354
1.374
1.394
.677
.687
.697
.707
–6
+6
1.414
1.435
1.456
1.477
.639
.648
.658
.667
–7
+7
1.498
1.520
1.542
1.565
.603
.612
.620
.630
–8
+8
1.587
1.611
1.634
1.658
.569
.578
.586
.595
–9
+9
1.681
1.706
1.731
1.756
.537
.545
.553
.561
–10
+10
1.781
1.808
1.834
1.861
.507
.515
.522
.530
–11
+11
1.888
1.915
1.943
1.971
.479
.486
.493
.500
.452
.459
.465
.472
–13
.427
.433
.439
.446
–14
.403
.407
.414
.420
–15
.380
.381
.391
.397
–16
.359
.364
.369
.375
–17
.339
.344
.349
.354
–18
.320
.324
.329
.334
–19
.302
.306
.310
.315
–20
.285
.289
.293
.297
–21
.269
.273
.277
.281
–22
.254
.257
.261
.265
–23
.250
30
Octave
2.000
NOTE
The lowest octave is only
available with the H949.
For use with the H910, round
each figure to 2 decimal places.
Two Octaves
8
Clockworks Legacy User Guide
Pro Tools Reference
Standard Pro Tools Plug-In Controls
The Clockworks Legacy Plug-Ins include standard Pro Tools plug-in controls along
the top control strip. We give you a brief overview of these controls here, but you
should refer to the latest Pro Tools documentation for detailed descriptions and
any new features.
Selects an insert on
the selected track or
channel.
Selects the plug-in
you want to use.
Selects a track or
channel strip for
adjustment.
Audio 1
b
Omnipressor
< factory default >
compare
no key input
Opens a Pop-up
menu for saving and
recalling settings.
Displays menu controls for
copy, paste, and import of
current plug-In settings.
Bypasses the currently
running plug-in, allowing
you to hear unprocessed
audio on the selected track
or channel strip.
bypass
auto
TDM
safe
Opens the Plug-In
Automation window.
Toggles between saved
and newly edited settings.
Key (sidechain) input allows you to
select a track for driving the
Omnipressor’s level detection.
Enabling Automation
In order to record and playback automation you must enable plug-in automation.
To do this, open the Pro Tools Display menu and select Show Automation
Enable Window. Once you have enabled plug-in automation in this window, the
Write Automation... selection in the Pro Tools Edit menu and the automation
pop-up menus on individual tracks and channels can be used to control
automation recording, playback and editing.
31
Eventide
Automation of Clockworks Legacy Controls
Clicking on the Automation button in the Pro Tools control strip displays a dialog
box which allows selection of any or all of the Clockworks Legacy controls for
automation. (Refer to your Pro Tools or sequencer documentation for detailed
descriptions of automation.)
Plug-In Automation
Master Bypass
Input Level
Pitch Ratio
Mode Select
Algorithm
Main Delay
Delay Only
Feedback
Feedback Delay
Low Eq
High Eq
Repeat
Remote
Add > >
< < Remove
Inserts
H910 Harmonizer
H949 Harmonizer
Omnipressor
Instant Flanger
None
Cancel
OK
To select any control, simply highlight it, then click on Add. The control will
disappear from the listed controls on the left and be entered into a new list on the
right side of the dialog box. To select all of the listed controls for automation, click
on the first item in the list on the left, hold down the shift key, and click on the last
item in the list, then click on Add. To remove any or all items from the righthand
list, simply highlight the control(s) and click on Remove.
32
Clockworks Legacy User Guide
Saving and Recalling Clockworks Legacy settings
When Clockworks Legacy is installed, a library of settings is placed into System/
DAE/Plug-In Settings folder (OS9) or in the Library/Application Support/
Digidesign/Plug-In Setting Folder (OSX). This library appears is available as a
Pop-up menu under Settings in the Clockworks Legacy dialog box.
We recommend saving your own Clockworks Legacy settings to this folder to
ensure that they are available to any Pro Tools session you’re working on. You
can create sub-folders inside the Clockworks Legacy Plug-In Folder if you
wish. You can also create custom user default settings for Clockworks Legacy,
so that it always comes up the way you want it to when you first start a new
session. (Note: All of these functions are designed to Digidesign standards, and
should be described in detail in your Pro Tools documentation.)
33
Eventide, Inc. • One Alsan Way • Little Ferry NJ 07643 • (201) 641-1200
www.eventide.com