1
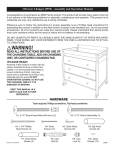
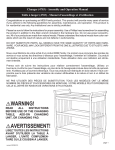
Parker Changing Table (K5102) - Assembly and Operation Manual
Congratulations on purchasing an MDB Family product. This product will provide many years of service if
you adhere to the following guidelines for assembly, maintenance and operation. This product is for
residential use only. Any institutional use is strictly prohibited.
Please be sure to follow the instructions for proper assembly. Use a Phillips head screwdriver for assembling the crib in addition to the Allen wrench included in the hardware box. Do not use power screwdrivers.
All of our products are made from natural woods. Please understand that natural woods have color
variations which are the result of nature and not defects in workmanship.
DO NOT SUBSTITUTE PARTS. ALL MODELS HAVE THE SAME QUANTITY OF PARTS AND HARDWARE. YOUR MODEL MAY LOOK DIFFERENT FROM THE ONE ILLUSTRATED DUE TO STYLISTIC
VARIATIONS.
!
WARNING!
READ ALL INSTRUCTIONS BEFORE USE OF THE CHANGING TABLE, ADD-ON
CHANGING UNIT, OR CONTOURED CHANGING PAD.
!!PLEASE READ!!
Assembly of this furniture is easier
with two people. Assemble furniture
on debris free carpets or on the
enclosed foam sheets to prevent
scratching of finish. Using any power
tools to assemble this furniture may
potentially strip the wood. DO NOT
OVERTIGHTEN SCREWS. DO NOT
USE THE CHANGING TABLE IF IT
IS DAMAGED OR BROKEN.
The size of changing pad
included in the package is
17"W x 34"L x 1”H.
Revised 10-2010
page 1
PARTS
B. Top Rear Support Panel
C. Top Front Support Panel
D. Rail x 4
E. Support Rail
A. Side Panel X 2
G. Pad
F. Shelf x 3
Tools Needed
(not included)
Phillips
screwdriver
HARDWARE
H1. 2 -3/4” Allen Head Bolt X 12
H2. Barrel Nut x 12
H3. Metal Dowel x 12
H4. 5/8” Pan Head Screw x 2
H5. Strap
H6. Allen Wrench
page 2
STEP 1. Attach support panels, rails
and support rail to one of the side panels.
B
D
H2
E
D
H3
C
H3
D
H3
D
H1
H1 H2
A
H1 H2
H3
H2
H1
H3
H1
H3
H1
STEP 2. Slide in the 3 shelves.
F
F
F
page 3
STEP 3. Attach the other side
panel to the changing table.
H1
A
H1
H3
H1
H3
H2
H2
H4
H2
H3
H2
H1
H3
STEP 4. Attach the strap and place
the pad onto the changing table.
H1
H1
H3
H2
H3
G
H5
H4
KEEP THIS MANUAL IN A SAFE
PLACE FOR FUTURE REFERENCE.
The recommended maximum weight of
the occupant is 30 lbs on changing table.
page 4
WARNING!
FALL HAZARD
TO PREVENT DEATH OR SERIOUS
INJURY, ALWAYS KEEP CHILD WITHIN
ARM’S REACH.
READ ALL INSTRUCTIONS BEFORE ASSEMBLING THIS
PRODUCT. KEEP THE MANUAL FOR FUTURE USE.
WARNING:
•Read all instructions before use of the changing table.
•Do not use changing table if it is damaged or broken.
•This product is not intended to be used as a changing
table without adult supervision. Use of the product
without this may result in death or serious injury to your
child from falling. Follow all instructions on attaching
and using the changing table.
•Only use the pad provided by MDB FAMILY.
•The maximum weight of the child for which the changing table is intended is 30 lbs.
•Stop using this changing table when the child is able to
sit up or roll over.
•As with all infant and baby furniture, it is important to
check fasteners, screws, and bolts periodically for tightness. Parents should ensure a safe environment for
their child by checking the furtniture regularly before
placing the child in the product.
•When using this product, always secure the child with
the safety strip.
WARNING!
FALL HAZARD
To prevent death or
serious injury, always
keep child within arm’s
reach. Never leave child
unattended and always
use restraining system.
ONE YEAR LIMITED WARRANTY:
We will replace any missing parts at the
time of purchase or any defective item
within a one year period from the date of
original purchase. Please keep your receipt
so that we may process your warranty
request. This warranty only covers new
units with original packaging and ownership, and is not transferable. It does not
cover any used, secondhand or demo
models.
This warranty does not cover any damaged
or defective parts that result from installation and assembly, normal wear and tear,
abuse, negligence, improper use or alteration to the finish, design, and hardware of
the crib. The specific legal rights of this
warranty may vary from state to state.
Some states do not allow any exclusion or
limitation of incidental damages. Some
States do not allow limitation on how long
an implied warranty lasts.
Maintenance and Cleaning:
Do not scratch or chip the finish. Do not use
abrasive chemicals for cleaning. Clean with mild
soap on a soft rag. Rinse and dry thoroughly. If
you ever refinish this furniture, be sure to use
only a non-toxic finish specified for children’ s
products. If you choose to refinish this furniture,
the warranty will be voided.
Storage:
Pine woods exchange moisture with the air
adjusting to major changes in room temperature
and humidity. Therefore it is best to place your
furniture away from heating or air-conditioning
vents. Sunlight is not friendly to solid wood
furniture and prolonged direct exposure to harsh
sunlight can discolor the finish. Be careful not to
place your furniture in direct sunlight for extended
periods of time. As with all your fine furniture,
blot up spills immediately.
Registering your product is even easier than
before. You can register your product on our
website at : www.themdbfamily.com
IF YOU WOULD LIKE TO ORDER
REPLACEMENT OR MISSING PARTS
PLEASE VISIT US AT:
WWW.THEMDBFAMILY.COM
OR YOU CAN CONTACT US BY MAIL:
MDB FAMILY
855 WASHINGTON BLVD.
page 5
MONTEBELLO, CA 90640
WARNING:
Restraint System
During the diaper changing process, be sure always to keep one hand on the baby to prevent the baby from falling off the
changing pad. Falling from the changing pad could cause severe injury or even death to the baby.
Step 1.
Place a baby on the pad with his/her bottom on the
top of the diaper. Safely secure the baby on the pad
with the safety straps and buckle on the pad. This
helps prevent the baby from falling off the pad,
which can result in severe injury or even death of
the baby.
Step 2.
Remove the dirty diaper from the baby.
Step 3.
Push the baby’s legs forward and create a cavity
under the baby’s bottom. Clean the baby.
Step 4.
Reattach the new diaper to a clean and happy
baby!
page 6