1
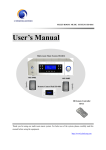
Wireless Public Address System Wireless Multifunctional Host PA7005 多功能控制器 PA7005 -20 电源指示灯 -10 -5 0 输出电平 低音 高音 0 0 U盘音量 监听音量 话筒开关 3 (MP3/WMA) U盘 -10 +10 -10 +10 0 10 0 10 内置话筒 开 关 电源开关 0 监听扬声器 告警开关 U盘 收音 接收终端 主界面 10 优先1音量 0 10 优先2音量 0 10 收音音量 0 10 话筒音量 话筒接口 Operation Instructions Welcome to use our wireless public address system. For the better application of this equipment, please read the operation instruction carefully prior to use. LY International Electronics Co., Ltd. Information Tip on Instructions The Instructions shall include the functions, appearance, technical parameters, system connection diagrams, example of system scheme, safety precautions for system use, and after-sales service of the multifunctional controller PA7005. Make sure to read this user’s manual carefully prior to the connection and use. The functions and relevant technical parameters as described herein are determined upon the completion of the development of this product. Thereafter, the functions and technical parameters may be changed without prior notice. Please keep the Instructions properly for the future reference. Overview of System As a host integrating multiple controls, PA7005 is used with different pre and post equipments to constitute various application systems. Such product is mainly used for wireless addressable system, rural broadcasting villages ringing project, and small public address system. Based on the design concept of diversified integration and resource utilization, the host of the system makes use of ARM control kernel and DSP acoustic chip, integrates the functions such as timer, MP3 player, FM tuner, data coding modulator, monitoring, alarm, and MIC microphone, and has the characteristics such as concision, practicality, stability, rationality, high efficiency, energy saving, and environmental protection. I. Functional features 1) Based on the design concept of diversified integration and resource utilization, make use of ARM control kernel and DSP acoustic chip, integrate the functions such as timer, MP3 player, FM tuner, data coding modulator, monitoring, alarm, and MIC microphone, and have the characteristics such as concision, practicality, stability, rationality, high efficiency, energy saving, and environmental protection; 2) Frequency agility controlled by the microcomputer, real-time display of all the functional operations on 3.2” TFT color screen, and the control of switch-off and off and volume of various equipments connected to this product; 3) Function of multistage online, principle of previous stage precedence for emergency broadcasting, and the function of Chinese interface prompt for emergency broadcasting; 4) Function of frequency memory and storage, and function of automatic recovery upon broadcasting power-off; 5) Mobile phone receiver module (Optional) and data coding modulator module (Optional), two channels of auxiliary input, one channel of emergency microphone input, and one channel of auxiliary audio output, and two serial communication interfaces; 6) Function of manual one-key alarm; 7) It is able to compulsorily turn on the equipments in the broadcasting studio at a long distance with telephone, release the voice warning message and alarm signal, automatically adjust the power output from the equipments to the maximum when releasing the warning signal, give voice prompt in Chinese during the whole course of telephone login and operation, and transfer to the state of scheduled broadcasting automatically after the release of the warning signal; 8) The unique address is allocated to every multifunctional controller with safety and exclusiveness, in order to ensure the exclusiveness and generality under the strict authorization management condition, so as to guarantee not only the interchangeability of the equipments under the authorization condition, but also the safety in the equipment under the authorization condition; 1 9) Identify caller ID number from communication tool automatically, offer the control function only available to preset authorization telephone number and password, and have the safety prevention and control functions such as pre-stored telephone number, caller identification, and record of talk time. Select the use of telephone login password (Not less than 6 digits), which is modifiable from time to time and restorable at any time if forgotten; 10) It is possible to pre-store 10000 telephone numbers and set the priority; 11) Function of automatic telephone connection, and working indication of telephone broadcasting control state; 12) With function of timing control, it is able to fix the time and place for the daily broadcasting programs, to preset the fixed programs manually, in order to achieve the unattended operation, and automatic broadcasting. 2 II. Description of appearance 1. Description of front panel 2 4 3 5 25 24 23 22 21 低音 高音 U盘音量 监听音量 话筒开关 0 0 多功能控制器 PA7005 -20 -10 电源指示灯 -5 0 3 (MP3/WMA) 输出电平 U盘 -10 +10 -10 +10 0 10 0 10 内置话筒 开 关 0 电源开关 监听扬声器 告警开关 1 6 7 U盘 收音 接收终端 主界面 8 9 10 11 12 13 14 10 0 10 0 10 0 10 优先1音量 优先2音量 收音音量 话筒音量 话筒接口 15 16 17 18 19 20 monitor all the output signals, including 1) Power switch Press this button to turn on the power, and pop up the button to turn of the power. the microphone signal. 7) Button of all-alarm switch In emergency circumstance, press this 2) Power indicator lamp When the power is turned on, such button to send the alarm to all the indicator lamp is on; when the power is receiving terminals. turned off, such indicator lamp is off. Press this button to directly enter the MP3 3) Output level meter It is used to indicate the intensity of the output signal; more alight indicator lamps indicate the strong 8) U-disk (MP3) control button output signal; otherwise, it indicates the weak output signal. 4) USB interface playing control interface. 9) Radio control button Press this button to directly enter the radio playing control interface. 10) Receiving terminal control button Press this button to directly enter the Insert the U-disk here to provide the control interface such as volume of built-in MP3 with programs. receiving terminal. 5) TFT color display/touch screen 11) Main interface control button It is used to display all the operations and Press this button to directly enter the main working states of the system, and it is interface. allowed to touch and control all the 12) Play/pause control button functions displayed on the screen. When playing MP3 programs, press this 6) Built-in monitoring speaker window button to switch over the operations of This device is provided with the built-in monitoring speaker, which is used to playing and pause. 13) Up selection button 3 This is a multifunctional operation key: In the state of MP3 playing, select the 20) Built-in microphone previous program to play with this button; This is the built-in microphone of this device. in the state of radio playing, select the It is allowed to speak directly into this previous channel with this button. microphone. 14) Down selection button 21) Microphone switch button This is a multifunctional operation key: In Before speaking with the microphone, please the state of MP3 playing, select the next first press this button to open the microphone program to play with this button; in the channel. In particular when speaking with the state of radio playing, select the next built-in microphone, the microphone channel channel with this button. is not opened unless this button is pressed; 15) Priority 1 input volume adjustment knob after the speaking, press this button to close It is used to adjust the volume of the input the microphone channel; otherwise, when signal of the priority 1 input port; turn it speaking in front of the device, it is possible clockwise to increase the volume, and turn it to pick up and output with the built-in counterclockwise to decrease the volume. microphone. 16) Priority 2 input volume adjustment knob 22) Monitoring volume adjustment knob It is used to adjust the volume of the input It is used to adjust the volume of the built-in signal of the priority 2 input port; turn it monitoring loudspeaker; turn it clockwise to clockwise to increase the volume, and turn it increase counterclockwise to decrease the volume. counterclockwise to decrease the volume. 17) Radio volume adjustment knob the volume, and turn it 23) U-disk volume adjustment knob It is used to adjust the volume of the built-in It is used to adjust the volume of the built-in tuner; turn it clockwise to increase the MP3 player; turn it clockwise to increase the volume, and turn it counterclockwise to volume, and turn it counterclockwise to decrease the volume. decrease the volume. 18) Microphone volume adjustment knob 24) Treble adjustment knob It is used to adjust the volume of the It is used to adjust the tone of the treble; turn microphone built-in it clockwise to boost the tone of the treble, microphone signal; turn it clockwise to and turn it counterclockwise to attenuate the increase tone of the treble. the interface volume, and and turn it counterclockwise to decrease the volume. 19) Microphone interface 25) Bass adjustment knob It is used to adjust the tone of the bass; turn it Connect the microphone configured for the clockwise to boost the bass effect, and turn it system into this interface, which is integrated counterclockwise to attenuate the bass effect. with the built-in microphone into the same input channel. It is allowed to use the built-in microphone to speak without the connection 4 of the microphone into this interface. 2. Description of rear panel 12 音频输入 右 13 14 15 RF 音量 天线 最小 通用FM收音 内置警笛声 音量 音量 75? 天线 1 F1AL 最大 通道1 移动电话接收模块 紧急FM收音 优先1 优先2 通迅口1 ~220V 电源 (300W) 通道2 ~220V/50Hz /10A 通迅口2 警告 最小 最大 11 17 调试接口 左 数据编码调制器模块 75? 天线 16 10 请勿打开,以免触电 最小 最大 9 8 输入 输入 输出 7 6 5 4 3 2 modulator module of this device. 1) AC power fuse socket The power fuse mounted here shall 6) Priority 2 input port conform to the specification as indicated It is used to connect the external sound on this device. In case of the damage to the sources such as DVD player, with the fuse, please replace with the fuse in the priority higher than that of built-in MP3 same specification; the continuous burnout and built-in radio. indicates the fault in the device. Please 7) Priority 1 input port remove the trouble in the device, and then It is use to connect the digital set-top box replace the fuse. and provide the audio signal, with the 2) AC220V power cord priority higher than that of priority 2 port, Before the access to the grid, please check the power cord for any damage in order to built-in MP3 and built-in radio. 8) Built-in siren volume adjustment knob prevent the occurrence of the electric It is used to adjust the volume output from leakage. the built-in siren; turn it clockwise to increase 3) Communication port 2 It is used to connect the digital set-top box in order to exchange the data with this device. the volume, and turn it counterclockwise to decrease the volume. 9) Emergency FM radio volume adjustment knob It is used to adjust the volume of signal 4) Communication port 1 It is used to connect the frequency from the built-in emergency FM radio; turn modulation it clockwise to increase the volume, and transmitter in order to exchange the data with this device. turn it counterclockwise to decrease the volume. 5) Audio signal output port This port is used to output the audio signal 10) Emergency FM radio antenna interface of the line, and connected to the audio It is used to connect the FM radio antenna. input (Special function for village ring; for general interface of the data coding 5 application, this interface is ignored) 11) General FM radio antenna interface 14) Mobile phone volume adjustment knob 12) Data coding modulator module audio 15) Mobile phone signal receiving antenna input interface It is used to connect the auxiliary output interface (8) of this device. 13) Data coding modulator module radio frequency output interface 2 It is used to connect the cable TV network. interface 16) Debugging interface (Use for factory debugging, not available to user) 17) AC220V controllable socket power output III. Device connection diagram The auxiliary output is used to connect the data coding modulator module of this device, and the input audio signal is output via the modulator radio frequency interface to the Mobile receiving antenna cable TV network. Cable TV network 音频输入 右 音量 RF 天线 F1AL 调试接口 左 最小 最大 数据编码调制器模块 通用FM收音 75? 天线 75? 天线 通道1 移动电话接收模块 内置警笛声 音量 紧急FM收音 音量 优先1 优先2 通迅口1 ~220V电源 (300W) 通道2 ~220V/50Hz /10A 通迅口2 警告 最小 最大 请勿打开,以免触电 最小 最大 输入 输入 输出 FM antenna DVD player FM antenna Prompt: Before the connection of the device is connected, do not connect the 220V power to the grid. Please connect the power supply to the system after completing the installation. 6 IV. Instructions to operation and use 1. Playing with sound source of this device This device is provided with the built-in MP3 and radio, and the external equipments including priority 1 and priority 2 sound sources. 1.1 To play MP3 sound source programs When playing MP3 programs, first insert the U-disk, in which the MP3 programs are stored, into the USB interface on the front panel, and then press the button “U-disk” to enter the interface “U-disk player” (As shown in the following diagram); on such interface, select the songs to be played, and then press the button “return” to return to the main interface. Press button “U-disk” to enter U-disk playing interface to select program (Figure 1 Main Interface) (Figure 2 U-disk Playing Interface) Click here to select 点击此处即可选 playing mode 择播放模式 Click here to select song Display inventory name inventory Display song name) Click here to select song Play/pause control button Click here to return to main interface (Figure 3 Instructions to U-disk Player Interface) 1.2 To play radio sound source programs When playing the radio programs, first press the button “radio” to enter the interface “radio modulator” (As shown in the following diagram), and then search and store the radio station on such interface. 1) Manual search of radio station: As shown in the following diagram, it is allowed to search the radio station with the button step by step. 2) Automatic search of radio station: It is allowed to search the radio station upward or downward automatically with the buttons “search up“ and “search down”. When finding the radio station by such 7 3) 4) 5) means, the search will be stopped automatically, and the searched radio station will be stored automatically to the storage number displayed currently for the calling in the future. Fully automatic search of radio station: Press the button “fully automatic search and storage of station” in the lower part of the interface to search from the lowest end of the frequency automatically to the highest end of the frequency. The radio stations found during the process of automatic search will be stored automatically to the storage numbers starting at 01 in turn for the calling in the future. Click the button “copy” on the left bottom of the interface to copy the currently displayed channel of the radio station to the previous storage number. After searching the radio station, press the button “return” to return the main interface and start to play the radio station. On the main interface, it is allowed to directly select the stored radio station to play. Click here to select storage Display storage number number of radio station of radio station Click here to search and store Display frequency of radio station automatically radio station Digital input buttons for setting of frequency and channel (Figure 4 Instructions to Radio Modulator Interface) 1.3 To play priority 1 and priority 2 sound sources Before playing priority 1 and priority 2 sound sources, connect the external players to the priority 1 and priority 2 interfaces on the rear panel, and then turn on the connected player equipment to play the programs. After that, turn off the volume of the other sound sources on this device, and turn on the volume of the sound source to be played, and adjust to the proper volume. 2. System setting Click the button “system setting” on the main interface to enter the system setting interface (As shown in the following diagram). Press the button “system setting” to enter system setting interface (Figure 5 Main Interface) (Figure 6 System Setting Interface) Before entering the system setting interface, there is a password entry confirmation interface; it is not allowed to carry out the system setting unless the correct password is entered. The original password of this device is left 8 blank; if the user forgets the password, please press down the next song selection button “ ” for 5 seconds on the main interface to empty the password set by the user previously; at this point, the password is left blank, and it is possible to enter the system setting interface without the entry of the password. On the system setting interface, in addition to the function setting under the next menu, it is possible to set the background light, system password, number of ringing for automatic answering of the telephone module, frequency of FM emergency broadcasting, as well as date and time. The user is not required to set “programming of transmitter and terminal”, because the incorrect setting operation may result in the failure of the terminal to work normally. 1) Timing programming: On the system setting interface, click the button “timing programming” to enter the timing programming interface (As shown in the following diagram). Edit the messages of the timing point on the timing programming interface. When implementing the edition operation, except for the function feature to be selected, it is required to enter the digits for some other function features. When entering the digits, first click in the box in which the digits shall be entered, and then click the digits at the bottom of the interface to complete the entry. Click here to check timing point message of serial number displayed currently Click here to change the serial number of time Click here to change week Click partition here to enter interface Click here to set on-off for state of power supply partition switch setting Click here to select sound Select song at timing source and set the sound point. This item must be source for playing set if selecting MP3 playing (Figure 7 Timing Point Edition Interface) Prompt: When selecting the sound source for the timing point, click the existing sound source to change to another sound source; After selecting the sound source, set the programs for such sound source; for example, it is required to set the looping mode, play/pause state, selecting songs for MP3; for the radio, it is required to call the channel of the stored radio station. After completing the setting of any timing point, click the button “storage” at the bottom of the interface to store the content just edited. When setting the partition for the timing point, click the button “partition open-close” to enter the partition open-close setting interface (As shown in the following diagram); on such interface, click the partition button to open and close the partition; the dot behind the opened partition is displayed in red, and the dot behind the unopened partition is displayed in dark gray. 9 Click here directly to open or close partition Partition page Click here to enter turning button timing partition volume scheme setting interface Partition full-open/full-clos (Figure 8 Timing Partition Opening Closing Interface) Volume scheme: Click the button “volume scheme” to enter the volume scheme setting interface (As shown in the following diagram); on such interface, it is allowed to set the volume for the timing partition when the timing point is coming. After the setting, the scheme is stored in the system, and it is allowed to call a scheme directly at the timing point. As shown in the following diagram: click the “check” button behind the serial number of the “scheme” to check the volume currently set for the partition, and use the “forward” or “backward” arrow to adjust the serial number of the scheme, so as to check the volume of the partition. When editing the volume of the partition, please click the button “edit” at the bottom of the interface; when the digital box turns to white color, click the digital box to be edited to select, and then click the digit representing the volume at the bottom of the interface to complete the edition. There is a button “track” at the bottom right of the interface; click the button “edit”, and click the button “track”, and then enter the volume digit in the digital box in front of such button, and click the button “track” again to adjust the volumes of all the partitions at the same level; finally, click the button “store” at the bottom of the interface to complete the editing operation for the volume scheme of one timing partition. Serial number of Unified adjustment button for timing volume scheme volume of timing partition Adjustment button for serial number of timing volume scheme Customization operation button for volume scheme (Figure 9 Timing Volume Scheme Interface) 2) Terminal control Press the button “receiving terminal” on the front panel under the main interface to enter the terminal control interface (As shown in the following diagram). 10 Used to control power-on Terminal partition paging and off of transmitter or button data coding modulation module Terminal full opening / full closing control button Terminal partition volume scheme setting button Terminal display page turning button (Figure 10 Terminal Control Interface) On such interface, click all the terminal, transmitting power supply, and partition paging buttons to perform the operation of opening or closing directly. All the opening states are displayed with red bright spots, and all the closing states are displayed with the gray bright spots. Transmitting power supply: Turn on the “transmitting power supply” here to turn on the power supply switch of the transmitter or switch on the output of the “data coding modulation module”. Partition paging: Open the “partition paging” here to release the paging to the partitions opened manually, and no paging will be released to the partitions unopened. This function is different from the paging released with the “microphone switch” on the front panel; when pressing the button “microphone paging”, all the partitions are opened automatically, while the paging is released to all the partitions; the button “partition paging” on the “terminal control” interface is used only to release the paging to the individual partition to be selected for opening manually. After turning off the function of “partition paging”, the microphone on the front panel is also turned off. Volume scheme: The volume scheme here is the same as that of the timing partition. First, the volume is preset for the partition, and all the partitions are stored as a scheme for the direct calling in the future. The operation method is the same as the setting method for the volume scheme of the timing partition, so we will not cover this again. Please refer to the description of the “timing edition” for operation. 3) Description of system control interface On the system setting interface, in addition to the function set under the next menu, it is possible to set the other functions directly on the interface as shown in the following diagram. Background light: Set the time state When the background light of the display screen is lighted; if it is set as normally open, the light will always be alight; if it is set as automatic, the background light will go out automatically if the equipment is subject to no operation for certain period of time, and it will be lighted if the equipment is subject to any operation. System password: Set the password for entering the “system setting”. The original password for this system is left blank. The user shall be cautious when setting the password for the system. Please remember the password if such password has been set. Before entering the system, it is necessary to enter such password to enter the system setting interface. If the user forgets the password, press down the song selection button “next song” on the main interface for at least 5 seconds to empty the password. Date and time: Set the date and time of the system. After completing the setting, it will be displayed at the top of the main interface. 11 (Figure 11 System Setting Interface) 4) Telephone setting Click the button “telephone authority” on the “system setting” interface to enter the telephone setting interface (As shown in the following diagram). On such interface, it is allowed to set the password and priority for the telephone number, and set whether the caller identification is needed for the device. When setting, first click the button “add”, and enter the telephone number, and then set the password, and finally click the button “store”. The set telephone number and its Tick here, and this device information are displayed here will display the caller ID. Click before After editing a telephone telephone number, click button “store” button “add” entering new to store it number When modifying the existing telephone number, first select it and then click button (Figure 12 Telephone Setting Interface) “modify” 5) Priority setting Click the button “priority” on the “system setting” interface to enter the function priority setting interface (As shown in the following diagram). When setting, click the box behind the function, and then click the level button at the bottom of the interface to set the priority of such function as the entered level. Note: Both the GSM telephone module and fixed telephone module are optional functions and set as the same priority; at this moment, enable the priority setting of the dialed telephone number. Please refer to the description of the “telephone setting” for the priority setting method for the dialed telephone number. 12 (Figure 13 Priority Setting Interface) 6) Call log Click the button “call log” on the “system setting” interface to enter the call log check interface (As shown in the following diagram). (Figure 14 Call Log Check Interface) On such interface, it is allowed to check the caller ID, calling date and time and so on. 7) Terminal programming Connect the communication port of the receiving terminal to the communication port 1 of the host to achieve the communication between the receiving terminal and the host. On the host, enter the “system setting” interface, and then touch the button “transmitter” to enter the setting interface. The interface is shown in the following diagram: Touch this button to enter the interface as shown in the following diagram Host “System Setting” Interface 13 Setting the transmitting frequency here Host “Transmitting Frequency” Setting Interface Set the “transmitting frequency” on this interface properly. Such frequency is the fixed receiving frequency of the receiving terminal. After the setting, touch the button “store” to store such parameter and exit from the “transmitter” setting interface. Touch the button “terminal programming” on the “system setting” interface to enter the terminal programming operation interface as shown in the following diagram: Touch this button to enter the interface as shown in the following diagram Host “System Setting” Interface Enter the address of receiving terminal here Host “Terminal Programming” Interface 14 On such interface, select the address and baud rate parameter of the receiving terminal, and then touch the button “programming” to program the receiving frequency set on the “transmitter’ interface to the receiving terminal. After completing the programming and displaying the successful programming, touch the button “return” to exit from such interface, so as to complete the parameter setting for the receiving terminal and the parameter programming operation. 8) Timing point copy On the ”system setting” interface, touch the button “timing copy” to enter the “timing point copy” interface, as shown in the following diagram: Touch this button to change the option of date (Week) Touch this button to select this week The small red circle indicates that this date is selected Touch this button to start the copying Timing Point Copy Interface 9) Screen calibration On the “system setting” interface, touch the button “screen calibration” to enter the display screen touch point calibration interface, and click in the red crossing circle appeared on the interface, and click on the four corners in turn, until the calibration is completed successfully. 15 3. Other function operations 1) One-key paging function Press the “microphone switch” on the front panel to release the paging to all the partitions simultaneously. When pressing this button, the volume of all the partition will be adjusted to the maximum automatically. Press the button “microphone switch” to enter the interface as shown in the following diagram. At the bottom of such interface, there is a function option “whether confirming the query option”; if selected such function, press the “microphone switch” to enter the query confirmation interface; on such interface, select the “release” to turn on the microphone and enter the paging release interface; select “not release” to return to the original interface. Select whether confirming Click here to hang up when the the query function or not paging broadcasting is over here (Page 15 All-Partitions Paging Interface) (Figure 16 Paging Release Confirmation Interface) 2) All-partitions alarm Press the red alarm switch button on the front panel to give alarm to all the partitions. When giving the alarm to all the partitions, the button lamp of the alarm switch will be lighted up, all the partitions will be opened compulsorily, and the volume of the partitions will be adjusted to the maximum automatically. When the alarm is over, press the alarm switch to pop the switch up so as to turn off the alarm. 16 Precautions for Use 1. Precautions for safety in use Before connecting the system line properly, do not insert the power plug of this equipment into the grid. Ensure the voltage input to the equipment shall be fully consistent with the voltage of this equipment to prevent the risk in the burning of the equipment. There is the hazardous voltage in the machine, which is sufficient to cause the electric shock to the person. Please do not open the machine housing without authorization to prevent the hazard of electric shock. In the event that the power supply to this equipment is turned off, the machine is not fully disconnected with the power supply of the grid. For the purpose of safety, please pull the power plug out of the socket when the equipment is not in service. Please do not put the equipment in the extremely cold or hot place. Ensure the good ventilation in the working environment of the equipment, to prevent the damage to the equipment due to the heating in working and excessively high temperature. In the rainy and humid days or if the machine is not in service for a long term, please pull out the power plug. Before removing or reassembling any part of the equipment, disconnecting or reconnecting any electrical plug or other connections of the equipment, be sure to pull out the power plug to ensure the full disconnection of the equipment with the grid. In case of any fault in the equipment, the non-professional person shall not disassemble the housing for repair without the approval, in order to prevent accident or aggravate the damage to the equipment. Do not put any corrosive chemicals nearby or on the equipment. 2. Precautions for after-sales service 17 In case of the installation and operation according to this instruction, the company will provide the free warranty service (Including replacement of parts free of charge) for any problem in the normal operation for two years since the date of purchase. In case of the warranty, the user shall show the user’s voucher of warranty card and the invoice as the certificate. In any of the following cases, the free warranty shall not be applicable: (1) In any of the following cases, the free warranty shall not be applicable: (2) The damage to the product due to the abnormal conditions (e.g. excessively high power voltage or ambient humidity); (3) The damage to the product due to natural and man-made disaster and other accidents; (4) The number on the product body is changed, altered or removed; (5) The product has been repaired or refitted by the person other than those authorized by the company; Please keep the operation instruction and warranty card properly. For the issue or matter not covered herein, please contact the distributor or visit the homepage of our company. In case of any fault occurred during the period of warranty, please contact the service personnel of our company (or distributor); our company will not take responsibility for the damage due to the unauthorized disassembly or the repair by the person other than the technicians of our company. Indicator parameters Item Indicator Output level 0dBV Built-in sound source U-disk playing, double FM modulator U-disk player decoding format MP3, WMA U-disk reading capacity and compatibility Compatible with most of commercially available 1-16G U-disks Signal to noise ratio ≥70dB (line) Frequency response 50Hz-20kHz (±3dB) Harmonic distortion <1% (1kHz) Serial communication port baud rate 9600bps Radio frequency output 0dBm Data coding modulator Double FM modulators Range of tone Radio frequency range Frequency range 87-108MHz Radio frequency input impedance 75Ω Noise limited sensitivity ≤3uV Data broadcast receiving Supporting RDS Treble (10kz) ±12dB Bass (100Hz) ±12dB 76-108MHz Mobile phone module CMCC 2G network, China Unicom 2G network Monitoring module Output power 3W/8Ω, adjustable volume Line input sensitivity 250mV (±50mV) Microphone input sensitivity 3mV (±2mV) Power supply input AC220V (±15%) Power supply output 2 groups (controllable), total power 300W Power consumption 10W Attention If the power switch of the equipment is “off”, the machine is not disconnected to the grid; for the purpose of safety, please pull the power line plug out of the socket if this equipment is not in service. This equipment shall not suffer from water dripping or spraying. Do not place the vase full of water onto the equipment. Do not open the cover plate of the machine without authorization to prevent electric shock. It shall be repaired by the professional with professional certificate if necessary. The terminal marked with in the equipment indicates the hazardous electrification. The connection of such terminal shall be completed by the trained personnel. This equipment is connected to the power supply of the grid with the power line plug; in case of any fault or risk in the equipment, pull out the power line plug to disconnect the connection between the equipment and the grid; therefore, the power line plug shall be put in the place easy for plug-in/out of the power line. LY International Electronics Co., Ltd. 18