1
2. Each succeeding course, up to and including the eighth course, should
start with a shingle 5" shorter (off the left end) than the previous
course. Expose each course 5 5 ⁄8 ". This completes “Section I”.
3. Install “Section II” as shown in Figure 10-15 using full shingles
against the eighth courses in “Section I.” This must be done before
continuing with course nine. These “Section II” shingles are to be
butted-up against the “Section I” shingles.
69/16" (1/2 tab)
21/2 tabs off
6th
1911/16" (11/2 tabs)
5th
2 tabs off
261/4" (2 tabs)
4th
11/2 tabs off
2nd
1/2 tab off
1st Course
Full 3 tab
2. Complete courses across the roof using full shingles.
3213/16" (21/2 tabs)
3rd
1 tab off
SUCCEEDING COURSES:
1. Repeat the above two-part procedure up the roof.
Deck
131/8" (1 tab)
Starter
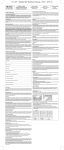
Figure 10-17: Half-Tab Method.
HALF-TAB METHOD
▲
CHIMNEY FLASHING
Deck
▼
6th
5th
Underlayment
4th
3rd
2nd
1st Course
7
(180 mm)
2 (50 mm)
Minimum
Starter
3 (75 mm)
Minimum
Figure 10-16: Half-Tab Method.
STARTER COURSE:
1. Use CertainTeed Swiftstart or a starter course consisting of
the shingles from which the lower tabs have been removed
(Figure 10-13). Remember, the sealant on starter courses should
lay as close as possible to the eaves edge of the roof.
Fold down
counter flashing
over step flashing
2. Cut half a tab off the length of the first starter strip and apply at the lower
left corner of the roof. This starter strip should overhang the rakes and
eaves 1 ⁄2 " when drip edge is used, or 3⁄4 " when no drip edge is used.
3. Continue with full-length starter-strip shingles along the eaves.
(Figure 10-16).
2 L ap
(5 0 m m )
m in im u m
Fasten
Flashing
To Roof
Counter
Flashing
1ST COURSE: Apply a full shingle at the lower left corner of the
roof, tabs flush with the starter course (Figure 10-16).
2ND COURSE: Cut 6 9 ⁄16 " (half of a tab) off the left end of a shingle
and apply the remaining piece over the first-course shingle, flush
with the left edge and exposing the first course 5 5 ⁄8 " (Figure 10-16).
Apron Fla
shing
3RD THROUGH 6TH COURSES: Each succeeding course, up to
and including the sixth course, should start with a shingle one-half of
a tab (6 9 ⁄16 ") shorter (cut-off from the left end) than the previous
course (Figure 10-16). Expose each course 5 5 ⁄8 ".
NOTE: Most CertainTeed 3-tab shingles have 3 aligning notches cut
into the headlap which can be used as a guide to line-up the cut-outs.
Figure 10-18: Flashing around a chimney.
98
Chapter 10
C E R T A I N T E E D S H I N G L E A P P L I C A T O R’ S M A N U A L