1
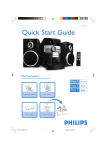
AJL303
Quick Start Guide
What’s in the Box?
You should find these items upon opening the box.
Quick Start
Guide
AJL303_QSG_Eng.indd
1
User Manual
AC adaptor
2008-09-25
4:50:58 PM
SLEEP
TUNING
CLOCK
Connect the supplied
AC adaptor to the set
and to the AC outlet.
DC IN 5V
DC IN 5V
Select on-screen display language
1
2
3
4
5
Press MENU.
➜ The home menu appears.
Select [Settings], then press OK.
➜ The setting menu appears.
Select [Language], then press OK.
Select an option, then press OK to confirm.
Press MENU to exit the setting menu.
AJL303_QSG_Eng.indd
2
2008-09-25
4:51:03 PM
Set time and date
1
2
3
4
Press MENU.
Select [Settings] -> [Clock] -> [Set time], then press OK.
Press 34 to set the hour, then press OK to confirm.
Press 34 to set the minute, then press OK to confirm.
5
Select [Set date], then press OK.
6
Press 34 to set the day, then press OK to confirm.
7
Press 34 to set the month, then press OK to confirm.
8
Press 34 to set the year, then press OK to confirm.
9
Press MENU to exit the setting menu.
Set the alarm timer
1
2
Press ALARM 1/ALARM 2.
➜ The Alarm 1/ALarm 2 icon and the clock digits are displayed.
Press 34 to set the hour, then press OK to confirm.
AJL303_QSG_Eng.indd
3
2008-09-25
4:51:04 PM
3
Press 34 to set the minute, then press OK to confirm.
➜ At the set time, the alarm sounds and the volume increase
gradually.
Note:
In photo or music mode, press and hold ALARM
1/ALARM 2 to save the current photo/music as the
alarm photo/music.
Display clock
1
2
Press MENU.
Select [Clock], then press OK.
➜ The current time and alarm status are displayed on a
background of photos from the internal memory.
Note:
• To change the clock position (5 positions available)
on the screen, press CLOCK.
• You can change clock face (either analog or digital)
by selecting [Settings] -> [Clock style] -> [Format].
AJL303_QSG_Eng.indd
4
2008-09-25
4:51:04 PM
Listen to FM radio
1
2
3
Press MENU.
Select [Settings] -> [Auto tune], then press OK.
➜ All available stations are programmed.
➜ After all stations are stored, the first preset station
automatically plays.
Press 34 to select the desired radio station.
View photos
1
2
3
Insert an SD/MMC card into the SD/MMC card slot.
Select [Photo] from the home menu.
➜ Thumbnail previews of the pictures stored in the card are
played.
Press OK.
➜ A slideshow of the stored pictures starts from the picture
selected.
Note:
• In photo or clcok mode, press TUNING 1 2to select previous/
next photo; press 34 to rotate clockwise/anti-clockwise.
• In photo mode, press CLOCK to display the clock for 10
seconds.
AJL303_QSG_Eng.indd
5
2008-09-25
4:51:05 PM
Listen to music
1
2
3
4
Insert an SD/MMC card into the SD/MMC card slot.
Select [Music] from the home menu.
Press 34 to select a folder/file.
Press OK.
➜ The file is played.
Tip
Detailed playback features and additional
functions are described in the accompany
owner's manual.
C Royal Philips Electronics N.V. 2008
All rights reserved.
http://www.philips.com
PDCC-SY/ZYL-0839
AJL303_QSG_Eng.indd
6
2008-09-25
4:51:06 PM