1
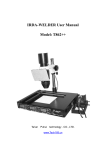
IRDA-WELDER User Manual
Model: T862++
Tai an Puhui technology . CO., LTD.
www.contactelectric.ro
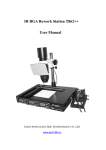
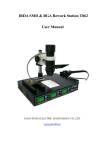
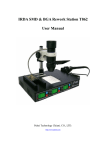
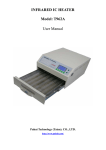
IRDA-Workstation T862++
User
Manual
CATALOGUE
.
1. Features
.2
2. Technical Parameter and Components
3
3. T-862++ Illustrated Explaination
4
(1)The Whole Machine
4
(2)Front panel and Rear panel .
..5
(3)IR Lamp Body(Focus Holder and Others)
..
6
4. Infrar
.
(1)Unpack the packaging
7
.
.7
(2)Check the items.......................
7
(3)Install the cell guide...
7
(4)Install the steady Ring ..
.7
(5)Assemble Wholly
...7
(6)Connect the Tie Wire of the Lamp and the Iron
.8
(7)Attach the IR Filter
.8
5. T-862++
...
9
Choose the lens
9
Open the machine
..
Remove
9
..
Soldering the chip
10
..
..
10
11
6. Maintenance and Warning.
Http://www.tech168.cn
12
1
IRDA-Workstation T862++
User
Manual
Features
Unlike Air Re-Work systems, The T-862++ uses an Infrared source
and optics to target heat to individual components without
dislodging other SMT parts by way of eddies air currents.
Infrared soldering technology with independent exploration
capabilities via three (3) focus lenses which are included with the
package.
Technician focused infrared heat is easy to target most component
removal/replacement and re-work.
The Workstation has a 120 X120mm a 650W controlled Pre-heating
System.
Infrared heat source bulbs are long-lived, in-expensive and easily
replaced.
Processor controlled set-point regulated temperatures with
thermocouple feed-back.
Integrated and adjustable Infrared (IR) eye protection.
Can suitable for the entire component, especially Micro BGA
component.
The T-862++ system also contains a temperature controlled
touch-up iron and stand.
Extra soldering tools are not necessary to solder/unsolder and
re-work Surface Mount Technology (SMT) components 15-35cm in
size
Training is illustrated in factory provided video.
Http://www.tech168.cn
2
IRDA-Workstation T862++
User
Manual
Technical parameter
AC220V/50Hz
AC110V/60Hz
Working Voltage
Output power
800W
Infra-red lamp body temperature adjustable
100
Preheating dish temperature adjustable
60
-350
-200
Components
Description
Quantity
T-862++ Chassis
1
PCB Board holder
1
936 Searing-iron
1
936 searing-iron rack
1
Lamp Body and Lens(D=28mm)
1
Lens(D=38mm)
1
Lens(D=48mm)
1
Eye protection(IR Filter)
1
Cell guide
1
Focus holder
1
Focus holder control knob
1
Fasten nut for focus holder
1
Steady ring
1
Fasten nut for steady ring
1
Power Cable (110VAC or 200VAC)
1
5mm Fuse, 10A 250VAC
1
(Spare)
CD User Manual w/Video
(D=28mm)
Illustration
1
(D=38mm)
(D=48mm)
[Shipped On Lamp Body]
Http://www.tech168.cn
3
IRDA-Workstation T862++
User
Manual
T-862++ Illustrated explaining
(1)The whole machine
The end covering
Fan Protector Protection Cover
Cell guide
Lamp body
Focus holder
Focus holder control knob
Eye Protection
(IR Filter)
Preheat dish
936 searing-iron
Lens for infrared lamp
Holder for PCB board
936searing-iron rack
Chassis (working bench )
Front panel
Http://www.tech168.cn
4
IRDA-Workstation T862++
User
Manual
(2)Front Panel
The screen displayed the
temperature of the 936 iron
The screen displayed
the peak temperature
of the IR lamp
The screen displayed
the temperature of the
preheat dish
Infrared Lamp Switch
Touch-UP Iron Switch
Preheat Switch
Temperature Set-Point Entry Buttons
Rear Panel
Jack for universal
power line
Fuse
Jack for 936Iron
Jack for Lamp body
Main Power Switch
Http://www.tech168.cn
5
IRDA-Workstation T862++
User
Manual
(3)Infrared Lamp
(Focus holder and others)
IR Lamp Cooling Fan
Cell guide
Focus holder
control knob
Focus holder
Focus holder
Fasten nut for focus holder
Fasten nut for steady ring
steady ring
Http://www.tech168.cn
6
IRDA-Workstation T862++
User
Manual
Infrared Work Station Unpacking and Assembly
1.Unpack and remove the T-862++ two (2) major assemblies and minor components from the
styrofoam packaging material and set aside.
Note: The Infrared Head, Body Mounting and Focus Assembly will be installed in the T-862++
chassis later.
2. Inventory all Items, confirm no parts are missing. If parts are missing call 0086 538 6138575
3.Install the cell guide. Loosen the fasten nut of the focus holder first, then install the cell guide
as follows:
The method to install the cell guide
The cell guide
4.Install the steady ring. Loosen the fasten nut for steady ring first, installed the steady ring as
follows, then fasten the nut.
Steady ring
The direction to fasten
the steady ring
5.Assemble wholly.
Relax the fasten nut of focus holder
Install the cell guide on the relevant nut, screw the cell guide on the nut as follows.
Rotation the fasten nut of focus holder to fix the focus holder .
Rip off the protective film of the filter.
Direction of Rotation
.
Http://www.tech168.cn
7
IRDA-Workstation T862++
User
Manual
6.Connect the IR-Lamp body and the 936-Iron with the chassis.
Insert the pin into the relevant jack.
Rotate rightward to fix it.
7. Attach IR Eye protective filter with the supplied screw and nut.
Http://www.tech168.cn
8
IRDA-Workstation T862++
User
Manual
T-862++ Operation
Infrared Lamp Body
PC Board Support
T-862++ chassis
1. Locate, choose and attach the appropriate lens:
The usable of the lenses diameter are 28mm, 38mm, 48mm.
(1)When the area of the chips is below 15mm*15mm, please choose the IR-lamp temperature
about 160-240
, and choose the lens which D=28mm to avoid destroying other places,
usually it will take you about 20-40seconds.
(2)When the area of the chips is between 15mm*15mm and 30mm*30mm, please choose the
IR-lamp temperature about 240-320
, and choose the lens which D=38mm to avoid destroying
other places, usually it will take you about 30-60seconds.
(3)When the area of the chips is above 30mm*30mm, please choose the IR-lamp temperature
350
(Attention: you should turn on the pre-heat dish first, and set-up the temperature about
150-200
,wait 3-5minutes to allow the temperature steady on the set-up temperature),and
choose the lens which D=48mmto avoid destroying other places, and keep the lamp body direct
light. You should control the time carefully to avoid burning the chips.
Warning:
The light system will shoot straightly. Please pay more attention to yourself control time to
avoid burning out.
2. Open the machine
(1) Check if the connection wire of the lamp body and the 936-Iron is ok.
(2) Locate and attach the power cable to the rear of the re-work station
(3) Confirm all front panel rocker switches are off.
(4) Place the rear AC Power Switch in the ON Position.
(5) Allow the T-862++ Power-On-Self-Test (POST) to complete.
(6) Temperature set-points will display last value used.
(7) Place the target PC Board on the slip-rack and orient to close proximity of estimated
position of focused Infrared light,
Http://www.tech168.cn
9
IRDA-Workstation T862++
User
Manual
(8) Adjust the T-862++ Infrared light system height, allow 20-30mm from lens end to PC board
target component.
(9) Turn on the two switches. They control warm-up plate and light system.
3. PC Board Component Removal and Replacement.
(1)Put the PCB board onto the holder
(2)Turn on the switch of the pre-heat dish, and set-up the temperature
(3)Turn on the switch of the IR-Lamp, Regulate the temperature (the temperature must be
warm enough to allow the solder to be liquefied), focus the Infrared light on the chip to
be removed.
(4)Once the solder liquefied and melted, use tweezers to remove the chip
4. Soldering a chip.
(1) Clean the target pad with the brush
(2) Then put the solder ball and a flat of solder flux on the target pad
(3) Turn on the switch of the pre-heat dish, and set-up the temperature
(4)Turn on the switch of the IR-Lamp, Regulate the temperature (the temperature must be
warm enough to allow the solder to be liquefied), focus the Infrared light on the chip to
be solder
Http://www.tech168.cn
10
IRDA-Workstation T862++
User
Manual
(5) Wait to allow the Infrared lamp to heat the solder flux to work as the solder balls on the
target chip pad reaches liquid temperature. Use tweezers or a vacuum device to place the
chip target position. Once the solder liquefies, the chip will be sold automatically.
After cooling the chip, pick up the PCB board, check if it is ok. If not, re-operate.
5. The use of the 936 searing-iron
It can be used separately, But be sure it must be connect with the chassis.
If the component is too small, you needn t use the IR-lamp, the 936 searing-iron is
enough.
Open the switch of the 936 searing-iron, set-up the temperature, then use it as you want.
Http://www.tech168.cn
11
IRDA-Workstation T862++
User
Manual
Maintenance:
At all times
Insure the light body cooling fan is unobstructed and clean.
Use a little machine oil. Lubricate the focus holder and cell guide to inhibit rusting,
keep them ease to operate.
Warning !
The T-862++ System creates temperatures in excess of high degrees via Infrared Light. Wear
appropriate eye protection or any device within the T-862++ when using it. After use, Do not cut
the power immediately, confirm the light body is cool-to-touch, Turn off the power switch, then
place the system in airiness & safety storage.
Do NOT use this system or any associated device in an environment conducive to fire or electrical
overload.
Disconnect the AC Power Plug when not in use.
When using, it is of high temperature, Do NOT allow children or the un-trained to touch the
T-862++.
12