1
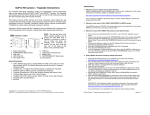
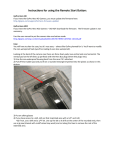
GoPro HD Camera TwinCam Instructions The Traqmate GPS Data Acquisition system can automatically record synchronized video on the popular GoPro HD HERO2TM cameras. The Traqmate will remotely control the GoPro cameras by turning them on and off and starting and stopping the video recording along with the data recording. These instructions are for adding a second camera and supplement the installation instructions for installing a single camera. NOTE: The TwinCam dual camera solution is only supported for 2 GoPro HERO2 cameras. Do not use this with HERO1 cameras. Operating two GoPro cameras with the Traqmate is easy and foolproof but it requires some one-time preparation of the cameras. Carefully follow these step-by-step instructions. NOTE: The rear case door of the GoPro camera requires a slot to access the Hero BUS Port. A template is included to create a slot or milled rear doors are available from Traqmate. To remove the rear door, snap the door out of the hinge at the bottom using a twisting motion. 1. 2. 3. 4. 5. Status LCD Screen POWER/MODE Button (front) LED Light HDTV Out Port Hero BUS™ Port 6. 7. 8. 9. 10. USB Port Video/Audio Composite Out Battery Door SHUTTER/SELECT Button (top) SD Card Slot Required Equipment GoPro HERO2 HD 1080 camera TraqData Pro or TraqSync Pro Interface Module, available from Traqmate TwinCam interface splitter and 6” RJ-45 cable Two Interface Cables for GoPro Cameras, available from Traqmate Traqmate Complete with 3.33 or later firmware (Display and Sensor Units) Traqmate Basic system with 3.33 or later firmware TraqDash with 2.20 or later firmware, Sensor Unit with 3.33 or later firmware Charged GoPro Camera Batteries SD Cards TraqData Pro and TraqSync Pro are designed for use with GOPRO® products. GOPRO® is a registered trademarks of Woodman Labs, Inc. in the United States and other countries. Instructions: 1. Determine if your Traqmate has the latest firmware. Update Traqmate Sensor Unit and Display Unit to V3.33 or later. TraqDash to V2.20 or later. Instructions and firmware updates are available at this link: http://store.traqmate.com/Latest-Software-Firmware-Downloads-s/286.htm If you are using a TraqDash, select Race Setup / Vehicle / Vehicle Settings / Camera and choose GoPro HD 1080. 2. Turn on One Button Record Mode “One Button Mode On” forces the camera to automatically begin recording video once the camera is turned on. In “One Button Mode On” the camera is either on and recording or powered off. The SHUTTER/SELECT button is disabled in “One Button Mode On” and will not start or stop the recording while the camera is on. Do this for both cameras. HERO2 a. Press the POWER/MODE button to power up the camera. b. Press the POWER/MODE button repeatedly until a wrench icon is displayed on the camera LCD. c. Press the SHUTTER/SELECT button. The mode menu should be displayed on the LCD. Make sure the video camera icon is shown indicating video mode. d. Press the POWER/MODE button seven times so that One Button menu is showing on the screen. e. Press the SHUTTER/SELECT button once to display OFF / ON. f. Press and release the POWER/MODE button to select ON. g. Press and hold the POWER/MODE button for 3 seconds until the camera turns off. The GoPro HD camera is now ready for connection to the Traqmate. The camera will retain these settings so steps 1 and 2 should not be required in the future. 3. Operation of the Traqmate and GoPro HERO cameras NOTE: It is the user’s responsibility to ensure the GoPro camera batteries are charged and the SD cards are inserted and have sufficient free space to record your videos. a. Turn on the Traqmate b. On Traqmate Complete and TraqDash systems an icon will indicate that at least one camera is properly connected to the TraqData Pro or TraqSync Pro interface module. c. Select a recording mode TraqDash – Go Racing / Laps Traqmate Complete – Record Data / Laps Traqmate Basic – Press Red button or AutoRecord d. When GPS signal is acquired and the data starts recording, the GoPro cameras will turn on and start recording. e. When the on-track session is finished, stop the data recording on the Traqmate. TraqDash – Press red << Back icon Traqmate Complete – Press red << Back button Traqmate Basic – Press Red button or AutoStop f. When the Traqmate stops recording data, the GoPro cameras will stop recording video and turn off. GoPro TwinCam Traqmate Instructions Version 1.0 Page 2 / 4 4. Using Data and Video in TraqStudio 7. Traqmate Interface Module Connections a. Move Data from Traqmate to PC TraqDash – Copy .tqm file from MySessions on SD card Traqmate Complete – Download using TraqStudio and USB cable Traqmate Basic – Download using TraqStudio and serial cable b. Open data file on PC using TraqStudio. You should see the track map. c. Copy the videos file to the PC in one of two ways. Remove SD card from a GoPro camera and insert into PC slot or SD card reader Plug GoPro camera into PC via the USB cable and press POWER/MODE button. Do this for both cameras so that both video files are on the PC. d. In TraqStudio, click on Setup button at top of Dashboard window. e. Put checkmark next to Video and select OK. f. Select a video matching the data from PC folder where you copied them. g. Video should appear in a window. Click the > Play button at the bottom of the TraqStudio window. Press the Show Dash button to see a gauge overlay. h. In the current release of TraqStudio, only one camera view can be displayed at a time. You can flip between the camera views by choosing “Open” on the top of the video window frame and choosing the other video file. Traqmate Sensor Unit Switch inside enclosure for Electronic or Coil Operation. Default is Electronic. TraqData Pro Module GoPro HD Camera (rear) 6" Cable RJ45 Plug TwinCam Splitter TraqData / GoPro Interface Cable RJ45 Plugs 5. Tips You can set the Date on the GoPro HERO camera to help you find the correct video files when you are combining your data and video during the review process. More information about setting the date can be found in the HERO2 user manual. It is not recommended to remove the battery from the camera, some settings can be lost. 6. Instructional Videos TraqData / GoPro Interface Cable GoPro HD Camera (rear) TraqData Pro Connection Traqmate Sensor Unit Opening a Data and Video File http://youtu.be/AP2tZnH4ijc TraqSync Pro GoPro Camera Interface Creating a Video http://youtu.be/zlxNFkVRt7A GoPro HD Camera (rear) TwinCam Splitter Switch inside hood for Electronic or Coil Operation. Default is Electronic. TraqData / GoPro Interface Cable Blue Wire to Tach RJ45 Plugs Use Included Crimpless Connector NOTE: RJ-45 Coupler and 6" RJ-45 cable are not needed for TraqSync Pro installation. GoPro HD Camera (rear) TraqData / GoPro Interface Cable TraqSync Pro Connection GoPro TwinCam Traqmate Instructions Version 1.0 Page 3 / 4 GoPro TwinCam Traqmate Instructions Version 1.0 Page 4 / 4