1
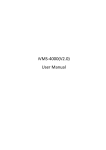
iVMS-2000 POS Application Guide V2.0.0 Hangzhou Hikvision Digital Technology Co., Ltd. I iVMS-2000 POS Application Guide Thank you for purchasing our product. If there is any question or request, please feel free to contact us. This Manual is for iVMS-2000 Hybrid PC-DVR Software. This manual may contain several technically incorrect places or printing errors, and the content is subject to change without notice. The updates will be added into the new version of this manual, and we will readily improve or update the product or procedure described in the manual. ©2006 – 2010 by HIKVISION. All rights reserved. I iVMS-2000 POS Application Guide Notices The information in this documentation is subject to change without notice and does not represent any commitment on behalf of HIKVISION. HIKVISION disclaims any liability whatsoever for incorrect data that may appear in this documentation. The product(s) described in this documentation are furnished subject to a license and may only be used in accordance with the terms and conditions of such license. Copyright © 2006-2010 by HIKVISION. All rights reserved. This documentation is issued in strict confidence and is to be used only for the purposes for which it is supplied. It may not be reproduced in whole or in part, in any form, or by any means or be used for any other purpose without prior written consent of HIKVISION and then only on the condition that this notice is included in any such reproduction. No information as to the contents or subject matter of this documentation, or any part thereof, or arising directly or indirectly therefrom, shall be given orally or in writing or shall be communicated in any manner whatsoever to any third party being an individual, firm, or company or any employee thereof without the prior written consent of HIKVISION. Use of this product is subject to acceptance of the HIKVISION agreement required to use this product. HIKVISION reserves the right to make changes to its products as circumstances may warrant, without notice. This documentation is provided “as-is,” without warranty of any kind. Please send any comments regarding the documentation to: [email protected] Find out more about HIKVISION at www.hikvision.com ©2006 – 2010 by HIKVISION. All rights reserved. II iVMS-2000 POS Application Guide Index 1 Brief Description of POS Application .................................................................................1 1.1 Hardware Configuration ............................................................................................. 1 1.2 Software Configuration............................................................................................... 3 2 POS Configuration ....................................................................................................................9 2.1 POS Management.......................................................................................................9 2.2 POS Rule .................................................................................................................... 12 2.3 Display Setup .............................................................................................................17 ©2006 – 2010 by HIKVISION. All rights reserved. 1 iVMS-2000 POS Application Guide 1 Brief Description of POS Application iVMS-2000 POS Application is part of iVMS-2000 system to support POS surveillance solution. Construction of iVMS-2000 POS application is: each POS machine is connected with a printer via serial port (RS232), and the POS transaction data is transmitted to iVMS-2000 via COM port or network connection. For network POS data transmission, users need to connect a serial port server to transfer the serial port data into network data and sends it to iVMS-2000. Terms Description Item Description POS Rule Rules configured by users to filter the original POS transaction data Original Data Data send by the POS Filtrated Data Data filtered by POS rules, which will be the final content displayed on video images 1.1 Hardware Configuration POS transaction data is send to iVMS-2000 via either serial port or network transmission. 1. Serial Port Connection Connect POS and PC directly with serial port (RS232) cable (Figure 1-1). Figure 1-1 Serial Port Connection Please refer to the following steps for connection between POS, Printer and PC: ©2006 – 2010 by HIKVISION. All rights reserved. 2 iVMS-2000 POS Application Guide Step 1: connect the POS with root end of a Y-branch RS232 cable. Step 2: Connect the 2 branches of the Y-branch RS232 cable to the printer and the PC that installed iVMS-2000. 2. Network Connection The IO Server can transfer the serial port data sent by POS into network data, and it is connected with POS via serial cable (Figure 1-2). Figure 1-2 Network Connection Please refer to the following steps for connection between POS, Printer, IO Server and PC: Step1: Step 1: connect the POS with root end of a Y-branch RS232 cable. Step 2: Step 2: Connect the 2 branches of the Y-branch RS232 cable to the printer and the IO Server. Step 3: Power on the IO Server. Step 4: Connect the IO Server to the network (Figure 1-3). Figure 1.3 NC601B ©2006 – 2010 by HIKVISION. All rights reserved. 3 iVMS-2000 POS Application Guide 1.2 Software Configuration The following content mainly describes the software Configuration for IO Server. First of all, please make sure that the IO Server and the PC are both connected into the same network. 1. Modify the IP of IO Server If the IP addresses of IO Server and PC are not in the same network section, users need to update the IO Server’s IP as the following configuration steps: Step 1: Double click the Upgrade.exe in the software CD, the software window will popup as below: Step 2: Click the Magnifier icon on the tool bar and enter the searching window as below: If the POS server is connected correctly, a software window will be displayed as below: ©2006 – 2010 by HIKVISION. All rights reserved. 4 iVMS-2000 POS Application Guide Step 3: Click [Tools] and select [Temporary change IP address]: Step4: Input IP address for POS, please notice that the POS server’s IP should be in the same segment as the PC. Step 5: Click [OK] Step 6: Click [OK] ©2006 – 2010 by HIKVISION. All rights reserved. 5 iVMS-2000 POS Application Guide 2. Configure POS Server Please follow the operation steps below for POS server configuration. Step 1: Input POS server’s IP in the address bar of IE browser, and click [Go]; Step 2: Click [Server] in the list on the left side, and configure POS server’s IP address, subnet mask and default gateway, etc. Click [OK] after all the configuration steps are done. ©2006 – 2010 by HIKVISION. All rights reserved. 6 iVMS-2000 POS Application Guide Step 3: Click [Serial Port Configuration] to configure serial port parameters. Select ‘RS232’ as [Type], and click [OK] after all the configuration steps are done. Step 4 : Click [Work Mode] to configure the working mode of POS server. Select ‘TCP/UDP Socket’ for [Work Mode] option and ‘TCP Server’ for dialog 1. Click [OK] after all the configuration steps are done. ©2006 – 2010 by HIKVISION. All rights reserved. 7 iVMS-2000 POS Application Guide Step 5: Click [Save] in the list after all the configuration steps are done as the figure below. ©2006 – 2010 by HIKVISION. All rights reserved. 8 iVMS-2000 POS Application Guide Step 6: Click [Reboot Device] in the list and then click [Reboot]. The above content describes basic configuration steps for POS server. For more detail configuration description, please kindly refer to the user manual of POS server. ©2006 – 2010 by HIKVISION. All rights reserved. 9 iVMS-2000 POS Application Guide 2 POS Configuration 2.1 POS Management iVMS-2000 system supports up to 16 POS server connection at the same time, and each POS server can be linked with several cameras. Please refer to the below content for POS configuration steps in iVMS-2000 software. Enter iVMS-2000 main interface, click [Application] and then select [POS Function] to view the POS application window. Click [POS Management] to enter POS management interface (Figure 2-1). Users can add/modify/delete POS server in this POS management window, and can check or modify POS server status by double-clicking on the POS server list. Figure 2-1 POS Management (1) Add POS POS server can be added via serial server mode (Figure 2-2) or COM port connection mode (Figure 2-3). 1. Click [Add] and open the Add POS window; 2. Input POS server name and other parameters. For the network connection mode, users need to configure [Serial Server], [IP address] and [Port]; and for the COM port connection mode, ©2006 – 2010 by HIKVISION. All rights reserved. 10 iVMS-2000 POS Application Guide users need to select COM port number and then setup COM port parameters. 3. After all the above configuration steps are done, click [Start Test] to start POS function testing (remark: users need to select a camera channel from the camera list for POS data viewing); 4. Select filtration rules for POS data (POS rule configuration is described in the following chapter); If users have not created any POS rules, please click [New] to add filtration rule for POS server. Please refer to Chapter 2.2 ‘POS Rule’. 5. POS data display and delay interval configuration : If the POS data can not been displayed completely in the configured display region (Figure 4.3: display region configuration), then the POS data will be displayed in paging mode. Display POS data: the selected POS data will be displayed on the selected camera image. Delay: the POS display delay interval ranges from 1 second to 10 seconds, i.e. 3 seconds ’ delay stands for the display duration for each page of POS data is 3 seconds. 6. Select the linked camera. 7. Click [OK] to save the POS management configuration, and then there will be a POS server added and displayed on the POS management list. Figure 2-2 Add POS (Serial Server Connection Mode) ©2006 – 2010 by HIKVISION. All rights reserved. 11 iVMS-2000 POS Application Guide Figure 2-3 Add POS (COM Port Connection Mode) (2) Modify POS 1. Double click the POS information on the list, or select the POS information from the list and click [Modify]. (Figure 2-1) 2. Modify the POS server configuration. The configuration steps are similar as ‘Add POS Server’ steps. (3) Delete POS 1. Select POS from the list and click [Delete], and there will be a message box popup on screen (Figure 2-4); 2. Click [OK] to delete the POS server or click [Cancel] to cancel this operation. Figure 2-4 Delete POS ©2006 – 2010 by HIKVISION. All rights reserved. 12 iVMS-2000 POS Application Guide 2.2 POS Rule iVMS-2000 supports up to 16 POS rules, and POS rule configuration is described below. Enter iVMS-2000 main interface, click [Application] and then select [POS Function] to view the POS application window. Click [POS Rule] to enter POS rule configuration interface (Figure 2-5). Users can add/modify/delete POS rules in this POS rule configuration window, and can check or modify POS rules by double-clicking on the POS rule list. Figure 2-5 POS Rule Configuration (1) Add a POS Rule 1. Click [Add] to open the Add POS Rule window (Figure 2-6). Name Description Rule Name Set POS rule name Select POS Select a POS device to get POS data Get Data Display the original transaction data send by the POS Filtrated Data Display filtrated POS data Rule Click the relative buttons to set POS filtration rules ©2006 – 2010 by HIKVISION. All rights reserved. 13 iVMS-2000 POS Application Guide Contents Display the POS rules which has already been configured Figure 2-6 Add POS Rule 2. Input POS rule name 3. Select a POS server and click [Get Data] to get its original transaction data 4. Operate the POS to send transaction data 5. Set POS rules according to the original data send by the POS (Remark: the ‘Start’ and ‘End’ rules is required to be configured) Click the Original Data Window and select the test content, and then select between the 5 buttons below to set different POS data filtration rules. The filtrated data will be displayed inside the window on the right side. Start: The selected text will be set as mark of each POS transaction start, and all the data between POS transaction start and the previous POS transaction end will be cleared. i.e. Select ‘HANGZHOU HIK MARKET’ as transaction start rule End: The selected text will be set as mark of each POS transaction end, and all the data between POS transaction end and the next POS transaction start will be cleared. ©2006 – 2010 by HIKVISION. All rights reserved. 14 iVMS-2000 POS Application Guide i.e.: Select ‘WELCOME!’ as transaction end rule New Line: The selected text for New Line rule will be treated as start of a new line. And all the contents after the new line rule will be displayed in a new line. i.e.: Select <0D><0A> as new line rule. Ignore: Delete the selected text from transaction data. i.e.: ignore ‘Cashier’ Replace: replace the selected text with user-defined content. i.e.: Replace ‘RMB’ as ‘Dollars’ 1. 2. Delete POS rules: Click icon in the list to delete the POS rules Click [OK] to save the rule configuration or [Cancel] to cancel rule configuration. (2) Delete POS Rule 1. Select a POS rule from POS rule list (Figure 2-5) and click [Delete]. Click [OK] in the popup messagebox to delete this POS rule, or click [Cancel] to cancel this operation (Figure 2-7). Figure 2-7 Delete POS Rule (3) Modify POS Rule 1. Double-click a rule from POS rule list (Figure 2-5) or select a rule and click [Modify] to enter Rule ©2006 – 2010 by HIKVISION. All rights reserved. 15 iVMS-2000 POS Application Guide Modification window (Figure 2-8). Figure 2-8 Modify POS Rule 2. (4) POS rule modification steps are similar as Add POS Rule configuration. Import POS Rule 1. Click [Import] (Figure 6-5) to enter the POS rule import window (Figure 6-9). Figure 6-9 Import POS Rules ©2006 – 2010 by HIKVISION. All rights reserved. 16 iVMS-2000 POS Application Guide 2. (5) Select the POS rule configuration file and click [Open] to import the file. Export POS Configuration 1. Select a POS rule from the POS rule list and click [Export] (Figure 6-5) to enter POS rule export interface (Figure 2-10). Figure 2-10 Export Rule 2. Click [Save] to export the POS rule into POS rule configuration file. ©2006 – 2010 by HIKVISION. All rights reserved. 17 iVMS-2000 POS Application Guide 2.3 Display Setup Enter iVMS-2000 main interface, click [Application] and then select [POS Function] to view the POS application window. Click [Display Setup] to enter POS display setup interface (Figure 2-11). The POS display setup includes foreground and display region settings. Foreground settings include font, font color and bold style settings; while display region settings is for configuring POS data display location on the camera image, and users can drag the rectangle and set the size and position fo r POS data display. Click [Save] to save the POS display configuration, or click [Default] to restore default POS display settings. Figure 2-11 Display Settings ©2006 – 2010 by HIKVISION. All rights reserved.