1
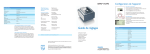
BiPAP A40
Set-up guide
1
Getting started
5
Humidification
2
Main screen
6
Connection to oximetry
3
Menus
7
Guidelines for ventilation set-up
4
Battery module
1
Getting started
Device navigation
How to start therapy
1
0
5
S/T AVAPS: 0.5
A
S/T AVAPS: 0.5
10
15
20
cm
H2 O
25
12/30/2010
12/30/2010
06:12 PM
06:12 PM
5
1
Humidifier
Menu
A
Setup
30
Menu
Ramp
Therapy
6
2
3
4
1 Display screen
2 Perform action specified on-screen
(humidifier setting, cancel action
or exit menu)
3 Navigate menus or change settings
4 Perform action specified on-screen
(activate ramp, select/modify/
confirm parameters)
5 Audio pause button
6 Start/stop button
•Connect the
device to AC
or DC power
source, or
use detachable
battery module
•Press
device
to switch on the
•Select
the treatment
to start
How to stop therapy
How to unlock
S/T AVAPS: 5.0
S/T
cm
H2O
cm
H2O
0
5
10
Pressure
3.5
15
RR
20 ml
cm
H2O
20
25
Vte
0
30
0 ml
5
10
Pressure
Leak
12.6
0.0 l/min
15
20
25
Vte
MinVent
0.0 l/min
30
Leak
0 ml
cm
H2O
RR
0.0 l/min
I:E Ratio
11 BPM
1:1.0
Standby
Power Off
Cancel
Navigate
OK
Menu
•Press
To unlock the device
•To keep power on but stop
therapy, select ‘Standby’
and
•Press and hold
for a few seconds to access
Setup page
•Then select
•To turn power off, select
‘Power Off’
•Then select
•Scroll down and select ‘Options’
•Modify ‘Menu access’ from
‘Limited’ to ‘Full’
•Press
to validate
and
to come back to
the main screen
•Press
When
appears on the main
screen, the device is unlocked
A
2
Main screen
AVAPS activated
with a speed rate
of 0.5cmH2O/min.
Mode of ventilation
A
A
S/T AVAPS: 0.5
Breath
indicator
(patient or
machine settable
in Options)
0
5
10
15
Pressure
12.1 cm
HO
2
Leak
30.0 l/min
I:E Ratio
RR
1:3.0
12 BPM
1
Humidifier
Humidifier
connected,
setting
FLEX1
AVAPS
AVAPS
A
Symbols
and icons
AVAPS: 1
AVAPS: 1
AVAPS
1
alarm enabled
A Apnea
AVAPS
AVAPS:
1
A
A
A
A
Audio pause isAVAPS:
active1
FLEX
Circuit disconnect
FLEX: 1
FLEX alarm enabled
A
AVAPS
AVAPS 1
AVAPS:
FLEX:11
Detachable
AVAPS:
AVAPS: 11battery is 20% capacity
FLEX: 1
Detachable battery is
1
1nearlyFLEX
depleted
FLEX
FLEX battery is
Detachable
1
FLEX: 1
11
being FLEX:
charged
FLEX:
Detachable1 battery in use
11
Real-time
monitored values
when detailed
view ON
(Options settings)
Detachable
battery connected
and in use
AVAPS
AVAPS
AVAPS
AVAPS: 1
AVAPS:
AVAPS:11
AVAPS
AVAPS: 1
FLEX FLEX enabled
FLEX
FLEX
FLEX: 1
FLEX:
1
FLEX:
FLEX 1 FLEX enabled
AVAPS (eg.AVAPS
1)
FLEX:
A 111
AVAPS:
AVAPS: 1
1
1
FLEX
AVAPSFLEX
battery is 80% capacity
FLEX:Detachable
1
Pressure bar graph
Ramp
Menu
SD card inserted
FLEX: 1
A
AA
cm
H2 O
30
Vte
3.9 l/min
AVAPS
25
325 ml
MinVent
Device
AVAPS: 1
unlocked
20
1
FLEX
FLEX: 1
and FLEX setting
Humidifier connected and
Humidifier setting (eg. 1)
Bad FLEX
humidifier state
(flashing symbol displays)
FLEX: 1
Ramp activated
1
1
SD Card error
(bad memory card inserted)
3
Menus
Menu: Settings and alarms
Mode
Trigger type
CPAP, S, S/T, PC, T, AVAPS-AE
Auto-Trak/Flow Trigger/
Auto-Trak (sensitive)
Flex Lock (only in S mode) On (locked)/Off (unlocked)
Flex (only in S mode)
On/Off
AVAPS
AVAPS rate
On/Off
0.5 - 5 cmH2O/min, in 0.5 cmH2O/min increments
Tidal volume*
200 - 1500 ml, in 10 ml increments
IPAP max *
IPAPmin - 40 cmH2O, in 0.5 cmH2O increments
IPAP min*
EPAP
4 - IPAPmax, in 0.5 cmH2O increments
4 - 25 cmH2O, in 0.5 cmH2O increments
Breath rate
0 - 40 BPM (4 - 40 BPM for T mode)
Inspiratory time
0.5 - 3 sec, in 0.1 sec increments
Rise time lock
On (locked)/Off (unlocked)
Rise time
1 (fastest) to 6 (slowest)
Ramp length
0 - 45 minutes, in 5 minute increments
Ramp start pressure
4 cmH2O - prescribed EPAP,
in 0.5 cmH2O increments
System One humidification On (System One Humidity Control)/
Off (classic mode)
Humidifier
1 (coolest) to 5 (hottest)
*only when AVAPS is enabled
Menu: Settings and alarms (cont.)
Tubing type lock
On (locked)/Off (unlocked)
Tubing type
15 mm/22 mm
System One resistance lock
On (locked)/Off (unlocked)
System One resistance (interface type) 0, X1, X2, X3, X4, X5 or Invasive
Circuit disconnect alarm
Off; 15 or 60 sec
Apnea alarm
Off; 10, 20 or 30 sec
Low tidal volume alarm
(only when AVAPS is enabled)
On/Off
Low minute ventilation alarm
Off; 1 - 99 LPM
High respiratory rate alarm
Off; 4 - 60 BPM
Menu: Settings and alarms: AVAPS-AE
Settings
Range
AVAPS rate
Tidal volume
0.5 - 5 cmH2O/min, in 0.5 cmH2O/min increments
200 ml - 1500 ml
Maximum pressure
6 - 40 cmH2O
Pressure support Max 2 - 36 cmH2O
Pressure support Min
EPAP Max pressure
EPAP Min pressure
Breath rate
2 - 36 cmH2O
4 - 25 cmH2O
4 - 25 cmH2O
Auto/0 - 40 BPM
Menu: Options
S/T AVAPS: 0.6
To navigate through the Options
menu:
A
Setup
Menu
1/18
Options
Menu access
Detailed view
Language
Pressure units
Breath Indicator
Finish
Full
ON
English
cmH20
Patient
Navigate
Modify
to scroll
•Use
through the menu.
•Usetheleftandright
buttons to perform the actions
specified on the on-screen buttons
and set according to your preference.
Under ‘Options’, you have access to the following parameters:
Menu access
Detailed view
Full (device unlocked)/Limited (device locked)
On (monitored data on the screen)/Off
(no monitored data on the screen, only time and date)
Language
You have the choice between 22 different languages
Pressure units
cmH2O/hPa
Breath indicator Patient (spontaneous breath)/machine (controlled breath)
Keypad lock
On (buttons inactive)/Off (buttons active)
Keypad backlight On/Off
LCD brightness 1 (darkest) to 10 (lightest)
Screen saver
Dim (backlight is decreased)/Breath (black screen,
but manometer and breath indicator are visible)/
Off (no screen saver)
Date and
Date and time settings
time format
Blower hours
Number of hours the blower has been active (resettable)
Therapy hours Number of hours the patient receives therapy
(resettable)
SpO2
Date of the last complete SpO2 session (at least 4 hours)
4
Battery module
To connect the battery module to
the BiPAP A40 device and install
the detachable battery, complete
the following steps:
1. Remove the side cover on the
therapy device
2. Line up the detachable battery
module and the therapy device
side by side
3. Press the two units together
until they snap into place
4. Insert the detachable battery
into the battery module, and
close the lid
2
3
4
Humidification
Humidification
Humidification
Humidification
With device turned off, remove and fill chamber with water.
With device turned off, remove and fill chamber with water.
1. (a) Lift humidifier door until it locks in place. Do not force
1. (a) Lift humidifier door until it locks in
place.
Do not
door
higher
thanforce
the locked position. (b) Grasp front of
door higher than the locked position.chamber
(b) Graspand
front
of toward you.
slide
With device turned off, remove and fill chamber with water.
chamber and slide toward you.
With device turned off, remove and fill chamber with water.
Humidification
5Humidification
1. (a) Lift humidifier door until it locks in place. Do not force
(a)place.
GentlyDopush
tab located inside round opening on top
1. (a) Lift humidifier door until it locks2. in
not
door higher
thanforce
the locked position. (b) Grasp front of
2. (a) Gently push tab located inside round
opening(b)
onSeparate
top
of(b)
chamber.
top and bottom of chamber.
door higher than the locked position.chamber
Graspand
front
of toward
slide
you.
of chamber. (b) Separate top and bottom of chamber.
chamber and slide toward you.
With device turned off, remove and fill chamber with water.
Undocking the battery
module or humidifier
(a)place.
GentlyDopush
located inside round opening on top
1. (a) Lift humidifier door until it locks2. in
not tab
force
2. (a) Gently push tab located inside 3.
round
opening
onSeparate
top
bottom
chamber
distilled
water. of chamber.
of(b)
chamber.
(b)
and bottom
door higher than the locked position.Fill
Grasp front
of withtop
3. Fill
bottom chamber
withtop
distilled
water. of chamber.
of chamber.
(b) Separate
and bottom
chamber and slide toward you.
2. (a) Gently push tab located inside 3.
round
opening
on top with distilled water.
Fill bottom
chamber
3. Fill
bottom chamber
withtop
distilled
water.
of chamber.
(b) Separate
and bottom
of chamber.
4.
Observe
maximum fill lines located on sides of chamber.
4. Observe maximum fill lines located on sides of chamber.
Release
latch
3. Fill bottom chamber with distilled 4.
water.
Observe
maximum fill lines located on sides of chamber.
5. Do
not overfill.
4.
maximum fill lines located on sides of chamber.
5. Observe
Do not overfill.
(bottom
Reassemble the chamber by lacing
p
the hinges on lid over the
Reassemble the chamber by lacing
p
the
onback
lid over
the
twohinges
tabs on
of chamber.
Closeview)
lid until it locks in place
two tabs on back of chamber. Close lid
until
locks in
place
with
an itaudible
click.
Insert filled chamber into humidifier.
5. Do not overfill.
with
an audible
click. Insert
filled
chamber
intoof
humidifier.
4. Do
Observe
maximum
fill lines
located
on sides
chamber.
5.
not overfill.
Reassemble the chamber by lacing
p
the hinges on lid over the
Reassemble the chamber by lacing
p
the
onback
lid over
the
twohinges
tabs on
of chamber.
Close lid until it locks in place
two tabs on back of chamber. Close lid
until
it
locks
in
place
with an audible click. Insert filled chamber into humidifier.
with an audible click. Insert filled chamber into humidifier.
5. Do not overfill.
6
Connection to oximetry
Back of device
1 Nurse call connector
2
1
2 Accessory slot
3
(cover shown)
3 SD card slot
4 DC power inlet
4
6
A
B
C
5 AC power inlet
6 Filter area
5
To connect the oximetry module:
A Remove the cover from the accessory
slot on the back of the BiPAP A40
B Remove the cover from the oximetry
accessory
C Plug the oximetry accessory into the
accessory slot
D Plug the oximetry sensor of your choice
into the oximetry module
When the oximetry module is connected,
and detailed view ON, the SpO2 and heart
rate values are monitored on the main
screen (see below).
A
S/T AVAPS: 0.5
0
5
10
Pressure
20
Vte
12.1 cm
HO
2
MinVent
D
15
3.9 l/min
SpO2
95
325 ml
RR
12 BPM
Heart Rate
79
2
Humidifier
Menu
25
cm
H2O
30
Leak
0.0 l/min
I:E Ratio
1:1.0
7
Guidelines for ventilation se
Initial
settings
IPAP = 8 - 10 cmH2O, EPAP = 4 cmH2O and RR = 10 - 12 BPM
IPAP
Increase IPAP if the patient wants more air, targeting patient tidal
volume at 8 ml/kg of ideal weight
EPAP
• without OSAS (Obstructive Sleep Apnea Syndrome): 4 - 5 cmH2O
• with OSAS: increase EPAP to remove obstructive apnea events
• with intrinsic PEP (stable chronic COPD): 5 - 6 cmH2O
BPM
Set to 2 - 3 BPM under patient’s spontaneous frequency
Rise
time
Obstructive patients prefer short rise time:
from 1 - 4 (100 ms - 400 ms)
Restrictive patients prefer long rise time:
from 3 - 6 (300 ms - 600 ms)
Ti
Set Ti between 25% and 33% for obstructive patients
Set Ti between 33% and 50% for restrictive patients
(refer to table opposite)
OHS
COPD
Other restrictive
diseases (NMD, etc.)
AVAPS
Vt target 8 - 10 ml/kg of ideal body weight (refer to table opposite)
Allow a more
restrictive pressure
window to combine
comfort and efficacy.
• IPAPmin =
comfortable IPAP
• IPAPmax =
IPAPmin + 5 cmH2O
Allow a more restrictive
pressure window to
combine comfort and
safety.
• IPAPmin =
efficient IPAP
• IPAPmax =
IPAPmin + 5 cmH2O
IPAP
window
(IPAPmin
and
IPAPmax)
Allow a wide range
of pressure variation
to ensure the right
pressure at the right
time.
• IPAPmin = EPAP
• IPAPmax =
25 - 30 cmH2O
AVAPS
rate
AVAPS rate setting depends on patient needs and clinical condition:
0.5 - 3 cmH2O/min so target tidal volume is reached smoothly
3 - 5 cmH2O/min so target tidal volume is reached more rapidly
Check patient arterial blood gases (PaCO2 and PaO2) and oxygen saturation (SpO2).
Important: Guidelines are intended to serve only as a reference. They shall be
used only in conjunction with the instructions and/or protocol set forth by the
physician and institution in which the assist device is being used. The guidelines are
not intended to supersede established medical protocols.
n set-up
Conversion table to set the inspiratory time for controlled breaths
Set back up breath rate
(BPM)
10
11
12
13
14
15
16
17
18
19
20
21
22
23
24
25
I/E 1/3,
Ti/Ttot 25%
1.5 s
1.4 s
1.3 s
1.2 s
1.1 s
1.0 s
0.9 s
0.9 s
0.8 s
0.8 s
0.8 s
0.7 s
0.7 s
0.7 s
0.6 s
0.6 s
I/E 1/2,
Ti/Ttot 33%
2.0 s
1.8 s
1.7 s
1.5 s
1.4 s
1.3 s
1.3 s
1.2 s
1.1 s
1.1 s
1.0 s
1.0 s
0.9 s
0.9 s
0.8 s
0.8 s
I/E 1/1,
Ti/Ttot 50%
3.0 s
2.7 s
2.5 s
2.3 s
2.1 s
2.0 s
1.8 s
1.7 s
1.6 s
1.5 s
1.5 s
1.4 s
1.3 s
1.3 s
1.2 s
1.2 s
Set the inspiratory time in seconds: Ti (second) = 60/Respiratory rate x % Ti
Conversion table to set the target tidal volume in relation to the ideal weight
Height
1.50 m
1.55 m
1.60 m
1.65 m
1.70 m
1.75 m
1.80 m
1.85 m
1.90 m
Calculated ideal
weight (if BMI = 23)
52.0 kg
55.0 kg
59.0 kg
62.5 kg
66.5 kg
70.5 kg
74.5 kg
78.5 kg
83.0 kg
Target Vte
if 8 ml/kg
410 ml
440 ml
470 ml
500 ml
530 ml
560 ml
600 ml
630 ml
660 ml
Target Vte
if 10 ml/kg
520 ml
550 ml
590 ml
620 ml
660 ml
700 ml
740 ml
780 ml
830 ml
Calculated with an ideal Body Mass Index of 23 kg/m2 (BMI = weight/height 2)
Philips Healthcare is part of
Royal Philips Electronics
How to reach us
www.philips.com/healthcare
[email protected]
Philips Respironics
1010 Murry Ridge Lane
Murrysville, PA 15668
Customer Sevice
+1 724 387 4000
800 345 6443 (toll free, US only)
Asia
+49 7031 463 2254
Philips Respironics International
Headquarters
+33 1 47 28 30 82
Europe, Middle East, Africa
+49 7031 463 2254
Philips Respironics Asia Pacific
+65 6882 5282
Philips Respironics Australia
+61 (2) 9947 0440
1300 766 488 (toll free,
Australia only)
Latin America
+55 11 2125 0744
North America
+1 425 487 7000
800 285 5585 (toll free, US only)
Philips Respironics France
+33 2 51 89 36 00
Philips Respironics Italy
+39 039 203 1
Philips Respironics Sweden
+46 8 120 45 900
Philips Respironics Switzerland
+41 6 27 45 17 50
Philips Respironics
United Kingdom
+44 800 1300 845
www.philips.com/respironics
Philips Respironics China
+86 400 828 6665
+86 800 828 6665
Philips Respironics Deutschland
+49 8152 93 06 0
This guide contains abstracted information from the User Manual; please refer
to the latest version for complete information regarding the BiPAP A40 device.
© 2012 Koninklijke Philips Electronics N.V. All rights are reserved.
BiPAP A40 is registered trademark of Philips.
Philips Healthcare reserves the right to make changes in specifications and/or to
discontinue any product at any time without notice or obligation and will not be
liable for any consequences resulting from the use of this publication.
Broudy AE 9/5/12 MCI 4104688 PN 1098001