1
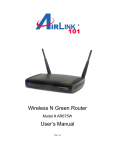
Quick Installation Guide
Wireless 150 Router
Model # AR570W
Ver. 1A
Introduction
Congratulations on your purchase of AR570W Wireless 150 Router. This
product is ideal for home or SOHO users who need greater bandwidth and
higher speed for various networking applications, such as VoIP phone,
online gaming or online video/audio streaming. Based on Wireless N
technology, the data throughput is up to 4 times faster than Wireless G. It is
recommended to use with AirLink101® Wireless N or Wireless 150 adapters
to reach the best performance. Best of all, Wireless 150 Router works with
IEEE 802.11 b/g/n network devices, which ensures compatibility with your
existing network products.
Before you begin the installation, please check the items of your package:
Package Contents:
•
•
•
•
•
Wireless 150 Router
Power Adapter
Ethernet Cable (Cat.5)
Manual CD
Quick Installation Guide
Section 1
This Quick Installation Guide only provides basic instructions. For detailed
information on using this product, please refer to the User’s Manual on the
supplied CD.
Connecting the Router
Note: Prior to connecting the router, be sure to power off your
computer, DSL/Cable modem, and the router.
Step 1 Connect one end of a network cable to the WAN port of the router
and connect the other end of the cable to the DSL/Cable modem. Power on
the modem.
Cable/DSL Modem
Step 2 With another network cable, connect one end of the cable to your
computer’s Ethernet port and the other end to one of the LAN ports on the
router. (After setup finishes, you can remove the network cable between the
computer and router if you want to use wireless connection.)
Step 3 Plug the power adapter to the router and connect it to an outlet or
power strip.
Step 4 Power on your computer.
Step 5 Make sure POWER, WAN, WLAN, and the LAN port that the
computer is connected to are lit. If not, try the above steps again.
LED Indicators:
LED
Light
Status
Description
POWER
On
Router is powered on.
On
WPS setup is in progress.
Off
Wireless network is switched off.
Flashing
Wireless network is ready and WPS setup is
not in progress.
On
WAN port is connected.
Off
WAN port is not connected.
Flashing
WAN port is transferring or receiving data.
On
LAN port is connected.
Off
LAN port is not connected.
Flashing
LAN port is transferring or receiving data.
WLAN
WAN
LNK/ACT
LAN 1-4
LNK/ACT
Section 2
Configuring the Router
Step 1 Open the web browser (Internet Explorer or Mozilla Firefox) from the
computer that is wired to the Router, type 192.168.2.1 in the Address bar
and press Enter.
Step 2 Enter admin for both the username and password fields and click
OK.
Step 3 Click Setup Wizard on the left menu.
Step 4 Configure the Time Zone Settings of the Router. You can click on
Copy Time from PC. Enable Daylight Saving if it is applicable in your
country. Click NEXT.
Step 5 Select WAN type by which Internet service you are using. This guide
will provide instructions on these WAN types: Cable and DSL.
For other WAN types such as PPTP, L2TP, please find the instructions in
the User’s Manual included in the provided CD.
Cable
Click on Dynamic IP if you are connecting to Internet through a cable
modem.
When the Dynamic IP settings appear below, click Clone MAC and click
NEXT.
DSL
For DSL users, your Internet type is either Dynamic IP or PPPoE. If you are
not sure which one you have, it is suggested to select PPPoE for your WAN
type, and if you cannot connect to the Internet after the Setup Wizard
finished, go through the Setup Wizard again and select Dynamic IP.
Otherwise, you can call your ISP to confirm which Internet type you have.
Option 1: PPPoE Settings
Click on PPPoE for your WAN type. Enter your user name and password
provided by your ISP. Click NEXT.
Note: Depending on the ISP, you may need to include the domain name
with your username.
Example:
[email protected]
Option 2: Dynamic IP Settings
Click on Dynamic IP for your WAN type. When the Dynamic IP settings
appear below, click Clone MAC and click NEXT.
Step 6 Keep the default LAN IP and DHCP server settings or modify as
needed. Click NEXT.
Step 7 Keep the default SSID (wireless network name) or change it to a
desired name, so you can always recognize your wireless network with it.
Click NEXT.
Step 8 Set up Wireless Security for your router.
WPA2(Mixed) is the most secured encryption mode for general users. WEP
is the most common encryption but the least secured. It is recommended to
use WPA2(Mixed) for your wireless security if all wireless devices on your
network support WPA-PSK or WPA2-PSK.
WPA2(Mixed)
Select WPA pre-shared key for Encryption.
WPA Unicast Cipher Suite: Select WPA2(Mixed)
Pre-Shared Key Format: Select Passphrase
Pre-shared Key: Enter a key between 8 to 63 characters (alphanumeric,
case sensitive). This is the security key for your wireless network
Click OK to save the settings.
Please refer to the User’s Manual in the provided CD for other security
mode settings.
Note: It is suggested to write down the security settings (Encryption
and Key) you configured for the Router on a piece of paper and keep it
for you to add more wireless device to your network in the future.
Step 9 Click Apply to restart the router.
Step 10 Click OK, you will go back to the Status page with valid IP address
assigned by you ISP (or configured by yourself if you use Static IP) in WAN
Status section.
If each field has valid numbers or IP address being assigned, the router is
connected to the Internet.
Congratulations! Your router configuration has been finished. You
should now be able to access the Internet; if not, please go to Section
5 for troubleshooting
Section 3
Connecting to the Router Wirelessly
If you can connect to Internet from your computer that is wired to the Router,
you can now set up wireless connection between computer(s) and the
Router. If you wish to use wireless on a certain computer, you can now
remove the network cable connecting your computer to the router.
You must configure your wireless computer in order to establish a wireless
connection to the router. In this section, you can find the instructions of how
to connect to the router wirelessly with your Vista computer. You can also
refer to the manual of your wireless network card regarding how to connect
to a router wirelessly.
Step 1 Click on this icon
on the task bar of your desktop, then click on
Wireless networks are available.
Step 2 Click on the wireless network you want to connect to and click
Connect.
Step 3 Enter the Security key you configured for the Router (see Step 8 in
Section 2). Click Connect.
Step 4 Click on Close. Now the wireless connection has been established
successfully with the Router.
You should now be able to connect to the Internet wirelessly.
Section 4 (Optional)
Connecting to the Router with
Easy Setup Button
The AR570W Airlink101 Wireless 150 Router has an Easy Setup Button
built-in which allows you to connect your wireless computer with the router
easily and safely. Your wireless adapter must support this feature (WiFi
Protected Setup™) as well. If not, you will need to set up the wireless
security manually and you can skip this section.
In the instructions below, we are going to use the Airlink101 WLAN Monitor
utility comes with the AWLL6077, Airlink101 Wireless N adapter as an
example.
Step 1 Go to the computer with Airlink101 Wireless N adapter, AWLL6077
connected.
Step 2 Push and hold the Easy Setup Button on the Adapter until you see
the following window pops up on the computer monitor.
You will see this window pops up on the monitor:
Step 3 Within the following 2 minutes, push the Easy Setup Button on the
Router. The WLAN LED on the Router will stay solid green instead of
blinking.
Step 4 The Router will now start to synchronize the security settings with
the wireless adapter. When you see a similar window as below, the
connection has been established.
Section 5
Troubleshooting
If you have trouble connecting to the Internet, try the following steps:
Step 1 Power off the Cable/DSL modem, router, and computer and wait for
5 minutes.
Step 2 Turn on the Cable/DSL modem and wait for the lights on the modem
to settle down.
Step 3 Turn on the router and wait for the lights on the router to settle down.
Step 4 Turn on the computer.
Step 5 Log in to the router and you will see the Internet Connection Status.
Step 6 Verify that the Internet IP Address, Subnet Mask, and Default
Gateway have valid numbers assigned to them (instead of all 0’s).
Section 6
Technical Support
E-mail: [email protected]
Toll Free: 1-888-746-3238
Website: www.airlink101.com
*Theoretical maximum wireless signal rate derived from IEEE standard 802.11 specifications. Actual data
throughput will vary. Network conditions and environmental factors, including volume of network traffic,
building materials and construction, mix of wireless products used, radio frequency interference (e.g.,
cordless telephones and microwaves) as well as network overhead lower actual data throughput rate. This
product is based on IEEE draft 802.11n technology and is not guaranteed to be compatible with future
versions of IEEE 802.11n specification. Compatibility with draft 802.11n devices from other manufacturers is
not guaranteed. Specifications are subject to change without notice. Photo of product may not reflect actual
content. All products and trademarks are the property of their respective owners. Copyright© 2009
Airlink101®