1
Accounts Receivable User’s Manual
OPEN SYSTEMS® Accounting Software
Accounts Receivable
User’s Manual
For Use With Contractors’ Job Cost
PN/2310.AR70
©2005 Open Systems Holdings Corp. All rights reserved.
No part of this manual may be reproduced by any means without the written permission of Open Systems, Inc.
OPEN SYSTEMS is a registered trademark and OSAS, Resource Manager, Resource Manager for Windows, and Report
Writer are trademarks of Open Systems Holdings Corp. BBx is a trademark and PRO/5 and Visual PRO/5 are registered
trademarks of BASIS International Ltd. Novell and NetWare are registered trademarks of Novell, Inc. Microsoft, Windows,
Windows 95, Windows NT, Windows 2000, and MS-DOS are either trademarks or registered trademarks of Microsoft
Corporation. Adobe and Acrobat are registered trademarks of Adobe Systems, Inc. TrueType is a registered trademark of
Apple Computer, Inc.
Open Systems Accounting Software for UNIX uses PKUNZIP utilities from Ascent Solutions, Inc.,
9009 Springboro Pike, Miamisburg, OH 45342. Phone: (937) 847-2374 Internet: www.asizip.com
Printed in U.S.A. This manual is recyclable.
November 2005
Document Number 2310.AR70
This document has been prepared to conform to the current release version of OPEN SYSTEMS Accounting Software.
Because of our extensive development efforts and our desire to further improve and enhance the software, inconsistencies
may exist between the software and the documentation in some instances. Call your customer support representative if you
encounter an inconsistency.
Open Systems, Inc.
4301 Dean Lakes Boulevard
Shakopee, Minnesota 55379
General Telephone
(952) 403-5700
General Fax
(952) 496-2495
Support Telephone
(800) 582-5000
Support Fax
(952) 403-5870
Internet Address
www.osas.com
Accounts Receivable User’s
Manual
Contents
Introduction
Welcome to OSAS
The Accounts Receivable System
Starting OSAS
Navigating OSAS
1-3
1-5
1-23
1-27
Installation and Conversion
Installation
Conversion
2-3
2-5
Setup
Setup Considerations
Setup Checklist
Setup Functions
3-3
3-7
3-9
Information Inquiry
Customers and Open Invoices
Open Invoices
Detail History
Summary History
4-3
4-11
4-13
4-17
Daily Work
Transactions
Cash Receipts
Edit Cash Receipts
Copy Recurring Entries
Change Batches
Batch Control
Accounts Receivable User’s Manual
5-3
5-23
5-29
5-31
5-33
5-35
iii
Contents
Transaction Reports
Print Invoices
Sales Journal
Miscellaneous Credits Journal
Daily Sales Tax Report
Cash Receipts Journal
Methods of Payment Journal
Deposits Report
Post Transactions
6-3
6-9
6-11
6-13
6-15
6-17
6-19
6-21
Job Receivables
Overview
Set Up Schedule
Application Text
Invoice Worksheet
Application Entries
Application Forms
Applications Journal
Post Applications
Job Invoice Entries
Print Job Invoices
Job Invoices Journal
Post Job Invoices
Cost Plus Invoice Entries
Print Cost Plus Invoices
Cost Plus Invoices Journal
Post Cost Plus Invoices
Job Open Invoice Report
Job Cash Flow Report
7-3
7-5
7-13
7-15
7-17
7-21
7-25
7-27
7-31
7-37
7-39
7-41
7-45
7-51
7-53
7-55
7-59
7-61
Open Invoices
Hold/Release Invoices
Open Invoice Report
Aged Trial Balance
Cash Flow Report
Calculate Finance Charges
iv
8-3
8-5
8-7
8-11
8-13
Accounts Receivable User’s Manual
Contents
Statements
Customer Analysis Report
Commissions Report
8-17
8-21
8-23
History Reports
AR Analysis Report
Sales Analysis Report
Detail History Report
Customer Sales Report
Customer Activity Report
Summary Invoice History
Promotional Analysis
Print History Invoices
Tax Audit Report
9-3
9-7
9-11
9-15
9-17
9-19
9-21
9-23
9-27
Periodic Processing
Sales Tax Report
Periodic Maintenance
Purge Customer Comments
Purge Selected Files
10-3
10-5
10-9
10-11
File Maintenance
Customers
Ship-to Addresses
Sales Reps
Recurring Entries
Tables
Build Open Invoice File
Change Fields
11-3
11-31
11-33
11-37
11-49
11-61
11-65
Codes Maintenance
GL Codes
Distribution Accounts
Terms
Shipping Methods
Accounts Receivable User’s Manual
12-3
12-5
12-7
12-9
v
Contents
Payment Methods
Finance Charges
12-11
12-13
Master File Lists
Printing a Master File List
Sales Reps List
Customer Detail List
Customer Labels
Customer Comments List
Customer Credit Cards
Ship-to Address List
Ship-to Address Labels
Recurring Entries List
Codes List
Tables List
13-3
13-5
13-7
13-9
13-11
13-13
13-15
13-17
13-19
13-21
13-23
References
System Messages
Common Questions
A-1
B-1
Index
vi
Accounts Receivable User’s Manual
Accounts Receivable User’s Manual
Introduction
Welcome to OSAS
The Accounts Receivable System
Starting OSAS
Navigating OSAS
Accounts Receivable User’s Manual
1
1-3
1-5
1-23
1-27
1-1
Welcome to OSAS
Welcome to the Accounts Receivable application for OPEN SYSTEMS
Accounting Software (OSAS). Accounts Receivable helps you manage your
company’s cash flow by tracking money owed to you by customers. Accounts
Receivable also helps you analyze your receivables and better manage customer
relations by producing timely statements, invoices, and reports.
Accounts Receivable plugs into Resource Manager, the foundation of OSAS.
Consult the Resource Manager guide for more information on basic OSAS
functionality and details on how Resource Manager works within the OSAS
system.
Accounts Receivable plugs into Resource Manager, the foundation of OSAS.
Consult the Resource Manager guide for more information on basic OSAS
functionality and details on how Resource Manager works within the OSAS
system.
About This Guide
This guide describes the functions that make up the Accounts Receivable
application and gives details on how Accounts Receivable fits into your existing
business workflow. This guide is divided into these sections:
•
Chapter 1 introduces OSAS and the Accounts Receivable application, and
describes the basics of the Accounts Receivable system and how to navigate
around OSAS.
•
Chapter 2, Installation and Conversion, details how to install Accounts
Receivable using Resource Manager and how to create or convert the data
files it requires.
•
Chapter 3, Getting Started, gives information and checklists on the steps you
need to perform to set up Accounts Receivable.
Accounts Receivable User’s Manual
1-3
Introduction
Welcome to OSAS
•
Chapters 4 through 12 contain function descriptions organized by menu.
These chapters mirror the order that appears on the Accounts Receivable
menu.
•
The Appendixes contain supplimentary material not directly related to
Accounts Receivable functionality.
•
The Index is a topical reference to the information in the rest of the chapters,
and concludes this guide.
Conventions
This guide uses the following conventions to present information.
When the Inquiry or Maintenance commands (or both) are available for a field,
the Inquiry and Maint flags appear in the margin. See page 1-34 and page 1-39
for more information on these commands.
When you see the phrase “use the Proceed (OK) command” in this guide, press
Page Down in either text or graphical mode to continue. In graphical mode, you
can also click OK to proceed.
If you use Accounts Receivable with Contractors’ Job Cost, additional features
and functions are added to Accounts Receivable when you install the
Contractors’ Job Cost Enhancements. When a feature or function has been added
and is only available when you use Accounts Receivable with Contractors’ Job
Cost, the CJC icon appears in the margin.
1-4
Accounts Receivable User’s Manual
The Accounts Receivable System
Use the Accounts Receivable system to record billings you make to customers. It
lends its tracking capabilities to other applications associated with tracking assets
(Inventory, for example). It represents an asset; when you record a sale to
customers, the transactions are expressed as gains to your source of revenue and
losses to the assets you sold. For example, if you sell inventory items, the
transaction represents a gain to your capital and a loss to inventory.
Application Interaction
Accounts Receivable can be used as a standalone application, but you get optimal
use from it when you interface it with other applications.
Interfacing applications means that the information you enter in one application
can be transferred to and used in other applications, reducing data entry time and
errors. For information about application interfaces, see page 3-9.
Accounts Receivable User’s Manual
1-5
The Accounts Receivable System
Introduction
Menu Structure
The Accounts Receivable menu structure is similar to the structure of other
OSAS applications: functions appear roughly in order of use.
File and Code Maintenance
Use the functions on the File Maintenance and Codes Maintenance menus to
set up and maintain information about your customers. For example, use the
Customers function to establish and update information about customers with
which you usually do business.
The system uses various codes to define customers’ records. Some of these codes
are defined in File Maintenance functions; others are defined in Codes
Maintenance functions. For example, terms codes, which serve as a shorthand
method of entering terms of a transaction for a customer, should be set up in the
Terms function on the Codes Maintenance menu before you set up the customer
records in the Customers function on the File Maintenance menu.
Information Inquiry
Use the Information Inquiry functions to view (not change) information about
customers, invoices, and history. If you are running OSAS through a multiuser
network, several people can look up the same information at the same time.
Daily Work
After you establish the valid codes and IDs through the File Maintenance and
Codes Maintenance functions, you can use the Daily Work functions to enter
transactions that involve a sale. Use the Daily Work functions to track sales,
record payments as they come in, track recurring entries as the money comes due,
and work with transaction batches.
Open Invoices and Reports
Accounts Receivable offers three categories of reports: transaction, open invoice,
and history.
1-6
Accounts Receivable User’s Manual
The Accounts Receivable System
Introduction
The transaction reports reflect activity before you post. After you have produced
all the transaction reports, you are ready to post.
The open invoice reports reflect money due but not necessarily paid after you
post. You can use other functions on the Open Invoices menu to hold or release
open invoices and to calculate finance charges for customers whose invoices are
past due.
The history reports reflect activity after you post. After you have produced the
history reports, you are ready to do periodic maintenance.
Use the report functions as often as you need to produce summarized information
about transactions, commissions, sales analysis, and so on.
Periodic Processing
After posting over a period of time, enough information is kept in various files
that the files can get too large and slow down your system. Use the Periodic
Maintenance function to remove period-, quarter-, and year-to-date figures;
year-to-date finance charges; and customer high balances. Use the Purge
Selected Files function to remove specific information from the ARHDxxx
(Additional Descriptions History), ARINxxx (Open Invoice), ARRHxxx and
ARRExxx (Recurring Entries), ARHIxxx (Detail History), and ARHSxxx
(Summary History) files according to the date you specify.
Master File Lists
Information that you enter in the File Maintenance functions is kept in master
files. Use the Master File Lists functions to produce the contents of the files:
details about sales reps, customers, ship-to addresses, recurring entries, and
codes.
Accounts Receivable User’s Manual
1-7
Introduction
The Accounts Receivable System
File Information
The information you enter in Accounts Receivable functions is stored in files.
Each file falls into one of four categories: customer files, attribute files,
temporary files, and history files. (OSAS does not make a distinction between
categories of files. The files are described in terms of categories to give you a
better idea of how each fits in.)
Customer Files
The customer files serve as permanent sources of customer information: data
stays in the files until you remove it.
The ARCUxxx (Customer) file holds the following customer information, which
you can enter directly through File Maintenance functions or by updating
information from interfaced applications:
•
•
•
•
•
•
•
•
•
Customer ID and description
Customer name, address, and phone and fax numbers
Terms code and distribution code
Customer class, sales reps, and web and e-mail addresses
Credit information
Account information
Tax information
Balance information
History information
The ARCMxxx (Credit Cards) file contains a list of the commonly used credit
cards for each customer. The file can store the card numbers and types for
reference or for verification during sales transactions and payments.
The ARCCxxx (Customer Comments) file holds comments about the customers
you do business with. Initially you enter comments using the Customers
function.
1-8
Accounts Receivable User’s Manual
The Accounts Receivable System
Introduction
Attribute Files
The attribute files hold data that you can assign to each customer. These
attributes often carry their own function names. These files serve as permanent
sources of information: data stays in these files until you remove it.
The ARDCxxx (Distribution Account Codes) file stores information about
distribution accounts set up using the Distribution Accounts function. The codes
serve as a shorthand method to enter the GL accounts for Accounts Receivable,
Freight Charges, Sales Tax Liability and Other Charges to which you post
accounting transactions for each customer.
The ARTCxxx (Terms Codes) file stores information about regular payment
terms you set up using the Terms function. The codes serve as a shorthand
method to enter terms in transactions and to assign the terms to customers. As a
result, you can receive payments from groups of customers based on the terms of
payment.
The ARSMxxx (Shipping Methods) file stores information about your usual
methods of shipping that you set up in the Shipping Methods function. The
codes serve as a shorthand method to enter shipping information in transactions.
The ARGLxxx (GL Codes) file stores information about your sales and cost of
sales GL accounts which you set up using the GL Codes function. The codes
serve as a shorthand method for entering GL sales and cost of goods accounts in
transactions when AR does not interface to the Inventory application.
The ARFCxxx (Finance Charge Codes) file stores information about the finance
charge rates you assess on past due balances. You use these codes as a shorthand
entry method for assigning finance charge rules to your customers.
The ARDExxx (Additional Descriptions) file stores additional descriptions you
assign to line items. This file is used only if you elect to enter additional
descriptive text for line items in the Resource Manager Options and Interfaces
function.
Accounts Receivable User’s Manual
1-9
The Accounts Receivable System
Introduction
The ARPYxxx (Payment Methods) file stores information about payment
methods. When you define the methods using the Payment Methods function,
you can specify the payment type, bank account ID, and debit general ledger
account. When you set up customers, you can assign a default payment method.
As money is collected and information is posted, history for each payment
method is also kept in this file.
The ARSRxxx (Sales Rep) file stores information about sales representatives.
When you set up the sales reps using the Sales Reps function, you can specify
the sales rep’s name and personal information, the employee ID, and how the
commission is calculated (based on percentage, kinds of sales, and which parts of
the sale are involved). You can also enter initial values for the history of the sales
rep. As money is collected and information is posted, this information updates
the month-to-date and year-to-date revenue collected through each sales rep.
When you enter invoices, you can assign the sales reps who dealt with the
customer.
The ARSAxxx (Ship-to Address) file stores information about shipping
addresses. When you set up the shipping addresses using the Ship-to Addresses
function, you can assign the associated customer ID, name and address, method
of shipment, and tax group. Then when you set up customers, you can assign the
shipping address where the goods for the customer are to be shipped.
The ARRHxxx and ARRExxx (Recurring Entries) files store information about
transactions that come up repeatedly. The ARRHxxx file stores header and tax
information about each recurring entry; the ARRExxx file stores line-item and
tax information about each recurring entry.
The ARRDxxx (Recurring Additional Descriptions) file holds additional
descriptions you assign to line items in a recurring entry. This file is used only if
you elect to enter additional descriptive text for line items in the Resource
Manager Options and Interfaces function. The additional text is printed on
invoices after you copy the entry to the ARTDxxx and ARTHxxx files.
1-10
Accounts Receivable User’s Manual
The Accounts Receivable System
Introduction
Resource Manager Files
The Resource Manager system has three files that Accounts Receivable uses:
RMCDxxx, RMTXxxx and RMGCxxx. These files store Accounts Receivable-
related information and serve as attribute files, but are stored as Resource
Manager files, so they can be used by other applications as well.
The RMCDxxx (Tax Classes) file stores the tax classes and associated
descriptions; for each number 00 through 99, enter a description. When you set
up tax groups, you assign a percentage and other information to each tax class.
When you set up a customer and assign a tax group, the set of tax classes for the
tax group (and associated percentage markups) are assigned with it. Then when
you enter a transaction for the customer and assign a line item to the transaction,
you specify the tax class, and the associated percentage according to the
customer’s tax group takes effect.
The RMTXxxx (Tax Locations) file stores the tax authorities and associated
information. For the classes and descriptions defined in the RMCDxxx file, this
file stores such information as whether the tax class is taxable, the percentage of
markup, the amounts of taxable and nontaxable sales for the reporting period, the
overall tax collected for each class of each group, the general ledger account
number, the tax ID, and whether freight charges are to be taxed.
The RMGCxxx (Tax Groups) file stores information for each group of sales tax
locations. This file groups one or more related tax locations together to arrive at
an overall sales tax rate used to calculate the tax on a sale (for example, state,
county, and city taxes can be grouped together for a combined effective sales tax
rate).
Accounts Receivable User’s Manual
1-11
The Accounts Receivable System
Introduction
Temporary Files
The temporary files store information created from an action you perform and
send that information to a different file—usually a history file—when you post.
The ARTDxxx and ARTHxxx (Transaction) files store information about
unposted invoices and miscellaneous credits. This information is entered
independently of when payments are made. Each transaction record is assigned a
number by the system. The ARTHxxx file stores the header information: the
customer ID and various terms of the transaction. The ARTDxxx file stores lineitem and tax information about the transaction.
The ARCRxxx (Cash Receipts) file stores unposted cash receipt information. You
can enter this information either as totals information in the Transactions
function or through the Cash Receipts function when you assign payments to
existing transactions. For open invoice customers, you apply receipts against
individual invoices. For balance forward customers, you apply them against
outstanding balances. (Customers are designated as open invoice or balance
forward in the ARCUxxx file.)
The ARINxxx (Open Invoice) file stores such summary information as the
amount due and the due date of the sales and miscellaneous credits that were
posted from the ARTDxxx and ARTHxxx files. The items remain on file until you
purge them.
The ARLSxxx (Lot and Serialized Item) file, which is used only if Accounts
Receivable interfaces with Inventory, stores the lot number, serial number, item
number, location ID, transaction number, quantity and unit information, and
associated line-item entry number when you enter a serialized item as a line item.
When you post, those numbers are cleared from the ARLSxxx file.
The ARBTxxx (Batch Control) file keeps track of the transaction batches in use
by each terminal. It is updated each time you enter or change a transaction.
The ARCTxxx (Transaction Control) file keeps track of the transactions in use by
each terminal. It is updated each time you enter or change a transaction. When
you complete a transaction, the record is deleted.
1-12
Accounts Receivable User’s Manual
The Accounts Receivable System
Introduction
History Files
The history files get information as a result of a post.
The ARHSxxx (Summary History) file contains information for each item sold to
each customer in each period. Three types of summary records are created: a
company record, a customer record, and an item record. This file is used only if
you elect to save summary history in the Resource Manager Options and
Interfaces function.
The ARHIxxx (Detail History) file contains detailed information about accounts
receivable transactions. This file is used only if you elect to save detail history in
the Resource Manager Options and Interfaces function.
The ARHDxxx (Additional Descriptions History) file contains additional
descriptions from entries that were posted to the ARHIxxx file. These
descriptions can also be printed in the Detail History Report. This file is used
only if you elect to use the additional descriptions option and to save detail
history in the Resource Manager Options and Interfaces function.
File Interaction
The Accounts Receivable system tracks money paid in terms of customers. When
you enter and post transactions, information is retained in or distributed to the
appropriate files to keep the information up-to-date, make the information
available through reports, and keep the system in balance.
Invoices and Miscellaneous Credits
You can enter invoices for sales or miscellaneous credits. When you enter either
type of daily work, the key unit is the invoice. An invoice holds one or more sales
or miscellaneous credits.
When you enter an invoice, you can record having received all the money or
having received only some of it.
Accounts Receivable User’s Manual
1-13
The Accounts Receivable System
Introduction
You can copy recurring entries to an invoice. Use the Recurring Entries function
to define the run codes that identify recurring entries. The information is kept in
the ARRHxxx and ARRExxx files.
Information about unposted invoices and miscellaneous credits is stored in the
ARTDxxx and ARTHxxx files.
When you enter a line item for a serialized item or for an item kept in a lot, the lot
number or the serial number, transaction number, and associated line-item entry
number are stored in the ARLSxxx file.
If the description field for each line item is not long enough, you can enter 10
lines of additional descriptive text about each line item. The additional text is
stored in the ARDExxx file and is printed on invoices and miscellaneous credit
memos.
Producing Reports
Use the Transaction Reports functions to prepare invoices, produce reports, and
post. The information comes from the ARTDxxx, ARTHxxx, and ARCRxxx files.
When you post, information from these files is cleared and you cannot retrieve it.
Use the Print Invoices function to print invoices for your customers. You can
print the invoices in batches or individually.
The ARTDxxx and ARTHxxx files provide information for the following
journals:
1-14
•
The Sales Journal provides a record of sales you entered in the Transactions
function since the last posting period.
•
The Miscellaneous Credits Journal provides a record of credits (for example,
returns) you entered in the Transactions function since the last posting
period.
Accounts Receivable User’s Manual
The Accounts Receivable System
Introduction
The ARINxxx file provides information for several reports and for statements:
•
The Open Invoice Report provides a list of invoices, miscellaneous credits,
and cash receipts.
•
The Aged Trial Balance provides up-to-date account balance information.
•
The Cash Flow Report provides a summary of how much cash is due within
any four aging periods.
•
Statements provide a summary of the month’s transactions.
•
The Customer Analysis Report provides an analysis of your customers’
activity.
•
The Commissions Report provides a summary of commissions your sales
representatives have earned.
The ARCRxxx file provides information for the following reports and journals:
•
The Cash Receipts Journal provides a record of revenue you entered as
received in the Cash Receipts and Edit Cash Receipts functions since the last
posting period.
•
The Methods of Payment Journal holds the same information as the Cash
Receipts Journal but is organized by payment method. In this journal you
can also single out information about a particular payment method.
•
The Deposits Report provides information about which revenue was
deposited with which bank accounts.
The ARHSxxx, ARHIxxx, and ARCUxxx files provide information for the
following reports:
•
The AR Analysis Report provides an analysis of your company’s
outstanding receivables.
•
The Sales Analysis Report provides an analysis of your company’s sales.
Accounts Receivable User’s Manual
1-15
Introduction
The Accounts Receivable System
•
The Detail History Report provides an analysis of trends in your sales based
on detailed line-item information from each sale: which items are being sold
most, which customers are buying most frequently, how much each item is
being sold for, and so forth.
•
The Customer Sales Report provides an analysis of customers’ buying
trends: how much you sold to your customers, the gross profit from each
sale, the average invoice amounts, and the number of invoices.
•
The Customer Activity Report provides an analysis of customer activity in
terms of which customers bought the most.
•
The Summary Invoice History Report provides a summary of invoices from
detail history.
•
The Promotional Analysis Report provides a means of comparing
promotional pricing with other types of pricing.
•
The Tax Audit Report shows sales tax calculated by income and location.
•
The Sales Tax Report provides a record by tax group of sales tax collected
from revenue since the last period.
Posting Transactions
After you are finished entering transaction and cash receipt information and
producing the desired reports, you are ready to post transactions.
When you post transactions, several files are changed:
•
•
Records are created in the ARINxxx file for each entry in the ARTDxxx and
ARTHxxx files. Invoice due dates and discount dates are updated.
Balances and sales history information are moved from the ARTDxxx and
ARTHxxx files to the ARCUxxx file.
•
1-16
The ARCRxxx, ARTHxxx, and ARTDxxx files are purged.
Accounts Receivable User’s Manual
The Accounts Receivable System
Introduction
•
Gross sales figures are updated in the ARSRxxx file.
•
The taxable and nontaxable sales amounts are updated in the RMTXxxx file.
•
Lot and serial numbers are removed from the ARLSxxx file.
•
If you elected to save detail and summary history in the Resource Manager
Options and Interfaces function, detailed line-item information is moved to
the ARHIxxx file and summary totals information is moved to the ARHSxxx
file.
•
If Accounts Receivable interfaces with General Ledger, entries are made to
the sales, sales tax, freight, miscellaneous, cash, discount, and accounts
receivable accounts in the GLJRxxx (Journal) file. If a cost is associated
with a line item, entries are also made to the inventory and cost-of-goodssold accounts.
•
If Accounts Receivable interfaces with Inventory, the INHIxxx (Detail
History), INHSxxx (Summary History), INLHxxx (Lot History), INLTxxx
(Lot Detail), INQLxxx (Quantity Locations), INQTxxx (Quantity Totals),
INSHxxx (Serial History), and INSNxxx (Serial Numbers) files are updated;
and average prices in the INUPxxx (Units Pricing) file are updated.
•
If Accounts Receivable interfaces with Job Cost, the cost information in the
JOHIxxx (Detail History) file is automatically updated, and the JOBSxxx
(Jobs) file is optionally updated.
•
The period-to-date history in the ARPYxxx file is updated.
•
An open invoice is created in the ARINxxx file for the total of the payments
in each credit card payment method.
•
If Accounts Receivable interfaces with Bank Reconciliation, deposits for
cash receipts update the BRTRxxx (Transactions) file.
Accounts Receivable User’s Manual
1-17
The Accounts Receivable System
Introduction
Transactions, Cash Receipts, and Open Invoices Files’ Relationship
Often the information in the ARTDxxx and ARTHxxx files, the ARCRxxx file,
and the ARINxxx file overlaps. Depending on how you use Accounts Receivable,
different files get used at different times.
The ARTDxxx and ARTHxxx files record transactions independently of how
much money was paid. You enter information in this file through the
Transactions function or by copying recurring entries through the Copy
Recurring Entries function.
If you record totals information when you are entering transactions (indicating
prepayment), the payment information is sent to the ARCRxxx file. You can also
enter this information through the Cash Receipts function. The ARCRxxx file
records money as received when it is entered. You can enter the transaction
independently of entering money received for it, so the customer can pay all at
once, some at the time of transaction and some later, or all of it at a later time or
several later times.
When you post, the information from the ARTDxxx, ARTHxxx, and ARCRxxx
files is moved to and reconciled in the ARINxxx file. This file sorts its
information by invoice number, reconciles overall worth of the transaction with
what was paid, and determines how much is owed. Information stays in this file
until you use the Periodic Maintenance function.
Periodic Work
When your files become too large, you may clear some data using the Periodic
Maintenance, Purge Selected Files, and Purge Customer Comments functions.
Periodic Maintenance
When you do Periodic Maintenance for period-end work, several things happen:
•
1-18
Newly calculated finance charges are added to the ARINxxx and ARCUxxx
files.
Accounts Receivable User’s Manual
The Accounts Receivable System
Introduction
•
Period-to-date accumulators are cleared and credit statuses are updated in
the ARCUxxx file.
•
Aging balances are updated in the ARHSxxx files.
•
Month-to-date gross sales amounts are cleared in the ARSRxxx file.
•
Month-to-date payments are cleared in the ARPYxxx file.
•
Finance charges are posted to the GLJRxxx file (if Accounts Receivable
interfaces with General Ledger). You can also make the system clear year-todate finance charges in the ARCUxxx file.
•
The period in the ARPDxxx table increments by one.
When you do Periodic Maintenance for quarter-end work, several things happen:
•
All period-end tasks are done.
•
Quarter-to-date totals are cleared in the ARPYxxx and ARCUxxx files.
When you do Periodic Maintenance for year-end work, several things happen:
•
All period-end and quarter-end tasks are done.
•
Last-year accumulators are updated and year-to-date accumulators are
cleared in the ARPYxxx and ARCUxxx files.
•
Year-to-date gross sales amounts are cleared in the ARSRxxx file. You can
also make the system clear the high balance in the ARCUxxx file.
Accounts Receivable User’s Manual
1-19
Introduction
The Accounts Receivable System
The following chart shows the effects of periodic maintenance on the ARCUxxx
file:
Value
Updated (+ or -)
Increased
Decreased
General
Information
Use the Customers
function
Customer
Comments
Use the Customers
function
Sales PTD, QTD,
YTD, and LY
Post sales
Post miscellaneous
credits
Cash Receipts
PTD, QTD, YTD,
and LY
Post sales
Post miscellaneous
credits
Discount Taken
PTD, QTD, YTD,
and LY
Post sales
Post miscellaneous
credits
Discount Lost
PTD, QTD, YTD,
and LY
Post orders
Post miscellaneous
credits
Last Invoice
Post sales
Post miscellaneous
credits
Last Sale Date
Post sales
Post miscellaneous
credits
Last Sale Amount
Post sales
Post miscellaneous
credits
Last Payment Date
Post sales
Post miscellaneous
credits
Last Payment
Amount
Post sales
Post miscellaneous
credits
Number
1-20
Accounts Receivable User’s Manual
The Accounts Receivable System
Introduction
Purge Selected Files
The following list shows the effects of purging selected files:
•
Paid invoices with check dates before the date you specify are removed from
the ARINxxx file.
•
Detail history with invoice dates before the date you specify is removed
from the ARHIxxx file.
•
Summary history before the period/fiscal year you specify is removed from
the ARHSxxx file.
•
Recurring entries with cutoff dates before the date you specify is removed
from the ARRExxx, ARRHxxx, and ARRDxxx files.
Purge Customer Comments
When you use the Purge Customer Comments function to remove customer
comments you no longer need from the ARCCxxx file, the following things
happen:
•
Paid invoices with check dates before the date you specify are removed from
the ARINxxx file.
•
Detail history with invoice dates before the date you specify is removed
from the ARHIxxx file.
•
Summary history before the period/fiscal year you specify is removed from
the ARHSxxx file.
•
Recurring entries with cutoff dates before the date you specify is removed
from the ARRDxxx, ARRExxx, and ARRHxxx files.
Accounts Receivable User’s Manual
1-21
The Accounts Receivable System
Introduction
Productivity Reports
Accounts Receivable includes a number of productivity reports in Microsoft
Excel® format. These reports connect directly to your OSAS data via the ODBC/
JDBC driver (included with OSAS 7.0) and allow you to use spreadsheet tools to
manipulate the data as you want and produce charts and graphs to visualize
trends.
The spreadsheet reports are listed on the Productivity Reports menu. Doubleclick a report name to automatically launch Excel or any other spreadsheet
program capable of opening an Excel-formatted spreadsheet to open the report.
Use the selection boxes to filter the information that appears in the report, or use
the tools within your spreadsheet software to create charts and graphs from the
report’s data.
1-22
Accounts Receivable User’s Manual
Starting OSAS
OSAS runs on an operating system supported by 150 MB of permanent storage
and 4 MB of RAM. You may need additional space or memory, depending on the
size of your data files and the operating system you use. Consult your reseller for
more information.
In Windows
To start OSAS on a computer running Windows, double-click the OSAS shortcut
on the desktop or access the program from the Start menu.
In Other
Operating
Systems
To start OSAS on an operating system other than Windows, enter osas at the
operating system prompt. If your operating system has graphical capabilities, you
can also use the OSAS shortcut to start OSAS.
Using
Parameters
You can use the -u, -c, -a, and -t parameters in OSAS shortcut properties or after
the osas command so that the system automatically uses the appropriate user ID,
company ID, and access code to save time logging in.
In Windows, open the OSAS shortcut’s properties and enter these parameters
after the path in the Target field (as in the example below; be sure to use the
correct directories for your system).
C:\basis\bin\bbj.exe osasstrt.txt -q -tT00 -cD:\osas70\progrm\config.bbx - -uSam
-aapple -cH
Note: In Windows, the -u, -c, and -a parameters must follow the separation dash.
In other operating systems, enter the parameters after the osas command, as in
this example:
osas -t T2 -c B -a apple
Note: You can enter these parameters in any order, but you must leave a space
between the parameter mark (-t, -c, or -a) and the parameter itself.
Refer to the Resource Manager guide for more information on these parameters.
Accounts Receivable User’s Manual
1-23
Introduction
Starting OSAS
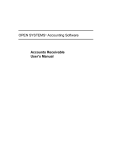
Logging In
After you start OSAS, the login screen appears.
To log in to OSAS, enter your User ID, the Company ID you want to work with,
and your Access Code. If you want to save your access code so that you do not
need to enter it again, select the Save Password? check box (or enter Y in text
mode) to save your information. Finally, click OK or press Enter to log in.
This screen appears only after you have set up users and access codes for the
OSAS system.
Access Codes
Access codes limit use of the system and protect sensitive information. Each
code allows access to specific applications, menus, and functions. If you cannot
select a menu or function, your access code is not authorized for it. Use the
Access Codes function in Resource Manager to set up access codes.
To change access codes, select Access code from the File menu, click the
Access Code button on the toolbar, or press F4 on the main menu. When the
Access Code box appears, enter the access code to change to and press Enter.
1-24
Accounts Receivable User’s Manual
Starting OSAS
Introduction
Workstation Date
To change the workstation date, select Workstation date from the File menu,
click the Change Date button on the toolbar, or press F6.
When the Workstation Date box appears, use the button or your keyboard to enter
the date and press Enter.
Accounts Receivable User’s Manual
1-25
Navigating OSAS
OSAS menus and functions are available in two modes: graphical and text. The
graphical mode allows both keyboard and mouse commands and uses data entry
fields and buttons similar to those found in any graphical software program. The
text mode presents information in a simpler text format and uses keyboard
commands to access functions and move around the screen. If you use an
operating system that does not have graphical capabilities, the text mode is the
only mode available.
You can use either text or graphical function screens indepently of the main
menu. For example, you can use text function screens while using the graphical
main menu, and vice versa. Select GUI Functions from the Modes menu or press
Shift+F6 to toggle between the text and graphical modes for function screens.
When available, press Shift+F5 to switch between graphical and text menu
modes, or press Shift+F6 to switch between modes on function screens. You can
also use the Resource Manager Defaults function to select the default mode to
use for the main menu and function screens.
In text mode, use the Page Up, Page Down , arrow, and Enter keys to move
between menus, select and enter functions, and move around function screens.
When a list of commands appears at the bottom of a function screen, press the
highlighted letter to use a command. These methods also work in graphical
mode, or you can use the mouse to click on fields and command buttons.
Graphical Mode
If you’re familiar with other graphical software programs, you’ll find it easy to
navigate around the OSAS graphical mode, which uses buttons, toolbars, text
entry boxes, and menus to help you move through your tasks.
Accounts Receivable User’s Manual
1-27
Introduction
Navigating OSAS
Main Menu
If you use BBj in graphical mode, the main menu is available in two flavors:
graphical and MDI. To switch between the two styles, press Shift+F5. If you use
Visual PRO/5, the graphical main menu is the only graphical menu available.
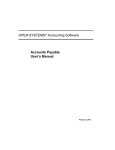
Graphical
Main Menu
The graphical main menu is shown below.
You can move around the graphical menu in these ways:
1-28
•
Click an application to view that application’s menu. Click a menu item to
view its functions. Double-click a function name to enter that function.
•
To exit from the graphical menu, click a different application or menu name
or press Tab to return to the main menu.
•
To exit from OSAS, click the Close box in the upper-right corner of the
screen, press F7, or select Exit from the File menu.
Accounts Receivable User’s Manual
Navigating OSAS
Introduction
MDI Main
Menu
The MDI menu centralizes all OSAS functionality in one location: applications
appear as tabs at the top of the screen, their menus and functions appear in a
navigation pane on the left side of the screen, and function screens appear in the
large pane on the right. Using this menu, you can open more than one function
screen at a time and move or minimize screens as needed. However, you cannot
open two functions that lock the same data file at the same time.
You can move around the MDI menu these ways:
•
To view an application’s menus, click that application’s tab.
•
To view the functions a menu contains, click the menu name. The menu
expands to list the functions it contains. Click the function name to enter the
function. The function screen appears in the right pane.
•
To exit from a menu, click a different menu name or application tab. To exit
from OSAS, click the Close box in the upper-right corner of the screen,
press F7, or select Exit from the File menu.
Accounts Receivable User’s Manual
1-29
Introduction
Navigating OSAS
Function Screens
Graphical screens contain the same functionality as text screens, presented in a
graphical format that includes easy access to commands via the mouse.
You can move around the screen in these ways:
1-30
•
Use the mouse or press Tab to move from field to field. Use the scroll
buttons to move from line to line in scrolling regions.
•
If a screen appears prompting for the kind of information to enter or
maintain (such as on File Maintenance or Transactions screens), select the
appropriate option and click OK to continue.
•
Press Page Down if prompted to move to the next section.
•
Click Header when it appears to return to the screen’s header section.
•
Press F7 to exit the screen and return to the main menu.
Accounts Receivable User’s Manual
Navigating OSAS
Introduction
Menus
Both the graphical main menu and graphical function screens contain drop-down
menus that give you access to additional commands without using the function
keys. While you can use the function keys to access commands in graphical
mode, you may find it easier to access command through these menus.
To access a menu’s commands, click a menu title. The commands for that menu
appear, followed by any associated hot key combinations in brackets < >. To use
a command, click the command name or press the hot key combination.
Refer to the Resource Manager guide for more information on the menus
available in OSAS and their commands.
Shortcut
Menu
OSAS gives you quick access to commands relating to the screen you’re using
via a shortcut menu. The commands that are available depend on the function and
the field you are currently using. To use these commands, click the right mouse
button and select the command from the menu that appears.
On the main menu, the shortcut menu gives you access to commands that help
you manage your Favorites menu, switch between sample and live data, perform
certain setup tasks, and view function information. On function screens, this
menu helps you access help documentation, move around the function screen,
work with EIS dashboards, and so on.
Other
Commands
Menu
The Other Commands (or F4) menu is available on both graphical and text
menu and function screens and gives you access to additional utilities and
commands not directly related to the function you’re currently using. Among
other things, these commands open calculators or allow you to view or enter
additional information. In text mode, press F4 twice on the menu or once on
function screens to access this menu.
Consult Appendix A in the Resource Manager guide for more information on the
commands available on the Other Commands menu.
Accounts Receivable User’s Manual
1-31
Introduction
Navigating OSAS
Information
Menu
The Information (or Shift+F2) menu is available in some graphical or text
function screens in certain applications and gives you access to additional
information about a customer, vendor, item, job, bill of material, or employee.
The commands available on the Information menu are determined by the
applications you have installed, and can include:
•
•
•
•
•
General Information
Comments
History
Documents
Address Lookup
Not all of the commands above appear on every Information menu; instead,
commands are available only as they are relevant to the task you are performing.
For example, if you are entering a transaction in Accounts Receivable, you can
access comments or documents about items or customers but not about
employees or vendors.
Consult Appendix A in the Resource Manager guide for more information on
how to use the functions on the Information menu.
Favorites
Menu
The Favorites menu gives you quick access to the OSAS functions you use most
by allowing you to add selections for entire menus or particular functions to a
custom menu. After you’ve set up the menu, select Change to Favorites from
the graphical Favorites menu or press F2 to access the functions.
The Favorites menu saves you time by eliminating the need to switch between
applications. You can add functions from several different applications to the
Favorites menu and access them all there rather than switching between
applications on the main menu to access the functions you need.
To add a function to the Favorites menu, select the function you want to add and
press F10. Press F2 to switch to the Favorites menu to confirm that your
selection was added.
To remove a function from the menu, select the function on the Favorites menu
that you want to remove and press F10 again.
1-32
Accounts Receivable User’s Manual
Navigating OSAS
Introduction
Toolbars
As with menus, graphical screens also contain toolbars that give you fast access
to the most frequently used OSAS commands. The toolbar for the main menu
differs slightly from that of function screens.
Main Menu
Toolbar
The toolbar for the main menu is shown below. Click a button to access that
command.
Access
Code
Workstation
Date
Function
Screen
Toolbar
Command
Help
Application
Versions
Calendar
Calculator
Toggle
Favorites
Call a BBj/Pro5
Program
The toolbar for function screens is shown below. Click a button to access that
command.
File
Maintenance
Start
Over
Delete
Paste
Copy
Calendar
Calculator
Field
Help
Online
Documentation
Address
Mapping
Date Fields
If you use BBj in graphical mode, click the Calendar button when it appears next
to date fields to open a calendar so that you can select the date you want to enter
into that field.
Accounts Receivable User’s Manual
1-33
Navigating OSAS
Introduction
Browse
If you use BBj in graphical mode, you can use the Browse button when it
appears next to fields to navigate to directories and files and automatically enter
file paths into that field. Click the Browse button to open the Select Directory/
File screen, then navigate to the directory or file and click Open to automatically
enter the file path in the field.
Inquiry
The Inquiry command helps you look up and select valid entries for fields that
are connected to master file records. For example, when you use the Inquiry
command in a Batch ID field, OSAS lists all batches you have set up so that you
can select the one you want to enter in that field. When the Inquiry button
appears next to a field, you can either click the button or press F2 to open the
Inquiry screen and search for valid entries.
Maintenance
The Maintenance command allows you to enter or edit master file records on the
fly from within functions. For example, you can use the Maintenance command
to add a new customer or item from within the Transactions function. The
Maintenance command is available when the Maintenance button appears on the
toolbar. Click the button or press F6 to open the File Maintenance function
associated with that field and enter or edit a new master file record.
Address Mapping
When you are working with a screen that contains an address, use the Address
Mapping command to view a map of that address. This command combines
address information with the URL and search variables in the Resource Manager
Web Setup function and the Map Lookup ID in the Company Setup function to
direct your web browser to a mapping website and generate the map.
Note: Before you can view maps, you must set up mapping websites in the
Resource Manager Web Setup function, select the Map Lookup ID to use in the
Resource Manager Company Information function, and enter the path to your
workstation’s web browser in the Resource Manager Defaults function.
1-34
Accounts Receivable User’s Manual
Navigating OSAS
Introduction
Text Mode
The OSAS text mode is available on all operating systems. If you use OSAS on
an operating system that does not have graphical capabilities, the text mode is the
only mode available. In text mode, all screens are presented in an easy-to-use
textual interface that you navigate through using keyboard commands.
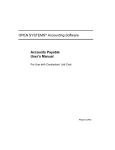
Main Menu
The text main menu is shown below.
When you select an application, the application’s menu is superimposed over the
main menu. Selecting an entry on an application menu opens a function screen or
a submenu.
Accounts Receivable User’s Manual
1-35
Introduction
Navigating OSAS
You can move around the text main menu in these ways:
1-36
•
Use the arrow keys to move the cursor up and down to highlight the
application you want. Then press Enter to select it.
•
Press the first letter of the application you want to move the cursor to the
first application beginning with that letter. Continue to press the letter key or
the down arrow until the application you want is highlighted, then press
Enter to select it.
•
Use the mouse to click an application to view that application’s menu.
•
To move to the first application on the menu, press Home. To move to the
last application on the menu, press End.
•
On an application menu, press Page Up to move to the menu immediately
behind it. If you are several levels away from the main menu, you can return
to the main menu by pressing Page Up repeatedly or by pressing Tab once.
•
To exit from OSAS, press F7.
Accounts Receivable User’s Manual
Navigating OSAS
Introduction
Function Screens
Like the text menu, OSAS text function screens can be used on all operating
systems and in combination with graphical menus.
You can move around the screen these ways:
•
Press Enter or the down arrow to move from field to field.
•
To use a command that is listed in the command bar, press the highlighted
letter.
•
Use hot key commands to access information screens or to toggle commands
on and off. Refer to Appendix B in the Resource Manager guide for more
information on these commands and their corresponding hot keys.
•
If a screen contains more than one section, press Page Down when
prompted to move to the next section.
Accounts Receivable User’s Manual
1-37
Introduction
Navigating OSAS
•
If a menu appears prompting you for the kind of information to enter or
maintain (such as in the example and on Transaction and File Maintenance
screens), select the appropriate option and press Enter.
•
To exit the screen and return to the menu, press F7.
Menus
Like the graphical mode, the text mode also includes menus that give you access
to commands that open additional utilities, show additional information about the
task at hand, or set up a custom menu that contains frequently-used commands.
Refer to Appendix A in the Resource Manager guide for full details about the
menus available in OSAS.
Other
Commands
The Other Commands (or F4) menu gives you access to additional utilities and
commands not directly related to the function you’re currently using. In text
mode, press F4 twice on the menu or once on function screens to access this
menu. See page 1-31 for more information on this menu.
Information
Menu
The Information (or Shift+F2) menu gives you access to additional information
about a customer, vendor, item, job, bill of material, or employee. In text mode,
this menu is available when the Info flag appears at the bottom of a function
screen.
The commands on the menu are available only as they are relevant to the task
you are performing. For example, if you are entering a transaction in Accounts
Receivable, you can access comments or documents about items or customers
but not about employees or vendors. See page 1-32 for more information.
Favorites
Menu
The Favorites menu allows you add the OSAS menus or functions you use most
frequently to a custom menu. After you’ve set up the menu, select Change to
Favorites from the graphical Favorites menu or press F2 to access the functions.
To add a function to the Favorites menu, select the function you want to add
from the main menu and press F10. To remove a function from the menu, select
the function on the Favorites menu that you want to remove and press F10 again.
See page 1-32 for more information on this menu.
1-38
Accounts Receivable User’s Manual
Navigating OSAS
Introduction
Commands and Flags
Both the text menu and text function screens let you use commands to drill down
to more information, change companies or access codes, switch to sample data,
and perform tasks related to the function you are using. These commands are
analogous to the commands contained on drop-down menus in graphical mode.
You access commands by pressing the hot key combination for the command you
want to use. If you’re working with a keyboard that lacks function keys (labeled
with an F followed by a number) or if you’re working with an emulator in UNIX
(which can cause function keys to become unavailable), press the appropriate
alternate key combination to access the command.
Refer to Appendix B in the Resource Manager guide for a list of all OSAS
commands and their associated hot keys.
Not all commands are available for every function or field; when a command is
available, a flag appears at the bottom of the function screen. Common flags
include Quick, Info, Maint, Inquiry, and Verify.
•
The Quick flag reminds you that you are using the Quick Entry mode to skip
fields that are not required. Press Ctrl+F to toggle quick entry on and off.
•
When the Info flag appears, press Shift+F2 to access the Information menu
to access additional information about a customer, vendor, item, job, bill of
material, or employee. See page 1-32 for more information on this menu.
•
When the Maint flag appears, press F6 to launch the appropriate File
Maintenance function to edit a master file record or enter a new one “on the
fly.” When you finish, press F7 to return to the function you were using.
•
When the Inquiry flag appears, press F2 to use the Inquiry command to look
up additional information and select valid entries for the field you are in.
•
The Verify flag reminds you that you are using verification. When this flag
appears, you must provide verification when you press Page Down or use
the Proceed (OK) command. Press Ctrl+V to toggle verification on and off.
Accounts Receivable User’s Manual
1-39
Navigating OSAS
Introduction
Command Bar
The command bar appears at the bottom of function screen and gives you access
to commands that allow you to move around the screen, add or edit information,
change settings for selected lines, or select output devices.
The commands that are available depend upon the function you are using, and are
analogous to the command buttons available on graphical screens. Press the
highlighted key to use a command.
Messages
Messages appear at the bottom of the screen when a command is unavailable or
when OSAS needs information to continue.
Address Mapping
When you are working with a screen that contains an address, you can use the
Address Mapping command menu to view a map of that address. This
command combines address information with the URL and search variables in
the Resource Manager Web Setup function and the Map Lookup ID in the
Company Setup function to direct your web browser to a mapping website and
generate the map.
The Address Mapping command is available when the Map flag appears at the
bottom of the screen. To view a map of the first address on the screen, press
Shift+F4. To view a map of the second address (if present), press Shift+F5. The
second command is not available when there is only one address.
Note: Before you can view maps, you must set up mapping website information
in the Resource Manager Web Setup function, select the Map Lookup ID to use
in the Resource Manager Company Information function, and enter the path to
your workstation’s web browser in the Resource Manager Defaults function.
1-40
Accounts Receivable User’s Manual
Navigating OSAS
Introduction
Reports
All OSAS applications contain a variety of reports to help you view and analyze
your business data. Each report function includes a selection screen that allows
you to select the range of information to include in the report, which appears in
alphabetical order when the report is produced. After you select the information
to include, use one of these options to output the report:
•
Select Printer (or enter P in text mode) to send the report to a printer, then
select the printer to use.
•
Select Print Preview (or enter R) to view the report in a preview window,
from which you can print the report later. This option is only available on
Windows or graphical Linux workstations running BBj.
•
Select File (or enter F) to save the report to a file, then change the directory
path and file name (followed by the .txt extension), if necessary. Directory
paths and file names must be less than 35 characters in length.
Note: To preserve formatting, view the reports you save to a text file with a
fixed-width or monospaced font (Courier or Lucida Console, for example).
•
In text mode, enter S to view the report directly in an OSAS function screen,
then select whether to view it in Standard or Compressed width.
•
When available, select Email (or enter M) to e-mail the report, then enter the
e-mail address to sent the message to, the subject for the message, and
whether to include the report as an attachment to the message.
Generally, reports or forms that make up part of your audit trail cannot be
e-mailed. You also must set up your e-mail system in Resource Manager
before you can e-mail reports.
Note: To preserve formatting, view e-mailed reports (or attachments) with a
fixed-width or monospaced font (Courier or Lucida Console, for example).
Consult the Resource Manager guide for more information about reports.
Accounts Receivable User’s Manual
1-41
Installation and Conversion
2
Accounts Receivable User’s Manual
Installation
Conversion
Accounts Receivable User’s Manual
2-3
2-5
2-1
Installation
Before You Install Accounts Receivable
Make sure your system meets these minimum requirements before you install
Accounts Receivable.
The Accounts Receivable system needs a minimum of 13 megabytes (13Mb) of
disk space to work correctly with programs, sample data, data dictionaries,
system files, and graphics files. Having more disk space available is necessary
for the data files you create and maintain.
The OSAS system requires at least one megabyte (1Mb) of main memory to run.
More memory may be necessary in certain environments and operating systems.
Installing Accounts Receivable
Use the Install Applications function in Resource Manager (see the Resource
Manager guide) to install Accounts Receivable. No special considerations need
to be made for Accounts Receivable when you use the function.
Setting up Accounts Receivable
Once you have installed Accounts Receivable on your system, you must prepare
your data files for everyday use.
You can prepare files for use with Accounts Receivable in one of two ways: you
can create and set up your files manually on a new system, or you can convert
your old files when you upgrade from an earlier version. To create files on a new
system, use the Data File Creation function on the Company Setup menu in
Resource Manager (see the Resource Manager guide). For instructions on
converting your files, see the Conversion section later in this chapter.
If you plan to use General Ledger, Inventory, Bank Reconciliation or Job Cost
with Accounts Receivable, you must set up those applications before you set up
Accounts Receivable.
Accounts Receivable User’s Manual
2-3
Installation and Conversion
Installation
Accounts Receivable and Sales Order
If you plan to install Sales Order, install it immediately after installing Accounts
Receivable. See the Sales Order User’s Manual for information about installing
Accounts Receivable and Sales Order at the same time.
2-4
Accounts Receivable User’s Manual
Conversion
If you use an earlier version of OSAS Accounts Receivable, you can convert
your files from the older version to the current version.
When you are ready to convert files, use the Data File Conversion function on
the Company Setup menu in Resource Manager (see the Resource Manager
guide) to upgrade Accounts Receivable data files. You can upgrade from version
3.2, 4.xx, 5.xx, or 6.xx. If you want to convert to version 7.0 from a version
earlier than 3.2, contact a client support representative.
Note
You must install the new version of Accounts Receivable before you convert
files. You can replace and update the programs properly only by using the
Install Applications function in Resource Manager.
Tax classes, locations and groups are kept in Resource Manager (the
RMCDxxx, RMTXxxx and RMGCxxx files). If you are converting Accounts
Receivable from a version previous to 5.0, and you want Accounts
Receivable to use the tax information from the earlier version, use the Data
File Creation function on the Resource Manager files first. The Accounts
Receivable conversion then moves the information from the old files to the
new ones.
Before you convert an application’s files, make note of the version number
of the application you are converting from. The Data File Conversion
function has no way of determining the information from within the
function.
Before you convert an application’s files, do these things:
•
•
Back up your data files.
Make sure that no unposted transactions are in your current version.
Accounts Receivable User’s Manual
2-5
Installation and Conversion
Conversion
Consider Your Setup
Before you try to convert your version of Accounts Receivable to the current
version, consider the exact setup of your system. Since OSAS code can be
customized, modifications to your system might be lost if you install a new
version of a program or update a file. If you are not sure whether your system is
ready for conversion, consult your Open Systems software provider.
If you are converting from version 6.5x to 7.0, no conversion is necessary. You
should still use the Data File Conversion function to copy data files from the old
data directory to the new directory, however.
Converting to Version 7.0
Select Data File Conversion from the Company Setup menu in Resource
Manager. The Data File Conversion screen appears.
2-6
Accounts Receivable User’s Manual
Installation and Conversion
Conversion
1.
All valid OSAS data paths appear. Select the destination directory where you
want the new data files to reside.
2.
Enter the path (drive and directory) that has the files you want to convert.
You cannot enter the same path as the path you selected as the destination.
3.
If you want source files to be erased after conversion, select the check box
(enter Y in text mode); if not, clear the check box (enter N in text mode).
4.
If you want the conversion process to pause if a problem occurs, select the
box (enter Y in text mode); if not, clear the box (enter N in text mode). The
system considers file corruption or evidence of data not converting correctly
a problem.
5.
Enter AR in the Appl column; Accounts Receivable appears.
6.
Enter your earlier version number of Accounts Receivable, and press Enter.
(You can determine the version by looking at the copyrights screen when
you start OSAS, or in most versions, by using the Information (Shift+F2)
command on the menu screen.)
7.
If data files already exist for Accounts Receivable in the intended destination
path, the AR data files exist. Do you want this task to erase them? prompt
appears. If you want to erase the existing files and convert the files from the
version in the source path, select Yes (enter Y in text mode); if not, select No
(enter N in text mode). If you elect not to erase existing files, you must
change your directory choices so that no conflict exists.
8.
To convert, use the Proceed (OK) command.
9.
The Do you want a printout of error log after each application? prompt
appears. If you want the error log to be produced after files are converted for
each application, select Yes (enter Y in text mode); if you want the log to be
produced after files for all applications are converted, select No (enter N in
text mode). If you are converting only Accounts Receivable files, your
answer to this prompt makes no difference.
Accounts Receivable User’s Manual
2-7
Conversion
Installation and Conversion
10. If a problem occurs and you indicated that you want the system to pause
when a problem occurs, a prompt alerts you. To stop the conversion process,
select Yes (enter Y in text mode). To let the conversion run its course and
investigate later, select No (enter N in text mode).
11. When the process is finished, the files are converted. Select the output
device for the error log.
After conversion is finished and the error log is produced, the main menu—
with Contractors’ Accounts Receivable added—appears.
2-8
Accounts Receivable User’s Manual
Setup
3
Accounts Receivable User’s Manual
Setup Considerations
Setup Checklist
Setup Functions
Accounts Receivable User’s Manual
3-3
3-7
3-9
3-1
Setup Considerations
After you have installed the software for the first time or after you have upgraded
the software, you must set up the system. Follow the setup procedures carefully;
the choices you make determine how the system operates.
To properly set up the Accounts Receivable system, you need to gather and
organize your accounting data. You need the following information:
•
A chart of accounts for your business
•
Identification and credit information about your customers
•
Previous- and current-year sales, returns, and receipts histories organized by
customer
•
A list of unpaid invoices organized by customer or an aging report
Accounts Receivable User’s Manual
3-3
Setup
Setup Considerations
Codes and IDs
When you set up the system, you assign codes and IDs to tell the system how to
identify each item on file. The system uses these identifiers to organize the
information in reports and inquiry windows.
The system arranges code characters in a particular order. In the following list
codes and IDs are sorted from lowest to highest, and dashes represent blank
spaces.
-----0
-----1
-----Z
-----a
----01
--a--000000
000001
1
The organization of these codes illustrates the following principles:
•
The system reads codes from left to right until it finds something other than a
blank space.
•
Items that make up a code are always listed alphabetically. The items are
listed in this order for each position:
Blank spaces
Characters (-, *, /, and so forth)
Numbers (0–9)
Uppercase letters (A–Z)
Lowercase letters (a–z)
3-4
Accounts Receivable User’s Manual
Setup Considerations
Setup
Alphabetical rules are not intuitive when numbers are involved. Numbers are
sorted as if they were letters: When the first characters of several IDs are
compared, the ID with the smallest first character is placed first in the list. If the
first character of the IDs is the same, the second characters are compared and the
ID with the smallest second character is placed first in the list. This comparison is
made for each character in the range of IDs until the IDs are clearly in
alphabetical order.
If you use numbers for IDs, pad them with zeros so that they are all the same
length and numeric rules can hold true. For example, in alphabetical sorting ID
112 comes before ID 60, since anything that starts with 1 comes before anything
that starts with 6 alphabetically. If ID 60 were ID 000060 and ID 112 were ID
000112, ID 000060 would be listed first, since 060 is less than 112 alphabetically
and numerically.
When you assign IDs and codes, establish a format that makes sense for your
business and use it consistently. The following suggestions may help:
•
To prevent organization problems, use zeros to make all IDs the same length.
If IDs are divided into more than one part, the parts should be the same
length in every ID. Do not use spaces to divide IDs into more than one part.
For example, use ACE-01 and ACE-11 instead of ACE-1 and ACE-11 or
ACE 01.
•
If you use letters in IDs, use either all uppercase or all lowercase letters so
that the IDs can be sorted correctly.
•
Use descriptive IDs. For example, WIN001 and WIN002 are more
descriptive IDs than 000001 and 000002. (If you already use a numbered
system, you might want to stick with it.)
•
If you want to sort items by a particular attribute—name or group—put the
attribute in the ID. For example, to organize customers by name, put the first
characters of the name in the customer ID.
Accounts Receivable User’s Manual
3-5
Setup Considerations
•
3-6
Setup
To ensure that you can insert new items into a sequence, use a combination
of letters and numbers that leaves room in the sequence for later additions.
For example, setting up two consecutive IDs of WIN001 and WIN005 leaves
room for three customers in between.
Accounts Receivable User’s Manual
Setup Checklist
Follow the steps below to set up the Accounts Receivable system. Each step is
explained in this section. If you converted from a previous version of Accounts
Receivable, you can simply verify the contents of these files instead of building
the data.
1.
Set up the options and interfaces.
2.
Build the tables.
3.
Use the functions on the Codes Maintenance menu to build the sales/COGS
and distribution accounts, terms codes, finance charge codes, and shipping
methods.
4.
Build the ARSRxxx (Sales Rep) file.
5.
Build the RMTHxxx (Tax Location Header), RMTDxxx (Tax Location
Detail), RMGCxxx (Group Code), and RMCDxxx (Tax Class Code) files in
Resource Manager.
6.
Build the ARPYxxx (Payment Methods) file.
7.
Build the ARCUxxx (Customer) file.
8.
Build the ARSAxxx (Ship-to Address) file.
9.
Build the ARRExxx (Recurring Entries Detail), ARRDxxx (Recurring
Additional Descriptions), and ARRHxxx (Recurring Entries Header) files.
10. Enter initial balances.
11. Set up access codes.
12. Set up a backup schedule.
Accounts Receivable User’s Manual
3-7
Setup Functions
Options and Interfaces
An application can be interfaced to work in conjunction with other applications.
Accounts Receivable can be interfaced with General Ledger, Contractors’ Job
Cost, Bank Reconciliation, and Inventory.
General Ledger
When Accounts Receivable interfaces with General Ledger, posting in Accounts
Receivable makes entries in the GLJRxxx (Journal) file for transactions that
affect the ledger (such as sales, cost of goods sold, inventory, freight).
Contractors’ Job Cost
When Accounts Receivable interfaces with Contractors’ Job Cost, posting in
Accounts Receivable updates billing information in the Contractors Job Cost job
and phase records. When you enter invoices, refer to the Contractors Job Cost
Jobs and Phases List for Customer IDs and contract numbers.
Bank Reconciliation
When Accounts Receivable interfaces with Bank Reconciliation, deposits for
sales paid with cash or checks update the BRTRxxx (Transactions) file.
Inventory
When Accounts Receivable interfaces with Inventory, accounts receivable
transactions update the quantities in use in the Inventory item records, and
posting in Accounts Receivable updates the item stock quantities, dates, and
balances.
Accounts Receivable User’s Manual
3-9
Setup
Setup Functions
Options and Interfaces Screen
Select Options and Interfaces from the Resource Manager Company Setup
menu. The Options and Interfaces screen appears.
The name of the company you are working with appears. Specify whether the
Options table is shared or owned. (See the Resource Manager User’s Manual for
information about Options tables.) Then enter AR as the application ID. The
Accounts Receivable Options screen appears.
To toggle an option (for example, between YES and NO), press Enter.
To move the prompt directly to a different option, press G. Then enter the option
number.
When you are finished selecting options, press W to save your entries. Then exit
to the Options and Interfaces screen. Select another application whose options
and interfaces you want to change or eixt to the Company Setup menu.
3-10
Accounts Receivable User’s Manual
Setup Functions
Setup
1.
Toggle to YES or NO to indicate whether or not you want to interface
Accounts Receivable with General Ledger, Inventory, Contractors’ Job Cost,
and Bank Reconciliation.
The interface options work independently of each other. You can respond to
them with any combination of settings.
2.
Toggle to YES or NO to indicate whether or not you want to use transaction
batching. You can use batching to group invoices, miscellaneous credits, and
cash receipts for printing and posting. You can determine how to set up the
batches (for example, by time or by workstation). If you use batches, one
operator can post transactions in one batch while another operator can add or
edit transactions in another batch.
3.
Toggle to YES or NO to indicate whether or not you want the system to
generate batch numbers. If you select YES, you cannot override the numbers
the system assigns.
4.
Toggle to YES or NO to indicate whether or not you want to enter 1 to 10
lines (35 characters each) of additional text for each line item on invoices,
miscellaneous credits, and recurring entries. If you select NO, the ARDExxx
(Additional Descriptions) file is not used.
5.
Toggle to YES or NO to indicate whether or not you want to use additional
descriptions stored in Inventory. If Accounts Receivable does not interface
with Inventory or if you do not use additional descriptions, this option is set
to NO and you cannot change it.
6.
Toggle to YES or NO to indicate whether or not you want to keep detail
(line-item) sales history. If you select NO, the ARHIxxx (Detail History) file
is not used and you cannot calculate commissions for sales reps or print the
Detail History Report.
7.
Toggle to YES or NO to indicate whether or not you want to keep additional
description history. If you elected not to use additional descriptions, this
option is set to NO and you cannot change it.
Accounts Receivable User’s Manual
3-11
Setup
Setup Functions
8.
Toggle to YES or NO to indicate whether or not you want to keep summary
(totals) sales history. If you select NO, the ARHSxxx (Summary History) file
is not used and you cannot print summary history reports.
9.
Toggle to YES or NO to indicate whether or not you want the unit cost of
inventory items to appear when you enter line items. If Accounts Receivable
does not interface with Inventory, this option is set to NO and you cannot
change it.
10. Toggle to YES or NO to indicate whether or not you want to be able to
change a customer’s level when you enter transactions. If you select YES,
you can change how a customer’s billing is calculated at the time of
transaction entry by assigning a different level.
11. Toggle to YES or NO to indicate whether or not you want to be able to enter
an expired credit card as payment for a transaction. If you select YES and
enter a credit card whose expiration date is passed, a warning message
appears.
12. Toggle to YES or NO to indicate whether or not you want quantities and
quantity breaks to appear when you enter line items.
13. Toggle to YES or NO to indicate whether or not you want to be able to print
invoices online as you enter them. If you select NO, you can print invoices
only in a group after you have entered them.
14. Toggle to YES if you want to use plain paper invoices. Toggle to NO if you
want to use forms.
15. If you elected to use forms for invoices, toggle to LASER, 8 1/2 x 11, or
STANDARD to indicate the type of invoice form you use.
16. Toggle to YES or NO to indicate whether or not you want to use
prenumbered invoice forms. If you select YES, the system overwrites
invoice numbers you enter. If you select NO, the system uses the invoice
numbers you enter.
3-12
Accounts Receivable User’s Manual
Setup Functions
Setup
17. Toggle to YES if you want to use plain paper statements. Toggle to NO if you
want to use forms.
18. If you elected to use forms for statements, toggle to LASER, 8 1/2 x 11, or
STANDARD to indicate the type of statement form you use.
19. Toggle to YES or NO to indicate whether or not you want to print company
information on plain paper forms.
20. Toggle to YES or NO to indicate whether or not you want to be able to post
data without printing reports.
21. Toggle to YES if you want to post line-item detail to General Ledger. Toggle
to NO if you want to post only summary information.
22. Toggle to YES or NO to indicate whether or not you want to be able to age
invoices online directly in the ARCUxxx file. If you select YES, invoices for
open invoice customers are aged in the Customers function and in the
Information Inquiry Customers and Open Invoices function; invoices for
all customers are aged in the Periodic Maintenance and the Post
Transactions functions. If you select NO, the invoices are aged for all
customers when you post and when you use the Periodic Maintenance
function.
23. Toggle to YES or NO to indicate whether or not you want to apply credits to
oldest items first for statements.
Accounts Receivable User’s Manual
3-13
Setup
Setup Functions
Tables
Tables store information relating to the system, data, options, and default settings
for other applications.
Note
Use tables only to enter and store data. Do not delete lines or rearrange the
account descriptions. The system looks for information by the position of the
lines in the table. For example, in the ARGLxxx table, the system always
treats the account on the first line as the cash receipts account and the
account on the second line as the discount account.
You can set up the ARGLxxx, ARPDxxx, DUNxxx, and FORMxxx tables for
individual companies and/or all companies that are in the system. You can set up
one table for all the companies that are alike, and you can set up one table for
each company that is different.
Note
You must enter OWN in the Option Table Type field in the Options and
Interfaces function to be able to set up company-specific tables.
For example, you can set up table ARGL for companies that post accounts
receivable transactions to the same general ledger accounts; and you can set up
table ARGLA01 for company A01, ARGLB01 for company B01, and so forth if
those companies post accounts receivable transactions to different general ledger
accounts.
These tables are identified by a four- or five-character prefix and a threecharacter suffix. The prefix is the table name—ARGL for general ledger
accounts, for example. The suffix is a company ID or a systemwide table. If you
delete a company-specific table, that company uses the generic table. For
example, if you delete table ARGLA01, company A01 uses the ARGL table.
3-14
Accounts Receivable User’s Manual
Setup Functions
Setup
The DFxxxx table (Defaults) and each Quick-Entry table (QExxxx, QH1xxxx,
QH2xxxx, QIxxxx, and QMxxxx) is identified by a two-character prefix and a
four-character suffix. The prefix is the table name—DF for Defaults, QI for
Quick-Entry Invoices, and so forth. The suffix is a terminal ID, a company ID, or
a systemwide table (without a suffix).
You can set up the Defaults and Quick-Entry tables for the following situations:
•
Assign each table to a particular terminal. For example, you can assign table
DFT001 to terminal T001.
•
Assign each table to all terminals in a particular company. For example, you
can assign table DFA to all terminals in company A.
•
Set up each table as a general table for several companies to use. For
example, you can set up table DF for the companies that use the same
defaults.
If you have three companies—A01, B01, and C01—you might want the
terminals in companies A01 and B01 to share table DF. You might want company
C01 to have some of its terminals use a set of defaults specific to each one, while
other terminals share values that are common among themselves but specific to
company C01.
Companies A01 and B01 can share table DF; no table has the label DFA or DFB.
Company C01 can have table DFC, to be used for the terminals in company C01
that do not need their own set of defaults. Each terminal in company C01 that
needs its own set of defaults can have its own table; for example, terminal T001
has table DFT001.
Accounts Receivable User’s Manual
3-15
Setup
Setup Functions
Note
The system treats all terminals with the same ID the same way, so you may
want to make sure that each terminal ID is unique. For example, if you have
two T001 terminals, one in company A01 and one in company C01, the
DFT001 table applies to both terminals regardless of the fact that they are in
different companies.
When you enter or edit transactions, the system first tries to find a table with a
terminal suffix specific to your terminal. If it cannot find one, it looks for a table
for the company in which you are working. If it cannot find one, it uses the
systemwide table. For example, if you are using quick entry to enter an invoice
for company A01 on terminal T001, the system first looks for QIT001. If it
cannot find table QIT001, it looks for QIA. If it cannot find table QIA, it uses the
systemwide table QI.
If the system cannot find any applicable table (perhaps because the systemwide
table was accidentally deleted), an error message appears and you must rebuild
the table.
Codes
Use the Codes Maintenance functions to set up information about sales/COGS
accounts, distribution accounts, terms of payment, shipping methods, payment
methods, and finance charge codes. The codes serve as a shorthand method of
entering information.
See Chapter 11 for information about these codes.
Sales Reps
The ARSRxxx file stores information about each person who is paid a
commission on sales entered in Accounts Receivable. If you plan to use the
commission system, you must set up sales rep records (see page 10-33) and elect
to keep sales history in the Resource Manager Options and Interfaces function
before you begin processing in Accounts Receivable.
3-16
Accounts Receivable User’s Manual
Setup Functions
Setup
For each sales rep, you must specify several pieces of information:
•
•
•
•
•
Personal information
Commission rate
Whether the commission is a percent of gross profit or net sales
Whether the commission is based on booked sales or paid invoices
Whether the commission is based on any combination of line items, tax,
freight charges, and miscellaneous charges
When you enter an invoice, you can specify one or two sales reps who receive the
commission and the percentage of the sale that each rep’s commission rate (from
the ARSRxxx file) is based on.
For example, sales rep A receives a 30 percent commission on line items. The
commission is based on net sales, and the sales rep receives it when an invoice is
paid. For invoice 55, the total of the line items is $10,000. Sales rep A receives a
commission on 40 percent of the sale; the commission from the other 60 percent
of the sale goes to sales rep B. For sales rep A, the commission is based on
$4000; the commission is $1200 ($4000 times 30 percent). A similar process is
used to calculate the commission of sales rep B.
The Commissions Report shows sales information for sales reps. Only the
amount of paid commissions is shown. If an invoice is partially paid, the
commission for the paid portion is adjusted proportionally.
In the example above, if $8000 (80 percent) of the invoice were paid so far, the
commission in the Commissions Report for sales rep A would be $960, or 80
percent of the $1200. The report shows the commission on the remaining $2000
(20 percent) when the remaining amount is paid.
If you assess the customer a finance charge for a late payment, you can base the
sales rep’s commission on the updated amount. In the example above, if $2000
had yet to be paid and you assigned an extra $200 to the charge, the sales rep
would get a commission from $2200 (22 percent) when the remaining amount
was paid.
Accounts Receivable User’s Manual
3-17
Setup
Setup Functions
Tax Groups
If you plan to accumulate tax for the authorities to which you pay sales tax, set up
the tax groups before you enter transactions. See the Resource Manager User’s
Manual for information about setting up tax groups.
When you set up the system, enter the taxable sales, nontaxable sales, and tax
collected. These fields update when you post sales.
The sales tax calculation is based on tax classes and the tax group. You assign tax
classes to inventory items, and you assign tax groups to customers or the ship-to
address to a transaction.
In addition, each customer record has a Taxable flag. The flag can serve as an
override; no tax is levied for a customer whose Taxable flag is set to NO.
Payment Methods
Use the Payment Methods function (see page 11-11) to establish codes for the
methods of payment you honor. The codes serve as a shorthand method of
specifying how the customer is to pay the invoice.
Use the payment types to set up payment methods. The payment types you can
use (cash, check, credit card, write-offs, and other) are provided by the system.
You must enter payment method codes and assign payment types to them.
For example, you can set up one code for personal checks and another code for
corporate checks. You can assign the check payment type to each code but assign
different information to each code. You might also set up codes for three credit
cards. You can assign the credit card payment type to each code but assign
different information to each code.
The system treats the amounts for payment types cash and check the same.
However, when you use a code that is assigned the payment type check, you must
also enter a check number.
3-18
Accounts Receivable User’s Manual
Setup Functions
Setup
When you use the payment type credit card, set up the credit card company as a
customer, because you ultimately get the money from the credit card company.
To identify the credit card company, enter C in the Group Code field on the
Customers General Information screen.
Customers
Use the Customers function (see page 10-3) to build the ARCUxxx file. You
must build the file before you begin processing Accounts Receivable
transactions.
General Information
Enter each customer’s name, address, attention line, phone and fax numbers,
contact, and class. Many reports can be sorted by ID, so the way you enter IDs is
important.
Then enter the sales reps who sell to the customer, the territory the customer is
located in, and the codes for the customer’s usual payment terms. You can enter
two sales rep IDs.
The group code for a customer that is a credit card company (such as VISA or
MasterCard) is C. No history is saved for credit card companies; the history of
the transactions involved is assigned to the customer who used the credit card.
You can set up recurring entries for regular customers with a group code from 0
through 9. When you copy these recurring entries, an invoice is created for each
customer with that group code.
The Stmt Code field determines whether the customer should receive only
statements, only invoices, both statements and invoices, or neither statements nor
invoices.
Customers that do not receive invoices are skipped when you print invoices.
Customers that do not receive statements are skipped when you print statements.
(If you elected to print invoices online in the Resource Manager Options and
Interfaces function, you can still print an invoice online for a customer that does
not receive invoices.)
Accounts Receivable User’s Manual
3-19
Setup
Setup Functions
You set up customers as open invoice or balance forward accounts. For open
invoice accounts, you keep detailed information about the invoices in the
ARINxxx (Open Invoice) file and apply payments to individual invoices. For
balance forward accounts, you keep summary information about the invoices in
the ARINxxx file and apply payments to the total balance due. If you have both
open invoice and balance forward accounts, the customer’s account type
determines which information you enter for the customer.
The distribution code you enter determines the general ledger accounts that are
used to post accounts receivable, freight, and miscellaneous charges to the
general ledger.
If the customer does not accept partial shipments, clear the check box (enter N in
text mode) for the Partial Ship field. A message appears if you enter backorder
quantities for a customer that does not accept partial shipments.
You can enter a default tax group (which is used to calculate sales tax on
transactions) for the customer. Next, designate transactions for the customer as
taxable or nontaxable. If the customer is nontaxable, enter the customer’s tax
exemption ID.
You can also enter the customer’s e-mail and web site addresses.
Credit and Balance Information
You can enter a default method of payment for the customer.
If you assess finance charges for a customer, check the box (enter Y in text mode)
in the Fin Charge field and enter the applicable Finance Charge Code. When you
run the Calculate Finance Charges function, the New Fin Chg field is updated
if the customer has an overdue invoice. The finance charge is based on the
information in the ARFCxxx (Finance Charge Codes) file.
When you run the Periodic Maintenance function, the amount in the New Fin
Chg field is added to the amount in the Unpaid Fin Chg field. Then the New Fin
Chg field is cleared.
3-20
Accounts Receivable User’s Manual
Setup Functions
Setup
Note
When you set up customer records, do not enter amounts in the New Fin
Chg and Unpaid Fin Chg fields. They are updated when you set up initial
balances.
You can enter a credit limit for the customer, and you can put customers on credit
hold. Then when you enter invoices, a warning message appears if the amount
the customer is putting on credit is greater than the customer’s credit limit or if
the customer is on credit hold. (You cannot enter an invoice for a customer that is
on credit hold.)
Balance Information
You can assign three types of balance information to a customer: finance charge
information, money owed, and unapplied credits. Enter finance charge
information, money due in the aging buckets presented, and unapplied credits
you want subtracted from the overall balance. You must enter unapplied credits
as negative numbers so that balances are correct when you use the Build Open
Invoice File function.
This information is updated when you enter and post accounts receivable
transactions.
Credit Card Information
The ARCMxxx file can store multiple credit card numbers, cardholder names,
and expiration dates for each customer. You can elect to verify credit cards
entered in transaction and cash receipts entry against the list, or to maintain the
list as a reference only.
Accounts Receivable User’s Manual
3-21
Setup
Setup Functions
Historical Information
The ARCUxxx file stores sales and payment information for the current period,
the current quarter, and the current and previous year. It also stores the date,
amount, and invoice number of the last sale to the customer and the date, amount,
and check number of the customer’s last payment.
Customer payment history for the last 12 periods is tracked in the Credit Status
field. The field is 12 characters long, and each character corresponds to one of
the 12 periods—the first position is the current period, and the twelfth position is
the oldest period.
The numbers 0 through 4 are used:
•
The number 0 means that all invoices were paid within 30 days or no activity
took place.
•
The number 1 means that an invoice was 31 to 60 days overdue.
•
The number 2 means that an invoice was 61 to 90 days overdue.
•
The number 3 means that an invoice was 91 to 120 days overdue.
•
The number 4 means that an invoice was over 120 days overdue.
The Credit Status field updates when you do periodic maintenance.
Ship-To Addresses
You can enter multiple ship to addresses for the customer on the Ship-To
Addresses screen. When you enter accounts receivable transactions, you can use
the Inquiry command to access a list of ship to addresses for that customer.
Ship to addresses are stored in the ARSAxxx file.
For more information about entering customer records, refer to the Customers
function (see page 10-3).
3-22
Accounts Receivable User’s Manual
Setup Functions
Setup
Customer Comments
You can enter comments about customers on the Customer Comments screen.
When you enter accounts receivable transactions, you can use the Information
menu (or the Shift+F2 command in text mode) to access a customer’s comments.
Comments are stored in the ARCCxxx (Customer Comments) file, not in the
ARCUxxx file.
For more information about entering customer records, refer to the Customers
function (see page 10-3).
User-Defined Fields
You can assign up to 16 user-defined fields, which can be numeric, dates, or
check boxes. You can view this information using the Customers and Open
Invoices Inquiry screens, the Master File List, and Customer Detail List.
User-defined field values are stored in the ARCUxxx.UF file.
For more information about entering customer records, refer to the Customers
function (see page 10-3).
Documents
You can attach multiple documents to customer records. However, you must set
up file types in Resource Manager before you can attach documents. See the
Resource Manager guide for more information.
You can attach 999 documents per customer. The filenames are stored in the
ARCUxxx.UD file, but the documents remain as separate files.
For more information about entering customer records, refer to the Customers
function (see page 10-3).
Accounts Receivable User’s Manual
3-23
Setup
Setup Functions
Ship-to Addresses
Use the Ship-to Addresses function (see page 10-31) to build the ARSAxxx file.
Ship-to numbers are a shorthand method of entering addresses of places where
you want goods to be shipped. When you enter invoices and credit memos, you
can enter the ship-to address number, and the shipping information appears.
You can assign 999,999 ship-to numbers to a customer record in the ARCUxxx
file.
Recurring Entries
If some individual customers or groups of customers regularly have the same
billing requirements, you can set up the invoices in the ARRExxx, ARRDxxx,
and ARRHxxx files and then copy them to the ARTHxxx and ARTDxxx files
when they come due.
Note
You can set up only noninventory recurring entries.
Group Codes
When you set up customer records, you assigned a group code to each customer.
Use the group codes to set up recurring entries for groups of customers. For
example, if you bill group code 4 customers $50 every month, you enter *4 in the
Sold to field. The asterisk indicates that the entry is a group recurring entry.
When you use the Copy Recurring Entries function, the system creates an
invoice for every customer with group code 4.
Run Codes
The run code is a unique number that you assign to each recurring entry. You
copy recurring entries to the ARTDxxx and ARTHxxx files by run codes.
3-24
Accounts Receivable User’s Manual
Setup Functions
Setup
If you do not want to copy an entry to the ARTDxxx and ARTHxxx files after a
particular date, enter a cutoff date for it.
You can use the Periodic Maintenance function (see page 9-5) to purge entries
from the ARRHxxx and ARRExxx files by cutoff dates. Entries with a cutoff date
before the date you specify are purged from the ARRDxxx, ARRHxxx, and
ARRExxx files.
Initial Balances
You can use the summary method, the detail method, or a combination of the
summary and detail methods to set up the initial customer balances and open
invoices.
Summary Method
The summary method is quicker than the detail method, but it does not provide
complete sales history. First, enter a balance in each customer record for the
period-, quarter- and year-to-date and last-year balances and credit and payment
history. Then enter outstanding balances.
If you elected to use online aging in the Resource Manager Options and
Interfaces function, turn the option off before you enter beginning balances.
The summary method consists of the following steps:
1.
Enter the unpaid finance charges and outstanding invoice amounts for the
current period and the four aging periods, and enter credit and payment
history.
2.
Use the Build Open Invoice File function (see page 10-59) to build an
invoice for each unpaid finance charge, current amount due, and balance in
an aging period.
Accounts Receivable User’s Manual
3-25
Setup
Setup Functions
Detail Method
The detail method provides complete sales history, but it is more time-consuming
than the summary method. You must enter the year-to-date transactions in the
ARINxxx file and post them to the appropriate periods.
The detail method consists of the following steps:
1.
Use the Transactions (see on page 5-3) and Cash Receipts (see on page
5-23) functions to enter the year-to-date accounts receivable transactions.
Then post the transactions to the appropriate periods.
2.
Calculate finance charges on overdue invoices. The customer records are
updated with these amounts.
Combination Method
The combination method, a blend of the summary and detail methods, is less
time-consuming than the detail method, but it does not provide a complete sales
history. You enter summary balances for transactions that are no longer
outstanding and build open invoices for balances that are still outstanding.
The combination method consists of the following steps:
3-26
1.
Use the Customers function to enter summary balances for transactions that
are no longer outstanding for the current period and for each aging period,
and enter credit and payment history.
2.
Use the Build Open Invoice File function (see page 10-59) to build one
invoice for each unpaid finance charge, current amount due, and balance in
an aging period.
3.
Use the Transactions (see on page 5-3) and Cash Receipts (see on page
5-23) functions to enter open transactions. Then post them to the appropriate
accounts and customer records.
4.
Calculate finance charges on overdue invoices. The customer records are
updated with these amounts.
Accounts Receivable User’s Manual
Setup Functions
Setup
Access Codes
To safeguard your system, prevent access by unauthorized people. Use the
Resource Manager Access Codes function to set up access codes on your
system. You can set up access codes for the Accounts Receivable system itself,
for menus in the system, and for individual functions. To control users’ access to
menus and functions, you can set up an access code for each user or group of
users that performs the same functions.
A Code for Each Company
Access codes are company-specific. When you set up an access code for a user,
the code is assigned the company you are in.
Because the codes are company-specific, you must set up a code for each
company a user needs to access. You can use the same code for each company so
that the user does not need to remember different codes. For example, you can set
up the access code CHARM for companies A01, B01, and C01 so that a user can
use the same code for each company.
What Should Be Protected
Because of the sensitive nature of some of the information in the Accounts
Receivable data files and reports, you should limit access to the functions that
provide confidential information or are sensitive to change. For maximum
security, protect the Accounts Receivable application itself, each of the Accounts
Receivable menus, and the individual functions.
After you have set up your access codes, print a list of the codes and store it in a
safe place.
For more information about access codes, see the Resource Manager guide.
Accounts Receivable User’s Manual
3-27
Setup
Setup Functions
Backup Schedule
Plan a backup schedule before you begin day-to-day operations.
You can lose files because of disk drive problems, power surges and outages, and
other unforeseen circumstances. Protect yourself against such an expensive crisis
by planning and sticking to a backup schedule.
Backing up Data Files
Back up your Accounts Receivable data files whenever they change—every day
or every week—and before you run the Post Transactions, Periodic
Maintenance, Purge Customer Comments, and Purge Selected Files
functions.
Backing up Programs
Once a month or so, back up your programs. Even though these files do not
change, diskettes can be damaged or deteriorate, so it pays to have a fresh copy in
storage in case you need it.
Diskettes
Keep more than one set of backups in case one set is bad or damaged. Rotate the
sets of backup diskettes, keeping one set off-site.
Use Resource Manager
Use the Backup function on the Resource Manager Data File Maintenance
menu to back up files.
3-28
Accounts Receivable User’s Manual
Setup Functions
Setup
Note
You must back up all the files in the data path for a particular list of
companies at once to ensure that you have up-to-date copies of the system
files. Do not try to use operating system commands to back up only a few
files that have changed; if you do, your system may not work after you
restore them. The Backup function backs up all the data files for a specified
company in a data path at one time.
Accounts Receivable User’s Manual
3-29
Information Inquiry
4
Accounts Receivable User’s Manual
Customers and Open Invoices
Open Invoices
Detail History
Summary History
Accounts Receivable User’s Manual
4-3
4-11
4-13
4-17
4-1
Information Inquiry
Introduction
Use the functions in this chapter to look at information about customers,
invoices, and history. You cannot use Information Inquiry functions to add or
change information.
Before you post information, you can use these functions at any point in your
work cycle to view customer information.
After you post information, the information becomes historical. You can use the
Summary History function if you elected to keep summary history in the
Resource Manager Options and Interfaces function. You can use the Detail
History function if you elected to keep detail history in the Resource Manager
Options and Interfaces function.
4-2
Accounts Receivable User’s Manual
Customers and Open Invoices
Use the Customers and Open Invoices function to look at customer records and
open invoices. This information comes from the ARCUxxx (Customer) file and
the ARINxxx (Open Invoice) file.
General Information
Select Customers and Open Invoices from the Information Inquiry menu. The
Customers and Open Invoices inquiry screen appears.
1.
Enter the ID of the customer whose information you want to look at, or press
Enter to look at information about the first customer.
Accounts Receivable User’s Manual
4-3
Information Inquiry
Customers and Open Invoices
2.
4-4
Use the commands (buttons in graphical mode) in the command bar of each
inquiry screen to find the information you need:
Command
Action
Customer
Press C to look at a different customer record. Then
enter the customer ID.
First
Press F to look at the first customer record on file.
Last
Press L to look at the last customer record on file.
Next
Press N to look at the next customer record on file.
Prev
Press P to look at the previous customer record on
file.
Balance
Press B to look at the balances for the customer.
See “View Customer Balances” on page 4-5 for
more information.
History
Press H to look at the sales and payment history for
the customer. See “View Customer History” on
page 4-6 section below for more information.
Invoices
Press I to scan invoices for the customer you
selected. See “Find Invoices for a Customer” on
page 4-7 for more information.
Ship to’s
Press S to look at the shipping addresses assigned
to the vendor you selected. See “Ship-To
Addresses” on page 4-8 for more information.
User fields
Press U to view the user-defined fields for the
vendor you selected.
Accounts Receivable User’s Manual
Information Inquiry
Customers and Open Invoices
View Customer Balances
To view the balances for the customer, press B. The customer history inquiry
screen appears.
The information that appears comes from the ARCUxxx file and is entered using
the Customers function (see page 10-3).
Use the commands (or buttons in graphical mode) on the command bar to find
the information you need. See the table in the General Information section for
more information.
When you finish viewing the information, press G to return to the customer’s
General Information Inquiry screen.
Accounts Receivable User’s Manual
4-5
Customers and Open Invoices
Information Inquiry
View Customer History
To view the sales and payment history for the customer, press H. The customer
history inquiry screen appears.
The information that appears comes from the ARCUxxx file and is entered using
the Customers function (see page 10-3).
Use the commands (or buttons in graphical mode) on the command bar to find
the information you need. See the table in the General Information section for
more information.
When you finish viewing the information, press G to return to the customer’s
General Information inquiry screen.
4-6
Accounts Receivable User’s Manual
Information Inquiry
Customers and Open Invoices
Find Invoices for a Customer
To scan invoices for the customer you selected, press I. The invoices inquiry
screen appears.
Press Enter to return to the main customer inquiry screen.
Use the commands (or buttons in graphical mode) on the command bar to find
the information you need. See the table in the General Information section for
more information.
Press G to move the prompt to a different invoice number. Then enter the invoice
number. (This command appears only if there is more than one screen of invoice
numbers.)
Accounts Receivable User’s Manual
4-7
Customers and Open Invoices
Information Inquiry
Ship-To Addresses
To view the ship to addresses assigned for the customer, press S. The Ship-To
Addresses screen appears.
Use the commands (or buttons in graphical mode) on the command bar to find
the information you need. See the table in the General Information section for
more information on these screen commands.
Press V to bring up the View Ship-To Address dialog box. The specific ship to
address information appears. Press any key to return to the Ship-To Addresses
screen.
Press O to move the prompt to a different ship-to address. Then enter the address.
(This command appears only if there is more than one screen of addresses.)
When you finish looking at the information, press G to return to the customers
general information inquiry screen.
4-8
Accounts Receivable User’s Manual
Information Inquiry
Customers and Open Invoices
User-Defined Fields
To view the user-defined fields for the vendor you selected, press U (User
fields). The User-Defined Fields screen appears.
Tab out of the Customer ID field. The user-defined field information setup for
the customer appears.
Use the commands (or buttons in graphical mode) on the command bar to find
the information you need. See the table in the General Information section for
more information on these screen commands.
Press Enter to return to the main customer inquiry screen.
Accounts Receivable User’s Manual
4-9
Open Invoices
Use the Open Invoices function to look at the open invoices that are on file for a
customer. This information comes from the ARCUxxx (Customer) file and the
ARINxxx (Open Invoice) file.
The main difference between this function and the Customers and Open
Invoices function is that this function provides information only about open
invoices and associated customers, not about customers that do not pertain to
invoices. For example, you cannot use this function to find a customer’s address.
To add to or change this information, use the Customers function (see page
10-3) or the Transactions function (see page 5-3).
Accounts Receivable User’s Manual
4-11
Information Inquiry
Open Invoices
Open Invoices
Select Open Invoices from the Information Inquiry menu. The Open Invoices
screen appears.
Enter the ID of the customer whose open invoices you want to view, or press
Enter to look at information about the first customer.
Use the commands (or buttons in graphical mode) on the command bar to find
the information you need. See “General Information” on page 4-3 for more
information.
When you finish looking at the information, use the Exit (F7) command to return
to the Information Inquiry menu.
4-12
Accounts Receivable User’s Manual
Detail History
Use the Detail History function to look at past sales and payment information in
terms of individual invoices. This information comes from the ARHIxxx (Detail
History) file.
This function is available only if you elected to keep detail history in the
Resource Manager Options and Interfaces function.
To add to or change this information, use the Customers function (see page
10-3).
Detail History
Select Detail History from the Information Inquiry menu. The Detail History
inquiry screen appears.
Accounts Receivable User’s Manual
4-13
Information Inquiry
Detail History
1.
Enter the ID of the customer whose history you want to view.
2.
Enter the order number you want to view. You can use wildcards (* or ?) to
expand or restrict the order numbers included in the display.
3.
Enter the purchase order number you want to view. You can use wildcards (*
or ?) to expand or restrict the purchase order numbers included.
4.
Use the commands (or buttons in graphical mode) on the command bar to
find the information you need. See “General Information” on page 4-3 for
more information.
Note: You can look at the records for a customer that has been deleted from
the ARCUxxx file, but has records in the ARHIxxx file, if you know the ID.
Ignore the Customer Is Not on File message.)
4-14
•
To look at the customer’s history from a particular date to the current
date, press S, and then enter the start date.
•
To look at invoice totals for the customer, press T. The invoice number,
subtotal, sales tax, freight, and miscellaneous charges appear:
Accounts Receivable User’s Manual
Detail History
Information Inquiry
5.
•
To look at an expanded summary of the invoice, press V. Additional
information about the invoice (general ledger account and period,
purchase order number and date, and quantity shipped) appears in the
View Line window:
•
To move the prompt to a different invoice number, press G. Then enter
the number, or exit to the Detail History screen. (This command appears
only if there is more than one screen of invoice numbers.)
•
To view any additional description associated with the customer, press
A . The Additional Description dialog box appears. Press any key to
return to the Detail History screen.
•
If you accessed this function from the Sales Order menu, press R to
view the shipment tracking information (if any) that is associated with
the invoice. This command is not available if you accessed the Detail
History function from the Accounts Receivable Information Inquiry
menu.
When you finish viewing history, exit to the Information Inquiry menu.
Accounts Receivable User’s Manual
4-15
Summary History
Use the Summary History function to look at past sales and payment
information associated with customers. This information comes from the
ARHSxxx (Summary History) file.
To add to or change this information, use the Customers function (see page
10-3) or the Transactions function (see page 5-3).
Summary History Customer Inquiry
Select Summary History from the Information Inquiry menu. The Summary
History customer inquiry screen appears.
1.
Enter the ID of the customer whose history you want to view.
Accounts Receivable User’s Manual
4-17
Information Inquiry
Summary History
2.
The current fiscal year from the ARPDxxx table appears. Accept it, or enter
the fiscal year whose history you want to view. The customer’s sales, cost of
the goods sold to the customer, discounts taken and lost, average amount of
the invoice during the specified fiscal year, and year-to-date totals appear.
3.
Use the commands (or buttons in graphical mode) on the command bar to
find the information you need.
•
To look at the next customer record, press Enter.
•
To look at a different customer record, press N. Then enter the customer
ID and fiscal year.
•
To look at the customer’s summary history for a particular period, press
V. Then enter the period whose summary history you want to view.
If you did not elect to keep summary history in the Resource Manager
Options and Interfaces function for a period, you cannot look at
customer history for that period.
4-18
Accounts Receivable User’s Manual
Information Inquiry
Summary History
If you keep summary history, the Summary History item inquiry screen appears.
The item number or job number, type of sale (I or J), quantity, units, and sales
and COGS amounts appear for each item sold during the period. The total sales
and COGS amounts appear for each period.
If you made more sales to the customer in this period than the screen can show,
enter M to view more history.
When you are finished looking at the item and job history, press Enter to return
to the Summary History customer inquiry screen.
Accounts Receivable User’s Manual
4-19
Daily Work
5
Accounts Receivable User’s Manual
Transactions
Cash Receipts
Edit Cash Receipts
Copy Recurring Entries
Change Batches
Batch Control
Accounts Receivable User’s Manual
5-3
5-23
5-29
5-31
5-33
5-35
5-1
Daily Work
Introduction
Use the Daily Work functions to record sales you made to a customer.
If you sold goods to a customer that are not associated with a recurring entry, use
the Transactions function. If the customer is associated with a recurring entry,
use the Copy Recurring Entries function. The information about recurring
entries is copied to the ARTDxxx and ARTHxxx (Transaction) files.
Use the Cash Receipts function to apply payments to on-account balances. Then
use the Edit Cash Receipts function to edit cash receipt information. This
information is kept in the ARCRxxx (Cash Receipts) file.
If you want to deal with transactions in batches and you elected to use batches in
the Resource Manager Options and Interfaces function, you can use the
Change Batches or Batch Control functions.
5-2
Accounts Receivable User’s Manual
Transactions
Use the Transactions function to enter customer invoices, cash invoices, and
miscellaneous credits or to edit transactions. The transactions are stored in the
ARTDxxx and ARTHxxx (Transaction) files until you post them to the ARINxxx
(Open Invoice) file. If you enter payments for the transaction, the payment
information is stored in the ARCRxxx (Cash Receipts) file until you post it to the
ARINxxx file.
You can enter a transaction independently of when you assign payments to it.
You can enter a transaction before receiving any payment, having received partial
payment, or having received the entire payment.
After you finish entering an invoice, you can print it online if you elected to print
online invoices in the Resource Manager Options and Interfaces function. You
can print online invoices for any customer, even if the record does not require
that the customer receive invoices. If an invoice was printed online, you cannot
print it again using the Print Invoices function.
Accounts Receivable User’s Manual
5-3
Daily Work
Transactions
Transaction Type
Select Transactions from the Daily Work menu. The Transaction Type menu
appears on top of the Transactions and Header Information screens.
Select the type of transaction with which you want to work:
•
•
•
Enter invoices or initial balances.
Credit a customer’s account for returned goods.
Change or delete unposted invoices and miscellaneous credits.
Before you change or delete transactions, print the Sales and Miscellaneous
Credits Journals so that you have the correct transaction numbers. After you
change or delete transactions, print the journals again so that the audit trail is
accurate.
The explanations for entering and changing invoices in this section also apply to
miscellaneous credits. The only difference between entering miscellaneous
credits and entering invoices is that figures are credited instead of debited. The
only difference between editing transactions and entering invoices or
miscellaneous credits is that you are working with existing information.
5-4
Accounts Receivable User’s Manual
Transactions
Daily Work
Header Information
After you make your selection from the Transaction Type dialog box, the header
screen appears.
Field
Description
Batch ID
If you elected to have the system assign batch
numbers in the Resource Manager Options and
Interfaces function, the batch number appears.
Otherwise, enter the number of the batch the
transaction belongs to, or press Enter to skip this
field. You cannot use the number of a batch that
another workstation is using. If you use the
Maintenance (F6) command, the Batch Control
function is temporarily called up.
Trans No
The system assigns a unique number to each
transaction.
Accounts Receivable User’s Manual
5-5
Daily Work
Transactions
Field
Description
To change a transaction, enter the number of the
transaction.
To delete the entire transaction, use the Delete (F3)
command.
Location
If you entered a default location ID when you set up
the company, the ID appears. If you change the ID of
the location you are selling the items from, the
description of the location appears for verification.
If you did not enter a default location ID, enter the ID
of the location you are selling the items from.
Sold to
Enter the ID of the customer you are selling goods to
or entering credits for. If you use the Maintenance
(F6) command, the Customers function temporarily
appears. (You cannot use the Maintenance command
to delete customer records.) After you enter the ID,
the customer’s name and address appear. If the
customer is on credit hold, a message which states
that fact appears. Press Enter to remove the message.
Sales Rep 1/Percent
Accept the default ID of the sales rep who usually
sells to the customer, or enter a different ID.
Then enter the percentage of the sale on which you
want to base the sales rep’s commission, or press
Enter to base the commission on 100 percent of the
sale. If you are entering a miscellaneous credit, enter
the commission percentage the sales rep received on
the original sale.
Sales Rep 2/Percent
5-6
Accept the default ID of the second sales rep
involved with the transaction, or press Enter to skip
this field.
Accounts Receivable User’s Manual
Transactions
Daily Work
Field
Description
Then enter the percentage of the sale on which you
want to base the sales rep’s commission, for
miscellaneous credits, enter the commission
percentage the sales rep received on the original sale.
The sum of the commission percentages cannot
exceed 100.
Cust Level
If you assigned a customer level in the customer
record, it appears. You can enter a different customer
level only if you elected that option in the Resource
Manager Options and Interfaces function. If
Accounts Receivable interfaces with Inventory and
you use the Maintenance ( F6) command, the
Inventory Customer Levels function temporarily
appears.
If you are entering a miscellaneous credit, enter the
customer level from the original invoice.
Terms Code
Accept the default terms code, or enter a different
code. If you use the Maintenance (F6) command, the
Terms Codes function temporarily appears. (You
cannot use the Maintenance command to delete
terms codes.) After you enter the code, the
description and percent for the payment terms of the
transaction appear.
If you are entering a miscellaneous credit to reverse
an invoice, accept the default terms percentage and
number of days, or enter the terms that were used for
the original invoice.
Order No
To identify the transaction, enter the sales order
number or the customer’s purchase order number.
Ord Date
If you entered an order number, enter the order date.
Accounts Receivable User’s Manual
5-7
Daily Work
Transactions
Field
Description
Inv No
If you assigned an invoice number to the transaction,
enter the number.
If you enter an invoice number and then print the
online invoice, the number you enter here is used. If
you use the Print Invoices function instead, a
different number is assigned to the invoice.
If you elected not to use prenumbered invoices in the
Resource Manager Options and Interfaces function,
existing invoice numbers are not overwritten. If you
elected to use prenumbered invoices, your invoice
numbers are overwritten.
If you frequently assign invoice numbers before
entering the transactions, print the Sales Journal (see
page 6-9) before and after you print invoices to check
for differences in the numbers. The invoices and the
ARINxxx file must agree so that customer payments
are applied correctly.
If you are reversing an incorrect invoice, enter its
number.
5-8
Inv Date
If you entered an invoice number, enter the invoice
date.
Ship to
Enter the shipping address code. Use the Inquiry
command to view all available addresses for the
selected customer. Select the address you want. You
are returned to the main screen.
Accounts Receivable User’s Manual
Transactions
Daily Work
Field
Description
If you use the Maintenance (F6) command, the
Ship-to Address function temporarily appears. (You
cannot delete ship-to addresses that you access
through the Maintenance command.) After you enter
the code, the address appears if the code is in the
ARSAxxx (Ship-to Address) file. Accept it, or enter a
different address.
You can skip the Ship To box and still enter shipping
information in the fields immediately following it.
You can enter four lines of address information, a
city, state, zip or postal code, and country code. You
might want to enter information in these fields if the
ship-to code is not on file and you do not want it on
file, but you still want to enter new data for the
transaction.
If you are entering a miscellaneous credit, you can
skip this field.
Ship Method
Enter the code for the shipping method.
Ship Via
If you entered a shipping address code, the means of
shipment appears. Accept it, or enter a different
means.
If the shipping code you entered is not on file, enter
the means of shipment.
If you are entering a miscellaneous credit, you can
skip this field.
Pick Slip No
Enter a picking slip number, or press Enter to skip
this field.
If you are entering a miscellaneous credit, you can
skip this field.
Accounts Receivable User’s Manual
5-9
Daily Work
Transactions
Field
Description
Ship Date
If you entered a picking slip number, enter a shipping
date, or press Enter to skip this field.
If you are entering a miscellaneous credit, you can
skip this field.
GL Period
Press Enter if you want to post the transaction to the
default period, or enter a different period.
If you enter an invoice in one period and then ship it
in a different period, the GL period adjusts
accordingly.
Taxable
If any part of the transaction is taxable, select the
check box (enter Y in text mode); if not, clear the box
(enter N in text mode).
Tax Group
Enter the group where the tax is to be applied—
even if the transaction is not taxable. If you use the
Maintenance (F6) command, the Tax Groups
function temporarily appears (see the Resource
Manager User’s Manual). After you enter the tax
group, the description of the group appears.
Description
Accept the default description of the tax group, or
enter a different description.
When you save the header information, the line-item entry screen appears.
5-10
Accounts Receivable User’s Manual
Transactions
Daily Work
Line-Item Entry
The Invoices line-item entry screen appears for one of three reasons:
•
You are creating an invoice and have finished entering header information.
•
You use the Append command to add an item to the end of the list.
•
You use the Edit command on the command bar to edit an item in the list.
This screen is titled the Edit Line screen when you edit an item in the list and
Append Line when you add an item.
Field
Description
Item/Job
If Accounts Receivable does not interface with
Contractors’ Job Cost, ITEM appears and you cannot
change it. If Accounts Receivable interfaces with
Contractor’s Job Cost, JOB appears.
If Accounts Receivable interfaces with Contractors’
Job Cost, enter I if you are entering an inventory line
item or J if you are entering a job line item.
Loc ID
Accounts Receivable User’s Manual
The location ID you entered on the header screen
appears. Accept it, or enter a different ID.
5-11
Daily Work
Transactions
Field
Description
ID
Enter the item number, or press Enter to skip this
field.
If you are entering a miscellaneous credit and do not
want to return the item to stock, press Enter.
If Accounts Receivable interfaces with Inventory
and you want to enter a noninventory item, leave
this field blank.
If you are billing for a job phase, enter the phase ID
in the spaces provided after the job ID. Then if the
job or phase is complete, select the check box ( or
enter Y in text mode) at the Is Job/Phase Done?
prompt; if not, clear the box (enter N in text mode).
If you elected to view information about current quantities and quantity-break
prices in the Resource Manager Options and Interfaces function, this
information appears in the following sections at the bottom of the screen:
Field
Description
Desc
Enter a description of the item, or press Enter to
skip this field.
Additional
Descriptions
If you elected in the Resource Manager Options
and Interfaces function to use additional
descriptions, you can enter 10 lines of information.
Sls Cat
5-12
Assign a sales category to the item, or press Enter to
skip this field.
Accounts Receivable User’s Manual
Transactions
Daily Work
When you produce the Detail History Report, you
can list items that belong to a particular sales
category so that you can analyze groups of stock
items.
Tax Class
The tax class you assigned in the customer record
appears. Accept it, or enter a different tax class.
Price ID
If Accounts Receivable interfaces with Inventory,
accept the default price ID for the item, or enter a
different price ID. (The Inquiry command is
available if Accounts Receivable interfaces with
Inventory.)
GL Code
The GL code identifies the pair of general ledger
sales and cost-of-goods-sold (COGS) accounts to
use for a noninventory item.
If you entered a GL code in the DFxxxx table, the
code appears. Accept it, or enter a different code. If
you use the Maintenance ( F6) command, the GL
Codes function is temporarily called up.
To enter accounts that are not set up in the
ARCDxxx (Codes) file, clear this field and press
Enter.
Sales Acct/COGS
Acct/Inv Acct
If Accounts Receivable interfaces with Inventory,
the account numbers come from the Inventory item
location files.
If you entered a GL code, the sales and COGS
accounts appear. The inventory account appears
from the ARGLxxx table.
Accept each displayed account number, or enter
different account numbers. (The Inquiry command
is available if Accounts Receivable interfaces with
General Ledger.)
Accounts Receivable User’s Manual
5-13
Daily Work
Transactions
Ordered
Enter the number of units the customer ordered. You
can enter either a positive or a negative quantity.
Units
Enter the type of unit the item is sold by—for
example, EACH if it is sold individually.
Shipped
Enter the number of units you shipped.
Backord
The backordered quantity, the difference between
the number of ordered units and shipped units, is
calculated. Accept the default quantity, or enter a
different quantity.
If you are entering a miscellaneous credit, you can
skip this field.
If you entered a serialized or lotted item, the Serial/Lot Number Entry screen
appears. Press A to enter the serial or lot number for the line item. The Append
Serial/Lot Number screen appears. This screen is titled Append Serial Number
when you enter a serialized item ID and Append Lot Number when you enter a
lotted item ID. The Append Serial Number screen is shown below; the Append
Lot Number screen appears on the next page.
5-14
Field
Description
Serial Number
Enter the serial number of the item you want to
include in the transaction.
Accounts Receivable User’s Manual
Transactions
Daily Work
Orig Qty/Cost/Fulfil
Qty/Backord Qty
The original and backordered quantity is always 0,
and the fulfilled quantity is always 1, for serialized
items because you must enter serial numbers for
each individual item entered.
If you do not enter serial numbers for each item in
the quantity ordered, the system automatically
adjust the quantity to match the number of serial
numbers you entered.
The item’s cost appears and cannot be changed.
Price
Accept the default price, or enter the item’s unit
price.
If you are entering a miscellaneous credit, enter the
unit price from the original invoice.
Comment
Enter a comment about the serialized item.
Field
Description
Lot No
Enter the item’s lot number.
Orig Qty
Enter the quantity of this lot that was ordered
originally.
Cost/Ext Cost
The item’s cost and extended cost appear and cannot
be changed.
Fulfill Qty
Enter the quantity of this lot that was actually
shipped.
Accounts Receivable User’s Manual
5-15
Daily Work
Transactions
Backord Qty
Enter the backordered quantity of this lot, if any.
Comment
Enter a comment about the lotted item.
If you elected not to display unit costs in the Resource Manager Options and
Interfaces function, no unit cost appears. The total amount of the line item, the
shipped quantity times the unit price, is calculated and appears. If you elected to
display unit costs in the Resource Manager Options and Interfaces function, the
extended cost appears. For an invoice, the cost is approximate; the system
calculates the actual cost when you post.
After you save the information about the line item, work with another line item,
or exit to the Transaction Scroll Region screen.
When you save the first line item, the totals are updated and your entries are
saved. You cannot use the Abandon (Cancel) command to cancel the
transaction. To delete the invoice, use the Delete (F3) command on the header
screen and delete the entire transaction.
5-16
Accounts Receivable User’s Manual
Transactions
Daily Work
Transaction Scroll Region
When you exit from the line-item entry screen, the Edit transactions screen
appears.
•
To edit a line item, move the prompt to the line and press Enter.
•
To append a line item to the transaction, press A. Then see “Line-Item Entry”
on page 5-11 earlier in this section.
•
To return to the header screen, press H. When you return to the header
screen, you do not lose the line-item and totals entries because you already
saved them.
•
To go to the Totals Information screen, press T. Then see “Totals
Information” on page 5-19.
Accounts Receivable User’s Manual
5-17
Daily Work
Transactions
•
To look at an expanded summary of the line item, move the prompt to the
line item, and press V. Additional information about the line item such as the
general ledger account and description, quantities ordered and shipped, and
price and cost information appears on the View Line screen:
Press any key to return to the Transaction Scroll Region screen.
5-18
•
To go to a particular line item, press G. Then enter the line number. (This
command appears only if there is more than one screen of line items.)
•
To print an invoice online, press O. (You can print online invoices for any
customer even if the customer record does not require that the customer
receive invoices.) This command is available only if you elected to print
online invoices in the Resource Manager Options and Interfaces function.
The Print Online Invoice prompt appears. If you want to print the invoice
later through the Print Invoices function, clear the check box (enter N in text
mode); you are returned to the Invoices screen. If you want to print the
invoice online, select the check box (enter Y in text mode); then see “Online
Invoicing” on page 5-21.
•
To finish with the transaction on the screen and move to a blank header
screen to enter a new transaction, press N. Then see “Header Information”
on page 5-5.
Accounts Receivable User’s Manual
Transactions
Daily Work
Totals Information
When you press T to work with the transaction totals, the Totals Information
screen appears.
Field
Description
Subtotal
The subtotal appears.
Freight/Tax Class
Enter the shipping charges and the tax class to
which you want to apply them. The Tax Class field
is available only if the transaction is taxable.
Miscellaneous Chgs/
Tax Class
Enter the miscellaneous charges (for example,
handling) and the tax class to which you want to
apply them. The Tax Class field is available only if
the transaction is taxable.
Sales Tax
The sales tax on the item appears. If the transaction
is taxable and you selected a Tax Class for a
miscellaneous charge, the Sales Tax screen (page
5-20) appears so that you can adjust the calculated
sales tax, if necessary.
Accounts Receivable User’s Manual
5-19
Daily Work
Transactions
Sales Tax Information
Tax Location
The tax location appears.
Tax Amount
The tax amount appears.
Tax Adjustment
Accept the default sales tax adjustment, or enter a
different amount.
Tax Loc
The tax location for the adjustment appears.
Class
Accept the default tax class, or enter a different tax
class.
Sales Tax
The total sales tax appears.
When you approve your entries, you are returned to the Totals Information
screen.
5-20
Invoice Total
The total amount of the invoice (the subtotal plus the
freight charges, sales tax, and miscellaneous charges)
appears.
Payment 1/2
Enter the payments made.
Accounts Receivable User’s Manual
Transactions
Daily Work
Payment Method 1/2
For cash, enter the payment method code. After you
enter a payment method, the system prompts you to
enter information about the method used. For a check,
enter the check number. For a credit card, enter the
card number and name, the expiration month/year, and
the authorization number. For other types of payment,
enter a memo, if desired.
Online Invoicing
When you press O on the Invoices screen, the Online Invoicing screen appears.
1.
Change the invoice number, if necessary. If you are printing an invoice you
did not assign a number to, the system date is used as the invoice date.
2.
If you want to print a message on the invoice, enter it.
3.
If you want the invoice to include additional descriptions, select the check
box (enter Y in text mode); if not, clear the box (enter N in text mode).
Accounts Receivable User’s Manual
5-21
Daily Work
Transactions
4.
If you do not want to print an alignment character to make sure that the
forms are lined up, clear the check box (enter N in text mode). If you want to
print an alignment character, select the box (enter Y in text mode). (This step
does not apply, and this prompt does not appear, if you are printing invoices
on plain paper.)
5.
The Reprint Invoice prompt appears after the invoice is printed.
If the invoice was printed correctly, select No (enter N in text mode). A blank
header screen appears. Enter another invoice, or exit to the Online Invoice
Totals screen (see “Online Invoice Totals” on page 5-22).
If the invoice was not printed correctly, select Yes (enter Y in text mode).
The cursor goes to the Invoice No field, where the next invoice number
appears. Reprint the invoice using the above procedures.
Online Invoice Totals
The Online Invoice Totals screen appears when you are finished entering and
printing invoices and exit from the Online Invoicing screen.
When you finish viewing the invoice totals, exit to the Daily Work menu. The
invoice numbers and dates are updated for the invoices you printed online.
After Entering Miscellaneous Credits
After you enter miscellaneous credits, do the following tasks:
5-22
•
Produce credit memo forms if you did not print them online.
•
Produce the Miscellaneous Credits Journal for an audit trail of each credit.
•
Post the transactions. This task sends the miscellaneous credits information
to the appropriate files: ARCUxxx (Customer), ARSRxxx (Sales Rep),
ARHIxxx (Detail History), and ARHSxxx (Summary History). When you
post, each credit creates an open item in the ARINxxx file and updates
applicable job billing information.
Accounts Receivable User’s Manual
Cash Receipts
Use the Cash Receipts function to do these things:
•
•
•
•
•
Record payments from customers
Apply payments to on-account balances
Apply prepayments from customers that have not been billed
Record unapplied cash receipts from a source other than a customer
Enter deposits for jobs
You can enter deposit information (such as the bank account ID, a batch/deposit
number, and so forth) for cash receipts.
Like the Transactions function, the Cash Receipts function can be used to
record payments. However, if you often receive partial payment for goods
shipped, you can use the Transactions function to record the transaction once,
and use this function to record payments as often as they come in.
Accounts Receivable User’s Manual
5-23
Daily Work
Cash Receipts
Select Cash Receipts from the Daily Work menu. The Cash Receipts screen
appears.
5-24
Field
Description
Batch/Dep No
The last batch number or deposit number you
entered appears. Accept it, or enter a different
number. If you use the Maintenance (F6) command,
the Batch Control function temporarily appears.
After you enter the number, the amount of the
receipt is added to the total deposit if the number
you enter is on file; if the number is not on file, a
new deposit is created.
Date
Accept the default (system) date as the receipt date,
or enter a different date.
Accounts Receivable User’s Manual
Cash Receipts
Daily Work
Field
Description
GL Period (1-13)
Press Enter to assign the cash receipt to the period,
or enter a different period. The system needs the
period for sorting when you post.
Customer ID
For an unapplied receipt from someone other than a
customer, press Enter to skip this field.
For a customer (whose record is in the ARCUxxx
file), enter the customer ID. If you use the
Maintenance (F6) command, the Customers
function temporarily appears. After you enter the
ID, the customer’s name and type of account
(balance forward or open invoice) appear.
Pymt Amt
Enter the payment amount you received.
Payment Method
Accept the default payment method for the
customer (if any), or enter a different method of
payment.
If you enter a payment method of cash or check, the
Bank ID and Check Number fields appear.
If you enter a payment method of credit card, the
Card Number, Card Holder, Expiration Date, and
Authorization Code fields appear.
If you enter a payment method of write-off or other,
the Memo field appears.
Aging Code
This field appears only for balance forward
customers.
The aging code you assign determines to which
aging bucket the cash receipt is assigned. You can
assign one of these values for the aging code:
Accounts Receivable User’s Manual
5-25
Daily Work
Cash Receipts
Field
Description
0
1
2
3
4
5
6
Bank ID
- apply to the oldest item
- apply to the unpaid finance charge
- apply to the 121+ day bucket
- apply to the 91–120 day bucket
- apply to the 61–90 day bucket
- apply to the 31–60 day bucket
- apply to the current bucket
The default bank ID appears.
The batch number you assigned earlier appears in
the Batch/Dep No field when you enter a bank ID.
Check Number
If you selected a payment method of check, enter
the number of the customer’s check.
Card Number
If you selected a payment method of credit card,
enter a credit card number for the customer, or enter
a different card number.
If the customer is set up for credit card validation,
the card number you enter must be set up in the
customer record. To enter a new card number for
this customer, use the Maintenance (F6) command.
5-26
Card Holder
If you selected a payment method of credit card,
accept the credit card holder’s name, or enter the
name on the credit card.
Expiration Date
If you selected a payment method of credit card,
enter the expiration date of the customer’s credit card.
Authorization Code
If you selected a payment method of credit card,
enter the authorization code for the payment.
Memo
If you entered a payment method of other or writeoff, enter memo information associated with the
payment—for example, discount, promotion, trade.
Accounts Receivable User’s Manual
Cash Receipts
Daily Work
When you save the information about how the payment was made, the command
bar appears.
•
To apply the cash receipt to a particular invoice, move the prompt to the
invoice line and press A. The Apply Receipt window appears. Press Enter to
apply the total remaining to the invoice, or enter an amount to apply to the
invoice.
•
When you have applied the entire cash receipt for this customer, you can
press C , and then enter a different customer ID to enter cash receipts for.
•
To enter new receipt information, press R. The cursor returns to the receipt
portion of the screen. Enter additional payment amounts for the customer, or
edit the receipt information.
•
To view the customer’s previous receipts or invoices, press V. The View
Receipts/Invoices screen appears. At the Receipts or Invoices prompt, enter
R to view receipts or I to view invoices. When you are finished viewing the
information, use the Exit (F7) command to return to the Cash Receipts
screen.
•
To edit a cash receipt that’s already applied, press E. Then see page 5-29 for
information about editing cash receipts.
•
To quit applying a receipt to the customer’s account, press D to change the
cash receipt to the amount you have applied so far.
•
To designate the cash receipt as on-account for the customer, press O. If a
default invoice number was set up in the DFxxxx table, it appears. Accept
the default invoice number, or enter a different number. Then enter the
amount you want to apply to the account. If you apply only part of the cash
receipt, the system subtracts it from the receipt to calculate the amount
remaining.
Accounts Receivable User’s Manual
5-27
Daily Work
Cash Receipts
•
To view totals information for the batch or deposit number, press T. Receipt,
prepayment, and totals information for each kind of payment method
associated with the batch so far appears:
You can enter a different batch or deposit number for a different set of totals.
After you are finished viewing the totals information, use the Exit (F7)
command to return to the Cash Receipts screen.
•
To move the prompt to a different invoice number, press G, and enter the
number. (This command appears only if there is more than one screen of
invoices.)
When you are finished entering cash receipts, exit to the Daily Work menu.
Produce the Cash Receipts Journal (see page 6-15) to check for errors and
to use as an audit trail. If you find errors, use the Edit Cash Receipts
function (see page 5-29) to edit incorrect cash receipts.
5-28
Accounts Receivable User’s Manual
Edit Cash Receipts
Use the Edit Cash Receipts function to change information about existing cash
receipts.
Select Edit Cash Receipts from the Daily Work menu. The Edit Cash Receipts
screen appears.
1.
Enter the batch or deposit number for the cash receipt you want to edit, or
accept the default number.
2.
Enter the transaction number for the cash receipt you want to edit, or accept
the default number.
3.
Edit information about the transaction—the customer ID, invoice number,
payment date, and GL period—or accept the default information.
Accounts Receivable User’s Manual
5-29
Edit Cash Receipts
4.
Daily Work
Edit information about the payment—the amount, discount difference, and
method of payment (and information related to the payment method)—or
accept the default information.
When you save the information, a blank Edit Cash Receipts screen appears.
Enter a different batch or deposit number and transaction number, or use the
Exit (F7) command to return to the Daily Work menu.
5-30
Accounts Receivable User’s Manual
Copy Recurring Entries
Use the Copy Recurring Entries function to copy entries from the ARRHxxx
and ARRExxx (Recurring Entries) files to the ARTDxxx and ARTHxxx
(Transaction) files when the recurring entries come due. Use the run codes and
cutoff dates that you set up in the Recurring Entries function to copy the batches
according to your schedule. After you copy an entry, it is treated like another
transaction. When the ARTDxxx and ARTHxxx files are posted, the entries are
moved to the ARINxxx (Open Invoice) file.
Before you copy recurring entries, produce the Recurring Entries List (see page
12-19) and back up your files. If you are using Accounts Receivable on a
multiuser system, make sure that no one else is using the Recurring Entries
function. You cannot copy recurring entries until the other users exit from that
function.
Select Copy Recurring Entries from the Daily Work menu. The Copy Recurring
Entries screen appears.
Accounts Receivable User’s Manual
5-31
Copy Recurring Entries
Daily Work
1.
Enter the range of run codes whose recurring entries you want to copy.
2.
Press Enter to copy the entries to the default period, or enter a different
period.
3.
If you entered cutoff dates when you entered recurring entries, accept the
system date as the cutoff date, or enter a different date. Entries that have
cutoff dates before the date you enter here are not copied to the ARTDxxx
and ARTHxxx files.
4.
Enter the ID of the batch to copy to. If you use the Maintenance ( F6)
command, the Batch Control function temporarily appears.
This field does not appear if you elected not to use batching in the Resource
Manager Options and Interfaces function.
5.
5-32
Select the output device for the log. See “Reports” on page 1-41 for more
information. When the entries have been copied and the log printed, the
Daily Work menu appears.
Accounts Receivable User’s Manual
Change Batches
Use the Change Batches function to replace a batch ID with a different batch ID
or to associate transaction numbers with a different batch.
Select Change Batches from the Daily Work menu. The Change Batches screen
appears.
1.
Select the kind of information you want to change. You can move a single
transaction to a new batch, or an entire batch to a new ID.
2.
Enter the batch ID that contains the transaction(s) you want to move.
3.
If you elected to move a single transaction, enter the number of the
transaction to move.
Accounts Receivable User’s Manual
5-33
Change Batches
4.
Daily Work
Enter the new batch ID. If you did not specify a transaction number, you are
replacing the old batch ID with this one. If you use the Maintenance (F6)
command, the Batch Control function temporarily appears.
When you use the Proceed (OK) command, the copy process begins. When
the process is finished, the Daily Work menu appears.
5-34
Accounts Receivable User’s Manual
Batch Control
You can use batches to group invoices, miscellaneous credits, and cash receipts
for printing and posting. If you group transactions by batch, one user can enter
information while another posts transactions.
Use the Batch Control function to add batches, release batches, or check the
status of batches.
Select Batch Control from the Daily Work menu. The Batch Control screen
appears.
1.
Enter the batch ID with which you want to work.
2.
If a terminal ID appears in the Lock Flag field, the batch is or was produced
or posted on that terminal. Do not change it unless you need to release a
locked batch.
Accounts Receivable User’s Manual
5-35
Daily Work
Batch Control
3.
Accept the default description of the batch, or enter a different description.
4.
Enter the status of the batch: H if it is on hold, or R if it has been released. If
you place the batch on hold, you can print or post the batch, but you cannot
enter or edit transactions in it.
5.
For each report, toggle the report status. The default status is Not
Applicable. When you enter invoices, miscellaneous credits, or cash
receipts, the appropriate report status changes to Unprinted. When you print
the entire report, the status changes to Printed. If you enter new transactions
after you print the report(s), the status changes to Reprint.
If you selected a batch that is in use, up to 20 terminal IDs and the user
names of those currently entering transactions appear.
After you save the information, enter information about a different batch ID,
or exit to the Daily Work menu.
5-36
Accounts Receivable User’s Manual
Transaction Reports
6
Accounts Receivable User’s Manual
Print Invoices
Sales Journal
Miscellaneous Credits Journal
Daily Sales Tax Report
Cash Receipts Journal
Methods of Payment Journal
Deposits Report
Post Transactions
Accounts Receivable User’s Manual
6-3
6-9
6-11
6-13
6-15
6-17
6-19
6-21
6-1
Print Invoices
Use the Print Invoices function to print invoices you entered in the ARTDxxx
and ARTHxxx (Transaction) files. This function is useful when you want to print
invoices for several transactions at once.
You can also print the invoice when you enter the transaction. See the Online
command in the Transactions function (see on page 5-3).
When an open invoice customer makes a payment toward a particular invoice,
you must apply the payment correctly. The invoice number in the ARINxxx
(Open Invoice) file must correspond to the information in the ARTDxxx and
ARTHxxx files. Since the Print Invoices function can reassign invoice numbers
(but not credit memo numbers), print the Sales Journal before and after you
print invoices to keep track of the numbers.
Accounts Receivable User’s Manual
6-3
Transaction Reports
Print Invoices
Print Invoices
Select Print Invoices from the Transaction Reports menu. The Print Invoices
screen appears.
1.
If you are finished entering Accounts Receivable transactions, select the
check box (enter Y in text mode); if not, clear the box (enter N in text mode).
If you have not finished entering transactions, return to the Transaction
Reports menu and finish the entries before printing invoices.
2.
Select the batch numbers to print. You can print multiple batches at once.
3.
Enter the date you want to print on the invoices or credit memos. This date is
used to age the invoices if you elected to use online aging in the Resource
Manager Options and Interfaces function.
Whether or not you print invoices determines how invoices are aged. The
invoice header date is used for aging only if you do not print invoices. This
date is used for aging if you print invoices regardless of the header date.
6-4
Accounts Receivable User’s Manual
Print Invoices
Transaction Reports
4.
If you assigned numbers to the invoices, enter the invoice number with
which you want to start. If you did not assign numbers to the invoices, enter
the number of the first form you are going to use.
5.
If you are reprinting invoices, enter the number of the last form that was
printed correctly. If you are reprinting and you use prenumbered invoices,
produce the Sales Journal after you print all the invoices so that you have a
record of the invoice numbers.
6.
If you want all invoices to have a message, enter one.
7.
If you want to print additional descriptions from the ARDExxx file on the
invoices, select the box (enter Y in text mode); if not, clear the box (enter N
in text mode).
8.
Select the output device.
9.
If you elect to print the forms, an alignment character is printed in the form’s
upper-right corner. If the X is not centered in the alignment box or if the Xs
are not aligned in the grid on laser forms, adjust the form and select No
(enter N in text mode). Continue this procedure until the form is aligned;
then select Yes (enter Y in text mode) to print the invoices and credit memos.
If a customer’s purchase order number is greater than eight characters, a row
of asterisks (*) is printed in the Order Number column, and the entire order
number is printed directly below the row of asterisks. To align the form so
that the customer’s purchase order number can be seen, make sure that only
the bottom of the alignment character (X) is printed in the upper part of the
alignment box in the form’s upper-right corner.
Sample invoice and credit memo forms are at the end of this section.
After you produce the forms, the Transaction Reports menu appears.
Accounts Receivable User’s Manual
6-5
Print Invoices
Transaction Reports
Invoice
6-6
Accounts Receivable User’s Manual
Transaction Reports
Print Invoices
Credit Memo
Accounts Receivable User’s Manual
6-7
Sales Journal
Print the Sales Journal before you post transactions to check for mistakes and
omissions. The Sales Journal also serves as an audit trail of sales transactions.
Select Sales Journal from the Transaction Reports menu. The Sales Journal
screen appears.
1.
Enter the range of customers whose information you want to include in the
journal, or leave the boxes blank to include all customers.
2.
Select the batch numbers you want to print. You can print multiple batches at
once.
3.
Select the order in which you want to print the journal.
4.
Select the amount of detail you want to include in the journal.
Accounts Receivable User’s Manual
6-9
Transaction Reports
Sales Journal
5.
Select the output device.After you produce the journal, the Transaction
Reports menu appears.
Note
If the Sales Journal does not include some invoice numbers, you probably
printed multiple-page invoices or credit memos. The number of an invoice
that is a continuation of a previous one is skipped. Invoice numbers are not
reassigned for credit memos if you elected to use prenumbered forms in the
Resource Manager Options and Interfaces function.
Sales Journal Report
6-10
Accounts Receivable User’s Manual
Miscellaneous Credits Journal
Produce the Miscellaneous Credits Journal before you post transactions to
check for mistakes and omissions and to use as an audit trail. If this journal
reveals incorrect transactions, use the Transactions function (see on page 5-3) to
edit or delete them.
Select Miscellaneous Credits Journal from the Transaction Reports menu.
The Miscellaneous Credits Journal screen appears.
1.
Enter the range of customers whose information you want to include in the
journal, or leave the boxes blank to include all customers.
2.
Select the batch numbers you want to print. You can print multiple batches at
once.
3.
Select the order in which you want to print the journal.
Accounts Receivable User’s Manual
6-11
Miscellaneous Credits Journal
4.
5.
Transaction Reports
Select the amount of detail you want to print in the journal.
Select the output device. After you produce the journal, the Transaction
Reports menu appears.
Miscellaneous Credits Journal
6-12
Accounts Receivable User’s Manual
Daily Sales Tax Report
The Daily Sales Tax Report shows taxes collected and owed, sorted by tax
group.
Select Daily Sales Tax Report from the Transaction Reports menu. The Daily
Sales Tax Report screen appears.
1.
Enter the range of tax groups whose sales taxes you want to include in the
report, or leave the boxes blank to include all tax groups.
2.
Select the batch numbers you want to print. You can print multiple batches at
once.
3.
Select the amount of detail you want to include in the report and select the
output device.
A sample Daily Sales Tax Report is at the end of this section. After you
produce the report, the Transaction Reports menu appears.
Accounts Receivable User’s Manual
6-13
Daily Sales Tax Report
Transaction Reports
Daily Sales Tax Report
6-14
Accounts Receivable User’s Manual
Cash Receipts Journal
The Cash Receipts Journal provides a record of the cash receipts in the
ARCRxxx (Cash Receipts) file. Produce it after you have entered all the cash
receipts for the day but before you post the transactions (since posting may clear
the ARCRxxx, ARTDxxx, and ARTHxxx files).
Select Cash Receipts Journal from the Transaction Reports menu. The function
screen appears.
1.
Enter the range of customers whose information you want to include in the
journal, or leave the boxes blank to include all customers.
2.
Enter the range of payment methods and bank accounts whose associated
receipts you want to include in the journal, or leave the boxes blank to
include all.
Accounts Receivable User’s Manual
6-15
Cash Receipts Journal
Transaction Reports
3.
Select the batch numbers you want to print. You can print multiple batches at
once.
4.
Select the order in which you want to print the journal.
5.
Select the output device. After you produce the journal, the Transaction
Reports menu appears.
Cash Receipts Journal
6-16
Accounts Receivable User’s Manual
Methods of Payment Journal
The Methods of Payment Journal summarizes cash receipts by methods of
payment. Use this function to produce a list of receipts for credit card claims.
Select Methods of Payment Journal from the Transaction Reports menu. The
Methods of Payment Journal screen appears.
1.
Enter the range of payment methods whose associated receipts you want to
include in the journal, or boxes blank to include all payment methods.
2.
Select the batch numbers you want to print. You can print multiple batches at
once.
3.
Select the payment types you want to include in the journal.
Accounts Receivable User’s Manual
6-17
Methods of Payment Journal
Transaction Reports
Note
You can include payment methods in two ways: entering a range and
selecting a payment method. Take care to make the two specifications agree.
For example, if you entered VIS at From and Thru for a credit card and then
selected 1 for cash, the journal would not have any data because no payment
method is both a credit card and cash.
4.
Select the output device. After you produce the journal, the Transaction
Reports menu appears.
Methods of Payment Journal
6-18
Accounts Receivable User’s Manual
Deposits Report
Use the Deposits Report function to summarize and list bank deposits from
receipts of type cash and check.
Select Deposits Report from the Transaction Reports menu. The Deposits
Report screen appears.
1.
Enter the range of bank accounts whose associated deposits you want to
include in the report, or leave the boxes blank to include all bank accounts.
2.
Select the batch numbers you want to print. You can print multiple batches at
once.
3.
Select the output device. After you produce the report, the Transaction
Reports menu appears.
A sample Deposits Report is at the end of this section.
Accounts Receivable User’s Manual
6-19
Deposits Report
Transaction Reports
Deposits Report
6-20
Accounts Receivable User’s Manual
Post Transactions
When you post transactions, open invoices are created in the ARINxxx (Open
Invoice) file for each sales and miscellaneous credit entry in the ARTDxxx and
ARTHxxx (Transaction) files. The due date for each transaction is updated from
the invoice date and the number of due days for the terms code, and the discount
date is updated from the invoice date and the number of discount days from the
customer’s terms. A payment record is created in the ARINxxx file for each cash
receipt.
The system creates a temporary file, ARTMTxxx, to store line-item entries, totals,
and cash receipt information. As you post information, the line-item information
is posted first; then the totals are updated. When all the line items are posted, the
cash receipts information is posted, and finally the bank reconciliation
transactions are posted and summary GL entries are calculated.
If you post detailed information to General Ledger, the system creates entries in
the GLJRxxx (Journal) file for each line item. If you post summary information,
the transaction figures are summarized into one entry for each account.
The balance and the sales and payment history fields in the ARCUxxx
(Customer) file are updated. The period-to-date, month-to-date, year-to-date, and
last-year fields in the ARPYxxx (Payment Methods) file are updated.
The month- and year-to-date gross sales figures in the ARSRxxx (Sales Rep) file
are updated.
The taxable and nontaxable totals from the transactions update the totals in the
RMTXxxx (Tax Groups) file.
If you keep detail and summary history, the ARHIxxx file is updated by line-item
and totals detail, and the ARHSxxx file is updated by summary totals for the
company, customer, and items sold when applicable.
Posted transactions are cleared from the ARTDxxx, ARTHxxx, and ARCRxxx
(Cash Receipts) files, and the temporary files are erased.
Accounts Receivable User’s Manual
6-21
Transaction Reports
Post Transactions
Interfaces
General Ledger
If Accounts Receivable interfaces with General Ledger, debit and credit entries
are created in the GLJRxxx file. If you post detail information, entries are made
for each line item. If you post summary information, one entry is made for each
account.
When you post invoices for sales on credit, entries are made to these accounts:
Sales
Sales Tax
CR
Freight
CR
Misc
CR
AR
CR
DB
The sales/COGS account code record provides the sales account. The general
ledger account in the tax group record provides the sales tax account. The
distribution codes record provides the other accounts.
The costs for each line item send entries to these accounts:
Inventory
CR
COGS
DB
The item record or the ARGLxxx table provides the inventory account. The item
record or the sales/COGS account code record provides the COGS account.
The miscellaneous credits for each line item send entries to these accounts:
Sales
DB
Sales Tax
DB
Freight
DB
Misc
DB
AR
CR
The sales/COGS account code record provides the sales account. The account in
the tax group record provides the sales tax account. The distribution code record
provides the other accounts.
6-22
Accounts Receivable User’s Manual
Post Transactions
Transaction Reports
The costs for each line item send entries to these accounts:
Inventory
COGS
CR
DB
The item record or the ARGLxxx table provides the inventory account. The item
record or the sales/COGS account code record provides the COGS account.
When you post invoices for cash receipts, entries are made to these accounts:
AR
Cash
CR
DB
Discounts
DB
The payment method record provides the cash account, and the ARGLxxx table
provides the discounts account.
The source of the accounts receivable account (or whichever account is credited
by cash receipts) can vary. If you enter a customer ID when you enter cash
receipts, the associated distribution code specifies the accounts receivable
account. If you do not enter a customer ID when you enter cash receipts, you
specify the accounts receivable account.
Contractors’ Job Cost
If Accounts Receivable interfaces with Contractors’ Job Cost, posting updates
the billing information in the JOBSxxx and JOHIxxx files. If a job or phase is
completed, posting also updates the actual end date.
Bank Reconciliation
If Accounts Receivable interfaces with Bank Reconciliation, each posted deposit
creates a summary record in the BRTRxxx (Transactions) file.
Accounts Receivable User’s Manual
6-23
Transaction Reports
Post Transactions
Inventory
If Accounts Receivable interfaces with Inventory, on-hand and in-use quantities
are decreased, and quantities and history are updated. The system also calculates
average prices in the INUPxxx (Units Pricing) file.
Before Posting
Before you post, do these things:
•
If you have a multiuser system, make sure that no one else is working with
the batches you are posting. You cannot post if someone else is working
within the batches.
•
Print the Sales Journal (see page 6-9), the Miscellaneous Credits Journal
(see page 6-11), and the Cash Receipts Journal (see page 6-15).
•
Back up all the data files.
The information in the Sales Journal and the Miscellaneous Credits Journal
comes from the ARTDxxx and ARTHxxx files. The information in the Cash
Receipts Journal comes from the ARCRxxx file. Posted entries are cleared from
these files to make room for the next group of entries. Because you cannot
reconstruct the journals after you post, printing them before you post is
important.
Backing up your data files before you post is an important practice. Unforeseen
problems, such as a power surge or failure, can interrupt the post and result in the
loss of data.
6-24
Accounts Receivable User’s Manual
Post Transactions
Transaction Reports
Post Transactions
Select Post Transactions from the Transaction Reports menu. The Post
Transactions screen appears.
1.
If you have backed up your data files, select the check box (enter Y in text
mode); if not, clear the check box (enter N in text mode). If you haven’t
backed up your files, return to the Transaction Reports menu and do so
before posting.
2.
Select the batch numbers you want to post. You can post multiple batches at
once.
3.
Select the fiscal year to which you want to post. If Accounts Receivable does
not interface with General Ledger or if you did not create last-year data in
General Ledger, you must post to the current year.
Accounts Receivable User’s Manual
6-25
Transaction Reports
Post Transactions
If Accounts Receivable interfaces with General Ledger and you have created
last-year data in General Ledger, select the fiscal year to which you want to
post the journal entries. You can post to the current-year GLJRxxx file or to
the last-year GLJRxxx file.
4.
If you want to age all customers, select the check box (enter Y in text mode);
if not, clear the box (enter N in text mode).
If you elect not to age all customers, the system does not make any aging
adjustments.
If you elect to age all customers, the customer aging buckets can be updated
in one of three ways. If you printed invoices, the invoice date entered in the
Print Invoices function serves as the basis for aging. If you did not print
invoices, the invoice header date serves as the basis for aging.
If you did not enter an invoice number (and therefore no invoice date), the
post date—the system date when you use this function—serves as the basis
for aging.
5.
Select the check box (enter Y in text mode) if you want to print logs for
customers with zero balance; clear the box (enter N in text mode) if not.
6.
Select the output device.
A sample posting log is at the end of this section.
After posting is completed and the log is printed, the Transaction Reports
menu appears.
6-26
Accounts Receivable User’s Manual
Transaction Reports
Post Transactions
Post Transactions Log
Accounts Receivable User’s Manual
6-27
Post Transactions
Transaction Reports
Post Cash Receipts Log
6-28
Accounts Receivable User’s Manual
Job Receivables
7
Accounts Receivable User’s Manual
Overview
7-3
AIA Invoicing
Set Up Schedule
Application Text
Invoice Worksheet
Application Entries
Application Forms
Applications Journal
Post Applications
7-5
7-13
7-15
7-17
7-21
7-25
7-27
Job Invoicing
Job Invoice Entries
Print Job Invoices
Job Invoices Journal
Post Job Invoices
7-31
7-37
7-39
7-41
Cost Plus Invoicing
Cost Plus Invoice Entries
Print Cost Plus Invoices
7-45
7-51
Accounts Receivable User’s Manual
7-1
Job Receivables
Cost Plus Invoices Journal
Post Cost Plus Invoices
Job Receivables Reports
Job Open Invoice Report
Job Cash Flow Report
7-2
7-53
7-55
7-59
7-61
Accounts Receivable User’s Manual
Overview
There are four ways to bill for a job in Accounts Receivable. If you don’t need to
track retainage, you can use the standard OSAS Transactions function (see
“Transactions” on page 5-3). The other three methods: AIA Invoicing, Job
Invoicing, and Cost Plus Invoicing handle retainage amounts.
The AIA (American Institute of Architects) Invoicing functions include setting
up a billing schedule, adding or editing existing application text that is printed on
the application form, printing an invoice worksheet, and entering current
applications. You can also print the application forms and journals and post
applications to update customer information.
Use Job Invoicing functions to enter invoices for general jobs based on a fixed
billing amount, to print invoices for which you have entered billing transactions,
to print a record of Job Invoice transactions to be posted, and to create regular
invoices and retainage invoices in the Open Invoice file.
The Cost Plus Invoicing functions include entering invoices for cost-plus work or
work whose bill consists of a fixed amount plus a percentage of the cost of
materials and labor. You can also print your cost plus invoices, create and record
your cost plus invoice transactions for future reference and analysis, and post
your cost plus invoices to Contractors’ Job Cost and to other applications that
may be interfaced to Contractors’ Accounts Receivable.
Use the Job Receivables functions to produce a list of open invoices or a cash
flow report with job IDs. The Job Open Invoice Report is a list of the invoices
with job IDs. This report is valuable if you want to track the job-related bills you
send as your jobs progress. The Job Cash Flow Report lists how much cash is due
within five aging periods with job IDs.
Accounts Receivable User’s Manual
7-3
Job Receivables
Overview
Introduction
Several of the functions in this chapter appear on additional submenus available
on the Job Receivables menu: AIA Invoicing , Job Invoicing, Cost Plus
Invoicing, Job Receivables Reports. To access these functions, select the
submenu from the Job Receivables menu and then select the function.
7-4
Accounts Receivable User’s Manual
Set Up Schedule
The American Institute of Architects (AIA) Invoicing functions enable you to set
up a billing schedule, add or edit existing text on the application form, print an
invoice worksheet, enter current applications, print application forms and
journals, and post applications.
Use the Set Up Schedule function to enter schedule, billing, tax, retainage, and
terms code information for a job. The information you establish in this function is
used when you enter AIA invoices.
Select the Set Up Schedule function from the AIA Invoicing submenu of the
Job Receivables menu. The Set Up Schedule screen appears.
1.
Enter the ID of the job for which you want to set up a schedule. The job
Description and Customer ID appear from the Jobs file. The Customer
name appears from the Customer file.
Accounts Receivable User’s Manual
7-5
Set Up Schedule
Job Receivables
2.
Enter the contract information for the job ID in the Contract For field. This
information is printed on the application form.
3.
Enter the architect information for the job ID in the Architect Info. field.
This information is printed on the application form.
4.
Select the Taxable? check box (enter Y in text mode) if any portion of the
job is taxable. Clear the box (enter N in text mode) if the job is not taxable.
5.
If part of the job is taxable, select the After Ret.? check box (enter Y in text
mode) if taxes are calculated after retainage is subtracted from the invoice
amount. Clear the box (enter N in text mode) if taxes are calculated on the
entire invoice amount including retainage.
6.
Enter the tax location for this job in the Tax Grp field. Taxes are calculated
based on a tax class you specify for each line item using percentages from
the Tax Locations file.
7.
Enter a Default Tax Class that appears when you enter line items. You can
change this tax class in each line item.
8.
Enter a default sales account in the Sales Acct field that appears when you
enter line items. You can change this account in each line item.
9.
Enter the information for calculating retainage. There are four methods that
can be used for calculating retainage (see the “Calculating Retainage”
section below).
10. Do not change the Accumulated Retainage amount. This amount appears
from the Schedule Header file (ARJAx) and is updated as you post invoices.
11. Enter an AIA application text form number for this schedule in the Form #
field. The text for this form is printed on the AIA invoice. You can have up
to ten different form codes (0-9). Use the Application Text function on the
AIA Invoicing menu to view or edit the application text.
7-6
Accounts Receivable User’s Manual
Set Up Schedule
Job Receivables
The Invoice Count and Last Invoice Date fields for this job display
information taken from the Schedule Header file (ARJAx). They are updated
when you post invoices. You should not change the invoice count number
because this is used as part of the invoice number.
12. The Terms Code field displays a terms code taken from the Customer file.
Enter a different one if different terms apply to this invoice.
13. Enter C in the Billing field if billing is complete for this job. Enter O if the
job is still open. When you print the Invoice Worksheet, you can choose to
include closed jobs only, open jobs only, or both.
14. Use the Proceed (OK) command to save the schedule header. The
information is stored in the Schedule Header file (ARJAx).
Calculating Retainage
There are four ways to calculate retainage: Flexible % Code method, Complete
% method, Material % method, and the combination of Complete % and
Material % method.
Flexible % Code Method
The Flexible % Code method uses the AIARy table. On the Set Up Schedule
screen, in the Flexible % Code field, enter a code (y) that corresponds to the table
you want to use for retainage calculations. A small table displays the percentages
and limits set up for that table.
When you use this method, different amounts are retained based on the amount
invoiced. For example, assume you are billing a customer $10,000 for a job and
you enter A as the table you want to use to calculate retainage. The retainage on
the first $5,000 is 15% which is $750. The retainage on the next $5,000 is 10%
which is $500. The total retainage for the $10,000 invoice is $1,250.
Accounts Receivable User’s Manual
7-7
Job Receivables
Set Up Schedule
Note
You cannot calculate retainage using the Flexible % Code method if any
portion of this job is taxable and taxes are calculated after retainage.
Complete % Method
The second method for calculating retainage is based on a work completed
percentage. The percent you enter is multiplied by each work completed billing
amount in the line items entered for the job in the Application Entries function.
Materials % Method
The third method for calculating retainage is based on a percentage of materials
stored. You enter the dollar amount of materials stored in the Application
Entries function. The percent you enter here is multiplied by that amount to
calculate retainage.
Complete % and Materials % Method
The fourth method is a combination of the second and third methods. You can
enter a complete percentage and a material percentage to be used to calculate
retainage for a job.
7-8
Accounts Receivable User’s Manual
Set Up Schedule
Job Receivables
Line-Item Entry Screen
If line items don’t exist for the information you defined on the Set Up Schedule
screen, the line-item entry window appears.
The line-item entry window appears for one of three reasons:
•
You are creating an invoice and have finished entering header information.
•
You use the Append command on the Command Bar to add an item to the
end of the list.
•
You use the Edit command on the Command Bar to edit an item in the list. If
you use this command, the line-item entry screen is titled Edit Entry instead
of Append Entry.
1.
If you are appending an entry, enter the Billing ID for the line item. You can
enter up to six characters. Billing items within the schedule usually
correspond to phases or segments of phases.
2.
If you are appending an entry, enter a Change Order Number if there is one
associated with this entry. Press Enter to skip this field.
3.
Enter a Description for the billing item (up to 40 characters).
4.
If you want to bill by phase, enter the phase ID with which the billing item is
associated. If you enter a phase ID, the Billed to Date and Last Bill Date
fields are updated in the phase record when you post AIA invoices.
Accounts Receivable User’s Manual
7-9
Job Receivables
Set Up Schedule
If you press Enter to skip this field because, for example, you bill by job, the
Billed to Date and Last Bill Date fields are updated in the job record when
you post AIA invoices.
5.
The sales account is taken from the schedule header. Press Enter to accept it.
6.
The Tax Class is taken from the schedule header. Press Enter to accept it.
7.
Enter the scheduled contract amount in the $ Scheduled field.
8.
If this is a new job, leave the $ Billed field blank. It is updated when you post
AIA invoices with amounts entered in the Application Entries function. If
you billed this customer prior to setting up the schedule in OSAS, enter the
dollar amount billed here.
9.
If this is a new job, leave the Material Stored $ field blank. It is updated
when you post AIA invoices with amounts entered in the Application
Entries function.
If you billed this customer prior to setting up the schedule in OSAS, enter
the material dollar amount here.
10. The % Completion field is updated by the system when you post AIA
Invoices. The percentage is calculated as the billed amount (which consists
of work completed and stored materials) divided by the scheduled amount.
11. Use the Proceed (OK) command to save the entry. The information is stored
in the Schedule Detail file (ARJBx).
Note
Entering a change order number here does not create a change order entry in
the Change Order Transactions file.
Use the Exit (F7) command to exit the line item entry screen when you are
finished.
7-10
Accounts Receivable User’s Manual
Set Up Schedule
Job Receivables
Billing Information Screen
The scrolling region appears and the available commands are listed at the bottom
of the screen.
Use the arrow keys to move to the billing with which you want to work. Then use
the Command Bar commands described below to perform tasks.
Command Bar
Field
Description
Enter=edit
Press Enter to edit the line entry in detail.
gEnerate
If no line entries are on file for this schedule, press E to
generate an entry for each Job/Phase available and the
scheduled contract dollars from each of those records.
Accounts Receivable User’s Manual
7-11
Job Receivables
Set Up Schedule
7-12
Field
Description
Append
If no line items are on file for this schedule, the Append
Entry window appears. If line items do exist, they appear
in the scrolling region. Press A to add an entry.
View
Press V to view the line entry in detail.
Header
Press H to move back into the header portion of the screen
to make any changes and then use the Proceed (OK)
command to return to the detail portion of the screen.
Next Job
Press N to edit, view, or create a schedule of entries for
another job.
Totals
Press T to view the totals for all schedule entries for this
job.
Accounts Receivable User’s Manual
Application Text
Use the Application Text function to create, edit, and print AIA invoice text
information. You can set up 10 different forms (0-9) that you can use to print AIA
invoices. Form 0 and 1 are provided with Contractors’ Job Cost.
Select Application Text from the AIA Invoicing submenu of the Job
Receivables menu. A blank Application Text screen appears.
1.
Enter the form number with which you want to work. If you are setting up a
new form, you can copy it from an existing one. You can have up to 10 forms
(0-9).
Accounts Receivable User’s Manual
7-13
Job Receivables
Application Text
2.
Select the type of action you want to perform:
•
•
•
Enter D to display the form.
Enter E to display and edit the form.
Enter P to print the text.
In the edit or display modes, use the arrow keys to move between lines of
text.
Use the Tab key to move from one end of a line to another.
3.
7-14
Use the Proceed (OK) command to save any changes when editing.
Accounts Receivable User’s Manual
Invoice Worksheet
Use the Invoice Worksheet function to plan completed amounts retained,
material amounts retained, and total amounts retained for each phase of a job.
Use the information in the Application Entries function.
Select Invoice Worksheet from the AIA Invoicing submenu of the Job
Receivables menu. The Invoice Worksheet screen appears.
1.
Define the Job ID and the Invoice Form information you want to view.
2.
Select the job type to include:
•
•
Completed Jobs includes jobs with actual finish dates.
Open Jobs includes jobs with actual start dates but no actual finish
•
All of the Above includes both completed and open jobs.
dates.
Accounts Receivable User’s Manual
7-15
Invoice Worksheet
Job Receivables
3.
Enter 1 to view a detail invoice worksheet which includes all jobs and
phases; otherwise, enter 2 to view a summary invoice worksheet which only
includes job totals.
4.
Select the check box (enter Y in text mode)to print each job on a separate
page; otherwise, clear the box (enter N in text mode) to print one continuous
page of information.
5.
Select how you want to output the report. For more information on how to
select an output device, see “Reports” on page 1-41.
After the report is produced, the AIA Invoicing menu appears.
Invoice Worksheet
7-16
Accounts Receivable User’s Manual
Application Entries
Use the Application Entries function to enter AIA invoice items.
Select Application Entries from the AIA Invoicing submenu on the Job
Receivables menu. The Application Entries screen appears.
1.
Enter the Job ID. The job description is taken from the Jobs file (CJBSxxx).
The Customer, JTD (job-to-date) Retainage, and Invoice Count field
defaults are taken from the Schedule Header file (ARJAx).
2.
The system automatically generates an invoice number that is a combination
of the Job ID and the next invoice count. Press Enter to accept it or enter a
different number.
Accounts Receivable User’s Manual
7-17
Job Receivables
Application Entries
3.
The system date appears as the Invoice Date. Press Enter to accept the date
or enter a new one.
4.
The Retainage % fields are taken from the Schedule Header file. Enter
different percentages or press Enter to accept them. If you want to invoice a
customer for all amounts retained, leave all the percentage fields blank. For
more information on calculating retainage methods, see “Calculating
Retainage” on page 7-7.
5.
Enter a description of the Billing Period for the invoice.
The GL Period appears based on the invoice date and the period set up in
Resource Manager.
6.
Select the Final Billing? check box (enter Y in text mode) if this is the final
billing for the job. If you bill by job, the actual finish date in the job record is
updated in the Jobs file when this invoice is posted.
If you bill by phase in the line items, the actual finish date in the phase
record is updated in the Jobs file when this invoice is posted.
7.
Select the On Hold? check box (enter Y in text mode) to put this invoice on
hold. If an invoice is on hold, it will not be posted.
8.
Use the Proceed (OK) command to save the information. It is stored in the
header record of the AIA Invoice file (ARJCX).
9.
The billing line items appear in the scrolling region. The information comes
from the Schedule Detail file.
Use the arrow keys to move to the item with which you want to work. Then
use the commands to perform tasks:
7-18
•
Press Enter to add billing amounts. You cannot change any fields
except the This Billing and Total Billing fields of the screen.
•
Press V to view the detail for a Billing ID. You cannot change this
information.
Accounts Receivable User’s Manual
Application Entries
Job Receivables
•
Press H to go back to the invoice header.
•
Press N to enter invoice information for another job.
•
Press T to view the totals information.
•
Press G to go to a particular billing item.
Line-Item Entry Screen
The line-item entry window appears for one of three reasons:
•
You are creating an invoice and have finished entering header information.
•
You use the Append command on the Command Bar to add an item to the
end of the list.
•
You use the Edit command on the Command Bar to edit an item in the list. If
you use this command, the line-item entry screen is titled Edit Entry instead
of Append Entry.
1.
Enter the billing amounts for the work completed and any materials stored.
You cannot bill for more than the scheduled amount. Retainage is calculated
on the amounts you enter here based on the percentages or flexible code you
entered on the header. The total billing amounts and percent complete are
calculated.
Accounts Receivable User’s Manual
7-19
Job Receivables
Application Entries
2.
Use the Proceed (OK) command to save the information. It is stored in the
AIA Invoice file (ARJCx).
3.
Use the Exit (F7) command to leave the line item entry screen and to go to
the scrolling region.
Totals Screen
When you press T to view the Totals window from the Line-Item screen
command bar, the Totals screen appears. Press any key to return to the Line-Item
screen.
7-20
Accounts Receivable User’s Manual
Application Forms
Use the Application Forms function to produce AIA invoices. The company
information that is printed on the form appears at the bottom of the screen.
Select Application Forms from the AIA Invoicing submenu on the Job
Receivables menu. The Application Forms screen appears.
1.
Define the Job ID range you want to view.
2.
Select the invoice types to include: On Hold Only includes only held
invoices, Released Only includes only released invoices, or Both includes
both held and released invoices.
3.
Select Detail to view detailed AIA invoices or select Summary to view
summarized invoices. Summarized invoices do not include application text.
Accounts Receivable User’s Manual
7-21
Job Receivables
Application Forms
4.
Enter the number of copies of the form you want to produce.
5.
Select how you want to output the report. For more information on how to
select an output device, see “Reports” on page 1-41. After the report is
produced, the AIA Invoicing menu appears.
Application for Payment Form
7-22
Accounts Receivable User’s Manual
Job Receivables
Application Forms
Application for Payment Form (page 2)
Accounts Receivable User’s Manual
7-23
Applications Journal
Use the Applications Journal function to print AIA invoice information before
posting. If you find mistakes, use the Application Entries function to edit the
invoices.
Select Applications Journal from the AIA Invoicing submenu on the Job
Receivables menu. The Applications Journal screen appears.
1.
Define the Job ID range you want to view.
2.
Select the invoice types to include:
•
•
•
On Hold Only includes only held invoices
Released Only includes only released invoices
Both includes both held and released invoices.
Accounts Receivable User’s Manual
7-25
Job Receivables
Applications Journal
3.
Select how much detail you want to include: Detail prints a detailed AIA
journal, including job and phase information, while Summary prints a
summarized journal that whos job totals only.
4.
Select the New Page per Invoice? check box (enter Y in text mode) to print
each invoice on a separate page, or clear the box (enter N in text mode) to
print one continuous page of information.
5.
Select how you want to output the report. For more information on how to
select an output device, see “Reports” on page 1-41.
After the report is produced, the AIA Invoicing menu appears.
Detail Applications Journal
7-26
Accounts Receivable User’s Manual
Post Applications
Separate invoices for retained amounts are posted to the Open Invoice file with
invoice number Rtxxxxxx where xxxxxx is the Job ID. The retained amount in the
Customer file is also updated during the post.
When you post an invoice with retainage, the sales account specified in the
Application Entries line item is credited for the entire amount billed.
The accounts receivable account specified in the distribution code for each
customer is debited for the invoice amount less retainage. The AR Retainage
account specified in the ARGLx table is debited for the retained amount.
The sales tax account is specified in the Tax Locations file.
When you post a retainage invoice, the accounts receivable account specified in
the distribution code for the customer is debited for the invoice amount. The
accounts receivable retainage account specified in the ARGLx table is credited.
Accounts Receivable User’s Manual
7-27
Post Applications
Job Receivables
Select Post Applications from the AIA Invoicing submenu on the Job
Receivables menu. The Post Applications Journal screen appears.
1.
If you have backed up your data files, select the check box (enter Y in text
mode); if not, clear the box (enter N in text mode). If you haven’t backed up
your files, do so before posting. See “Before Posting” on page 6-24 for more
information.
2.
Select the fiscal year to which you want to post. If Accounts Receivable does
not interface with General Ledger or if you did not create last-year data in
General Ledger, you must post to the current year.
If Accounts Receivable interface with General Ledger and you have created
last-year data in General Ledger, select the fiscal year to which you want to
post the journal entries. You can post to the current-year GLJRxxx file or to
the last-year GLJRxxx file.
3.
7-28
If you want to age all customers, select the check box (enter Y in text mode);
if not, clear the box (enter N in text mode).
Accounts Receivable User’s Manual
Post Applications
Job Receivables
If you select not to age all customers, the system does not make any aging
adjustments.
If you elect to age all customers, the customer aging buckets can be updated
in one of three ways. If you printed invoices, the invoice date entered in the
Print Invoices function serves as the basis for aging. If you did not print
invoices, the invoice header date serves as the basis for aging.
If you did not enter an invoice number (and therefore no invoice date), the
post date—the system date when you use this function—serves as the basis
for aging.
4.
Select how you want to output the report. For more information on how to
select an output device, see “Reports” on page 1-41.
After posting is completed and the log is printed, the AIA Invoicing menu
appears.
A sample posting log is shown below.
Post Applications Log
Accounts Receivable User’s Manual
7-29
Job Invoice Entries
Use the Job Invoicing functions to enter invoices for general jobs based on a
fixed billing amount.
Select Job Invoice Entries from the Job Invoicing submenu on the Job
Receivables menu. The Job Invoice Entries header screen appears.
1.
Enter the Job ID you are billing.
The Description and Customer ID defaults come from the Jobs (CJBSxxx)
file. The Customer name and Address defaults come from the Customer
(ARCUxxx) file.
2.
Enter an invoice number. It is required.
Accounts Receivable User’s Manual
7-31
Job Invoice Entries
Job Receivables
3.
The Invoice Date default is the workstation date. Press Enter to accept it or
enter a different one.
4.
The GL Period default is based on the invoice date previously entered. Press
Enter to accept it or change it.
5.
You can enter a Reference for this invoice (up to 20 characters) to print on
the invoice.
6.
Select the check box (enter Y in text mode) if the invoice will be taxed. Clear
it if the invoice will not be taxed.
7.
The After Ret.? check box is only available for taxable invoices. Select it
(enter Y in text mode) to have taxes calculated after retainage amounts are
subtracted. Clear it to have taxes calculated with the full invoice amount.
8.
The Tax Location default comes from the Customer file. Press Enter to
accept it.
9.
If you are entering a retainage invoice, select the Ret. Invoice? check box
(enter Y in text mode). The Retainage % field is skipped. If this is a regular
invoice, clear the box (enter N in text mode) and then enter the retainage
percentage. This percentage is multiplied by the total billing amount for the
invoice to calculate retainage.
10. The Terms Code default comes from the Customer file. Press Enter to
accept it.
11. Select the Final Billing check box (enter Y in text mode) when the job is
finished. When you post job invoices, the Actual Finish Date is updated in
the Jobs file. If you bill by phase, the Actual Finish Date is updated in the
phase record. If you bill by job, the Actual Finish Date is updated in the job
record.
12. Use the Proceed (OK ) command to save the header information. It is stored
in the header record of the Job Invoice file (ARJDx).
If no line items exist for this invoice, the line-item entry box appears.
7-32
Accounts Receivable User’s Manual
Job Invoice Entries
Job Receivables
Line-Item Entry Screen
The line-item entry window appears for one of three reasons:
•
You are creating an invoice and have finished entering header information.
•
You use the Append command on the Command Bar to add an item to the
end of the list.
•
You use the Edit command on the Command Bar to edit an item in the list. If
you use this command, the line-item entry screen is titled Edit Line instead
of Append Line.
1.
Enter a description for the line item (up to 50 characters).
2.
If you want to bill by phase, enter the Phase ID with which the billing item is
associated. If you enter a Phase ID, the Billed to Date and Last Bill Date
fields are updated in the phase record when you post job invoices.
Press Enter to bill by job. The Billed to Date and Last Bill Date fields are
updated in the job record when you post job invoices.
3.
4.
Enter the Sales GL Account number, Tax Class, and Billing Amount for
this line item.
If this is a retainage invoice, enter the retainage amount in the Billing
Amount field.
Accounts Receivable User’s Manual
7-33
Job Receivables
Job Invoice Entries
5.
Use the Proceed (OK) command to save your entry. The information is
stored in the detail record of the Job Invoice file (ARJDx).
6.
Use the Exit (F7) command to go to the scrolling region when you are
finished entering line items.
Scrolling Region Commands
The scrolling region appears and the available commands are listed at the bottom
of the screen.
Use the arrow keys to move to the item with which you want to work. Then use
the Command Bar commands to perform tasks.
7-34
Accounts Receivable User’s Manual
Job Invoice Entries
Job Receivables
Command Bar
Field
Description
Enter=edit
Press Enter to edit the line entry in detail.
Append
If no line items are on file for this schedule, the Append
Entry window appears. If line items do exist, they appear
in the scrolling region. Press A to add an entry.
View
Press V to view the line entry in detail.
Header
Press H to move back into the header portion of the screen
to make any changes and then use the Proceed (OK)
command to return to the detail portion of the screen.
Next Job
Press N to edit, view, or create a schedule of entries for
another job.
Totals
Press T to view the totals for all schedule entries for this
job.
Totals Screen
When you press T to view the Totals window, this window appears. Change or
verify the information before exiting the Job Invoice Entries screen.
Use the Exit (F7) command to exit the Job Invoice Entries screen and return to
the Job Invoicing menu.
Accounts Receivable User’s Manual
7-35
Print Job Invoices
Use the Print Job Invoices function to print invoices for which you entered
billing transactions.
Select Print Job Invoices from the Job Invoicing submenu on the Job
Receivables menu. The Print Job Invoices screen appears.
1.
Define the Job ID range you want to view.
2.
Enter a Message (up to 40 characters) you want printed on all invoices.
3.
Select the check box (enter Y in text mode) to print the company heading on
the form; otherwise, clear the box (enter N in text mode).
4.
Select how you want to output the report. For more information on how to
select an output device, see “Reports” on page 1-41.
Accounts Receivable User’s Manual
7-37
Print Job Invoices
Job Receivables
Job Invoice From
7-38
Accounts Receivable User’s Manual
Job Invoices Journal
Use the Job Invoices Journal function to print a record of Job Invoice
transactions to be posted.
Select Job Invoices Journal from the Job Invoicing submenu. The Job
Invoices Journal screen appears.
1.
Define the Job ID range you want to view.
2.
Select the check box (enter Y in text mode) to print a detailed journal which
includes job and phase information; otherwise, clear it (enter N in text mode)
to print a summarized journal that includes job totals only.
3.
Select how you want to output the report. For more information on how to
select an output device, see “Reports” on page 1-41. After the report is
produced, the Job Invoicing menu appears.
Accounts Receivable User’s Manual
7-39
Job Invoices Journal
Job Receivables
Detail Job Invoices Journal
7-40
Accounts Receivable User’s Manual
Post Job Invoices
The Post Job Invoices function creates regular invoices and retainage invoices
in the Open Invoice file. Retainage invoices are assigned the invoice number
Rtxxxxxx where xxxxxx is the Job ID. The retained amount and other balance
fields are updated in the Customer file.
If you post a retainage invoice, the amount is subtracted from the Rt invoice and
a new invoice is created for the amount billed. The amount is subtracted from the
Retainage field in the Customer file.
When you post an invoice with retainage, the sales account specified in the line
item is credited for the entire amount billed.
The accounts receivable account specified in the Distribution Code for each
customer is debited for the invoice amount less retainage. The AR Retainage
account specified in the ARGLx table is debited for the retained amount.
The sales tax account is specified in the Tax Locations file.
Accounts Receivable User’s Manual
7-41
Post Job Invoices
Job Receivables
When you post a retainage invoice, the accounts receivable account specified in
the Distribution Code for the customer is debited for the invoice account. The
accounts receivable retainage account specified in the ARGLx table is credited.
Select Post Job Invoices from the Job Invoicing submenu. The Post Job
Invoices screen appears.
1.
7-42
If you have backed up your data files, select the check box (enter Y in text
mode); if not, clear it (enter N in text mode) and do so before posting. See
“Before Posting” on page 6-24 for more information.
Accounts Receivable User’s Manual
Post Job Invoices
Job Receivables
2.
Select the fiscal year to which you want to post. If Accounts Receivable does
not interface with General Ledger or if you did not create last-year data in
General Ledger, you must post to the current year.
If Accounts Receivable interfaces with General Ledger and you have created
last-year data in General Ledger, select the fiscal year to which you want to
post the journal entries. You can post to the current-year GLJRxxx file or to
the last-year GLJRxxx file.
3.
If you want to age all customers, select the check box (enter Y in text mode);
if not, clear it (enter N in text mode). If you select not to age all customers,
the system does not make any aging adjustments.
If you elect to age all customers, the customer aging buckets can be updated
in one of three ways. If you printed invoices, the invoice date entered in the
Print Invoices function serves as the basis for aging. If you did not print
invoices, the invoice header date serves as the basis for aging.
If you did not enter an invoice number (and therefore no invoice date), the
post date—the system date when you use this function—serves as the basis
for aging.
4.
Select how you want to output the report. For more information on how to
select an output device, see “Reports” on page 1-41.
After posting is completed and the log is printed, the Job Invoicing menu
appears.
Accounts Receivable User’s Manual
7-43
Post Job Invoices
Job Receivables
Post Job Invoices
7-44
Accounts Receivable User’s Manual
Cost Plus Invoice Entries
Use the Cost Plus Invoicing functions to enter invoices for cost-plus work or
work whose bill consists of a fixed amount plus a percentage of the cost of
materials and labor.
Select Cost Plus Invoice Entries from the Cost Plus Invoicing submenu of the
Job Receivables menu. The Cost Plus Invoice Entries header screen appears.
1.
Enter the Job ID you are billing.
The Description and Customer ID defaults come from the Jobs (CJBSxxx)
file. The Customer name and Address defaults come from the Customer
(ARCUxxx) file.
2.
Enter an invoice number. It is required.
Accounts Receivable User’s Manual
7-45
Cost Plus Invoice Entries
Job Receivables
3.
The Invoice Date default is the workstation date. Press Enter to accept it or
enter a different one.
4.
The GL Period default is based on the invoice date previously entered. Press
Enter to accept it or change it.
5.
You can enter a Reference for this invoice (up to 20 characters) to print on
the invoice.
6.
Select the check box (enter Y in text mode) if the invoice will be taxed, or
clear it (enter N in text mode) if the invoice will not be taxed.
7.
The After Ret.? check box is only available for taxable invoices. Select it
(enter Y in text mode) to have taxes calculated after retainage amounts are
subtracted, or clear it (enter N in text mode) to have taxes calculated with the
full invoice amount.
8.
The Tax Location default comes from the Customer file. Press Enter to
accept it.
9.
If you are entering a retainage invoice, select the Ret. Invoice? check box
(enter Y in text mode). The Retainage % field is skipped. If this is a regular
invoice, clear the box (enter N in text mode) and then enter the retainage
percentage. This percentage is multiplied by the total billing amount for the
invoice to calculate retainage.
10. The Terms Code default comes from the Customer file. Press Enter to
accept it.
11. Enter the code from the MARKUx table that you want to use for this invoice.
The markup percentages appear at the bottom of the screen. Press Enter to
skip the Markup Code field (blank = no markup).
12. Select the Final Billing check box when the job is finished. When you post
job invoices, the Actual Finish Date is updated in the Jobs file. If you bill by
phase, the Actual Finish Date is updated in the phase record. If you bill by
job, the Actual Finish Date is updated in the job record.
7-46
Accounts Receivable User’s Manual
Cost Plus Invoice Entries
Job Receivables
13. Use the Proceed (OK ) command to save the header information. It is stored
in the header record of the Job Invoice file (ARJDx).
If no line items exist for this invoice, the line-item entry box appears.
Line-Item Entry Screen
The line-item entry window appears for one of three reasons:
•
You are creating an invoice and have finished entering header information.
•
You use the Append command on the Command Bar to add an item to the
end of the list.
•
You use the Edit command on the Command Bar to edit an item in the list. If
you use this command, the line-item entry screen is titled Edit Line instead
of Append Line.
1.
Enter the Cost Type for this line item. The Cost Types are listed in the
window. The percentage for the cost type appears in the Markup % field if
you entered a code on the header screen.
2.
Enter a description for the billing item.
3.
If you want to bill by phase, enter the phase ID with which the billing item is
associated. If you enter a Phase ID, the Billed to Date and Last Bill Date
fields are updated in the phase record when you post job invoices.
Accounts Receivable User’s Manual
7-47
Cost Plus Invoice Entries
Job Receivables
Press Enter to bill by job. The Billed to Date and Last Bill Date fields are
updated in the job record when you post job invoices.
4.
5.
Enter the Sales GL Account number, Tax Class, and Billing Amount for
this line item.
If this is a retainage invoice, enter the retainage amount in the Billing
Amount field.
7-48
6.
The Markup % field default is based on the markup code from the MARKU
table that was entered on the transaction header. Press Enter to accept it or
change the percent.
7.
Use the Proceed (OK) command to save your entry. The information is
stored in the detail record of the Cost Plus Invoice file (ARJEx).
8.
Use the Exit (F7) command to go to the scrolling region when you are
finished entering line items.
Accounts Receivable User’s Manual
Cost Plus Invoice Entries
Job Receivables
Scrolling Region Commands
The scrolling region appears and the available commands are listed at the bottom
of the screen.
Use the arrow keys to move to the item with which you want to work. Then use
the Command Bar commands to perform tasks.
Command Bar
Field
Description
Enter=edit
Press Enter to edit the line entry in detail.
Append
If no line items are on file for this schedule, the Append
Entry window appears. If line items do exist, they appear
in the scrolling region. Press A to add an entry.
View
Press V to view the line entry in detail.
Accounts Receivable User’s Manual
7-49
Job Receivables
Cost Plus Invoice Entries
Field
Description
Header
Press H to move back into the header portion of the screen
to make any changes and then use the Proceed (OK)
command to return to the detail portion of the screen.
Next Job
Press N to edit, view, or create a schedule of entries for
another job.
Totals
Press T to view the totals for all schedule entries for this
job.
GoTo
Press G to go to a particular line item. This option only
appears when all cannot be viewed in the scrolling region.
Totals Screen
When you press T to view the Totals window, this window appears.
Press any key to exit the Cost Plus Invoice Entries screen and then use the Exit
(F7) command to return to the Cost Plus Invoicing menu.
7-50
Accounts Receivable User’s Manual
Print Cost Plus Invoices
Use the Print Cost Plus Invoices function to print your cost plus invoices.
Select Print Cost Plus Invoices from the Cost Plus Invoicing submenu on the
Job Receivables menu. The Cost Plus Invoices screen appears.
1.
Define the Job ID range you want to view.
2.
Enter a Message (up to 40 characters) you want printed on all invoices.
3.
Select the check box (enter Y in text mode) to print the company heading on
the form; otherwise, clear the box (enter N in text mode).
4.
Select how you want to output the invoices. For more information on how to
select an output device, see “Reports” on page 1-41. After the invoices are
produced, the Cost Plus Invoicing menu appears.
Accounts Receivable User’s Manual
7-51
Print Cost Plus Invoices
Job Receivables
Cost Plus Invoice Form
7-52
Accounts Receivable User’s Manual
Cost Plus Invoices Journal
Use the Cost Plus Invoices Journal function to print a record of Cost Plus
Invoice transactions to be posted.
Select Cost Plus Invoices Journal from the Cost Plus Invoicing submenu on
the Job Receivables menu. The Cost Plus Invoices Journal screen appears.
1.
Define the Job ID range you want to view.
2.
Select the check box (enter Y in text mode) to print a detailed journal which
includes job and phase information; otherwise, clear it (enter N in text mode)
to print a summarized journal that includes job totals only.
3.
Select how you want to output the journal. For more information on how to
select an output device, see “Reports” on page 1-41. After the journal is
produced, the Cost Plus Invoicing menu appears.
Accounts Receivable User’s Manual
7-53
Cost Plus Invoices Journal
Job Receivables
Detail Cost Plus Invoices Journal
7-54
Accounts Receivable User’s Manual
Post Cost Plus Invoices
Use the Post Cost Plus Invoices function to post your cost plus invoices to
Contractors’ Job Cost and to other applications that interface with Contractors’
Accounts Receivable.
The Post Cost Plus Invoices function works similarly to the Post Job Invoices
function (see “Post Job Invoices” on page 7-44). Regular invoices and retainage
invoices are created in the Open Invoice file. Retainage invoices are assigned the
invoice number Rtxxxxxx where xxxxxx is the Job ID. The retained amount and
other balance fields are updated in the Customer file.
If you post a retainage invoice, the amount is subtracted from the Rt invoice and
a new invoice is created for the amount billed. The amount is subtracted from the
Retainage field in the Customer file.
When you post an invoice with retainage, the sales account specified in the line
item is credited for the entire amount billed.
The accounts receivable account specified in the Distribution Code for each
customer is debited for the invoice amount less retainage. The AR Retainage
account specified in the ARGLx table is debited for the retained amount.
The sales tax account is specified in the Tax Locations file.
Accounts Receivable User’s Manual
7-55
Post Cost Plus Invoices
Job Receivables
When you post a retainage invoice, the accounts receivable account specified in
the Distribution Code for the customer is debited for the invoice account. The
accounts receivable retainage account specified in the ARGLx table is credited.
Select Post Cost Plus Invoices from the Cost Plus Invoicing submenu on the
Job Receivables menu. The Post Cost Plus Invoices screen appears.
1.
7-56
If you have backed up your data files, select the check box (enter Y in text
mode); if not, clear it (enter N in text mode) and do so before posting. See
“Before Posting” on page 6-24 for more information.
Accounts Receivable User’s Manual
Post Cost Plus Invoices
Job Receivables
2.
Select the fiscal year to which you want to post. If Accounts Receivable does
not interface with General Ledger or if you did not create last-year data in
General Ledger, you must post to the current year.
If Accounts Receivable interfaces with General Ledger and you created lastyear data in General Ledger, select the fiscal year to which you want to post
the journal entries. You can post to the current-year GLJRxxx file or to the
last-year GLJRxxx file.
3.
If you want to age all customers, select the check box (enter Y in text mode);
if not, clear the check box (enter N in text mode). If you select not to age all
customers, the system does not make any aging adjustments.
If you elect to age all customers, the customer aging buckets can be updated
in one of three ways. If you printed invoices, the invoice date entered in the
Print Invoices function serves as the basis for aging. If you did not print
invoices, the invoice header date serves as the basis for aging.
If you did not enter an invoice number (and therefore no invoice date), the
post date—the system date when you use this function—serves as the basis
for aging.
4.
Select how you want to output the log. For more information on how to
select an output device, see “Reports” on page 1-41. After posting is
completed and the log is printed, the Cost Plus Invoicing menu appears.
Accounts Receivable User’s Manual
7-57
Post Cost Plus Invoices
Job Receivables
Post Cost Plus Invoices Log
7-58
Accounts Receivable User’s Manual
Job Open Invoice Report
Use the Job Receivables Reports functions to produce a list of open invoices or a
cash flow report with Job IDs.
The Job Open Invoice Report is a list of the invoices with Job IDs. This report is
valuable if you want to track the job-related bills you send as your jobs progress.
Select Job Open Invoice Report from the Job Receivables Reports submenu
on the Job Receivables menu. The Job Open Invoice Report screen appears.
1.
Define the Customer ID range you want to view.
Accounts Receivable User’s Manual
7-59
Job Receivables
Job Open Invoice Report
2.
Select the invoice types you want to print:
•
Print invoice without retainage includes invoices without retainage.
•
Print retainage invoices includes only retainage invoices.
•
Print all invoices prints all invoices.
3.
Enter the date after which you want to include paid invoices.
4.
Select how you want to output the report. For more information on how to
select an output device, see “Reports” on page 1-41. After the report is
produced, the Job Receivables Reports menu appears.
Job Open Invoice Report
7-60
Accounts Receivable User’s Manual
Job Cash Flow Report
Print the Job Cash Flow Report to see how much cash is due within five aging
periods with Job IDs.
Select Job Cash Flow Report from the Job Receivables Reports submenu on
the Job Receivables menu. The Job Cash Flow Report screen appears.
1.
Define the Customer ID range you want to view.
2.
Select the invoice types to print:
•
•
•
Print all invoices includes all invoices.
Print only held invoices includes only held invoices.
Print all released invoices prints all released invoices.
Accounts Receivable User’s Manual
7-61
Job Cash Flow Report
Job Receivables
3.
Enter four dates for the aging periods. Each date must be greater than the
previous date entered above it.
4.
Select how you want to output the report. For more information on how to
select an output device, see “Reports” on page 1-41. After the report is
produced, the Job Receivables Reports menu appears.
Job Cash Flow Report
7-62
Accounts Receivable User’s Manual
Open Invoices
8
Accounts Receivable User’s Manual
Hold/Release Invoices
Open Invoice Report
Aged Trial Balance
Cash Flow Report
Calculate Finance Charges
Statements
Customer Analysis Report
Commissions Report
Accounts Receivable User’s Manual
8-3
8-5
8-7
8-11
8-13
8-17
8-21
8-23
8-1
Open Invoices
Introduction
When you enter a transaction whose invoice has been paid completely, and you
post, information about the transaction amounts moves from the ARCRxxx (Cash
Receipts) and ARTDxxx and ARTHxxx (Transaction) files to the ARCUxxx
(Customer) file and the ARHIxxx and ARHSxxx (Detail and Summary History)
files.
The invoices and payments are posted to the ARINxxx (Open Invoices) file. Use
the functions on the Open Invoices menu to take open invoices into account.
You can put disputed invoices on hold to halt aging or release held invoices,
calculate finance charges for invoices past due, and produce several reports to
serve as a reference of your open invoices and as part of a larger audit trail for all
transactions.
8-2
Accounts Receivable User’s Manual
Hold/Release Invoices
Use the Hold/Release Invoices function to put disputed invoices on hold, release
held invoices, split a payment or credit into several parts, or reapply a payment or
credit to an outstanding invoice.
If you put an invoice, a miscellaneous credit, or a cash receipt on hold, it does not
appear on the customer’s statement, but it continues to age properly. Finance
charges are not assessed for held invoices.
Select Hold/Release Invoices from the Open Invoices menu. The Hold/
Release Invoices screen appears.
Enter the ID of the customer whose invoices you want to hold or release. If you
use the Maintenance (F6 ) command, the Customers function temporarily
appears.
Accounts Receivable User’s Manual
8-3
Open Invoices
Hold/Release Invoices
After you enter the ID, information about the customer appears: the customer’s
account type, status, date and amount of the last payment, and check number.
•
To hold or release an invoice, move the prompt to the invoice you want to
change and press H to change the status. To change it back, press H again.
•
To change the status of all invoices from one type to another, press A . In the
window that appears, enter H to change all statuses to HOLD or R to change
all statuses to REL (released).
•
To split a payment or credit memo into more than one payment or credit
memo or to reapply a payment to an invoice, press S. Then enter the amount
of the new invoice and the invoice number to which you want to apply
payment.
•
To work with invoices for a different customer, press C. Then enter the ID of
the customer whose invoices with which you want to work.
•
To work with invoices for the first customer on file, press F.
•
To work with invoices for the last customer on file, press L.
•
To work with invoices for the next customer on file, press N.
•
To work with invoices for the previous customer on file, press P.
•
To move to a specific invoice number, press G and enter the number. (You
can use this command only if there is more than one screen of invoice
numbers.)
When you are finished working with information for the customer, enter
another customer ID, or exit to the Open Invoices menu.
8-4
Accounts Receivable User’s Manual
Open Invoice Report
The Open Invoice Report lists the invoices, miscellaneous credits, and cash
receipts in the ARINxxx (Open Invoice) file. Only open invoice customers
(account type O) in the ARCUxxx (Customer) file are included in this report.
The Open Invoice Report shows only summary (totals) information. If you need
a more detailed report for sales analysis, print the Detail History Report (see
page 8-11).
Before you produce the Open Invoice Report, make sure that you have posted all
the transactions.
Select Open Invoice Report from the Open Invoices menu. The Open Invoice
Report screen appears.
Accounts Receivable User’s Manual
8-5
Open Invoice Report
Open Invoices
1.
Enter the range of customers whose information you want to include in the
report.
2.
Enter the date of the first paid invoice that you want to include in the report.
Paid invoices dated on or after the date you enter are included in the report.
3.
Select the output device. See “Reports” on page 1-41 for more information.
A sample Open Invoice Report is at the end of this section. The letter H in
the St (status) column indicates that the invoice is on hold. The amounts in
the Gross Amount column are the invoice totals before discounts are taken.
After you produce the report, the Open Invoices menu appears.
Open Invoice Report
8-6
Accounts Receivable User’s Manual
Aged Trial Balance
The Aged Trial Balance shows the invoice balances broken down into five aging
periods. The detail report shows full detail for all invoices; the summary report
shows only the aging period totals.
For balance forward customers, the summary balances of the five aging periods
are shown. For open invoice customers, the invoices, credits, and receipts in the
ARINxxx (Open Invoice) file and the aging period each of the transactions
belongs to are shown (provided you elect to include full details).
If you have open invoice customers, the aged balances in the Aged Trial Balance
may not be the same as the ones in the ARCUxxx (Customer) file. The balances
in Aged Trial Balance are up-to-date on the day you print the report; the balances
in the ARCUxxx file are updated at the end of the month, when you post, or if the
online aging option is set to YES.
If you do not do periodic maintenance before you enter activity for a new month,
the Current columns in the report show activity for the current month and all the
months you did not do periodic maintenance.
Accounts Receivable User’s Manual
8-7
Open Invoices
Aged Trial Balance
Select Aged Trial Balance from the Open Invoices menu. The Aged Trial
Balance screen appears.
1.
Enter the range of customers, sales reps, states, and distribution codes you
want to include in the report, or leave the boxes blank to include all.
2.
Accept the default aging date, or enter the date the system is to use as a
starting point for aging.
3.
You can exclude paid invoices from the aging report by specifying a cutoff
date. Specify the point at which you want to cut off invoices on the report.
4.
8-8
•
Select Date from the list box and edit the cutoff date, if necessary.
Invoices dated later than this date do not appear in the report.
•
Select Period from the list box and enter the GL period and year.
Invoices with periods after this one do not appear in the report.
Edit the date of the first statement that you want to include in the report.
Invoices paid before the date you enter are not included in the report.
Accounts Receivable User’s Manual
Aged Trial Balance
Open Invoices
5.
Aging breaks are the dates that define aging buckets, or categories of
invoices with a particular aging status. The categories are Current and Past
Due 1-4. Accept the default dates, or enter different dates.
6.
Select the date by which you want to age invoices.
7.
Select the order in which you want to print the report.
8.
If you want to include only customers whose balance is past due, select the
check box (or enter Y in text mode); if not, clear the box (or enter N in text
mode).
9.
If you want to list line-item transactions associated with each customer,
select the box (or enter Y in text mode). To list only totals associated with
each customer, clear the box (or enter N in text mode).
10. If you want to include balance forward customers, select the box (or enter Y
in text mode); if not, clear the box (or enter N in text mode).
11. If you want to include zero balance customers, select the box (or enter Y in
text mode); if not, clear the box (or enter N in text mode).
12. If you want to include the contact ID, select the box (or enter Y in text
mode); if not, clear the box (or enter N in text mode).
13. If you want information about each sales rep, state/city, or distribution code
to begin on a new page, select the box (or enter Y in text mode). If you want
the information produced in a continuous flow, clear the box (or enter N).
You can print page breaks only if you organize the report by sales rep, state
and city, or distribution code (as selected in the Print By section of the
screen) and if you have more than one page of data.
14. Select Age By or Job ID to print that information on the report.
15. Select the output device. See “Reports” on page 1-41 for more information.
After you produce the report, the Open Invoices menu appears.
Accounts Receivable User’s Manual
8-9
Open Invoices
Aged Trial Balance
A sample Aged Trial Balance is shown below. Unapplied credits (in the
Unapplied column) are applied to the customer totals for each aging period.
The letter H in the St (status) column shows that the invoice is held. The
Current column shows balances that are not yet 31 days old.
Aged Trial Balance
8-10
Accounts Receivable User’s Manual
Cash Flow Report
The Cash Flow Report helps you calculate the amount of cash that is due to be
received with any one of four aging periods you specify. (It does not show paid
invoices.)
The information comes from the ARINxxx (Open Invoice) file and the ARCUxxx
(Customer) file.
Select Cash Flow Report from the Open Invoices menu. The Cash Flow Report
screen appears.
1.
Enter the range of customers whose information you want to include in the
report, or leave the boxes blank to include all customers.
2.
Select the invoices you want to include in the report. You can include all
invoices or only invoices that are on hold.
Accounts Receivable User’s Manual
8-11
Open Invoices
Cash Flow Report
3.
Enter four aging periods for the invoices, or accept each default date. Enter
the dates in chronological order, the earliest date first.
4.
Select the output device. See “Reports” on page 1-41 for more information.
After you produce the report, the Open Invoices menu appears.
Cash Flow Report
8-12
Accounts Receivable User’s Manual
Calculate Finance Charges
If your company assesses finance charges, use the Calculate Finance Charges
function to calculate finance charges on overdue invoices, to produce a report of
finance charges, and to update the new finance charge in the ARCUxxx
(Customer) file.
Finance charges are assessed only for customers that are set up for finance
charges and that have an associated finance charge code in the ARCUxxx file.
The calculation is based on the minimum charge, the percentage, the invoice or
due date, and the cutoff days specified in the customer’s finance charge code.
If you recalculate finance charges, you must do it before you do periodic
maintenance. Performing periodic maintenance moves the figure in the New Fin
Chg field to the Unpaid Fin Chg field in the customer record and creates an open
invoice in the ARINxxx (Open Invoice) file.
Accounts Receivable User’s Manual
8-13
Calculate Finance Charges
Open Invoices
Select Calculate Finance Charges from the Open Invoices menu. The
Calculate Finance Charges screen appears.
1.
Enter the range of customers for which you want to calculate finance
charges, or leave the boxes blank to include all customers.
2.
Accept the default statement date, or enter a different date. Invoice aging for
open invoice customers is based on this date.
3.
To calculate finance charges based on the due date, select Due Date. To
calculate finance charges based on the invoice date, select Invoice Date.
Finance charges are calculated for invoices dated before the default date,
which is determined by the number of days in each customer’s finance
charge code and the due or invoice dates.
4.
8-14
Select the output device. See “Reports” on page 1-41 for more information.
Accounts Receivable User’s Manual
Calculate Finance Charges
Open Invoices
A sample finance charge report is shown below. The letters BF in the Type
column indicate a balance forward account; the letters OI indicate an open
invoice account. The statement FINANCE CODE = 0 indicates that the
customer is not assessed finance charges.
After you produce the report, the Open Invoices menu appears.
Calculate Finance Charges Report
Accounts Receivable User’s Manual
8-15
Statements
Statements show the month’s transactions, summarizing your customer accounts.
Use the Statements function to print statements for customers whose records
specify that they receive statements.
Select Statements from the Open Invoices menu. The Statements screen
appears.
1.
Enter the range of customers for whom you want to produce statements, or
leave the boxes blank to include all customers.
2.
Accept the default date as the closing date, or enter the date that customers
must pay their statements to avoid finance charges.
3.
Accept the default date as the statement date, or enter the date you will issue
the statements. This date is used to age invoices for open invoice customers.
Accounts Receivable User’s Manual
8-17
Open Invoices
Statements
4.
Accept the default date as the cutoff date, or enter a different cutoff date.
Invoices dated later than this date do not appear on the statements.
5.
Accept the default date, or enter the date of the first paid invoice you want to
include in the statements. Paid invoices dated on or after the date you enter
are included in the statements.
6.
If you want to print customers’ year-to-date finance charges on the
statements, select the check box (enter Y in text mode); if not, clear the box
(enter N in text mode).
7.
If you want to print purchase order numbers on the statements, select the box
(enter Y in text mode); if not, clear the box (enter N in text mode).
8.
Select the order in which you want to print the statements.
9.
Select the group of customers whose statements you want to print.
10. The messages that were used the last time you printed the statements appear.
Accept the messages for their respective aging periods, or enter different
messages. The messages are printed on the statements.
11. Select the output device. See “Reports” on page 1-41 for more information.
12. If you elect to print the statements, an alignment character is printed in the
statement’s top right-hand corner. If the X is not centered in the alignment
box or if the Xs are not aligned in the grid on laser forms, adjust the form
and select No (enter N in text mode). The alignment character is printed
again. Continue this procedure until the form is aligned; then select Yes
(enter Y in text mode) to print the statements.
After you print the statements, the Open Invoices menu appears.
8-18
Accounts Receivable User’s Manual
Open Invoices
Statements
Statement
Accounts Receivable User’s Manual
8-19
Customer Analysis Report
Print the Customer Analysis Report to find out how much money you are
making from your customers, if they are paying on time, the last time each
customer purchased items, and who your most profitable customers are. This
report is valuable if you are planning a marketing strategy and want to consider a
specific group of buyers.
Produce the Customer Analysis Report before you do periodic maintenance,
because periodic maintenance clears several fields in the ARCUxxx (Customer)
file.
Select Customer Analysis Report from the Open Invoices menu. The
Customer Analysis Report screen appears.
1.
Enter the range of customers you want to include in the report, or leave the
boxes blank to include all customers.
Accounts Receivable User’s Manual
8-21
Open Invoices
Customer Analysis Report
2.
Select or clear the check box (enter Y or N in text mode) to indicate the types
of history information you want in the report.
The selections progressively cover more history; for example, the year-todate history includes period-to-date history. When you elect to include a
field, the information is broken down at that level. For example, when you
include Period-to-Date, the period information is broken down as such.
When you exclude Period-to-Date and include Year-to-Date, the period-todate information is presented as an overall part of the year’s total.
3.
Select the order in which you want to print the report.
4.
Select the output device. See “Reports” on page 1-41 for more information.
A sample Customer Analysis Report is shown below. The sales amount is
the net of the line items.
After you produce the report, the Open Invoices menu appears.
Customer Analysis Report
8-22
Accounts Receivable User’s Manual
Commissions Report
The Commissions Report shows the sales information for each sales rep who
had activity during the selected range of dates. If you elected not to save detail
sales history in the Resource Manager Options and Interfaces function, no
information is available for this report.
Produce the report before you do periodic maintenance, because you can clear
the ARHIxxx (Detail History) file through that function. Open invoices in a
period whose history you deleted are not included in the Report.
You can produce a report with commissions broken down by line items,
commissions broken down by invoices, or summary commissions. The line-item
detail report shows the price, profit, and commission for each line item. The
invoice detail report shows the total price, profit, and commission for each
invoice. The sales rep summary report shows only the totals for each sales rep.
If a sales rep’s commission is based on paid invoices, commissions are calculated
only on the portion of sales that has been paid for open invoice customers and
balance forward customers. (See page 3-16 for an explanation of how
commissions are calculated.)
Accounts Receivable User’s Manual
8-23
Open Invoices
Commissions Report
Select Commissions Report from the Open Invoices menu. The Commissions
Report screen appears.
8-24
1.
Enter the range of sales reps whose commissions you want to include in the
report, or leave the boxes blank to include all sales reps.
2.
Enter the range of dates of the invoices to be taken into account in the report.
3.
Select the type of detail you want to include in the report.
4.
Select the output device. See “Reports” on page 1-41 for more information.
After you produce the report, the Open Invoices menu appears.
Accounts Receivable User’s Manual
Open Invoices
Commissions Report
Commissions Report
Accounts Receivable User’s Manual
8-25
History Reports
9
Accounts Receivable User’s Manual
AR Analysis Report
Sales Analysis Report
Detail History Report
Customer Sales Report
Customer Activity Report
Summary Invoice History
Promotional Analysis
Print History Invoices
Tax Audit Report
Accounts Receivable User’s Manual
9-3
9-7
9-11
9-15
9-17
9-19
9-21
9-23
9-27
9-1
History Reports
Introduction
The history reports get information from the ARHIxxx and ARHSxxx (Detail and
Summary History) files. Each report serves as a reference for activity after you
post; together they provide a source of data you can use to complete an audit trail.
9-2
Accounts Receivable User’s Manual
AR Analysis Report
The AR Analysis Report provides an analysis of your company’s outstanding
receivables. The report has three parts. Each part compares the receivables of a
period you specify with those of a previous period, the previous three periods,
and the same period of the previous year.
The first section of the report shows the total sales and a breakdown of sales into
aging buckets and the number of days sales were outstanding. The second section
shows a composite of receivables that are outstanding for more than 30, 60, 90,
and 120 days. The third section shows the average invoice amount, number of
days sales were outstanding, number of invoices you sent to customers, and
number of payments you received from customers.
The system reads backwards through the ARHSxxx (Summary History) file to
find data for the previous periods. If you did not do period-end maintenance for a
period, the data is inaccurate for that period.
You cannot produce this report if you did not elect to keep summary history in
the Resource Manager Options and Interfaces function, if the reporting period
you specify has no summary history, or if you did not build the ARPDxxx table.
Accounts Receivable User’s Manual
9-3
History Reports
AR Analysis Report
Select AR Analysis Report from the History Reports menu. The AR Analysis
Report screen appears.
1.
Accept the current period and fiscal year that appear from the ARPDxxx
table, or enter a different period or fiscal year.
2.
Enter the number of days that have gone by in the reporting period you
entered. All other periods use 30 days as an average. The number you enter is
used to calculate the number of days that sales are outstanding.
3.
Select the output device.
A sample AR Analysis Report is at the end of this section. The system
inserts the periods in the report. An asterisk (*) in the report indicates that no
summary history is available for that period or it is insufficient for a range of
periods. In the first section of the report, finance charges are included in the
Total AR column but not in the individual aging columns. The amounts in
the second section are a composite of all receivables that are outstanding for
more than 30, 60, 90, and 120 days.
After you produce the report, the History Reports menu appears.
9-4
Accounts Receivable User’s Manual
History Reports
AR Analysis Report
AR Analysis Report
Accounts Receivable User’s Manual
9-5
Sales Analysis Report
The Sales Analysis Report provides an analysis of your company’s sales based
on a reporting period you specify and of the last fiscal year’s trends by period.
The report has two parts. The first part shows the current and previous years’
sales, COGS, gross profit, number of invoices, and average invoice amounts for
the reporting period, quarter, and year. The second part of the report shows the
sales, COGS, gross profit, average invoice amount, and number of invoices for
the reporting period and the previous 12 periods.
You cannot produce the report if you did not elect to keep summary history in the
Resource Manager Options and Interfaces function, if the reporting period you
specify has no summary history, or if you did not build the ARPDxxx table.
The system reads backwards through the ARHSxxx (Summary History) file to
find data for the previous period. If you did not do period-end maintenance for a
period, the data is inaccurate for that period.
Accounts Receivable User’s Manual
9-7
Sales Analysis Report
History Reports
Select Sales Analysis Report from the History Reports menu. The Sales
Analysis Report screen appears.
1.
Accept the current period and fiscal year that appear from the ARPDxxx
table, or enter a different period or fiscal year.
2.
Select the output device.
A sample Sales Analysis Report is at the end of this section. An asterisk (*)
in the report indicates that no summary history is available for that period or
is insufficient for a range of periods.
After you produce the report, the History Report menu appears.
9-8
Accounts Receivable User’s Manual
History Reports
Sales Analysis Report
Sales Analysis Report
Accounts Receivable User’s Manual
9-9
Detail History Report
Print the Detail History Report to find out which items are being sold most,
which customers are buying most frequently, what each customer is buying, what
each sales rep is or is not selling, when items are being sold, and how much each
item is being sold for.
You cannot produce the report if you did not elect to keep detail history in the
Resource Manager Options and Interfaces function.
Select Detail History Report from the History Reports menu. The Detail
History Report screen appears.
1.
Enter the range of customers and sales reps you want to include in the report,
or leave the boxes blank to include all.
2.
Enter the range of associated job or item numbers and sales categories whose
invoice information you want to include in the report, or leave the boxes
blank to include all.
Accounts Receivable User’s Manual
9-11
History Reports
Detail History Report
3.
Enter the range of dates of the invoices and the range of invoices you want to
include in the report, or leave the boxes blank to include all.
4.
Select the amount of detail you want to include in the report.
5.
Select the type of units you want the report to reflect.
6.
Select the order in which you want to print the report.
7.
If you want the report to include invoice line items, select the check box
(enter Y in text mode); if not, clear the box (enter N in text mode).
8.
If you want the report to include payment information, select the box (enter
Y in text mode); if not, clear the box (enter N in text mode).
9.
If you want the report to include sales taxes, select the box (enter Y in text
mode); if not, clear the box (enter N in text mode).
10. If you want the report to include freight charges, select the box (enter Y in
text mode); if not, clear the box (enter N in text mode).
11. If you want to include miscellaneous charges, select the box (enter Y in text
mode); if not, clear the box (enter N in text mode).
12. If you want the report to include finance charges, select the box (enter Y in
text mode); if not, clear the box (enter N in text mode).
13. If you want the report to include additional descriptions, select the box (enter
Y in text mode); if not, clear the box (enter N in text mode). You can include
additional descriptions only if you elected to use additional descriptions in
the Resource Manager Options and Interfaces function.
14. Select the output device.
A sample Detail History Report is at the end of this section. The profit on
each sale is shown as a dollar amount in the Profit column and as a percent
in the % column.
After you produce the report, the History Reports menu appears.
9-12
Accounts Receivable User’s Manual
History Reports
Detail History Report
Detail History Report
Accounts Receivable User’s Manual
9-13
Customer Sales Report
The Customer Sales Report shows how much money you are making from your
customers, the gross profit you made on the sales, the average invoice amounts,
and the number of invoices. You can list only customer sales history, or you can
include item and job history. If you elect to include item and job history, the
report shows the quantities sold.
You cannot print the report if you did not elect to keep summary history in the
Resource Manager Options and Interfaces function, if the reporting period you
specify has no summary history, or if you did not build the ARPDxxx table.
Select Customer Sales Report from the History Reports menu. The Customer
Sales Report screen appears.
1.
Enter the range of customers you want to include in the report, or leave the
boxes blank to include all customers.
Accounts Receivable User’s Manual
9-15
History Reports
Customer Sales Report
2.
Enter the range of customer classes you want to include in the report, or
leave the boxes blank to include all customer classes.
3.
Enter the range of sales reps whose associated customers you want to
include in the report, or leave the boxes blank to include all sales reps.
4.
Select the order in which you want to print the report.
5.
If you want to include history for items and jobs, select the check box (enter
Y in text mode); if not, clear the box (enter N in text mode).
6.
Accept the current period and fiscal year that appear from the ARPDxxx
table, or enter a different period or fiscal year. After you produce the report,
the History Reports menu appears.
Customer Sales Report
9-16
Accounts Receivable User’s Manual
Customer Activity Report
The Customer Activity Report shows who your top customers are. The
customers are listed in descending order of sales: the customer who bought the
most is listed first and the customer who bought the least is listed last.
If you organize the report by customer ID, the report shows only grand totals. If
you organize the report by customer class, the report shows subtotals for each
class in addition to grand totals. If you list the customers by sales rep ID, the
report shows subtotals for each sales rep in addition to grand totals.
You cannot produce the report if you did not elect not to keep summary history in
the Resource Manager Options and Interfaces function, if the reporting period
you specify has no summary history, or if you did not build the ARPDxxx table.
Select Customer Activity Report from the History Reports menu. The
Customer Activity Report screen appears.
Accounts Receivable User’s Manual
9-17
History Reports
Customer Activity Report
1.
Enter the range of customers, customer classes, and sales reps you want to
include in the report, or leave the boxes blank to include all.
2.
Select the order in which you want to print the report.
3.
Accept the current period and fiscal year that appear from the ARPDxxx
table, or enter a different period or fiscal year.
4.
Select the output device. After you produce the report, the History Reports
menu appears.
Customer Activity Report
9-18
Accounts Receivable User’s Manual
Summary Invoice History
Use the Summary Invoice History function to produce a report that summarizes
sales information by invoice totals from history.
Select Summary Invoice History from the History Reports menu. The
Summary Invoice History screen appears.
1.
Enter the range of customers you want to include in the report, or leave the
boxes blank to include all customers.
2.
Enter the range of invoice numbers and invoice dates you want to include in
the report, or leave the boxes blank to include all.
3.
Enter the range of sales reps you want to include in the report, or leave the
boxes blank to include all sales reps.
Accounts Receivable User’s Manual
9-19
History Reports
Summary Invoice History
4.
Select the order in which you want to print the report.
5.
Select the output device. After you produce the report, the History Reports
menu appears.
Summary Invoice History Report
9-20
Accounts Receivable User’s Manual
Promotional Analysis
The Promotional Analysis Report shows a comparison of promotional pricing
with other types of pricing.
You can produce this report only if Accounts Receivable interfaces with
Inventory, where the product promotional information is stored.
Select Promotional Analysis from the History Reports menu. The Promotional
Analysis screen appears.
1.
Enter the range of promotion IDs, items, locations, customers, and sales reps
you want to include in the report, or leave the boxes blank to include all.
2.
Enter the range of invoice dates you want to include in the report, or leave
the boxes blank to include all invoice dates.
3.
Select the order in which you want to print the report.
Accounts Receivable User’s Manual
9-21
Promotional Analysis
History Reports
4.
Select the item you want to compare the promotional pricing to.
5.
Select the output device. After you produce the report, the History Reports
menu appears.
Promotional Analysis Report
9-22
Accounts Receivable User’s Manual
Print History Invoices
Use the Print History Invoices function to select invoices from history and print
duplicates.
You cannot produce these invoices if you did not elect to keep detail history in the
Resource Manager Options and Interfaces function or if you purged the
ARHIxxx (Detail History) file.
Note
Your original and history invoices may be different, because not all the
information from your original invoices is saved in history.
Select Print History Invoices from the History Reports menu. The Print History
Invoices screen appears.
Accounts Receivable User’s Manual
9-23
Print History Invoices
9-24
History Reports
1.
Enter the range of customers for which you want to print invoices or credit
memos, or leave the boxes blank to include all customers.
2.
Enter the range of invoice numbers and invoice dates you want to print, or
leave the boxes blank to include all.
3.
Indicate whether you want to print invoices, credit memos, or both.
4.
Accept the default message that the system prints on the invoices and credit
memos, or change the message.
5.
If you want to print additional descriptions, select the check box (enter Y in
text mode); if not, clear the box (enter N in text mode).
6.
Select the output device. After you print the invoices, a totals log prints.
Accounts Receivable User’s Manual
History Reports
Print History Invoices
Print History Invoices Form
Accounts Receivable User’s Manual
9-25
Tax Audit Report
The Tax Audit Report shows amounts allocated for as many as five tax levels.
This information comes from the transactions posted to the ARHIxxx (Detail
History) file.
Produce this report before you delete records or purge history.
You cannot produce the report if you did not elect to keep detail history in the
Resource Manager Options and Interfaces function.
Select Tax Audit Report from the History Reports menu. The Tax Audit Report
screen appears.
1.
Enter the range of tax groups and customers you want to include in the
report, or leave the boxes blank to include all.
Accounts Receivable User’s Manual
9-27
History Reports
Tax Audit Report
2.
Enter the range of invoice dates you want to include in the report, or leave
the boxes blank to include all invoice dates.
3.
If you want to print invoice detail, select the check box (enter Y in text
mode); if not, clear the box (enter N in text mode).
4.
If you want to print zero-tax invoices, select the box (enter Y in text mode);
if not, clear the box (enter N in text mode).
5.
Select the output device. After you produce the report, the History Reports
menu appears.
Tax Audit Report
9-28
Accounts Receivable User’s Manual
Periodic Processing
10
Accounts Receivable User’s Manual
Sales Tax Report
Periodic Maintenance
Purge Customer Comments
Purge Selected Files
Accounts Receivable User’s Manual
10-3
10-5
10-9
10-11
10-1
Periodic Processing
Introduction
Use the Periodic Processing functions to update accounts, remove data from files,
and print the Sales Tax Report.
10-2
Accounts Receivable User’s Manual
Sales Tax Report
Print the Sales Tax Report at the end of each period for information about how
taxes have been allocated for the tax groups you set up. Print the Sales Tax
Report before you clear the sales tax in Resource Manager (see the Resource
Manager User’s Manual).
Select Sales Tax Report from the Periodic Processing menu. The Sales Tax
Report screen appears.
1.
Enter the range of tax authorities and tax locations you want to include in the
report, or leave the boxes blank to include all.
2.
Select the order in which you want to print the report.
3.
If you want to print sales, purchases, and zero balance tax classes and
locations, select the appropriate check box (or enter Y in text mode); if not,
clear the box (or enter N in text mode).
Accounts Receivable User’s Manual
10-3
Periodic Processing
Sales Tax Report
4.
Select the output device. After the report is produced, the Periodic
Processing menu appears.
Sales Tax Report
10-4
Accounts Receivable User’s Manual
Periodic Maintenance
Use the Periodic Maintenance function to perform maintenance tasks on several
files and prepare them for the next processing period, quarter, or year. (You
cannot do periodic maintenance until the ARPDxxx table is set up for the
company for which you are doing maintenance)
You should do periodic maintenance at the end of each period. If you do not,
transactions are posted to incorrect periods, and the amounts in the aging buckets
in the ARCUxxx file for balance forward customers are wrong.
When you perform period-end maintenance, the system performs several tasks:
•
Accumulates the balance totals in the ARCUxxx (Customer) file for balance
forward customers.
•
Ages the figures in the ARCUxxx file in the aging periods.
•
Updates the ARINxxx and ARCUxxx files with newly calculated finance
charges.
•
Clears the period-to-date accumulators and updates credit statuses in the
ARCUxxx file.
•
Clears the month-to-date gross sales amounts in the ARSRxxx (Sales Rep)
file.
•
Clears the month-to-date payments in the ARPYxxx (Payment Methods) file.
•
Posts finance charges to the GLJRxxx (Journal) file if Accounts Receivable
interfaces with General Ledger; you also have the option of clearing the
year-to-date finance charges in the ARCUxxx file.
•
Increments the period by 1 in the ARPDxxx table.
Accounts Receivable User’s Manual
10-5
Periodic Processing
Periodic Maintenance
When you perform quarter-end maintenance, the system performs these tasks:
•
•
Performs all the period-end tasks.
Clears the quarter-to-date accumulators in the ARPYxxx file and the
ARCUxxx file.
Note
Quarter-end maintenance does all the period-end maintenance tasks.
Therefore, you must perform only quarter-end maintenance at the quarter’s
end.
When you perform year-end maintenance, the system performs these tasks:
•
Performs all the period- and quarter-end tasks.
•
Updates the last-year accumulators and clears the year-to-date accumulators
in the ARPYxxx file and the ARCUxxx file.
•
Clears the year-to-date gross sales amounts in the ARSRxxx file.
•
Clears the high balance in the ARCUxxx file if you select the option on the
function screen.
•
Increments the current fiscal year by 1 in the ARPDxxx table.
Note
Year-end maintenance does all the period- and quarter-end maintenance
tasks. Therefore, you must perform only year-end maintenance at the end of
the year.
10-6
Accounts Receivable User’s Manual
Periodic Maintenance
Periodic Processing
If you have a multiuser system, make sure that no one else is using the Accounts
Receivable system while you are doing periodic maintenance. If you run this
function while someone else is using the ARCUxxx, ARSRxxx, ARINxxx,
ARRHxxx, or ARRExxx files, the files are not updated.
Select Periodic Maintenance from the Periodic Processing menu. The Periodic
Processing screen appears.
1.
The information in the Customer Analysis Report comes from the
ARCUxxx, ARINxxx, and ARSRxxx files. Since the Periodic Maintenance
function affects the data in the ARCUxxx file, print statements, the Customer
Analysis Report, and back up your data files before you do period-, quarter-,
or year-end maintenance.
If you have not printed the statements, printed the Customer Analysis
Report, and backed up your data files (see the Resource Manager User’s
Manual), clear the check box (enter N in text mode), return to the Periodic
Processing menu and do these tasks before proceeding. When you have
done these things, select the box (enter Y in text mode).
Accounts Receivable User’s Manual
10-7
Periodic Maintenance
Periodic Processing
2.
Select the type of periodic maintenance you want to perform.
3.
If you want to clear the year-to-date finance charges in the ARCUxxx file,
select the check box (enter Y in text mode); if not, clear the box (enter N in
text mode).
4.
If you want to clear the high balances in the ARCUxxx file, select the box
(enter Y in text mode); if not, clear the box (enter N in text mode).
You can clear customer high balances only during year-end maintenance.
5.
To begin processing, use the Proceed (OK ) command and select the output
device.
When processing completes and the log is produced, the Periodic
Processing menu appears.
Periodic Maintenance Error Log
10-8
Accounts Receivable User’s Manual
Purge Customer Comments
Use the Purge Customer Comments function to delete comments about a
customer whose comments you no longer need.
Note
Before you purge customer comments, produce the Customer Comments
List (see page 12-11) and make sure that the comments you intend to delete
are not needed later. Then file the list so that you have a record of the
comments.
Select Purge Customer Comments from the Periodic Processing menu. The
Purge Customer Comments screen appears.
Accounts Receivable User’s Manual
10-9
Purge Customer Comments
Periodic Processing
1.
Enter the range of customers whose comments you want to purge, or leave
the boxes blank to include all customers.
2.
Enter the range of dates that the comments you want to purge were recorded,
or leave the boxes blank to include all dates.
3.
Enter the range of references whose comments you want to purge, or leave
the boxes blank to include all references.
When you finish making your selections, use the Proceed (OK) command to
purge the comments and return to the Periodic Processing menu.
10-10
Accounts Receivable User’s Manual
Purge Selected Files
Use the Purge Selected Files function to clear the ARHDxxx (Additional
Descriptions), ARHIxxx (Detail History), ARHSxxx (Summary History), and
ARRExxx and ARRHxxx (Recurring Entries) files, and paid invoices from the
ARINxxx (Open Invoice) file.
Select Purge Selected Files from the Periodic Processing menu. The Purge
Selected Files screen appears.
1.
If you have backed up your data files, select the check box (enter Y in text
mode); if not, clear the box (enter N in text mode). If you have not backed up
your files, exit to the Periodic Processing menu and do so before
continuing.
2.
Enter the date of the recurring entries you want to purge. Recurring entries
dated before the date you enter are purged.
Accounts Receivable User’s Manual
10-11
Purge Selected Files
Periodic Processing
3.
Enter the date of the invoices for which you want to purge detail history.
Detail history for invoices dated before the date you enter are purged.
4.
Enter the period and year of the summary history you want to purge.
Summary history before the period and year you enter are purged.
5.
Enter the date of the paid invoices you want to purge. Paid invoices dated
before the date you enter are purged.
To purge the files and return to the Periodic Processing menu, use the
Proceed (OK) command.
10-12
Accounts Receivable User’s Manual
Accounts Receivable User’s Manual
File Maintenance
Customers
Ship-to Addresses
Sales Reps
Recurring Entries
Tables
Build Open Invoice File
Change Fields
Accounts Receivable User’s Manual
11
11-3
11-31
11-33
11-37
11-49
11-61
11-65
11-1
Customers
Use the Customers function to set up and maintain customer records. You can
set up a customer as an open-invoice or as a balance-forward account. For openinvoice accounts, you keep detail on invoices and apply payments to specific
invoices. For balance-forward accounts, you keep detail on invoices for the
current month and apply payments to the total balance.
After you set up the customer records, you must create initial (opening) balances
for them. The way you create initial balances depends on whether you have openinvoice or balance-forward accounts or both. See the Build Open Invoice File
function (see page 10-61) for information about how to enter initial balances.
Select Customers from the File Maintenance menu. The selection screen
appears.
Accounts Receivable User’s Manual
11-3
File Maintenance
Customers
.
Field
Description
Customer ID
Enter the ID of the customer with which you want to
work.
To delete the customer record, use the Delete (F3)
command.
Before you delete a customer record, perform
Periodic Maintenance (see page 9-5) and make sure
that the customer does not have a balance or open
invoices in the ARINxxx (Open Invoices) file.
When you delete a customer record, the customer’s
comments are not automatically deleted. You must
use the Purge Customer Comments function (see
page 9-9) to delete the comments.
Copy From?
If you entered a new customer ID, you can copy the
class, sales rep, territory, terms code, group code,
statement code, customer level, account type, and tax
information from an existing customer record. If you
frequently use a particular combination of tax codes,
distribution codes, and other information, set them up
with the customer name Default. When you enter a
new customer that uses the same information, you
can copy from the Default customer.
Enter the ID of the customer whose record you want
to copy.
Customer Name
11-4
If you entered an existing ID in the Customer ID
field, the customer’s name appears; if not, the field is
skipped.
Accounts Receivable User’s Manual
Customers
File Maintenance
Field
Description
Do You Want to Add/
Change
The Customers function has these subscreens:
•
•
•
•
•
•
•
•
General Information
Credit and Balance Information
Credit Card Information
History Information
Ship-To Addresses
Customer Comments
User-Defined Fields
Documents
If you want to enter or change information on a
subscreen, select the check box (enter Y in text
mode) and turn to the appropriate screen below; if
not, clear the box (enter N in text mode).
When you add customers, you must enter general
information.
Accounts Receivable User’s Manual
11-5
File Maintenance
Customers
General Information
If you elected to add or change general customer information, this screen
appears:
11-6
Field
Description
Cust ID
The customer ID from the header screen appears.
Name
Enter the customer’s name.
Address 1/Address 2/
Address 3
Enter the customer’s address.
City
Enter the customer’s city.
State
Enter the customer’s state or province.
Zip
Enter the customer’s zip or postal code (a five-digit
zip code or a nine-digit zip code with the hyphen).
Accounts Receivable User’s Manual
Customers
File Maintenance
Field
Description
Country
Enter the customer’s country code, or leave this field
blank. If you enter a country code, it must be among
the valid codes entered in Resource Manager (see the
Resource Manager User’s Manual).
Ship Zone
Enter the customer’s ship zone. This field is for
reference only.
Attention
Enter the name of the person or department you send
invoices or statements to. This name is printed on
invoices, statements, and mailing labels.
Phone/Fax
Enter the customer’s phone and fax numbers using
the mask that appears in the field. The phone mask
used is determined by the customer’s country code.
Contact
Enter the name of the person you usually contact
about billing questions or invoice payments.
Class
Enter the class the customer belongs to, or press
Enter to skip this field.
Sales Rep 1
Enter the ID of the sales rep who usually sells to the
customer, or press Enter to skip this field. If you
enter an existing ID, the name of the sales rep
appears.
Sales Rep 2
Enter the ID of any other sales rep who usually
shares in sales to the customer, or press Enter to skip
this field. If you enter an existing ID, the name of the
sales rep appears.
Territory
Enter the territory the customer is in, or press Enter
to skip this field.
Terms Code
Terms codes describe the terms of the customer’s
payment.
Accounts Receivable User’s Manual
11-7
File Maintenance
Customers
Field
Description
Enter the customer’s payment terms code. If you use
the Maintenance (F6) command, the Terms function
temporarily appears. After you enter the terms code,
the terms percentage, days, and net due days appear.
Group Code (0–9 or C)
The group code is used in the Recurring Entries
function to identify groups of customers that have the
same periodic billing requirements. Enter the code of
the group the customer belongs to. Enter C for a
credit card customer.
Stmt/Inv Code
Enter I if you want to send the customer only
invoices, S if you want to send only statements, B if
you want to send both invoices and statements, or N
if do not want to send either invoices or statements.
For a customer that pays cash, enter N.
Even if you do not send statements, you may want to
produce statements to keep a proper audit trail.
Cust Level
Enter the level assigned to the customer, or press
Enter to skip this field. (If Accounts Receivable
interfaces with Inventory, the Inquiry command is
available.)
Acct Type
In an open invoice account you track and apply
payments to specific invoices. In a balance forward
account you track and apply payments to a monthly
invoice total.
For an open invoice account, enter I. For a balance
forward account, enter B.
Distrib Code
11-8
Distribution codes describe how payment
information is to be distributed in accounts in
General Ledger.
Accounts Receivable User’s Manual
Customers
File Maintenance
Field
Description
Enter the GL distribution code for the customer. If
you use the Maintenance ( F6) command, the
Distribution Accounts function temporarily
appears. After you enter the distribution code, the
account information appears.
Partial Ship?
If the customer accepts partial shipments, select the
check box (enter Y in text mode); if not, clear the box
(enter N in text mode). If the customer does not
accept partial shipments and you ship an order for the
customer, a message warns you if you try to back
order items.
Tax Group
Enter the ID of the tax group where you want sales
tax for the customer to be assigned. If you use the
Maintenance (F6) command, the Tax Groups
function temporarily appears (see the Resource
Manager User’s Manual). After you enter the tax
group code, information about the tax group appears.
Taxable?
If the customer should be charged sales tax, select the
check box (enter Y in text mode); if not, clear the box
(enter N in text mode).
Exempt ID
If the customer is non-taxable, you should enter the
customer’s tax exemption ID for your tax records.
E-Mail Address
Enter the electronic mail address of your main
contact at the customer’s office, if available.
Web Site
Enter the Internet address of the customer’s web site
for reference purposes.
When you save the entries using the Proceed (OK ) command, the next screen
you selected appears. If you did not select another screen, the Customers
selection screen appears.
Accounts Receivable User’s Manual
11-9
File Maintenance
Customers
Credit and Balance Information
If you elected to add or change the customer’s credit information or balances, this
screen appears:
The Credit and Balance Information screen stores basic credit information and
summary amounts for each customer. This balance information is updated by the
ARINxxx file when you post. If you elected to use online aging in the Resource
Manager Options and Interfaces function, the ARINxxx file also updates the
balances each time you work with an open item customer. As a result, you can
enter the initial balances here and have the system update them as often as you
want.
If the customer is an open invoice customer whose individual invoices you want
to work with, setting initial values on this screen is not important.
11-10
Accounts Receivable User’s Manual
Customers
File Maintenance
Note
Unless you are setting up the system for the first time and will use the Build
Open Invoice File function, be wary of changing the values on the Credit
and Balance Information screen. Changes you make after setting up the
system affect the validity of your data. If you make changes, the system
warns you when you use the Periodic Processing function that the balances
in the ARINxxx file do not match those in the ARCUxxx file..
Field
Description
Pymt Method
Enter the customer’s usual method of payment. If
you use the Maintenance (F6) command, the
Payment Methods function temporarily appears.
After you enter the payment method code, the pay
type and description appears.
Fin Charge?
If you want to be able to apply a finance charge to
the customer, select the check box (enter Y in text
mode); if not, clear the box (enter N in text mode). If
this customer is not eligible for finance charges, and
you use the Calculate Finance Charges function,
Finance Code = 0 appears after the customer’s
information on the log.
Fin Charge Code
If you elected to assess finance charges on past due
balances for this customer, enter the finance charge
code associated with the proper terms, percentage
and minimums for the finance charge calculation. If
you use the Maintenance (F6) command, the
Finance Charge Codes function temporarily
appears.
Accounts Receivable User’s Manual
11-11
File Maintenance
Customers
Field
Description
Credit Limit
Enter the customer’s credit limit, accept the default
value, or enter 0 if the customer has no credit limit.
If the credit used on a transaction surpasses the
customer’s credit limit, a message states that the
customer’s credit limit has been reached.
Credit Hold?
If the customer is on credit hold, select the check
box (or enter Y in text mode); if not, clear the box
(or enter N in text mode). If you place the customer
on hold and then enter a sale paid for on credit, a
message states that the customer is on credit hold
and the system does not allow the transaction.
New Fin Chg
The FINCHxxx table determines how you assess
finance charges or penalty fees for late payments. As
you assess charges, post information, and receive
payments, the Calculate Finance Charges function
updates this value. Edit this value, if necessary.
Unpaid Fin Chg
If the customer has an unpaid finance charge, enter
it, or accept the default value. The value is updated
when you use the Periodic Maintenance function,
at which time new finance charges are added.
Current Due/Balance
The Accounts Receivable system uses aging buckets
to measure amounts owed based on how much time
has passed since the invoice date. Accounts
Receivable has five aging buckets: Current Due
(within 30 days of the invoice date), Balance 31–60
days (after the invoice date), Balance 61–90 days,
Balance 91+ days, and Retainage Aged.
Enter the balance that is due for each aging bucket
or press Enter to skip it. If you track only a
summary invoice, enter the value in the Current
Due field.
11-12
Accounts Receivable User’s Manual
Customers
File Maintenance
Field
Description
When you enter retainage invoices, the amount
appears in the Retainage Aged field. The amount in
this field is reduced after you post retainage
invoices. This field is not affected by online aging
but retainage invoices are included and aged in the
regular balance information.
Unapplied Credits
If you owe the customer money for returned items,
and the balances have not been applied to a specific
invoice or aging bucket, enter the credit amount as a
negative value here.
Retainage Posted
Retained amounts are added to this field when you
post invoices with amounts retained from any of the
Job Receivables functions.
Total Due
The new finance charge, unpaid finance charge,
current due, and balance are added, and the
unapplied credit is subtracted from that number. The
result appears as the overall amount the customer
owes you.
When you save the entries using the Proceed (OK ) command, the next screen
you selected appears. If you did not select another screen, the Customers
selection screen appears.
Accounts Receivable User’s Manual
11-13
File Maintenance
Customers
Credit Card Information
If you elected to add or change the customer’s credit cards, this screen appears:
The Credit Card Information screen stores multiple credit card numbers, names
and expiration dates for the cards commonly used by the customer for
prepayments and paying invoices on account. You can elect to verify credit card
numbers entered in the Transactions and Cash Receipts functions against this
file, or you can use the information on this screen for reference only.
If you want to restrict credit card numbers entered during transaction and cash
receipt entry to the card numbers in this list, select the Validate Credit Cards?
box (enter Y in text mode); if not, clear the box (enter N in text mode).
If you elect to validate card numbers and you enter a new credit card number in
the Transactions or Cash Receipts functions, an error message appears.
11-14
Accounts Receivable User’s Manual
Customers
File Maintenance
If you choose not validate card numbers, you may enter any card number, name,
and expiration date information in the Transactions or Cash Receipts functions.
•
To continue with the next customer maintenance screen you selected, press
N . If you did not select another screen, the Customers selection screen
appears.
•
To return to the previous customer maintenance screen you selected, press P.
If you did not select another screen, the Customers selection screen appears.
•
To change your entry in the Validate Credit Cards? field, press H.
•
To go to a specific credit card in the list, press G.
•
To add a card, press A. To edit a card, press Enter. In either case a Credit
Card Information window appears
Field
Description
Payment Method
Enter the payment method code associated with the
type of credit card you are adding for the customer.
The description of the payment method appears.
Card No
Enter the credit card number as it appears on the
card. Do not enter spaces between blocks of
numbers.
Name
Enter the card holder’s name as it appears on the
card.
Accounts Receivable User’s Manual
11-15
File Maintenance
Customers
Field
Description
Exp (Month and
Year)
Enter the month and then the year that the credit
card expires. If you attempt to enter a payment using
the card on a date after the expiration month and
year, a message appears to warn you that the card
has expired.
When you save the entries, you are returned to the credit card information scroll
region. When you save the entries using the Proceed (OK) command, the next
screen you selected appears. If you did not select another screen, the Customers
selection screen appears.
History Information
If you elected to add or change customer history, this screen appears:
11-16
Accounts Receivable User’s Manual
Customers
File Maintenance
The History Information screen stores sales and payment history for each
customer. When you post transactions, the ARTDxxx and ARTHxxx
(Transaction) files update the period-, quarter-, and year-to-date accumulators.
If you elected to keep summary history in the Resource Manager Options and
Interfaces function, this information is also sent to the ARHSxxx (Summary
History) file. If you keep summary history and you use the Periodic
Maintenance function, one of three things can happen:
•
When you do period-end maintenance, the period-to-date information is
transferred to the ARHSxxx file and the period-to-date amounts are cleared.
•
When you do quarter-end maintenance, the period- and quarter-to-date
information is transferred to the ARHSxxx file and those amounts are
cleared.
•
When you do year-end maintenance, the year-to-date amounts are
transferred to the Last Year column and the period-, quarter-, and year-todate amounts are transferred to the ARHSxxx file. Then those amounts are
cleared.
Field
Description
Sales
Period to Date/
Qtr to Date/
Year to Date/
Last Year
Enter the amount you made from sales to the
customer this period, this quarter, this year, and last
year.
Profit
Period to Date/
Qtr to Date/
Year to Date/
Last Year
Enter the amount of profit the customer accounted
for this period, this quarter, this year, and last year.
Accounts Receivable User’s Manual
11-17
File Maintenance
Customers
11-18
Field
Description
No/Inv
Period to Date/
Qtr to Date/
Year to Date/
Last Year (N5)
Enter the number of invoices you sent the customer
this period, this quarter, this year, and last year.
Fin Chg
Period to Date/
Qtr to Date/
Year to Date/
Last Year
Enter the finance charges applied to the customer’s
balance this period, this quarter, this year, and last
year. When you do periodic maintenance, the accrued
finance charges update these fields.
Pymts
Period to Date/
Qtr to Date/
Year to Date/
Last Year
Enter the amount the customer paid you this period,
this quarter, this year, and last year.
Disc
Period to Date/
Qtr to Date/
Year to Date/
Last Year
Enter the discounts applied to the customer’s balance
this period, this quarter, this year, and last year.
No/Pymts
Period to Date/
Qtr to Date/
Year to Date/
Last Year
Enter the number of payments the customer sent you
this period, this quarter, this year, and last year.
Tot Days/Pay
Period to Date/
Qtr to Date/
Year to Date/
Last Year
Enter the total number of days the customer took to
pay all invoices this period, this quarter, this year,
and last year.
Accounts Receivable User’s Manual
Customers
File Maintenance
Field
Description
Avg Days/Pay
Period to Date/
Qtr to Date/
Year to Date/
Last Year
Calculation of the average number of days the
customer took to pay all invoices this period, this
quarter, and this year is based on your entries in the
Tot Days Pay and No Pmts fields.
First Sale Date
Enter the date of the first sale to the customer.
Last Sale Date
Enter the date of the last sale to the customer. This
field is updated when you post transactions.
Last Sale Amount
Enter the amount of the last sale to the customer. This
field is updated when you post transactions.
Last Inv No
Enter the number of the last invoice you received
from the customer. This field is updated when you
post transactions.
First Payment Date
The date of the customer’s first payment appears.
Last Payment Date
Enter the date of the last payment the customer made.
This field is updated when you post transactions.
Last Payment Amount
Enter the amount of the last payment the customer
made. This field is updated when you post
transactions.
Last Payment Number
Enter the number of the last check the customer
issued to you. This field is updated when you post
transactions. If the customer’s last payment was with
cash or by credit card, CASH appears.
Customer High
Balance
Enter the highest outstanding balance the customer
has had. This field is updated when you post
invoices. You can clear the customer’s high balance
when you do year-end maintenance.
Accounts Receivable User’s Manual
11-19
File Maintenance
Customers
Field
Description
Credit Status
The system keeps a running status of the customer’s
credit history and updates the status when you do
periodic maintenance. Each character in the field
represents 1 of 12 periods: the current period (the
first character) and the previous 11.
For each period, one of these values appears:
0
1
2
3
4
All invoices (if any) were paid within 30 days
An invoice was 31 to 60 days overdue
An invoice was 61 to 90 days overdue
An invoice was 91 to 120 days overdue
An invoice was more than 120 days overdue
When you save the entries using the Proceed (OK ) command, the next screen
you selected appears. If you did not select another screen, the Customers
selection screen appears.
11-20
Accounts Receivable User’s Manual
Customers
File Maintenance
Ship-To Addresses
If you elected to add or change ship-to addresses, the Ship-To Addresses screen
appears.
The Ship-To Addresses screen displays all addresses associated with a customer
ID, so you do not have to look up each address separately.
•
To set a particular address as the default Ship-To Address through Accounts
Receivable, press D. At the confirmation message, use the Proceed (OK)
command to accept the address as the default.
•
To return to the previous customer maintenance screen you selected, press P.
If you did not select another screen, the Customers selection screen appears.
•
To continue with the next customer maintenance screen you selected, press
N . If you did not select another screen, the Customers selection screen
appears.
Accounts Receivable User’s Manual
11-21
File Maintenance
Customers
•
To add an address, press A. To edit a card, press Enter. In either case a ShipTo Address dialog box appears.
Field
Description
Ship To
Enter the ID for the ship-to address.
Name/Address 1–3/ Enter the customer’s name and address, city, state,
zip or postal code, and country code, or accept the
City/State/Zip
default information if you are editing an address.
Code/Country
You can use the Inquiry (F2) command to look up
and select states and country codes from the lists
that appear.
11-22
Ship Via
Enter the method you usually use to ship items to the
customer—for example, the name of a shipping
service.
Ship Zone
Enter the customer’s ship zone. This field is for
reference only.
Accounts Receivable User’s Manual
Customers
File Maintenance
Field
Description
Tax Group
Accept the default tax group, or enter the tax group
that applies to sales shipped to this address. When
you enter a tax group, the description appears. If you
enter a different tax group, it overrides the tax group
you set up for the customer in the Customers
function.
When you save the entries using the Proceed (OK ) command, the next screen
you selected appears. If you did not select another screen, the Customers
selection screen appears.
Accounts Receivable User’s Manual
11-23
File Maintenance
Customers
Customer Comments
If you elected to add or change customer comments, the Customer Comments
screen appears.
To work with comments for only the default reference ID, press Enter. To work
with comments for a different reference ID, enter that ID. To work with all
comments, clear this field and press Enter.
Enter the date of the most recent comment you want to work with, or press Enter
to work with all comments.
The date, reference, sequence number, and text that appear for each comment
depend on the reference ID and end date you enter. The comments are arranged
by date—the most recent date first—then by reference ID and then by sequence
number.
11-24
Accounts Receivable User’s Manual
Customers
File Maintenance
•
To work with comments associated with a different reference ID, press R.
Then enter the reference ID and end date.
•
To work with comments with a different end date, press D and enter the new
end date.
•
To return to the previous customer maintenance screen you selected, press P.
If you did not select another screen, the Customers selection screen appears.
•
To continue with the next customer maintenance screen you selected, press
N . If you did not select another screen, the Customers selection screen
appears.
•
To go to a comment for a specific date, press G and enter the date.
•
To add a comment, press A. To edit a comment, press Enter. In either case a
comment entry window appears.
Field
Description
Date
If you have not added or edited any other comments,
the system date appears; otherwise, the date of the
last comment you worked with appears. Accept the
default date, or enter a different date.
Reference
Enter the reference ID of the comment you want to
add or edit.
Comment
Enter or edit the comment, and press Enter to save
the comment record.
Accounts Receivable User’s Manual
11-25
File Maintenance
Customers
When you save the entries using the Proceed (OK ) command, the next screen
you selected appears. If you did not select another screen, the Customers
selection screen appears.
User-Defined Fields
If you elected to add or change user-defined field information, the User-Defined
Fields screen appears.
Enter the appropriate information for each user-defined field you set up using the
Resource Manager User-Defined Fields Setup function. See the Resource
Manager User’s Guide for more information on setting up user-defined fields.
When you save the entries using the Proceed (OK ) command, the next screen
you selected appears. If you did not select another screen, the Customer selection
screen appears.
11-26
Accounts Receivable User’s Manual
Customers
File Maintenance
Documents
If you elected to add or change documents attached to a customer record, the
Documents screen appears. There are many types of documents you can attach to
customer records, for example, contracts, sales notes, pricing documents,
brochures, and so on.
Note: You must set up file types in Resource Manager before you can attach
documents. See the Resource Manager User’s Guide for more information.
•
Press P to view the previous screen in File Maintenance.
•
Press N to view the next screen in File Maintenance.
•
Press G to move directly to a different document. Then enter the document
name or exit to the Documents screen. (This command appears only if you
have more than one screen of attached documents.)
Accounts Receivable User’s Manual
11-27
File Maintenance
Customers
Attach a Document
To attach a document to a customer record, follow these steps:
1.
Click Append or enter A to attach a document. The Append Documents
dialog box appears.
2.
Enter the document file name and extension, the full file path, and a
description of the file you want to attach to the master file record.
You can use the DocumentShare directory (as specified in the Resource
Manager Directories function) to simplify entering document information.
To use this directory, make sure all users have access to the DocumentShare
directory, then store document attachments in that directory. When you enter
document information in the Append Documents screen, enter (DOC) in the
Path field (remember to include the parenthesis).
When you use this convention with the Open command to open an
attachment, OSAS automatically replaces the (DOC) variable with the
appropriate path and opens the attachment from that directory.
If you do not store the file in the DocumentShare directory, do not use the
(DOC) variable. Instead, enter the full file path in the Path field. OSAS will
not be able to locate the file to open it if you enter an incorrect path.
3.
11-28
Use the Proceed (OK) command to attach the file.
Accounts Receivable User’s Manual
File Maintenance
Customers
Edit Attached Document File Information
To edit file information about attached documents, select the document and then
press Enter. Edit the file information in the Edit Documents dialog box, then use
the Proceed (OK) command to save your changes.
To view the file information about attached documents, select the document and
then select View (or press V in text mode). The View Documents dialog box
appears. Press any key to exit.
To edit the document itself, select Open document (or press O in text mode) to
launch the appropriate application and open the file.
Note: If you have problems opening a document, press Enter to change the
direction of the slashes used in the attachment’s directory path. If the directory
path contains backward slashes (\), change them to forward slashes (/) and vice
versa.
Delete Attached Documents
To remove a document attachment, select the attached document you want to
delete and press F3. When the confirmation message appears, press Y to delete
the attachment or N to return to the Documents screen. Keep in mind that this
procedure only removes the attachment from the master file record; it does not
delete the file from its storage location.
After you are finished working with the Documents screen, select Next Screen
(or press N in text mode) to return to the Customers selection screen. Enter
another customer ID, or use the Exit (F7) command again to return to the File
Maintenance menu.
Accounts Receivable User’s Manual
11-29
Ship-to Addresses
Use the Ship-to Addresses function to enter, change, or delete shipping
addresses and assign them to customers. You can enter 999,999 shipping
addresses for each customer.
Select Ship-to Addresses from the File Maintenance menu. The Ship-to
Addresses screen appears.
Field
Description
Cust ID
Enter the ID of the customer you want to assign
shipping addresses to. The customer’s name appears.
Ship To
Enter the ID for the ship-to address.
Accounts Receivable User’s Manual
11-31
File Maintenance
Ship-to Addresses
Field
Description
Name/Address 1–3/
City/State/Zip Code/
Country
Enter the customer’s name and address, city, state,
zip or postal code, and country code, or accept the
default information. You can use the Inquiry (F2)
command to look up and select states and country
codes from the lists that appear.
Ship Via
Enter the method you usually use to ship items to the
customer—for example, the name of a shipping
service.
Ship Zone
Enter the customer’s ship zone. This field is for
reference only.
Tax Group
Accept the default tax group, or enter the tax group
that applies to sales shipped to this address. When
you enter a tax group, the description appears. If you
enter a different tax group, it overrides the tax group
you set up for the customer in the Customers
function.
After you save the ship-to information, enter information about a different
shipping address, or use the Exit (F7) command to return to the File
Maintenance menu.
11-32
Accounts Receivable User’s Manual
Sales Reps
Use the Sales Reps function to set up and maintain records for sales reps whose
sales you want to track. You can pay a sales rep on commission only if you set up
sales rep records and elected to keep sales history in the Resource Manager
Options and Interfaces function.
You can pay commissions on any combination of line items, tax, freight, and
miscellaneous charges; and you can base commissions on net sales or gross
profit. Sales reps can receive their commissions when the invoice is sent or paid.
After you enter the sales reps, produce the Sales Reps List (see page 12-5) to
check for mistakes and to use as a reference when you enter accounts receivable
transactions.
Select Sales Reps from the File Maintenance menu. The Sales Rep screen
appears.
Accounts Receivable User’s Manual
11-33
File Maintenance
Sales Reps
1.
Enter the ID of the sales rep.
2.
Enter personal information (name, address, phone numbers, and so on).
3.
Enter an employee ID for the sales rep for your reference. You might want
this reference to the Payroll system if the sales rep is an employee. However,
even though Accounts Receivable does not interface with Payroll, you can
use the Inquiry (F2) command to look up an employee ID if Payroll is
installed for this company.
4.
Enter the run code you want to assign to the sales rep, or press Enter to skip
this field. This code is a digit you can assign to the sales rep for reference
only; the system does not use it in any calculations and uses it for sorting
only if you make modifications to the system.
5.
Enter the percentage of the sale you want the sales rep’s commission to be.
6.
Select the amount the commissions are to be paid on: S for the net sales
amount, G for the gross profit of the sale, or N for neither amount.
7.
Enter B if the commissions are to be paid when the sale is entered or P if
they are to be paid when the sale is paid.
8.
For each type of charge, select the check box (or enter Y in text mode) if the
sales rep’s commission is to be based on that type of charge, or clear the box
(or enter N in text mode) if it is not.
9.
Enter the sales rep’s month- and year-to-date gross sales. The figures are
updated when you post the sales rep’s transactions.
10. Enter the date of the rep’s last sale. Post transactions updates this field.
11-34
Accounts Receivable User’s Manual
Sales Reps
File Maintenance
Note
The ARHIxxx (Detail History) file provides information for the sales history
fields and the Commissions Report. If you change the information in these
fields, the ARHIxxx file is not updated and the data in the Commissions
Report does not match the data in the ARSRxxx (Sales Rep) file.
11. Enter the sales rep’s electronic mail address for reference purposes.
After you use the Proceed (OK) command to save the information that you
entered about the sales rep, enter information about another sales rep, or use
the Exit (F7) command to return to the File Maintenance menu.
Accounts Receivable User’s Manual
11-35
Recurring Entries
Use the Recurring Entries function to set up noninventory invoices that you
send to customers regularly. You can set up Recurring Entries for individual
customers and for groups of customers.
After you set up the Recurring Entries, use the Copy Recurring Entries function
(page 5-31) to copy them to the ARTDxxx and ARTHxxx (Transaction) files
when they come due.
To save time, you can copy a group of Recurring Entries to the ARTDxxx and
ARTHxxx files instead of entering each transaction each time you send the bill.
By assigning each entry a run code, you can process these groups of entries on
different schedules—monthly, bimonthly, or whatever fits your company’s needs.
Select Recurring Entries from the File Maintenance menu. A menu appears.
Accounts Receivable User’s Manual
11-37
File Maintenance
Recurring Entries
The Recurring Entries Transaction Type menu offers two choices: Recurring
Entries and Edit Recurring Entries. The only difference between the two
functions is the fact that when you use Recurring Entries, you create data; when
you Edit Recurring Entries, you work with existing data.
Select the action you want to perform and use the Proceed (OK) command to
continue.
Recurring Entries Header
After you make your selection from the Recurring Entries menu, the header
screen appears.
11-38
Field
Description
Recurring No
Enter a number that identifies the recurring entry.
Sold to
If the recurring entry is for one customer, enter the ID
of the customer. The customer’s name and address
appear.
Accounts Receivable User’s Manual
Recurring Entries
File Maintenance
Field
Description
If the recurring entry is for a group of customers,
enter an asterisk (*) and the customers’ group code.
Sales Rep 1/Percent
If you entered a customer ID in the Sold to field, the
ID of the sales rep who usually sells to the customer
appears. Accept it, or enter a different ID.
Then enter the percentage of the sale you want to
base the sales rep’s commission on, or press Enter
for a commission of 100 percent.
Sales Rep 2/Percent
If you entered a customer ID in the Sold to field, a
second sales rep ID who usually sells to the customer
appears. Accept it, or enter a different ID.
If you entered an ID, enter the percentage of the sale
you want to base the sales rep’s commission on. The
sum of the two percentages you entered cannot
exceed 100.
Cust Level
Accept the default customer level, or enter a different
customer level.
Terms Code
The terms code describes the terms of the payment.
Accept the default terms code, or enter a different
code. If you use the Maintenance (F6) command, the
Terms function temporarily appears. After you enter
the terms code, the description for the code appears.
Ord No
To identify the transaction, enter the sales order
number or the customer’s purchase order number. To
skip this field, press Enter.
Ord Date
If you entered an order number, enter the order date.
Accounts Receivable User’s Manual
11-39
File Maintenance
Recurring Entries
Field
Description
Run Cd
You copy Recurring Entries by run code to the
ARTDxxx and ARTHxxx files. Use the same run code
for entries that you copy on the same basis. For
example, you could use 01 for entries you copy on
the first day of each month, 15 for entries you copy
on the fifteenth day of each month, and so on.
Enter the run code to which the recurring entry
belongs.
Cutoff Date
Enter the date after which you no longer want the
entry to be copied to the ARTDxxx and ARTHxxx
files, or press Enter to skip this field.
Ship to
Enter the shipping address code for one customer or
for a group of customers. If you use the Maintenance
(F6) command, the Ship-to Addresses function
temporarily appears.
If you enter a code for one customer and the code is
in the ARSAxxx (Ship-to Address) file, the address
appears.
If you enter a code for a group of customers, the
associated shipping address is used for the customers
in the group with the same shipping address code
when you copy the entry. If the code is not valid for a
customer, no address is used when you copy the
entry.
11-40
Ship Method
Enter a notation for the shipping method. If you use
the Maintenance (F6) command, the Ship-to
Addresses function temporarily appears.
Ship Via
If you entered a shipping address code that is on file,
the means by which the method is shipped appears.
Accept it, or enter a different shipping method.
Accounts Receivable User’s Manual
Recurring Entries
File Maintenance
Field
Description
Pick Slip No
Enter the picking slip number for the entry.
Taxable
For each entry, select the check box (enter Y in text
mode) if the location is taxable, or clear the box
(enter N in text mode) if it is not.
Tax Group
Enter the tax group for the customer. If you use the
Maintenance (F6) command, the Tax Groups
function temporarily appears (see the Resource
Manager User’s Manual). After you enter the tax
group, the description appears.
Description
The description of the tax group appears.
If you are entering a new recurring entry, the Append Line screen (page 11-42)
appears after you use the Proceed (OK) command to approve the header
information. If you are editing an existing entry, the Recurring Entries screen and
scroll region (page 11-44) appears.
Accounts Receivable User’s Manual
11-41
File Maintenance
Recurring Entries
Append Line
The Append Line dialog box can appear for one of three reasons:
•
You are creating a recurring entry and you finish entering header
information.
•
You use the Append command on the command bar to add an item to the
end of the list.
•
You use the Edit command on the command bar to edit an item in the list. If
you use this command, the line-item entry screen is titled Edit Line instead
of Append Line.
Field
Description
Desc
Enter a description of the recurring entry.
Additional text
If you elected in the Resource Manager Options
and Interfaces function to enter additional
descriptive text about line items when you enter
invoices, the Additional Description Lines window
appears when you press Enter in the Desc field. You
can enter 10 lines of additional text.
When you are finished entering text, press Enter at a
blank line. The text is saved and you are returned to
the line-item entry screen.
11-42
Accounts Receivable User’s Manual
Recurring Entries
File Maintenance
Field
Description
Sls Cat
The sales category usually refers to an inventory
item. Enter a category, or press Enter to skip this
field.
Tax Class
Accept the default value, or enter a different sales
tax class. The effective tax rate for this class appears
when you enter the price.
GL Code
The GL code identifies the pairs of general ledger
sales and cost-of-goods-sold (COGS) accounts to
use for a line of an entry. (The codes are set up in the
GL Codes function.)
If you entered a GL code in the DFxxxx table, the
code appears.
Sales Acct/COGS
Acct/Inv Acct
If you entered a GL code, the sales and COGS
accounts appear. The inventory account appears
from the ARGLxxx table. Accept each default
account number. (The Inquiry command is available
if Accounts Receivable interfaces with General
Ledger.)
Ordered
Enter the number of units that were sold.
Units
Enter the type of unit the item is sold by—for
example, EACH if it is sold individually.
Price/Cost
Enter the item’s unit price and unit cost.
The entry’s total price (the quantity ordered times
the unit price) and total cost (the quantity ordered
times the unit cost) are displayed.
After you save the line-item entry information, enter another line item, or exit to
the Recurring Entries screen.
Accounts Receivable User’s Manual
11-43
File Maintenance
Recurring Entries
When you save the first line item, the totals are updated and your entries are
saved. You cannot use the Abandon (Cancel) command to cancel the entry. To
delete the entire recurring entry, use the Delete ( F3) command on the header
screen.
Recurring Entries Scroll Region
When you exit from the line-item entry screen, the Recurring Entries scroll
region screen appears.
The Recurring Entries screen is divided into these sections:
11-44
•
Information from the header screen is summarized at the top of the screen.
•
The line-item entry area or the line-item scroll region is in the middle of the
screen.
•
The entry totals appear at the bottom of the screen.
Accounts Receivable User’s Manual
Recurring Entries
File Maintenance
Enter one of these commands to perform the associated action.
Command
Action
Enter
To edit a line item, move the prompt to the line item
and press Enter.
Append
Press A to append a line item to an entry. Then see
“Append Line” on page 11-42.
Header
Press H to return to the header screen. When you
return to the header screen, you do not lose the lineitem and total entries because you already saved
them.
Totals
Press T to enter or edit totals associated with the
recurring entry. The Totals Information window
appears (see below). The total amount of the entry
(the subtotal plus the sales tax, freight, and
miscellaneous charges) and the total amount of the
invoice (the subtotal plus the sales tax, freight, and
miscellaneous charges) appear.
View
Press V to look at an expanded summary of the line
item, move the prompt to the line item. Additional
information about the line item such as the general
ledger account and description appears on the View
Line screen. Press any key to return to the Recurring
Entries screen.
Goto
Press G to go to a particular line item. Then enter
the line number. (This command appears only if
there is more than one screen of line items in the
scroll region.)
Next trans
Press N to enter a different recurring entry. The
Transaction Type menu appears. Enter a different
recurring entry, or use the Exit (F7) command to
return to the File Maintenance menu.
Accounts Receivable User’s Manual
11-45
File Maintenance
Recurring Entries
Totals Information
This window appears when you use the Totals command from the Recurring
Entries scroll region:
11-46
Field
Description
Subtotal
The subtotal of the line items appear.
Freight
Enter the shipping charges.
Tax Class
If you indicated that freight is taxable in the Resource
Manager Tax Groups function, the freight’s tax class
appears. Accept the default tax class, or enter the tax
class to which the shipping charges should be
applied.
Miscellaneous Chgs
Enter the miscellaneous charges (for example,
handling). Then enter the tax class to which the
miscellaneous charges should be applied.
Accounts Receivable User’s Manual
Recurring Entries
File Maintenance
Field
Description
Tax Class
If you indicated that freight is taxable in the Resource
Manager Tax Groups function, the freight’s tax class
appears. Accept the default tax class, or enter the tax
class to which the shipping charges should be
applied.
Sales Tax
Enter the sales tax. If you enter a sales tax that is
different from the calculated amount (which is based
on the tax class and tax group), a window appears:
Field
Description
Tax Location
The tax location for the recurring entry appears.
Tax Amount
The tax amount for each location appears.
Tax Adjustment
Accept the default sales tax adjustment, or enter a
different amount.
Tax Loc
Enter the tax location for the adjustment.
Class
Accept the default tax class, or enter a different tax
class.
Accounts Receivable User’s Manual
11-47
Recurring Entries
File Maintenance
After you enter the tax class, the cursor returns to the Totals Information dialog
box.
When you are done entering the information on the totals screen, use the
Proceed (OK ) command to save your entries and return to the Recurring Entries
Scroll Region screen.
11-48
Accounts Receivable User’s Manual
Tables
Use the Tables function to set up and maintain the Accounts Receivable tables.
Tables store information about the system, data, options, and default settings for
other applications.
The following tables are related to Accounts Receivable:
•
•
•
•
•
•
•
•
•
•
ARGLxxx
ARPDxxx
DFxxxx
DUNxxx
FORMxxx
QExxxx
QH1xxxx
QH2xxxx
QIxxxx
QMxxxx
For more information about each of these tables, see their individual descriptions
in this section.
Note
The OPTxxx (Options) tables store options and interfaces settings. Maintain
the information stored in this table through Resource Manager functions, not
through the table itself.
Accounts Receivable User’s Manual
11-49
File Maintenance
Tables
Tables
Select Tables from the File Maintenance menu. A blank tables screen appears.
1.
To add or change a table, enter the table ID. To set up a company-specific
table, enter the table ID plus the one- to three-character company ID. To set
up a terminal-specific table, enter the table ID plus the four-character
terminal ID. To delete the table, use the Delete (F3) command.
2.
If you entered a new table ID, the Copy From field appears. To copy a
company- or terminal-specific table, enter the table ID plus the company ID
and terminal ID. A set of tables comes with the sample company, Builders’
Supply. You can copy the sample tables for a company and then change the
appropriate fields. To copy a sample table, enter the table ID.
3.
Accept the default table description, or enter a different description.
The number of columns, their length, and the type of data you can enter—
alphanumeric (A), numeric with 2 decimals (N), numeric with 3 decimals (3), or
numeric with 4 decimals (4)—appear.
11-50
Accounts Receivable User’s Manual
File Maintenance
Tables
AIARy Table
The AIAR table (where y is the flexible code for the amount retained) stores up
to 18 AIA percentages and limits for calculating retainage.
You must manually set up this table. There is a sample table in Sample Data to
use as a guide, if necessary. A sample AIARy table is shown below.
A Flexible % Code field appears on both the Set Up Schedule and Application
Entry screens in AIA Invoicing. For each percentage of the amount retained,
enter the maximum billing amount to which that percentage applies.
For example, assume you are billing a customer $10,000 for a job, and you enter
A for the Flexible Code % for calculating retainage. The retainage on the first
$5,000 is 15%, which is $750. The retainage on the next $5,000 is 10%, which is
$500. The total retainage for the $10,000 invoice is $1,250.
Accounts Receivable User’s Manual
11-51
File Maintenance
Tables
ARGLxxx Table
The ARGLxxx table stores the general ledger accounts that accounts receivable
cash receipts, discounts, inventory, and finance charges are posted to in the
GLJRxxx (Journal) file.
When you enter the table ID, the rest of the ARGLxxx table appears.
1.
Accounts Receivable posts to five accounts: cash receipts, discounts,
inventory, finance charges, and AR retention. Accept each account shown, or
change the description of each account.
The cash receipts account is used only if Accounts Receivable does not
interface with Bank Reconciliation and if the payment method record is
missing. The inventory account is used for non-inventory items and when
Accounts Receivable is not interfaced with Inventory.
11-52
Accounts Receivable User’s Manual
Tables
File Maintenance
The AR Retention account is debited for the amount retained when you post
AIA invoices, job invoices, or cost plus invoices. When retainage invoices
are posted, this account is credited.
2.
For each account description (except AR Retainage), accept the default
general ledger account number or enter a different account number. Enter the
AR Retainage account on the fifth row of the table.
Do not delete lines or rearrange field names. The system looks for the
defaults by their position in the table. It treats the account number on the first
line as the cash receipts account number, the account number on the second
line as the discounts account number, and so forth.
Accounts Receivable User’s Manual
11-53
File Maintenance
Tables
ARPDxxx Table
The ARPDxxx tables stores a company’s current general ledger period, fiscal
year, and number of periods per year for posting and periodic history.
When you enter the table ID, the rest of the ARPDxxx table appears.
Enter the number of the current period in the PERIOD (1.00-13.00) box. The
period increments when you do periodic maintenance.
Enter the current fiscal year in the FISCAL YEAR box. The fiscal year increments
when you do year-end maintenance.
Enter the number of accounting periods your company uses in a year (1.0013.00) in the # PERIODS/YR box.
11-54
Accounts Receivable User’s Manual
File Maintenance
Tables
DFxxxx Table
The DFxxxx table stores the default batch ID, distribution code, GL code, and
cash receipt invoice number that appear when you enter transactions.
When you enter the table ID, the rest of the DFxxxx table appears.
The fields you can enter defaults for appear. Accept the default fields, or change
them.
Do not delete lines or rearrange field names. The system looks for the defaults by
their position in the table; it treats the number on the first line as the batch ID, the
value on the second line as the distribution code, and so forth.
For each field, enter the value that you want to appear when you enter invoices,
miscellaneous credits, and cash receipts.
Accounts Receivable User’s Manual
11-55
File Maintenance
Tables
DUNxxx Table
The DUNxxx table stores dunning messages for statements in the Statements
function. These messages appear at the bottom of a statement. You can change
the message on that function screen or in the DUNxxx table.
When you enter a table ID, the rest of the DUNxxx table appears.
Enter the message for statements less than 30 days past due, from 31 to 60 days
past due, from 61 to 90 days past due, and from 91 days or more past due,
respectively. The system assigns the message on the first line to statements less
than 30 days past due, the message on the second line to statements from 31 to 60
days past due, and so on.
11-56
Accounts Receivable User’s Manual
File Maintenance
Tables
FORMxxx Table
The FORMxxx table stores the message you want to print at the bottom of each
invoice.
When you enter the table ID, the rest of the FORMxxx table appears.
The number that appears before the message is the next invoice number that is
printed when you print invoices.
To change the default message, maintain the same spacing. If you want to change
the message when you print invoices, enter the message in the Print Invoices
function.
Accounts Receivable User’s Manual
11-57
File Maintenance
Tables
MARKUx Table
The MARKUx table can store seven markup codes that you use in the Cost Plus
Invoicing function. Each markup code details the markup percentages for five
cost types: labor, material, equipment, subcontract, and others.
You must manually set up this table. There is a sample table in Sample Data to
use as a guide, if necessary. A sample MARKUx table is shown below.
11-58
Accounts Receivable User’s Manual
File Maintenance
Tables
QExxxx, QHxxxx, QIxxxx, and QMxxxx Tables
The QExxxx table stores the quick-entry stops used by the Transactions
function when you edit transactions and the QHxxxx tables when you enter
header information. Two tables store this information: QH1xxxx stores quickentry stops on the left half of the invoice header screen, and QH2xxxx stores
quick-entry stops for the right half of the header screen.
The QIxxxx table stores quick-entry stops used by the Transactions function
when you enter invoices and the QMxxxx table when you enter miscellaneous
credits.
When you enter the table ID, the rest of the table appears. A QExxxx table is
shown below:
The fields that appear on the line-item entry screen when you add or change
transactions appear. Accept the default fields, or change them.
Accounts Receivable User’s Manual
11-59
File Maintenance
Tables
Do not delete lines or rearrange the descriptions. The system looks for these
accounts by their position in the table; it applies the information on the first line
to the Description field, the information on the second line to the Additional
Descriptions fields, and so forth.
If you want the cursor to stop at a field only when you press Enter, enter E. If you
want the cursor to stop at a field when you press Tab or Enter, enter T. If you do
not want the cursor to stop at a field, leave the field blank.
.
Printing Tables
After you have set up or changed a table, use the List (F8) command to produce a
copy of it. You can also use the Tables List function (see page 12-23) to produce
a list of all Accounts Receivable tables.
11-60
Accounts Receivable User’s Manual
Build Open Invoice File
Before you use Accounts Receivable, you must build the ARINxxx (Open
Invoice) file, which stores invoices, credit memos, cash receipts, and finance
charges. The method you use to build the ARINxxx file depends on whether you
want detailed or summary invoice information.
Note
Before you enter beginning balances, if you elected to use online aging in the
Resource Manager Options and Interfaces function, select NO for the Use
Online Aging option in that function.
If all your customers have open invoice accounts and you want individual
invoices for them, use the Invoices option in the Transactions function (see on
page 5-3) to build the ARINxxx file.
If you have some balance forward customers, use the Build Open Invoice File
function to quickly enter their open invoice balances. You should also use this
function if you have open invoice customers you want only one summary invoice
for in each aging period.
For open invoice customers, the Build Open Invoice File function creates an
open invoice for each balance you entered in the ARCUxxx (Customer) file.
Because these summary invoices lack the detail they have when you enter
invoices manually, you must bill them the first month for the total balance due.
This situation is corrected when you begin entering invoices as part of your daily
processing.
Accounts Receivable User’s Manual
11-61
Build Open Invoice File
File Maintenance
Note
You must enter balances for the customers before you run the Build Open
Invoice File function. You must run this function before you post invoices.
You can run this function only once.
Aging classifies receivables by the amount of time that has passed since the date
of the sale. Accounts Receivable has five aging periods:
•
•
•
•
•
The current period
31 to 60 days old
61 to 90 days old
91 to 120 days old
More than 120 days old
When you run the Build Open Invoice File function for open invoice customers,
you create an invoice for each aging period, and the system assigns an invoice
date for the current period—the date you enter in the Current Date field.
11-62
Accounts Receivable User’s Manual
Build Open Invoice File
File Maintenance
Select Build Open Invoice File from the File Maintenance menu. The Build
Open Invoice File screen appears.
1.
Enter the current date from which invoices will be aged.
2.
Use the Proceed (OK) command to build the ARINxxx file. When
processing is complete, you are returned to the File Maintenance menu.
3.
Print the Aged Trial Balance report (see on page 7-7) to make sure that the
accounts are aged correctly. Then if you want information about individual
invoices for some open invoice customers, use the Invoices option in the
Transactions function (see on page 5-3) to enter the invoices manually.
4.
When the ARINxxx file is correct, post the invoices.
Accounts Receivable User’s Manual
11-63
Change Fields
Use the Change Fields function on the File Maintenance menu to change any
code used from one value to another. The Change Fields function can change
codes within this application, as well as in other applications. To produce a list of
fields changed, use the Print Log feature. A sample of the log appears on page
10-68.
When you select Change Fields from the File Maintenance menu, the Change
Fields screen appears:
The screen contains three sections. The top Header, section, which includes the
Field ID and Print Log? fields, is where you select the code or ID to change, and
whether to produce the printed log. The lower left Values section is where you
build a list of the values to change by specifying the old value and the new value.
The lower right Files section contains a list of the files that are changed in the
applications you installed on your system.
Accounts Receivable User’s Manual
11-65
File Maintenance
Change Fields
Header
1.
Enter the Field ID you want to change. You can change only Accounts
Payable fields from the Accounts Payable menu. To change IDs and codes
from other applications, run the Change Fields function in the respective
application.
2.
Select the Print Log? check box to print a list of the files that are changed.
3.
After you enter the Field ID and indicate your preference for printing the log,
use the Proceed (OK) command to begin entering field values to change.
Values
4.
To edit or add original/new values in this section, select a line and press
Enter to edit the current line. The Edit Original/New Values dialog box
appears. Press A to append another value to the list. The Add Original/New
Values dialog box appears.
11-66
5.
Enter the current field value you want to change in the Original Value box.
6.
Enter the new value that you want to use for this field in the New Value box.
7.
Select a command.
•
Press Tab to switch to the File Description section to specify which
files change during processing.
•
Press Enter to edit the current line.
•
Press A to append another value to the list.
•
Press B to begin the change field process.
•
Press H to return to the header section to change the selection you made
for printing the log.
Accounts Receivable User’s Manual
Change Fields
File Maintenance
8.
•
Press G to go to a particular entry. This option is only available when
there is more than one page of entries.
•
Press F to choose a new field ID (this abandons any field changes you
entered, but have not yet saved).
Continue entering old values and new values until you have specified all of
the values you want to change in the Values section.
Files
The files that contain the Field ID you selected appear in the File Description
section. You should change IDs in all of the files as a general rule. Exclude files
from the change process only when your reseller or support representative
instructs you to so.
9.
The Time field gives you an idea of the relative time it takes to change the
field in a given file. Files where this code or ID are a part of the key to the
file can be changed more quickly than files where each record in the file
must be scanned for the code or ID. Each file is rated as Short or Long to
denote the estimated time required to change the field.
10. The Tag field denotes whether the file is affected by the copy process. Tag
the file to change fields in the file.
11. Select a command.
•
Press Tab to switch to the Values section of the screen.
•
Press Enter to toggle a file as included or excluded from the copy
process.
•
Press A to tag all of the files.
•
Press N to untag all of the files.
•
Press B to begin the change field process.
Accounts Receivable User’s Manual
11-67
File Maintenance
Change Fields
•
Press H to return to the header section to change the selection you made
for printing the log.
•
Press G to go to a particular entry. This option is only available when
there is more than one page of entries.
•
Press F to choose a new field ID (this abandons any field changes you
entered, but have not yet saved).
12. When you have tagged the files you want to change, press B to begin the
change process. When the changes are complete, the log prints if you elected
to produce it.
13. Enter a new Field ID to change, or use the Exit (F7) command to return to the
File Maintenance menu.
Change Fields Log
11-68
Accounts Receivable User’s Manual
Codes Maintenance
12
Accounts Receivable User’s Manual
GL Codes
Distribution Accounts
Terms
Shipping Methods
Payment Methods
Finance Charges
Accounts Receivable User’s Manual
12-3
12-5
12-7
12-9
12-11
12-13
12-1
GL Codes
Use the GL Codes function to assign sales and cost-of-goods-sold accounts in
General Ledger to a general ledger code. The codes serve as a shorthand method
of assigning the accounts to a transaction. When you post transactions,
information associated with a sales/COGS code is sent to the correct accounts.
Select GL Codes from the Codes Maintenance menu. The GL Codes screen
appears.
1.
Enter the code for the sales/COGS account pair.
2.
Accept the default code description, or enter a different code description.
This description appears when you use the Inquiry command in the GL
Code field anywhere in the system.
Accounts Receivable User’s Manual
12-3
Codes Maintenance
GL Codes
3.
Accept the default general ledger sales account, or enter a different account
number. (The Maintenance and Inquiry commands are available if Accounts
Receivable interfaces with General Ledger.) If Accounts Receivable
interfaces with General Ledger, the account number is verified in the
GLMAxxx (Master) file.
4.
Accept the default general ledger cost-of-goods-sold account, or enter a
different account number. If Accounts Receivable interfaces with General
Ledger, the account number is verified in the GLMAxxx file.
After you save the sales/COGS account information, enter information for a
different GL code, or exit to the Codes Maintenance menu.
12-4
Accounts Receivable User’s Manual
Distribution Accounts
Use the Distribution Accounts function to add or change the codes that contain
your general ledger distribution accounts or to set up a selection of different
distribution accounts.
You assign distribution codes to customers when you set them up. When you post
transactions that involve the customers, the GL journal information is posted
from the ARTDxxx and ARTHxxx (Transaction) files to the accounts you
specified in the associated distribution code.
Select Distribution Accounts from the Codes Maintenance menu. The
Distribution Accounts screen appears.
1.
Enter the distribution code with which you want to work.
Accounts Receivable User’s Manual
12-5
Distribution Accounts
Codes Maintenance
2.
Accept the default description, or enter a different code description. This
description appears when you use the Inquiry (F2) command in any
Distribution Code field in the system.
3.
Accept each default general ledger account number, or enter a different
account number for receivables, sales tax, freight, and miscellaneous
charges. (The Maintenance and Inquiry commands are available if Accounts
Receivable interfaces with General Ledger.)
After you save the distribution account information, enter information about
a different distribution code, or exit to the Codes Maintenance menu.
12-6
Accounts Receivable User’s Manual
Terms
Use the Terms function to add or change codes for payment terms for customers.
These codes serve as a shorthand method of assigning particular conditions for
doing business with a customer. For example, you can assign a terms code with
10 discount days to one customer and a terms code with 30 discount days to
another customer.
After you set up valid terms codes, you assign them to the customer records.
Then when you enter transactions involving the customer, the terms you
specified are automatically applied.
Select Terms from the Codes Maintenance menu. The Terms screen appears.
1.
Enter the terms code with which you want to work.
Accounts Receivable User’s Manual
12-7
Codes Maintenance
Terms
2.
If you want the terms to be prox terms, calculated as days from the
beginning of the next month, enter P. If you want the terms to be regular
terms, calculated as days from the invoice date, enter R .
3.
Enter the discount percentage used for the terms (up to 100.0%), or accept
the default percentage.
4.
Enter the number of days for which the discount is valid.
5.
Enter the number of days the customer is given to pay the net due without a
discount.
6.
The description that appears is based on your entries in the previous fields
and appears on the customer invoice and statement. Accept the default
description, or enter a different description.
Note
The terms code represents ongoing terms of payment. Leaving all fields zero
means that you want cash on delivery (COD).
After you save the terms code information, enter information about a
different terms code, or exit to the Codes Maintenance menu.
12-8
Accounts Receivable User’s Manual
Shipping Methods
Use the Shipping Methods function to set up and maintain the codes used to
describe shipping methods. The codes serve as a shorthand method of entering
information about how goods are shipped when you enter transactions. Shipping
method codes can also help you track shipment status by linking the tracking
number you enter in Sales Order transactions to the shipping company’s website.
Note: You must set the Use Tracking Numbers? option to YES in the Sales
Order Options and Interfaces before you can enter tracking numbers for orders.
Follow these steps to work with shipping methods:
1.
Select Shipping Methods from the Codes Maintenance menu. The
Shipping Methods screen appears.
2.
Enter the shipping code whose information you want to add or change.
Accounts Receivable User’s Manual
12-9
Shipping Methods
Codes Maintenance
3.
Enter the shipping code’s description, if necessary. The description is used in
the Ship Via field in transactions when you enter the shipping method code.
4.
Enter the company’s shipment tracking website URL. You must enter
[TRACK] (in uppercase letters and including the brackets) after the search
term that references the tracking number in the URL.
Examine the shipping company’s tracking website URL carefully to identify
the tracking number search term; examples of this term include
&tracknumbers= or &InquiryNumber1=.
When you use the Launch Browser command in Sales Order while viewing
tracking numbers for transactions, OSAS automatically launches your web
browser and directs it to the URL you enter here, replacing the [TRACK]
variable with the transaction’s tracking number.
An example of a shipment tracking URL is:
http://www.fedex.com/cgi-bin/tracking?action=track&tracknumbers=[TRACK]
5.
12-10
After you save the information, enter another shipping method code, or exit
to the Codes Maintenance menu.
Accounts Receivable User’s Manual
Payment Methods
Use the Payment Methods function to add or change the codes used to specify
which kinds of payments you honor for customers. For example, you can set up
codes to designate personal checks, company checks, write-offs, cash, credit
cards, and so on.
Select Payment Methods from the Codes Maintenance menu. The Payment
Methods screen appears.
1.
Enter the payment method code with which you want to work. To delete the
payment method code, use the Delete (F3) command.
2.
Accept the default description, or enter a description of the payment method.
This description appears when you use the Inquiry (F2) command in a
Payment Method field.
Accounts Receivable User’s Manual
12-11
Payment Methods
Codes Maintenance
3.
Accept the default short description, or enter a short description of the
payment method. This description appears on statements unless the payment
method is a check; in that case the check number appears.
4.
Enter the type of payment to which the payment method belongs.
5.
This field appears if the payment type is cash or check. Enter the bank
account ID associated with the payment method.
6.
This field appears if the payment type is credit card. Enter the credit card
customer ID associated with the payment method.
To track receivables from a credit card company as you would monies owed
you by other customers, enter the credit card company as a customer in the
Customers function (see page 10-3) and enter C in the Group Code field to
identify it as a credit card company.
7.
Enter the default general ledger account associated with the payment code.
(The Inquiry and Maintenance commands are available if Accounts
Receivable interfaces to General Ledger.
8.
Enter the amount of the payments received using this payment method this
period, this quarter, this year, and last year. When you post transactions, the
ARTDxxx and ARTHxxx (Transaction) files update the ARPYxxx file.
After you save the payment method information, enter information about a
different payment method, or exit to the Codes Maintenance menu.
12-12
Accounts Receivable User’s Manual
Finance Charges
Use the Finance Charges function to set up different finance charge codes for
specific customers. Assign the finance charge codes to the customer when you
set up the customer’s record. The codes are used to determine the finance charges
when you run the Calculate Finance Charges function.
Select Finance Charges from the Codes Maintenance menu. The Finance
Charges screen appears.
1.
Enter the finance charge code with which you want to work.
2.
Accept the default description, or enter a description of the finance charge
code.
3.
Enter the percentage. The finance charges are calculated by applying this
percentage to the past-due balance for the customer.
Accounts Receivable User’s Manual
12-13
Codes Maintenance
Finance Charges
4.
Enter the minimum amount to be charged. If the calculated charge is less
than the minimum you enter, the minimum amount is assessed.
5.
For open invoice customers, enter in the number of days an invoice must be
past due to accrue finance charges.
6.
For balance forward customers, enter the aging period for which finance
charges are calculated. You can choose any of these time periods:
•
•
•
•
12-14
31 days and over
61 days and over
91 days and over
121 days and over
Accounts Receivable User’s Manual
Master File Lists
13
Accounts Receivable User’s Manual
Printing a Master File List
Sales Reps List
Customer Detail List
Customer Labels
Customer Comments List
Customer Credit Cards
Ship-to Address List
Ship-to Address Labels
Recurring Entries List
Codes List
Tables List
Accounts Receivable User’s Manual
13-3
13-5
13-7
13-9
13-11
13-13
13-15
13-17
13-19
13-21
13-23
13-1
Printing a Master File List
All Master Lists are printed in a similar manner. Use the instructions below to
print a list from the Master File Lists menu, modifying them as necessary for the
list you are printing. For example, if the pick screen for the list you want to print
does not contain check box options, skip that step and continue to the next.
Follow these steps to print a master list:
1.
Select the list you want to print from the Master Lists menu. The selection
screen for that list appears. The Recurring Entries List screen is shown
below as an example.
2.
Select the range of values to print on the list from the boxes.
Leave these fields blank to select all values, or enter values into a
combination of fields to select specific information to print on the list.
Accounts Receivable User’s Manual
13-3
Master File Lists
Printing a Master File List
3. If the screen has check boxes that control what type of information prints,
select or clear the boxes (enter Y or N in text mode) to include or exclude
that information type. For example, select whether or not you want to
include user-defined fields, documents, sales rep addresses, and so on.
4. In the Print section of the screen, select the information you want included in
the list, for example, GL codes, distribution codes, and so on.
5. In the Print By section of the screen, select how you want the list ordered,
for example, by customer ID, zip code, or customer name.
6. Select whether or not you want the additional descriptions to print and in
which format.
7. Select whether or not you want to suppress blank lines.
8. Select whether or not you want a page break after each table.
9. Select the output device. See “Reports” on page 1-41 for more information.
10. If you elected to produce standard labels, a line of x’s is printed so that you
can align the labels. Then this prompt appears:
Is form aligned?
If the labels are not aligned, select No (enter N in text mode) and adjust
them. When the labels are aligned, select Yes (enter Y in text mode) to
produce them. The attention line is on the first line of the mailing labels
according to the U.S. Postal Service standard.
After you produce the list, the Master File Lists menu appears.
13-4
Accounts Receivable User’s Manual
Sales Reps List
The Sales Reps List contains information from the ARSRxxx (Sales Rep) file:
the sales reps’ IDs, names, addresses, commission information, and sales history.
Sample List
Accounts Receivable User’s Manual
13-5
Customer Detail List
The Customer Detail List shows the information stored in the ARCUxxx
(Customer) file: each customer’s name and address, credit and tax information,
current balances, sales and payment history, and user-defined fields and
documents associated with each customer.
Sample List
Accounts Receivable User’s Manual
13-7
Customer Labels
Customer labels are a helpful reference to the customers you have on file. Use the
Customer Labels function to print 1-by-3½-inch mailing labels for customer
invoices and statements.
Sample Labels
Accounts Receivable User’s Manual
13-9
Customer Comments List
The Customer Comments List shows the comments that are on file for a
customer. You can use the list as a reference when you enter accounts receivable
transactions.
Sample List
Accounts Receivable User’s Manual
13-11
Customer Credit Cards
The Customer Credit Cards function allows you to print a list of the credit card
information you have on file for your customers.
Sample List
Accounts Receivable User’s Manual
13-13
Ship-to Address List
The Ship-to Address List is a helpful reference of your customers’ shipping
addresses.
Sample List
Accounts Receivable User’s Manual
13-15
Ship-to Address Labels
Use the Ship-to Address Labels function to print 1-by-3½-inch mailing labels
showing each customer’s ID, ship-to ID, and address.
Sample Labels
Accounts Receivable User’s Manual
13-17
Recurring Entries List
Produce the Recurring Entries List after you set up recurring entries to make sure
that everything is correct and to use as a reference when you copy recurring
entries to the ARTDxxx and ARTHxxx (Transaction) files. Produce a new list
each time you add, change, or delete recurring entries.
If you find incorrect transactions in the Recurring Entries List, use the Edit
Recurring Entries option in the Recurring Entries function (see page 10-37) to
correct them.
Sample List
Accounts Receivable User’s Manual
13-19
Codes List
The Codes List is a reference of the codes used for sales/COGS account pairs,
distribution codes, terms codes, and shipping methods codes. This information is
entered in the DFxxxx table and the ARCDxxx (Codes) file; produce this list
before you change information in either place.
Sample List
Accounts Receivable User’s Manual
13-21
Tables List
Produce the Tables List to get information from a particular Accounts
Receivable table. This function is valuable if you plan to change a table and want
a list to compare it against.
Sample List
Accounts Receivable User’s Manual
13-23
References
System Messages
System Messages
A
Accounts Receivable User’s Manual
Messages on the screen or in a report indicate an error, tell you how to enter data,
or inform you about what is happening in the function you are using. Selfexplanatory messages are not listed.
Access denied.
Your access code is not set up to access this function.
Amount billed exceeds amount scheduled.
The $ Billed and Material Stored field amounts exceed the amount that appears in
the $ Scheduled field on the Edit or Append Entry window when setting up
information for AIA invoicing.
An error occurred while {converting or creating} files. Conversion aborted.
If an error occurs during data file creation or conversion, a message that describes
the problem appears. Then this message appears on the RM Data File Creation or
Data File Conversion screen to inform you that the process has been aborted.
Correct the problem described in the first message and try again.
At least one history selection must be YES.
You must include at least one type of history in the Customer Analysis Report.
A valid bank account ID is required.
If Accounts Receivable interfaces with Bank Reconciliation, you must enter a bank
account ID that is in the BRBAxxx (Bank Accounts) file.
Accounts Receivable User’s Manual
A-1
System Messages
References
Bank account {ID} is not on file.
Bank account not found.
The bank account ID you entered is not in the BRBAxxx (Bank Accounts) file.
Enter a different ID. The Inquiry (F2) command is available.
Basic Error = nn Host Error = xxx Line = nnnn Program = xxxxxx
Basic Error = nn Line = nnnn Program = xxxxxx
A serious error has occurred. Write down the information that appears and get help
from a support technician.
Billing ID/Change Order already on file.
The Billing ID/Change Order you entered in the Append Entry window is already
on file. Enter another Billing ID, use the Exit (F7) command to return to the lineitem scrolling area, or press Enter to edit an existing Billing ID/Change Order.
Break Code is not accepted for tax after retainage.
The Flexible % Code field on the Application Entries screen contains information
taken from the Schedule Header file (ARJAx). You cannot enter a code in this field
if you chose to calculate tax after retainage (by entering Y in the After Ret. field of
the Set Up Schedule screen).
Cannot delete customer with {assigned data}.
You cannot delete the record of a customer that has open invoices, orders, or
unposted transactions on file.
Cannot delete last line of a transaction.
You cannot create a transaction with zero line items. A transaction must have at
least one line item. You can delete an entire transaction from the header screen.
A-2
Accounts Receivable User’s Manual
References
System Messages
Cannot run graphical version of this function. xxxxxxxx.BRC not found.
OSAS cannot locate the graphical resource file associated with the function you are
trying to run. If you do not have the graphical version of OSAS, return to the menu
and turn off GUI functions using the Shift+F6 keyboard command or using the
Resource Manager Workstation Defaults function. If you have the graphical
version of OSAS, seek help from a support technician.
Could not find any valid source files for this application.
The source directory you specified does not have files for the application you are
converting. Make sure that you entered the correct source directory and application
ID.
Credit limit exceeded.
The customer is already over the credit limit you assigned (if you are on the header
screen), or the line item you are entering together with the other balances on
account for this customer exceeds the customer’s credit limit. In either case, press
Enter to override the credit limit and continue entering the invoice or exit from the
function.
Customer {ID} has open invoices.
You cannot delete the record of a customer that has open invoices on file. If you
know the customer has paid in full, make sure that the payments were recorded and
posted properly. Do periodic maintenance and then delete the customer record.
Customer is on credit hold.
You cannot enter an invoice for a customer that is on credit hold.
{application ID} data files exist. Do you want this task to erase them?
The directory where you are creating files already has files for the selected
application and company. To continue with the conversion and erase the existing
files, enter Y. To create only the missing files (if any), enter N. To cancel the
operation, exit from the function.
Accounts Receivable User’s Manual
A-3
System Messages
References
Date must be greater than previous date entered.
You must enter the aging period dates in chronological order in the Cash Flow
Report.
Delete entire transaction?
To delete the entire transaction, use the Delete (F3) command.
Delete entry number {number}.
To delete the line item, use the Delete (F3) command.
Destination file {drive:/path/file name} not found. No conversion.
The filename or path you specified does not exist.
Disk drive not ready.
The system cannot access one of the disk drives to find the file for which it is
looking. Sometimes the door of a disk drive is open, or a CD is not in the drive. If
closing the door or inserting the CD corrects the problem, press Enter; if not,
consult your system administrator or hardware support specialist.
Drive not available.
The system does not have the disk drive ID you entered. Press Enter and enter a
different ID. If this message appears when you enter the correct drive ID, get help
from a support technician.
Entry in process on terminal {terminal ID}.
Another user is entering or editing a transaction in the batch with which you are
working. You cannot process the batch while it is in use.
Error xxx Loading {filename}.
A BASIC error occurred in loading the program. Contact a support technician if the
error persists.
A-4
Accounts Receivable User’s Manual
References
System Messages
Field size is too large.
The amount of the line item makes one of the calculated amounts exceed the space
provided for it. Check the amounts you entered in the fields. If they are correct, you
must enter the transaction as two transactions to accommodate the total.
File unavailable {filename}.
This message appears for one of three reasons:
•
The function you are trying to access needs one or more files that are locked
by another user on your system. When a file is locked, other users cannot
access it during posts and other functions that need to keep the file intact.
•
The function you are trying to access needs one or more files that are not on
your system. Use the Options and Interfaces function on the Resource
Manager Company Setup menu to verify that the correct interfaces have been
selected. If that doesn’t solve the problem, get help from a support technician.
•
You are working with the wrong company. Return to the menu. Then use the
Change Company (F3) command to enter the ID you want.
In any case, press Enter to get back to the menu, correct the problem, and select the
function again.
{filename} does not exist. Cannot convert it.
One of the files listed in \xxDATA is not in your old data directory. See
Destination file {drive:/path/file name} not found. No conversion.
Flexible retainage is not allowed for tax after retainage
If you chose to calculate tax after retainage (by entering Y in the After Ret. field of
the Set Up Schedule screen), you cannot use the flexible retainage option (in the
Retainage: Flexible % Code field) because the amount retained will be adjustable.
GL account {number} is a memo account.
You cannot use a memo account in the sales, COGS, or inventory account.
Accounts Receivable User’s Manual
A-5
System Messages
References
GL account {number} is not in Master file.
The account number you entered is not in the GLMAxxx (Master) file. Enter the
correct account number. The Inquiry (F2) command is available.
Invalid date - mm/dd/yyyy.
Invalid date - dd/mm/yyyy.
The date you entered is invalid or the format you used is incorrect (for example,
American format in a European-format system). This message is usually
accompanied by one of two explanatory messages:
Month out of range (1 to 12)
or
Day out of range (1 to nn)
If you entered an invalid date, press Enter and enter a valid one. You can enter
dates in either format: 010100 or 01012000.
Invalid entry.
The information is not valid in the field where you entered it. Check the data and
enter it again. Consult the user’s manual or use the Help (F1) command for
information.
Invalid number of periods in ARPDxxx table.
The valid number of periods you can use in the ARPDxxx table are 1, 4, 12, and 13.
Invalid Period Conversion table.
The CNVTxxx table for the company is invalid. A common reason is that you did
not update the table with the corresponding data for the next period. Use the Period
Setup function to make adjustments (see the Resource Manager User’s Manual).
Invalid year.
The fiscal year you entered is invalid.
A-6
Accounts Receivable User’s Manual
References
System Messages
Invoice Form {number} does not exist.
The system does not recognize the invoice form number you entered. Enter a valid
form number or use the Exit (F7) command to return to the AIA Invoice menu.
Item/Job {ID} is not on file.
The item or job number you entered is not on file. Enter a different number. The
Inquiry (F2) command is available.
Job {ID} is not on file.
Job {ID} not found.
The job number you entered is not on file in the Contractors’ Job Cost JOBSxxx
(Jobs) file. Check your records. Then enter a job number that the Contractors’ Job
Cost system recognizes or add the job number to Contractors’ Job Cost.
Mask format error use {mask}.
You entered data that does not fit the predefined format for the field. Enter the data
again, using the predefined format.
Maximum number of lines is 998.
Maximum number of lines reached. Cannot insert.
You cannot insert a line item if the transaction already has 998 line items.
Must be {within range}.
You must enter a value within the range specified in this message.
Must be greater than 0.
You must enter an invoice number that is greater than zero when you print
invoices.
Must build {table ID} first.
You must build the table shown in this message before you can use the function.
Accounts Receivable User’s Manual
A-7
System Messages
References
Must delete the existing application entry first.
You must delete the AIA application entry for this job before you delete the AIA
Schedule.
Must enter {value} - {value}.
You must enter a value within the range specified in this message.
Must enter {type}.
You must enter the kind of value specified in this message.
Net due days cannot be less than discount days.
The number of net due days must be equal to or greater than the number of discount
days.
New batch ID cannot equal old batch ID.
You must enter a unique ID for the new batch number when you use the Change
Batches function.
No more open invoices for {ID}.
The customer does not have any more open invoices to scan.
No summary history for this period.
You selected a period whose summary history was either deleted or never kept.
Open Invoice file not empty.
You cannot use the Build Open Invoice File function for a company whose
ARINxxx (Open Invoice) file has been initialized and contains open invoices. If
you are using the wrong company, exit to the File Maintenance menu, change to
the correct company, and then try the function again.
Over maximum of 999 sequences for this date and reference ID.
You can enter a maximum of 999 comments for a particular date and reference ID.
A-8
Accounts Receivable User’s Manual
References
System Messages
Percentages cannot total more than 100.
The sum of the two sales rep’s percentages cannot exceed 100.
Phase {ID} not on file.
The phase ID is not set up for the job. Enter a different phase ID. The Inquiry (F2)
command is available.
Press Enter to adjust payment amount and return to menu.
You cannot exit to the menu until the remaining amount to be applied is zero. Press
Enter to adjust the payment amount and return to the menu or use the up-arrow key
to return to the scroll region.
Printer busy.
You are trying to use a printer that is in use. Press Enter to continue with your entry
and try to print later.
Record in use.
Another terminal is using the record you are trying to access. Exit from the
function. Then try to access the record again when the other terminal is finished
with it.
Sales history is not implemented.
You cannot print the Detail History Report if you elected not to keep detail sales
history in the Resource Manager Options and Interfaces function.
Sales rep (ID} has current balance.
You cannot delete the record of a sales rep who has outstanding commissions.
Sales rep {ID} is not on file.
You entered a sales rep ID that is not set up in the ARSRxxx (Sales Rep) file. Enter
a different ID (the Inquiry (F2) command is available) or use the Maintenance
(F6) command to add a new sales rep to the file.
Accounts Receivable User’s Manual
A-9
System Messages
References
Schedule not set up for Job {ID}
The job must be set up in the AIA Schedule before you make an application entry
for the job.
Summary history not available for this period.
You cannot print the report for this period because it does not have any summary
history. It might have been deleted from the ARHSxxx (Summary History) file, or
you might have elected not to keep summary history in the Resource Manager
Options and Interfaces function when this period was active.
Tax {ID/Location} is not on file.
You entered a tax group ID/location that is not in the RMTXxxx (Tax Groups) file.
Enter a different ID or location. The Inquiry (F2 ) command is available.
Terms Code {code} not on file
The terms code you entered is not on file.
There is no summary history for customer {ID} in {fiscal year}.
You cannot print the report for this fiscal year because it does not have any
summary history. It might have been deleted from the ARHSxxx (Summary
History) file, or you might have elected not to keep summary history in the
Resource Manager Options and Interfaces function during this year.
Thru value cannot be less than From value.
Thru value must be greater than From value.
The value you entered at Thru is smaller than the value you entered at From. Press
Enter and then enter the correct value at Thru .
A-10
Accounts Receivable User’s Manual
References
System Messages
Transaction is not on file.
Transaction number not found.
Transaction number not on file.
Transaction {number} not found.
The transaction number you entered is not in the ARTHxxx (Transaction) file.
Enter a different transaction number. The Inquiry (F2) command is available. The
transaction may also be stored in a different batch. Change the Batch ID and try
again.
Transaction in process on terminal {ID}.
The terminal in this message is adding the transaction number. Assign a different
number to the transaction.
Unable to create temporary file for this workstation.
The system cannot create a temporary file for posting in the data directory. Check
directory permission. If the problem persists, contact a support technician.
Unable to execute program {program}.
The system cannot run the program you selected from the menu. Make sure that the
program that appears is in the application’s program directory and select the
function again.
Unable to load menu record {menu} from file {filename}.
The application’s menu record is not in the menu file, or the menu file is missing.
Make sure that the application is properly installed and try again.
Unable to lock - file in use.
One of the function’s files is locked because another workstation on the system is
using it. Try the function again when no one else is using the file.
Accounts Receivable User’s Manual
A-11
System Messages
References
Unable to open file.
Unable to open - file in use.
The file you are trying to use is either corrupted or locked at another terminal on
the system. Wait a few minutes and try again. If the condition continues, get help
from a support technician.
Unable to print to device.
The system cannot access the output device you are trying to use. Make sure that
the output device is online.
Valid entries are {range}.
Valid units are: {units}.
Enter one of the valid selections shown in this meesage.
Warning: customer is on credit hold.
The customer is on credit hold. Press Enter to remove the message and then
continue working with the customer ID or enter a different customer ID.
Warning: summary history not available for all comparisons.
Summary history is not available for all the comparisons in the report. In each
column of the report where summary history is unavailable or insuffiencient, .00*
prints.
You must build ARPDxxx table before {operation}.
You must build the ARPDxxx table for the company before you can use the
Periodic Maintenance and Post Transactions functions. These functions rely on
being able to sort by period.
Your hard disk is full - unable to finish copying.
The system cannot finish converting your files because your hard disk is full.
Delete unnecessary files, optimize your hard disk, or take other measures to make
space. Then restore the backup you made before converting the files and try again.
A-12
Accounts Receivable User’s Manual
Common Questions
Common Questions
B
Accounts Receivable User’s Manual
These commonly asked questions about the Accounts Receivable system are
divided into two categories: Entering Balances and Daily Work.
Entering Balances
I entered balances in the customer record, but when I go back into the file, the balances are
zero. What happened?
The online aging feature can throw your initial balances off. You must turn off the
online aging option before you enter beginning balances. Then after you use the
Build Open Invoice File function, turn the option on again.
Daily Work
The invoice number I entered does not match the invoice number in the Sales Journal. Why
not?
If you use prenumbered forms, the invoice numbers are reassigned when you print
invoices to match the numbers of the preprinted forms. To make sure that the
invoice number in the ARINxxx (Open Invoice) file is the same as the one on the
invoice you send to the customer, the system updates the invoice record with a new
number.
This numbering method is important for open invoice customers because when
they make payments toward specific invoices, you must apply the payments to the
right invoices.
Accounts Receivable User’s Manual
B-1
Common Questions
When I enter invoices, the wrong general ledger period shows up. Why?
The displayed period corresponds to the system date. If the system date is wrong,
the displayed general ledger period date is wrong.
Check the system date. If it is wrong, change it. If it is correct, check the dates in
the Period Setup function in Resource Manager to make sure that you specified the
correct periods and their corresponding months for the company.
What does the system do with an unapplied credit?
Cash receipts and credit memos that are not applied to specific invoices for open
item customers are put in the unapplied credits bucket in the customer record and in
the Aged Trial Balance. You can use the Hold/Release Invoices function to apply
these credits and payments to specific invoices.
I had printer problems before I finished printing invoices. The printer problem is fixed now,
but how do I start over without reprinting all the invoices?
Use the Restart option. Enter the new first invoice number and the number of the
last invoice that was printed correctly.
I was in the middle of posting and had computer problems. Can I recover?
Yes. If you backed up your data files before posting, restore the backup and start
the post over.
The Post Transactions function has a restart feature. If you did not back up before
posting, start the post over. Each posted transaction is flagged as posted, so if a
transaction or batch of transactions was completely posted, it will not be processed
again. If the system was in the middle of posting a transaction or a batch of
transactions, it processes the transaction(s) again.
Then print the Open Invoice Report, the Detail History Report, and the appropriate
reports from interfaced applications. Make adjustments for the double-posted
entry, if any. (Only one transaction line or cash receipt can be double-posted.)
B-2
Accounts Receivable User’s Manual
Common Questions
The Current column in the Aged Trial Balance shows both last month’s and this month’s
activity for my balance forward customers. Why?
You did not do periodic maintenance before you entered this month’s activity. You
can correct this situation in one of two ways:
•
If you caught the error in the first few days of the month and you have a
backup of your sales history since the beginning of the month, produce the
Detail History Report from the first of the month to the present date,
organized by customer ID. Then restore the backup from the end of the
previous month and do periodic maintenance. Refer to the Detail History
Report to reenter this month’s activity.
•
If you did not back up your files or if you did not catch the error until well into
the month, let the current month’s customers go without aging. Keep activity
for both this month and next month in the current period and do periodic
maintenance at the end of the month.
How does the system calculate finance charges, and what are the Open Invoice Days and
Balance Forward Days fields for?
Finance charges are calculated for invoices (for open item customers) or balances
(for balance forward customers) that are older than the number of days specified in
the finance charge code record associated with each customer. The Open Invoices
Days is the number of days after which finance charges are assessed on unpaid
invoices, based on invoice or due dates. The Balance Forward days refers to the
aging buckets used to summarize past-due balances for balance forward customers.
How does the prenumbered forms option assign numbers?
If you elect to use prenumbered invoice forms in the Resource Manager Options
and Interface function, existing invoices with assigned numbers will be
overwritten. Miscellaneous credits with invoice numbers are never overwritten.
Why are history invoices different from my original invoices?
Not all the data in the ARTHxxx and ARTDxxx (Transaction) files transfers to the
ARHIxxx (Detail History) file.
Accounts Receivable User’s Manual
B-3
Common Questions
When are paid invoices removed?
Paid invoices dated before the date you specify are removed through the Purge
Selected Files function.
B-4
Accounts Receivable User’s Manual
Accounts Receivable User’s Manual
Index
A
access codes
changing, 1-24
command, 1-24
company-specific information, 3-27
entering, 1-24
setting up, 3-27
what to protect, 3-27
account types
setting up, 3-20
Accounts Receivable
before converting, 2-5
before you install, 2-3
converting to version 6.1, 2-6
description, 1-5
files, 1-8
installation, 2-3
installing new version before converting, 2-5
interfaces, 1-5
Bank Reconciliation, 3-9
General Ledger, 3-9
Inventory, 3-9
Job Cost, 3-9
menu structure, 1-6
setting up, 3-3
setup considerations, 2-6
system requirements, 2-3
additional descriptions, 1-14
specifying whether to keep history, 3-11
using those stored in Inventory, 3-11
Additional Descriptions file
description, 1-9
setting up, 3-11
Additional Descriptions History file
description, 1-13
setting up, 3-11
Accounts Receivable User’s Manual
IX
additional text
option for line items, 3-11
Address Lookup, 1-34, 1-40
address mapping, 1-34, 1-40
addresses, 1-34, 1-40
Aged Trial Balance
balance forward accounts, 8-7, B-3
description, 1-15
function, 8-7
open invoice accounts, 8-7
sample, 8-10
screen, 8-8
unapplied credits, 8-10
aging
breaks, 8-9
cash receipt codes, 5-25
online, 3-13, 3-25, 11-61
periods, 11-62
AIA Invoicing
accumulated retainage, 7-6
adding application text, 7-13
Application Entries function, 7-17
Application Entries screen, 7-17
Application for Payment Form sample, 7-22
Application Forms function, 7-21
Application Forms screen, 7-21
Application Text function, 7-13
Applications Journal function, 7-25
Applications Journal screen, 7-25
calculating retainage, 7-7
Detail Applications Journal sample, 7-26
editing application text, 7-13
entering AIA invoice items, 7-17
invoice worksheet, 7-15
Invoice Worksheet function, 7-15
Invoice Worksheet sample, 7-16
IX-1
Index
Invoice Worksheet screen, 7-15
overview, 7-3
planning amounts retained, 7-15
Post Applications
function, 7-27
retained amounts, 7-27
sample, 7-29
print AIA invoice info before posting, 7-25
printing application text, 7-13
producing AIA invoices, 7-21
Set Up Schedule function, 7-5
Set Up Schedule screen, 7-5
setting up a billing schedule, 7-5
AIARy table
description, 11-51
Flexible % code, 11-51
retainage amount, 11-51
setting up, 11-51
alphabetical sorting, 3-5
applying cash receipts, 5-27
AR Analysis Report
description, 1-15
function, 9-3
sample, 9-5
ARBTxxx file, 1-12
ARCCxxx file
description, 1-8
setting up, 3-23
ARCMxxx file
description, 1-8
setting up, 3-21
ARCRxxx file
description, 1-12
setting up, 5-23
ARCTxxx file, 1-12
ARCUxxx file
description, 1-8
setting up, 3-19
balance information, 3-21
comments, 3-23
general information, 3-19
historical information, 3-22
payment information, 3-20
ARDCxxx file
description, 1-9
ARDExxx file
IX-2
description, 1-9
setting up, 3-11
ARFCxxx file
description, 1-9
ARGLxxx file
description, 1-9
ARGLxxx table
description, 11-52
screen, 11-52
setting up, 3-14, 11-52
ARHDxxx file
description, 1-13
setting up, 3-11
ARHIxxx file
description, 1-13
setting up, 3-11
ARHSxxx file
description, 1-13
setting up, 3-12
ARINxxx file
description, 1-12
setting up, 11-61
ARLSxxx file, 1-12
ARPDxxx table
description, 11-54
setting up, 3-14
ARPYxxx file
description, 1-10
setting up, 3-18
ARRDxxx file
description, 1-10
setting up, 3-24
ARRExxx file
description, 1-10
setting up, 3-24
ARRHxxx file
description, 1-10
setting up, 3-24
ARSAxxx file
description, 1-10
setting up, 3-24
ARSMxxx file
description, 1-9
ARSRxxx file
description, 1-10
setting up, 3-16
Accounts Receivable User’s Manual
Index
setting up commissions, 3-17
ARTCxxx file
description, 1-9
ARTDxxx file
description, 1-12
setting up, 3-24
ARTHxxx file
description, 1-12
setting up, 3-24
B
backup schedule
for data files, 3-28
for programs, 3-28
setting up, 3-28
Balance and Credit Information
setting up for customers, 3-20
balance forward accounts, 11-3, 11-61
Aged Trial Balance, 8-7, B-3
cash receipts, 5-25
balances
zero, B-1
Bank Reconciliation
effects of posting transactions, 6-23
interface with Accounts Receivable, 3-9
Batch Control
file, 1-12
function, 5-35
batch numbers
option for generating automatically, 3-11
batches
changing, 5-33
copying recurring entries, 5-31
option for transactions, 3-11
purpose of, 3-11
replacing, 5-33
uses of, 5-35
Browse, 1-34
Build Open Invoice File
aging periods, 11-62
balance forward accounts, 11-61
function, 11-61
online aging, 11-61
open invoice accounts, 11-61
prerequisite to using, 11-62
Accounts Receivable User’s Manual
summary invoices, 11-61
C
Calculate Finance Charges
function, 8-13
Calculating Retainage
Complete % and Materials % Method, 7-8
complete % method, 7-8
flexible % code, 7-7
materials % method, 7-8
Cash Flow Report
description, 1-15
function, 8-11
sample, 8-12
cash on delivery terms, 12-8
Cash Receipts
aging codes, 5-25
balance forward accounts, 5-25
batches, 3-11
deposit information, 5-23
editing, 5-29
function, 5-23
partial payments, 5-23
posting invoices, 6-23
relationship with transactions and open invoices, 1-18
screen, 5-24
Cash Receipts file
description, 1-12
setting up, 5-23
Cash Receipts Journal
description, 1-15
function, 6-15
sample, 6-16
when to print, 6-15
Change Batches
function, 5-33
screen, 5-33
Change Fields
sample log, 11-68
screen, 11-65
checks
payment type, 3-18
COD terms, 12-8
Codes
access codes, changing, 1-24
IX-3
Index
codes
payment methods, 3-18
setting up, 3-4, 3-16
sorting, 3-4
Codes List
function, 13-21
Codes Maintenance functions
setting up, 3-16
Codes Maintenance menu structure, 1-6
combination method
initial balances, 3-26
commands
access code, 1-24
flags, 1-39
hot keys, 1-39
Proceed (OK), 1-4
comments
entering, 3-23
commissions, 11-33
based on paid invoices, 8-23
setting up, 3-16
Commissions Report
description, 1-15
function, 8-23
screen, 8-24
when to print, 8-23
company
assigning access codes, 3-27
tables for, 3-14
company information
printing on plain-paper invoices and statements, 3-13
Complete % and Materials % Method
calculating retainage, 7-8
Complete % Method
calculating retainage, 7-8
Contractors’ Job Cost
interface with Accounts Receivable, 3-9
conversion
before converting, 2-5
setup considerations, 2-6
tax information, 2-5
converting to OSAS version 6.1, 2-6
Copy Recurring Entries, 1-14
before copying, 5-31
copying batches, 5-31
function, 5-31
IX-4
Cost Plus Invoicing
Cost Plus Invoice
form sample, 7-52
Cost Plus Invoices Journal
function, 7-53
sample, 7-54
Cost Plus Invoices Journal screen, 7-53
Entries screen, 7-45
functions, 7-45
overview, 7-3
Post Cost Plus Invoices
retainage invoices, 7-55
sample log, 7-58
screen, 7-56
Post Cost Plus Invoices function, 7-55
Print Cost Plus Invoices
function, 7-51
screen, 7-51
retainage fields, 7-46
Credit and Balance Information
changing, 11-10
entering, 11-10
finance charges, 3-21
money owed, 3-21
setting up, 3-21
unapplied credits, 3-21
credit card
option to enter expired card as payment, 3-12
payment type, 3-19
Credit Card Information
changing, 11-14
entering, 11-14
setting up for customers, 3-21
Credit Cards
file, 1-8
credit hold, 3-21
credit limits
setting up, 3-21
credit memo
splitting, 8-4
credit statuses
assigning to customers, 3-22
list of, 11-20
updating, 3-22
credits
applying to oldest items first, 3-13
Accounts Receivable User’s Manual
Index
Customer Activity Report
description, 1-16
function, 9-17
requirements, 9-17
sample, 9-18
screen, 9-17
Customer Analysis Report
description, 1-15
function, 8-21
when to print, 8-21
Customer Comments
accessing, 3-23
changing, 11-24
deleting, 11-4
entering, 11-24
file, 1-8
Customer Comments List
function, 13-11
sample, 13-11, 13-13
Customer Detail List
function, 13-7
sample, 13-7
Customer file
description, 1-8
setting up, 3-19
balance and credit information, 3-20
balance information, 3-21
comments, 3-23
credit card information, 3-21
documents, 3-23
general information, 3-19
historical information, 3-22
payment information, 3-20
ship to addresses, 3-22
user-defined fields, 3-23
Customer Labels
function, 13-9
sample, 13-9
Customer Sales Report
description, 1-16
function, 9-15
requirements, 9-15
sample, 9-16
Customers
account types, 3-20
aging, 6-26, 7-28, 7-43, 7-57
Accounts Receivable User’s Manual
balance forward accounts, 11-3
balance information, 3-21
changing levels, 3-12
clearing high balances, 10-8
comments, 3-23, 11-24
credit and balance information, 11-10
credit card information, 3-21, 11-14
credit hold, 3-21
credit limit, 3-21
credit statuses, 3-22
Customer Comments screen, 11-24
deleting, 11-4
distribution codes, 3-20
documents, 3-23
finance charges, 3-20, 3-21
function, 11-3
general information, 11-6
General Information screen, 11-6
group codes, 3-19
header screen, 11-3
history information, 3-22, 11-16
money owed, 3-21
open invoice accounts, 11-3
partial shipments, 3-20
payment information, 3-20
setting up, 3-19
ship to addresses, 3-22
ship-to addresses, 11-21
statement code, 3-19
tax groups, 3-20
unapplied credits, 3-21
user-defined fields, 3-23
viewing
balances, 4-5
detail history, 4-13
history, 4-6
invoice totals, 4-14
invoices, 4-7
open invoices, 4-11
payment history, 4-6
sales history, 4-6
summary history, 4-17
Customers and Open Invoices
function, 4-3
viewing
customer balances, 4-5
IX-5
Index
customer history, 4-6
invoices, 4-7
ship to addresses, 4-8
user-defined fields, 4-9
cutoff date, B-3
D
Daily Sales Tax Report
function, 6-13
sample, 6-14
Daily Work menu structure, 1-6
data dictionaries, 2-3
Data File Conversion
function, 2-5, 2-6
Data File Creation
function, 2-3
data files
backing up, 3-28
date fields, 1-33
Defaults table
description, 11-55
setting up, 3-15
Delete
customer comments, 11-4
customer records, 11-4
Deposits Report
description, 1-15
function, 6-19
sample, 6-20
Depreciation Tables List
list, 11-68
Detail History
file, 1-13
function, 4-13
specifying whether to keep, 3-11
Detail History Report
description, 1-16
function, 9-11
sales categories, 5-13
sample, 9-13
detail method
initial balances, 3-26
DFxxxx table
description, 11-55
screen, 11-55
IX-6
setting up, 3-15
Distribution Account Codes file
description, 1-9
Distribution Accounts
function, 12-5
screen, 12-6
distribution codes
assigning to customers, 3-20
definition, 11-8
setting up, 3-20
DUNxxx table
description, 11-56
setting up, 11-56
E
Edit Cash Receipts
function, 5-29
screen, 5-29
F
F2 Inquiry
button, 1-34
flag, 1-39
F6 Maintenance
flag, 1-39
icon, 1-34
File Maintenance menu structure, 1-6
files
Accounts Receivable, 1-8
backing up, 3-28
purging, 10-9, 10-11
Finance Charge Codes file
description, 1-9
finance charges
balance information, 3-21
calculation, B-3
recalculating, 8-13
setting up, 3-20
flags, in text mode, 1-39
Flexible Code %
calculating retainage, 7-7, 11-51
FORMxxx table
description, 11-57
setting up, 11-57
Accounts Receivable User’s Manual
Index
G
General Information
screen, 11-6
setting up for customers, 3-19
General Ledger
effects of posting transactions, 6-22
interface with Accounts Receivable, 3-9
posting detail or summary information to, 3-13
GL Codes
definition, 11-43
function, 12-3
GL Codes file
description, 1-9
graphical mode
drop-down menus, 1-31
function screens, 1-30
graphical main menu, 1-28
Inquiry button, 1-34
Maintenance icon, 1-34
MDI menu, 1-29
shortcut menu, 1-31
toolbars, 1-33
group codes
assigning to customers, 3-19
definition, 11-8
recurring entries, 3-19, 3-24
H
Header Information
Transactions screen, 5-5
History Information
changing, 11-16
entering, 11-16
setting up for customers, 3-22
history reports, 1-15
Hold/Release Invoices
changing invoice status, 8-4
function, 8-3
splitting payments, 8-4
hot keys, 1-39
I
IDs
setting up, 3-4
sorting, 3-4
Accounts Receivable User’s Manual
Information Inquiry menu structure, 1-6
initial balances
combination method, 3-26
detail method, 3-26
finance charges, 3-21
setting up, 3-25
summary method, 3-25
Inquiry (F2)
button, 1-34
flag, 1-39
Install Applications
function, 2-3, 2-5
installing Accounts Receivable, 2-3
and Sales Order, 2-4
interfaces with Accounts Receivable, 1-5
Bank Reconciliation, 3-9
General Ledger, 3-9
Inventory, 3-9
Job Cost, 3-9
Inventory
effects of posting transactions, 6-24
interface with Accounts Receivable, 3-9
Invoices
additional text for line items, 3-11
aging, 6-4
aging online, 3-13
assigning numbers, 5-8
batches, 3-11
changing status, 8-4
copying recurring entries, 1-14
Enter Serial Numbers window, 5-14, 5-15
entering, 1-13
for miscellaneous credits, 1-13
for sales, 1-13
general ledger period, B-2
hold/release, 8-3
line items, 5-11
number, B-1
online, 3-19, 5-3, 5-8
Online Invoice Totals screen, 5-22
Online Invoicing screen, 5-21
options
printing on plain paper or forms, 3-12
printing online, 3-12
using forms, 3-12
using prenumbered forms, 3-12
IX-7
Index
posting
for cash receipts, 6-23
for credit sales, 6-22
printing, 6-3
forms, 6-5
online, 5-18, 5-21
reprinting, 6-5, B-2
Sales Tax Information window, 5-20
splitting payments, 8-4
Totals Information screen, 5-19
viewing, 4-7
detail history, 4-13
expanded summary, 4-15
totals, 4-14
J
Job Cost
effects of posting transactions, 6-23
Job Invoicing
Entries screen, 7-31
functions, 7-31
Job Invoice Form sample, 7-38
Job Invoices Journal function, 7-39
Job Invoices Journal screen, 7-39
overview, 7-3
Post Job Invoices
function, 7-41
retainage invoices, 7-41
sample post, 7-44
screen, 7-42
Print Job Invoices function, 7-37
Print Job Invoices screen, 7-37
retainage fields, 7-32
Job Receivables
overview, 7-3
Job Receivables Reports
function, 7-59
Job Cash Flow Report, 7-61, 7-62
Job Open Invoice Report, 7-59
Job Open Invoice Report sample, 7-60
L
laser forms
invoice, 3-12
statement, 3-13
IX-8
launching
OSAS in other operating systems, 1-23
OSAS in Windows, 1-23
line items
additional text, 3-11
option to display unit cost, 3-12
recurring entries, 11-42
Lot and Serialized Item file, 1-12
lot numbers, 1-14
M
main menu
graphical, 1-28
MDI, 1-29
navigating graphical, 1-28
navigating MDI, 1-29
navigating text, 1-36
text, 1-35
toolbars, 1-33
Maintenance (F6)
flag, 1-39
icon, 1-34
mapping, 1-34, 1-40
Master File Lists menu structure, 1-7
master lists
screen example, 13-3
Materials % Method
calculating retainage, 7-8
menus
Codes Maintenance, 1-6
Daily Work, 1-6
drop-down menus, 1-31
File Maintenance, 1-6
graphical main menu, 1-28
History Reports, 1-7
Information Inquiry, 1-6
Master File Lists, 1-7
MDI, 1-29
Open Invoices, 1-6
Periodic Processing, 1-7
shortcut, 1-31
structure in AR, 1-6
text main menu, 1-35
Transaction Reports, 1-7
messages
Accounts Receivable User’s Manual
Index
in text mode, 1-40
Methods of Payment Journal
description, 1-15
function, 6-17
sample, 6-18
miscellaneous credits
additional text for line items, 3-11
after entering, 5-22
batches, 3-11
entering invoices, 1-13
Miscellaneous Credits Journal
description, 1-14
function, 6-11
sample, 6-12
when to print, 6-11
modes
graphical, 1-27
text, 1-35
money owed
balance information, 3-21
N
navigating
graphical function screens, 1-30
graphical main menu, 1-28
MDI menu, 1-29
text function screens, 1-37
text main menu, 1-36
to directories and files, 1-34
O
on-account cash receipts, 5-27
online
aging, 3-25, 11-61
invoice totals, 5-22
invoices, 3-12, 5-3, 5-10, 5-18
printing, 5-21
Online Invoicing screen, 5-21
open invoice accounts, 11-3, 11-61
Aged Trial Balance, 8-7
Open Invoice file
building, 11-61
description, 1-12
Open Invoice Report
before printing, 8-5
Accounts Receivable User’s Manual
definition, 1-7
description, 1-15
function, 8-5
Open Invoices
function, 4-11
relationship between transactions and cash receipts,
1-18
Options
table, 11-49
Options and Interfaces
screen, 3-10
setting up, 3-9
toggling an option, 3-10
writing (saving) the specifications, 3-10
OPTxxx table, 11-49
OSAS
MDI menu, 1-29
modes, 1-27
graphical, 1-27
text, 1-35
setup considerations, 2-6
starting in other operating systems, 1-23
starting in Windows, 1-23
P
partial payments
recording, 5-23
partial shipments
assigning to customers, 3-20
payment history
viewing, 4-13, 4-17
payment information
setting up, 3-20
Payment Methods
definition, 3-18
function, 12-11
screen, 12-11
setting up, 3-18
Payment Methods file
description, 1-10
setting up, 3-18
payment types
check, 3-18
credit card, 3-18
definition, 3-18
IX-9
Index
payments
partial, 5-23
splitting, 8-4
period-end maintenance
consequences of, 11-17
effects of, 10-5
Periodic Maintenance
credit status, 3-22
effects of period-end maintenance, 10-5
effects of quarter-end maintenance, 10-6
effects of year-end maintenance, 10-6
error log, 10-8
function, 10-5
period end, 1-18
purging transactions, 3-25
quarter end, 1-19
requirements, 10-7
when to do, 10-5
year end, 1-19
Periodic Processing
menu structure, 1-7
purpose of, 1-7
Post Transactions
before posting, 6-24
cash receipts, 6-23
credit sales, 6-22
effects on Bank Reconciliation, 6-23
effects on General Ledger, 6-22
effects on Inventory, 6-24
effects on Job Cost, 6-23
function, 6-21
results, 1-16, 6-21
posting, 1-16
detail or summary information, 3-13
interrupted, B-2
without printing reports, 3-13
Print History Invoices
function, 9-23
Print Invoices
aging, 6-4
forms, 6-5
function, 6-3
purchase order number, 6-5
reprinting, 6-5
printing
invoices, 6-3
IX-10
online invoices, 5-21
statements, 8-17
tables, 11-60
Proceed (OK) command, 1-4
programs
backing up, 3-28
Promotional Analysis Report
description, 1-16
function, 9-21
prox terms, 12-8
purchase order number
on invoice forms, 6-5
Purge Selected Files
function, 10-9, 10-11
Q
QExxxx table
description, 11-59
screen, 11-60
setting up, 3-15
QH1xxxx table
description, 11-59
setting up, 3-15
QH2xxxx table
description, 11-59
setting up, 3-15
QHxxxx table
description, 11-59
setting up, 11-59
QIxxxx table
description, 11-59
setting up, 3-15
QMxxxx table
description, 11-59
setting up, 3-15
quantities option, 3-12
quarter-end maintenance, 1-19
consequences of, 11-17
effects of, 10-6
Quick-Entry tables
description, 11-59
setting up, 3-15
R
Recurring Additional Descriptions file, 1-10
Accounts Receivable User’s Manual
Index
Recurring Entries
adding line items, 11-45
additional text for line items, 3-11
copying, 1-14, 5-31
to invoices, 1-14
to transaction files, 3-24
editing line items, 11-45
editing totals, 11-45
entering totals, 11-45
function, 11-37
group codes, 3-24
line-item entry, 11-42
run codes, 3-24, 11-37
setting up, 3-19, 3-24
Recurring Entries files
description, 1-10
setting up, 3-24
Recurring Entries List
function, 13-19
sample, 13-19
regular terms, 12-8
reports
history, 1-7
menu structure, 1-6
open invoice, 1-7
posting data without printing, 3-13
producing, 1-14
transactions, 1-7
Resource Manager
Data File Conversion function, 2-5, 2-6
Data File Creation function, 2-3
Install Applications function, 2-3, 2-5
right-click menu See shortcut menu, 1-31
RMCDxxx file, 1-11
RMTXxxx file, 1-11
run codes
defining, 1-14
recurring entries, 3-24, 11-37
S
sales
entering invoices, 1-13
Sales Analysis Report
description, 1-15
function, 9-7
Accounts Receivable User’s Manual
requirements, 9-7
sales categories
Detail History Report, 5-13
sales history
for commissions, 11-33
option to keep detail history, 3-11
option to keep summary history, 3-12
viewing, 4-13, 4-17
Sales Journal
description, 1-14
function, 6-9
invoice number, B-1
missing invoice numbers, 6-10
when to print, 6-9
Sales Order
installing, 2-4
Sales Reps
commissions, 3-16, 11-33
function, 11-33
setting up, 3-16
Sales Reps file
description, 1-10
setting up, 3-16
setting up commissions, 3-17
Sales Reps List
function, 13-5
sample, 13-5
Sales Tax Information window
Invoices, 5-20
Recurring Entries, 11-47
Sales Tax Report
description, 1-16
function, 10-3
when to print, 10-3
screens
graphical function, 1-30
graphical main menu, 1-28
navigating graphical, 1-30
navigating text function, 1-37
OSAS MDI menu, 1-29
text function, 1-37
text main menu, 1-35
Serial Number Entry window, 5-14, 5-15
serialized items, 1-14
setting up
access codes, 3-27
IX-11
Index
backup schedule, 3-28
checklist, 3-7
codes, 3-16
customers, 3-19
information to gather, 3-3
initial balances, 3-25
options and interfaces, 3-9
payment methods, 3-18
recurring entries, 3-24
sales reps, 3-16
ship-to addresses, 3-24
tables, 3-14
tax groups, 3-18
shipping addresses
groups of customers, 11-40
Shipping Methods
function, 12-9
Shipping Methods file
description, 1-9
Ship-to Address file
description, 1-10
setting up, 11-31
Ship-to Address Labels
function, 13-17
sample, 13-17
Ship-to Address List
function, 13-15
Ship-to Addresses
function, 11-31
group codes, 3-24
setting up, 3-24
shortcut menu, 1-31
sorting
alphabetical, 3-5
codes and IDs, 3-4
starting
OSAS
in other operating systems, 1-23
in Windows, 1-23
statement code
setting up, 3-19
Statements
applying credits to oldest items first, 3-13
description, 1-15
function, 8-17
options
IX-12
printing on plain paper or forms, 3-13
using forms, 3-13
printing, 8-17
Summary History
file, 1-13
function, 4-17
item inquiry screen, 4-19
specifying whether to keep, 3-12
viewing period, 4-18
Summary Invoice History
description, 1-16
function, 9-19
summary method
initial balances, 3-25
T
Tables
AIARy, 11-51
all companies, 3-14
ARGLxxx, 11-52
ARPDxxx, 11-54
assigning to a terminal, 3-15
Defaults, 3-15
deleting or rearranging information, 3-14
DFxxxx, 11-55
DUNxxx, 11-56
for any situation, 3-15
FORMxxx, 11-57
function, 11-49
individual companies, 3-14
prefix and suffix information, 3-14
printing, 11-60
Quick Entry, 3-15
system selection, 3-15, 3-16
use of, 11-49
Tables List
function, 13-23
sample, 13-23
Tax Audit Report
function, 9-27
Tax Classes file, 1-11
Tax Groups
file, 1-11
setting up, 3-18, 3-20
terminal
Accounts Receivable User’s Manual
Index
assigning table to, 3-15
Terms
cash on delivery, 12-8
function, 12-7
miscellaneous credits, 5-7
regular, 12-8
terms codes
definition, 1-6, 11-7, 11-39
miscellaneous credits, 5-7
Terms Codes file
description, 1-9
text mode
command line, 1-40
commands, 1-39
flags, 1-39
function screens, 1-37
main menu, 1-35
messages, 1-40
toolbars, 1-33
function screens, 1-33
main menu, 1-33
totals
transactions, 5-19
Totals Information screen, 11-46
Transaction Control file, 1-12
Transaction files, 1-12
Transaction Reports
descriptions, 1-14
files that provide information, 1-14
Transactions
after entering miscellaneous credits, 5-22
batches, 3-11
before changing or deleting, 5-4
current quantities and quantity-break prices window,
5-12
Enter Serial Numbers window, 5-14, 5-15
function, 5-3
invoice numbers, 5-8
line items, 5-11
Online Invoice Totals screen, 5-22
Online Invoicing screen, 5-21
options
changing customer’s price level, 3-12
displaying quantities and quantity breaks, 3-12
entering expired credit card as payment, 3-12
partial payments, 5-23
Accounts Receivable User’s Manual
posting, 1-16
printing invoices online, 5-18
relationship with cash receipts and open invoices, 1-18
Sales Tax Information window, 5-20
totals information, 5-19
when to enter, 5-3
U
unapplied credits, 8-10, B-2
balance information, 3-21
unit cost
displaying for line items, 3-12
V
Vendor Comments
viewing, 4-9
W
workstation date, 1-25
Y
year-end maintenance, 1-19
clearing high balances, 10-8
consequences of, 11-17
effects of, 10-6
IX-13