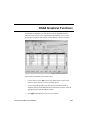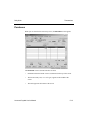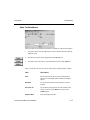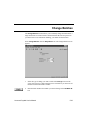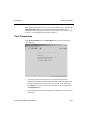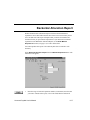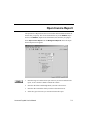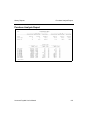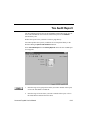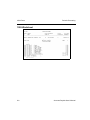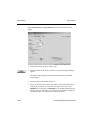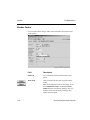
1
OPEN SYSTEMS® Accounting Software Accounts Payable User’s Manual For Use with Contractors’ Job Cost PN/2310.AP65 © 1995, 1997, 2000 by Open Systems Holdings Corp. All rights reserved. No part of this manual may be reproduced by any means without the written permission of Open Systems, Inc. OPEN SYSTEMS is a registered trademark and OSAS, Resource Manager, Resource Manager for Windows, and Report Writer are trademarks of Open Systems Holdings Corp. BBx is a trademark and PRO/5 and Visual PRO/5 are registered trademarks of BASIS International Ltd. Novell and NetWare are registered trademarks of Novell, Inc. Microsoft, Windows, Windows 95, Windows NT, Windows 2000 and MS-DOS are either trademarks or registered trademarks of Microsoft Corporation. Adobe and Acrobat are registered trademarks of Adobe Systems, Inc. TrueType is a registered trademark of Apple Computer, Inc. Open Systems Accounting Software for UNIX uses PKUNZIP utilities from Ascent Solutions, Inc., 9009 Springboro Pike, Miamisburg, OH 45342. Phone: (937) 847-2374 Internet: www.asizip.com Printed in U.S.A. This manual is recyclable. August 2003 Document No. 2310.AP65 This document has been prepared to conform to the current release version of OPEN SYSTEMS Accounting Software. Because of our extensive development efforts and our desire to further improve and enhance the software, inconsistencies may exist between the software and the documentation in some instances. Call your customer support representative if you encounter an inconsistency. Open Systems, Inc. 1157 Valley Park Drive Suite 105 Shakopee, Minnesota 55379 General Telephone (952) 403-5700 General Fax (952) 496-2495 Support Telephone (800) 582-5000 Support Fax (952) 403-5870 Internet Address www.osas.com Accounts Payable User’s Manual Contents Introduction Welcome to OSAS The Accounts Payable System Conventions OSAS Text Menu OSAS Graphical Menu OSAS Text Functions OSAS Graphical Functions Menu and Function Commands Favorites Menu Information Menu Reports 1-3 1-7 1-23 1-27 1-31 1-43 1-49 1-61 1-67 1-69 1-75 Installation and Conversion Installation Conversion 2-3 2-5 Setup Setup Considerations Setup Checklist Setup Functions 3-3 3-7 3-9 Information Inquiry Vendors and Invoices Invoices Detail History Summary History Accounts Payable User’s Manual 4-3 4-11 4-13 4-17 iii Contents Daily Work Transactions Copy Recurring Entries Purchases Journal Miscellaneous Debits Journal Daily Sales Tax Report Change Batches Batch Control Post Transactions 5-3 5-21 5-23 5-27 5-31 5-33 5-35 5-37 Material Requisitions Enter Material Requisitions Print Material Requisitions Material Requisitions Journal Backorder Allocation Report Post Material Requisitions 6-3 6-13 6-15 6-17 6-21 Management Reports Open Invoice Report Cash Flow Report Aged Trial Balance Vendor Analysis Report Sales Tax Report 7-3 7-5 7-7 7-11 7-15 History Reports AP Analysis Report Purchase Analysis Report Check History Report Detail History Report Payment History Report Tax Audit Report Summary Invoice History Report Vendor Activity Report Vendor Purchase History Report iv 8-3 8-7 8-11 8-13 8-17 8-19 8-21 8-23 8-27 Accounts Payable User’s Manual Contents Periodic Processing 1099 Forms Periodic Maintenance Purge Vendor Comments Purge Selected Files 9-3 9-17 9-21 9-23 Pay Invoices Change Open Invoice Status Hold/Release Invoices Prepare Checks Select Payables Edit Register Print Checks Check Register Subcontractor Release Paid Invoices Detail Post Payments Void Checks 10-3 10-5 10-13 10-17 10-21 10-23 10-27 10-29 10-33 10-35 10-39 File Maintenance Vendors Recurring Entries Terms Codes Distribution Codes Tables Release Form Text Maintenance Subcontract Change Fields 11-3 11-25 11-33 11-35 11-37 11-53 11-57 11-61 Master File Lists Printing a Master List Vendor Labels Vendor Detail List Vendor Comments List Recurring Entries List Accounts Payable User’s Manual 12-3 12-5 12-7 12-9 12-11 v Contents Tables List Vendor Reference List by Class Subcontract List 12-13 12-15 12-17 Job Payable Reports Job Aged Trial Balance Job Open Invoice List Subcontract Report Insurance Expiration Report 13-3 13-7 13-9 13-11 References System Messages Common Questions Build Retainage Invoice A-1 B-1 C-1 Index vi Accounts Payable User’s Manual Accounts Payable User’s Manual Introduction Welcome to OSAS The Accounts Payable System Conventions OSAS Text Menu OSAS Graphical Menu OSAS Text Functions OSAS Graphical Functions Menu and Function Commands Favorites Menu Information Menu Reports Accounts Payable User’s Manual 1 1-3 1-7 1-23 1-27 1-31 1-43 1-49 1-61 1-67 1-69 1-75 1-1 Welcome to OSAS The OPEN SYSTEMS Accounting Software (OSAS) product line consists of several accounting applications. Each application addresses a different phase of your financial operations; together, they form a powerful accounting solution to your daily and periodic accounting needs. Customer Support Open Systems, Inc. has a strong commitment to customer service and product quality. If you have difficulty using Open Systems, Inc. products, consult your user’s manual and other OSAS reference materials. If you need more information, consult a customer support representative. OSAS Overview Resource Manager The Resource Manager application is the foundation or shell of OSAS. It provides the operating environment that holds the other applications. Resource Manager also includes three powerful business features: Global Inquiry, Executive Information Summary (EIS), and Print Manager. With Global Inquiry, you can drill through your accounting data to find selected information throughout your system. With EIS, you can access company information quickly and view summaries of all aspects of a company or a group of companies. With Print Manager, when you print reports to file, your reports can be stored, sorted, printed, and searched for specific text. Base Applications Base applications are designed and produced with the largest possible number of industries in mind. They are most effective when you interface them with each other. Base applications are usually named after common accounting operations. Examples are: General Ledger, Accounts Payable, Purchase Order, Accounts Receivable, Sales Order, Payroll, and Inventory. Accounts Payable User’s Manual 1-3 Welcome to OSAS Introduction Running OSAS OSAS runs on an operating system supported by 150 megabytes of permanent storage and 4MB of RAM. You may need additional space or memory, depending on the size of your data files and the operating system you use. Consult your reseller for more information. Starting OSAS in Windows To start OSAS on a computer running Windows, double-click the OSAS shortcut on the desktop or access the program from the Start menu. Starting OSAS on Other Operating Systems To start OSAS on an operating system other than Windows, enter osas at the operating system prompt. The osas command can recognize three parameters: -t, -c, and -a. The terminal ID (-t) is the identification code assigned to the terminal you are using to run OSAS. On multiuser systems, each terminal usually has a default ID assigned when the terminals were added to the system. Use the -t parameter only when you want to log on with an ID other than the default ID. The terminal parameter is valid only if you are using Resource Manager for LANs. The company ID (-c) is the identification code assigned to a company. If your system carries two or more companies and you do not enter a company ID, the menu of the company entered by the last person who used the terminal appears. The access code (-a) is your personal password. Use the Access Codes function on the Resource Manager Company Setup menu to set up access codes. The most general expression for getting into OSAS takes all the parameters into account. For example, if you are on terminal 2 (T2) working with company B, and the password is apple, specify that information to access the system: osas -t T2 -c B -a apple 1-4 Accounts Payable User’s Manual Welcome to OSAS Introduction In UNIX you can enter the parameters in any order, and you can use any combination. You must leave a space between the parameter mark (-t, -c, or -a) and the parameter itself. Note In Windows, you can set up OSAS such that it always opens using a certain access code. Open the OSAS program shortcut’s properties and enter the access code and your company ID in the Target box. For example, using apple as your access code and H as your company ID, enter the following: C:\osas\progRM\osastm.exe -m4096 -tT00 -nT00 - -aapple -cH If you want the system to prompt for an access code after opening, enter -a in the Target field, followed by a space, followed by -c and the company ID. In the Windows icon properties, you can enter the parameter marks (-m, -t, or -n) in any combination but must be before the separation dash. Enter the access code and company ID commands (-a and -c) after the separation dash. See the Resource Manager Installation Manual for more information on these parameters. Accounts Payable User’s Manual 1-5 The Accounts Payable System Use the Accounts Payable system to record invoices you receive and payments you make to vendors. It lends its tracking capabilities to other applications associated with tracking assets (Inventory, for example). It represents a liability; when you make a payment to vendors, the transactions are expressed as losses to your source of revenue and gains to the assets you paid for. For example, if you purchase inventory items, the transaction represents a loss to your capital and a gain to inventory. Menu Structure The Accounts Payable menu structure is similar to the structure of other OSAS applications: functions appear roughly in order of use. File Maintenance Use the functions on the File Maintenance menu to set up and maintain information about your vendors. For example, use the Vendors function to establish and update information about vendors with which you usually do business. Information Inquiry Use the Information Inquiry functions to view (not change) information about vendors, invoices, and history. If you are running OSAS through a multiuser network, several people can look up the same information at the same time. Entering Transactions After you establish the valid codes and IDs through the File Maintenance functions, you can use the Daily Work functions and the Material Requisitions functions to enter transactions that involve acquiring goods. Accounts Payable User’s Manual 1-7 The Accounts Payable System Introduction Daily Work Use the Daily Work functions to do daily operations that involve an outside vendor: entering transactions and recurring entries, producing the Purchases and Miscellaneous Debits Journals, and posting transactions. You can choose to group certain transactions by batch, to help streamline entry, printing, and posting tasks. Material Requisitions Use the Material Requisitions functions to do daily operations that involve transferring goods from one part of the company to another: entering and printing requisitions, producing the Material Requisitions Journal and the Backorder Allocation Report, and posting. Reports Accounts Payable offers two categories of reports: management reports and history reports. The management reports show information primarily from the APINxxx (Open Invoice) file. The history reports show information from the APHIxxx and APHSxxx (Detail and Summary History) files and the APHCxxx (Check History) file. Use the reports functions as often as necessary to produce summarized information about current and historical purchases and payments. Pay Invoices After doing your daily work and producing reports, you can use the Pay Invoices functions to prepare the invoices produced as checks, print the checks, and post the payments. Master File Lists Information that you enter in the File Maintenance functions is kept in master files. Use the Master File Lists functions to produce the contents of the files: details about vendors, recurring entries, and so forth. 1-8 Accounts Payable User’s Manual The Accounts Payable System Introduction File Information The information you enter in Accounts Payable functions is stored in files. Each file falls into one of four categories: vendor files, attribute files, temporary files, and history files. (OSAS does not make a distinction between categories of files. The files are described in terms of categories to give you a better idea of how each fits in.) Vendor files The vendor files serve as permanent sources of vendor information: data stays in the files until you remove it. The APVExxx (Vendor) file holds the following vendor information, which you can enter directly through File Maintenance functions or by updating information from interfaced applications: • • • • • • • Vendor ID and description Vendor name, address, and phone number Terms code and distribution code Web site and e-mail addresses Vendor class and payment priority 1099 information Amount due The APVCxxx (Vendor Comments) file holds comments about the vendors with which you do business. Initially you enter comments through the Vendors function. Accounts Payable User’s Manual 1-9 The Accounts Payable System Introduction Attribute files The attribute files hold data that you can assign to each vendor. These attributes often carry their own function names. These files serve as permanent sources of information: data stays in these files until you remove it. The APDCxxx (Distribution Codes) file stores the distribution codes assigned to the vendor in the Distribution Codes function. The codes are assigned to vendors and serve as a shorthand method to the General Ledger accounts to which accounts payable, sales tax expense, and freight and miscellaneous charges are posted. The APTCxxx (Terms Codes) file stores the terms codes assigned to the vendor in the Terms Codes function. The codes are assigned to information about regular payment terms and serve as a shorthand method to enter the information required to calculate payment discounts. As a result, you can make payments to groups of vendors based on the terms of payment with the defined codes. The APRLxxx and APRHxxx (Recurring Entries) files store information about payments you make regularly to vendors. The APRLxxx file stores line-item information about each recurring entry; the APRHxxx file stores totals information. The APBTxxx (Batch) file stores information about the batches you use to organize your AP invoices and miscellaneous debits when you enter, print and post them. The APRDxxx (Recurring Additional Descriptions) file holds additional descriptions you assign to line items in a recurring entry. This file is used only if you elect to enter additional descriptive text for line items in the Resource Manager Options and Interfaces function. The additional text is printed on invoices after you copy the entry to the APTDxxx and APTHxxx files. The RMTDxxx (Tax Location Detail) file stores such tax location information as the location ID, taxable and nontaxable sales and purchases, tax paid, class, percentage, and amount refundable. 1-10 Accounts Payable User’s Manual The Accounts Payable System Introduction The RMGCxxx (Group Code) file stores information about tax groups and tax levels. The RMTHxxx (Tax Location Header) file stores information about the tax authority and tax accounts. Temporary files The temporary files store information created from an action you perform and send that information to a different file—usually a history file—when you post. The APLSxxx (Serial Item) file stores information about serial numbers and lots. You can delete and change the information in this file through Accounts Payable functions, but not through Inventory functions. The APTDxxx and APTHxxx (Transaction) files store information about unposted purchases and miscellaneous debits. The APTDxxx file stores line-item information about each transaction; the APTHxxx file stores totals information. The APDExxx (Additional Descriptions) file stores additional descriptions you assign to line items. This file is used only if you elect to enter additional descriptive text for line items in the Resource Manager Options and Interfaces function. The APMDxxx and APMHxxx (Material Requisitions) files store unposted and backordered material requisitions. The APMDxxx file stores line-item information about each material requisition; the APMHxxx file stores totals information. The APINxxx (Open Invoice) file stores such summary information as the amount due and the due date of the purchases and miscellaneous debits that were posted from the APTDxxx and APTHxxx files. The items remain on file until they are recorded as paid in full. The APIXxxx (Open Invoice Additional Information) file stores purchase order numbers associated with invoices posted from the APTDxxx and APTHxxx files. Accounts Payable User’s Manual 1-11 Introduction The Accounts Payable System The APCHxxx (Checks) file stores the latest batch of unposted checks that have been prepared for vendors. The APCMxxx (Requisition Control) file stores a record for each terminal ID with requisitions being entered or edited. History files The history files get information as a result of a post. The APHCxxx (Check History) file stores summary information for posted or voided checks. This file is used only if you elect to save check history in the Resource Manager Options and Interfaces function. The APHSxxx (Summary History) file contains information for each item purchased from each vendor in each period. Three types of summary records are created for each vendor: a company record, a vendor record, and an item record. This file is used only if you elect to save summary history in the Resource Manager Options and Interfaces function. The APHIxxx (Detail History) file contains detailed information about accounts payable transactions. This file is used only if you elect to save detail history in the Resource Manager Options and Interfaces function. The APHDxxx (Additional Descriptions History) file contains additional descriptions from entries posted to the APHIxxx file. You can also print these descriptions in the Detail History Report. This file is used only if you elect to use the additional descriptions option in the Resource Manager Options and Interfaces function. File Interaction The Accounts Payable system tracks money owed to your vendors. When you enter and post transactions, information is retained in or distributed to the appropriate files to keep the information up to date, make the information available through reports, and keep the system in balance. 1-12 Accounts Payable User’s Manual The Accounts Payable System Introduction Transactions You can enter two categories of transactions: purchases (or miscellaneous debits) and material requisitions. Purchases or Miscellaneous Debits When you enter purchases or miscellaneous debits, the key unit is the invoice. An invoice holds one or more purchases or miscellaneous debits. You can copy recurring entries to a purchase. Use the Recurring Entries function to define the run codes that identify recurring entries. The information is kept in the APRLxxx and APRHxxx files. When the purchase is made, enter the run code in the Transactions function. If Accounts Payable interfaces with Inventory and you enter a line item for an inventory item, the on-hand and available quantities in the Inventory item record are reduced for miscellaneous debits and increased for purchases by the quantity you enter. Information about unposted purchases and miscellaneous debits is stored in the APTDxxx and APTHxxx files. If you selected the option to use additional descriptions, you can enter 10 lines of additional descriptive text about each line item. The additional text is stored in the APDExxx file and is printed in the Purchases and Miscellaneous Debits Journals. When you post purchases and miscellaneous debits, several things happen, depending on your option settings: • Information about purchases and miscellaneous debits is moved from the APTDxxx and APTHxxx files to the APINxxx file. The APIXxxx file is updated with the purchase order number associated with the open invoice. • Each vendor’s company and vendor records are updated in the APHSxxx file. Accounts Payable User’s Manual 1-13 Introduction The Accounts Payable System • The amount due, amount prepaid, and purchase and payment history fields are updated in the APVExxx file. • If you keep detail and summary history, the APHIxxx file is updated by detailed line-item and totals information, and the APHSxxx file is updated by summary line-item and totals information. • If Accounts Payable interfaces with General Ledger, debit and credit entries are made to the accounts payable, sales tax, freight, miscellaneous, and expense accounts in the GLJRxxx (General Ledger Journal) file. • The Resource Manager tax files are updated. • If Accounts Payable interfaces with Job Cost, the job and phase records are updated by cost information in the JOBSxxx file. • The APLSxxx, APTDxxx, and APTHxxx files are cleared. Batching Using the batching function in your daily work increases your productivity and enables you to better control your daily transactions. Using the batch function allows you to group certain transactions by batch, to help streamline entry, printing, and posting tasks. Material Requisitions When you enter material requisitions, the key unit is the requisition. A requisition holds one or more requisitioned items. If Accounts Payable interfaces with Inventory, the line items are first filled from current stock. The remainder is backordered. Information about unposted and backordered material requisitions is stored in the APMDxxx and APMHxxx files. When you post material requisitions, several things happen, depending on your option settings: 1-14 Accounts Payable User’s Manual The Accounts Payable System Introduction • Backorders are created in the APMDxxx and APMHxxx files for partially filled requisitions. • Fully filled requisitions are removed from the APMDxxx and APMHxxx files, and serial numbers are removed from the APMSxxx file. • The APHIxxx file is updated by detailed line-item and totals information. • If Accounts Payable interfaces with General Ledger, debit and credit entries are made to the accounts payable, material inventory, and miscellaneous material accounts in the GLJRxxx file. • If Accounts Payable interfaces with Job Cost, the job and phase records are updated by cost information. The JOHIxxx file is automatically updated; the JOBSxxx file is optionally updated. Preparing Payments and Paying Invoices Use the Pay Invoices functions to prepare payments and pay your bills. These Accounts Payable functions are optional; you could go through an entire Accounts Payable work cycle without using the functions. Since it is likely that you make many of your payments by check, these functions are useful because you can send the information directly from the APINxxx file to the APCHxxx file and then to the checks themselves. Before you prepare checks, place disputed (open) invoices on hold and release held invoices that can be paid. To place all invoices on hold or release all held invoices for one or more vendors, use the Change Open Invoice Status function. To place individual invoices on hold or release some invoices that are on hold, use the Hold/Release Invoices function. Use the Prepare Checks function to indicate to the APCHxxx file the released invoices that are due to be paid. When checks are prepared, a log showing which invoices were prepared is produced. To look at which invoices have checks prepared and remove an invoice from the list. If necessary, use the Select Payables function. Accounts Payable User’s Manual 1-15 Introduction The Accounts Payable System Before you print the checks, you might want to produce the Edit Register to get a list of the checks cleared to print. Use the Print Checks function to print the checks. If you elected to save check history in the AP Options and Interfaces, the record is sent to the APHCxxx file. After you print the checks, print the Check Register for an audit trail of the vendor checks you printed. When you have printed all the checks and are ready to post, use the Post Payments function. Information is moved from the APCHxxx file to the APHIxxx and APHSxxx files, and the general ledger account numbers of the checks are stored in the APHCxxx file. If you spot checks that should not have printed or if printed checks are lost or destroyed, use the Void Checks function to void them. Producing Reports The APVExxx file provides information for several reports: • The Vendor Analysis Report shows the balances and cumulative purchases for vendors and summarizes the purchasing activity with your vendors. • The Vendor Detail List shows general information about your vendors. • Use the vendor labels as mailing labels or as a quick reference of the vendors that are on file. • The 1099 Forms summarize your year-to-date payments to vendors. You can print forms or save the data on magnetic media. The APINxxx, APIXxxx, and APVExxx files provide information for several reports: • 1-16 The Open Invoice Report shows the invoices that remain unpaid and miscellaneous debits from the APINxxx and APIXxxx files. Accounts Payable User’s Manual The Accounts Payable System Introduction • The Cash Flow Report shows the amount of cash you can expect to pay out within three user-defined periods from the APINxxx and APVExxx files. • The Aged Trial Balance shows the open invoice balances broken down into five aging periods—current, 30, 60, 90, and 120+ days. The APVCxxx file provides the information for the Vendor Comments List. The APRLxxx, APRHxxx, and APRDxxx files provide information for two reports: • The Copy Recurring Entries Report shows the total recurring entries transferred to the APTDxxx and APTHxxx files. If problems occur during the process, an error log is included in the report. • The Recurring Entries List serves as a reference when you copy entries to the APTDxxx and APTHxxx files. The APCHxxx file provides information for the Edit Register and for checks. The APMDxxx and APMHxxx files provide information for the material requisition forms and the Backorder Allocation Report. Produce this report to find out which backordered requisitions you can fill when goods are received in Inventory. The APHCxxx file provides information for the Check History Report, which shows summary information for printed and voided checks. The APHIxxx file provides information for several reports: • The Detail History Report shows the purchases and returns you made. • The Vendor Activity Report shows what you are purchasing, from whom you are purchasing it, and how often you purchase it. • The Payment History Report shows paid invoices, check numbers and dates, and payment types. Accounts Payable User’s Manual 1-17 Introduction The Accounts Payable System • The Summary Invoice History Report shows vendor and invoice summary totals. • The Tax Audit Report shows the tax breakdown by vendor, invoice number, and tax location. The APHSxxx file provides information for several reports: • The AP Analysis Report shows the statuses of your company’s payables. • The Purchase Analysis Report shows your company’s purchases and discounts taken and lost. • The Vendor Purchase History Report shows how much you purchased from vendors. Posting Payments When you use the Post Payments function to post the checks you printed, several things happen: 1-18 • Invoices that are paid in full change to paid status, and the check numbers and dates are added to the APINxxx file. • The totals in the APVExxx file are updated for the invoices you paid. • The APCHxxx file is cleared for the next check cycle. • The APHCxxx file is updated with the checks’ general ledger account numbers if you elected to keep check history in the Resource Manager Options and Interfaces function. • The invoice and payment information is transferred to the APHIxxx and APHSxxx files if you elected to keep summary and invoice history in the Resource Manager Options and Interfaces function. Accounts Payable User’s Manual The Accounts Payable System Introduction • If Accounts Payable interfaces with General Ledger, debit and credit entries are made to the cash, accounts payable, and discount accounts in the GLJRxxx file. • If Accounts Payable interfaces with Bank Reconciliation, disbursement entries are created in the BRTRxxx file for the checks posted. Periodic Maintenance When you do periodic maintenance, several things happen: • Totals are transferred from the APVExxx file to the last-year fields, and period-, quarter-, and year-to-date totals are cleared. • At the end of the calendar year, 1099 YTD payments are moved to last year. The following chart shows the effects of periodic maintenance on the APVExxx file: Value Updated (+ or -) Increased Decreased General Information Use the Vendors function Vendor Comments Use the Vendors function Purchases PTD, QTD, YTD, and LY Post transactions Post miscellaneous debits Payments PTD, QTD, YTD, and LY Post payments Post payments Discount Taken PTD, QTD, YTD, and LY Post transactions Post miscellaneous debits Discount Lost PTD, QTD, YTD, and LY Post transactions Post miscellaneous debits Last Purchase Number Post transactions Post miscellaneous debits Accounts Payable User’s Manual 1-19 Introduction The Accounts Payable System Value Increased Decreased Last Purchase Date Post transactions Post miscellaneous debits Last Purchase Amount Post transactions Post miscellaneous debits Last Payment Date Post payments Post payments Last Check Number Post payments Post payments Last Payment Amount Post payments Post payments YTD 1099 Payments Post payments Post payments Last-Year 1099 Payments Post payments Post payments 1-20 Updated (+ or -) Accounts Payable User’s Manual The Accounts Payable System Introduction Purging Selected Files After your files become too large, you should clear data through the Periodic Maintenance function and the Purge Vendor Comments function. The following list shows the effects of purging selected files: • Paid invoices with check dates before the date you specify are removed from the APINxxx and APIXxxx files. • Detail history with invoice dates before the date you specify is removed from the APHIxxx file. • Summary history before the period/fiscal year you specify is removed from the APHSxxx file. • Check history with check dates before the date you specify is removed from the APHCxxx file. • Recurring entries with cutoff dates before the date you specify is removed from the APRLxxx, APRHxxx, and APRDxxx files. • Temporary vendors with zero balances are removed from the APVExxx file. Accounts Payable User’s Manual 1-21 The Accounts Payable System Introduction Application Interaction You can use Accounts Payable as a standalone application, but you get optimal use from it when you interface it with other applications. Interfacing applications means that the information you enter in one application, you can transfer to and use in other applications. So it reduces data entry time and the number of errors that might creep in along the way. 1-22 Accounts Payable User’s Manual Conventions This manual helps you install OSAS on any standard computer running any of several popular operating systems and helps with your accounting software questions. Use the manual as a reference for the OSAS interface and application functions. Manual Conventions This manual is divided into the following sections: • This introduction provides an overview of this application and the OSAS system, the basic functionality of the application including graphical and text-based application features, and function key references. • The remainder of the chapters explains the set up, workflow, and functions of the application: where each function fits within the application and how to use each function to get the most out of the application. Mouse Conventions The standard mouse has two buttons, left and right, each performing certain functions. In this manual, these terms are used for operating the mouse: click, right-click, double-click, and deselect. The click is a single press on the left mouse button. Place the cursor over the desired function, and press the left button to enable, or select, that function. A right-click is a single press of the right mouse button. To double-click, move the cursor over the desired function and quickly press the left mouse button twice. If there is too long a pause between clicks, the computer may interpret your action as two separate clicks and may not perform the desired function. Accounts Payable User’s Manual 1-23 Introduction Conventions To deselect an object, move the cursor off the icon or folder onto a blank space within the window and press the left mouse button. Note Some mouse manufacturers allow you to change the function of the mouse buttons for those who prefer (for example) to use the mouse with their left hand. In this case, reverse the commands when you use them. For example, a click refers to a single press of the right mouse button, while the term rightclick refers to a single press of the left button. GUI/Text Command Conventions When you see the phrase “use the Proceed (OK) command” in the user’s manuals, press PgDn in either text or graphical mode. In graphical mode, clicking OK has the same effect as pressing PgDn. GUI/Text Menu and Function Conventions When you start OSAS, the main menu appears and lists the applications available for use. If you are using UNIX or Linux, the text main menu appears. If you are using Windows, you can choose between the text main menu, the graphical main menu, or the start-style main menu. Use the Defaults function under the Resource Manager Workstation Configuration menu to select the style of menu you want to appear by default, or you can press Shift+F5 to toggle between the menu styles from any menu. You can use any of the menus regardless of whether you use the text or graphical modes for the OSAS functions. In addition, if you are using Windows, you can use either text or graphical function screens independently of the main menu. For example, you can use text function screens even if you are using the graphical main menu and vice versa. Select GUI Functions from the Modes menu or press Shift+F6 to toggle between the text and graphical modes for function screens. 1-24 Accounts Payable User’s Manual Conventions Introduction Access Codes Your company can limit use of the system by defining access codes and assigning them to employees. Each code allows access to specific applications, menus, and functions. If you cannot select a menu, your access code is not authorized for it. Use the Access Codes function on the Resource Manager Company Setup menu to set up access codes. If you have more than one access code, select Access code from the File menu or press F4. The Access Code box appears (the example below uses the graphical mode). Enter the access code you want to change to, then click OK or press Enter. Workstation Dates To change the workstation date, select Workstation date from the File menu or press F6. The Workstation Date box appears (the example below uses the graphical mode). Use the buttons or your keyboard to enter the date and click OK or press Enter to change the workstation date. Click System Date to change the workstation date to match the operating system date, click Abandon to restore the original date, or click Exit or press F7 to close the box without changing the date. Accounts Payable User’s Manual 1-25 OSAS Text Menu The text main menu can be used on all operating systems. Using text-based menus, the text menu (shown below) offers easy access to your applications. When you select an application, the application’s menu, which presents several related functions, is superimposed over the main menu. Selecting a function leads you to a function screen or to another menu. You can select applications from the main menu in these ways: • Use the arrow keys to move the cursor up or down, highlighting the application you want to use. Then press PgDn or Enter to select it. • Press the first letter of the application you want to use. The cursor jumps to the first application beginning with the letter. Continue to press the letter key or the down arrow until the application you want is highlighted. When your choice is highlighted, press PgDn or Enter to select it. Accounts Payable User’s Manual 1-27 Introduction OSAS Text Menu • Position the mouse cursor over the application and click. The application briefly highlights and switches to the application screen. • To jump to the first application on the menu, press Home. To jump to the last application on the menu, press End. To select a function from an application menu, highlight and select your choices the same way you do on the main menu—with one exception: you can press PgDn only when an option leads to another menu. You must press Enter to select a function. On an application menu, you can press PgUp to move to the menu immediately above it. If you are several menu levels away from the main menu, you can return to the main menu by pressing PgUp repeatedly or by pressing the Tab key. You can exit from a menu in these ways: • • • Press PgUp to go to the previous menu (one menu up). Press the Tab key to go to the main menu. Use Exit (F7) to go to the operating system. Commands Several commands are available within the menu to perform various tasks such as changing the system date, entering access codes, switching between sample data and live data, and so on. To access a command, press the corresponding key. If you’re working with a keyboard that lacks function keys (labeled with an F followed by a number) or if you’re working with an emulator in UNIX (which can cause function keys to become unavailable), press the appropriate alternate key combination to access the command. Command Key Esc 1-28 Alternate Key Description Opens a menu listing available commands. Accounts Payable User’s Manual OSAS Text Menu Introduction Command Key Alternate Key Description F1 (Help) Esc+H Opens the help description for the selected application/function. You must be within an application menu to access this command. F2 Esc+W Toggles between the Favorites and main menus. Esc+D Allows you to switch to a different company. Esc+O Allows you to enter an access code. (Favorites) F3 (Change Company) F4 (Access Code/Other) Pressing this key (or key combination) twice opens a utility menu similar to the Other Commands menu on graphical screens. See “Other Commands Menu” on page 1-37 for more information on the commands available. Esc+X Switches between live and sample data. Esc+F Allows you to change the workstation date. F7 (Exit) Esc+M Exits from OSAS. F8 (Print Esc+L Allows you to output the current screen to a printer, print preview window, or file. Esc+U Allows you to change to a different fiscal year when you are inside the General Ledger or Payroll menus. F5 (Live/ Sample Data) F6 (Workstation Date) Screen) F9 (Change Year) Accounts Payable User’s Manual 1-29 Introduction OSAS Text Menu Command Key Alternate Key F10 (Add to/ Ctrl+Z Pressing this key (or key combination) on the main menu adds the selected application or function to your Favorites menu. Pressing this key on the Favorites menu removes the selected application or function from the Favorites menu. Shift+F2 (Application Info) Esc+I Opens a screen listing information about the applications you have installed. Shift+F5 (Menu Style) Esc+G On Windows workstations, pressing this key combination toggles between graphical and text main menus. Shift+F6 (Toggle GUI screens) Esc+K On Windows workstations, pressing this key combination toggles between graphical and text function screens. Delete Favorites) 1-30 Description PgUp Moves back one menu level. Tab Moves back to the main menu from any application menus. Enter Selects an application menu or function from a menu. Up/Down arrow Moves the cursor up or down through the menu selections. Accounts Payable User’s Manual OSAS Graphical Menu In a Windows environment, you can choose from two types of graphical-style menus. The standard graphical menu features application selections that resemble many Windows functions. The start-style menu is named so because of its functional resemblance to the Start menu in Windows 95, 98, NT, and 2000. Both graphical menus provide pull-down menus, convenient tool buttons, and easy access to your installed applications and their functions using either the mouse or keyboard. The two graphical menus provide you with a visual choice in your interaction with OSAS and your data. When you select an application in either graphical OSAS menu, the application’s main menu, presenting several related functions, appears beside the OSAS menu. Selecting a function leads you to either a function screen or another menu. Several commands are available within the menu to perform various tasks such as changing the system date, entering access codes, switching between sample data and live data, and so on. You can access commands in these ways (if a button or pull-down menu selection is muted or gray, it is not available for use): • • • Click the appropriate graphical tool button. Select the command from a pull-down menu. Press the associated keyboard hot key. If you use the graphical menu, you can select application menus and functions by clicking the function or menu name on the menu or by highlighting your choice and pressing Enter. If you choose the start-style menu, you can select applications from the main menu by using the arrow keys to highlight your choice and pressing Enter, by clicking the selection, or by holding the mouse cursor over the selection until the menu appears. From any application menu, you can select a button from the previous menu to move directly to that menu. If you are several menu levels away from the main menu, you can return to the main menu by clicking items on the previous menus. Accounts Payable User’s Manual 1-31 Introduction OSAS Graphical Menu Graphical Main Menu You can exit from a graphical menu in these ways: • • • • • 1-32 Select a button from a previous menu. Press the Tab key to go to the OSAS menu. Click the Close box in the upper-right corner of the window. Use Exit (F7). Select Exit from the File menu. Accounts Payable User’s Manual OSAS Graphical Menu Introduction Start-Style Main Menu You can exit from a menu in these ways: • • • • • • Press the left arrow key to go to the previous menu (one menu up). Hold the mouse over a different menu choice. Press the Tab key to go to the OSAS menu. Click the Close box in the upper-right corner of the window to close OSAS. Use Exit (F7) to close OSAS. Select Exit from the File menu to close OSAS. Accounts Payable User’s Manual 1-33 OSAS Graphical Menu Introduction Main Menu Elements Pull-Down Menus When using the graphical menus, you can use the pull-down menus and toolbar buttons to access functions without using the function keys. While the function keys work in graphical menus, the menu bar and toolbar buttons give you a choice in accessing these functions. The OSAS pull-down menu bar is shown below. To access the menu’s commands, click one of the menu titles. The menu for that heading appears and lists available commands followed by any hot key combinations in brackets <>. To use a command, either click the command name or press the hot key(s) listed. 1-34 Accounts Payable User’s Manual OSAS Graphical Menu Introduction File Menu Command Description Access Code Opens the Access Code dialog box. See “Access Codes” on page 1-25 for more information. Sample data set/Live data set Toggles between Sample and Live data. Workstation date Opens the Workstation Date dialog box. See “Workstation Dates” on page 1-25 for more information. Exit Exits OSAS. Accounts Payable User’s Manual 1-35 Introduction OSAS Graphical Menu Modes Menu Command Description GUI Functions Toggles between graphical and text function screens. Scale GUI Screens Toggles scaling of graphical screens on and off. When selected, this command enlarges graphical screens. When off, the command restores the OSAS screens to their original size. This command does not take effect until you access a function. Tools Menu Command Description Calculator Opens the OSAS calculator. Favorites Menu 1-36 Command Description Change to Favorites Toggles between the Favorites and main menus. See “Favorites Menu” on page 1-67 for more information. Accounts Payable User’s Manual OSAS Graphical Menu Introduction Other Commands Menu Command Description Calculator Opens the OSAS calculator. Execute an Operating System Command Allows you to enter an operating system command from within OSAS. Call a PRO/5 Program Allows you to execute a PRO/5 program. Product Suggestions Creates a report for future OSAS product suggestions. Application Options Inquiry Allows you to view the application options you have set up for a particular application. Global Inquiry Allows you to search across your data. You can select from the installed applications which data to search. General Information Inquiry Allows you to search for information on employees, customers, and vendors. Support Information Displays the OSAS Support Information. User Comments Allows you to record comments for your own use. EIS Dashboard Display Displays the EIS Dashboard. EIS Dashboard History Displays the EIS Dashboard history. Accounts Payable User’s Manual 1-37 Introduction OSAS Graphical Menu Command Description Pop-Up Calendar Allows you to create and read date reminders in OSAS. Inventory Price Calculator Allows you to calculate prices and view quantity, cost, and pricing information for inventory items. Help Menu Command Description Help Opens help descriptions for the application menus and functions. About OSAS Opens the About OSAS dialog box. Main Menu Toolbar The main menu toolbar gives you quick access to frequently-used OSAS commands. To access a command, click the appropriate button. Button Description Opens the Workstation Date dialog box to change the workstation date. See “Workstation Dates” on page 1-25 for more information. 1-38 Accounts Payable User’s Manual OSAS Graphical Menu Introduction Button Description Opens the Access Code dialog box to switch between access codes. See “Access Codes” on page 1-25 for more information. Displays the Application Information dialog box. Opens help descriptions for the application menus and functions. Opens the OSAS calculator. Displays the pop-up calendar screen. You can use the calendar to add and review reminders for any date. Opens an MS-DOS command window. Displays a screen for calling any BBx program that does not require variables to be passed to it. For more information, see “Appendix F” in the Resource Manager User’s Manual. Toggles between the Favorites and main menus. See “Favorites Menu” on page 1-67 for more information. Accounts Payable User’s Manual 1-39 Introduction OSAS Graphical Menu Right-Click Menu On the graphical and start-style main menus, the right-click menu gives you quick access to commands that help you manage commands on your Favorites menu, switch between sample and live data, perform certain setup tasks, and view function information. To access the menu, click the right mouse button anywhere on the graphical or start-style main menu. 1-40 Command Description Add to/Remove Favorites (F10) Use the Add to/Remove Favorites Menu button to add the desired submenu or function to or from your Favorites menu. Change to Favorites/ Main (F2) Toggles your display menu between the Favorites and main menus. Sample Data/Live Data (F5) Switches between sample and live data. Setup (F9) Performs certain application setup tasks. For example, in General Ledger, you can select the year with which you want to work. If Setup is required in an application, the application’s user’s manual describes its use. Function Information (F1) Displays information about the selected function. Accounts Payable User’s Manual OSAS Graphical Menu Introduction Data Set On the start-style main menu, you can select the Live Data radio button to work with live data or select the Sample Data radio button to work with sample data. You can also press F5 to toggle between sample and live data. Change Company Field On the start-style or graphical main menu, select the company to change to from the list box. Accounts Payable User’s Manual 1-41 OSAS Text Functions Like the text menu, OSAS text function screens can be used on all operating systems. On Windows workstations, text function screens can also be used with graphical menus (or vice versa—the text menu can be used with graphical function screens). Function screens provide you an interface to the data in your data files, allowing you to view, update, and change information as needed. Function screens also allow you to print reports or perform tasks on your data, such as calculations, purges, or the resetting of accumulated totals. You can move around the screen in these ways: • Press the down arrow or Enter to move from field to field. • Select the appropriate command on the command bar. Accounts Payable User’s Manual 1-43 Introduction OSAS Text Functions • Use commands to access information screens or to toggle commands on and off. See “Commands and Flags” on page 1-44 for more information. • If a screen contains more than one section, press PgDn when prompted to move to the next section. • If a menu appears prompting you for the kind of information to enter or maintain (such as on Transaction or File Maintenance screens), select the appropriate option and press Enter. • Press F7 to exit the screen and return to the main menu. Text Function Screen Elements Command Line The command line appears at the bottom of the screen and gives you access to commands that allow you to move around the screen, add or edit information, change settings for selected lines, or select output devices. Press the highlighted key to use a command. Enter = edit, Append, View, Workstation ID, Header The commands that are available depend upon the function you are using. Consult the user’s manual for the appropriate application for information on commands in the command line. Commands and Flags Like the text menu, text function screens also contain several commands that allow you to perform tasks related to the function you are using. Some of these commands are not available for every function; when a command is available, a flag appears at the bottom of the screen. 1-44 Accounts Payable User’s Manual OSAS Text Functions Introduction To access a command, press the corresponding key. If you’re working with a keyboard that lacks function keys (labeled with an F followed by a number) or if you’re working with an emulator in UNIX (which can cause function keys to become unavailable), press the appropriate alternate key combination to access the command. Command Key Alternate Key Description Enter Moves the cursor to the next field and accepts the data entered or access a line for editing. Esc Opens a window listing available commands for the screen. Ins Toggles between insert and overwrite modes for entry. When the Ins flag appears, the characters you enter push other characters in the field to the right. If there is no Ins flag, the characters you enter overwrite other characters in the field. PgUp Moves back to the first field on the screen (or the first field after the key field) without erasing any entries. PgDn Approves the data on the screen, updates the data file accordingly, and proceeds to the next field or section. Tab Moves the cursor to the next block or field that requires an entry. Up/Down arrow Moves the cursor up or down through the fields. F1 (Help) Esc+H Accounts Payable User’s Manual Opens the help description for the current field. 1-45 Introduction OSAS Text Functions Command Key Alternate Key F2 (Inquiry) Esc+W Opens the Inquiry screen for the current field. This command is available for a field when the Inquiry flag appears at the bottom of the screen. See “Inquiry Commands” on page 1-62 for more information. F3 (Delete) Esc+D Deletes the current record or line item (when allowed). F4 (Others) Esc+O Opens a utility menu similar to the Other Commands menu on graphical screens. See Description “Other Commands Menu” on page 1-37 for more information on the commands available. Esc+X Abandon processing or clear all fields. F6 (Maint) Esc+F Opens the appropriate File Maintenance function where you can view or update master file information. This command is available when the Maint flag appears at the bottom of the screen. F7 (Exit) Esc+M Exits from the function. F8 (Print Screen) Esc+L Allows you to output the current screen to a printer, to a print preview window, or to a file. F9 (Undo Typing) Esc+U Clears the contents of the current field. F10 (Delete) Ctrl+Z Deletes information to the end of the line. Shift+F2 (Info Menu) Esc+I Opens an information menu for the function when the Info flag appears at the bottom of the screen. The commands that are available depend on the applications you have installed. See “Information Menu” on page 1-55 for more information. F5 (Abandon) 1-46 Accounts Payable User’s Manual OSAS Text Functions Introduction Command Key Shift+F3 Alternate Key Esc+B Description Uses the item alias lookup when the IN Search flag appears for an Item ID field. See “Inventory Lookup” on page 1-64 for more information. In Sales Order, pressing this key combination allows you to enter purchase requisitions from the Ordered, Units, Shipped, and Backordered fields. In sales tax fields, pressing this key combination allows you to view sales tax breakdowns. Shift+F4 (Part # Lookup) Esc+C Uses the customer/vendor part number lookup when the IN Search flag appears for an Item ID field. See “Inventory Lookup” on page 1-64 for more information. Shift+F5 (Item Detail Lookup) Esc+G Uses the item detail lookup when the IN Search flag appears for an Item ID field. See “Inventory Lookup” on page 1-64 for more information. Shift+F6 (Lot Lookup) Esc+K Uses the lot lookup when the IN Search flag appears for an Item ID field. See “Inventory Lookup” on page 1-64 for more information. Shift+F7 (Serial Number Lookup) Esc+N Uses the serial number lookup when the IN Search flag appears for an Item ID field. See Shift+F8 (Item Descr. Lookup) Accounts Payable User’s Manual “Inventory Lookup” on page 1-64 for more information. Uses the item description lookup when the IN Search flag appears for an Item ID field. See “Inventory Lookup” on page 1-64 for more information. 1-47 Introduction OSAS Text Functions Command Key Alternate Key Description Ctrl+F (Quick Entry) Toggles quick entry on and off. If this option is off, the cursor stops at every field possible. If you want to skip the fields that are not required (thus speeding data entry), turn this option on. Quick entry is on when the Quick flag appears at the bottom of the screen. Ctrl+G (Bell) Toggles the bell on or off. If the bell is on, it sounds at an error or when you must verify a command. Ctrl+O (Online Hints) Toggles function key display on and off. If this option is on, the available function keys appear at the bottom of the screen to remind you of their use. Ctrl+V (Verify) Toggles verification on and off. If verification is turned on, you must press a key twice to verify that you want to perform an operation. Verification is on when the Verify flag appears at the bottom of the screen. Messages Messages appear at the bottom of the screen when a command is unavailable or when OSAS needs information to continue. 1-48 Accounts Payable User’s Manual OSAS Graphical Functions On Windows workstations, you can choose to use the graphical mode for function screens. These screens contain all the functionality of text screens presented in a graphical mode similar to other Windows software programs. You can move around the screen in these ways: • Use the mouse or press Tab to move from field to field. Use the scroll buttons to move from line to line in scrolling regions. • If a screen appears prompting for the kind of information to enter or maintain (such as on File Maintenance or Transactions screens), select the appropriate option and click OK to continue. • Press PgDn if prompted to move to the next section. Accounts Payable User’s Manual 1-49 Introduction OSAS Graphical Functions 1-50 • Click Header when it appears to return to the screen’s header section. • Press F7 to exit the screen and return to the main menu. Accounts Payable User’s Manual OSAS Graphical Functions Introduction Graphical Function Screen Elements Like the main menu, graphical function screens also contain pull-down menus and toolbars. These menus and toolbars are described below. Function Pull-Down Menus Commands Menu Command Description Inquiry Lists valid entries for the current field. Maintenance Opens the appropriate File Maintenance function. Proceed/OK Proceeds to the next screen or saves your entries. Start Over Moves back to the first field on the screen or to the first field after the key field without erasing any entries or changes. Field Up Moves the cursor to the previous field. Field Down Moves the cursor to the next field. Abandon Clears data from all fields and moves the cursor to the first field on the screen. Delete Deletes the information on the screen. Since this command can delete an entire record, use it with caution. Accounts Payable User’s Manual 1-51 Introduction OSAS Graphical Functions Command Description Jump Moves the cursor to the next block of data on the screen or to the next field that requires an entry. Exit Exits from a screen or a window without saving data. Edit Menu Command Description Copy Copies the contents of the current field. Paste Pastes the value you copied from a previous field into the current field. Undo Restores the contents of the current field from before you made changes to it. Modes Menu Select the options you want to use. 1-52 Command Description Verify Exit When verification is turned on, you must press a key twice to verify that you want to exit or abandon functions. Accounts Payable User’s Manual OSAS Graphical Functions Introduction Command Description Bell When the bell is turned on, it sounds at an error or when you must verify a command. Quick When this option is off, the cursor stops at every field possible. To make the cursor skip the fields that do not require an entry in certain application functions, select the option. Verify PgDown If verification is turned on, you must press PgDn twice to proceed to the next screen or to save your entries. Accounts Payable User’s Manual 1-53 Introduction OSAS Graphical Functions Other Commands Menu See “Other Commands Menu” on page 1-37 for information on this menu’s commands. Help Menu 1-54 Command Description About OSAS Opens the About OSAS dialog box. Command Help Opens the OSAS Key Help screen. Help Lists information about the field on which you are working. Online Doc Launches your.PDF file viewer and opens the documentation for the appropriate OSAS application. Accounts Payable User’s Manual OSAS Graphical Functions Introduction Information Menu The Information menu appears on some function screens in certain applications. The functions on the menu are determined by the applications installed. The Information menu also gives you access to documents attached to customer, vendor, employee, invoice, or other records. When the Information menu appears, select the appropriate Documents command to open the Documents screen where you can view document information or open attached documents. Scroll Commands Menu The Scroll Commands menu appears only on screens with scroll regions. Command Description First Line Moves the cursor to the first data entry field. Previous Page Displays the previous page. Previous Line Moves the cursor up to the previous line. Next Line Moves the cursor down to the following line. Next Page Displays the following page. Accounts Payable User’s Manual 1-55 Introduction OSAS Graphical Functions Command Description Last Line Moves the cursor to the last data entry field. Insert Inserts characters between pre-existing entries in a field. Delete Deletes the selected characters. Jump Moves the cursor to the next section of the screen in some functions. Inventory Lookups Menu If you use the Inventory application and the cursor is in an Item ID field, you can use any of the Inventory Lookups commands to search for information about items and select an item for entry in the field you are in. 1-56 Command Description Alias Lookup Searches for items with a specified alias listed as an alternate item. When you enter the alias, you can use the * and ? wildcard characters to restrict or widen the search. Customer/Vendor Lookup Searches for an item based on customer ID or vendor ID. When you enter the customer or vendor ID, you can use the * and ? wildcard characters to restrict or widen the search. Accounts Payable User’s Manual OSAS Graphical Functions Introduction Command Description Detail Lookup Searches for detailed information about an item. You can enter search information in any of the fields that appear using any of the following wildcard characters to restrict or widen the search: * ? < > =. Lot Lookup Searches for an item based on lot number. When you enter the lot number, you can use the * and ? wildcard characters to restrict or widen the search. Serial Lookup Searches for an item based on serial number. When you enter the serial number, you can use the * and ? wildcard characters to restrict or widen the search. Description Lookup Searches for an item based on item description. When you enter the description, you can use the * and ? wildcard characters to restrict or widen the search. Function Screen Toolbar Like the main menu’s toolbar, the toolbar located near the top of function screens gives you quick access to frequently-used commands. Click the appropriate button to access a command. Button Result Opens the appropriate File Maintenance function to update information about the field you are in. Deletes the information on the screen. Since this command can delete an entire record, use it with caution. Moves the cursor back to the first field on the screen or to the first field after the key field without erasing any entries or changes. Accounts Payable User’s Manual 1-57 Introduction OSAS Graphical Functions Button Result Copies the contents of the current field. Pastes the contents you copied from a previous field into the current field. Opens the OSAS calculator screen. Opens the pop-up calendar. Use the calendar to add and review reminders for any date. Displays information about the field you are in. Opens your .PDF file viewer so that you can view the online documentation. Right-Click Menu The right-click menu gives you quick access to commonly used commands such as those used to access help, move around the function screen, work with information on EIS dashboards, and so on. The commands that are available on the right-click menu depend on the function and the field you are currently using. 1-58 Accounts Payable User’s Manual OSAS Graphical Functions Introduction Function Field Inquiry When the Inquiry button appears next to a field on a function screen, you can either click the button or press the F2 (Inquiry) key to open the inquiry screen and search for information. Verification Buttons When you’ve completed data entry on a function screen, you can either click OK or press PgDn to proceed to the next screen or to save your entries. Click Abandon or press F5 to abandon entries. Accounts Payable User’s Manual 1-59 Menu and Function Commands OSAS lets you navigate around the main menu and function screens in a variety of ways. This section describes the commands that are available when you access a specific command. For example, accessing the Help command makes the Maintenance and Exit commands available while you are in that function. This section also describes how to navigate within scroll regions and fields while you work with OSAS functions. Help Commands When you use the Help (F1) command, you can use these commands. Key Operation F3 (Delete) Deletes the help screen content. To recover a deleted screen, copy the xxHELP file from the distribution media to the /PROGxx subdirectory (xx is the application ID). The copying process overwrites changes you made to other help screens. In graphical mode, you must first press F6 to enter the edit screen for the help content before you can press F3. F6 (Maintenance) Edits a help screen. F7 (Exit) Exits the help screen and closes the window. Accounts Payable User’s Manual 1-61 Menu and Function Commands Introduction Inquiry Commands When the Inquiry button appears next to a field or the Inquiry flag appears in the lower-right corner of the screen, the Inquiry command is available. Click the button or press F2 to open the Inquiry screen to look up and select an appropriate entry. The Inquiry screen operates in two modes: Search and Sort. You can toggle between these modes within an Inquiry window by pressing the Ins (Insert) key. You can also choose the default mode for Inquiry windows by using the Defaults function on the Workstation Configuration menu within Resource Manager. • In Search mode, you can move through the keys listed by typing progressively larger portions of the key you want to find. For example, when you press C, the window displays keys beginning with the letter C. When you next press A, the window displays keys beginning with CA, and so on. • In Sort mode, you can change the order of certain Inquiry windows by pressing the letter key associated with the window sort. You can see the available sorts in any Inquiry window by pressing Esc (Command Help). Note To shorten your data search, use a partial-key inquiry to cut down the size of the inquiry list. For example, if you know that the ID starts with JAR, enter JAR in the ID field before you use the Inquiry command. The Inquiry list starts with JAR and runs through the end of the list. 1-62 Accounts Payable User’s Manual Menu and Function Commands Introduction The following commands are available inside Inquiry windows. The scroll buttons are available in graphical mode only. Key Button Description Home Moves directly to the first item on file. PgUp Displays the previous page of the window. Up Moves up one item. Down Moves down one item. PgDn Displays the next page of the window. End Moves directly to the last item on file. Ins Toggles between Search mode and Sort mode. (Look Up) F7 (Exit) Leaves the Inquiry window without selecting anything. Enter Selects the item to which the cursor is pointing. Esc Opens a window that shows Inquiry window commands and the Window ID. The Esc key is available in text mode only. (View Commands) In graphical mode, select Command Help from the Help menu to view a list of commands available. Accounts Payable User’s Manual 1-63 Introduction Menu and Function Commands Inventory Lookup If you use the Inventory application and the cursor is in an Item ID field on a function screen, you can use any of the Inventory Lookup commands to search for information about items and select an item for entry in the field. In graphical mode, these commands are available on the Inquiry Lookup menu. In text mode, the IN Search flag appears at the bottom of the screen to alert you that these commands are available. 1-64 Command Hot Key Operation Alias Lookup Shift+F3 Searches for items with a specified alias listed as an alternate item. When you enter the alias, you can use the * and ? wildcard characters to restrict or widen the search. Customer/ Vendor Lookup Shift+F4 Searches for an item based on customer or vendor ID. When you enter the ID, you can use the * and ? wildcard characters to restrict or widen the search. Detail Lookup Shift+F5 Searches for detailed information about an item. Enter information in any of the fields that appear, using these wildcards to restrict or widen the search: * ? < > =. Lot Lookup Shift+F6 Searches for an item based on lot number. When you enter the lot number, you can use the * and ? wildcard characters to restrict or widen the search. Serial Lookup Shift+F7 Searches for an item based on serial number. When you enter the serial number, you can use the * and ? wildcard characters to restrict or widen the search. Description Lookup Shift+F8 Searches for an item based on item description. When you enter the description, you can use the * and ? wildcard characters to restrict or widen the search. Accounts Payable User’s Manual Menu and Function Commands Introduction Scroll Region Commands When the prompt (>) is in a line-item scroll region, you can use the following commands. The buttons are available only in graphical mode. Hot Key Button Operation Home Moves to the first line item in the entire list. Page Up Moves to the previous screen or to the first line if you are on the first screen. Up Moves up one line item. Down Moves down one line item. Page Down Moves to the next screen or to the last line if you are on the last screen. End Moves to the last line item in the entire list. F3 Deletes the line item in the selected line. Insert Inserts a line item at the selected line. Enter Edits or views the line item in the selected line. Accounts Payable User’s Manual 1-65 Introduction Menu and Function Commands In-Field Editing Commands When the cursor is in a field that contains information, you can use the following commands: Hot Key Description Right Moves the cursor to the right. Left Moves the cursor to the left. Delete Deletes the character the cursor is on. Insert Switches insert mode on and off. When the Insert flag appears at the bottom of the screen, characters you enter push characters after the cursor over. When insert mode is turned off, characters you enter write over existing ones. Home Moves the cursor to the beginning of the field. End Moves the cursor to the end of the field. F9 (Undo) Restores a field to the way it was before you changed it. You can use this command only while you are in the field; once you move past it, you must use the Abandon (F5) command. F10 (Delete to End of Line) Deletes the characters in the field to the right of the cursor. If insert mode is turned off and you enter a character in the field’s first position, everything in the field is deleted. Shift+F9 Copies the contents of the current field. (Copy Field Contents) Shift+F10 (Paste Field Contents) 1-66 Pastes the value you copied from a previous field into the current field. Accounts Payable User’s Manual Favorites Menu The Favorites menu operates in any of the menu formats and gives you quick and easy access to the OSAS functions you use most, allowing you to add selections for entire menus or particular functions. After you’ve set up the menu, you can access the functions either by pressing F2 or by selecting Change to Favorites from the graphical Favorites pull-down menu. With the Favorites menu, you save time by eliminating the need to switch between applications. For example, if you perform tasks in several applications, such as using the Transactions and Cash Receipts function in Accounts Receivable, GL Account function in General Ledger, and Price and Availability and Item Inquiry functions in Inventory, you can set up a Favorites menu rather than moving between each application. The Favorites menu for the graphical main menu is illustrated below. To set up the Favorites menu, do the following: 1. Select the function you want to add to the menu and press F10 (or use the right-click menu in graphical mode). 2. Press F2 to confirm that your selection was added. To remove a function from the menu, follow these steps: 1. Select the function on the Favorites menu that you want to remove. 2. Press F10 (or use the right-click menu in graphical mode). Accounts Payable User’s Manual 1-67 Information Menu The Information menu appears on some function screens in certain applications and gives you access to additional information about a customer, vendor, item, job, bill of material, or employee. The commands available on the Information menu are determined by the applications you have installed, and can include: • • • • General Information Comments History Documents Not all of the commands above appear on every Information menu; instead, commands are available only as they are relevant to the task you are performing. For example, if you are entering a transaction in Accounts Receivable, you can access comments or documents about items or customers but not about employees or vendors. Information The Information command gives you general information about the subject. For customers, the Information command lists sale amounts and important dates, while for inventory items, the same command lists quantities, types, and base prices. When the Information screen appears, enter the ID for which you want to view information. Use the commands available at the bottom of the screen to scroll between or select a new ID, then use the Exit (F7) command to return to the function screen from which you accessed the Information command. Accounts Payable User’s Manual 1-69 Introduction Information Menu Comments Use the Comments command when it appears to view comments added through File Maintenance functions or to add comments about a customer, item, vendor, employee, or job. The Comments screen appears after you access the Comments command. The Customer Comments screen is shown below as an example. 1. Enter the ID for which you want to view or enter comments in the ID field at the top of the screen. The Inquiry (F2) command is available. 2. The ID of the terminal you are working at appears in the Ref ID field. To work with comments for only the default reference ID, press Enter. To work with comments for a different reference ID, enter that ID. To work with all comments, clear this field and press Enter. 3. Enter the date of the most recent comment you want to work with in the End Date field, or press Enter to work with all comments. 1-70 Accounts Payable User’s Manual Information Menu Introduction The date, reference, and text that appear for each comment depend on the reference ID and end date you enter. The comments are arranged by date— the most recent date first—then by reference ID. 4. Use these commands to work with the comments on the screen: • Press R to return to the Ref ID field to enter a new reference ID. • Press D to return to the End Date field and enter a new end date by which to sort comments. • Press I to return to the ID field and enter a new ID for which to view or enter comments. • Press A to add a new comment. The Append Comment screen appears. • Press E to edit a selected comment. The Edit Comment screen appears. • Press F to view comments for the first ID on record. • Press N to view comments for the next ID on record. • Press P to view or edit comments for the previous ID on record. • Press L to view or edit comments for the last ID on record. • Press G to go to a specific comment. This command is available only when there is more than one screen of comments. Accounts Payable User’s Manual 1-71 Introduction Information Menu Adding or Editing Comments The Append Comment screen appears when you add a new comment. The Edit Comments screen appears when you edit an existing comment. Other than the title, these screens are identical. 1. If you are working with a new comment, the system date appears; otherwise, the date entered for the comment you are editing appears. Accept this date, or enter a different date. 2. The current terminal ID appears in the Reference field. Edit this reference, if necessary. 3. Enter or edit the comment, then press Enter to save the comment record. History When available, the History command gives you access to customer history in a manner similar to OSAS Inquiry functions. Select the customer for which you want to view detail information, enter a date from which to view information (if desired), then press Enter to view invoice or payment information. Use the commands at the bottom of the screen to switch between or change customers, view totals, or select the line item to view. Use the Exit (F7) command to return to the function screen from which you accessed the History command. 1-72 Accounts Payable User’s Manual Information Menu Introduction Documents The Documents command lets you view or open documents attached to certain master file records. You cannot use this command to attach a document to a record; instead, use the appropriate File Maintenance function to attach documents. Note Before you can open documents, you need to have the appropriate file associations set up in the File Types function on the Resource Manager Workstation Configuration menu. The entries you make in this function help OSAS identify which software applications to use to open attached documents. See the Resource Manager User’s Manual for more information. The Documents screen appears after you access the Documents command. The Employee Documents screen is shown below as an example. Accounts Payable User’s Manual 1-73 Introduction Information Menu Enter the ID for which you want to view attached documents. The Inquiry (F2) command is available. • Press H to return to the header section to select a new ID. • Press F to view documents attached to the first ID on record. • Press L to view documents attached to the last ID on record. • Press N to view documents attached to the next ID on record. • Press P to view documents attached to the previous ID on record. • Press V to view document information. The View Documents screen appears and lists the file name, directory path, and description of the attached document. Press any key to return to the Documents screen. • Press O to open the attached document in the appropriate software application. You may need to edit the Resource Manager File Types function in order to associate files with your preferred applications. Note If you have problems opening a document, return to the function in which the document was attached and edit the attachment to change the direction of the slashes used in the directory path. If the directory path contains backward slashes (\), change them to forward slashes (/) and vice versa. • Press G to go to a specific document line. This command is available only when there is more than one screen of line items. Use the Exit (F7) command to return to the function screen from which you accessed the Documents command when you finish viewing documents. 1-74 Accounts Payable User’s Manual Reports Selecting a Range of Information To produce a report, you must specify the amount of information you want in the report. • To produce a report that includes all the available information, leave the From-Thru fields on the report screen blank. For example, if you want information about all the vendors to be in a report, leave the Vendor ID From and Thru fields blank. • To limit the amount of information in the report, enter the range of information in the From-Thru fields. For example, if you want a report to include information only about vendor ACE001, enter ACE001 at both From and Thru. If you want the report to include information only about vendors that start with CO, enter CO at From and COZZZZ at Thru. Each field where you enter information on a report screen usually restricts the overall output of the report. For example, if you leave the Vendor ID From and Thru fields blank, the report contains information about all the vendors. But if you enter invoice 100 in the Invoice Number From and Thru fields, and invoice 100 is assigned only to vendor ACE001, the report includes information only about vendor ACE001. Sorting Information for reports is sorted first by a space (_), then by special characters, then by digits, then by uppercase letters, and finally by lowercase letters. No matter what you enter in the From and Thru fields, however, your entries are sorted in alphabetical order (unless the function provides an option to sort the information differently). Sorting by alphabetical codes or IDs is easy. For example, the ID ACL comes before the ID BB because A comes before B. Accounts Payable User’s Manual 1-75 Introduction Reports Use caution when you enter codes or IDs consisting of characters other than letters; the order might not be what you expect. For example, if 20 items are labeled 1 through 20, and all are included in a report, you might enter 1 at From and 20 at Thru, expecting them to be listed 1, 2, 3. . . 19, 20. However, since OSAS sorts in alphabetical order, the numbers are listed in this order: 1, 10–19, 2, 20. In this example, numbers 3 - 9 are not included in the sort since they fall after 20 in an alphabetical sort. To prevent this situation, pad extra spaces in codes and IDs with zeros so that numbers in alphabetical order are also in numerical order. In the example above, the items would be labeled 000001 through 000020. Output the Report The type of menus you use controls which options are available to output reports. If you are using graphical function screens, you have the following output options: Printer, Print Preview, File, or E-mail (for selected reports). If you are using text function screens, you have these options: Printer, Preview, File, Screen, or E-mail (for selected reports). See the instructions below for details. If you are using graphical screens, the Output Information dialog box appears after you select the range of information to print in the report. If you are using text screens, these options appear at the bottom of the screen after you select what to print in the report and how it is organized. 1-76 Accounts Payable User’s Manual Reports Introduction Print the Report 1. Select Printer (in graphical screens) or enter P (in text screens). 2. If multiple printers are available for the terminal, either select the printer from the list or enter the appropriate code for the printer and press Enter. Use the Devices function on the Resource Manager Workstation Configuration menu to add printers to the terminal. 3. When available, either select Standard or enter S if you want to print the report in standard width or select Compressed or enter C if you want to print it in compressed width. 4. Click OK or press Enter to begin printing the report. 5. If you want to stop printing after it has begun, press Ctrl+Break. 6. Click OK or press Enter to continue. View the Report using Print Preview (Windows Workstations Only) The Print Preview option is only available for workstations running Windows. However, before Print Preview will work, you must add a sysprint device line in the config.bbx file for that printer. Use the Devices function on the Resource Manager Workstation Configuration menu to add this line. Follow these steps to view a report using Print Preview: 1. Select Print Preview (in graphical screens) or enter R (in text screens). 2. If multiple printers are available for the terminal, either select the printer from the list or enter the appropriate code for the printer and press Enter. Use the Devices function on the Resource Manager Workstation Configuration menu to add printers to the terminal. 3. Click OK or press Enter to continue. Accounts Payable User’s Manual 1-77 Introduction Reports 4. When available, either select Standard or enter S if you want to view the report in standard width or select Compressed or enter C if you want to view it in compressed width. 5. Press Enter. The Print Preview screen displays the report as it will look when printed out in hard copy. 6. To print from this screen, select Print from the File menu. To exit from this screen, select Exit from the File menu. Save the Report as a File To save the report as a text file, select File or enter F. The data path set up for the workstation in the Defaults function on the Resource Manager Workstation Configuration menu appears. If necessary, enter a new data path or click the Browse button to navigate to the correct directory, then enter the filename followed by the .txt extension. The filename plus extension that you enter must be less than 35 characters. Press Enter to save the report in that directory. View the Report on Screen (Text Screens Only) If you are using text screens, you can view selected reports directly in the OSAS screen. Keep in mind that this option displays the report one page at a time, storing previously viewed pages in the workstation’s memory. Use the Defaults function on the Resource Manager Workstation Configuration menu to limit the number of screen pages you can view to conserve memory resources. Follow these steps to view the report on screen: 1-78 1. Enter S to select (S)creen. 2. When available, enter S if you want to view the report in standard width or C if you want to view it in compressed width. 3. When the report appears, press Enter to view the next page or Page Up to view previous pages. Accounts Payable User’s Manual Reports Introduction E-mail the Report Before you can e-mail reports, you must enter details about your e-mail system using the E-Mail Setup function on the Resource Manager System File Maintenance menu. You can e-mail only selected reports. In general, any report or form that makes up part of your audit trail cannot be e-mailed. Follow these steps to e-mail a report: 1. Select E-mail or enter M. 2. When available, select Standard or enter S if you want to e-mail a standard width report or select Compressed or enter C if you want to e-mail it in compressed width. The E-Mail Information screen appears. 3. If you e-mailed this report previously, the last e-mail address to which you sent the report appears. Press Enter to use this address, change it if necessary, or enter a new e-mail address. 4. Enter another address to send the e-mail to as a carbon copy, if necessary. 5. OSAS automatically enters the name of the report in the Subject field. Change this subject line, if necessary. 6. Select the Attachment check box (or enter Y in text mode) to send the report as a text file attachment to the e-mail message. If you clear this box (or enter N in text mode), the report is sent in the body of the e-mail. 7. Click OK or press Enter to e-mail the report. Accounts Payable User’s Manual 1-79 Introduction Reports Report Commands Use the following commands when a report appears on the screen: 1-80 Key Operation PgUp Moves to the previous page of the report. PgDn Moves to the next page of the report. Home Moves directly to the top of a group of pages. End Moves directly to the bottom of a group of pages. F7 (Exit) Exits to the menu from any point in the report. Left Moves left one character. Right Moves right one character. Tab (Toggle) Toggles between the left and right halves of a report. Up/Down Moves a line up and down the screen to line up information when you toggle between halves of a report. Accounts Payable User’s Manual Accounts Payable User’s Manual Installation and Conversion Installation Conversion Accounts Payable User’s Manual 2 2-3 2-5 2-1 Installation Before You Install Accounts Payable Make sure your system meets these minimum requirements before you install Accounts Payable. The Accounts Payable system needs a minimum of 15 megabytes (15Mb) of disk space to work correctly with programs, sample data, data dictionaries, system files, and graphics files. Having more disk space available is necessary for the data files you will create and maintain. The OSAS system requires at least one megabyte (1Mb) of main memory to run. More memory may be necessary in certain environments and operating systems. Installing Accounts Payable Use the Install Applications function in Resource Manager (see the Resource Manager User’s Guide) to install Accounts Payable. No special considerations need to be made for Accounts Payable when you use the function. Setting up Accounts Payable Once you have installed Accounts Payable on your system, you must prepare your data files for everyday use. You can prepare files for use with Accounts Payable in one of two ways: you can create and set up your files manually on a new system, or you can convert your old files when you upgrade from an earlier version. To create files on a new system, use the Data File Creation function on the Company Setup menu in Resource Manager (see the Resource Manager User’s Guide). For instructions on converting your files, see the Conversion section later in this chapter. If you plan to use General Ledger, Inventory or Job Cost with Accounts Payable, you must set up those applications before you set up Accounts Payable. Accounts Payable User’s Manual 2-3 Installation Installation and Conversion Accounts Payable and Purchase Order If you plan to install Purchase Order, install it immediately after installing Accounts Payable. See the Purchase Order User’s Manual for information about installing Accounts Payable and Purchase Order at the same time. 2-4 Accounts Payable User’s Manual Conversion If you use an earlier version of OSAS Accounts Payable, you can convert your files from the older version to the current version. When you are ready to convert files, use the Data File Conversion function on the Company Setup menu in Resource Manager (see the Resource Manager User’s Guide) to upgrade Accounts Payable data files. You can upgrade from version 3.2, 4.xx, 5.xx, 6.0x, or 6.1. If you want to convert to version 6.5 from a version earlier than 3.2, contact a client support representative. Note You must install the new version of Accounts Payable before you convert files. You can replace and update the programs properly only by using the Install Applications function in Resource Manager. You must set up tax information in Resource Manager before converting Accounts Payable. If tax information is not set up, the conversion will not execute. See the Resource Manager User’s Manual. Before you convert an application’s files, make note of the version number of the application you are converting from. The Data File Conversion function has no way of determining the information from within the function. Consider Your Setup Before you try to convert your version of Accounts Payable to the current version, consider the exact setup of your system. Since OSAS code can be customized, modifications to your system might be lost if you install a new version of a program or update a file. If you are not sure whether your system is ready for conversion, consult your value-added reseller. Accounts Payable User’s Manual 2-5 Conversion Installation and Conversion Because of the ways tax information is stored in Accounts Payable and depending on which other applications you are using, you must follow several steps to convert existing Accounts Payable data. If you are converting from version 4.5x to 6.5 and you are using Accounts Receivable, you have two choices: • Convert Accounts Receivable files from 4.5x to 6.5 first; then convert Accounts Payable from 4.5x to 6.5. • Create Resource Manager files first; then set up tax location and tax group information before converting Accounts Payable from 4.5x to 6.5 (see the Resource Manager User’s Manual). If you are converting from version 4.5x to 6.5 and you do not have Accounts Receivable on your system, you must create Resource Manager files first. Then set up tax location and tax groups information before converting Accounts Payable from 4.5x to 6.5. If you are converting from version 5.0x to 6.5, whether you are using Accounts Receivable or not, you have two options: 2-6 • Convert Resource Manager from version 5.0x to 6.5. • Create Resource Manager files; then set up tax location and tax groups information before converting Accounts Payable. (This method is recommended only if you want to reenter all tax information.) Accounts Payable User’s Manual Installation and Conversion Conversion Converting to Version 6.5 Select Data File Conversion from the Company Setup menu in Resource Manager. The function screen appears. 1. The system displays all valid OSAS data paths. Select the destination directory where your new data files will reside. 2. Enter the path (drive and directory) that has the files you want to convert. You cannot enter the same path as the path you selected as the destination. 3. If you want source files to be erased after conversion, select the check box (enter Y in text mode); if not, clear the check box (enter N in text mode). 4. If you want the conversion process to pause if a problem occurs, select the check box (enter Y in text mode); if not, clear the check box (enter N in text mode). The system considers file corruption or evidence of data not converting correctly a problem. Accounts Payable User’s Manual 2-7 Conversion Installation and Conversion 5. Enter AP in the Appl column; Accounts Payable appears. 6. Enter your earlier version number of Accounts Payable, and press Enter. (You can determine the version by looking at the copyrights screen when you start OSAS, or in most versions, by using the Information (Shift+F2) command on the menu screen.) 7. If data files already exist for Accounts Payable in the intended destination path, the AP data files exist. Do you want this task to erase them? prompt appears. If you want to erase the existing files and convert the files from the version in the source path, select Yes (enter Y in text mode); if not, select No (enter N in text mode). If you elect not to erase existing files, you must change your directory choices so that no conflict exists. 8. To convert, use the Proceed (OK) command. 9. The Do you want a printout of error log after each application? prompt appears. If you want the error log to be produced after files are converted for each application, select Yes (enter Y in text mode); if you want the log to be produced after files for all applications are converted, select No (enter N in text mode). If you are converting only Accounts Payable files, your answer to this prompt makes no difference. 10. If a problem occurs and you indicated that you want the system to pause when a problem occurs, a prompt alerts you. To stop the conversion process, select Yes (enter Y in text mode). To let the conversion run its course and investigate later, select No (enter N in text mode). 11. When the process is finished, the files are converted. Select the output device for the error log. After conversion is finished and the error log is produced, the main menu—with Accounts Payable added—appears. 2-8 Accounts Payable User’s Manual Accounts Payable User’s Manual Setup Setup Considerations Setup Checklist Setup Functions Accounts Payable User’s Manual 3 3-3 3-7 3-9 3-1 Setup Considerations After you have installed the software for the first time, or after you have upgraded the software, you must set up the Accounts Payable system. Follow the setup procedures carefully; the choices you make determine how the system operates. To properly set up the Accounts Payable system, you need to gather and organize your accounting data. You need the following information: • • • • A chart of accounts for your business Purchasing and payment cycles Identification and credit information about your vendors Previous- and current-year purchase, returns, and receipts history organized by vendor Codes and IDs When you set up Accounts Payable, you assign codes and IDs to tell the system how to identify each item on file. The system uses these identifiers to organize the information in reports and inquiry windows. The system arranges code characters in a particular order. In the following list codes and IDs are sorted from lowest to highest, and dashes represent blank spaces. —————0 —————1 —————Z —————a — — — — — 01 ——a——— 000000 000001 1 Accounts Payable User’s Manual 3-3 Setup Setup Considerations The organization of these codes illustrates the following principles: • The system reads codes from left to right until it finds something other than a blank space. • Items that make up a code are always listed alphabetically. The items are listed in this order for each position: Blank spaces Characters (-, *, /, and so forth) Numbers (0–9) Uppercase letters (A–Z) Lowercase letters (a–z) Alphabetical rules are not intuitive when numbers are involved. Numbers are sorted as if they were letters. When the first characters of several IDs are compared, the ID with the smallest first character is placed first in the list. If the first character of the IDs is the same, the second characters are compared and the ID with the smallest second character is placed first in the list. This comparison is made for each character in the range of IDs until the IDs are clearly in alphabetical order. If you use numbers for IDs, pad them with zeros so that they are all the same length and numeric rules can hold true. For example, in alphabetical sorting ID 112 comes before ID 60, since anything that starts with 1 comes before anything that starts with 6 alphabetically. If ID 60 were ID 000060 and ID 112 were ID 000112, ID 000060 would be listed first, since 060 is less than 112 alphabetically and numerically. When you assign IDs and codes, establish a format that makes sense for your business and use it consistently. The following suggestions may help: • 3-4 To prevent organization problems, use zeros to make all IDs the same length. If IDs are divided into more than one part, the parts should be the same length in every ID. Do not use spaces to divide IDs into more than one part. For example, use ACE-01 and ACE-11 instead of ACE-1 and ACE-11 or ACE 01. Accounts Payable User’s Manual Setup Considerations Setup • If you use letters in IDs, use either all uppercase or all lowercase letters so that the IDs can be sorted correctly. • Use descriptive IDs. For example, WIN001 and WIN002 are more descriptive IDs than 000001 and 000002. (If you already use a numbered system, you might want to stick with it.) • If you want to sort items by a particular attribute—name or group—put the attribute in the ID. For example, to organize vendors by name, put the first characters of the name in the vendor ID. • To ensure that you can insert new items into a sequence, use a combination of letters and numbers that leaves room in the sequence for later additions. For example, setting up two consecutive IDs of WIN001 and WIN005 leaves room for three vendors in between. Accounts Payable User’s Manual 3-5 Setup Checklist Follow the steps below to set up the Accounts Payable system. See the Resource Manager User’s Manual for steps 1 and 2. Steps 3–9 are explained in this section. 1. Build the RMTDxxx (Tax Location Detail) and the RMTHxxx (Tax Location Header) files. 2. Build the RMGCxxx (Group Code) file. 3. Set up options and interfaces for Contractors’ Accounts Payable. 4. Build the tables. 5. Set up the APVExxx (Vendor) file. 6. Build the APRHxxx and APRLxxx (Recurring Entries) files. 7. Set up the subcontract information. 8. Enter initial balances (summary or detail) and use the build retainage invoice function, if necessary. 9. Set up access codes. 10. Verify and reset any options and interfaces for using the system. 11. Create a backup schedule. Accounts Payable User’s Manual 3-7 Setup Functions Options and Interfaces An application can be interfaced to work in conjunction with other applications. Accounts Payable can be interfaced with General Ledger, Contractors’ Job Cost, Bank Reconciliation, and Inventory. General Ledger When Accounts Payable interfaces with General Ledger, posting in Accounts Payable makes entries in the GLJRxxx (Journal) file for transactions that affect the ledger (such as sales tax, freight, miscellaneous expenses). Contractors’ Job Cost When Accounts Payable interfaces with Contractors’ Job Cost, posting in Accounts Payable updates related information in the Contractors’ Job Cost job and phase records. When you enter invoices, refer to the Contractors’ Job Cost Jobs and Phases List for vendor IDs and contract numbers. Bank Reconciliation When Accounts Payable interfaces with Bank Reconciliation, you must specify the ID of the bank account for the checks that are written. When you post checks, summary disbursement entries of the checks are created in the BRTRxxx (Transactions) file in Bank Reconciliation for the bank ID. Inventory As you enter transactions, inventory quantities and costs are updated online. If you are keeping detail and summary history in Inventory, Accounts Payable updates them as each action is completed. Accounts Payable User’s Manual 3-9 Setup Setup Functions Transaction Batching If you use transaction batching, you can group like transactions to better control daily work and analyze reports. Transactions can be batched into groups such as: • • • • • 3-10 Daily Weekly By person (whether sales or entry) Location Item Accounts Payable User’s Manual Setup Functions Setup Options and Interfaces Screen Select Options and Interfaces from the Resource Manager Company Setup menu. The Options and Interfaces screen appears. The name of the company you are working with appears. Specify whether the Options table is shared or owned. (See the Resource Manager User’s Manual for information about Options tables.) Then enter AP as the application ID. The Accounts Payable Options screen appears. To toggle an option (for example, between YES and NO), press Enter. When you are finished selecting options, press W to save your entries. Then exit to the Options and Interfaces screen. Select another application whose options and interfaces you want to change or exit to the Resource Manager Company Setup menu. Accounts Payable User’s Manual 3-11 Setup Setup Functions 1. Toggle to YES or NO to indicate whether or not you want to interface Accounts Payable with General Ledger, Inventory, Contractors’ Job Cost, and Bank Reconciliation. The interface options work independently of each other. You can respond to them with any combination of YES and NO answers. 3-12 2. Toggle to YES or NO to use transaction batching during your daily operations. 3. Toggle to YES to allow the system to generate batch numbers automatically. Toggle to NO to manually create the batch numbers. 4. Toggle to DETAIL or SUMMARY to indicate whether you want to post transactions in the GLJRxxx file by line item or by totals. This option is not used if Accounts Payable does not interface with General Ledger. 5. Toggle to YES or NO to indicate whether or not you want to keep history information for each line item of each purchase or miscellaneous debit. If you select NO, the APHIxxx (Detail History) file is not used. 6. Toggle to YES or NO to indicate whether or not you want to be able to enter up to 10 lines of additional descriptions for line items. If you select NO, the APDExxx (Additional Descriptions), APHDxxx (Additional Descriptions History), and APRDxxx (Recurring Additional Descriptions) files are not used. 7. Toggle to YES or NO to indicate whether or not you want additional descriptions to be copied to a line item from Inventory during transaction entry. 8. Toggle to YES or NO to indicate whether or not you want to keep additional description history. Select YES to have the option to include additional history on any reports you print. If you select NO, the APHDxxx (Additional Descriptions History) is not used. 9. Toggle to YES or NO to indicate whether or not you want to be able to print online checks during transaction entry. Accounts Payable User’s Manual Setup Functions Setup 10. Toggle to YES or NO to indicate whether or not you want to keep history information for the totals of each purchase or miscellaneous debit. If you select NO, the APHSxxx (Summary History) file is not used. 11. Toggle to BLANK STUB, LASER, or PREPRINTED to indicate whether you want to print checks on blank stubs, laser forms, or preprinted stubs. If you select BLANK STUB, the company address and purchase order number are not printed on the checks. 12. Toggle to YES or NO to indicate whether or not you want the system to warn you when you enter duplicate invoice numbers (when you enter the same number twice). If you select YES, you can still move past the warning. 13. Toggle to YES or NO to indicate whether or not you want the system to force you to enter totals when you exit from the Transactions function. If you select YES, you cannot exit from the Transactions function without entering totals for the transaction. 14. Toggle to YES or NO to indicate whether or not you want material requisition credits to be posted to inventory item accounts. 15. Toggle to YES or NO to indicate whether or not you want to keep check history. If you select NO, the APHCxxx (Check History) file is not used. 16. Toggle to YES or NO to indicate whether or not you want to print company names on checks. 17. Toggle to YES or NO to use GL Descriptions in the transaction description. 18. Toggle to YES or NO to indicate whether or not you want to be able to post data without printing reports. 19. Toggle to YES or NO to indicate whether or not you want the default to be posting all invoices as Held when you post. Accounts Payable User’s Manual 3-13 Setup Setup Functions Tables Tables store information relating to the system, data, options, and default settings for other applications. Note Use tables only to enter and store data. Do not delete lines or rearrange the account descriptions. The system looks for information by the position of the lines in the table. You must set up the following tables before you build the Accounts Payable data files: • • • • • • • • • • • • • • • • • APGLxxx APPDxxx DFxxxx DMxxxx DISCxxx D1099xxx F1099 FORMxxx MRGLxxx QCxxxx QDxxxx QExxxx QHxxxx QMxxxx QPxxxx QXxxxx QZxxxx You can set up the APGLxxx, DISCxxx, D1099xxx, and MRGLxxx tables for individual companies and all companies that are in the system. You can set up one table for all the companies that are alike, and you can set up one table for each company that is different. 3-14 Accounts Payable User’s Manual Setup Functions Setup For example, you can set up table APGL for companies that post accounts payable transactions to the same general ledger accounts, and you can set up table APGLA01 for company A01, APGLB01 for company B01, and so forth if those companies post accounts payable transactions to different general ledger accounts. These tables are identified by a four- or five-character prefix and a threecharacter suffix. The prefix is the table name—APGL for general ledger accounts, for example. The suffix is a Company ID or a systemwide table. If you delete a company-specific table, that company uses the generic table. For example, if you delete table APGLA01, company A01 uses the APGL table. You must set up the F1099 table for all companies in the system. Because all companies share the table, you cannot assign a suffix to it. You must set up one APPDxxx table for each company in the system—for each company, you must assign a corresponding suffix to the APPDxxx table. The FORMxxx table tracks the last check number and is created when you enter the online check or print checks. Each Defaults table (DFxxxx, DMxxxx) and each Quick-Entry table (QCxxxx, QDxxxx, QExxxx, QHxxxx, QMxxxx, QPxxxx, QXxxxx, and QZxxxx) is identified by a two-character prefix and a four-character suffix. The prefix is the table name—DF for Defaults, QP for Quick-Entry Purchases, and so forth. The suffix is a terminal ID, a company ID, or a systemwide table (without a suffix). You can set up the Defaults and Quick-Entry tables for the following situations: • Assign each table to a particular terminal. For example, you can assign table DFT001 to terminal T001. • Assign each table to all terminals in a particular company. For example, you can assign table DFA to all terminals in company A. • Set up each table as a general table for several companies to use. For example, you can set up table DF for the companies that use the same defaults. Accounts Payable User’s Manual 3-15 Setup Setup Functions If you have three companies—A01, B01, and C01—you might want the terminals in companies A01 and B01 to share table DF. You might want company C01 to have some of its terminals use a set of defaults specific to each one, while other terminals share values that are common among themselves but specific to company C01. Companies A01 and B01 can share table DF. No table has the label DFA or DFB. Company C01 can have table DFC, to be used for the terminals in company C01 that do not need their own set of defaults. Each terminal in company C01 that needs its own set of defaults can have its own table, for example, terminal T001 has table DFT001. Note The system treats all terminals with the same ID the same way, so you may want to make sure that each terminal ID is unique. For example, if you have two T001 terminals, one in company A01 and one in company C01, the DFT001 table applies to both terminals regardless of the fact that they are in different companies. When you enter or edit transactions, the system first tries to find a table with a terminal suffix specific to your terminal. If it cannot find one, it looks for a table for the company in which you are working. If it cannot find one, it uses the systemwide table. For example, if you are using quick entry to enter a purchase for company A01 on terminal T001, the system first looks for QPT001. If it cannot find table QPT001, it looks for QPA. If it cannot find table QPA, it uses the systemwide table. If the system cannot find any applicable table (perhaps because the systemwide table was deleted), an error message appears, and you must rebuild the table. 3-16 Accounts Payable User’s Manual Setup Functions Setup Vendors The APVExxx file stores general and historical information about the vendors with which you do business. You must set up the file before you begin processing accounts payable transactions. General Information Enter each vendor’s name, address, phone and fax number, contact, information about where to send payments, code and payment information, and 1099 information. You can also enter the vendor’s Internet web site address and the contact’s e-mail address. If you use the detail method to enter initial balances in the Vendors function, do not enter the amount due and prepaid. Vendor Codes If the vendor provides a set discount when you pay bills promptly, enter the code used to describe the discount percentage and the number of days in which you must pay to receive the discount. You can establish distribution codes so that you can allocate general ledger accounts for payables, sales tax, freight, or miscellaneous charges. You can assign vendor classes and payment priorities as additional sort criteria for General Report Writer reports, and you can organize the Vendor Purchase History Report by vendor class. Vendor classes and payment priorities are arbitrary attributes. The information is stored only with the vendor record. If you do not want to pay a vendor for some reason, you can put the vendor on hold. When you enter transactions for the vendor, a message appears to alert you to the situation. You cannot pay invoices for a vendor that is on hold. When you prepare checks, an error message printed in the Prepare Checks Log informs you that the vendor is on hold. Accounts Payable User’s Manual 3-17 Setup Setup Functions To track the sales tax you pay to vendors, set up the tax groups before you enter transactions. The RMTDxxx file accumulates sales tax for the groups you set up. See the Resource Manager User’s Manual for information about setting up tax groups. The system calculates sales tax based on tax classes and the tax group. You assign tax classes for transactions, and you assign tax groups to vendors. If you usually send purchase and miscellaneous debit transactions for a vendor to a particular account, enter the GL account number. You can override the account when you enter accounts payable transactions. If a vendor requires a 1099 form, enter the vendor’s taxpayer identification number and the payment type. See the federal tax circular for information about the payment types. Indicate whether the Internal Revenue Service notified your company twice in the past three years that the vendor’s tax identification number is incorrect. If it did, the 2nd TIN Not box on the form is checked when you prepare a 1099 form for the vendor. Historical Information Whether you enter historical information depends on the method you use to enter initial balances. See information about the Vendors function (see page 11-3) before you enter the vendor records. Vendor Comments You can enter comments about vendors on the Vendor Comments screen. When you enter accounts payable transactions, you can use the Information (Shift+F2) command to access a vendor’s comments. Comments are stored in the APVCxxx (Vendor Comments) file, not in the APVExxx file. For more information about entering vendor records, refer to “Vendors” (see page 11-3). 3-18 Accounts Payable User’s Manual Setup Functions Setup User-Defined Fields You can assign up to 16 user-defined fields, which can be numeric, dates, or check boxes. You can view this information using the Vendors and Invoices Inquiry screen or the Vendors screen within File Maintenance. User-defined field values are stored in the APVEx.UF file. For more information about entering vendor records, refer to Vendors (see page 11-3). Documents You can attach multiple documents to vendor records. However, you must set up file types in Resource Manager before you can attach documents. See the Resource Manager User’s Guide for more information. You can attach 999 documents per vendor. The filenames are stored in the APVEx.UD file, but the documents remain as separate files. For more information about entering vendor records, refer to Vendors (see page 11-3). Recurring Entries If you make payments to some vendors on a regular schedule, you can set up recurring payments records for those vendors and then copy them to the APTDxxx and APTHxxx (Transaction) files when they come due. Note You can set up only noninventory recurring entries. Accounts Payable User’s Manual 3-19 Setup Setup Functions Recurring Numbers Numbers for recurring entries can be eight characters long. If you are adding Purchase Order to Accounts Payable and you are using system-generated purchase order numbers, you should start your recurring numbers with a character other than a number—for example, RE000001, RE000002, and so forth. When you copy recurring orders in Purchase Order, the system places an R at the beginning of the order number. The recurring number is not related to the transaction number or the order number. See the Purchase Order User’s Manual for information about system-generated order numbers. Run Codes A run code is a unique number that you assign to each recurring entry. You copy recurring entries to the APTDxxx and APTHxxx files by run codes. You might want to set up run codes to reflect when you will copy them to the APTDxxx and APTHxxx files. For example, you might assign code 01 for entries you will copy on the first of each month, 15 for those you will copy on the fifteenth of each month, and so forth. You can use the Purge Selected Files function (see page 9-23) to purge entries from the APRHxxx and APRLxxx files by cutoff dates. Entries with a cutoff date before the date you specify are purged from the APRHxxx and APRLxxx files. For more information about establishing recurring entries, see page 11-25. Subcontract Information If you offer subcontracts, set up subcontract information using the Subcontract function. Enter the contract number and amounts related to the contract such as subcontract, change order, previous invoice, payment, and retainage amounts (see “Subcontract” on page 11-57). 3-20 Accounts Payable User’s Manual Setup Functions Setup Initial Balances After you have set up the vendor records, build the APINxxx (Open Invoice) file to set up initial vendor balances. If you are not setting up Accounts Payable at the beginning of the year and if you are keeping detail and summary history, you must also enter purchasing history. If you have Accounts Payable and Purchase Order, use the setup instructions in the Purchase Order User’s Manual to enter the initial balances. You can use the summary method or the detail method to set up the initial vendor balances and open invoices. Summary Method The summary method is quicker than the detail method, but it does not provide complete purchasing history. First enter a summary amount in each vendor record for the period-, quarter- and year-to-date and last-year purchases and payment history. Then enter outstanding transactions. The summary method consists of the following steps: 1. Enter purchase and payment history information for each vendor in the Vendors function (see page 11-3). 2. 3. Enter outstanding invoices in the Transactions function (see on page 5-3). If you made payments against the invoices, enter them in the Amt Paid field on the totals screens. Post the outstanding transactions you entered in step 2. This step builds the APINxxx file. 4. Enter outstanding material requisitions in the Enter Material Requisitions function (see page 6-3). 5. Post the requisitions (see page 6-21). Accounts Payable User’s Manual 3-21 Setup Setup Functions Detail Method The detail method provides complete purchasing history, but it is more timeconsuming than the summary method. You must leave the amount fields in the vendor records blank and enter and post all transactions from the beginning of the year. The detail method consists of the following steps: 1. Leave the history fields (except last-year’s values) in the vendor records blank. 2. Use the Transactions function to enter the invoices for the first general ledger period. If you made payments against the invoices, enter them in the Amt Paid field on the totals screens. 3. Post the transactions you entered in step 2 in the Post Transactions function (see on page 5-37). 4. Enter material requisitions and returned requisitions for the first general ledger period in the Enter Material Requisitions function (see page 6-3). 5. Post the requisitions you entered in step 4 in the Post Material Requisitions function (see page 6-21). 6. Repeat steps 2–5 until you reach the current date. Access Codes To safeguard your system, prevent access by unauthorized people. Use the Resource Manager Access Codes function to set up access codes on your system. You can set up access codes for the Accounts Payable system itself, for menus in the system, and for individual functions. To control users’ access to menus and functions, you can set up an access code for each user or group of users that performs the same functions. 3-22 Accounts Payable User’s Manual Setup Functions Setup A Code for Each Company Access codes are company-specific. When you set up an access code for a user, the code is assigned the company you are in. Because the codes are company-specific, you must set up a code for each company a user needs to access. You can use the same code for each company so that the user does not need to remember different codes. For example, you can set up the access code CHARM for companies A01, B01, and C01 so that a user can use the same code for each company. What Should Be Protected Because of the sensitive nature of some of the information in the Accounts Payable data files and reports, you should limit access to the functions that provide confidential information or are sensitive to change. For maximum security, protect the Accounts Payable application itself, each of the Accounts Payable menus, and the individual functions. After you have set up your access codes, print a list of the codes and store it in a safe place. For more information about access codes, see the Resource Manager User’s Manual. Accounts Payable User’s Manual 3-23 Setup Setup Functions Backup Schedule Plan a backup schedule before you begin day-to-day operations. You can lose files because of disk drive problems, power surges and outages, and other unforeseen circumstances. Protect yourself against such an expensive crisis by planning and sticking to a backup schedule. Backing Up Data Files Back up your Accounts Payable data files whenever they change—every day or every week—and before you run these functions: • • • • • • Post Transactions Post Material Requisitions Post Payments Periodic Maintenance Purge Selected Files Purge Vendor Comments Backing Up System Files Once a month or so, back up your programs and system files. Even though these files seldom change, backup media can be damaged or deteriorate, so it pays to have a fresh copy in storage in case you need it. Backup Media Keep more than one set of backups in case one set is bad or damaged. Rotate the sets of backup media, keeping one set off-site. 3-24 Accounts Payable User’s Manual Setup Functions Setup Use Resource Manager Use the Backup function on the Resource Manager Data File Maintenance menu to back up files. Note You must back up all the files in the data path for a particular list of companies at once to ensure that you have up-to-date copies of the system files. Do not try to use operating system commands to back up only a few files that have been changed. If you do, your system may not work after you restore them. The Backup function backs up all the data files for a specified company in a data path at one time. Accounts Payable User’s Manual 3-25 Information Inquiry Vendors and Invoices Invoices Detail History Summary History 4 4-3 4-11 4-13 4-17 Accounts Payable User’s Manual Accounts Payable User’s Manual 4-1 Information Inquiry Introduction Use the functions in this chapter to look at information about vendors, invoices, and history. You cannot use the Information Inquiry functions to add or change information. You can use these functions at any point in your work cycle. Once transaction information has been posted, you can use the Vendors and Invoices function to look at information about vendors and their invoices. You can also use the Invoices function to look at information about invoices. You can use the Summary History function and the Detail History function if you elected to keep detail history in the Resource Manager Options and Interfaces function. 4-2 Accounts Payable User’s Manual Vendors and Invoices Use the Vendors and Invoices function to look at vendor records and open invoices. To add to or change this information, use the Vendors function (see page 11-3). Select Vendors and Invoices from the Information Inquiry menu. The Vendor Inquiry screen appears. 1. Enter the vendor ID whose information you want to view. Accounts Payable User’s Manual 4-3 Information Inquiry Vendors and Invoices 2. 4-4 Use the commands (buttons in graphical mode) in the command bar of each inquiry screen to find the information you need: Command Action Vendor Press V to look at a different vendor record. Then enter the Vendor ID. History Press H to look at the purchase and payment history for the vendor. See “Look at Vendor History” on page 4-5 for more information. Invoices Press I to scan invoices from the vendor you selected. See “Find Invoices From a Vendor” on page 4-6 for more information. Codes Press O to view the Vendor Codes for the vendor you selected. See “Codes Inquiry for a Vendor” on page 4-7 for more information. Comments Press C to look at the comments about the vendor you selected. See “Look at Comments for a Vendor” on page 4-8 for more information. User Fields Press U to view the User-Defined Fields for the vendor you selected. See “Look at User-Defined Fields” on page 4-10 for more information. First Press F to look at the first vendor record on file. Last Press L to look at the last vendor record on file. Next Press N to look at the next vendor record on file. Previous Press P to look at the previous vendor record on file. Accounts Payable User’s Manual Information Inquiry Vendors and Invoices Look at Vendor History To look at the purchase and payment history for the vendor, press H. The Vendor History Inquiry screen appears. This information comes from the APVExxx (Vendor) file and is entered using the Vendors function. Use the commands (or buttons in graphical mode) on the command bar to find the information you need. See the table in the Vendor Inquiry section for more information. When you are finished looking at the information, press Enter or G (General) to return to the Vendor Inquiry screen. Accounts Payable User’s Manual 4-5 Vendors and Invoices Information Inquiry Find Invoices From a Vendor To scan invoices from the vendor you selected, press I. The Invoices screen appears. Use the commands (buttons in graphical mode) on the command bar to find the information you need. See the table in the Vendor Inquiry section for more information on these commands. To sort the invoices a different way—by invoice number (the default), invoice date, or invoice due date—press S (Sort) until the sort option you want appears and the invoices are in the order you want. If Accounts Payable interfaces with Job Cost, each sort option is available with the job ID for six options overall. Press G (Goto inv) to enter a specific invoice number and go directly to that invoice on the screen. When you are finished looking at the information, press Enter to return to the Vendor Inquiry screen. 4-6 Accounts Payable User’s Manual Information Inquiry Vendors and Invoices Codes Inquiry for a Vendor To view the vendor codes for the vendor you selected, press O. The Vendor Codes Inquiry screen appears. Use the commands (buttons in graphical mode) on the command bar to find the information you need. See the table in the Vendor Inquiry section for more information on these commands. When you are finished looking at the information, press G (General) to return to the Vendor Inquiry screen. Accounts Payable User’s Manual 4-7 Vendors and Invoices Information Inquiry Look at Comments for a Vendor To look at the comments about the vendor you selected, press C. The Vendor Comment Inquiry window appears. 1. 2. Tab out of the Vendor ID field to select the reference ID for the comments you want to view. Press Enter in the Ref ID field to look at the comments for all reference IDs. Enter the date of the most recent comment you want to look at, or press Enter to look at all comment dates. References can indicate a hierarchy. For example, your company might assign reference number 0 to comments on invoices considered crucial. Those comments would appear first in comments windows. Sequence numbers are automatically incremented according to order of entry within the same date. For example, if you entered three invoices on 12/ 15, they would carry sequence numbers 001, 002, and 003 in the order you entered them. 4-8 Accounts Payable User’s Manual Vendors and Invoices Information Inquiry The date, reference, sequence number, and text that appear depend on the reference ID and end date you entered (if any). The comments are arranged by date—the most recent date first—then by reference ID and then by sequence number. 3. 4. Use the commands (buttons in graphical mode) on the command bar to find the information you need. See the table in the Vendor Inquiry section for more information on these commands. • Press R to view comments for a different reference ID. Then enter the reference ID. • Press D to view the last date entered. • Press I to view comments for a new vendor ID. • Press G to go to the next window of comments. This button is only available if you have more than one window of comments. When you are finished viewing vendor comments, exit to the Vendor Inquiry screen. Accounts Payable User’s Manual 4-9 Vendors and Invoices Information Inquiry Look at User-Defined Fields To look at the user-defined fields for the vendor you selected, press U (User fields). The User-Defined Fields screen appears. Tab out of the Vendor ID field. The user-defined field information setup for the vendor appears. Use the commands (buttons in graphical mode) on the command bar to find the information you need. See the table in the Vendor Inquiry section for more information on these commands. When you are finished viewing the user-defined field information, exit to the Vendor Inquiry screen. 4-10 Accounts Payable User’s Manual Invoices Use the Invoices function to look at the open invoices that are on file for a vendor. To add or change this information, use the Transactions function (see on page 5-3). Invoices Select Invoices from the Information Inquiry menu. The Invoices screen appears. 1. Enter the Vendor ID whose open invoices you want to view. Accounts Payable User’s Manual 4-11 Information Inquiry Invoices 2. Use the commands (buttons in graphical mode) on the command bar to find the information you need: Command Action Vendor Press V to look at a different vendor record. Then enter the vendor ID. First Press F to look at the first vendor record on file. Last Press L to look at the last vendor record on file. Next Press N to look at the next vendor record on file. Prev Press P to look at the previous vendor record on file. Sort To sort the invoices a different way—by invoice number (the default), invoice date, or invoice due date—press S until the sort option you want appears and the invoices appear in the order you want. Goto inv Press G to enter a specific invoice number and go directly to that invoice on the screen. Note: The Information menu gives you access to documents attached to customer, vendor, employee, invoice, or other records. When the Information menu appears, select the appropriate Documents command to open the Documents screen where you can view document information or open attached documents. 3. 4-12 When you are finished looking at the vendor’s open invoices, use F7 to exit to the Information Inquiry menu. Accounts Payable User’s Manual Detail History Use the Detail History function to look at past purchases, debit memos, and payment information. Most invoices are listed more than once. They are listed by line item in order of appearance in the invoice. The last entry for each invoice number is Invoice Total. The value for this entry is the total value of the invoice—the sum of the subtotal of line items, sales tax, freight charge, and miscellaneous charge. This function is available only if you elected to keep detail history in the Resource Manager Options and Interfaces function. To add to or change this information, use the Transactions function (on page 5-3) or the Pay Invoices functions (on page 10-1). Select Detail History from the Information Inquiry menu. The Detail History screen appear. 1. Enter the ID of the vendor whose history you want to view. Accounts Payable User’s Manual 4-13 Information Inquiry Detail History 2. 4-14 Use the commands (buttons in graphical mode) on the command bar to find the information you need: Command Action Vendor Press V to view a different vendor record. Then enter the vendor ID. (If a vendor has been deleted from the APVExxx file but has records in the APHIxxx file, you can look at the records if you know the vendor ID.) First Press F to look at the first vendor record on file. Last Press L to look at the last vendor record on file. Next Press N to look at the next vendor record on file. Previous Press P to look at the previous vendor record on file. Header Press H to view invoice information for a purchase order number or a start date. Then enter the purchase order number or start date. You can use the * and ? wildcards. Totals Press T to look at invoice totals for the vendor. The invoice number, subtotal, sales tax, freight, miscellaneous charges, and total appear in a window. Press any key to return to the Detail History screen. View Press I to look at an expanded summary of the invoice. Additional information about the invoice (general ledger account and period, purchase order number and date, quantity purchased) appears in the View Line window. Press any key to return to the Detail History screen. Accounts Payable User’s Manual Detail History Information Inquiry 3. Command Action Goto Invoice Press G to move directly to a different invoice number. Then enter the number or exit to the Detail History screen. (This command appears only if you have more than one screen of invoice numbers.) Add’l Desc Select A to view the additional descriptions for the particular line item. This function is only available if you have toggled both Use Additional Descriptions and Keep Additional Descriptions History to YES in the Options and Interface function (see the Resource Manager User’s Manual for more description). When you are finished looking at detail history, use F7 to exit to the Information Inquiry menu. Accounts Payable User’s Manual 4-15 Summary History Use the Summary History function to look at past purchases and payment information associated with vendors. To add to or change this information, use the Transactions function (on page 5-3) or the Pay Invoices functions (on page 10-1). Select Summary History from the Information Inquiry menu. The Summary History screen appears. 1. Enter the vendor ID whose history you want to view. 2. The current fiscal year from the APPDxxx table appears. Accept it or enter the fiscal year whose history you want to view. The vendor’s purchases, the discounts taken and lost, the payment amounts for each period, the number of periods specified in the APPDxxx table, and the year-to-date totals appear. Accounts Payable User’s Manual 4-17 Information Inquiry Summary History 3. Use the commands (buttons in graphical mode) on the command bar to find the information you need. Command Action Enter = next vendor Press Enter to view the next vendor on the list. New ID Press N to enter a new vendor ID and view their summary history information. View Period Press V to look at the vendor’s item and job history for a particular period. See the section below. Look at History for a Particular Period To look at the vendor’s item and job history for a particular period, press V. Then enter the period whose item and job history you want to view. The Summary History input screen appears: If you did not elect to keep summary history in the Resource Manager Options and Interfaces function for a period, an asterisk (*) appears next to the period, and the message *=Summary History Not Kept appears near the bottom of the screen. You cannot look at the item history for a period if you do not keep summary history. 4-18 Accounts Payable User’s Manual Information Inquiry Summary History If you kept summary history for the period you entered, the Summary History Item Inquiry screen appears. Press Enter to return to the Summary History Vendor Inquiry screen. Note: If you made more purchases from the vendor in this period than the screen can show, you can also press M to view the next page of history for this period. Accounts Payable User’s Manual 4-19 Daily Work 5 Accounts Payable User’s Manual Transactions Copy Recurring Entries Purchases Journal Miscellaneous Debits Journal Daily Sales Tax Report Change Batches Batch Control Post Transactions Accounts Payable User’s Manual 5-3 5-21 5-23 5-27 5-31 5-33 5-35 5-37 5-1 Daily Work Introduction Use the Daily Work functions to record purchases you made from a vendor. If you purchased goods from a vendor that is not associated with a recurring entry, use the Transactions function. If the vendor is associated with a recurring entry, use the Copy Recurring Entries function. The information about recurring entries is copied to the APTDxxx and APTHxxx (Transaction) files. Use the Purchases Journal to check purchasing transactions. Use the Miscellaneous Debits Journal to check debits that are not directly related to purchases. Use the Daily Sales Tax Report to recap the sales tax charges you’ve been assessed for the items you’ve purchased. If you elected to use transaction batching, use the Batch Control and Change Batches functions to manage groups of transactions. You can group transactions by time period, by data entry person, or in other similar ways to streamline the Daily Work process. 5-2 Accounts Payable User’s Manual Transactions Use the Transactions function to enter invoices with amounts retained. Separate invoices are created in the Open Invoice file for amounts retained and total amounts retained per vendor are tracked in the Vendor file. Note If you interface Accounts Payable to General Ledger and last-year files exist, you must select the fiscal year when you enter transactions into an empty file. All transactions you enter default to that year until you post. Select Transactions from the Daily Work menu. The Transaction Type dialog box appears. Accounts Payable User’s Manual 5-3 Daily Work Transactions Select the type of transaction with which you want to work. You can: • • • Enter purchases Enter returned goods and cancel incorrectly posted transactions Change or delete unposted transactions Before you change or delete transactions, produce the Purchases and Miscellaneous Debits Journals so that you have the correct transaction numbers. After you change or delete transactions, produce the journals again so that the audit trail is accurate. If you add, change, or delete a transaction, pay attention to the transaction totals. The system puts the entire payment balance in the First Payment field when a quantity, a cost, or an amount changes. If the calculated discount is different from the cash discount, you can elect to automatically use the calculated amount. Header Information After you make your selection from the Transaction Type menu, the header screen appears. 5-4 Accounts Payable User’s Manual Transactions Daily Work Field Description Batch ID If you elected to use transaction batching in Options and Interfaces, enter a batch ID or select an ID from the inquiry window. If you elected the option for system-generated batch numbers, a new batch ID can be automatically generated when you use the Maintenance (F6) command. Tran No The system assigns a unique number to each transaction. To change transactions or return goods, enter the number of the transaction. To delete the entire transaction, use the Delete (F3) command. Loc ID If you entered a default location ID when you set up the company, the ID appears. If you change the ID of the location you are purchasing the items for, the description of the location appears for verification. If you did not enter a default location ID, enter the ID of the location you are purchasing the items for or press Enter to skip this field. Accounts Payable User’s Manual 5-5 Daily Work Transactions Field Description Vendor ID Enter the ID of the vendor you are purchasing goods from or returning goods to. If you use the Maintenance (F6) command, the Vendors function is temporarily called up. (You cannot use the Maintenance command to delete vendor records.) After you enter the ID, the vendor’s name and address appear. If the vendor is flagged as a subcontractor, the message ***Subcontractor*** appears at the bottom of the screen. General liability and worker’s compensation insurance information also appear. To enter a vendor you plan to use only once, enter TEMP and then the vendor’s name, address, and a distribution code. The system assigns each temporary vendor an ID that consists of a + and a five-digit number. This ID is printed in the Purchases Journal. Temporary vendors that have balances of zero are removed from the APVExxx (Vendor) file when you run Purge Selected Files. 5-6 Invoice No Enter the number of the vendor’s invoice for the items you purchased or are returning. If the number you enter is in the APINxxx (Open Invoice) file or the APHIxxx (Detail History) file, a message appears to warn you. Date Enter the date of the invoice whose number you entered. PO Number Enter the purchase order number or press Enter if you did not assign one. Accounts Payable User’s Manual Transactions Daily Work Field Description Terms Code Enter the terms code. The default Terms Code comes from the Vendor General Information screen. If you use the Maintenance (F6) command, the Terms Code function temporarily appears. After you enter the code, the description and the percent for the payment terms of the transaction appear. Tax Group Enter the tax group where you want to apply the tax—even if the transaction is not taxable. The default Tax Group comes from the Vendor General Information screen. If you use the Maintenance (F6) command, the Tax Groups function temporarily appears (see the Resource Manager User’s Manual). After you enter the group, the description of the group appears. 1099? If the vendor does not receive a 1099-MISC form, the box is clear (or NO appears in text mode) and you cannot change it. If the vendor receives a 1099-MISC form, the box is selected (or YES appears in text mode). If you want the purchase to update the 1099 Payments Year to Date field in the vendor’s record, press Enter; if not, clear the box (or enter N in text mode). GL Period The default GL Period listed in this field is based on the invoice date you selected above. You can change the period. However, if you change the invoice date, the period resets relative to that date. Press Enter if you want to post the transaction to the default period, or enter a different period. When you save the Header information, the line-item entry screen appears. Accounts Payable User’s Manual 5-7 Daily Work Transactions Append Line The Append Line screen appears only if no line items are associated with the transaction. Field Description Item ID Enter the number of the item you are purchasing or returning, or press Enter to skip this field. If Accounts Payable interfaces to Inventory, you can also use the Inventory lookup search commands (see Chapter 1) to find an item. Desc Enter a description of the item. Additional Descriptions If you elected to use additional descriptions in the Resource Manager Options and Interfaces function, you can enter up to ten descriptive lines. GL Desc If you elected in the Resource Manager Options and Interfaces function to post summary information to General Ledger, this field is skipped. If you elected in the Resource Manager Options and Interfaces function to post detailed information to General Ledger, enter a description to identify the transaction, or press Enter to skip this field. 5-8 Accounts Payable User’s Manual Transactions Daily Work Field Description If Accounts Payable interfaces with General Ledger, the description you enter appears in the Description column of the GLJRxxx (Journal) file when you post the transaction. (If you do not enter a description, the invoice number and the item description appear in the Description column of the GLJRxxx file when you post the transaction.) Job ID Enter the ID of the job affected by the purchase, or press Enter to skip this field. (The Inquiry command is available if Accounts Payable interfaces with Job Cost.) The message Note: When ITEM-ID’s are purchased to a JOB it does not add to Qty OnHand appears (when interfaced to Inventory). Rather than adding to quantity on-hand, quantities you enter are committed directly to the job instead. A warning message may appear if the job has a finished date assigned to it. Press Enter to continue. Phase ID Enter the ID of the phase (cost center) affected by the purchase, or press Enter to skip this field. A warning message may appear if the job has a finished date assigned to it. Press Enter to continue. Cost Code Accounts Payable User’s Manual Enter the cost code to be associated with this purchase, or press Enter to skip this field. 5-9 Daily Work Transactions Field Description GL Account If Accounts Payable interfaces with Contractors’ Job Cost and you entered a job ID, the WIP account from the DFxxxxxx table appears. If the job and phase has the WIP Info option set to Yes, then the account from the WIP Code assigned to the job/ phase appears. If you specified a range of job GL accounts in the JOBGLxxx table, and you entered a job, phase, and cost code for this line item, the GL account must be in the specified range. A warning message appears if the account is not in the specified range. Note: If you do not want the system to verify the GL account number for orders that use jobs, leave the Job GL From and Thru values blank in the JOBGLxxx table. If Purchase Order does not interface with Contractors’ Job Cost or if you did not enter a job ID, the account number is selected in this order: 1. If you assigned an account number in the vendor’s record, that number appears. 2. If Accounts Payable interfaces with Inventory and you entered an item ID, the inventory account from the item location appears. 3. If Accounts Payable does not interface with Inventory or if the line is for a noninventory item and no account number is entered in the vendor record, the inventory account from the DFxxxxxx table appears. 5-10 Accounts Payable User’s Manual Transactions Daily Work Field Description Tax Class This field defaults from the Item ID used. Press Enter to accept it. If you are only using a description and not an Item ID, yo must enter the tax class. Use Maintenance (F6) if you want to create a new tax class. Quantity Enter the number of units of the purchased item. Units Enter a valid alternate unit of measure. If you are purchasing an item that is not kept in inventory, enter the unit of measure by which you purchase the item; for example, you might enter DZ if you measure the item by the dozen. Unit Cost Accept the amount you paid for each item, or enter a different amount. The Unit Cost field on the Purchases line-item entry screen is updated by the average of the unit costs you enter; the Ext Cost field on the Purchases line-item entry screen is updated by the total of the unit costs you enter. Ext Cost Enter the extended cost if the unit cost is not known. The unit cost is then calculated. Retainage Enter either a dollar amount or a percentage of the purchase to be retained. Whichever field you fill in, the other is calculated accordingly. Note: If you enter a retainage amount or percentage, OSAS creates two invoices when you post transactions: one for the transaction amount minus retainage, and one for the retainage amount. OSAS automatically assigns the retainage invoice a status of Hold. Use the Hold/Release Invoices function (page 10-5) to release invoices, apply payment, or split an invoice. Accounts Payable User’s Manual 5-11 Daily Work Transactions Note If you have the Post Job to Open Invoice option selected on the Vendors Subcontractor Information screen (page 11-15), the system notes separate line item detail on the Subcontract Report for each transaction line item. Even if two line items are entered for the same job, phase, and cost type, two line item entries are created in the report. After you finish entering the line items for the transaction, use the Exit (F7) command to exit or enter N to enter the next transaction. The Totals screen appears. The retainage amount appears at the top of the screen and is subtracted from the invoice subtotal. If you have the option set to Post Job to Open Invoices, and you enter an amount paid on the Totals screen, the payment is applied to the line items in the order they were entered. Use the Proceed (OK) command to save the information. You cannot use the Abandon (F5) command to cancel the purchase. You can delete the entire purchase by using the Delete (F3) command on the header screen. 5-12 Accounts Payable User’s Manual Transactions Daily Work Purchases When you exit from the line-item entry screen, the Purchases screen appears. The Purchases screen is divided into these sections: • Information from the header screen is summarized at the top of the screen. • The line-item entry area, or scroll region, appears in the middle of the screen. • The totals appear at the bottom of the screen. Accounts Payable User’s Manual 5-13 Daily Work Transactions Use the commands (buttons in graphical mode) in the command bar of each inquiry screen to find the information you need. 5-14 Command Description Enter = edit Move to the line you want to edit and press Enter. Append Press A to append a line item to the transaction. See “Append Line” on page 5-8 for more information on appending a line item. Header Press H to return to the header screen. When you return to the header screen, you do not lose the lineitem and totals entries because you already saved them. Totals Press T to open the Totals/Payments window. See “Purchase Totals” on page 5-16 for more information. View Move to the line item you want to view and press V to look at an expanded summary of the line item. Additional information about the line item, such as the general ledger account and description, quantity purchased, and cost information, appears on the View Line window. Press any key to return to the Purchases screen. Goto Press G and then enter a line number to go directly to a particular line item. (This command appears only if there is more than one screen of line items.) Next trans Press N to finish with the transaction on the screen and move to a blank header screen to enter a new transaction. Accounts Payable User’s Manual Transactions Daily Work View Line When you select View, the View Line dialog box appears. The View Line dialog box displays the information for the selected item. Press Proceed (OK) to return to the Purchases screen. Accounts Payable User’s Manual 5-15 Daily Work Transactions Purchase Totals When you press T to work with the totals, press N to enter another transaction, or exit from the Transactions function, the Totals/Payments dialog box appears (If you pressed T, you can use only the Sales Tax, Freight, and Misc fields.). The subtotal of all the line items appears. 5-16 1. Enter the shipping charges and the tax class to which you want to apply the charges in the Freight boxes. 2. In the Misc box, enter the miscellaneous charges (for example, handling) if the vendor added some. Then enter the tax class to which you want the miscellaneous charges applied. 3. Enter the sales tax from the invoice. If you enter an amount different from the calculated amount, the Sales Tax Breakdown dialog box appears. Accounts Payable User’s Manual Transactions Daily Work Sales Tax Breakdown The tax location for the transaction and the tax amount for each location appears. 1. Accept the current sales tax adjustment or enter a different amount in the Tax Adjustment box. 2. Enter the tax location for the adjustment in the Tax Loc box. 3. Accept the current tax class or enter a different tax class in the Class box. After you enter the tax class, the cursor returns to the Totals/Payments window. Field Description Total The total amount of the invoice (the subtotal plus the sales tax and freight and miscellaneous charges) appear. Amt Paid If you prepaid a portion of the purchase, enter the amount. Via Check No If you entered a prepayment, enter the number of the check you used, or press Enter if you paid cash— CASH appears. Payment Date Enter the prepayment date. Accounts Payable User’s Manual 5-17 Daily Work Transactions Field Description Online Check? You cannot use this field if you did not elect to use online checks in the Resource Manager Options and Interfaces function or if the prepayment was for cash. If you want to produce online checks, select the check box (enter Y in text mode); if not, clear the check box (enter N in text mode). Cash Disc If you entered a discount percentage on the Purchases header screen, the amount of the discount appears; if not, .00 appears. Accept the discount or enter a different one. The discount is based on your inclusion/exclusion selections in the DISCxxx table (see page 11-37). If you did not set up this table, the amount from which the discount is calculated includes tax, freight, and miscellaneous charges. First Payment Amount Accept the first payment (the purchase total minus the prepayment and cash discount), or enter a different amount (it must be less than the purchase total). If you change the amount of the first payment, the remaining payment appears in the Second Payment field. First Payment Due Date 5-18 If you entered discount terms on the header screen, the first due date is calculated from the number of due days you entered using the Terms Codes function. Accept the date or enter a different date. Accounts Payable User’s Manual Transactions Daily Work Field Description Second Payment Amount If you changed the amount of the first payment, the second payment (the purchase total minus the prepayment, cash discount, and first payment) appears. Accept it, or enter a lower amount. If you change the amount of the second payment, the remaining payment appears in the Third Payment field. Second Payment Due Date Enter the date the second payment is due. Third Payment Amount If you entered an amount for the first and second payments, the remaining payment appears. If you need to split an invoice into more than three payments, post the purchases. Then use the Hold/ Release Invoices function (see page 10-5) to split it further. Third Payment Enter the date the third payment is due. Due Date When you approve the totals, one of several things can happen, depending on what you entered or which options you elected: • If you elected to print an online check, you are prompted to print it. • If you pressed T to work with the transaction totals, you are returned to the Purchases screen. • If you pressed N to enter another transaction, the Totals screen reappears so that you can confirm your entries. • If you exited from the Transactions function, the Daily Work menu appears. Accounts Payable User’s Manual 5-19 Copy Recurring Entries Use the Copy Recurring Entries function to copy entries from the APRHxxx and APRLxxx (Recurring Entries) files to the APTDxxx and APTHxxx (Transaction) files when the recurring entries come due. Use the run codes and cutoff dates that you set up in the Recurring Entries function to copy the transactions according to your schedule. After you copy an entry, it is treated like another transaction. When the APTDxxx and APTHxxx files are posted, the entries are moved to the APINxxx (Open Invoice) file. Before you copy recurring entries, produce the Recurring Entries List (see page 11-21) and back up your files. If you are using Accounts Payable on a multiuser system, make sure that no one else is using the Recurring Entries function. You cannot copy recurring entries until the other users exit from that function. Accounts Payable User’s Manual 5-21 Daily Work Copy Recurring Entries Select Copy Recurring Entries from the Daily Work menu. The Copy Recurring Entries screen appears. 1. Enter the run codes whose recurring entries you want to copy. 2. Press Enter to copy the entries to the period that appears or enter a different period. 3. When you entered recurring entries, you may have entered cutoff dates for them. Accept the system date as the cutoff date, or enter a different date. Entries that have cutoff dates before the date you enter here are not copied to the APTDxxx and APTHxxx files. 4. If you elected to use transaction batching in the Resource Manager Options and Interfaces function, enter the Batch ID to which you want to copy the recurring transactions. The report shows the total amount of recurring entries that were copied to the APTDxxx and APTHxxx files, and a log of errors (such as a recurring entry for a vendor whose record has been deleted from the APVExxx file) is produced. After the report is produced, the Daily Work menu appears. 5-22 Accounts Payable User’s Manual Purchases Journal Print the Purchases Journal to check for mistakes and omissions and to use as an audit trail of purchasing transactions. The journal is helpful when you want to reconstruct events for a particular period of time. If you find incorrect transactions in the Purchases Journal, use the Transactions function to edit or delete them. Produce the Purchases Journal before you post transactions. Select Purchases Journal from the Daily Work menu. The Purchases Journal screen appears. 1. Enter the range of vendor IDs you want in the journal. 2. If you elected to use transaction batching in the Resource Manager Options and Interfaces function, select the batches you want to include in the journal. Accounts Payable User’s Manual 5-23 Daily Work Purchases Journal 3. Select the amount of detail you want in the journal: line-item detail or invoice totals. 4. Select the option by which to organize the journal. 5. In the Additional Description field, select your choice for printing additional descriptions. • Enter N to skip printing additional description on the journal. • Enter S to print the additional descriptions in a short-line format. • Enter L to print additional descriptions in a long-line format that reduces the number of lines required to print multiple lines of additional descriptions. This option is available only if you elected to use additional descriptions in the Options and Interface function. 6. Select the output device. See “Output the Report” on page 1-76 for more information. After the journal is produced, the Daily Work menu appears. 5-24 Accounts Payable User’s Manual Daily Work Purchases Journal Purchase Journal Accounts Payable User’s Manual 5-25 Miscellaneous Debits Journal Print the Miscellaneous Debits Journal to check for mistakes and omissions and to use as an audit trail of debits not directly related to purchases. The journal is helpful when you want to reconstruct events for a particular period of time. It complements the Purchases Journal; together they provide an overall view of how your money was spent. If you find incorrect transactions in the Miscellaneous Debits Journal, use the Transactions function to edit or delete them. Produce the Miscellaneous Debits Journal before you post transactions. Select Miscellaneous Debits Journal from the Daily Work menu. The Miscellaneous Debits Journal screen appears. 1. Enter the range of vendor IDs you want in the journal. Accounts Payable User’s Manual 5-27 Daily Work Miscellaneous Debits Journal 2. If you elected to use transaction batching in the Resource Manager Options and Interfaces function, select the batches you want to include in the journal. 3. Select the amount of detail you want in the journal: line-item detail or miscellaneous debit totals. 4. Select the option by which to organize the journal. 5. In the Additional Description field, select your choice for printing additional descriptions. • Enter N to skip printing additional description on the journal. • Enter S to print the additional descriptions in a short-line format. • Enter L to print additional descriptions in a long-line format that reduces the number of lines required to print multiple lines of additional descriptions. This option is available only if you elected to use additional descriptions in the Options and Interfaces function. 6. 5-28 Select the output device. See “Output the Report” on page 1-76 for more information. After the journal is produced, the Daily Work menu appears. Accounts Payable User’s Manual Daily Work Miscellaneous Debits Journal Miscellaneous Debits Journal Accounts Payable User’s Manual 5-29 Daily Sales Tax Report Use the Daily Sales Tax Report to print and review the current taxes for each tax location in your tax groups. Select Daily Sales Tax Report from the Daily Work menu. The Daily Sales Tax Report screen appears. 1. Enter the range of tax group IDs you want in the report. 2. If you elected to use transaction batching in the Resource Manager Options and Interfaces function, select the batches you want to include in the report. 3. Select the check box (enter Y in text mode) to print all tax classes for each tax location, regardless of whether the tax class has zero balances. Clear the check box (enter N in text mode) to exclude tax classes that have zero balances from the report. Accounts Payable User’s Manual 5-31 Daily Sales Tax Report 4. Daily Work Select the output device. See “Output the Report” on page 1-76 for more information. After the report prints, the Daily Work menu appears. Daily Sales Tax Report 5-32 Accounts Payable User’s Manual Change Batches The Change Batches function allows you to manually change the batch ID for a single transaction or an entire batch of transactions that has not been posted. If you did not elect to use transaction batching, you cannot use this function. Select Change Batches from the Daily Work menu. The Change Batches screen appears. 1. Select the type of change you want to make in the Change section of the screen. You can copy a single transaction to a new batch or you can move all transactions from one batch to another. 2. Enter the batch number from which you want to change in the Old Batch ID box. Accounts Payable User’s Manual 5-33 Daily Work Change Batches 3. In the Transaction Number box, enter the transaction number from which you want to change. 4. Enter the batch number to which you want to change in the New Batch ID box. After the transactions are copied and the corresponding log is produced, the Daily Work menu appears. 5-34 Accounts Payable User’s Manual Batch Control Use the Batch Control function to inquire about the status of your batches, to set up new batches, and to maintain existing batches. If you did not elect to use transaction batching, you cannot use this function. Select Batch Control from the Daily Work menu. The Batch Control screen appears. 1. Enter the batch ID with which you want to work in the Batch ID box. If you elected to use automatic batch number generation, you can create a new batch ID by using the Proceed (OK) command. 2. If a terminal ID appears in the Lock Flag box, the batch is or was produced or posted on that terminal. Do not change it unless you need to release a locked batch. 3. Enter a description of the transactions in this batch in the Description text box. Accounts Payable User’s Manual 5-35 Daily Work Batch Control 4. Enter the status of the batch: H if it is on hold, or R if it has been released. If you place the batch on hold, you can print or post it, but you cannot enter or edit transactions in it. 5. For each report listed, toggle the report status. The report status begins as Not Applicable. When you enter purchases or miscellaneous debits, the status automatically changes to Unprinted. When you print the report, the status automatically changes to Printed. If you then add or change transactions, the status automatically changes to Reprint. 6. If you selected a batch that is in use, the terminal ID and the user name of the person entering transactions are displayed. A maximum of 20 terminal IDs can appear at one time. After you save the information, enter information about a different batch ID, or exit to the Daily Work menu. 5-36 Accounts Payable User’s Manual Post Transactions When you post transactions, the purchases and miscellaneous debit entries are moved from the APTDxxx and APTHxxx (Transaction) files to the APINxxx (Open Invoice) file, and the purchase order number is saved in the APIXxxx (Open Invoice Additional Information) file. Detail (line-item) information about the transactions is not transferred to the APINxxx or APIXxxx files; the system keeps only the summary information (totals) necessary to prepare and print checks. Posting transactions also updates the amount due, the amount prepaid, and the purchase and payment history fields in the APVExxx (Vendor) file and clears the APTDxxx and APTHxxx files for the next group of transactions. If you keep transaction history, line-item information updates the APHIxxx (Detail History) file, and totals update the APHSxxx (Summary History) file. Note If Accounts Payable does not interface with General Ledger, you must select the year for which you are posting transactions. If Accounts Payable interfaces with General Ledger, the year you selected in Transactions appears. If Accounts Payable interfaces with Inventory and you entered the wrong year, delete all the transactions and reenter them. Accounts Payable User’s Manual 5-37 Daily Work Post Transactions Interfaces General Ledger If Accounts Payable interfaces with General Ledger, debit and credit entries are created in the GLJRxxx (Journal) file. If you post detail (line-item) information, entries are made for each line item. If you post summary (totals) information, one entry is made for each account. When you post purchases, entries are made to several accounts: You specify the expense/WIP account when you enter transactions. You set up the other accounts through the Distribution Codes function. The AP Retainage account comes from the APGLxxx table. 5-38 Accounts Payable User’s Manual Post Transactions Daily Work When you post miscellaneous debits, entries are made to these accounts: You specify the expense/WIP when you enter miscellaneous debits. You set up the other accounts through the Distribution Codes function. The AP Retainage account comes from the APGLxxx table. When you post a retainage invoice, the AP Retainage account is debited for the amount and the AP account is credited. The AP account comes from the Distribution Codes for the vendor and the AP Retainage account is specified in the line item of the transaction. Accounts Payable User’s Manual 5-39 Daily Work Post Transactions Tax Refundables If you set up the taxable percentages for refundables and refundable percentages in the Resource Manager Tax Locations function, entries are made to these accounts when you post: Entries made to the sales tax and tax refundable accounts replace the entry to the sales tax account for purchases or miscellaneous debits. Before Posting Before you post, do these things: • If you have a multiuser system, make sure that no one else is using the Accounts Payable system. You cannot post if someone else is using Accounts Payable functions. • Print the Purchases Journal (see on page 5-25). • Print the Miscellaneous Debits Journal (see on page 5-29). • Back up all the data files. The information in the Purchases Journal and the Miscellaneous Debits Journal comes from the APTDxxx and APTHxxx files. Posted entries are cleared from these files to make room for the next group of entries. Because you cannot reconstruct the journals after you post, printing them before you post is important. 5-40 Accounts Payable User’s Manual Post Transactions Daily Work Backing up your data files before you post is an important practice. Although the Post Transactions function is designed to minimize data problems due to interruptions in the posting process, unforeseen problems, such as a power surge or failure, can corrupt data files and result in data loss. Post Transactions Select Post Transactions from the Daily Work menu. The Post Transactions screen appears. 1. If you have entered and reviewed the accounts payable transactions, produced the Purchases Journal and the Miscellaneous Debits Journal, and backed up the data files, select the check box (enter Y in text mode) and press Enter; if not, clear the check box (enter N in text mode) and return to the Daily Work menu. 2. If you elected to use transaction batching, select the batches you want to post at this time. Accounts Payable User’s Manual 5-41 Post Transactions Daily Work 3. If you selected Yes to the Default Posting All Invoices as Held option within the Options and Interfaces function of Resource Manager, the check box is selected. When you post, invoices are posted as held. You can override the default here by clearing the check box. If you post invoices as held, you must use the Hold/Release Invoices function (see page 10-5) to release each invoice for payment individually. If you selected No to the Default Posting All Invoices as Held option within the Options and Interfaces function of Resource Manager, the check box is not selected. Use the Hold/Release Invoices function to hold individual invoices you don’t want to pay. If there was a retainage amount in the transaction, the system also creates a retainage invoice. The retainage invoice number is Rtxxxxxx where x is the Job ID. It is posted with a held status. See “Release Retainage” on page 10-9 for more information on releasing or paying a retainage invoice. Note If you have the option set to Post Job to Open Invoice on the Subcontractor Information screen, the system creates separate invoice records in the Open Invoice file for each line item entered for a transaction. Even if two line items are entered for the same job, phase, and cost type, two separate invoices are created. Separate retainage invoices are tracked per job, phase, and cost type if the vendor has the option Post Job to Open Invoice set to YES. If you post transactions with retainage for vendors who have the Post Job to Open Invoice option set to NO, the system creates one retainage invoice without a Job ID. 4. 5-42 If Accounts Payable does not interface with General Ledger or if you have not created last-year data in General Ledger, the current fiscal year appears. Accounts Payable User’s Manual Post Transactions Daily Work If Accounts Payable interfaces with General Ledger, the information you entered when you started entering transactions appears. If you have not yet selected a year to post to, you must select a year now. 5. Select the output device. See “Output the Report” on page 1-76 for more information. After you post and the log prints, the Daily Work menu appears. Transaction Posting Log Accounts Payable User’s Manual 5-43 Material Requisitions 6 Accounts Payable User’s Manual Enter Material Requisitions Print Material Requisitions Material Requisitions Journal Backorder Allocation Report Post Material Requisitions Accounts Payable User’s Manual 6-3 6-13 6-15 6-17 6-21 6-1 Enter Material Requisitions Use the Enter Material Requisitions function to remove from inventory items that are used internally or for jobs. If you do not have enough items to fill a material requisition, you can enter a backorder quantity. The requisition stays on file until the entire requisition has been filled. You can also use the Enter Material Requisitions function to return material requisitions or to change a requisition. To find out which backorders you can fill, produce the Backorder Allocation Report (see page 6-17). Then use the Change Material Requisitions option (see below) to fill backordered requisitions. Material Requisitions Menu Select Enter Material Requisitions from the Material Requisitions menu. The Transaction Type selection screen appears. Accounts Payable User’s Manual 6-3 Material Requisitions Enter Material Requisitions Select the type of transaction you want to work with: • • • Enter material requisitions Enter returned material requisitions Change or delete material requisitions You cannot use the Change Material Requisitions option to change posted requisitions, returned or otherwise. To reverse incorrect requisitions, use the Return Material Requisition option. To reverse incorrect returned requisitions, use the Change Material Requisitions option. Before you change or delete material requisitions, produce the Material Requisitions Journal so that you have the correct transaction numbers. After you edit or delete requisitions, produce the journal again so that the audit trail is accurate. Material Requisitions Header After you make your selection from the Material Requisitions menu, the header screen appears 6-4 Accounts Payable User’s Manual Enter Material Requisitions Material Requisitions Field Description Transaction No When you enter or return material requisitions, the system assigns a unique number to each transaction. You cannot give two material requisitions the same number; entering an existing number indicates that you want to change a requisition. To change a material requisition, enter the number of the material requisition. To delete the entire material requisition, use the Delete (F3) command. Date If you are using the first requisition in a group, the system date appears; otherwise, the date you assigned to the last requisition appears. Accept the date, or enter a different requisition date. Location ID If you entered a default location ID when you set up the company, the ID appears. To change the location ID, use the up-arrow key to move the cursor to this field. Then enter the ID of the location you are removing the items from. The location description appears for verification. If you did not enter a default location ID, enter the ID of the location where the inventory items are stored. Requisition No Enter the requisition number or a different code to identify the material requisition. Requested By Enter the name of the person requesting the items. Date Needed Enter the date the items are needed. If you are returning material requisitions, enter the date the items were removed from the location or a different date to identify the returned requisition. Notes Enter miscellaneous information about the requisition. You can enter two lines of notes. Accounts Payable User’s Manual 6-5 Material Requisitions Enter Material Requisitions Field Description Ship to This field is used by the Purchase Order system. Enter a ship-to address code, or press Enter to skip this field. If you enter a code, enter the shipping address; you can enter 30 characters for each of the four following lines. Ship Via Enter the shipping method, or press Enter to skip this field. Actual Ship Date If you have filled some or all of the requisition, enter the date the requisition was filled. If you are returning a requisition, enter the date the items were returned. GL Period Press Enter if you want to post the requisition to the displayed period, or enter a different period. When you save the header information the line-item entry screen appears. 6-6 Accounts Payable User’s Manual Enter Material Requisitions Material Requisitions Material Requisitions Line-Item Entry The Material Requisitions line-item entry screen appears only if no line items are associated with the material requisition. Field Description Loc ID The location ID you entered on the header screen appears. To change it, use the up-arrow key to go to this field. Then enter a different location ID. Item ID Enter the number of the item you are requisitioning, or press Enter to skip this field. Desc Enter an item description. Accounts Payable User’s Manual 6-7 Material Requisitions Enter Material Requisitions Field Description GL Desc If you elected to post summary information to General Ledger in the Resource Manager Options and Interfaces function, this field is skipped. If you elected to post detailed information to General Ledger in the Resource Manager Options and Interfaces function, enter a description to identify the requisition, or press Enter to skip this field. If Accounts Payable interfaces with General Ledger, the description you enter appears in the Description column of the GLJRxxx (Journal) file when you post the requisition. Job ID Enter the ID of the job affected by the requisition, or press Enter to skip this field. (The Inquiry command is available if Accounts Payable interfaces with Job Cost.) If Accounts Payable interfaces with Job Cost, the description of the job appears for verification when you enter a job ID. Phase ID If you entered a job ID, enter the ID of the phase (cost center) affected by the requisition, or press Enter to skip this field. (The Inquiry command is available if Accounts Payable interfaces with Job Cost.) Cost Code If you entered a job ID and Accounts Payable interfaces with Job Cost, select a cost code. If you entered a job ID and Accounts Payable does not interface with Job Cost, enter a cost code for reference purposes only, or press Enter to skip this field. 6-8 Accounts Payable User’s Manual Enter Material Requisitions Material Requisitions Field Description GL Account If Accounts Payable interfaces with Job Cost and you entered a job ID, the WIP account from the DMxxxx table appears. If Accounts Payable does not interface with Job Cost and the line is for an inventory item, the inventory account from the DMxxxx table appears. If you do not enter a job ID and use a noninventory item, the expenses account from the DMxxxx table appears. Accept the account number, or enter a different account number. (The Inquiry command is available if Accounts Payable interfaces with General Ledger.) Quantity Requested Enter the number of units of the item you are requesting. Units Enter a valid unit of measure for this item. If you are requesting an item that is not kept in inventory, you can enter any unit of measure for the item; for example, you might enter DZ if you measure the item by the dozen. Quantity Filled Enter the number of units of the item you received. If you are changing a requisition, the number of units you entered appears and you cannot change it. Quantity Enter the number of units that are backordered. Backordered The requisition stays open until this quantity is zero. If you are editing a requisition, you cannot change this field. You cannot enter a backorder quantity greater than the quantity still on demand (the quantity requested minus the quantity filled). Unit Cost Accept the amount, or enter a different amount. Ext Cost If the line is for a noninventory item, enter the extended cost of the line. Accounts Payable User’s Manual 6-9 Material Requisitions Enter Material Requisitions Field Description Total The total amount of the items appears at the bottom of the screen. After you save the line item, you can enter another line item or exit to the Material Requisitions screen. When you save the first line item, the totals are updated and your entries are saved. You cannot use the Abandon (Cancel) command to cancel the purchase. You can delete the entire purchase by using the Delete (F3) command on the header screen. 6-10 Accounts Payable User’s Manual Material Requisitions Enter Material Requisitions Material Requisitions When you exit from the line-item entry screen, the Material Requisitions screen appears. The Material Requisitions screen is divided into these sections: • Information from the header screen is summarized at the top of the screen. • The line-item entry area or the line-item scroll region appears in the middle of the screen. • The requisitions totals appear at the bottom of the screen Accounts Payable User’s Manual 6-11 Material Requisitions Enter Material Requisitions . 6-12 Command Action Enter = edit To edit a line item, move the prompt to the line and press Enter. Append To append a line item to the transaction, press A. Then see Material Requisitions Line-Item Entry Screen earlier in this section. Header To return to the header screen, press H. When you return to the header screen, you do not lose the line-item and totals entries because you already saved them. View To look at an expanded summary of the line item, move the prompt to the line item, and press V. Additional information about the line item, such as the general ledger account and description, quantity purchased, and cost information, appears on the View Line screen. Press any key to return to the Material Requisitions screen. Online To send an online instruction to produce the material requisition, press O. Select the output device. After the requisition is produced, you are returned to the Material Requisitions screen. Goto To go directly to a particular line item, press G. Then enter the line number. (This command appears only if there is more than one screen of line items.) Next trans To finish with the material requisition on the screen and move to a blank header screen to enter a new material requisition, press N. Then see Material Requisitions Header Screen earlier in this section. Accounts Payable User’s Manual Print Material Requisitions Use the Print Material Requisitions function to print material requisition forms or to print material requisitions on 8½-by-11-inch paper. Select Print Material Requisitions from the Material Requisitions menu. The function screen appears. 1. Enter the transaction numbers you want to print on forms. 2. Enter the requisition numbers you want to print on forms. 3. Enter the location IDs you want to print on forms. 4. Select the order in which you want to print the forms. Accounts Payable User’s Manual 6-13 Print Material Requisitions Material Requisitions If you order items from several locations on a requisition, and you want to print a separate form for each location, you must organize the requisitions by location ID. 5. Select the output device. After the forms are produced, the Material Requisitions menu appears. Sample Material Requisition Form If you organize the requisitions by transaction number, requisition number, or the date the items are needed, the location ID is listed next to the item number for each line item. The sample requisition is organized by location ID, so the location information is listed near the top of the requisition instead of being listed for each line item. Material Requisition 6-14 Accounts Payable User’s Manual Material Requisitions Journal Print the Material Requisitions Journal before you post requisitions to check for mistakes and omissions and to use as an audit trail of material requisitions and returned material requisitions. If you find incorrect material requisitions in the Material Requisitions Journal, use the Change Material Requisitions option in the Enter Material Requisitions function (see page 6-3) to edit or delete them. You cannot post material requisition credits to inventory item accounts if you did not elect that option in the Resource Manager Options and Interfaces function. Select Material Requisitions Journal from the Material Requisitions menu. The function screen appears. 1. Enter the range of material requisitions you want in the journal. Accounts Payable User’s Manual 6-15 Material Requisitions Journal Material Requisitions 2. Select the amount of detail you want in the journal: line items or only the header information and totals. 3. Select the order in which you want to organize the journal. 4. Select the output device. After the journal is produced, the Material Requisitions menu appears. A sample of the Material Requisitions Journal appears below. Material Requisitions Journal 6-16 Accounts Payable User’s Manual Backorder Allocation Report Produce the Backorder Allocation Report to find out which backordered requisitions can be filled with items that have been received in inventory and to use as an audit trail. This report is helpful when you check for mistakes and omissions before you post material requisitions. If you find incorrect material requisitions in the Backorder Allocation Report, use the Enter Material Requisitions function (see page 6-3) to edit or delete them. You cannot produce this report if Accounts Payable does not interface with Inventory. Select Backorder Allocation Report from the Material Requisitions menu. The function screen appears. 1. Enter the range of material requisition numbers, location IDs, and item IDs you want to include in the report, or leave the fields blank to include all. Accounts Payable User’s Manual 6-17 Backorder Allocation Report Material Requisitions 2. Enter the range of ship-to IDs you want to include in the report. 3. Select the order in which you want to organize the report. The report shows how the backorders can be filled, based on the way you organize the report. For example, if you have 30 requisitions for item 100, but only 25 are available, and you organize the report by the date the items are needed, the backorders needed the quickest are filled first until all 25 items are allocated. If you organize the report by requisition number, the backorders for requisition number 00000001 are filled first, backorders for 00000002 are filled second, and so on. 4. Select the output device. After the report is produced, the Material Requisitions menu appears. A sample of the Backorder Allocation Report appears at the end of this section. Notes How Backorders Are Arranged For each group of backorders for an inventory item, the first backorder listed is filled first, the next backorder is filled second, and so on. The system partially fills a backorder if the on-hand quantity reaches zero; the amount in the Allocated column for the remaining backorders for the item is zero. No backordered item whose on-hand quantity is zero is listed in the report. Balance Available The balance available is the quantity available minus the total quantity allocated. The balance available is zero if the quantity backordered is greater than the quantity available. 6-18 Accounts Payable User’s Manual Material Requisitions Backorder Allocation Report Backorder Allocation Report Accounts Payable User’s Manual 6-19 Post Material Requisitions When you post material requisitions, the requisitions and returned requisitions (except for backorders) are removed from the APMDxxx and APMHxxx (Material Requisitions) files. If you keep detail history, detailed line-item information updates the APHIxxx (Detail History) file. Interfaces General Ledger If Accounts Payable interfaces with General Ledger, debit and credit entries are created in the GLJRxxx (Journal) file. If you post detail (line-item) information, entries are made for each line item. If you post summary (totals) information, one entry is made for each account. When you post material requisitions and returned requisitions, entries are made to several accounts: Material Inv CR Expense DB Material Misc or CR Expense DB You specify the expense account(s) when you enter requisitions. Inventory If Accounts Payable interfaces with Inventory and you have elected to post material requisition credits to inventory item accounts in the Resource Manager Options and Interfaces function, inventory item accounts are credited. If you are not posting the credits to inventory item accounts, the material inventory account in the MRGLxxx table is used. Accounts Payable User’s Manual 6-21 Post Material Requisitions Material Requisitions Before Posting Before you post, do these things: • If you have a multiuser system, make sure that no one else is using the Accounts Payable system. You cannot post if someone else is using Accounts Payable functions. • Print the Material Requisitions Journal (see page 6-13). • Print the Backorder Allocation Report (see page 6-17). • Back up all the data files. The information in the Material Requisitions Journal comes from the APCMxxx (Requisition Control) file and the APMDxxx and APMHxxx (Material Requisitions) files. Posted entries are cleared from these files to make room for the next group of entries. Because you cannot reconstruct the journals after you post, printing them before you post is important. Backing up your data files before you post is an important practice. Unforeseen problems, such as a power surge or failure, can interrupt the post and result in the loss of data. 6-22 Accounts Payable User’s Manual Material Requisitions Post Material Requisitions Post Material Requisitions Select Post Material Requisitions from the Material Requisitions menu. The function screen appears. 1. If you have entered and reviewed the accounts payable requisitions, select the check box (enter Y in text mode); if not, clear the check box (enter N in text mode) and return to the Material Requisitions menu. 2. If you have produced the appropriate material requisitions forms and the Material Requisitions Journal and backed up the data files, select the check box (enter Y in text mode); if not, clear the check box (enter N in text mode) and return to the Material Requisitions menu. 3. If Accounts Payable does not interface with General Ledger or if you did not create last-year data in General Ledger, the fiscal year appears. 4. Select the output device. Accounts Payable User’s Manual 6-23 Material Requisitions Post Material Requisitions After posting is completed and the log is printed, the Material Requisitions menu appears. A sample of the posting log appears below. Material Requisitions Posting Log 6-24 Accounts Payable User’s Manual Management Reports 7 Accounts Payable User’s Manual Open Invoice Report Cash Flow Report Aged Trial Balance Vendor Analysis Report Sales Tax Report Accounts Payable User’s Manual 7-3 7-5 7-7 7-11 7-15 7-1 Open Invoice Report The Open Invoice Report shows the invoiced orders and miscellaneous debits for the due date you specify. The invoiced transactions stay in the APINxxx (Open Invoice) and APIXxxx (Open Invoice Information) files until they are purged. Select Open Invoice Report from the Management Reports menu. The Open Invoice Report screen appears. 1. Enter the range of vendors whose open invoices you want to include in the report, or leave the boxes blank to include all vendors. 2. Enter the date before and through which you want to list invoices. 3. Enter the date on and after which you want to discount invoices. 4. Select the types of invoices you want to include in the report. Accounts Payable User’s Manual 7-3 Open Invoice Report 5. Management Reports Select the output device. See “Output the Report” on page 1-76 for more information. After the report is produced, the Management Reports menu appears. Open Invoices Report 7-4 Accounts Payable User’s Manual Cash Flow Report The Cash Flow Report shows the amount of cash you can expect to pay out within any three periods you specify. This information can help you project the cash position of your business and make sound payment decisions. Select Cash Flow Report from the Management Reports menu. The Cash Flow Report screen appears. 1. Enter the range of vendors you want to include in the report, or leave the fields blank to include all vendors. 2. Select the types of invoices you want to include in the report, or leave the fields blank to include all invoices. 3. Enter three dates to establish aging periods. Enter the dates in chronological order, the earliest date first. Accounts Payable User’s Manual 7-5 Management Reports Cash Flow Report 4. If you want gross amounts due and discounts in the report, select the check box (or enter Y in text mode); if not, clear the check box (or enter N in text mode). 5. Select the output device. See “Output the Report” on page 1-76 for more information. After the report is produced, the Management Reports menu appears. Cash Flow Report 7-6 Accounts Payable User’s Manual Aged Trial Balance The Aged Trial Balance report shows the invoice balances broken down into five aging periods. The detail report shows full detail for all invoices; the summary report shows only the aging period totals. If you do not do periodic maintenance before you enter activity for a new month, the CURRENT columns in the report show activity for the current month and all the months you did not do periodic maintenance. Select Aged Trial Balance from the Management Reports menu. The Aged Trial Balance screen appears. 1. Enter the range of vendors, vendor classes, and vendor payment priorities you want to include in the report, or leave the fields blank to include all. 2. Enter the range of distribution codes you want to include in the report. Accounts Payable User’s Manual 7-7 Management Reports Aged Trial Balance 3. Accept the default aging date, or enter a different date to use as a starting point for aging the invoices. 4. Specify the point at which you want to cut off invoices on the report. • Select Date from the list box and accept the default cutoff date, or enter a different cutoff date. Invoices dated later than this do not appear in the report. • Select Period from the list box and enter the GL period and year. Invoices with a period after this one do not appear in the report. 5. Aging breaks define aging buckets, or invoice categories with a particular aging status. Accept the default dates, or enter different ones. 6. Select the kind of date by which you want to age invoices. 7. Select the order in which you want to print the report. 8. If you want to include vendors with a balance of zero, select the check box (or enter Y in text mode); if not, clear the check box (or enter N). 9. If you want to include only vendors whose balance is past due, select the check box (or enter Y in text mode); if not, clear the check box (or enter N). 10. If you want to list line-item transactions associated with each vendor, select the check box (or enter Y in text mode). If you want to list only totals associated with each vendor, clear the check box (or enter N in text mode). 11. If you want information about each vendor to appear on a different page, select the check box (or enter Y in text mode). If you want the information produced in a continuous flow, clear the check box (or enter N in text mode). This option is available only if you have more than one page of data. 12. If you want to add and include each invoice as a total, select the check box (or enter Y in text mode); if not, clear the check box (or enter N in text mode). This option is available only if you elected to include line-item transactions associated with each vendor. 13. Select the output device. See “Output the Report” on page 1-76 for more information. After the report prints, the Management Reports menu appears. 7-8 Accounts Payable User’s Manual Management Reports Aged Trial Balance Aged Trial Balance Accounts Payable User’s Manual 7-9 Vendor Analysis Report The Vendor Analysis Report shows the balances and cumulative purchases for the vendors you specify, and it summarizes the purchasing activity for those vendors. Select Vendor Analysis Report from the Management Reports menu. The Vendor Analysis Report screen appears. 1. Enter the range of vendors you want to include in the report, or leave the fields blank to include all vendors. 2. If you want the report to include history for the past period to date, select the check box (or enter Y in text mode); if not, clear the check box (or enter N). Accounts Payable User’s Manual 7-11 Vendor Analysis Report 7-12 Management Reports 3. If you want the report to include history for the past quarter-to-date, select the check box (or enter Y in text mode); if not, clear the check box (or enter N in text mode). If you include history for the past quarter, but not for the past period, the period is included in the quarter-to-date total, but is not listed separately. 4. If you want the report to include history for the past year-to-date, select the check box (or enter Y in text mode); if not, clear the check box (or enter N in text mode). If you include history for the past year, but not for the past quarter or period, that information is included in the year-to-date total, but is not listed separately. 5. If you want the report to include history for last year, select the check box (or enter Y in text mode); if not, clear the check box (or enter N in text mode). This data has no connection with data from the previous three selections. 6. If you want the addresses of each vendor to appear with the vendor, select the check box (or enter Y in text mode); if not, clear the check box (or enter N in text mode). 7. Select the output device. See “Output the Report” on page 1-76 for more information. After the report is produced, the Management Reports menu appears. Accounts Payable User’s Manual Management Reports Vendor Analysis Report Vendor Analysis Report Accounts Payable User’s Manual 7-13 Sales Tax Report The Sales Tax Report shows the amount of taxes paid on both sales and purchases after posting. Select Sales Tax Report from the Management Reports menu. The Sales Tax Report screen appears 1. Enter the range of tax authorities you want to include in the report, or leave the fields blank to include all. 2. Enter the range of tax locations you want to include in the report, or leave the fields blank to include all. 3. Select the order in which you want to print the report. 4. If you want taxes for sales, purchases, or both in the report, select the check box (or enter Y in text mode); if not, clear the box (or enter N in text mode). 5. If you want tax classes with no balances included in the report, select the check box (or enter Y in text mode); if not, clear the box (or enter N). Accounts Payable User’s Manual 7-15 Management Reports Sales Tax Report 6. Select the output device. See “Output the Report” on page 1-76 for more information. After the report prints, the Management Reports menu appears. Sales Tax Report 7-16 Accounts Payable User’s Manual History Reports 8 Accounts Payable User’s Manual AP Analysis Report Purchase Analysis Report Check History Report Detail History Report Payment History Report Tax Audit Report Summary Invoice History Report Vendor Activity Report Vendor Purchase History Report Accounts Payable User’s Manual 8-3 8-7 8-11 8-13 8-17 8-19 8-21 8-23 8-27 8-1 AP Analysis Report The AP Analysis Report provides an analysis of your company’s payables. The report has three parts. Each part compares the payables of a period you specify with those of a previous period, the previous three periods, and the same period of the previous year. The first section of the report shows the total purchases and the outstanding payables. The second section shows the total payments, the amounts that were prepaid and paid on account, and the amounts that were eligible and ineligible for a discount. The third section shows the total discount amounts that were available, taken, and lost. The system reads backwards through the APHSxxx (Summary History) file to find data for the previous periods. If you did not do period-end maintenance for a period, the data will be inaccurate for that period. You cannot produce the report if you did not elect to keep summary history in the Resource Manager Options and Interfaces function, if the reporting period you specify has no summary history, or if you did not build the APPDxxx table. Accounts Payable User’s Manual 8-3 History Reports AP Analysis Report AP Analysis Report Screen Select AP Analysis Report from the History Reports menu. The AP Analysis Report screen appears. 1. Accept the current period that is displayed from the APPDxxx table, or enter a different period. If the reporting period you specify has no summary history, the following message appears: Warning: Summary history is not available for all comparisons. If this message appears, you can still produce the report, but .00* appears where summary history is not available. 2. Press Enter to show data for the current fiscal year that appears from the APPDxxx table, or enter a different fiscal year. 3. Select the output device. After you produce the report, the History Reports menu appears. 8-4 Accounts Payable User’s Manual History Reports AP Analysis Report AP Analysis Report Accounts Payable User’s Manual 8-5 Purchase Analysis Report The Purchase Analysis Report provides an analysis of your company’s purchases based on a reporting period you specify and of the last fiscal year’s trends by period. The report has two parts. The first part shows the current and previous year’s purchases and discounts taken and lost for the reporting period, quarter, and year. The second part of the report shows the purchases and discounts taken and lost for the reporting period and the previous 12 periods. You cannot produce the report if you did not elect to keep summary history in the Resource Manager Options and Interfaces function, if the reporting period you specify has no summary history, or if you did not build the APPDxxx table. Accounts Payable User’s Manual 8-7 Purchase Analysis Report History Reports Purchase Analysis Report Screen Select Purchase Analysis Report from the History Reports menu. The function screen appears. 1. Accept the current period taken from the APPDxxx table, or enter a different period. If the reporting period you specify has no summary history, the following message appears: Warning: Summary history is not available for this period. If this message appears, you can still produce the report, but .00* appears where summary history is not available. 8-8 2. Accept the current fiscal year taken from the APPDxxx table, or enter a different year. 3. Select the output device. See “Output the Report” on page 1-76 for more information. After you produce the report, the History Reports menu appears. Accounts Payable User’s Manual History Reports Purchase Analysis Report Purchase Analysis Report Accounts Payable User’s Manual 8-9 Check History Report The Check History Report is a log of all the checks in the APCHxxx (Checks) file. You cannot produce the report if you did not elect to keep check history in the Resource Manager Options and Interfaces function. Select Check History Report from the History Reports menu. The Check History Report screen appears. 1. Enter the range of checks you want to include in the report. 2. Enter the range of dates associated with the check numbers you want to include in the report. 3. Enter the range of vendors associated with the checks you want to include in the report. Accounts Payable User’s Manual 8-11 History Reports Check History Report 4. Enter the range of general ledger accounts associated with the checks you want to include in the report. (The Inquiry command is available if Accounts Payable interface with General Ledger.) 5. Select the order in which you want to print the report. 6. Select the type of checks to include in the report. You can include only checks, only void checks, or both checks and void checks. 7. Select the output device. See “Output the Report” on page 1-76 for more information. After you produce the report, the History Reports menu appears. Check History Report 8-12 Accounts Payable User’s Manual Detail History Report The Detail History Report, which you can print in either detailed or summary format, contains information from the APHIxxx (Detail History) file. You can use it to review the purchases and returns you made and miscellaneous debits and material requisitions. You cannot produce the report if you did not elect to keep detail history in the Resource Manager Options and Interfaces function. Select Detail History Report from the History Reports menu. The Vendor Detail History Report screen appears. 1. Enter the range of vendors you want to include in the report, or leave the fields blank to include all vendors. Accounts Payable User’s Manual 8-13 History Reports Detail History Report 2. Enter the range of invoice numbers you want to include in the report, or leave the fields blank to include all invoice numbers. 3. Enter the range of dates, item IDs, and location IDs associated with the vendors’ invoices you want to include in the report, or leave the fields blank to include all. 4. Enter the range of job IDs associated with the vendors’ invoices you want to include in the report. (The Inquiry command is available if Accounts Payable interfaces with Job Cost.) 5. Enter the range of general ledger accounts associated with the vendor’s invoices you want to include in the report. (The Inquiry command is available if Accounts Payable interfaces with General Ledger.) 6. Enter the range of general ledger periods whose history you want in the report. 7. Select the order in which you want to print the report. 8. Select the level of detail you want in the report. 9. Select the type of units you want printed in the report. If Accounts Payable interfaces with Inventory, the base unit may be the smallest unit the item is priced by; for example, computer diskettes might be priced by the individual diskette even though they are packaged in boxes of 100. 10. Specify whether you want to print additional descriptions. This option is available only if you elected to use additional descriptions in the Resource Manager Options and Interfaces function. 11. Select the output device. See “Output the Report” on page 1-76 for more information. After you produce the report, the History Reports menu appears. 8-14 Accounts Payable User’s Manual History Reports Detail History Report Detail History Report Accounts Payable User’s Manual 8-15 Payment History Report The Payment History Report lists paid invoices, check numbers, check dates, voided check information, and payment types. This information comes from the transactions that were posted to the APHIxxx (Detail History) file. You cannot produce the report if you did not elect to keep detail history in the Resource Manager Options and Interfaces function. Select Payment History Report from the History Reports menu. The Payment History Report screen appears. 1. Enter the range of vendors you want to include in the report, or leave the fields blank to include all vendors. 2. Enter the invoice numbers you want to include in the report, or leave the fields blank to include all invoice numbers. Accounts Payable User’s Manual 8-17 History Reports Payment History Report 3. Enter the range of dates and check numbers associated with the vendors’ invoices you want to include in the report, or leave the fields blank to include all. 4. Select the order in which you want to print the report. 5. Select the amount of detail you want in the report. 6. Select the output device. See “Output the Report” on page 1-76 for more information. After you produce the report, the History Reports menu appears. Payment History Report 8-18 Accounts Payable User’s Manual Tax Audit Report The Tax Audit Report shows the tax and refundable amounts allocated to five tax levels. This information comes from the transactions posted to the APHIxxx (Detail History) file. Produce this report before you delete records or purge history. You cannot produce the report if you did not elect to keep detail history in the Resource Manager Options and Interfaces function. Select Tax Audit Report from the History Reports menu. The Tax Audit Report screen appears. 1. Enter the range of tax groups and vendors you want to include in the report, or leave the field blank to include all. 2. Enter the range of invoice dates you want to include in the report, or leave the fields blank to include all invoice dates. Accounts Payable User’s Manual 8-19 History Reports Tax Audit Report 3. Select the output device. See “Output the Report” on page 1-76 for more information. After you produce the report, the History Reports menu appears. Tax Audit Report 8-20 Accounts Payable User’s Manual Summary Invoice History Report The Summary Invoice History Report summarizes invoice line-item detail history. This information comes from the transactions that were posted to the APHIxxx (Detail History) file. Produce this report before you delete records or purge history. You cannot produce the report if you did not elect to keep detail history in the Resource Manager Options and Interfaces function. Select Summary Invoice History Report from the History Reports menu. The Summary Invoice History Report screen appears. 1. Enter the range of vendors you want to include in the report, or leave the fields blank to include all vendors. 2. Enter the range of invoice numbers you want to include in the report, or leave the fields blank to include all vendors. Accounts Payable User’s Manual 8-21 Summary Invoice History Report History Reports 3. Enter the range of dates associated with the vendors’ invoices you want to include in the report, or leave the fields blank to include all dates. 4. Select the output device. See “Output the Report” on page 1-76 for more information. After you produce the report, the History Reports menu appears. Summary Invoice History Report 8-22 Accounts Payable User’s Manual Vendor Activity Report The Vendor Activity Report shows what you bought, who sold it to you, and how often you bought it. This information comes from the transactions that were posted to the APHIxxx (Detail History) file. Produce an audit copy of this report before you delete records or purge history. You cannot produce the report if you did not elect to keep detail history in the Resource Manager Options and Interfaces function. Select Vendor Activity Report from the History Reports menu. This screen appears. 1. Enter the range of vendors you want to include in the report, or leave the fields blank to include all vendors. Accounts Payable User’s Manual 8-23 History Reports Vendor Activity Report 8-24 2. Enter the range of invoice numbers you want to include in the report, or leave the fields blank to include all invoice numbers. 3. Enter the range of dates associated with the vendors’ invoices you want to include in the report, or leave the fields blank to include all dates. 4. Select the order in which you want to organize the report. 5. Select the amount of detail you want in the report. 6. If you want the report to include additional descriptions, select the check box (or enter Y in text mode); if not, clear the check box (or enter N in text mode). This option is available only if you elected to use additional descriptions in the Resource Manager Options and Interfaces function. 7. Select the output device. See “Output the Report” on page 1-76 for more information. After you produce the report, the History Reports menu appears. Accounts Payable User’s Manual History Reports Vendor Activity Report Vendor Activity Report Accounts Payable User’s Manual 8-25 Vendor Purchase History Report The Vendor Purchase History Report shows how much you have purchased from vendors. You can list only vendor purchase history, or you can include item detail. If you elect to include item detail, the report shows the quantities of each item purchased. You cannot produce the report if you did not elect to keep summary history in the Resource Manager Options and Interfaces function, if the reporting period you specify has no summary history, or if you did not build the APPDxxx table. Select Vendor Purchase History Report from the History Reports menu. The Vendor Purchase History Report screen appears. 1. Enter the range of vendors you want to include in the report, or leave the fields blank to include all vendors. Accounts Payable User’s Manual 8-27 History Reports Vendor Purchase History Report 2. Enter the range of vendor classes you want to include in the report, or leave the fields blank to include all vendor classes. 3. Select the order in which you want to print the report. 4. If you want the report to list item history, select the check box (or enter Y in text mode); if not, clear the check box (or enter N in text mode). 5. Press Enter to base the data in the report on the current period taken from the APPDxxx table, or enter a different period. 6. Press Enter to base the data in the report on the current fiscal year taken from the APPDxxx table, or enter a different fiscal year. After you produce the report, the History Reports menu appears. Percent of the Total The value in the %Tot column is the percentage of the value on the line to the next increment of measure. The information on the vendor line is from the vendor record in the APHSxxx (Summary History) file for the specified period and year. The vendor line’s %Tot value, which is also stored in this file, is calculated as the amount for the vendor divided by the total amount for the company. The %Tot value listed for items or jobs is the amount of the item divided by the vendor’s total amount. The amounts on the Grand Totals lines are the sum total of the amounts printed in the report. The %Tot value is calculated as the Grand Total divided by the company total from the APHSxxx file for this period and year. The %Tot may be less than 100.00 if you produce this report for a range of vendor IDs or vendor classes. 8-28 Accounts Payable User’s Manual History Reports Vendor Purchase History Report Vendor Purchase History Report Accounts Payable User’s Manual 8-29 Accounts Payable User’s Manual Periodic Processing 1099 Forms Periodic Maintenance Purge Vendor Comments Purge Selected Files Accounts Payable User’s Manual 9 9-3 9-17 9-21 9-23 9-1 1099 Forms When you enter a vendor record, you indicate whether you want to produce a 1099 form for the vendor. The 1099 form summarizes your payments to the vendor for the year. Send a copy of the form to the vendor and the Internal Revenue Service. According IRS regulations, you must apply for approval to file on magnetic media if you exceed a certain number of 1099 forms issued per year (check with your accountant or the IRS for the magnetic media filing requirements). After you get approval, send the 1099 information (which the Accounts Payable system can produce for you) on a diskette. You can get a circular containing procedure guidelines from the Internal Revenue Service. You can use the 1099 payments year-to-date or the 1099 payments last-year amounts to prepare 1099 forms (see 1099 Forms Screen below). If you have already transferred the 1099 year-to-date amounts to last year during periodic maintenance, use the last-year amounts; if not, use the current-year amounts. Note Unless your state revenue department accepts the federal magnetic media format, you cannot produce state magnetic media using this function. Check with your state revenue department or you accountant for more information. Accounts Payable User’s Manual 9-3 Periodic Processing 1099 Forms 1099 Forms Screen Select 1099 Forms from the Periodic Processing menu. The 1099 Forms screen appears. 1. Enter the range of vendors for whom you want to produce the forms. 2. Enter the field indicators to apply to the forms. The field indicator number corresponds to the amount boxes on the 1099-MISC form. 3. Select the type of 1099 forms or media you want to produce. You can produce standard forms, laser forms, magnetic media, or a worksheet. 4. Select the year that contains the 1099 information you want to use. If you chose to produce magnetic media, use the Proceed (OK) command to complete this screen and then turn to Magnetic Media later in this section to continue. 9-4 Accounts Payable User’s Manual 1099 Forms Periodic Processing 5. Enter the company’s federal and state tax IDs; the default data is taken from the D1099xxx table. You can enter information here only if you elected to print the 1099-MISC forms. Note The Output Device File option and Magnetic Media option are different options. They both send the information to a data file, but the Magnetic Media option sends the information into a template of specifications defined by the government. For example, the columns are a different width from what they are in a standard OSAS report. If you elected to print standard or laser forms, put the forms in your printer. If you elected to print the 1099 Worksheet, use plain paper. 1. Select the output device. 2. To be sure that the 1099 forms are aligned, select No (enter N in text mode) to print a test pattern. Repeat the test pattern as often as necessary. (Before you can align the forms, you must elect to prompt for mounting forms and printing alignment marks using the Resource Manager Form Codes function.) When the forms are lined up, select Yes (enter Y in text mode) to print the forms. After the forms or the 1099 Worksheet is produced, the Periodic Processing menu appears. Accounts Payable User’s Manual 9-5 1099 Forms Periodic Processing 1099 Worksheet 9-6 Accounts Payable User’s Manual 1099 Forms Periodic Processing Magnetic Media When you select Magnetic Media on the 1099 Forms screen, the Create Output File screen appears. If the disk has a work file, this prompt appears: Output file already exists. Do you want to start over? To complete the function, click No (enter N in text mode) and skip ahead to “Editing the Intermediate Records” later in this section. To prepare magnetic media from scratch, click Yes (enter Y in text mode). The number of records in the input file appears. The Internal Revenue Service requires that the file be named IRSTAX; this name also appears. 1. Accept the number of records for the default output file, or enter a different number. Accounts Payable User’s Manual 9-7 Periodic Processing 1099 Forms 2. Press Enter if you want to put your output file in the default data directory, or enter a different directory. When you are finished entering output file information, use the Proceed (OK) command to continue. Header Information Create the header record by entering information on the magnetic media screens. 9-8 1. If you want to produce 1099 forms on magnetic media for the year that appears, press Enter; if not, enter a different year. 2. If your company is not a foreign corporation, clear the check box (enter N in text mode). If your company is a foreign corporation, select the check box (enter Y in text mode). Accounts Payable User’s Manual 1099 Forms Periodic Processing (Throughout the OSAS system and user’s manuals, the term foreign means not one of the 50 states. Similarly, the term federal refers to the United States federal government.) 3. Press Enter to accept your company’s employer identification number, or enter a different number. Do not enter hyphens, letters, all 9s, or all 0s. 4. Select the type of medium you are sending to the IRS. Enter 1 to prepare your first filing for the tax year, enter 2 to prepare a test run to the IRS for approval, or enter 3 to prepare a corrected filing for the tax year. 5. Accept your company’s name and address, or enter different information. If you do not change the transmitter company name, the address fields are skipped; the cursor goes to the Control Code field. 6. Enter the control code and payer name control assigned by the Internal Revenue Service. The information is assigned to you by the IRS. 7. Enter the transfer agent’s name and address. If you are not using a transfer agent, press Enter to skip this field. If you do not enter a transfer agent’s name, the address fields are skipped. Accounts Payable User’s Manual 9-9 Periodic Processing 1099 Forms When you are finished entering the information on this screen, use the Proceed (OK) command to continue to the second header screen: 9-10 1. If you are transmitting the magnetic media to the IRS for your own company, accept the company address information or enter a different name and address for your company. If another company is transmitting your information for you, enter the Transmitter’s name, taxpayer identification number (TIN), and IRS-assigned control code in the appropriate fields. 2. Enter the name and a phone number of the person whom the IRS can contact in the event that questions or problems arise in processing your 1099 information. Accounts Payable User’s Manual 1099 Forms Periodic Processing When you are finished, use the Proceed (OK) command to save the information you entered and continue to the next screen. 1. If your software was purchased from a vendor or other outside source, enter V. If your software was produced by in-house programmers, enter I. 2. Enter the name of the company and the company’s address from whom you purchased your software. These fields are only available if you selected V in the Vendor Indicator list box. 3. Enter the name, phone number, and e-mail address of the person who can be contacted concerning any software question. When you are finished, use the Proceed (OK) command to save the information you entered and continue to the next screen. Accounts Payable User’s Manual 9-11 Periodic Processing 1099 Forms Output 1099 Forms to Magnetic Media When you save the header information, this screen appears: Select the action you want to perform and use the Proceed (OK) command to continue. For instructions on creating the output, skip to the “Output to Magnetic Media” section below. 9-12 Accounts Payable User’s Manual 1099 Forms Periodic Processing Editing the Intermediate Records When you elect to edit the 1099 forms file, a temporary intermediate file with one record for each vendor is created. The file’s information is sorted by vendor ID; you must edit the records in that order. 1. You can edit only the recipient ID, company name and address, account number, second TIN notification flag, name control code, type of TIN flag, and box that corresponds to the field indicator set up for the vendor in the file. You cannot change the value in box 9. 2. After you check a record, use the Proceed (OK) command to go on to the next screen. You can change any field, however, in general, you do not want to edit a 1099 form. 3. If you finish making changes before you get to the last record in the file, use the Exit (F7) command. The following prompt appears: Save Changes. Press Y to save your changes or N to cancel. Accounts Payable User’s Manual 9-13 Periodic Processing 1099 Forms When you respond to the Save Changes prompt or after you use the Proceed (OK) command to save the last record in the file, the Output 1099 Forms to Magnetic Media screen reappears. You can edit the file again or output the edited file to magnetic media. Output to Magnetic Media The output screen that appears is based on your operating system. If you are using OSAS in a Windows environment, see” Windows Systems” below. If you are using OSAS in a UNIX, Linux, AIX or UnixWare environment, see “UNIX/ Linux Systems” later in this section. Windows Systems For Windows systems, this screen represents the last step in the magnetic media process. 1. 9-14 Insert a blank 3.5-inch, 1.44M, DOS-formatted diskette into the diskette drive. Accounts Payable User’s Manual 1099 Forms Periodic Processing 2. If you want a copy of the records as they are transferred to the diskette, make sure that your printer is online and select the check box (enter Y in text mode). If you do not want the copy, clear the check box (enter N in text mode). 3. Enter the drive that holds the diskette to which you are transferring the 1099 information. For example, enter A:\ if you want to send the data to drive A. When you are ready to transfer the files, use the Proceed (OK) command to begin sending the 1099 information to the output drive you specified. When the process is finished, the Periodic Processing menu appears. Follow the instructions in the magnetic media circular for labelling and mailing the diskettes to the Internal Revenue Service. UNIX/Linux Systems For UNIX or Linux systems, the final screen in the magnetic media process is slightly different from the Windows screen above. The Internal Revenue Service requires that you submit the file on a 3.5-inch diskette in 1.44M DOS format. If you do not have a porting utility, contact your value-added reseller. 1. If you want an audit report of the information as it is written to the disk, make sure that your printer is online and select the check box (enter Y in text mode). If you do not want the report, clear the check box (enter N in text mode). 2. Press Enter to write the files to the directory you are using on the hard drive, or enter a different directory on the hard drive to write to. When you are ready to write the 1099 information to the hard drive, use the Proceed (OK) command. When the process is complete, the Periodic Processing menu appears. Accounts Payable User’s Manual 9-15 Periodic Maintenance Use the Periodic Maintenance function to clear your vendor records and prepare them for activity for the next period, quarter, or year. (You cannot use the Periodic Maintenance function until the APPDxxx table is set up for the company you are doing maintenance for.) Period-end maintenance clears the period-to-date totals in the APVExxx (Vendor) file and deletes records of temporary vendors you paid in full from the APVExxx file. Quarter-end maintenance performs the period-end tasks and clears the quarterto-date totals in the APVExxx file. Year-end maintenance performs the period-end tasks for periods 12 and 13, performs the quarter-end tasks, clears the year-to-date totals in the APVExxx file, and transfers those totals to the last-year fields. If you have a multiuser system, make sure that no one else is using the Accounts Payable system. You cannot run this function while someone else is using Accounts Payable functions. Accounts Payable User’s Manual 9-17 Periodic Maintenance Periodic Processing Periodic Maintenance Screen Select Periodic Maintenance from the Periodic Processing menu. The function screen appears. 1. The information in the Vendor Analysis Report comes from the APVExxx file. Since the Periodic Maintenance function affects the data in the APVExxx file, print the Vendor Analysis Report and back up your data files before you do period-, quarter-, or year-end maintenance. If you have not printed the report and backed up your data files (see the Resource Manager User’s Manual), clear the check box (enter N in text mode); you are prompted to return to the Periodic Processing menu. When you have done these things, select the check box (enter Y in text mode). 2. 9-18 Select the type of maintenance you want to do. You can perform period-, quarter-, or year-end maintenance. Accounts Payable User’s Manual Periodic Maintenance Periodic Processing 3. If you are at the end of the calendar year and you want to move the values in the 1099 Payments Year to Date field to the 1099 Payments Last Year field in the vendor records, select the check box (enter Y in text mode); if not, clear the check box (enter N in text mode). If you do not transfer the 1099 payments at the end of the calendar year, the system continues to accumulate the next calendar year’s 1099 payments in the 1099 Payments Year to Date field in the vendor records. When you produce 1099 forms, the 1099 payment amounts will be incorrect. 4. The current period and fiscal year from the APPDxxx table appears. 5. To begin processing, use the Proceed (OK) command. When the media is prepared, the Periodic Processing menu appears. Accounts Payable User’s Manual 9-19 Purge Vendor Comments Use the Purge Vendor Comments function to delete comments about a vendor whose record you no longer need. Before you purge vendor comments, produce the Vendor Comments List (see page 12-9). Check it to make sure that the comments you intend to delete will not be needed later. Then file the list so that you will have a record of the comments. Select Purge Vendor Comments from the Periodic Processing menu. The function screen appears. 1. Enter the range of vendors whose comments you want to purge. 2. Enter the range of dates on which the comments you want to purge were recorded and enter the range of references for which you want to purge comments. 3. To purge the comments, use the Proceed (OK) command. When the process finishes, the Periodic Processing menu appears. Accounts Payable User’s Manual 9-21 Purge Selected Files Use the Purge Selected Files function to delete information from the APINxxx (Open Invoice), APHIxxx (Detail History), APHCxxx (Check History), APRLxxx and APRHxxx (Recurring Entries), APRDxxx (Recurring Additional Descriptions), and APHSxxx (Summary History) files. The invoice date determines which detail history records are deleted. The period and fiscal year determine which summary history records are deleted. The cutoff date, current balance, ending date, or remaining payments entries determine which recurring entries are deleted. You can also delete temporary vendors with a zero balance. Select Purge Selected Files from the Periodic Processing menu. The Purge Selected Files screen appears. 1. If you have backed up your data files, select the check box (enter Y in text mode); if not, clear the check box (enter N in text mode) and back them up before proceeding. Accounts Payable User’s Manual 9-23 Purge Selected Files 9-24 Periodic Processing 2. Enter the date of the paid invoices you want to purge. Paid invoices dated on or before the date you enter will be purged. 3. Enter the date of the invoices for which you want to purge detail history. Detail history for invoices dated on or before the date you enter will be purged. 4. Enter the period and year of the summary history you want to purge. Summary history before the period and year you enter will be purged. 5. Enter the date of the checks for which you want to purge history. History for checks dated on or before the date you enter will be purged. 6. Enter the date of the recurring entries you want to purge. Entries dated on or before the date you enter will be purged. 7. If you want to purge temporary vendors with zero outstanding balances, select the check box (or enter Y in text mode); if not, clear the check box (or enter N in text mode). 8. To purge the files, use the Proceed (OK) command. When the process is finished, the Periodic Processing menu appears. Accounts Payable User’s Manual Pay Invoices 10 Accounts Payable User’s Manual Change Open Invoice Status Hold/Release Invoices Prepare Checks Select Payables Edit Register Print Checks Check Register Subcontractor Release Paid Invoices Detail Post Payments Void Checks Accounts Payable User’s Manual 10-3 10-5 10-13 10-17 10-21 10-23 10-27 10-29 10-33 10-35 10-39 10-1 Change Open Invoice Status Use the Change Open Invoice Status function to change the status of a group of invoices to Hold, Released, Prepaid, or Temporary. To change the status of one invoice, use the Hold/Release Invoices function. Select Change Open Invoice Status from the Pay Invoices menu. The Change Open Invoice Status screen appears. 1. Enter the range of vendors whose invoice statuses you want to change. 2. Enter the range of vendor priorities associated with the invoices whose status you want to change. 3. Enter the due date of the invoices whose status you want to change. 4. Select the current status of the invoices you want to change. Accounts Payable User’s Manual 10-3 Change Open Invoice Status 5. 6. Pay Invoices Enter the new status of the invoices. When you are finished specifying status change information, use the Proceed (OK) command to save your selections and begin the change process. When the changes have been made, the Pay Invoices menu appears. 10-4 Accounts Payable User’s Manual Hold/Release Invoices Use the Hold/Release Invoices function to change the status of individual invoices. This function is valuable if you need to change the status of a particular invoice from what it was when you entered it. You can place an invoice on permanent or temporary hold so that it is not automatically paid when you prepare and print checks. (An invoice on temporary hold is automatically released when you post checks.) You can also release an invoice that is on permanent or temporary hold as well as release retainage using this function. You can pay off an invoice at once, change an invoice’s due date and discount amount, and split the invoice amount into an unlimited number of payment installments. Select Hold/Release Invoices from the Pay Invoices menu. The Hold/Release Invoices screen appears. Accounts Payable User’s Manual 10-5 Pay Invoices Hold/Release Invoices Use one of these commands to select the vendor with which you want to work: Command Action Vendor Press V to view invoices for a different vendor. Then enter the Vendor ID. First Press F to hold or release invoices for the first vendor on file. Last Press L to hold or release invoices for the last vendor on file. Next Press N to hold or release invoices for the next vendor on file. Prev Press P to hold or release invoices for the previous vendor on file. Select the invoice you want to change and do one of the following: • To edit an invoice, press Enter. This dialog box appears: Accept the default due date, or enter a different due date. Then, accept the default discount amount, or enter a different discount amount. Use the Proceed (OK) command to save your changes and return to the scroll region. 10-6 Accounts Payable User’s Manual Hold/Release Invoices Pay Invoices • To change an invoice’s status by toggling to a different one, press H. The statuses appear in this order: T (Temporary), H (Hold), R (Released). Keep pressing H until the correct status appears. If the invoice you select is a retainage invoice (an Rt invoice), the Release Retainage dialog box appears. See “Release Retainage” on page 10-9 for more information. • To change the status of all invoices from one type to another (for the selected vendor), press A and select the new status from this window: • To pay an invoice that is not due yet, press R. Then, enter the check number of the prepayment in this window: • To split payments for an invoice, press S. Then, enter the payment and date due in this window: Accounts Payable User’s Manual 10-7 Hold/Release Invoices Pay Invoices • To view totals for the vendor, press T. When you finish viewing the totals, press any key to return to the Hold/Release Invoices scroll region. • To view check totals, press C. When you finish viewing the check totals, press any key to return to the Hold/Release Invoices screen. When you finish working with the invoices for this vendor, press V and enter another vendor ID or use the Exit (F7) command to return to the Pay Invoices menu. 10-8 Accounts Payable User’s Manual Hold/Release Invoices Pay Invoices Release Retainage When you use the Hold/Release Invoices function to change the status of a retainage invoice (an Rt invoice), the Release Retainage dialog box appears. Use this dialog box to create a new invoice from the retainage invoice based on the information you enter. You can perform all the release functions on this dialog box, including postings. You can choose to release all of the retainage or part of it by either dollar amount or a percentage. When you finish (and press PageDown), the system automatically posts, and an audit log prints. You can then include the released retainage in a check run for payment, or you can press R to enter a prepaid (manual) check against it. When you release retainage, it posts just as if you entered it the traditional way: • It updates the Accounts Payable Open Invoice file (removes or reduces the retainage invoice and creates a new standard invoice that can be paid). • It posts to General Ledger (if interfaced) to reduce Retainage Payable and increase Accounts Payable. • It posts to the Contractors’ Job Cost Job files. Accounts Payable User’s Manual 10-9 Pay Invoices Hold/Release Invoices On the Release Retainage dialog box, do the following: The top two rows of the dialog box list information about the invoice from which you are releasing retainage, include the invoice number, date, and amount, and the job phase and cost code. This information is view-only. 1. In the New Invoice field, enter the new invoice number for the invoice you create during this release process. 2. In the Date field, enter the invoice date for the new invoice. 3. In the Due Date field, enter the due date of the new invoice. 4. In the Release Amount field, the amount of retainage you want to release appears. This amount becomes the Gross Due amount of the new invoice. Note You cannot release an amount that is more than is retained. 5. 10-10 In the Release Pct field, enter a release precent if you want the system to calculate a release amount based on the percentage you enter. This amount becomes the Gross Due amount of the new invoice. Accounts Payable User’s Manual Hold/Release Invoices Pay Invoices 6. In the Status field, select the status that you want the new invoice to have, either R (Release) or H (Held). 7. When you are finished, use the Proceed (OK) command to continue. 8. Select the output device. See “Output the Report” on page 1-76 for more information. After the log prints, the Pay Invoices menu appears. Release Retainage Log Accounts Payable User’s Manual 10-11 Prepare Checks Use the Prepare Checks function to create a record of released invoices that are due to be paid in the APCHxxx (Checks) file. After you prepare checks, you produce a log that shows prepaid invoice and check totals (after checks are printed). If errors occur while you prepare checks, they are also listed in the log. If you want to prepare a check for only one invoice, you have two options: • Use the Invoices Inquiry function (see on page 4-11) to find out which invoices are released for the vendor. Use the Hold/Release Invoices function (see page 10-5) to hold all invoices except the one whose check you want to prepare. Then use the Prepare Checks function to enter the vendor ID. • Issue a manual check for the invoice. Then use the Hold/Release Invoices function to mark the invoice as prepaid. If you prepare a check for an invoice that you do not want to pay, put the invoice on hold (see page 10-5). Then before you print or post checks, prepare the checks again, leaving out the held check. Accounts Payable User’s Manual 10-13 Pay Invoices Prepare Checks Prepare Checks Screen Select Prepare Checks from the Pay Invoices menu. The Prepare Checks screen appears: If you already prepared a batch of checks but did not complete the pay invoices steps, the selections from the last time you used the Prepare Checks function appear with the following prompt: Checks already on file. Do you want to start over? If you want to erase the checks on file and reprepare, enter Y. If you do not want to start over, enter N and exit from the function. Complete the pay invoices steps for the batch of checks in progress, and then prepare checks for the new batch. 1. 10-14 Enter the due date for the invoices whose checks you want to prepare. Accounts Payable User’s Manual Prepare Checks Pay Invoices Prepaid invoices are always included regardless of the due date you enter for invoices. If you want to prepare checks for prepaid invoices only, enter a date before the system date in the Pick Invoices Due field. 2. Enter the range of vendors whose checks you want to prepare. To prepare a list of vendors, enter an asterisk (*) in the Vendor ID field. The cursor drops to the bottom of the screen for entering the Vendor IDs in the Vendor List section of the screen. If you enter less than 20 IDs, enter END. 3. Enter the range of jobs whose checks you want to prepare. To prepare a list of jobs, enter an asterisk (*) in the Job ID field. The cursor drops to the bottom of the screen for entering the Job IDs in the Job List section of the screen. If you enter less than 20 IDs, enter END. Note You can only prepare checks for a range or list of jobs for vendors who have the option Post Jobs to Open Invoice set to YES on the Subcontractor Information screen. 4. Enter the date on and after which you want discounts taken. No discounts are taken into account for invoices marked before this date. 5. Enter the date you want printed on the checks. 6. Press Enter to post the checks to the default period or enter a different one. 7. Select the output device. See “Output the Report” on page 1-76 for more information. After the log is produced, the Pay Invoices menu appears. Accounts Payable User’s Manual 10-15 Prepare Checks Pay Invoices Prepare Checks Log 10-16 Accounts Payable User’s Manual Select Payables Use the Select Payables function to see the checks that have been prepared for a vendor, and to specify which checks you do not want to print. Choose Select Payables from the Pay Invoices menu. The Select Payables screen appears. Enter the ID of the vendor whose invoices you want to see, or press Enter to view information about the first vendor with prepared invoices. The invoice information for the vendor appears. Accounts Payable User’s Manual 10-17 Pay Invoices Select Payables Use one of these commands to perform the associated action: Command Action Drop To change whether or not you want an invoice dropped from the check preparation process, move the prompt to the invoice number and press D. The status in the Drop column changes. A check in the column (or a Y in text mode) indicates that the invoice will not be included in the payment. All To include all invoices in or exclude all invoices from check preparation, press A. At the prompt for the task you want to do, enter D to drop all invoices, or I to include all invoices. Summary To see a summary of check activity for all vendors, press S. The window that appears shows the contents of the APCHxxx (Checks) file. Write To write the changes to the APCHxxx file, press W. At the prompt for confirmation, select Yes (enter Y in text mode) if you want to write the changes, or select No (enter N in text mode) if you do not. The checks you chose to drop are removed from the APCHxxx file. Then select a new vendor to work with or use the Exit (F7) command to return to the Pay Invoices menu. 10-18 Vendor Press V to work with invoices for a different vendor. Then enter a different vendor ID. First Press F to work with invoices for the first vendor on file. Last Press L to work with invoices for the last vendor on file. Accounts Payable User’s Manual Select Payables Pay Invoices Command Action Next Press N to work with invoices for the next vendor on file. Prev Press P to work with invoices for the previous vendor on file. Goto Press G to go to the next window of invoices. This button is only available if you have more than one window of invoices. As you make changes to the APCHxxx file, the vendor and grand totals (for the entire check run) at the bottom of the screen change to reflect your changes. Accounts Payable User’s Manual 10-19 Edit Register The Edit Register shows the checks you prepared. Before you print the checks, print the Edit Register to check the calculations. If you find inaccuracies, use the Hold/Release Invoices function (see page 10-5) to change the invoices. Select Edit Register from the Pay Invoices menu. The Edit Register screen appears. The information you entered in the Prepare Checks function appears. 1. Select the level of detail you want to print on the Edit Register. You can choose to print the detail of the invoices paid for each vendor, or a summary showing totals for each vendor. 2. Select the output device. See “Output the Report” on page 1-76 for more information. After the register is produced, the Pay Invoices menu appears. Accounts Payable User’s Manual 10-21 Edit Register Pay Invoices Edit Register 10-22 Accounts Payable User’s Manual Print Checks After you prepare the checks, you can print and record all the check numbers used for every record in the APCHxxx (Checks) file. Select Print Checks from the Pay Invoices menu. The Print Checks screen appears. The screen shows the dates, vendors, and general ledger period you selected when you prepared checks. 1. The Check Saver feature prints a plain-paper remittance advice to list invoices in excess of the number that fit on the check stub. This prevents the system from voiding checks when more than one check stub is required for vendors with 12 or more paid invoices. Accounts Payable User’s Manual 10-23 Pay Invoices Print Checks To use the Check Saver feature, select the check box (enter Y in text mode). The check is printed with the first 10 invoices and a note printed at the bottom: *** With Invoice Details Enclosed ***. To void checks for vendors with 12 or more paid invoices, clear the check box (enter N in text mode). 2. 3. Press Enter to use the default check number from the FORMxxx table or enter a different check number to start the check run. If you want to print the Job ID on the check stub, select the check box (enter Y in text mode); otherwise, clear the check box (enter N in text mode). The Job ID prints only if the option Post Job to Open Invoice is set to YES on the Subcontractor Information screen. The job and phase ID are printed in the deduction column. 4. If you have a print problem, you must restart the Print Checks function. If you restart, and you are using this function as a continuation of an earlier instruction, enter the number of the last check that was printed correctly so that only the misprinted checks are reprinted. 5. If you elected to print the checks, the message Mount check forms now appears. After you mount the forms, press Enter. An alignment form is printed. (To align the forms, you must elect to prompt for mounting forms and printing alignment marks in the Resource Manager Form Codes function.) 6. Check the alignment form. If the X is not printed in the alignment box, adjust the form. Then select No (enter N in text mode) to print the alignment character again. Continue this procedure until the form is aligned; then select Y (enter Y in text mode). 7. If you waste some forms during the alignment procedure, change the number in the If Restart, Last Good Check Number field. Then select Yes (enter Y in text mode) at the Is the form aligned? prompt. A sample check is on the next page. After the checks are printed, a check log, which shows the number of checks that printed, the gross amounts, deductions, and total amounts paid appears. Verify the amounts; then exit to the Pay Invoices menu. 10-24 Accounts Payable User’s Manual Print Checks Pay Invoices If you used the check saver feature, and you have checks with more than 11 invoice lines on a check stub, you are prompted to print the Remittance Advice Log. Sample Check Accounts Payable User’s Manual 10-25 Check Register Print the Check Register for an audit trail of the vendor checks your company issues. The Check Register has two sections. The first section lists the checks you used to prepay invoices since the last time you posted payments. The second section lists the checks you used the last time you printed checks. Select Check Register from the Pay Invoices menu. The Check Register screen appears. The dates, vendors, and general ledger period you selected when you prepared checks appears. 1. Select the level of detail you want to print on the register. You can choose to print the detail of the invoices paid for each vendor, or a summary showing totals for each vendor. Accounts Payable User’s Manual 10-27 Pay Invoices Check Register 2. Select the output device. See “Output the Report” on page 1-76 for more information. After the Check Register is produced, the Pay Invoices menu appears. Check Register 10-28 Accounts Payable User’s Manual Subcontractor Release Use the Subcontractor Release function to print a release form that you set up in the Release Form Text Maintenance function. Note You must have the option Post Jobs to Open Invoice set to YES on the Subcontractor Information screen in order to use this function. Select Subcontractor Release from the Pay Invoices menu. The Subcontractor Release screen appears. 1. Enter the Form # and the Cost Type for the release form you want to print. Accounts Payable User’s Manual 10-29 Subcontractor Release 2. Pay Invoices Select All to print release forms for all checks in the Checks (APCHx) file. A release form prints for those invoices that match the cost type you select. Select Selective to print release forms for a list of check numbers. The invoices paid with that check must match the cost type you selected in order for a release form to print. 3. 10-30 Select how you want to output the subcontractor release. For more information on the steps required when selecting an output device, see “Output the Report” on page 1-76. Accounts Payable User’s Manual Pay Invoices Subcontractor Release Subcontractor Release Form Accounts Payable User’s Manual 10-31 Paid Invoices Detail Use the Paid Invoices Detail function to print a list of invoices for checks that were paid in a pay cycle. Select Paid Invoices Detail from the Pay Invoices menu. The Paid Invoices Detail screen appears. Select All to print the invoice detail for all checks. A separate page is printed for each check prepared, listing all invoices paid. The list is printed for a check even if all the invoices fit on one check stub. Select Selective to print the invoice detail for a list of checks. You can specify only those checks that had more than 11 invoices paid. Select how you want to output the list. For more information on the steps required when selecting an output device, see “Output the Report” on page 1-76. Accounts Payable User’s Manual 10-33 Paid Invoices Detail Pay Invoices Paid Invoice Detail 10-34 Accounts Payable User’s Manual Post Payments When you post the checks you prepared and printed, invoices that are paid in full are changed to paid status in the APINxxx (Open Invoice) file, the totals and history information in the APVExxx (Vendor) file are updated for the invoices you paid, and the APCHxxx (Checks) file is cleared for the next check cycle. If you elected to keep detail, summary, and check history in the Resource Manager Options and Interfaces function, the invoice information is moved to the APHIxxx (Detail History), APHSxxx (Summary History), and APHC (Check History) files. Interfaces General Ledger If Accounts Payable interfaces with General Ledger, summary entries of the check and discount amounts are created in the GLJRxxx (Journal) file. When you post payments, entries are made to several accounts that you specified in the APGLxxx table. Cash AP CR DB Discounts CR Bank Reconciliation If Accounts Payable interfaces with Bank Reconciliation, summary entries of the checks are created in the BRTRxxx (Bank Reconciliation Transactions) file for the bank account ID you specify. The cash account comes from the BR bank account record. The AP account comes from the distribution code for each vendor. Accounts Payable User’s Manual 10-35 Pay Invoices Post Payments Before Posting Before you post, perform these preparatory tasks: • If you have a multiuser system, make sure that no one else is using the Accounts Payable system. You cannot post if someone else is using the Accounts Payable functions. • Print the checks (see page 10-23). • Print the Check Register (see page 10-27). • Back up all the data files. The information on the checks and in the Check Register comes from the APCHxxx and APVExxx files. Posted entries are cleared from the APCHxxx file to make room for the next group of entries. Because you cannot reconstruct either the checks or the register after you post, printing them before you post is important. Backing up your data files before you post is an important practice. Unforeseen problems, such as a power surge or failure, can interrupt the post and result in a loss of data. 10-36 Accounts Payable User’s Manual Post Payments Pay Invoices Select Post Payments from the Pay Invoices menu. The Post Payments screen appears. The dates, vendors, and general ledger period you selected when you prepared checks appear. 1. Select the General Ledger fiscal year in which you want to create the journal entries for these payments. You can post the payments to the current- or lastyear GLJRxxx file. If Accounts Payable does not interface with General Ledger or if you have not created last-year data files in General Ledger, you must post to the current fiscal year. 2. Select the accumulator in the vendor record to which you want any 1099 payments in this check run posted. You can update the 1099 Payments Year to Date field, or the 1099 Payments Last Year field (see page 11-8 for more information). Accounts Payable User’s Manual 10-37 Pay Invoices Post Payments 3. If Accounts Payable interfaces with Bank Reconciliation, accept the default bank account ID, or enter a different ID. (If Accounts Payable does not interface with Bank Reconciliation, no corresponding field appears.) 4. Select the output device. See “Output the Report” on page 1-76 for more information. The log shows the debits and credits that were posted to General Ledger. If Accounts Payable does not interface with General Ledger, you must make manual entries for the amounts in the log. If Accounts Payable interfaces with Bank Reconciliation, the log shows the amounts posted to Bank Reconciliation. After posting is completed, the Pay Invoices menu appears. Post Payment Log 10-38 Accounts Payable User’s Manual Void Checks Use the Void Checks function to cancel checks that have been printed. For example, if you print a check by mistake, you can use this function to remove the record from the system. When you void a check, several things happen: • If Accounts Payable interfaces with General Ledger, the cash account is debited and the accounts payable account is credited for the amount of the check. • If Accounts Payable interfaces with Bank Reconciliation, the status of the checks changes to Voided. • Check information is updated in the APVExxx (Vendor), APHIxxx (Detail History), APHSxxx (Summary History), and APHC (Check History) files. This information includes the check number, amount, transaction number, associated vendor, and payment code. • If the invoice record still exists, it is changed in the APINxxx (Open Invoice) file from paid status to the status you entered, since the voided check means that you still have to make the payment. Otherwise, the invoice is reinstated from the APHIxxx (Detail History) file. Accounts Payable User’s Manual 10-39 Pay Invoices Void Checks Select Void Checks from the Pay Invoices menu. The Void Checks screen appears. 1. Enter the date of the check you want to void. 2. Enter the number of the check you want to void. The associated vendor ID appears. The bank account ID appears if Accounts Payable interfaces with Bank Reconciliation. 10-40 3. Select the status of the reinstated invoice. 4. Select the General Ledger fiscal year in which you want the journal entries made for the void check. You can create the entries in the current-year GLJRxxx file or in the last-year GLJRxxx file. If Accounts Payable does not interface with General Ledger, or if you have not created last-year data files in General Ledger, you must post to the current fiscal year. Accounts Payable User’s Manual Void Checks Pay Invoices 5. Select the accumulator in the vendor record to which you want any 1099 payments in this check posted. You can update the 1099 Payments Year to Date field, or the 1099 Payments Last Year field (see page 11-8 for more information). 6. Select the output device. See “Output the Report” on page 1-76 for more information. After the log is produced, the Pay Invoices menu appears. Void Payments Log Accounts Payable User’s Manual 10-41 Accounts Payable User’s Manual File Maintenance Vendors Recurring Entries Terms Codes Distribution Codes Tables Release Form Text Maintenance Subcontract Change Fields Accounts Payable User’s Manual 11 11-3 11-25 11-33 11-35 11-37 11-53 11-57 11-61 11-1 Vendors Use the Vendors function to set up and maintain records for vendors with which you do business. A record contains the vendor’s name and address, the pay-to name and address, 1099 information, payment and distribution codes, purchase and payment histories, and comments. Select Vendors from the File Maintenance menu. The Vendors screen appears. 1. Enter the ID of the vendor with which you want to work. If you are adding a new vendor, you can enter the ID of an existing vendor to copy that vendor’s information into the new vendor record you are adding. 2. Select the check box (enter Y in text mode) for each type of information you want to add or change. Clear the check box (enter N in text mode) for each type you do not want to add or change. If you are adding a vendor, you must select General Information. Accounts Payable User’s Manual 11-3 File Maintenance Vendors Note If you are adding a vendor, you must enter Y at General Information. 3. When you have selected the screens you want to work with, use the Proceed (OK) command to go to the first screen you selected. General Information If you elected to add or change general vendor information, this screen appears: 11-4 Accounts Payable User’s Manual Vendors File Maintenance Field Description Vendor ID The vendor ID from the header screen appears. Name Enter the vendor’s name. Address 1/2/3 Enter the vendor’s address. City/State Enter the vendor’s city. State Enter the vendor’s state, or use the Inquiry command to look up and select the state from the list that appears. Zip Enter the vendor’s zip code. You can enter a fivedigit zip code, enter a nine-digit zip code with the hyphen, or leave this field blank. Country Enter a country code for the vendor, or leave the field blank. If you enter a country code, you must use one that is among the valid codes entered in Resource Manager (see the Resource Manager User’s Manual). If you do not enter a code, the vendor uses the same country code as your company. Phone No Enter the vendor’s phone number. The format of the phone number is determined by the vendor’s country code. Fax Enter the vendor’s fax number. The format of the phone number is determined by the vendor’s country code. Contact Enter the name of the person you usually contact about billing questions or invoice payments. Accounts Payable User’s Manual 11-5 File Maintenance Vendors Field Description Our Acct Enter the account number the vendor uses to identify your company. It is printed on the remittance stubs of checks. Enter information in the Pay-To Information section only if it is different from the information you entered above. 11-6 Field Description Name Enter the name to which you want to send the check. Address 1/2/3 Enter the address to which you want to send the check. City Enter the vendor’s city or leave the field blank. State Enter the vendor’s state, or use the Inquiry command to look up and select a state from the list that appears. Zip Enter the vendor’s zip code. You can enter a fivedigit zip code, enter a nine-digit zip code with the hyphen, or leave this box blank. Country Enter a country code for the vendor, or leave the box blank. If you enter a country code, you must use one that is among the valid codes entered in Resource Manager (see the Resource Manager User’s Manual). If you do not enter a code, the vendor uses the same country code as your company. Phone/Fax No Enter the phone and fax numbers of the place to which you want the check sent. The format of the numbers is determined by the vendor’s country code. Accounts Payable User’s Manual Vendors File Maintenance Field Description Attention Enter the name of the person or department to which you send payments. The attention might be different from the vendor’s name. The attention is printed on mailing labels. Next, enter the following general information about your vendor: Field Description E-mail Address Enter the e-mail address of the vendor’s main office or your contact at the vendor’s offices. Web Site If your vendor has a web site on the Internet, enter the Internet address of the vendor’s site. Amount Due/ Amount Prepaid Enter values in these boxes only when you use the summary method to enter initial balances. Otherwise, these boxes are updated when you post transactions and payments. When you save the entries using the Proceed (OK) command, the next screen you selected appears. If you did not select another screen, the Vendors header screen appears. Accounts Payable User’s Manual 11-7 File Maintenance Vendors Vendor Codes If you elected to add or change vendor codes information, the Vendor Codes screen appears Field Description Vendor ID The vendor ID and name from the header screen appear. Terms Code Terms codes describe the terms of payment to the vendor. Enter the payment terms code for the vendor. If you use the Maintenance (F6) command, the Terms Codes function is temporarily called up. After you enter the terms code, the terms percentage, days, and net due days appear. 11-8 Accounts Payable User’s Manual Vendors File Maintenance Field Description Distribution Code Distribution codes describe how you want payment information distributed in accounts in General Ledger. Enter the GL distribution code for the vendor. If you use the Maintenance (F6) command, the Distribution Codes function is run. If Accounts Payable does not interface with General Ledger, you can leave this box blank. Vendor Class A vendor class is an arbitrary attribute stored only with the vendor record. A class means what you want it to mean. You can use the vendor class to organize the Vendor Purchase History Report and to sort information in GENERAL Report Writer reports. Assign a class to the vendor, or leave the box blank. Payment Priority A payment priority code is an arbitrary attribute stored only with the vendor record. You can use the payment priority code to change the status of an open invoice and to sort information in GENERAL Report Writer reports. Enter a payment priority code. The lower the digit, the higher priority the payment is assigned. Vendor Hold? Accounts Payable User’s Manual If payment to the vendor is on hold, select the check box (enter Y in text mode); if not, clear the box (enter N in text mode). You cannot pay vendors on payment hold. 11-9 File Maintenance Vendors Field Description Tax Group Enter a tax group for the vendor. The tax group is used to calculate sales tax on the orders you place with the vendor. If you use the Maintenance (F6) command, the Resource Manager Tax Groups function is run temporarily. GL Account Enter the number of the general ledger account to debit when you purchase items from the vendor, or press Enter to skip this field. (The Inquiry command is available if Accounts Payable interfaces with General Ledger.) The account you enter appears when you enter transactions. 1099 Form Code Enter I for vendors that file as individuals, B for those that file as businesses, or N for those that do not receive a 1099. If the vendor does not receive a 1099 form, the cursor skips the remaining fields on the screen. If the vendor is an individual or business, fill in the remaining boxes. If you change the 1099 Form Code field from I or B to N and the vendor has a value other than zero in the 1099 Payments Year to Date field or the 1099 Payments Last Year field on the History Information screen, the following message appears: Warning: 1099 payments exist for this vendor. If you do not want the vendor to receive a 1099-MISC form, change the values in the 1099 Payments Year to Date and 1099 Payments Last Year fields to zero. 1099 Recipient ID 11-10 Enter the vendor’s taxpayer identification number (TIN). Accounts Payable User’s Manual Vendors File Maintenance Field Description 1099 Field Indic The list box indicators correspond to the box numbers on the 1099-MISC form in which the yearto-date payment amount is printed. (See the federal tax circular for information about these indicators.) Select a field indicator: 1 = Rents 2 = Royalties 3 = Other income 4 = Federal tax withholding 5 = Fishing boat proceeds 6 = Medical and health care payments 7 = Nonemployee compensation 8 = Payments in lieu of dividends or interest 9 = Direct sales A = Crop insurance proceeds C = Gross attorney’s fees See the F1099 table (see page 11-43) for information about box numbers, box categories, and associated limits. 1099 Foreign Addr? If the vendor has a foreign address, select the check box (enter Y in text mode); if not, clear the box (enter N in text mode). The word foreign means not one of the 50 states. 1099 2nd TIN Not? If the Internal Revenue Service notified your company twice in the past three years that the vendor’s tax identification number is incorrect, select the check box (enter Y in text mode); if not, clear the check box (enter N in text mode). When you save the entries using the Proceed (OK) command, the next screen you selected appears. If you did not select another screen, the Vendors header screen appears. Accounts Payable User’s Manual 11-11 File Maintenance Vendors History Information If you elected to add or change vendor history, this screen appears: The History Information screen stores purchase and payment history for each vendor. When you use the Periodic Maintenance function, one of these things can happen: 11-12 • When you do period-end maintenance, the period-to-date amounts are reset to zero. • When you do quarter-end maintenance, the period- and quarter-to-date amounts are reset to zero. • When you do year-end maintenance, the year-to-date amounts are transferred to the Last Year column and the period-, quarter-, and year-todate amounts are reset to zero. Accounts Payable User’s Manual Vendors File Maintenance Field Description Last Purchase Date Enter the last date you purchased items from the vendor. This is updated when you post transactions. Last Purchase Amount Enter the cost of the last purchase from the vendor. This is updated when you post transactions. Last Purchase Number Enter the number of the last invoice you received from the vendor. This is updated when you post transactions. Last Payment Date Enter the date of the last payment you made to the vendor. This is updated when you post checks. Last Payment Amount Enter the amount of the last payment you made to the vendor. This is updated when you post checks. Last Payment Number Enter the number of the last check you sent to the vendor. This is updated when you post checks. Purchases Period to Date/Qtr to Date/Year to Date/Last Year Enter the amount you purchased from the vendor this period, this quarter, this year, and last year. Payments Period to Date/ Qtr to Date/Year to Date/ Last Year Enter the amount you paid the vendor this period, this quarter, this year, and last year. Discounts Taken Period to Date/Qtr to Date/Year to Date/Last Year Enter the discount amount you received from the vendor this period, this quarter, this year, and last year. Accounts Payable User’s Manual 11-13 File Maintenance Vendors Field Description Discounts Lost Period to Date/Qtr to Date/Year to Date/Last Year Enter the discount amount you did not take advantage of from the vendor this period, this quarter, this year, and last year. 1099 Payments Year to Date/Last Year Enter the amount of 1099 payments you made to the vendor this year and last year. These values are used for preparing 1099-MISC forms. When you save the entries using the Proceed (OK) command, the next screen you selected appears. If you did not select another screen, the Vendors header screen appears. 11-14 Accounts Payable User’s Manual Vendors File Maintenance Subcontract Information If you elected to add or change vendor subcontract information, the Subcontract Information screen appears: Field Description Subcontractor? Select the check box (enter Y in text mode) if this vendor is a subcontractor. You can choose to print some reports for subcontractors only. If this vendor is not a subcontractor, clear the check box (enter N in text mode). Accounts Payable User’s Manual 11-15 File Maintenance Vendors Field Description Post Job to Open Invoice? Select the check box (enter Y in text mode) if you want the system to create a separate invoice in the Open Invoice file for each line item of a transaction that is posted; otherwise clear the check box (enter N in text mode). You must select the check box for subcontractors so that payment information prints on the Subcontract Report, and you must select this check box if you want to use the job-related functions in Accounts Payable, for example, prepare checks by job ID, print job IDs on checks, or print the Job Receivable reports for a range of jobs. Insurance Select these check boxes (enter Ys in text mode) if this subcontractor has general liability and worker’s compensation insurance; otherwise clear the check boxes (enter Ns in text mode). Enter the expiration dates for the insurance types. This information appears on the transaction header screen for subcontractors. You can print the Insurance Expiration Report to produce a list of vendors whose insurance expires before a date you specify. Amount Retained The Amount Retained field is updated when you post transactions. The amount retained is added to this field when you post an invoice. When you enter and post a retainage invoice, the amount in this field is reduced. When you save the entries using the Proceed (OK) command, the next screen you selected appears. If you did not select another screen, the Vendors header screen appears. 11-16 Accounts Payable User’s Manual Vendors File Maintenance Vendor Comments If you elected to add or change vendor comments, this screen appears: 1. 2. The ID of the terminal you are working at appears. To work with comments for only the default reference ID, press Enter. To work with comments for a different reference ID, enter that ID. To work with all comments, clear this field and press Enter. Enter the date of the most recent comment you want to work with, or press Enter to work with all comments. 3. The date, reference, sequence number, and text that appear for each comment depend on the reference ID and end date you enter. The comments are arranged by date—the most recent date first—then by reference ID and then by sequence number. Accounts Payable User’s Manual 11-17 File Maintenance Vendors Command Bar Select a command for the task you want to perform. Command Action Ref ID Press R to work with comments associated with a different reference ID. Then enter the reference ID and end date. end Date Press D to change the end date for the reference ID with which you are working. Append Press A to add a comment. To edit a comment, press E. In either case a comment entry dialog box appears. See the “Append” section below for more information. When you save the entries using the Proceed (OK) command, the next screen you selected appears. If you did not select another screen, the Vendors header screen appears. Append 11-18 1. If you have not added or edited any other comments, the system date appears; otherwise, the date of the last comment you worked with appears. Accept the default date, or enter a different date. 2. Enter the reference ID of the comment you want to add or edit. Accounts Payable User’s Manual Vendors File Maintenance To edit a comment, enter its sequence number. The text appears. If you want to delete the comment, use the Delete (F3) command. Subsequent comments for the vendor that have the same date and reference ID as the one you deleted are resequenced. To insert a comment, enter the sequence number of the position in which you want it to appear. The comments after the inserted comment are resequenced. 3. Enter or edit the comment, and press Enter to save the comment record. 4. When you are finished working with the Vendor Comments screen, use the Proceed (OK) command to move to the Vendors header screen. Enter another Vendor or exit to the File Maintenance menu. Accounts Payable User’s Manual 11-19 File Maintenance Vendors User-Defined Fields If you elected to add or change user-defined field information, the User-Defined Fields screen appears. Enter the appropriate information for each user-defined field you set up using the Resource Manager User-Defined Field Setup function. See the Resource Manager User’s Guide for more information on setting up user-defined fields. When you save the entries using the Proceed (OK) command, the next screen you selected appears. If you did not select another screen, the Vendors header screen appears. 11-20 Accounts Payable User’s Manual File Maintenance Vendors Documents If you elected to add or change documents attached to this vendor record, the Documents screen appears. There are many types of documents you can attach to vendor records, for example, pricing documents, customer contracts, map of the customer location, vendor brochures, and so on. Note: You must set up file types in Resource Manager before you can attach documents. See the Resource Manager User’s Guide for more information. Press P to view the previous screen in File Maintenance. Press N to view the next screen in File Maintenance. Press G to move directly to a different document. Then enter the document name or exit to the Documents screen. (This command appears only if you have more than one screen of attached documents.) Accounts Payable User’s Manual 11-21 File Maintenance Vendors Attach a Document To attach a document to a vendor record, follow these steps: 1. Click Append or enter A to attach a document. The Append Documents dialog box appears. 2. Enter the document file name and extension, the full file path, and a description of the file you want to attach to the master file record. 3. Use the Proceed (OK) command to attach the file. Edit Attached Document File Information To edit file information about attached documents, select the document and then press Enter. Edit the file information in the Edit Documents dialog box, then use the Proceed (OK) to save your changes. To view the file information about attached documents, select the document and then select View (or press V in text mode). The View Documents dialog box appears. Press any key to exit. To edit the document itself, select Open document (or press O in text mode) to launch the appropriate application and open the file. Note: If you have problems opening a document, press Enter to change the direction of the slashes used in the attachment’s directory path. If the directory path contains backward slashes (\), change them to forward slashes (/) and vice versa. 11-22 Accounts Payable User’s Manual File Maintenance Vendors Delete Attached Documents To remove a document attachment, select the attached document you want to delete and press F3. When the confirmation message appears, press Y to delete the attachment or N to return to the Documents screen. Keep in mind that this procedure only removes the attachment from the master file record; it does not delete the file from its storage location. Accounts Payable User’s Manual 11-23 Recurring Entries Use the Recurring Entries function to set up transactions that require the same payment on a regular schedule—for example, loan or insurance payments, service contracts, or maintenance fees. To save time, you can copy a group of recurring entries to the APTDxxx and APTHxxx (Transaction) files instead of entering a new transaction each time the payment is due. By assigning each entry a run code, you can process these groups of entries on different schedules—monthly, bimonthly, or on whatever schedule fits your company’s needs. Select Recurring Entries from the File Maintenance menu. The Transaction Type dialog box appears. Accounts Payable User’s Manual 11-25 File Maintenance Recurring Entries The Recurring Entries Transaction Type menu offers two choices: Recurring Entries and Edit Recurring Entries. The only difference between the two functions is that when you create a recurring entry, you create data; when you edit a recurring entry, you work with existing data. Select the action you want to perform. Header Information After you make your selection from the Recurring Entries menu, the header screen appears. 11-26 Field Description Recurring No Enter a number that identifies the recurring entry. Vendor ID Enter the vendor’s ID. The vendor’s name and address appear. Invoice No Enter the invoice number, or press Enter if you do not want to assign the entry to an invoice. PO Number Enter the purchase order number. Accounts Payable User’s Manual Recurring Entries File Maintenance Field Description Terms Code The terms code describes the terms of the payment. Accept the default terms code, or enter a different code. If you use the Maintenance (F6) command, the Terms Codes function temporarily appears. After you enter the code, the description for the code appears. Run Code You copy recurring entries by run code to the APTDxxx and APTHxxx files. Use the same run code for entries that you copy on the same basis. For example, you could use 01 for entries you copy on the first day of each month, 15 for entries you copy on the fifteenth day of each month, and so forth. Enter the run code to which the recurring entry belongs. Tax Group Enter a tax group for the entry. If the tax group you enter here is different from the one you previously entered, the system updates the tax information in all the line items in the order. Starting Balance Enter the amount that was originally due for the entry, or press Enter to skip this field. Remaining Balance Accept the current balance, or enter the amount you still owe for the entry. Starting Date Enter the date of the first invoice for the entry, or press Enter to skip this field. Cutoff Date Enter the date after which you no longer want to copy the entry to the APTDxxx and APTHxxx files, or press Enter to skip this field. Total Payments Enter the total number of payments that you will make for the entry, or press Enter to skip this field. Accounts Payable User’s Manual 11-27 File Maintenance Recurring Entries Field Description Remaining Payments If you entered the total number of payments, the number of remaining payments appears; if not, zero appears. Accept the current number, or enter the remaining number of payments. If you did not enter the total number of payments, enter the number of remaining payments, or leave the field blank if this information does not apply. The number in this field cannot be greater than the number in the Total Payments field. 1099? If the vendor does not receive a 1099-MISC form, the box is clear (or NO appears in text mode) and you cannot change it. If the vendor receives a 1099-MISC form, the box is selected (or YES appears in text mode). If you want the recurring entry to update the 1099 Payments Year to Date field in the vendor’s record (once you copy the entry to the APTDxxx and APTHxxx files and post it), press Enter; if not, clear the box (or enter N in text mode). When you save the header information the line-item entry screen appears. 11-28 Accounts Payable User’s Manual Recurring Entries File Maintenance Edit Line The Recurring Entries line-item entry screen can appear for one of three reasons: • You are creating a recurring entry and are finished entering header data. The line-item dialog box has the title “Append Line.” • You use the Append command in the scroll region to add an item to the end of the list. The line-item dialog box has the title “Append Line.” • You use the Edit command in the scroll region to edit an item in the list. The line-item dialog box has the title “Edit Line.” After you save the line-item entry information, enter another line item, or exit to the Recurring Entries screen. When you save the first line item, the totals are updated and your entries are saved. You cannot use the Abandon (F5) command to cancel the entry. To delete the entire recurring entry, use the Delete (F3) command on the header screen. Accounts Payable User’s Manual 11-29 File Maintenance Recurring Entries Recurring Entries When you exit from the line-item entry screen, the Recurring Entries screen appears: The Recurring Entries screen is divided into these sections: 11-30 • Information from the header screen is summarized at the top of the screen. • The line-item entry area (or scroll region) appears in the middle of the screen. • The entry totals appear at the bottom of the screen. Accounts Payable User’s Manual Recurring Entries File Maintenance Use one of these commands to perform the corresponding action in the scroll region: Command Action Enter = edit To edit, move the prompt to the line item and press Enter. Append Press A to append a line item to a purchase. Then see “Recurring Entries Line-Item Entry Screen” earlier in this section. Header Press H to return to the header screen. When you return to the header screen, you do not lose your line-item entries because you already saved them. Totals Press T to enter or edit totals associated with the recurring entry. A subtotal of the line items appears. Enter the sales tax, shipping charges, and miscellaneous charges; or press Enter to skip these fields. The total amount of the invoice (the subtotal plus the sales tax and freight and miscellaneous charges) appears. Use the Proceed (OK) command to save your entries. View Move the prompt to the line item and press V to look at a line item without changing it. More information about the line item such as the general ledger account and description, quantity purchased, and cost information appears on the View Line screen. Press any key to return to the Recurring Entries screen. Goto Press G to go to a particular line item. Then enter the line number. (This command appears only if there is more than one screen of line items.) Accounts Payable User’s Manual 11-31 File Maintenance Recurring Entries 11-32 Command Action Next Trans Press N to work with another recurring entry. The Transaction Type menu appears. Enter another recurring entry, or exit to the File Maintenance menu. Accounts Payable User’s Manual Terms Codes Use the Terms Codes function to add or change codes for payment terms for transactions. Select Terms Codes from the File Maintenance menu. The Terms Code screen appears. Select a command: • Press G to go directly to a particular term code. Then enter the line number. (This command appears only if there is more than one screen of line items.) • Move the prompt to the line and press Enter to edit a line item. • Press A to append a line item to the transaction. Accounts Payable User’s Manual 11-33 File Maintenance Terms Codes Append/Edit Terms Codes When you choose to edit or append a terms code, this screen appears: 1. Enter the code you want to add. If you are adding a terms code, use a descriptive code to make entry easy and efficient. 2. Enter P for prox terms or R for regular terms in the Type box. Prox terms are calculated as days from the beginning of the next month. Regular terms are calculated as days from the discount date. 3. Enter the percent used to calculate the discount amount of the payment when a discount is taken. 4. Enter the number of days that a discount is valid in the Discount Days text box and enter the number of days given to pay the net due in the Net Due Days text box. 5. The description is based on your entries in the previous fields. Accept it, or enter a different description. When you save your entries, you are returned to the Terms Codes scroll region. When you finish editing or adding terms codes, use the Exit (F7) command to return to the File Maintenance menu. 11-34 Accounts Payable User’s Manual Distribution Codes Distribution codes specify which general ledger accounts get which information. Use the Distribution Codes function to add or change codes for your general ledger distribution accounts or to set up a selection of different payable accounts. Select Distribution Codes from the File Maintenance menu. The Distribution Codes screen appears. 1. Enter the code you want to add or change. 2. Accept the current code description, or enter a different code description. This description appears when you use the Inquiry (F2) command to access a list of codes. Accounts Payable User’s Manual 11-35 Distribution Codes 3. File Maintenance Accept each default general ledger account number, or enter a different account number. If you use the Inquiry command to access a list of codes, the description appears. If Accounts Payable interfaces with General Ledger, this field’s mask is determined in General Ledger; otherwise, the account field is 12 characters in length. When you save the information, the cursor returns to the top of a blank Distribution Codes screen. Enter another code, or exit to the File Maintenance menu. 11-36 Accounts Payable User’s Manual Tables Use the Tables function to set up and maintain the Accounts Payable tables. Tables store information about the system, data, options, and default settings for other applications. The following tables are related to Accounts Payable: • • • • • • • • • • • • • • • • • APGLxxx APPDxxx DFxxxx DMxxxx DISCxxx D1099xxx F1099 FORMxxx MRGLxxx QCxxxx QDxxxx QExxxx QHxxxx QMxxxx QPxxxx QXxxxx QZxxxx For information about each of these tables, see their descriptions in this section. Note The OPTxxx (Options) table stores options and interfaces settings. Maintain the information stored in this table through Resource Manager Options and Interfaces function, not through the table itself. Accounts Payable User’s Manual 11-37 File Maintenance Tables Tables Select Tables from the File Maintenance menu. A blank tables screen appears. 1. To add or change a table, enter the table ID. To set up a company-specific table, enter the table ID plus the one- to three-character company ID. To set up a terminal-specific table, enter the table ID plus the four-character terminal ID. To delete the table, use the Delete (F3) command. 2. If you entered a new table ID, the Copy From field appears. To copy a company- or terminal-specific table, enter the table ID plus the company ID and terminal ID. A set of tables comes with the sample company, Builders Supply. You can copy the sample tables for a company and then change the appropriate fields. To copy a sample table, enter the table ID. 3. Press Enter to accept the default description of the table, or enter a different description. The number of columns, the length of the columns, and the type of characters you can enter—alphanumeric (A), numeric with two decimal places (N), numeric with three decimal places (3), or numeric with four decimal places (4)—appear. 11-38 Accounts Payable User’s Manual Tables File Maintenance APGLxxx Table The APGLxxx table stores the general ledger accounts that accounts payable transactions and checks are posted to in the GLJRxxx (Journal) file. When you enter the table ID, the rest of the APGLxxx table appears. 1. Accounts Payable posts to three accounts: discounts taken, cash/checking, and retainage. Accept each account or change the account descriptions. 2. For each account description, accept the default general ledger account number, or enter a different account number. Make sure that the account numbers you enter match the account mask for the descriptions. This practice ensures that the posted amounts are sent to the right accounts. Accounts Payable User’s Manual 11-39 File Maintenance Tables APPDxxx Table The APPDxxx table stores a company’s current general ledger period, fiscal year, and number of periods per year for posting and periodic history. When you enter the Table ID, the rest of the APPDxxx table appears. 11-40 1. Enter the number of the current period (1.00-13.00). The period increments when you do periodic maintenance. 2. Enter the current fiscal year. The fiscal year is incremented when you do year-end maintenance. 3. Enter the number of accounting periods your company uses in a year. Accounts Payable User’s Manual Tables File Maintenance DISCxxx Table The DISCxxx table stores the fields you can include in or exclude from vendor discounts—sales tax, freight, and miscellaneous charges. When you enter the table ID, the rest of the DISCxxx table appears. 1. The three fields—Sales Tax, Freight, and Misc—you can include in or exclude from discounts appear. Accept each description, or enter different descriptions. Do not delete lines or rearrange field names. The system looks for the defaults by their position in the table; it treats the item on the first line as sales tax, the item on the second line as freight, and the item on the third line as miscellaneous charges. 2. For each field, enter YES to include the field in discount calculations, or enter NO to exclude the field. Accounts Payable User’s Manual 11-41 File Maintenance Tables D1099xxx Table The D1099xxx table stores a company’s federal and state tax identification numbers. When you enter the table ID, the rest of the D1099xxx table appears. 1. The descriptions Federal TIN and State TIN appear. Accept each description or change it. Do not delete lines or rearrange field names. The system looks for the defaults by their position in the table; it treats the item on the first line as the company’s federal tax identification number and the item on the second line as the company’s state tax identification number. 2. 11-42 Enter the company’s federal tax ID on the first line and the company’s state tax ID on the second line. The tax IDs you enter are used as default IDs when you prepare 1099 forms. Accounts Payable User’s Manual Tables File Maintenance F1099 Table The F1099 table stores the minimum amounts for preparing 1099 forms. When you enter the table ID, the rest of the F1099 table appears. 1. The descriptions of the payment boxes on the 1099-MISC form appear. Accept each description, or change the descriptions. The system looks for these items by their position in the table; it treats the item on line one as rent, the item on line two as royalties, and so on. 2. Enter the 1099 limit for each type of payment. See the appropriate year’s instructions for 1099-MISC forms issued by the Internal Revenue Service for the limits. Accounts Payable User’s Manual 11-43 File Maintenance Tables FORMxxx Table The FORMxxx table tracks the last check number and is incremented each time a check is printed. It is created when you enter online checks or print checks. When you enter the table ID, the rest of the FORMxxx table appears. Press Enter to accept the next check number that appears, or enter a different starting check number. 11-44 Accounts Payable User’s Manual Tables File Maintenance MRGLxxx Table The MRGLxxx table stores the general ledger accounts that material requisitions are posted to in the GLJRxxx (Journal) file. This table is available only if you elected not to post material requisition credits to inventory item accounts in the Resource Manager Options and Interfaces function. When you enter the table ID, the rest of the MRGLxxx table appears. 1. Material requisitions are posted to two accounts: material requisitions from inventory and material requisitions for miscellaneous materials. Accept each account description, or change the account descriptions. Do not delete lines or rearrange the account descriptions. The system looks for these accounts by their position in the table; it treats the account on the first line as the material requisitions account for inventory items and the item on the second line as the material requisitions account for non-inventory items. Accounts Payable User’s Manual 11-45 File Maintenance Tables 2. For each account description, accept the current general ledger account number, or enter a different account number. Make sure that the account numbers you enter match the account mask for the descriptions so that the amounts are posted to the right accounts. 11-46 Accounts Payable User’s Manual Tables File Maintenance DFxxxx and DMxxxx Tables The DFxxxx and DMxxxx tables store default information associated with jobs. Both store the WIP account for jobs. The DFxxxx stores the inventory account for accounts payable transactions and posting payments. The DMxxxx table stores the inventory account for material requisitions. When you enter the ID, the rest of the table appears. Here is a sample DMxxxx table: 1. The fields you can enter defaults for appear. Accept the default fields, or change them. 2. For each field, accept the default general ledger account number, or enter a different account number. Make sure that the account numbers you enter match the account mask for the descriptions so that the amounts are posted to the right accounts. Accounts Payable User’s Manual 11-47 File Maintenance Tables QDxxxx, QExxxx, QHxxxx, and QPxxxx Tables The QHxxxx table stores the quick-entry stops used by the Transactions function when you enter header information. The QDxxxx table stores these stops when you enter miscellaneous debits, the QExxxx table when you edit transactions, and the QPxxxx table when you enter purchases. The tables all have the same layout. When you enter the table ID, the rest of the table appears. A QPxxxx table is shown below. 1. 11-48 The fields that appear in the line-item entry area when you add or change transactions appear. Accept the current fields, or change them. Accounts Payable User’s Manual Tables File Maintenance Do not delete lines or rearrange the descriptions. The system looks for these values by their position in the table; it treats the value on the first line as the purchase description, the value on the second line as the general ledger description, and so forth. 2. If you want the cursor to stop at a field only when you press Enter, enter E. If you want the cursor to stop at a field when you use the Jump command or press Enter, enter T. If you do not want the cursor to stop at a field, leave the field blank. Accounts Payable User’s Manual 11-49 File Maintenance Tables QCxxxx, QMxxxx, QXxxxx, and QZxxxx Tables The QZxxxx table stores the quick-entry stops used by the Enter Material Requisitions function when you enter header information. The QMxxxx table stores these stops when you enter material requisitions, the QCxxxx table when you change material requisitions, and the QXxxxx table when you return material requisitions. The tables all have the same layout. When you enter the ID, the table appears. A QMxxxx table is shown below. 1. The fields that appear in the line-item entry area when you add or change material requisitions appear. Accept the current fields, or change them. Do not delete lines or rearrange the fields. The system looks for the fields by their position in the table; it treats the first line as the description, the second line as the first additional description, and so forth. 11-50 Accounts Payable User’s Manual Tables File Maintenance 2. If you want the cursor to stop at a field only when you press Enter, enter E. If you want the cursor to stop at a field when you use the Jump command or press Enter, enter T. If you do not want the cursor to stop at a field, leave the field blank. Accounts Payable User’s Manual 11-51 Release Form Text Maintenance Use the Release Form Text Maintenance function to add or change the text printed on the release form. Select Release Form Text Maintenance from the File Maintenance menu. The Release Form Text Maintenance screen appears. Enter the number of the form you want to work with. If you are creating a new form, you can copy it from an existing one. Once you enter the form number information, press D to display the form, E to edit it, or P to print it. Accounts Payable User’s Manual 11-53 File Maintenance Release Form Text Maintenance Editing When editing a form, use the arrow keys to move the cursor up and down and left and right. You can enter variable codes for the form that instruct the application to insert actual information when the form prints. For example, if you always want the current check amount to appear, but the amount changes between subcontractors, you would use the check amount code @CHA. The notation for variable codes consists of the prefix @ and a three character suffix. Note When using variable codes, be sure to leave enough blank spaces in the form to allow for the length of the information when the form is printed. 11-54 Available Variable Codes Description @CHA Check Amount @CKD Check Date @CKN Check Number @INV Invoice Number @JID Job ID @JN1 Job Description 1 @JN2 Job Description 2 @PID Phase ID @PN1 Phase Description 1 @PN2 Phase Description 2 @TOD Today’s Date Accounts Payable User’s Manual Release Form Text Maintenance File Maintenance Available Variable Codes Description @VID Vendor ID @VND Vendor Name Printing 1. When you are ready to print, enter the form number you want to print. 2. Enter the number of copies you want to print and press P. 3. Select how you want to print the release form. For more information on the steps required when selecting an output device, see “Output the Report” on page 1-76. 4. Once the form prints, you are returned to the Release Form Text Maintenance screen. Enter another form number or use the Exit (F7) command to return to the File Maintenance menu. Accounts Payable User’s Manual 11-55 Release Form Text Maintenance File Maintenance Sample Release Form 11-56 Accounts Payable User’s Manual Subcontract Use the Subcontract function to establish and update information about subcontracts you offer. Select Subcontract from the File Maintenance menu. The Subcontract screen appears. 1. Enter the Job ID. The job description information appears. The total Estimate and Actual amounts come from the Job Master file. The Committed subcontract amount also appears. This figure is the sum of the subcontract and change order amounts from the items listed in the body of the screen. Accounts Payable User’s Manual 11-57 File Maintenance Subcontract 2. Use the arrow keys to move the cursor to a specific item and press Enter to edit the information, A to append an entry, or V to view an item (you cannot make changes to it). The entry window appears. If no line items exist for the Job ID you selected, the Append Entry window automatically appears. 3. Enter the Phase ID. If you pressed Enter to edit a line item, skip to step five. 4. Enter the Vendor ID to be used as a subcontractor. If you elected to edit a line item, skip to step five. The vendor must already be set up as a subcontractor. 11-58 5. Enter a reference (contract) number for the job. This information is printed on the Subcontract List and Subcontract Report. 6. Enter the transaction date for the job. This information is printed on the Subcontract List and Subcontract Report. 7. Enter the Subcontract Amount associated with the job. This information is printed on the Subcontract List and Subcontract Report. 8. Enter the Change Order Amount for this vendor. You can only enter one change order per vendor for a job and phase due to the structure of the file. 9. Enter the Previous Invoice, Payment, and Retainage amounts for this vendor. Accounts Payable User’s Manual File Maintenance Subcontract 10. Use the Proceed (OK) command to save the information. Use the Exit (F7) command to go to the scrolling region when you are finished appending or editing line items. 11. Press N to enter a new Job ID to work with or press F7 again to exit to the File Maintenance menu. Accounts Payable User’s Manual 11-59 Change Fields Use the Change Fields function on the File Maintenance menu to change any code used from one value to another. The Change Fields function can change codes within this application, as well as in other applications. To produce a list of fields changed, use the Print Log feature. A sample of the log appears on page 11-65. When you select Change Fields from the File Maintenance menu, the Change Fields screen appears. The screen contains three sections. The top, or Header, section, which includes the Field ID and Print Log? fields, is where you select the code or ID to change, and whether or not you want to produce the printed log. The lower left, or Values, section is where you build a list of the values you want to change by specifying the old value and the new value. Accounts Payable User’s Manual 11-61 File Maintenance Change Fields The screen contains three sections. The top, or Header, section, which includes the Field ID and Print Log? fields, is where you select the code or ID to change, and whether or not you want to produce the printed log. The lower left, or Values, section is where you will build a list of the values you want to change by specifying the old value and the new value. The lower right, or Files, section contains a list of the files that will be changed in the applications you have installed on your system. The lower right, or Files, section contains a list of the files that are changed in the applications you installed on your system. Header 1. Enter the Field ID you want to change. You can change only Accounts Payable fields from the Accounts Payable menu. To change IDs and codes from other applications, run the Change Fields function in the respective application. 2. Select the Print Log? check box to print a list of the files that are changed. 3. After you enter the Field ID and indicate your preference for printing the log, use the Proceed (OK) command to begin entering field values to change. Values 4. To edit or add original/new values in this section, select a line and press Enter to edit the current line. The Edit Original/New Values dialog box appears. Press A to append another value to the list. The Add Original/New Values dialog box appears. 11-62 5. Enter the current field value you want to change in the Original Value box. 6. Enter the new value that you want to use for this field in the New Value box. 7. Select a command. Accounts Payable User’s Manual Change Fields File Maintenance 8. • Press Tab to switch to the File Description section to specify which files change during processing. • Press Enter to edit the current line. • Press A to append another value to the list. • Press B to begin the change field process. • Press H to return to the header section to change the selection you made for printing the log. • Press G to go to a particular entry. This option is only available when there is more than one page of entries. • Press F to choose a new field ID (this abandons any field changes you entered, but have not yet saved). Continue entering old values and new values until you have specified all of the values you want to change in the Values section. Files The files that contain the Field ID you selected appear in the File Description section. You should change IDs in all of the files as a general rule. Exclude files from the change process only when your reseller or support representative instructs you to so. 9. The Time field gives you an idea of the relative time it takes to change the field in a given file. Files where this code or ID are a part of the key to the file can be changed more quickly than files where each record in the file must be scanned for the code or ID. Each file is rated as Short or Long to denote the estimated time required to change the field. 10. The Tag field denotes whether the file is affected by the copy process. Tag the file to change fields in the file. 11. Select a command. Accounts Payable User’s Manual 11-63 File Maintenance Change Fields • Press Tab to switch to the Values section of the screen. • Press Enter to toggle a file as included or excluded from the copy process. • Press A to tag all of the files. • Press N to untag all of the files. • Press B to begin the change field process. • Press H to return to the header section to change the selection you made for printing the log. • Press G to go to a particular entry. This option is only available when there is more than one page of entries. • Press F to choose a new field ID (this abandons any field changes you entered, but have not yet saved). 12. When you have tagged the files you want to change, press B to begin the change process. When the changes are complete, the log prints if you elected to produce it. 13. Enter a new Field ID to change, or use the Exit (F7) command to return to the File Maintenance menu. 11-64 Accounts Payable User’s Manual File Maintenance Change Fields Change Fields Log Accounts Payable User’s Manual 11-65 Master File Lists 12 Accounts Payable User’s Manual Printing a Master List Vendor Detail List Vendor Comments List Recurring Entries List Tables List Vendor Reference List by Class Subcontract List Accounts Payable User’s Manual 12-3 12-7 12-9 12-11 12-13 12-15 12-17 12-1 Printing a Master List All Master Lists are printed in a similar manner. Use the instructions below to print a list from the Master File Lists menu, modifying them as necessary for the list you are printing. For example, if the pick screen for the list you want to print does not contain any check boxes, skip that step and continue to the next. Follow these steps to print a master list: 1. Select the report you want to print from the Master File Lists menu. The screen for that report appears. The Subcontractor List screen is shown below as an example. 2. Select the range of values to print on the report in the list boxes. Leave these fields blank to select all values, or enter values into a combination of fields to select specific information to print on the list. The Inquiry command is usually available with these list boxes. Accounts Payable User’s Manual 12-3 Printing a Master List Master File Lists 3. If the screen contains option buttons, select the button corresponding to the type of information you want to print on the list. You can select only one per option group. These options control the type of information that prints on the list. For example, option buttons determine if the report lists vendor ID or vendor name, or recurring entries, run code, or cutoff date. On the example screen, these option buttons control whether the vendor ID or vendor name prints on the list. 4. If the screen contains check boxes, select the check box corresponding to the information you want to include in the report. Clear the check box to exclude information from the report. These check boxes are often used to specify whether to suppress blank lines or insert a page break per table. 5. If you elected to produce the list of labels, a line of x’s prints so that if you are producing labels, you can align them. Then this prompt appears: Is form aligned? If the labels are not aligned, select No and adjust them. When the labels are aligned, select Yes to produce them. 6. 12-4 Select the output device. See “Output the Report” on page 1-76 for more information. After you produce the list, the Master File Lists menu appears. Accounts Payable User’s Manual Vendor Labels Use the Vendor Labels function to print 1-by-3½-inch standard labels for vendor checks or to print a vendor phone list. You can also produce 1½-inch mailing labels with three address lines. Lables Example Accounts Payable User’s Manual 12-5 Vendor Detail List The Vendor Detail List shows the information stored in your vendor records: each vendor’s name and address, pay-to name and address, purchasing information, and 1099 information. List Example Accounts Payable User’s Manual 12-7 Vendor Comments List Produce the Vendor Comments List to list the comments that are on file for a vendor. You can use the list as a reference when you enter accounts payable transactions. List Example Accounts Payable User’s Manual 12-9 Recurring Entries List Before you copy recurring entries to the APTDxxx and APTHxxx (Transaction) files, produce the Recurring Entries List to check for mistakes and omissions. If you find incorrect transactions in the Recurring Entries List, use the Edit Recurring Entries option in the Recurring Entries function (see page 11-21) to correct them. List Example Accounts Payable User’s Manual 12-11 Tables List Produce the Tables List to get information from a particular Accounts Payable table. This function is valuable if you plan to change a table and want a hard copy. List Example Accounts Payable User’s Manual 12-13 Vendor Reference List by Class Produce the Vendor Reference List by Class to view a list of vendors that includes their class, vendor ID and name, contact person, phone and fax numbers. List Example Accounts Payable User’s Manual 12-15 Subcontract List Produce the Subcontract List to view a list of subcontractors by Vendor and Subcontractor ID that includes the job and phase ID, contract date, contract number, and contract amount, as well as billing, payment, and retainage information. Data for the Subcontract List comes from the Subcontract file (APSCx). List Example Accounts Payable User’s Manual 12-17 Job Payable Reports 13 Accounts Payable User’s Manual Job Aged Trial Balance Job Open Invoice List Subcontract Report Insurance Expiration Report Accounts Payable User’s Manual 13-3 13-7 13-9 13-11 13-1 Job Aged Trial Balance The Job Aged Trial Balance report provides information about what you owe vendors. Job information is printed only for those vendors who have the Post Job to Open Invoice field set to YES on the Subcontract Information screen. Select Job Aged Trial Balance from the Job Payable Reports menu. The Job Aged Trial Balance screen appears. 1. Define the Vendor and Job IDs you want to include. For more information on how to define ranges, see “Selecting a Range of Information” on page 175. 2. The current workstation date is the default in the Aging Date field. Press Enter to accept it or enter a new aging date. All invoices on the report are aged based on this date, and the aging breaks are created based on this date. Accounts Payable User’s Manual 13-3 Job Aged Trial Balance 13-4 Job Payable Reports 3. Press Enter in the Cutoff Date field to accept the default date (the current workstation date) or enter a new date. Only invoices before this date are included in the report. 4. The dates listed in the Aging Breaks section of the screen are based on the aging date entered above. Press Enter to accept them or enter different dates for your aging breaks. 5. Select how you want to age the invoices: Invoice Date ages invoices on the report by their invoice date, while Invoice Due Date ages invoices on the report by their invoice due date. 6. Select what invoices you want to print: All includes all invoices on the report, and Exclude Retainage excludes all retainage invoices from the report. 7. Select the Full Detail? check box (enter Y in text mode) to print the report in detail, or clear the box (enter N in text mode) to print the report in summary. 8. Select the Print Page Breaks? check box (enter Y in text mode) to print page breaks between vendors, or clear the box (enter N in text mode) to produce a continuous report. 9. Select how you want to output the report. For more information on selecting an output device, see “Output the Report” on page 1-76. Accounts Payable User’s Manual Job Payable Reports Job Aged Trial Balance Detail Job Aged Trial Balance Accounts Payable User’s Manual 13-5 Job Open Invoice List The Job Open Invoice List provides a list of invoices that fall into different categories: released, held, retainage, prepaid, or all. Job information is printed only for those vendors who have the Post Job to Open Invoice field set to YES on the Subcontract Information screen. Select Job Open Invoice List from the Job Payable Reports menu. The Job Open Invoice List screen appears. 1. Define the Vendor and Job IDs you want to include. For more information on how to define ranges, see “Selecting a Range of Information” on page 175. 2. Enter the due date in the Pick Invoice Due field. All invoices with a due date on or before the date you enter are included. Accounts Payable User’s Manual 13-7 Job Open Invoice List Job Payable Reports 3. Enter the discount date in the Take Discounts Due field. Discounts are taken for all invoices that have a discount date on or after the date you enter. 4. Select the invoice types you want to include from the list displayed. 5. Select how you want to output the list. For more information on selecting an output device, see “Output the Report” on page 1-76. Job Open Invoice List 13-8 Accounts Payable User’s Manual Subcontract Report The Subcontract Report combines information from the Subcontract file (APSCx) and the Detail History file (APHIx). Print this report to find out what you currently owe your subcontractors. The report includes contract amounts, gross and net billings, amounts paid and unpaid, amounts retained, and a current balance amount. Only items posted as Cost Type 6 (Subcontract) for the Subcontr $ field in the job are printed in this report. Information from the Subcontract file is not printed unless items exist in the Detail History file for this job, phase, and vendor. Select Subcontract Report from the Job Payable Reports menu. The Subcontract Report screen appears. 1. Define the Subcontractor and Job IDs that you want to include. For more information on how to define ranges, see “Selecting a Range of Information” on page 1-75. Accounts Payable User’s Manual 13-9 Job Payable Reports Subcontract Report 2. Select how you want the report sorted by Subcontractor ID or by Job ID. 3. Select whether you want to include Detail or Summary information. 4. Select how you want to output the report. For more information on selecting an output device, see “Output the Report” on page 1-76. Subcontract Report Note The Contract Amount is the sum of the contract and change order amounts in the Subcontractor file (APSx). The Gross Billing is the invoice amount (including retainage). The Net Billing is the Gross Billing less the Amount Retained. 13-10 Accounts Payable User’s Manual Insurance Expiration Report The Insurance Expiration Report provides information about whether your subcontractors are insured and the expiration dates of the insurance. This information is valuable if you want to assign work to subcontractors and want a list of who is insured for comparison. Select Insurance Expiration from the Job Payable Reports menu. The Insurance Expiration screen appears. 1. Define the Vendor ID range you want to include. For more information on defining ranges, see “Selecting a Range of Information” on page 1-75. 2. Select the type of insurance information you want to view in the report. You can choose to include General Liability, Worker’s Compensation, or Both. 3. To list the subcontractors’ certificates that expire before a particular date, enter that date in the Date Expired Before field. You must enter a date. Accounts Payable User’s Manual 13-11 Insurance Expiration Report 4. Job Payable Reports Select how you want to output the report. For more information on selecting an output device, see “Output the Report” on page 1-76. Insurance Expiration Report 13-12 Accounts Payable User’s Manual References System Messages System Messages A Accounts Payable User’s Manual Messages on the screen or in a report indicate an error or tell you how to enter data or what is happening in the function you are using. Self-explanatory messages are not listed. Access denied. Your access code is not set up to access this function. Access for File Maintenance denied. Your access code is not set up to use the Maintenance (F6) command in this field. You must be set up to access the File Maintenance function associated with this field. Account (#) is a memo account. You cannot use a memo account as the expense account for a line item. Amount paid cannot exceed total. You cannot enter a prepayment amount that is greater than the invoice total. An error occurred while converting files. Conversion aborted. An error occurred while creating files. File creation aborted. If an error occurs during data file creation or conversion, a message that describes the problem appears. Then this message appears on the RM Data File Conversion/ Creation screen to inform you that the process has been aborted. Correct the problem described in the first message and try again. Accounts Payable User’s Manual A-1 System Messages References At least one history selection must be YES. You must include at least one type of history in the Vendor Analysis Report. A valid GL account is required. Because Accounts Payable interfaces with General Ledger, you must enter an account number that is set up in the GLMAxxx (Master) file for the company. A valid location ID is required. You must enter a location ID that is set up in the INLOxxx (Locations) file for the company. Backorder quantity cannot be greater than requested less filled. The difference between the requested and filled quantities is the largest amount the backorder quantity can be. Bank account ID is not on file. The bank account ID you entered is not on file. Enter a different ID. If Accounts Payable interfaces with Bank Reconciliation, the Inquiry (F2) command is available. Basic Error = nn Host Error = xxx Line = nnnn Program = xxxxxx Basic Error = nn Line = nnnn Program = xxxxxx A serious error has occurred. Write down the information that appears and get help from a support technician. Cannot change distribution code for nonzero-balance vendors. If you still owe a vendor money or have a prepaid balance with the vendor, you cannot change the distribution code assigned to it. A-2 Accounts Payable User’s Manual References System Messages Cannot define file. The system cannot write information to the specified destination. Make sure that enough disk space is available, the path you specified exists, and the diskette or disk is formatted and is not write-protected or corrupt. If you still cannot write the file, get help from a support technician. Cannot delete last line of transaction. A transaction must have at least one item. You cannot delete the line item because it is the only one for the transaction. You can go to the header screen and delete the entire transaction. Cannot delete vendor with (items). If a vendor has open invoices, open orders, or transactions on file, you cannot delete the vendor’s record. Cannot purchase service items. You can purchase inventory items only. Cannot set up recurring entries for temporary vendors. Because temporary vendors are meant to be used only once, you cannot set up recurring entries for them. Enter the vendor in the Vendors function (see page 11-3), and then enter recurring entries for the vendor. Cannot split - maximum of 999,999 sequences. You cannot split a payment more than 999,999 ways. Changing location ID will clear all values. The values are based on the line item from the location. If you clear the location ID, all the values get cleared. Accounts Payable User’s Manual A-3 System Messages References Checks already on file. Do you want to start over? You prepared some checks but did not complete some pay invoices steps. To erase the checks on file and reprepare, enter Y. To exit from the Prepare Checks function and complete the remaining pay invoices steps for the checks, enter N. Costs must be positive. You must enter positive numbers for costs. Cutoff date cannot precede starting date. The cutoff date you enter must be later than the starting date. (app) data files exist. Do you want this task to erase them? To continue with the conversion and erase the existing files, enter Y. To create only the new or missing files (if any), enter N. Date must be before (date). The date you enter must be before the date that appears. Dates must be in increasing order. You must enter dates in chronological order for the Aged Trial Balance and the Cash Flow Report. Days cannot be negative. You cannot enter a negative number for terms days. Days must be greater than zero. The number of past-due days must be greater than zero for each aging bucket (break) in the Aged Trial Balance. A-4 Accounts Payable User’s Manual References System Messages Detail history is not implemented. You cannot produce the Detail History, Payment History, or Vendor Activity Reports or use the Detail History function because you elected not to keep detail history in the Resource Manager Options and Interfaces function. Discount cannot exceed total less amount filled. The difference between the total and filled amounts is the largest amount the discount can be. Diskette contains file(s), directories, or volume label. The diskette you want to use for 1099 magnetic media files has some files or directories on it, or it contains a label. Use a blank, formatted diskette. (See page 9-3 for instructions and information on acceptable formats.) Disk full; cannot define file. The diskette you are using for magnetic media 1099 forms is full. Put a formatted, empty diskette in the disk drive and try again. Due date cannot be before invoice date. The payment due date must be on or later than the invoice date. Due dates have been adjusted. If you change the invoice date or terms code of an existing transaction, the payment due dates for the order are adjusted accordingly. End of Vendor file. You have reached the end of the APVExxx (Vendor) file; the file does not have any more records. Enter a run code between 1 and 99. The mask for this field is N2, and the value must be greater than zero. Accounts Payable User’s Manual A-5 System Messages References Extended cost is too large. The extended amount of the line item is too large to fit in the space provided. Check the quantity and unit cost you entered. If they are correct, you must enter the line item as two line items to accommodate the total. Field size is too large. The amount of the invoice is too large to fit in the space provided. Check the amounts you entered in the Tax, Freight, and Misc fields. If they are correct, you must enter the invoice as two invoices to accommodate the total. File unavailable (filename). This message appears for one of three reasons: • The function you are trying to access needs one or more files that are locked by another user on your system. When a file is locked, other users cannot access it during posts and other functions that need to keep the file intact. • The function you are trying to access needs one or more files that are not on your system. Use the Options and Interfaces function on the Resource Manager Company Setup menu to verify that the correct interfaces have been selected. If that does not correct the problem, get help from a support technician. • You are working with the wrong company. Return to the menu and then use the Change Company (F3) command to enter the ID you want. In any case, press Enter to get back to the menu, correct the problem, and select the function again. Form # x not on file. The form number you entered in the Copy from Form # field is not recognized by the system. Use the Abandon (F5) command to start the process again or use the Exit (F7) command to return to the File Maintenance menu. A-6 Accounts Payable User’s Manual References System Messages GL account (#) is not in Master file. The account number you entered is not in the GLMAxxx (Master) file. Enter the correct account number. The Inquiry (F2) command is available. History not implemented for subcontract report. The Accounts Payable/Purchase Order option Keep Detail Purchase History must be set to YES and history must be saved to print detail for this report. Invalid date - mm/dd/yyyy. Invalid date - dd/mm/yyyy. The date you entered is invalid or the format you used is incorrect (for example, American format in a European-format system). This message is usually accompanied by one of two explanatory messages: Month out of range (1 to 12) or Day out of range (1 to nn) If you entered an invalid date, press Enter and enter a valid one. You can enter dates in either format: 010102 or 01012002. Invalid entry. The information is not valid in the field where you entered it. Check the data and enter it again. Consult the user’s manual or use the Help (F1) command for information. Invalid number of periods in APPDxxx table. The valid number of periods you can enter in the APPDxxx table are 1, 4, 12, and 13. Accounts Payable User’s Manual A-7 System Messages References Invalid period conversion table. The CNVTxxx table for the company is invalid. A common reason is that you did not update the table with the corresponding data for the next period. Use the Tables function (see page 11-37) to make adjustments. Invalid year. The fiscal year you entered is invalid. Item is discontinued. You cannot enter a transaction with a discontinued item. Someone may have removed the item record. Press Enter to remove the message. Then make sure that you have the correct item. Item (#) not found in location (#). The number of the item that you entered is not in the location shown in this message. Job (#) not found. Job (ID) is not on file. The job number you entered is not on file in the Contractors’ Job Cost system. Check your records. Then enter a job number that the Contractors’ Job Cost system recognizes or add the job number to Contractors’ Job Cost. Job not implemented for subcontract report. The option to interface with Contractors’ Job Cost is inactive on the Accounts Payable/Purchase Order Options and Interfaces screen. You cannot print the report unless you enter YES in the field(s). Line item exists. Change phase or vendor ID. A subcontract record already exists for the specified phase and vendor. To edit the existing record, press Enter. Use the Exit (F7) command to return to the line-item scrolling area. A-8 Accounts Payable User’s Manual References System Messages Location (ID) is not on file. Location (ID) not found. The location you entered is not on file. Enter a location ID that is on file or add the location ID to the INLOxxx (Locations) file. Maximum number of lines is 998. Maximum number of lines reached. Cannot insert. You cannot insert a line item if the transaction already has 998 line items. Must be (within range). You must enter a value within the range specified in this message. Must build (table ID) first. You must build the table shown in this message before you can use the function. Must enter (1-n). You must enter a value within the range specified in this message. Must enter (value). You must enter the kind of value specified in this message. NAMES table missing for company (ID). Using default expense types. Because you have not set up the NAMESxxx table in Contractors’ Job Cost for the company, the system uses the default expense types instead. Net due days cannot be less than discount days. The number of net due days must be greater than or equal to the number of discount days. Accounts Payable User’s Manual A-9 System Messages References No check records on file for (vendor ID). The vendor’s record does not have any check records on file. You cannot select payables for it. No checks on file. After posting payments, use the Prepare Checks function (see page 10-13) to create the checks on file. Then, print the checks (see page 10-23). No checks to print. Only prepaid invoices were on file for the due date and vendors you selected when you prepared checks. No date selects all invoices on file. When you do not enter a date, the system selects all the invoices the vendor has on file. No history for vendor (ID). This vendor does not have any history records on file, possibly because they were deleted, the vendor is new, or you elected not to keep summary history in the Resource Manager Options and Interfaces function. No history records exist. No history records are on file. Exit from the function. No invoice records on file for (ID). No invoices on file for (ID). No invoice records for the vendor are on file. Make sure that you entered the correct vendor ID. If it is correct, post the transactions (after you print the appropriate journals and back up the system) and try again. If this message still appears, reenter the transaction, post it, and try again. A-10 Accounts Payable User’s Manual References System Messages No prepaid checks for vendor (ID). No prepaid checks for the vendor are on file. No records in intermediate file. The intermediate file used to prepare magnetic media for 1099 forms does not have any records. Exit from the 1099 Forms function. No records in specified date range. No records are available for the date range you entered. Enter a different range of dates. No summary history for this period. The period you selected has no summary history. Output file already exists. Do you want to start over? Accounts Payable already has a work file used to create magnetic media. To delete this file and continue, enter Y. To work with the current file, enter N. Over maximum of 999 sequences for this date and reference ID. A particular date and reference ID can hold only 999 comments. Payment date must be equal to or greater than the invoice date. The prepayment date is earlier than the invoice date. Enter a different date. Payment of n is not allowed. The amount of the calculated payment is too large for the field size. Make sure that the values you entered in the Tax, Freight, and Misc fields are correct. If they are not, enter the correct values. If they are, you may want to split the payment into two or more payments. Accounts Payable User’s Manual A-11 System Messages References Percentage cannot be negative. You cannot enter a negative terms code percentage. Phase (ID) is not on file. The phase ID is not set up for the job. Enter a different phase ID. The Inquiry (F2) command is available. Printer busy. The printer you are trying to use is being used by another program. Press Enter to continue with your entry and try again later. Purchase history is not implemented. You cannot produce the Detail History, Payments History, or Vendor Activity Reports or use the Detail History function because you elected not to keep detail history in the Resource Manager Options and Interfaces function. Quantity cannot be less than zero. You cannot enter a negative value for the quantity. Quantity must be greater than zero. You must enter a quantity that is greater than zero. Quantity on hand = (n). The quantity in inventory with the status on hand appears. Remaining balance cannot be greater than starting balance. A recurring entry’s remaining balance is the starting balance minus an amount. Therefore, the recurring entry’s balance cannot be greater than its starting balance. A-12 Accounts Payable User’s Manual References System Messages Remaining payments cannot be greater than total payments. A recurring entry’s remaining number of payments is the starting number of payments minus the payments that were made. Therefore, the number of remaining payments cannot be greater than the number of total payments. Summary history is not available for all comparisons. Summary history is not available for all the comparisons in the report. In each column of the report where summary history is unavailable or insufficient, .00* appears. Summary history is not available for this period. The reporting period you specified does not have summary history. You cannot print the report for this period. Summary history is not selected in the options table. You cannot produce the AP Analysis, Purchase Analysis, Vendor Purchase History Reports, or use the Summary History function because you elected not to keep summary history in the Resource Manager Options and Interfaces function. Terms code (code) not on file. The terms code you entered is not on file. There is no (data). The kind of data indicated is not on file. This invoice number has already been used. The invoice number has already been assigned to a transaction. Accept it as a duplicate invoice number or enter a different invoice number. Accounts Payable User’s Manual A-13 System Messages References This vendor is not set up as subcontractor. You must set up the vendor as a subcontractor in the Vendors function for this vendor to appear in the Subcontract Report. Thru value cannot be less than From value. The value you entered at Thru is smaller than the value you entered at From. Press Enter and then enter the correct value at Thru. Transaction is in process on terminal (ID). Someone else is processing the transaction that you are trying to access. Press Enter and try again. Transaction is not on file. The number you entered is not associated with a transaction that is on file. Enter a different transaction number. The Inquiry (F2) command is available. Unit cost is too large. The unit cost of the line item is too large to fit in the space provided. See the Contractors’ Job Cost User’s Guide for information about how to reduce a job’s cost. Valid entries are (range). Valid units are: n. Enter one of the valid selections shown in this message. Value entered cannot equal previous field. The value you enter cannot be equal to the value in the previous field. Value must be at least (amount). You must enter a value greater than or equal to the amount specified in this message. A-14 Accounts Payable User’s Manual References System Messages Vendor (ID) is missing. Vendor (ID) is missing from the Vendor file. The vendor ID associated with the record has been deleted. You can add the vendor ID to the APVExxx (Vendor) file, if necessary. Vendor (ID) is not on file. The vendor you entered does not have a record in the APVExxx file. Enter a different vendor ID. The Inquiry (F2) command is available. Vendor (ID) is on hold. You cannot pay invoices for a vendor whose status is on hold. Vendor (ID) record in use. The vendor record is being accessed by another user. Try to access the record again later. Warning: (job or phase) has a finish date. The Contractors’ Job Cost job or phase that the item is to be applied to has a finish date. Make sure that you do not apply costs to the job or phase after that date. Warning: Retention Invoice exists, must enter YES. If you are trying to mark a vendor as a subcontractor on the Subcontract Information screen, and this vendor has an existing invoice with retainage amounts, you must enter Y in the Post Job to Open Invoice field. Warning: Summary history is not available for all comparisons. Summary history is not available for all the comparisons in the report. In each column of the report where summary history is unavailable or insufficient, .00* is appears. Accounts Payable User’s Manual A-15 System Messages References Warning: 1099 amounts exist for this vendor. This message appears for one of two reasons: • You are preparing checks and you entered a 1099 payment for a vendor that does not receive a 1099-MISC form (see page 9-3). If you do not want the 1099 payments to be updated in the vendor’s record, use the Hold/Release Invoices function (see page 10-5) to deselect the 1099 flag for the invoice. • You cannot produce the AP Analysis, Purchase Analysis, Vendor Purchase History Reports, or use the Summary History function because you elected not to keep summary history in the Resource Manager Options and Interfaces function. You cannot enter comments for a blank vendor ID. You must enter a vendor ID before you can enter a comment. You have unposted (information); you must post them before conversion. If you have unposted transactions or checks when you convert, you must post them. The function automatically posts the information. You can either proceed with the conversion and post or exit from the function and stop the conversion. You must enter (information). You must enter the kind of information indicated in this message. Your hard disk is full - unable to finish copying. The system cannot finish converting your files because your hard disk is full. Delete unnecessary files, optimize your hard disk, or take other measures to make space. Then restore the backup you made before converting the files, and try again. A-16 Accounts Payable User’s Manual Common Questions Common Questions B Accounts Payable User’s Manual These commonly asked questions about the Accounts Payable system are divided into the following categories: Daily Work and Pay Invoices. Daily Work What is a temporary vendor and how do I work with one? A temporary vendor is one you do business with only once (or not frequently enough to justify an entry in the APVExxx file). To assign purchase information to this kind of vendor without entering the vendor in File Maintenance, enter TEMP in the Vendor ID field on the invoice. Then assign a name and an address to the vendor. The system assigns an ID, consisting of a “+” sign and a five-digit number. This number is included in the Purchases Journal. You can use the Purge Selected Files function to clear out temporary vendors with zero balances. If I make an error on a line item when I enter a purchase or material requisition, how can I correct it without reentering the whole invoice? You have three options: • If you have not saved the line item, use the Abandon (F5) command to return to the beginning of the line item. • If you have saved the line item but have not posted the transaction, go to the line-item scroll region, move the prompt (>) to the line item, and use the Delete (F3) command to delete it. Then enter the correct information. To edit the line item, use the Edit command in the Transactions (see page 5-3) and Enter Material Requisitions (see page 6-3) functions. • If you posted the transaction, enter a miscellaneous debit to reverse the item. Accounts Payable User’s Manual B-1 Common Questions Can I reverse purchases that were posted without account numbers? Yes. Enter miscellaneous debits to reverse the purchases. However, if you posted purchases without account numbers, the APGLxxx table is probably not set up correctly, which could lead to a problem later. Check the table to make sure that you are entering valid account numbers. Then reenter the purchases with the correct account numbers. Can I enter a prepayment? Yes. If you entered the purchase but did not post it, use the Purchases option in the Transactions function (see page 5-3) to record the purchase. Enter the header information and assign the line items. When you get to the Amt Paid field in the Totals/Payments window, enter the amount you paid and the check number. If you posted the purchase, use the Hold/Release Invoices function (see page 10-5) to change its status to prepaid. I entered a prepayment but it was not posted to the cash account in General Ledger. Why? The cash account is affected only when you prepare checks and post payments. I was in the middle of posting and had computer problems. Can I recover? Yes. If you backed up your data files before posting, restore the backup and start the post over. The Post Transactions function has a restart feature. If you did not back up before posting, start the post over. Each posted transaction is flagged as posted, so if a transaction or batch of transactions was completely posted, it will not be processed again. If the system was in the middle of posting a transaction or a batch of transactions, it processes the transaction(s) again. Then print the Open Invoice Report, the Detail History Report, and the appropriate reports from interfaced applications. Make adjustments for the double-posted entry, if any. (Only one transaction line or total can be double-posted.) B-2 Accounts Payable User’s Manual Common Questions How is the Take Discounts Due field on the Open Invoice Report screen used? Discounts are taken for invoices that are due on or after the date you enter in this field; the earlier the date, the more invoices have discounts taken. When I print the Open Invoice Report, I cannot find any discounts. Why? Check the date you entered in the Take Discounts Due field. Discounts are taken for invoices that are due on or after the date you entered; the later the date, the less discount information appears. How do I enter installment payments for an invoice after it has been posted to the APINxxx (Open Invoice) file? Use the Hold/Release Invoices function (see page 10-5) to split one payment into several. You need to know the vendor ID and the invoice number. The system assigns a sequence number to each installment. You can use the Vendors and Invoices function (see page 4-3) to find out how many installments have already been made. When are paid invoices cleared from the APINxxx (Open Invoice) file? You can clear paid invoices by posting payments. Posting also updates vendor balances. If Accounts Payable is interfaced with General Ledger, payments are posted to the GLJRxxx (Journal) file automatically. If Accounts Payable is interfaced with Bank Reconciliation, summary disbursement entries are created in the BRTRxxx (Bank Reconciliation Transactions) file. Pay Invoices How do I use the Take Discounts Due date field in the Prepare Checks function? The discount amount on an invoice is deducted from the total on the check that is prepared if the invoice is due on or after the date you enter. Accounts Payable User’s Manual B-3 Common Questions I entered the wrong information when I prepared checks. How can I correct the checks in the APCHxxx (Checks) file? Run the Prepare Checks function again. The following prompt appears: Checks already on file. Do you want to start over? Select Yes (or enter Y in text mode) to prepare the checks again. How do alignment and restart work for printing checks? An X is printed in the alignment box on the first form, and you are asked whether the forms are aligned. If you select No (or enter N in text mode), the process is repeated. Use the restart feature to resume printing checks if the checks were not printed correctly or if the printer malfunctions. The Last Good Check Number field corresponds to the last form that was printed correctly. When the system starts printing again, it uses the next number. This number corresponds to the number of the check in the printer. How can I prepare a check for just one invoice? Use the Vendors and Invoices inquiry function (see page 4-3) to find out how many invoices the vendor has. If the vendor has more than one invoice, use the Hold/ Release Invoices function (see page 10-5) to put the invoices you do not want to pay on hold. Then, when you prepare checks, enter the ID of the vendor whose invoice you want to pay. Your other alternative is to issue a manual check for the invoice. How do I record a manual check? If you have posted the invoice, use the Hold/Release Invoices function (see page 10-5) to assign it the status of prepaid. When you prepare checks, the appropriate accounts are adjusted. If you did not enter the purchase, enter it as prepaid. When you go to the Totals/ Payments window, enter the amount of the check and the check number in the Amt Paid field. B-4 Accounts Payable User’s Manual Common Questions If I specify installment payments when I enter a purchase, will they be paid automatically? If you follow the right procedures, yes. When you prepare checks, specify a due date. Check records are set up in the APCHxxx (Checks) file for invoices that are due on or before this date. As long as you regularly prepare checks, your installments will be paid. Accounts Payable User’s Manual B-5 Build Retainage Invoice C Accounts Payable User’s Manual Build Retainage Invoice C Accounts Payable User’s Manual Use the Build Retainage Invoice function only if you are upgrading from CJC version 4.11 or you are implementing CJC 4.5 from a manual system. This function creates records in the Open Invoice file for the retainage amounts stored in the Vendor file. You must enter the information for each invoice manually, and you must enter separate amounts for each job, phase, and cost type. Print the Accounts Payable Detail History Report to get the information you need to build retainage invoices. Note You should not use this function if you are upgrading from C.R.A.F.T. because C.R.A.F.T. already has AP retainage invoices. To access the Build Retainage Invoice function, following these steps: 1. In graphical mode, select the Other menu from the menu bar and then Call a PRO/5 Program. The Call a PRO/5 Program screen appears. Alternatively, in text mode, press F4 twice to bring up the Other Commands menu. Select Call a PRO/5 Program and the screen appears. Accounts Payable User’s Manual C-1 Build Retainage Invoice C-2 2. Enter the following code: APCJACR. 3. Use the Proceed (OK) command to continue. Build Retainage Invoice The Build Retainage Invoice screen appears. 4. Use the Accounts Payable Detail History Report information to fill in the required fields. 5. Use the Proceed (OK) command to create the invoice. The Retention Invoice Number for each invoice appears at the bottom of the screen. 6. When you finish adding retainage invoices, use the Exit (F7) command to return to the menu. C-3 Accounts Payable User’s Manual Index Numerics 1099 Forms control code, 9-9 field indicators, 9-4 function, 9-3 intermediate records, 9-13 magnetic media for UNIX/Linux systems, 9-15 for Windows systems, 9-14 Magnetic Media option, 9-7 Output 1099 Forms to Magnetic Media screen, 9-13 setting up, 3-18 1099 payments posting to year to date, 10-37, 10-41 transferring at end of calendar year, 9-19 A Abandon function key, 1-51 pull-down menu command, 1-51 verification button, 1-59 About OSAS pull-down menu command, 1-54 Access Code tool button, 1-35 access code entering in graphical menus, 1-35 Access Codes parameter, 1-4 access codes company-specific information, 3-23 setting up, 3-22 what to protect, 3-23 Accounts Payable before you install, 2-3 Accounts Payable User’s Manual IX converting to version 6.1, 2-7 files, 1-9 installation, 2-3 installing new version before converting, 2-5 interfaces, 1-22 Bank Reconciliation, 1-19, 3-9 General Ledger, 1-19, 3-9 Inventory, 3-9 Job Cost, 3-9 menu structure, 1-7 Options screen, 3-11 setting up, 3-3 setup considerations, 2-5 system requirements, 2-3 actual amounts subcontract, 11-57 adding comments, 1-72 Additional Descriptions file, 1-11 specifying whether to copy to line items, 3-12 specifying whether to keep history, 3-12 specifying whether to use, 3-12 Additional Descriptions History file, 1-12 Aged Trial Balance aging breaks, 7-8 aging buckets, 7-8 function, 7-7 aging breaks, 7-8 buckets, 7-8 Alias Inventory Lookup function key, 1-56, 1-64 pull-down menu command, 1-56, 1-57 alphabetical sorting, 3-4 AP Analysis Report IX-1 Index function, 8-3 summary history required, 8-3 APBTxxx file, 1-10 APCHxxx file, 1-12 APCMxxx file, 1-12 APDCxxx file, 1-10 APDExxx file, 1-11 APGLxxx table description, 11-39 screen, 11-39 APHDxxx file, 1-12 APHIxxx file, 1-12 APHSxxx file, 1-12 APINxxx file, 1-11 APIXxxx file, 1-11 APLSxxx file, 1-11 APMDxxx file, 1-11 APMHxxx file, 1-11 APPDxxx table description, 11-40 screen, 11-40 setting up, 3-15, 9-17 Application Information tool button, 1-39 Application Setup right-click menu, 1-40 APRDxxx file, 1-10 APRHxxx file, 1-10 APRLxxx file, 1-10 APTCxxx file, 1-10 APTDxxx file, 1-11 APTHxxx file, 1-11 APVCxxx file, 1-9 APVExxx file description, 1-9 setting up, 3-17 comments, 3-18 general information, 3-17 historical information, 3-18 vendor codes, 3-17 B Backorder Allocation Report balance available, 6-18 function, 6-17 IX-2 order of filling, 6-18 sample, 6-19 backorders arrangement in Backorder Allocation Report, 6-18 balance available, 6-18 filling, 6-3, 6-18 quantity, 6-9 backup schedule for data files, 3-24 for programs, 3-24 setting up, 3-24 Bank Reconciliation effect of voiding checks, 10-39 effects of posting checks, 10-35 interface with Accounts Payable, 1-19, 3-9 base applications defined, 1-3 base unit Detail History Report, 8-14 Batch file, 1-10 Bell mode pull-down menu command, 1-53 Build Retainage Invoice function, C-1 screen, C-2 C Calculator tool button, 1-36, 1-58 Cash Flow Report function, 7-5 Change Fields sample log, 11-65 screen, 11-61 Change Open Invoice Status function, 10-3 change to/from Favorites tool button, 1-36, 1-40 changing companies graphical menus, 1-41 check history option to keep, 3-13 Check History Report check history required, 8-11 function, 8-11 Accounts Payable User’s Manual Index Check Register printing before posting, 10-36 Check Saver function, 10-23 Checks aligning forms, B-4 before printing, 10-21 correcting prepared checks, B-4 dropping from preparation, 10-18 erasing prepared checks on file, 10-14 file, 1-12 leaving out prepared checks, 10-13 log, 10-24 manual, B-4 posting, 10-35 preparing, 10-13 preparing for one invoice, B-4 printing blank stubs, 3-13 company name, 3-13 invoice detail, 10-33 invoice detail for a list, 10-33 laser forms, 3-13 online, 3-12 preprinted stubs, 3-13 selecting to print, 10-17 voiding, 10-39 click defined, 1-23 Codes setting up, 3-3 sorting, 3-3 Command Help pull-down menu command, 1-54 commands in-field editing, 1-66 report, 1-80 scroll region, 1-65 comments adding, 1-72 editing, 1-72 entering, 3-18 viewing, 1-70 companies changing, 1-41 company Accounts Payable User’s Manual assigning access codes, 3-23 tables for, 3-14 company name printing on checks, 3-13 company parameter, 1-4 Contract Amount definition, 13-10 Contractors’ Job Cost interface with Accounts Payable, 3-9 control code magnetic media, 9-9 conventions report, 1-75 user’s manual, 1-23 conversion from 4.5x to 6.1, 2-6 from 5.0x to 5.21, 2-6 setup considerations, 2-5 tax information, 2-5 converting to OSAS version 6.1, 2-7 Copy function key, 1-52, 1-66 pull-down menu command, 1-52 tool button, 1-58 Copy Recurring Entries before copying, 5-21, 12-11 copying batches, 5-21 Cost Type 6 subcontract, 13-9 Ctrl-J function key, 1-52 Ctrl-Z function key, 1-52 cursor moving down or forward one field, 1-51 moving up or back one field, 1-51 selecting item, 1-63 Cursor end function key, 1-66 Cursor home function key, 1-66 Cursor left function key, 1-66 Cursor right function key, 1-66 Customer/Vendor Inventory Lookup function key, 1-56, 1-64 pull-down menu command, 1-56 IX-3 Index D D1099xxx table description, 11-42 screen, 11-42 Daily Sales Tax Report function, 5-31 sample, 5-32 Daily Work menu structure, 1-8 data dictionaries, 2-3 Data File Conversion function, 2-5, 2-7 Data File Creation function, 2-3 data files backing up, 3-24 debit memos viewing history, 4-13 Defaults tables description, 11-47 Del function key, 1-66 Delete function key, 1-51 history, 9-23 pull-down menu command, 1-51 recurring entries, 9-23, 11-29 tool button, 1-57 delete information on a screen, 1-51 line item, 1-56, 1-65 Delete character function key, 1-66 Delete Line command function key, 1-56, 1-65 pull-down menu command, 1-56 Delete to End of Line function key, 1-66 Depreciation Tables List list, 11-65 Description Inventory Lookup function key, 1-57, 1-64 pull-down menu command, 1-57 deselect defined, 1-24 Detail History IX-4 deleting, 9-23 file, 1-12 function, 4-13 Detail History Report base unit, 8-14 detail history required, 8-13 function, 8-13 Detail Inventory Lookup function key, 1-57 detail method initial balances, 3-22 DFxxxx table description, 11-47 screen, 11-47 discounts Open Invoice Report, B-3 DISCxxx table description, 11-41 screen, 11-41 Distribution Codes definition, 11-9, 11-35 file, 1-10 function, 11-35 use of, 3-17 DMxxxx table description, 11-47 Documents, 1-73 File Types, 1-73 opening, 1-74 viewing, 1-74 double-click defined, 1-23 Down Arrow inquiry command, 1-63 report command, 1-80 scroll region command, 1-55, 1-65 duplicate numbers, 3-13 E edit line item, 1-65 Edit Register function, 10-21 sample, 10-22 editing comments, 1-72 Accounts Payable User’s Manual Index EIS defined, 1-3 End inquiry command, 1-63 report command, 1-80 scroll region command, 1-56, 1-65 End function key, 1-66 Enter inquiry command, 1-63 scroll region command, 1-65 Enter Material Requisitions function, 6-3 Header Information screen, 6-4 online requisitions, 6-12 screen, 6-11 Esc inquiry command, 1-63 estimate amounts subcontract, 11-57 Executive Information Summary defined, 1-3 Exit function key, 1-52 pull-down menu command, 1-52 exit from inquiry window, 1-63 from report to menu, 1-80 from screen or window, 1-52 F F1 function key, 1-54 F10 function key, 1-66 F1099 table description, 11-43 setting up, 3-15 F2 function key, 1-51 F3 function key, 1-57 scroll region command, 1-56, 1-65 F3 function key, 1-51 F5 function key, 1-51 F6 function key, 1-57 F6 function key, 1-51 F7 Accounts Payable User’s Manual inquiry command, 1-63 report command, 1-80 F7 function key, 1-52 F9 function key, 1-66 Favorites Menu, 1-67 adding items to, 1-40 changing to/from, 1-40 Favorites Menus removing items from, 1-40 Field Down function key, 1-51 pull-down menu command, 1-51 field indicator 1099 Forms, 9-4 Field Up function key, 1-51 pull-down menu command, 1-51 File Maintenance menu structure, 1-7 files Accounts Payable, 1-9 backing up, 3-24 First Line command function key, 1-55, 1-65 pull-down menu command, 1-55 foreign definition, 9-9 FORMxxx table description, 11-44 screen, 11-44 Function help, 1-40 function keys Ctrl-J, 1-52 Ctrl-Z, 1-52 Del, 1-66 Down Arrow, 1-51 End, 1-66 F1, 1-54 F10, 1-52, 1-66 F2, 1-51, 1-59 F3, 1-51 F5, 1-51 F6, 1-51 F7, 1-52 F9, 1-66 Home, 1-66 IX-5 Index Ins, 1-66 Left, 1-66 PgDn, 1-51 PgUp, 1-51 Right, 1-66 Shift+F3, 1-64 Shift+F4, 1-64 Shift+F5, 1-64 Shift+F6, 1-64 Shift+F7, 1-64 Shift+F8, 1-64 Shift-F1, 1-54 Shift-F10, 1-66 Shift-F3, 1-56 Shift-F4, 1-56 Shift-F5, 1-57 Shift-F6, 1-57 Shift-F7, 1-57 Shift-F8, 1-57 Shift-F9, 1-52, 1-66 Up Arrow, 1-51 G General Information screen, 11-5 General Ledger effects of posting checks, 10-35 effects of posting material requisitions, 6-21 effects of posting transactions, 5-38 effects of voiding checks, 10-39 interface with Accounts Payable, 1-19, 3-9 GL accounts overriding, 3-18 Global Inquiry defined, 1-3 graphical menu exiting from, 1-32 features of, 1-31 right-click menu, 1-40, 1-58 sample screen, 1-32 graphical menus right-click menu, 1-40, 1-58 Gross Billing definition, 13-10 Group Code file, 1-10, 1-11 GUI/Text Using OSAS with Contractors’ Job Cost, 1-31 IX-6 H Header Information screen Enter Material Requisitions, 6-4 Help, 1-40 function key, 1-54 pull-down menu command, 1-54 tool button, 1-38, 1-58 help commands F3, 1-61 F6, 1-61 F7, 1-61 History command, 1-72 History Information keeping for line items, 3-12 keeping for totals, 3-13 History Reports menu structure, 1-8 Hold/Release Invoices changing invoice status, 10-7 function, 10-5 prepaying, 10-7 splitting payments, 10-7 Home inquiry command, 1-63 report command, 1-80 scroll region command, 1-55, 1-65 Home function key, 1-66 I IDs sorting, 3-3 Information command, 1-69 Information Inquiry menu structure, 1-7 Information menu, 1-69 Comments command, 1-70 Documents command, 1-73 History command, 1-72 Information command, 1-69 initial balances detail method, 3-22 setting up, 3-21 summary method, 3-21 Inquiry function key, 1-51, 1-59 Accounts Payable User’s Manual Index graphical, 1-59 partial-key, 1-62 pull-down menu command, 1-51 inquiry commands Down Arrow, 1-63 End, 1-63 Enter, 1-63 Esc, 1-63 F7, 1-63 Home, 1-63 Ins, 1-63 PgDn, 1-63 PgUp, 1-63 Up Arrow, 1-63 Ins inquiry command, 1-63 scroll region command, 1-56, 1-65 Ins function key, 1-66 Insert Line command function key, 1-56, 1-65 pull-down menu command, 1-56 Insert line item, 1-56, 1-65 Insert mode function key, 1-66 Install Applications function, 2-3, 2-5 installing Accounts Payable, 2-3 and Purchase Order, 2-4 installment payments automatic, B-5 posted invoice, B-3 Insurance Expiration Report function, 13-11 sample, 13-12 screen, 13-11 interfaces with Accounts Payable, 1-22 Bank Reconciliation, 3-9 General Ledger, 3-9 Inventory, 3-9 Job Cost, 3-9 Inventory effects of posting material requisitions, 6-21 interface with Accounts Payable, 3-9 Inventory Lookup commands, 1-56, 1-64 Inventory Lookup commands, 1-56 Accounts Payable User’s Manual alias lookup, 1-56 customer/vendor lookup, 1-56 description lookup, 1-57 detail lookup, 1-57 lot lookup, 1-57 serial lookup, 1-57 Shift-F3, 1-56 Shift-F4, 1-56 Shift-F5, 1-57 Shift-F6, 1-57 Shift-F7, 1-57 Shift-F8, 1-57 Inventory lookup commands Alias Lookup, 1-64 alias lookup, 1-64 Customer/Vendor Lookup, 1-64 Description Lookup, 1-64 Detail Lookup, 1-64 Lot Lookup, 1-64 Serial Lookup, 1-64 inventory search commands, 1-64 Shift + F6, 1-64 Invoices aging buckets, 7-8 changing status, 10-3, 10-5, 10-7 cleared from APINxxx file, B-3 effect of voiding checks, 10-39 excluding from check preparation, 10-18 function, 4-11 hold/release, 10-5, 10-9 holding, 3-17 including in check preparation, 10-18 payment not due, 10-7 preparing check for one invoice, 10-13 preparing checks for prepaid invoices, 10-15 recording released invoices, 10-13 screen, 4-11 sorting to view, 4-6 splitting payments, 10-7 viewing, 4-3 invoices paying, 1-15 J Job Aged Trial Balance IX-7 Index function, 13-3 sample, 13-5 Job Open Invoice List function, 13-7 sample, 13-8 Jump function key, 1-52 pull-down menu command, 1-52 Jump command function key, 1-56 pull-down menu command, 1-56 L laser check printing, 3-13 Last Line command function key, 1-56, 1-65 pull-down menu command, 1-56 Left Arrow report command, 1-80 Left Arrow function key, 1-66 line-item entry Enter Material Requisitions, 6-7 live data changing to, 1-35, 1-40, 1-41 Lot Inventory Lookup function key, 1-57, 1-64 pull-down menu command, 1-57 M magnetic media control code, 9-9 DOS diskette formats, 9-14 editing intermediate records, 9-13 header information, 9-8, 9-10 naming input file, 9-7 Output 1099 Forms to Magnetic Media screen, 9-13 output information, 9-7 UNIX/Linux systems, 9-15 Windows systems, 9-14 XENIX/UNIX diskette formats, 9-15 Maintenance function key, 1-51 pull-down menu command, 1-51 tool button, 1-57 Management Reports IX-8 menu structure, 1-8 manual conventions, 1-23 Master File Lists menu structure, 1-8 Material Requisitions before changing or deleting, 6-4 correcting line items, B-1 files, 1-11 Header Information screen, 6-4 line-item entry, 6-7 menu structure, 1-8 online, 6-12 posting, 6-21 posting credits to inventory item accounts, 3-13 printing, 6-13 printing forms for each location, 6-14 reversing, 6-4 material requisitions entering, 1-14 posting, 1-14 Material Requisitions Journal function, 6-15 sample, 6-17 Menu styles, 1-24 menus Daily Work, 1-8 File Maintenance, 1-7 History Reports, 1-8 Information Inquiry, 1-7 information menu, 1-69 Management Reports, 1-8 Master File Lists, 1-8 Material Requisitions, 1-8 Pay Invoices, 1-8 Recurring Entries, 11-25 structure in AP, 1-7 miscellaneous debits before changing or deleting, 5-4 entering, 1-13 posting, 1-13, 5-39 Miscellaneous Debits Journal function, 5-27 sample, 5-29 when to produce, 5-27 mouse commands Accounts Payable User’s Manual Index click, 1-23 deselect, 1-24 double-click, 1-23 right-click, 1-23 MRGLxxx table description, 11-45 MS-DOS prompt tool button, 1-39 writing (saving) selections, 3-11 Options screen, 3-11 OPTxxx table, 11-37 OSAS running, 1-4 setup considerations, 2-5 system requirements, 1-4 output device printer, 1-77 N Net Billing definition, 13-10 Next Line command function key, 1-55, 1-65 pull-down menu command, 1-55 Next Page command function key, 1-55, 1-65 pull-down menu command, 1-55 numbers preventing duplicates, 3-13 sorting, 3-4 O OK (Proceed) function key, 1-51 pull-down menu command, 1-51 online checks, 3-12 material requisitions, 6-12 Online Documentation function key, 1-54 pull-down menu command, 1-54 tool button, 1-58 Open Invoice Additional Information file, 1-11 Open Invoice file, 1-11 Open Invoice Report function, 7-3 sample, 7-4 take discounts due, B-3 opening documents, 1-74 Options and Interfaces screen, 3-11 setting up, 3-9 toggling options, 3-11 Accounts Payable User’s Manual P Paid Invoice Detail sample list, 10-34 Paid Invoices Detail function, 10-33 screen, 10-33 parameters access code, 1-4 command to start OSAS, 1-4 company ID, 1-4 general expression, 1-4 terminal ID, 1-4 partial-key inquiry, 1-62 Paste function key, 1-52, 1-66 pull-down menu command, 1-52 tool button, 1-58 Pay Invoices menu structure, 1-8 Payment History Report detail history required, 8-17 function, 8-17 payment priority codes definition, 11-9 use of, 3-17, 11-9 payments installment, B-3, B-5 posting, 1-16, 1-18, 10-35 preparing, 1-15 viewing history, 4-13, 4-17 period-end maintenance consequences of, 9-17, 11-12 Periodic Maintenance before beginning, 9-17 function, 9-17 IX-9 Index results of, 1-19 screen, 9-18, 9-23 PgDn inquiry command, 1-63 report command, 1-80 scroll region command, 1-55, 1-65 PgDn function key, 1-51 PgUp function key, 1-57 inquiry command, 1-63 report command, 1-80 scroll region command, 1-55, 1-65 PgUp function key, 1-51 Pop-Up Calendar tool button, 1-58 Post Material Requisitions before posting, 6-22 effects on General Ledger, 6-21 effects on Inventory, 6-21 function, 6-21 Post Payments before posting, 10-36 effects on Bank Reconciliation, 10-35 effects on General Ledger, 10-35 function, 10-35 log, 10-38 results, 10-35 Post Transactions before posting, 5-40 effects on General Ledger, 5-38 screen, 5-41 tax refunds, 5-40 posting before posting checks, 10-36 before posting material requisitions, 6-22 before posting transactions, 5-40 checks, 10-35 detail or summary transactions, 3-12 interrupted, B-2 material requisitions, 1-14 miscellaneous debits, 1-13, 5-39 payments, 1-18 prepayments, B-2 purchases, 1-13, 5-38 Prepare Checks correcting, B-4 IX-10 discounts, B-3 dropping invoices, 10-18 erasing prepared checks on file, 10-14 excluding invoices, 10-18 excluding prepared checks, 10-13 function, 10-13 including invoices, 10-18 one invoice, 10-13, B-4 prepaid invoices, 10-15 screen, 10-14 prepayments entering, B-2 posting, B-2 Previous Line command function key, 1-55, 1-65 pull-down menu command, 1-55 Previous Page command function key, 1-55, 1-65 pull-down menu command, 1-55 Print Checks function, 10-23 prenumbered forms, 10-24 restarting, 10-24 screen, 10-23 Print Manager defined, 1-3 Print Material Requisitions function, 6-13 printing forms for each location, 6-14 printing forms blank, 3-13 laser, 3-13 preprinted, 3-13 PRO/5 Command tool button, 1-39 Proceed (OK) function key, 1-51 pull-down menu command, 1-51 verification button, 1-59 Proceed command, 1-27 programs backing up, 3-24 prox terms, 11-34 pull-down menu functions Accounts Payable User’s Manual Index commands, 1-51 Edit, 1-52 Help, 1-54 Information, 1-55 Inventory Lookup, 1-56 Modes, 1-52 Other, 1-54 Scroll Commands, 1-55 graphical menus, 1-34 Favorites, 1-36 File, 1-35 Help, 1-38 Modes, 1-36 Other, 1-37 Tools, 1-36 pull-down menus functions information menu, 1-69 Purchase Analysis Report function, 8-7 summary history required, 8-7 Purchase Order installing, 2-4 Purchases before changing or deleting, 5-4 cash payment, 5-17 correcting line items, B-1 line-item entry screen, 5-8 posting, 5-38 reversing, B-2 Sales Tax Breakdown window, 5-17 temporary vendors, 5-6 totals, 5-16 viewing history, 4-13, 4-17 purchases entering, 1-13 posting, 1-13 Purchases Journal function, 5-23 when to produce, 5-23 Purge Selected Files effects of, 1-21 function, 9-23 Purge Vendor Comments before purging, 9-21 function, 9-21 Accounts Payable User’s Manual screen, 9-21 Q QCxxxx table description, 11-50 QDxxxx table description, 11-48 QExxxx table description, 11-48 QHxxxx table, 11-48 QMxxxx table description, 11-50 screen, 11-50 QPxxxx table description, 11-48 quarter-end maintenance consequences of, 9-17, 11-12 Quick mode pull-down menu command, 1-53 Quick-Entry tables description, 11-50 QXxxxx table description, 11-50 QZxxxx table, 11-50 R Recurring Additional Descriptions file, 1-10 Recurring Entries before copying, 12-11 correcting, 12-11 deleting, 9-23, 11-29 editing totals, 11-31 entering totals, 11-31 files, 1-10 function, 11-25 Goto command, 11-31 Header command, 11-31 header screen, 11-26 line-item entry, 11-29 menu, 11-25 Next trans command, 11-32 purging, 3-20 recurring numbers, 3-20 returning to header screen, 11-31 run codes, 3-20, 11-25, 11-27 IX-11 Index screen, 11-25, 11-30 setting up, 3-19 Totals command, 11-31 recurring entries run codes, 1-13 Recurring Entries List function, 12-11 recurring numbers entering in recurring entries, 3-20 refunding taxes, 5-40 regular terms, 11-34 Release Form Text Maintenance function, 11-53 sample, 11-56 screen, 11-53 report commands, 1-80 Down Arrow, 1-80 End, 1-80 Exit, 1-80 F7, 1-80 Home, 1-80 PgDn, 1-80 PgUp, 1-80 Right Arrow, 1-80 Tab, 1-80 Up Arrow, 1-80 Reports and Report Writer, 3-17 conventions, 1-75 including all information, 1-75 limiting information, 1-75 selecting information for, 1-75 Requisition Control file, 1-12 Resource Manager Data File Conversion function, 2-5, 2-7 Data File Creation function, 2-3 features of, 1-3 Install Applications function, 2-3, 2-5 Retainage entering amounts, 10-9 releasing and paying, 10-9 reversing material requisitions, 6-4 Right Arrow report command, 1-80 Right Arrow function key, 1-66 right-click IX-12 defined, 1-23 RMGCxxx file, 1-11 RMTDxxx file, 1-10 RMTHxxx file, 1-11 run codes assigning to recurring entries, 3-20, 11-25 defining, 1-13 definition, 3-20, 11-27 setting up, 3-20 S Sales Tax Breakdown window, 5-17 sales tax calculation, 3-18 Sales Tax Report function, 7-15 sample, 7-16 sample data changing to, 1-35, 1-40, 1-41 scroll region commands, 1-65 Down Arrow, 1-55, 1-65 End, 1-56, 1-65 Enter, 1-65 F3, 1-56, 1-65 Home, 1-55, 1-65 Ins, 1-56, 1-65 PgDn, 1-55, 1-65 PgUp, 1-55, 1-65 Tab, 1-56 Up Arrow, 1-55, 1-65 Select Payables dropping from check preparation, 10-18 function, 10-17 screen, 10-17 Serial Inventory Lookup function key, 1-64 pull-down menu command, 1-57 Serial Item file, 1-11 Set up application, 1-40 setting up Accounts Payable, 3-3 access codes, 3-22 backup schedule, 3-24 checklist, 3-7 codes and IDs, 3-3 information to gather, 3-3 initial balances, 3-21 Accounts Payable User’s Manual Index options and interfaces, 3-9 recurring entries, 3-19 subcontract information, 3-20 tables, 3-14 Shift+F2 menu, 1-69 Comments command, 1-70 Documents command, 1-73 History command, 1-72 Information command, 1-69 Shift-F1 function key, 1-54 Shift-F10 function key, 1-52, 1-66 Shift-F3 function key, 1-64 Shift-F4 function key, 1-64 Shift-F5 function key, 1-64 Shift-F6 function key, 1-57, 1-64 Shift-F7 function key, 1-57, 1-64 Shift-F8 function key, 1-57, 1-64 Shift-F9 function key, 1-52, 1-66 sorting alphabetical, 3-4 codes and IDs, 3-3 Start Over function key, 1-51 pull-down menu command, 1-51 tool button, 1-57 Start-style menu exiting from, 1-33 features of, 1-31 right-click menu, 1-40, 1-58 sample screen, 1-33 Subcontract actual amounts, 11-57 estimate amounts, 11-57 function, 11-57 Job Master file, 11-57 Reference (contract) number, 11-58 retainage amounts, 11-58 screen, 11-57 Subcontract Information setting up, 3-20 Subcontract List APSCx file, 12-17 function, 12-17 retainage information, 12-17 sample, 12-17 Subcontract Report Accounts Payable User’s Manual amounts retained, 13-9 contract amount, 13-10 cost type 6, 13-9 function, 13-9 gross billing, 13-10 net billing, 13-10 sample, 13-10 screen, 13-9 Subcontractor Release APCHx file, 10-30 function, 10-29 print a release form, 10-29 sample form, 10-31 screen, 10-29 Summary History deleting, 9-23 file, 1-12 function, 4-17 Item Inquiry screen, 4-19 screen, 4-17 specifying whether to keep, 3-13 Summary Invoice History Report detail history required, 8-21 function, 8-21 when to produce, 8-21 T Tab report command, 1-80 scroll region command, 1-56 Tables all companies, 3-14, 3-15 APGLxxx, 11-39 APPLxxx, 11-40 companies that use the same defaults, 3-15 company-specific, 3-15 D1099xxx, 11-42 deleting or rearranging information, 3-14 DFxxxx, 11-47 DISCxxx, 11-41 DMxxxx, 11-47 F1099, 11-43 FORMxxx, 11-44 function, 11-37 individual companies, 3-14 IX-13 Index MRGLxxx, 11-45 prefix and suffix information, 3-15 QCxxxx, 11-50 QDxxxx, 11-48 QExxxx, 11-48 QHxxxx, 11-48 QMxxxx, 11-50 QPxxxx, 11-48 QXxxxx, 11-50 QZxxxx, 11-50 screen, 11-38 setting up, 3-14 system selection, 3-16 terminal ID, 3-16 use of, 11-37 Tables List function, 12-13 Tax Audit Report detail history required, 8-19 function, 8-19 when to produce, 8-19 tax classes use of, 3-18 tax groups setting up, 3-18 use of, 3-18 tax identification number incorrect, 3-18 Tax Location Detail file, 1-10 Tax Location Header file, 1-11 tax refunds, 5-40 temporary vendors, 5-6 definition, B-1 terminal ID tables, 3-16 parameter, 1-4 Terms Codes definition, 3-17, 11-8, 11-27 file, 1-10 function, 11-33 screen, 11-33 toggle between halves of reports, 1-80 tool button Access Code, 1-35 IX-14 Application Information, 1-39 Calculator, 1-36, 1-58 change to/from Favorites, 1-36 Copy, 1-58 Delete, 1-57 Help, 1-38, 1-58 Maintenance, 1-57 MS-DOS prompt, 1-39 Online Documentation, 1-58 Paste, 1-58 Pop-Up Calendar, 1-58 PRO/5 Command, 1-39 Start Over, 1-57 Workstation Date, 1-35 toolbar function screen toolbar, 1-57 graphical menus, 1-38 totals purchases, 5-16 transaction, 5-4 Vendor Purchase History Report, 8-28 Transaction files, 1-11 Transactions automatic batch numbers, 3-12 before changing or deleting, 5-4 duplicate numbers, 3-13 entering, 1-7 function, 5-3 posting detail or summary, 3-12 Purchases screen, 5-13 refunding taxes, 5-40 Sales Tax Breakdown window, 5-17 specifying whether totals entry is required, 3-13 temporary vendors, 5-6 totals, 5-4, 5-16 using batching, 3-12 transactions copying recurring entries, 5-21 U Undo function key, 1-52, 1-66 pull-down menu command, 1-52 Up Arrow inquiry command, 1-63 Accounts Payable User’s Manual Index report command, 1-80 scroll region command, 1-55, 1-65 user’s manual conventions, 1-23 V Vendor Activity Report detail history required, 8-23 function, 8-23 sample, 8-27 when to produce, 8-23 Vendor Analysis Report function, 7-11 vendor class definition, 11-9 use of, 3-17, 11-9 Vendor Codes screen, 11-8 Vendor Comments accessing, 3-18 entering, 11-17 file, 1-9 inquiry window, 4-8 viewing, 4-4, 4-8, 4-10 Vendor Comments List function, 12-9 Vendor Detail List function, 12-7 Vendor file description, 1-9 setting up, 3-17 comments, 3-18 general information, 3-17 historical information, 3-18 vendor codes, 3-17 Vendor Labels function, 12-5 Vendor Purchase History Report function, 8-27 percent of total, 8-28 summary history required, 8-27 Vendor Reference List by Class function, 12-15 sample, 12-15 Vendors amount retained, 11-16 Accounts Payable User’s Manual classes, 3-17, 11-9 comments, 11-17 function, 11-3 general information, 11-4 history information, 11-12 holding invoices, 3-17 payment priorities, 3-17, 11-9 screen, 11-3 subcontract information, 11-15 temporary, 5-6, B-1 vendor codes, 11-8 viewing purchase and payment history, 4-5 viewing records, 4-3 Vendors and Invoices function, 4-3 sorting invoices, 4-6 Vendor Comment Inquiry window, 4-8 viewing vendor comments, 4-8, 4-10 verification button Abandon, 1-59 Proceed (OK), 1-59 Verify-exit mode pull-down menu command, 1-52 Verify-PgDn mode pull-down menu command, 1-53 View inquiry command, 1-63 viewing comments, 1-70 documents, 1-74 Void Checks effect on Bank Reconciliation, 10-39 effects on General Ledger, 10-39 function, 10-39 W Workstation date tool button, 1-35 workstation date entering in graphical menus, 1-35 Y year-end maintenance consequences of, 9-17, 11-12 IX-15