1
tm
Auto-‐Tune for Guitar Software Pack User Manual v2.14 Andy Hildebrand Jan 2013
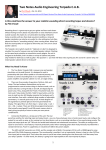
Contents Introduction ............................................................................................
Chapter 1 Guitars: Are They Mystery, or Are They Science? .....................
Chapter 2 The Development of ATG and the People Who Took Part .........
Chapter 3 Hardware Implementation .....................................................
Chapter 4 String Tune and Solid-‐Tunetm ..................................................
Chapter 5 Fret Control ............................................................................
Chapter 6 MIDI Control ...........................................................................
Chapter 7 Brief Instructions and User Tip Summary .................................
2 3 8 16 20 22 25 31
39 Introduction The electric guitar is a musical instrument. In the hands of a skilled guitarist, it is subtle and responsive. There are many playing techniques; strumming, plucking, palm muting, harmonics, plucked harmonics, hammer-‐on, finger mutes, string mutes, palm mutes, etc. The electric guitar is as complex, or more complex, than a violin or a saxophone. Auto-‐Tunetm For Guitar (ATG) does not get in the way of any of that. ATG passes through all the sounds and gestures of the player. It adds only two features: controlling pitch and compensating for the harsh tonality of the required hexaphonic pickups. ATG does not create sound. It only processes sounds created by the player. ATG is not genre specific and is equally helpful for rock, soul, jazz, C&W and others. I am Andy Hildebrand -‐ researcher, designer, development engineer and programmer of Auto-‐Tunetm and the ATG product. I am also a lifetime musician and composer. I have written this document to be the usual and obligatory User Manual. But it is more than that, as you will see. A Guide To This Document Definitely read this introduction -‐ oh, you are! This is a quick introduction and it discusses the basic concepts and technologies of ATG. If you are wanting to do the minimum reading possible, read this introduction, then proceed directly to Chapter 7 "Brief Instructions and User Tip Summary". That Chapter summarizes Fret Control and MIDI control via the "MIDI Designer Pro" iPad application. It also clues you in to the other magic this guitar can do. Chapter 1 is about the science and Chapter 2 is about the development and people. These are really cool chapters because they de-‐mystify guitars and show you that this product was developed by, and for, musicians. Chapter 3 is a short description of the hardware involved. Chapter 4 is the guts: This guitar is about intonation, and Chapter 4 explains exactly what is involved with the String Tune and Solid-‐Tunetm features. Chapters 5 and 6 are about controlling the features using Fret Control and MIDI control. 3 Basic Features and Terminology Musical Settings: There are two means ATG uses to control an out-‐of-‐tune guitar. The first is "String Tune" invoked by strumming the open strings, then pressing the String Tune button. A scooping sound occurs if all six strings are tuned. Otherwise, only the strings meeting a loudness threshold are tuned. String Tune can be used at any time, even during Alternate Tunings and Virtual Capos. The second pitch control is Solid-‐Tunetm intonation. ATG constantly monitors the pitch of each string. If the pitch of the string is close to a note, that pitch is tuned exactly to the note. If not, the pitch is allowed to not be on the note, allowing strings to be bent. Solid-‐Tunetm intonation thereby corrects for excess finger pressure on a string, non-‐ideal setup, geometry errors of the guitar and string pitch change after a pluck. Other technologies to change pitch are Virtual Capos, Alternate Tunings and Doublings. Examples of Alternate Tunings are DADGAD, Open E, Baritone, etc. Doublings refers to the fact that each processing channel (there are six, one for each string) can produce two string sounds pitched at different pitches. Examples are Octaver and Twelve String. So, for example, you can create a Twelve String in Drop-‐
D tuning. Why Virtual Capo is Really Nice With Virtual Capo, you can learn a song using convenient fingerings on open strings. You never have to learn different keys for performance issues. Nor do you have to struggle with having all your "landmarks" shift when using a physical capo. Another reason Virtual Capo is nice is to do down tuning for heavier music, while still having strings at standard tension. Virtual Capos are stored in Presets, letting you change keys easily in the middle of a Song. Want to move an entire gig down a few half-‐steps? Use the Global Transpose function without having to change your Virtual Capos. There are two varieties of Pitch Bend. The first is a Pitch Bend MIDI control value. The result of this is controlled by a Pitchshift Configuration MIDI control which allows bends of octave up, octave down and a -‐2 to +2 half step for vibrato. The second is a standard MIDI Pitch Bend message which allows fine resolution Pitch Bending from one octave down to one octave up. 4 There are a variety of physical models built from different standard guitars and some vintage guitars. I modeled the pickup placement and the pickup selector (as per Charles R. Sullivan in 1990) as discussed below. These models are named generically (but I trust that you’ll be able to figure out what is what). The generic names include Modern Humbucker, Nashville Single Coil and California Single Coil. There are some global settings. These are settings that remain in effect across preset selections, power cycles and Feature Pack changes. They are Global Gain, Global Transpose, Global Detune and Global Tone Offset. Global Transpose is like Virtual Capo but Capo is a preset parameter and Global Transpose is a Global parameter. Global Tone Offset affects what the tone control does. More on these below. Controlling the ATG: I have mentioned MIDI above. MIDI is an abbreviation of Musical Instrument Digital Interface. Originally, MIDI was designed for a keyboard to control a synthesizer. On ATG, MIDI is used to set control values. This can be done with an iPad program we support, or you can program your own MIDI foot switch, MIDI sequencer, or any other source of MIDI Control Change, Program Change and Pitch Bend messages to control the ATG. MIDI allows control of all ATG parameters. Some controls can only be set by MIDI. We use a second means to control many of the parameters: Fret Control. Fret Control uses the guitar’s fret board to access Virtual Capos, Tunings, Doublings, Global Transposes, Models and Presets. Presets can be read or written using Fret Control. A third means to control the ATG is with Presets. The Essential Pack has 16 presets, Pro has 32 and Complete has 64 (more about those later). Presets can be written and recalled using MIDI. Also, using Fret Control, you can save and recall twenty-‐one presets (16 in Essential Pack) using string 1 (the high E string). A preset recalls Solid-‐Tunetm on/off, Tuning, Doubling, Virtual Capo, Model, and Pitch Shift Configuration (the configuration -‐ not the actual pitch shift). Presets do not recall Tone, Pickup Select, Global Gain, Global Detune or Global Transpose. 5 Software and Hardware Organization ATG is DSP (Digital Signal Processing) hardware and software that is installed in a guitar. The standard passive pickups, pickup selector, tone control and volume control are included in the design, so that if you run out of battery power, you can switch to the passive system. At this writing, the Peavey AT-‐200 guitar is commercially available with basic software functionality. Soon, we will be introducing a Luthier kit that allows the technology to be installed in most guitars. ATG software: ATG software is organized as Feature Packs. The guitar holds six Feature Packs, one for each string. To activate a Feature Pack, you turn off ATG, pluck a single string and then immediately power-‐on the guitar. If a feature pack has been installed on that string, then it is activated. Otherwise, the previously activated feature pack is activated. On the web site, www.autotuneforguitar.com, you can download several feature packs for free to try out some of the features and ensure your computer connection and MIDI interface is functioning correctly. You can also purchase and download available Feature Packs: Complete, Pro and Essential. More about them later. Feature Packs Up to six Feature Packs can be stored in your guitar. These correspond to the six strings of your guitar. You can use the Guitar Manager on the Auto-‐Tunetm for Guitar web site to move a Pack(s) from the guitar back into your account. If you sell your guitar, any Feature Packs in it go with the guitar and you loose ownership of them (just like programs on a computer). To access a different Feature Pack, turn off ATG on your guitar, pluck the corresponding string, then immediately power on the guitar. Be careful, if you pick more than one string, it won't work. If you power on without plucking a string, the most recent Feature Pack is restored. You can also change a Feature Packs in 200 milliseconds during a performance using MIDI. 6 ATG hardware: The hardware starts with a hexaphonic pickup to record the six strings in six separate channels. Because channel separation is an issue, miniature mag pickups, like the Roland GK-‐3 are required. Piezo pickups are also possible, but care must be taken to assure they have satisfactory channel separation. The guitar's pickup selector and tone control are modified to report their positions to the processing board. The on/off button switches power to the processor and selects audio source, which goes to the volume control. On the AT-‐200 the on/off is part of the tone control. The volume control has an integrated momentary switch that is used as the “String Tune” button. Your guitar's ¼ inch jack gets the selected audio source – passive or ATG. Audio is also available through the 8 pin DIN connector via the Peavey AT-‐200B breakout box. A LED (Light Emitting Diode) is used to show power-‐on and is flashed rapidly for a couple of seconds when you do a “String Tune”. It flashes slowly when the batteries get down to their last hour. Battery life is approximately 10 hours for alkaline and 20 hours for lithium's. Always use all alkalines or all lithiums, never mix them. Also, always replace all batteries at the same time. If you disobey these rules, you need help. 7 Chapter 1 Guitars: Are They Mystery, or Are they Science? Short Answer: YES WARNING: this chapter is mostly science content. You may not want to go here. Unless of course you are a guitar player. Then you probably should go here. One of the earliest qualities I noticed about the world of guitars and guitar players was the large amount of mystery and hearsay about how guitars work and what affects their sound. Practically every guitar player I talked to had a different opinion of what was important, from the wood in the fret board to non-‐uniform magnetic flux density to the temperature of the cable. Even experts provided divergent opinions. How the guitar works is important to me for two reasons. First the nature of the waveforms affects how I detect and track pitch. Second, the nasty sound of the hexaphonic pickups needs to be processed to give a more pleasing result. Third, the pitch behavior of the instrument affects how I design pitch correction. And I am a research scientist, so my first duty is off to the books... The Vibrating String and Pitch Detection The big breakthrough in mathematical physics occurred with Sir Isaac Newton inventing integral and differential calculus and publishing this in his book Philosophiæ Naturalis Principia Mathematica in 1687. Isaac was an edgy kind of guy with long hair and he was really, really, really smart. Maybe as smart as Einstein. Based on this new mathematics, the wave equation was initially studied by Johann Bernoulli in 1728 as the equation of the physics for a vibrating string (and other vibrating things as well). In its simplest form, the wave equation concerns a time variable t, a spatial variable x and a scalar function u = u (x, t), whose values could model the height of a string. The wave equation for u is 8 where (KL2)/M is the square of the propagation speed. (The fancy 2's are partial derivatives.) Using the means of analysis at the time, the solution to the wave equation was initially figured out to be combinations of vibrations called modes: Figure 1: Normal modes of the vibrating string. We know these modes as the fundamental, first harmonic, second harmonic, etc. An enterprising high school student these days can figure out that if you put a pickup on such a string, the frequency response from the amplitudes of the nodes at the location of the pickup will be the same shape as the frequency response of a comb filter and that the comb filter delay parameter is related to the frequency of vibration and the position of the pickup. But frequency doesn't specify phase, which is the second ingredient to assure a comb filter is at work. This is not enough for me. I need to understand the shape of the waveform in time, starting with the pluck. I also need to know how to create a physical model of pickups. To the rescue comes Jean-‐Baptiste le Rond d'Alembert, my friend and the ultimate inventor of AGT. Jean was a French mathematician (but don't hold that against him). He was a cool guy and a musician as well as a mathematician. He lived from 1717 to 1783 and discovered a new family of solutions to the wave equation. Specifically, when a string is tied down at both ends and when the initial velocities of the string are zero, such as when the string is plucked, then the motion of the string is always of the form: u(x,t) = f(x + ct) + f(x -‐ ct)
where x is distance down the string and t is time. f() is called a travelling wave. At the bridge, x == 0, u(0,t) = f(ct) + f(-‐ct) = 0 requires that f() is odd symmetry. At the nut, x = L, u(L,t) = f(L+ct) + f(L-‐ct) = 0 requires the function has period 2L. The period 2L corresponds to one complete vibration of the string. 9 You can see these vibrations in motion: 1) Look up "wave equation" at www.wikipedia.com. You will see an animation of d'Alembert's solution at the top of the page. 2) Find a telephone handset connected to its base with one of those curly cords. I know one of these antique instruments may be hard to find, but try. Now put the handset to your face as if you are talking on the phone, stretch the cord out some and give it a pluck. You will see the wave travel down the base, bounce and come back!!! Now I'm getting the answers I need. This tells me the vibrations of a plucked guitar string ALWAYS become periodic after one cycle. Here is an example of a guitar pluck: Figure 2: The first few cycles of a typical string pluck You have to know the period of the data to change the pitch without artifacts. Because period can be computed from two repeated cycles, the Auto-‐Tunetm algorithm knows the pitch by about the middle of the graph above. But not from the pluck. ATG is so sensitive, it usually detects the period from the faint sound generated when your finger presses the string against the fret! 10 The D'Alembert solution and Pickup Modeling The D'Alembert solution is perfect and works well in the world of real physics. But sticking that data into a computer and building algorithms is not as obvious. There are some restrictions to putting data in a buffer and calling it distance along a string. In these regards, there were two important academic papers published in 1990. First: "Efficient Yet Accurate Models for Strings and Air Columns using Sparse Lumping of Distributed Losses and Dispersion", Julius Orion Smith III, CCRMA, Report No. STAN-‐M-‐67, Stanford University, Dec 1990 This article shows the time and space ("Lumping") sampled model of an infinite string and a discrete simulation of a guitar string as reflected inverted waves at bridge and nut in a circular buffer of data whose length corresponds to the period of the data. Dr. Smith presents the necessary and sufficient conditions to allow the spatial buffer to be constructed from PCM (Pulse Code Modulated) sampled data (digital audio). The second paper is: "Extending the Karplus-‐Strong Algorithm to Synthesize Electric Guitar Timbres with Distortion and Feedback", Charles R. Sullivan, Computer Music Journal, Vol 14, No. #3, Fall 1990, MIT The Sullivan article shows the simulation of the pickup from the lumped system circular buffer also published by Smith. As Sullivan states and shows in his Fig. 12 and 13, this results in a comb filter added to the delay line, having time delay equal to the velocity of D'Alembert's traveling wave and distance from the pickup to the bridge and back to the pickup. Because Sullivan is the earliest reference to the physics behind the comb filter that I can find, I give him credit for the invention: Hurray for Charles Sullivan!! He is the guy who invented physical modeling of guitars and their pickups!! And hurray for Auto-‐Tunetm, because to accurately do the arithmetic using audio data input, you must know the period of the data, which Auto-‐Tunetm does very well. And there you have it, how to simulate pickups, all from Newton, Bernoulli, D'Alembert, Sullivan, Smith and Auto-‐Tunetm. 11 What's really Happening? Physics isn't necessarily the whole truth. The wave equation is created from simplified assumptions, like no friction from the air. Ultimately the wood on the fret board will make some difference. And certainly, what we think we might hear can become the reality we live in. On the other hand, as you will see next, what we've been clearly hearing all along is sometimes ignored (at least by me). But as a research scientist my second duty is to measure, then maybe do something about it. Instant QUIZ: What was my first duty? Amplitude Decay: One measurement is, in part, obvious in Figure 2, above. That is, the string is loosing high frequencies rather quickly. I'm not referring to the first non-‐repeated cycle, rather, the subsequent cycles. The lost frequencies you see in Figure 2 are too high to be audible. But the effect continues, over time, that the highs are lost quickly, the lows are lost, but less quickly. Eventually even the fundamental fades away to nothing. Is it energy lost in the pickup system? Is it the friction in the air? Is it the guitar? Perhaps you can think of some testing to find out. OMG, now you are a scientist! Decay and amplitude loss are not predicted by the original wave equation, but decay was studied and simulated by Julius Smith is the citation above, as well as many others. 12 Pitch Decay: The problem is that after you pluck a string, the pitch is initially sharp and then decreases in pitch. Here is a graph: Figure 3: Decay of pitch over time This is a low E string pluck (about a whole step flat -‐ nothing is in tune around here) sustained for about 12 seconds. You can see the string amplitude in white. The horizontal lines are pitches in half notes. The top line is F1, the second E1, etc. The dark green curve is the actual pitch of the string. It starts midway between D1 and D1# and gradually settles to a pitch close to D1. Specifically, the pitch is going from D1 + 44 cents to D1 + 6 cents. The pitch after one second is D1 + 24 cents. This pitch decay is at a different rates and amounts for the different strings. This phenomenon is why no guitar can ever be built that is always in tune. Even with itself. For example, the pitch of the open B string is also the pitch of the second harmonic of the open low E. Because these strings go flat at different rates, when you strum them, they never stay in tune, even with each other. BTW, these graphs and measurements were created with our Auto-‐Tunetm plugin which works just great on guitars and other instrument 13 Figure 4: First fix to Solid-‐Tunetm: (-‐20 to +25) The graph in Figure 4 is similar to the test in Figure 3. This time I changed the Solid-‐
Tunetm flat threshold from -‐5 cents to -‐20 cents. With this setting, if the String Tuned pitch is within (-‐20 to +25) cents it is set exactly to the correct pitch. The String Tune button was pressed 1.1 seconds after the pluck. The pitch during the decay went to E1 -‐ 20 cents. Solid-‐Tunetm was engaged near the end of the decay and the intonation was corrected. A second pluck shows the system working as intended. But the (-‐20 to +25) change is not without issue. Bending started pitch shifting at NOTE + 25 cents as it had before, but the bend gets to the next note too soon. So much so that the bend felt unnatural. I eventually compromised on a Solid-‐Tunetm range of (-‐15 to +20) cents. 14 Processing Latency: I often get the comment from ATG users there is no latency. Actually there is. There is about 50 samples of latency from the ADC and DAC converters. (That would be Analog to Digital and Digital to Analog Converters.) 50 samples is about 1 millisecond (.001 seconds). There is no latency from the comb filters because they have an impulse response that starts at zero. Changing the pitch is another matter and it is easy to understand. Changing pitch ultimately involves compressing cycles and adding cycles to make the pitch sharper or stretching cycles and removing cycles to make the pitch flatter. When you place the input pitch side by side with the output pitch, you would see that there is no relationship between the cycles -‐ NOT. The processing algorithm guarantees the output is no more than one cycle delayed from the input. At one cycle delay it is time to drop a cycle if going flatter (which brings it to zero delay) or the algorithm has just repeated a cycle if going sharper (changing from zero to one cycle delay) after which the delay decreases. Add 10 samples for a brief crossfade, and there you have it. No human has been documented to perceive one cycle of latency, at any pitch. Hence latency that varies from (50 samples + 10 samples) to (50 samples + 10 samples + one cycle) is not perceived. 15 Chapter 2 The development of ATG and the People who Took Part Two and a half years ago, I knew nothing of guitars. Most of what I have learned, I learned from other people. I am an implementer of ideas and most of the ideas come from other people. The ones that don't, do come from the general conversation around us, in which I am a single voice. The birth of an idea: Occasionally, I walk around the office to practice my development of social skills. If I sometimes discussed our Auto-‐Tunetm market place, I would mention one reason we are successful is the vocalist is the second most popular instrument. Second only to the guitar! Duh. I said that for years. The skull never opened. The light never came in. It was only while I was porting Auto-‐Tunetm to a new DSP processor did I ask myself how many Auto-‐Tunetms could go on that chip? A little calculation ... hummm, 6! Wait, Wait ... Wait ... no light. I was talking with with Fred Poole, from Peavey, about the ability of putting six instances of Auto-‐Tune on a chip when we were discussing a different partnering opportunity and he said "Oh, that's how many strings on a guitar." !
Finally,... light!! That was in September, 2010. I wired a cheap hex pickup to a $100 used Strat, ran it into Pro Tools and used six Auto-‐Tunetm plug-‐ins to see what it did: it sounded GREAT!! So by October, I had wired the manufacturer's development board to the pickup and got the six Auto-‐Tunetms processing data on the chip, and that worked fine too. Then I made my second good move (my first was talking to Fred Poole). I hired Marc to design and build me a board. Marc is a genius. He's a hardware guru and has a lot of audio industry experience. He's been doing programming and hardware for as may years as I have and the together, we total about 80 years of hands on experience. Marc designed me stuff I haven't had time to productize, like a tremolo bar. In November (one month) he completed the design of the first ATG processing board, called the LB6, including all purchasing, fabrication and manufacturing information. By December he had the board fabricated, purchasing completed and assembly completed. He checked out the power-‐to-‐ground connections (hopefully 16 open) and power supply voltages. I received the first board about January 10, one week before the NAMM 2011 trade show, loaded the software, found a single problem that Marc corrected in one day, and it all ran the second day. The only feature programmed at the time was String Tune. For those of you who don't understand, this is equivalent to one guy designing and building an iPad from nothing in about three months. Thank you to Marc!!! Here is the LB6 (smaller than a business card): Figure 5: LB6 board This circuit board inputs six channels of audio from the guitar strings and outputs one or two channels of audio. The largest chip is a Freescale 56724 processor with two cores, each capable of sustained 250,000,000 multiply-‐adds per second (that is 250 million), cost about $5 in quantity. In 1976 I was a Ph.D. research engineer at Exxon when a Cray or Amdahl Super Computer cost about $1,000,000 per 5 million multiply-‐adds per second. And that in 1976 dollars! If those prices persisted, what would the LB6 be worth today? Mummm, ... 250M multiply-‐adds * 2 cores / 5M Cray multiply-‐adds * $1M Cray dollars * 7 inflation = $700 Million dollars ... about the cost of a wild cat oil well in the Gulf of Mexico. Except for BP, which paid about $30 Billion. Before that NAMM 2011 show, I hired a guitar player to do demos at the show. We showed to a lot of people including several artists and most of the major guitar manufacturers. Peavey instantly saw the value of a self-‐tuning, self intonating guitar and agreed to immediately begin the design of what became the Peavey AT-‐200. By the middle of 2011, I had added Solid-‐Tunetm, Guitar Models, Alternate Tuning and Virtual Capo. I developed a digital encoder and control interface and 17 programmed encoders to control Models, Alternate Tuning and Virtual Capo. I added MIDI controls and changed to a decent pickup. At this point I have a guitar that has very low distortion, the ability to tune strings from String-‐Tune, and the ability to keep the strings in tune with Solid-‐Tunetm, up and down the neck, independent of geometry issues or finger pressure. The guitar also provided physical models. I had total control of the pitch: I added Alternate Tunings: Drop D, Double Drop D, DADGAD, and some open tunings. I also added transposing the low E down an octave (at the suggestion of my CFO, Operations manager and Corporate Counsel, Georganna). I added a second channel to each string so that I could have a 12 String and an Octaver. I also added a full two-‐octave Virtual Capo, an octave up and an octave down, as well as Pitch Bend that can also go up and down one octave. If you're into self abuse, try playing a harmonic, pitch bend up an octave, then capo up another octave. I customized several guitars with ATG technology and gave them to interested guitar manufacturers. I hired Henrik Bridger, who is an experienced Luthier and guitar builder. He is a bass player, and when he speaks, you listen (in a nice way). Henrik Bridger is known in the office as Honey Badger, which is funny because his antithetical to the "he don't care" rodent. He has given us a lot of excellent advice on guitars. Together, Henrik and I customized ten guitars for three companies for the 2012 NAMM. Peavey and Parker showed ATG guitars at NAMM and Peavey has moved forward to produce the AT-‐200 which was released in November 2012. In the meantime, Marc had revised the circuit board to reduce costs, run on much less current, and support piezos and mag pickups. I must say, the guys at Peavey have spent many hours playing, building and selling guitars. I thoroughly enjoyed spending time with Hartley Peavey. Hartley is made of steel. He is smart and intuitive, and way too modest. Hartley's General Manager, Fred Poole, is a visionary. He predicted this instrument would do very well. He built a lot of AT-‐200 guitars to ship the first day -‐ but he was wrong there: when he shipped those guitars, he had 4 times that backlog. Michael Smith is a bulldog of a product manager. Both Michael and Fred are guitar players, and they knew exactly what their guitar should do. We all made it happen on schedule. I continued software refinements. But I was light on guitar players, and I wanted some truly seasoned and aggressive players to beat up these guitars in every way possible. I hired Eric Barnett. Eric is a musical prodigy. He started out as a violin player and graduated to be an award-‐winning guitar player. You can see him on our home page video at www.autotuneforguitar.com. Check out Eric's web site at www.pointsnorthband.com. Eric has been invaluable at isolating extremely detailed issues in the software and has also contributed strongly to create features that are useful to players. I trust his judgment and many features we have are his ideas. 18 Another gift has been Robin Macomber. Robin is the demonstrator in the feature demos on the website. He is also a guitar teacher and has many students and a great website for guitarist: www.navigatingmusictheory.com. Robin's uncanny gift has been to ferret out any digital artifacts the software could create. I don't know how he does it, but it usually involves doing everything other than plucking strings. Thank you Robin! Getting close to real time, I implemented several fresh ideas. These were: The Doubling options were created by moving the multi-‐channel options out of the Alternate Tunings menu. As a result, you can choose a 12 string and tune it to an Open E, etc. Fret Control was suggested by a user on the www.autotuneforguitar.com forum. I programmed that after which Marc politely reminded me he had that idea a year ago. This is what happens when you get old like me. Eric created global settings. These are settings that remain in effect across preset selections, power cycles and Feature Pack changes. They are Global Gain, Global Transpose, Global Detune and Global Tone Offset. These settings are discussed below. The www.autotuneforguitar.com web site was designed and built by Jon Cattivera at www.sleeplessmedia.com (great name, isn't it?). Our employee, web manager and database guru, Trish Nielsen, designed and programmed our web store and guitar download software in response to my grueling requirement that any completed transfer has zero errors. Finally, involved from the beginning, is Marco Alpert who does the nitty-‐gritty marketing work at Antares. Marco has been with us since 1998. He has been a great person for product ideas and messaging to the user. Lately he has taken over implementing www.autotuneforguitar.com. He has also designed and maintains iPad control files using the "MIDI Designer Pro" application to allow detailed control of the guitar. He is working on a special new guitar product that I can't tell you about. Thank you, Marco!
19 Chapter 3 Hardware Implementation Pickups The nature of the ATG processing is that it requires one signal from each string. This limits us to hexaphonic pickups. There are two varieties, piezo and magnetic. Different electrical interfaces are required for each of these varieties, so as a consequence, there are two varieties of circuit board. There are also differences in how the pickups must be processed. The magnetic pickups have a decrease in low frequency response that must be restored. The piezos output D.C. voltage that changes when the palm hits the string, producing distortion when changing pitch. These ultra-‐low frequencies are reduced by filters. Still, you have to be careful not to actually put your palm on the piezo, it makes a scratchy noise. User Tip #1 Using ATG guitars with piezos, when palm muting be aware that the piezo pickup will make noise if you touch it, so make sure your palm sits in front of the pickup/bridge at all times. You may have to adjust your hand slightly forward from your typical palm muting technique. The most important consideration with pickups is potential distortion created by the algorithm changing pitch. What happens with hex pickups is that some sound from neighboring strings gets into each string's data. The cross-‐channel sounds have different periods than the primary sound of the channel, and dropping or repeating cycles to change pitch creates discontinuities in the cross-‐channel sounds. This results in distortion. The amount of this distortion depends on how much channel separation the pickup has and how much pitch shifting is occurring. I carefully test pickups using specific tests to measure channel separation in order to qualify what pickups are used. Specific piezo pickups and miniature magnetic pickups, such as Roland’s GK-‐3, are supported. ATG Guitar Built-‐in Hardware 20 Pickup Selectors: Our pickup selectors have two parts: one for the standard passive pickups and one to report its position to the processor board. There are three and five position selectors that that work with ATG. Tone Control: A tone control with two potentiometers: one for the passive pickups and one to report its position to the processor board. Volume Control: A volume control with a single potentiometer for both passive or ATG audio and a momentary switch that is used as the String Tune Control. Power Switch: An on/off switch that switches power on the ATG and selects audio source. On the AT-‐200, this is built into the Tone Control. Pressing it down powers the ATG and connects ATG audio to the guitar's ¼ inch output jack. LED: A LED (Light Emitting Diode) that is visible to the player. This is used to indicate power-‐on and is flashed rapidly for a couple of seconds when you do a “String Tune”. It flashes slowly when the batteries get down to their last hour. Battery life is approximately 10 hours for alkaline and 20 hours for lithium. DIN Connector: An eight-‐pin DIN connector that handles MIDI IN, MIDI OUT, Audio Out and 9V DC power in. Audio is available through the 8-‐pin DIN connector via the Peavey AT-‐200B breakout box. 21 Chapter 4 String Tune and Solid-‐Tunetm String Tune Summary: The first way ATG controls an out-‐of-‐tune guitar is "String Tune," invoked by strumming the open strings, then pressing the String Tune button. A “scooping” sound occurs if all six strings are tuned. What is happening is this: the processor continuously listens to each string and if there is any periodic waveform, it detects it and follows the pitch. This happens about eight thousand times a second. (That's correct: 8,000 times a second.) That's about once every five audio samples. I say "about" because the system sometimes has something else to do, like process a button press or interpret MIDI data. In those cases, the pitch update might take six samples. Big deal, eh? (That's "eh?" with a Canadian accent -‐ please). Anyway, when you press the String Tune button, the processor takes the current natural pitch of the string and compares it to the standard E1, A1, D2, G2, B2 and E3 pitches. It instantly computes and applies a pitch correction coefficient for each string to change that pitch to the standard. This will happen independently of any Alternate Tuning, Virtual Capo setting or Solid-‐Tunetm pitch change currently in effect. Almost. The DSP also follows the amplitude of each string. A string must have a specific minimum amplitude to get tuned. If you hear the scooping sound, that tells you the guitar has heard all six strings and has tuned them. In that case, the guitar also flashes the LED for couple of seconds in case you want to turn the Volume down to not broadcast the scoop. If the amplitude test fails some strings, the remainder are tuned anyway, and no scoop and no LED flashing occurs. User Tip #2 If you don't like the scooping sound, turn down the volume, strum, press and watch for the LED flash. Just one more annoying little detail. With the original shipping Peavey AT-‐200 software, the String Tune happened immediately when you pressed down the button. This can be somewhat annoying if you accidently bump the button in the middle of a concert. So I changed the software to execute the String Tune when the 22 button is released after about 100 milliseconds (that's .1 seconds). This approach also plays well with Fret Control, which you will read about later. Having Fun With String Tune: Craig Anderton wrote a very positive and in-‐depth review of the Peavey AT-‐200 for the www.harmonycentral.com website: "Peavey AT-‐200 Guitar with Antares Auto-‐Tunetm". In http://www.harmonycentral.com/docs/DOC-‐2786, Craig explains: "Auto-‐Tunetm works based on the pitch at the nut, but you can fool it into thinking the nut is somewhere else. For example, suppose you want a dropped D tuning. Fret the second fret on the sixth string (F#), strum the strings, and initiate tuning. Auto-‐Tunetm will “think” the F# is the open E, and tune F# to E. So now when you play the E open string, you’ll hear a D as the string is transposed down two steps. "It gets better. Want that heavy metal drop tuning? Barre on, for example, the fourth fret while tuning, and now whatever you play will be transposed down four semitones. Being a wise guy, I tried this on the 12th fret and—yes, I was now playing bass. What’s more, it actually sounds like a bass. Say what? Or try this: fret the 12th fret on only the 5th and 6th strings. Now when you play chords, you’ll have one helluva bottom end. The [Peavey] manual gives suggested fingering to create various alternate tunings—open G, baritone, DADGAD, open tunings, and the like." Because the ATG applies the String Tune result independently of Alternate Tunings and Capo, you can also use fretting with String Tune to modify those tunings as well. The only problem is if you press a little hard during String Tune, the string will be slightly sharp and the resulting tuning will be slightly flat. User Tip #3 When using fretting with String Tune, be careful to press down lightly at the fret to minimize having the results be flat. User Tip #4 When using fretting with String Tune, Fret Control will no longer function as documented. The frets will be shifted. 23 Solid-‐Tunetm Summary: The second intonation correction is Solid-‐Tunetm intonation. This works automatically, unless you disable it (humor). After String Tune, the ATG is constantly monitoring the pitch of each string (8,000 times a second). If the pitch of a (String Tuned) string is close to a note, that pitch is tuned exactly to the note. If not, the pitch is allowed to not be on the note so you can bend strings. Solid-‐Tunetm intonation thereby corrects for finger pressure on a string, non-‐ideal setup, geometry errors of the guitar, and (as discussed in Chapter 1) the gradual pitch change of strings decreasing in pitch as they sustain. User Tip #5 Solid-‐Tunetm does wonky things (engineering lingo) to pitch if String Tune is not done, or if a string changes its natural pitch too much. Do a String Tune frequently after changing strings. 24 Chapter 5 Fret Control Sometimes the world changes gradually around us and we fail to recognize that our old ways are no longer the best ways. -‐-‐ Dr. Andy I had MIDI controls working fine, but MIDI is complicated. Marc had created Fret Control. But the pitch detection was not completely reliable and made octave errors typical of auto-‐correlation based methods, including Auto-‐Tunetm for the voice. In terms of pitch correction, octave errors mean nothing, so nobody knew that was happening. I gradually discovered and leveraged the phenomenon that a guitar string has repeated cycles starting no more that one period of vibration after a pluck (see Chapter 1: Guitars: Are They Mystery, or Are they Science?). This allowed me to reliably detect the pitch of a string without making octave errors. And so I went on for a long time. Then a user on the forum suggested Fret Control. Duh, ... of course. Here's how it works. First, do a String Tune with open string (no fretting). Anytime after such a string tune, hold down the String Tune button and, while continuing to hold down the button, pluck a note. A setting will change (details below). To avoid issues with unintended "plucks", like a finger hitting a fret or a pick hitting a string, the pluck has to be a strong enough amplitude. User Tip #4 (repeated) When using fretting with String Tune, Fret Control will no longer function as documented. The frets will be shifted. User Tip #6 Be careful with Fret Control plucking. As you get casual, you will have plucks fail because of the amplitude threshold. Then you will get an unwanted String Tune with your finger down on a fret. Once the pluck is accepted as a Fret Control event, then no String Tune will happen when you lift the button. 25 While the String Tune button is down, you can pluck multiple notes, even quickly in a strum, to set multiple settings. Here is the assignment of parameters to strings: String # Function High E B G D A Low E 1 2 3 4 5 6 Presets Capo down Capo up Doublings and Global Transpose Alternate Tunings Models Table 1: Fret Control String Assignments Please note that Virtual Capo, Doubling, Alternate Tuning and Model are stored in Presets. However Global Transpose will remain in force for eternity, or until you change it again. Yet another note: The various settings are different for each of the three tiers of Software Feature Packs: Essential Pack, Pro Pack and Complete Pack. Guitar Models (String 6 -‐ low E string): I used a number of guitars to develop the guitar modeling in the ATG. Although I do not publish the specific names of the guitars, you will recognize them. The California Single Coil has a five position pickup selector corresponding to combinations of three pickups. The five positions are neck, neck+middle, middle, middle+bridge and bridge. Most of the remaining guitars have a three position pickup selector as combinations of two pickups. The Junior P-‐90 and Bass guitar models only have a single pickup model. Accessing modeled pickup selector positions is done in three ways: Five valued MIDI pickup selector input, and A five position guitar pickup: These directly access the five position models of California Single Coil. For three position models, these access neck, neck+bridge, neck+bridge, neck+bridge, and bridge. A three position guitar pickup: These access the California Single Coil pickup models neck, middle and bridge. These directly access the three positions of the three position models -‐ neck, neck+bridge, and bridge. 26 The Acoustic modeling uses the pickup selector to select three models corresponding to kinds of strings and microphone positions. Try them out to learn the sounds. Fret Complete Pack Pro Pack Essential Pack 0 1 2 3 4 5 6 7 8 9 Modern Humbucker California Single Coil Acoustic Nashville Single Coil Mini Humbucker P-‐90 Modern Humbucker California Single Coil Acoustic Modern Humbucker California Single Coil Acoustic Nashville Single Coil Mini Humbucker P-‐90 Junior P-‐90 Vintage Humbucker Vintage Lipstick-‐tube Bass Table 4: Low E-‐String Guitar Models Alternate Tunings (String 5 -‐ A string): These are Alternate Tunings. They are widely adopted tunings, originally derived from retuning individual strings. Because of that, their departures from the standard tuning don't go very far. Yours truly had the bright idea that since ATG is unfettered by physical constraints, I could invent unusual tunings, like a augmented seventh chords or big intervals (big intervals sound awesome). Then a guitar player (gently) explained to me that guitar players have developed chord fingerings for THE Alternate Tunings, so to change the notes would be a problem. Darn. 27 So, here are the tunings: Fret Complete Pack 0 1 2 3 4 5 6 7 8 9 10 11 12 Standard Single Drop D DADGAD Open E Open A Open G Open D Open E minor Open A minor Open D minor Double Drop D Bass Bass-‐Standard split Pro Pack Essential Pack Open Fret Notes Standard Single Drop D DADGAD Open E Open A Open G Open D Open E minor Open A minor Standard Single Drop D DADGAD Open E Open A E1 A1 D2 G2 B2 E3 D1 A1 D2 G2 B2 E3 D1 A1 D2 G2 A2 D3 E1 B1 E2 G#2 B2 E3 E1 A1 E2 A2 C#2 E3 D1 G1 D2 G2 B2 D3 D1 A1 D2 F#2 A2 D3 E1 B1 E2 G2 B2 E3 E1 A1 E2 A2 C2 E3 D1 A1 D2 F2 A2 D3 D1 A1 D2 G2 B2 D3 E0 A0 D1 G1 B1 E2 E0 A1 D2 G2 B2 E3 Table 3: A-‐String Alternate Tunings Doublings and Global Transpose (String 4 -‐ D string): Doubling refers to having one or more strings that split into two virtual strings where each string can vibrate at a different frequency. No Doubling: (obvious -‐ power on default) Twelve String 1: Is a twelve string guitar where the second channel strings are slightly out of tune. Octaver Down: Is similar to a twelve string but all the second channels are down one octave plus a bit out of tune. Seven String 1: The low E string is doubled down a perfect fifth. Fifth Up: All strings are double up a perfect fifth. Seven String 2: The low E string is doubled down a perfect fourth. Fourth Up: All strings are double up a perfect fourth. Octaver Up: Is like Octaver Down, but the second strings are up an octave and slightly out of tune. Twelve String 2: Is a twelve string guitar where the second channel strings are very flat. 28 Global Transpose was created by Eric to solve the following problem: Eric had programmed different Presets, including Capo changes, for his gigs. At one concert his singer showed up with a sore throat and announced everything had to be brought down a couple of whole steps. So there he was with half a dozen Presets he had to rework during the hassle of getting everything else done. So he invented the variable: Global Transpose. Globals are settings that remain in effect across preset selections, power cycles and Feature Pack changes. You can set Global Transpose from Fret Control on the D string. Fret Complete Pack Pro Pack Essential Pack 0 1 2 3 4 5 6 7 8 12 13 14 15 16 17 18 19 No Doubling Twelve String 1 Octaver Down Seven String 1 Fifth Up Seven String 2 Fourth Up Octaver Up Twelve String 2 No Doubling Twelve String 1 Octaver Down Seven String 1 Fifth Up Global Transpose Down by half steps: 0 0 1 1 2 2 3 3 4 4 5 5 6 6 7 7 No Doubling Twelve String 1 0 1 2 3 4 5 6 7 Table 2: G-‐String Doubling and Global Transpose Assignments 29 Capo Up (String 3 -‐ G string): Capo Up and Capo Down control the single Capo control value, so whichever is used last is the Capo result. To Capo up one half step, hold the String Tune button down and pluck fret 1 on the B string. To Capo up one whole step, use Fret 2, etc. To cancel Capo, use Fret 0. (that's O for Open -‐ or maybe I'm just an old C programmer: Our number line starts at zero, before negative numbers were invented.) You can Capo up as much as one octave (fret 12) except Essential Pack, which is limited to one half step and one whole step Capo Up. Capo Down (String 2 -‐ B string): To Capo down one half step, hold the String Tune button down and pluck fret 1 on the B string. To Capo down one whole step, use Fret 2, etc. To cancel Capo, use Fret 0 You can Capo down as much as one octave (fret 12) except Essential Pack, which is limited to one half step and one whole step and a fourth Capo Down. Presets (String 1 -‐ high E string): Presets can be saved and recalled using String 1, the high E string. The open string is Preset 1, the first fret is Preset 2, etc. The Essential Pack is limited to 16 presets. Otherwise, both the Pro Pack and Complete Pack can access Presets 1 through 21 using Fret Control. To recall Preset 3, go to String 1, hold down the String Tune button, and pluck fret 2 (the open fret is Preset 1). To save a preset, hold down the String Tune button, pluck String 1, fret 21 or higher to get the preset save mode beep, then pluck the fret you want to assign the preset to get the preset saved beep. User Tip #7 Use Preset #1 (open string) as a default preset. Set it to whatever you like, then keep it. That way you can always pull up Preset #1 and know what you are going to get. 30 Chapter 6 MIDI Control Introduction to MIDI MIDI is the abbreviation for Musical Instrument Digital Interface. MIDI is a standard that includes the physical layer voltages, interface circuits and connectors. It is also a signaling standard that describes serial data baud rate, word length and parity bits. Finally it is a protocol standard the defines the message contents. The MIDI standard was originally introduced as a way for keyboards to tell synthesizers what sound to produce. Typical messages are Note On, Note Off, Program Change, Control Change (Mod wheel, Volume, etc.), Pitch Bend Change, System Exclusive, etc. There are many books and web resources that can teach you about MIDI details. An excellent place to learn more is www.MIDI.org, which is the site of the governing regulatory and standards organization. Standard MIDI cables carry data in one direction only. A cable might carry data from a keyboard to a synthesizer, or MIDI computer interface to a synthesizer, or keyboard to a computer interface, etc. A standard MIDI cable has a 5 pin DIN connector at both ends. It is not possible to plug a cable in backwards, because there is no backwards or forwards. You can plug a cable into a wrong "port", say from a MIDI computer interface MIDI out port to the MIDI out of a keyboard. The MIDI standard allows this to happen without damage to the circuits, so if you plug your cable incorrectly, you need only change it to be correct. This manual assumes that you know enough about MIDI to take care of your needs. The various message contents the ATG uses are described a few pages below. 31 How MIDI is used on an ATG guitar The physical interface to MIDI on the guitar is the 8 pin DIN plug on the side of the guitar. Figure 6: The 8 pin DIN plug on the AT-‐200 and a 5 pin DIN connector Downloading Feature Packs with MIDI The ATG uses both MIDI output and input to connect to the Guitar Manager on www.autotuneforguitar.com so that you can download and manage the guitar's contents. In order to do this you must either connect: A special MIDI "Y" cable. One end of the Y cable connects to the guitar, and the other end has two MIDI 5 pin DIN connectors, one for MIDI IN and one for MIDI OUT to connect to a MIDI interface. The Peavey AT-‐200B connection box, which also supports audio out and power in. It has MIDI IN and OUT ports that let you connect to a MIDI interface. The web site www.autotuneforguitar.com has documentation and video tutorials on how to connect your guitar and transfer data. 32 MIDI data input The 8 pin DIN ATG plug is able to accept a standard MIDI 5-‐pin DIN cable that is sending data to the guitar. A frequent use of this interface is to connect an iPad via the Apple USB adapter connected to a MIDI interface cable, which is in turn connected to the guitar , and a standard MIDI cable carrying output from the computer to the guitar. (See http://www.autotuneforguitar.com/support/documentation.php for detailed information how to do this. ) Antares provides a control file for the "MIDI Designer Pro" iPad application that lets you completely control the guitar from the iPad application. Figure 7: MIDI Designer Pro example screen shot. A second use of the ATG MIDI IN is that the various controls can be programmed into MIDI foot pedals, MIDI sequencers or other MIDI controllers. These are devices used by musicians to send MIDI data to devices, such as the ATG, during performances. The programming of foot pedals and sequencers is up to you, the user. 33 MIDI Control Change Messages Most settings are controlled with MIDI Control Change (MIDI CC) messages. These include all of the controls that can be accessed from the guitar itself: String Tune, Tone, Pickup Selector, Models, Doublings, Alternate Tunings, Capo, Global Transpose, Preset recall, and Preset Save. There are other controls that can only be accessed from MIDI. These are: Solid-‐
Tunetm on/off, Global Tone Offset, Global Gain, Global Detune, Pitch Shift Configuration, Pitch Shift Amount and Pitch Bend. Start New Feature Pack can be accessed from MIDI or by plucking a string before power-‐on. Most settings are controlled with MIDI Control Change messages. The Control Change messages have a Channel Number which can be any value (OMNI mode), a control number and a control value. The control number and control values are listed in the following Tables 6 through 9. Function Control Control Value Number String Tune Solid-‐Tunetm on/off Alternate Tuning Capo 2 3 7 11 Models Tone Pitch Shift Configuration 14 17 20 Pitch Shift Pickup Select Save Preset Startup new Pack Doublings 21 22 23 24 27 >= 64 to tune >= 64 on, < 64 off See Table 7 64 + (-‐12, -‐11, ... 0, 1, .... +12) except Essential Pack which allows (-‐5, -‐2, -‐1, 0, 1, 2) See Table 9 56 to 67, 64 is neutral 0 for no shift to one octave up, 1 for no shift to one octave down, 2 for one octave down to one octave up, 3 for a whole step down to a whole step up 0 to 127. see Pitch Shift Configuration 0 to 4. See notes below. 0, 1, 2,... for preset numbers 1, 2, 3,... string numbers 1 to 6 for high E to low E See Table 8 Global Tone Offset 8 (57 to 76) for offset (-‐7, to +12) Global Gain 18 0 to 127: 0 is no gain, 127 is +12dB Global Detune 19 0 to 127 for -‐63 to 0 to +64 cents detune Global Transpose 28 0, ..., 7 for half steps down. Table 6: MIDI control numbers and control values 34 Tuning Name Standard Bass/Standard split Bass Single Drop D Double Drop D DADGAD Open G Open D Open E Open A Open E minor Open D minor Open A minor MIDI control value 0 1 2 3 4 5 6 7 8 9 10 11 12 Complete Pack Pro Pack Essential Pack yes yes yes yes yes yes yes yes yes yes yes yes yes yes yes yes yes yes yes yes yes yes yes yes yes yes yes Table 7: Alternate Tunings MIDI control values Doubling Name MIDI Complete Pro Pack Essential control Pack Pack value No doubling 0 yes yes yes Octaver Down 1 yes yes Octaver Up 2 yes Fourth Up 3 yes Fifth Up 4 yes yes Seven String 1 5 yes yes Seven String 2 6 yes Twelve String 1 7 yes yes yes Twelve String 2 8 yes Table 8: Doublings MIDI control values 35 Model Name MIDI Complete Pro Pack control Pack value Modern Humbucker 0 yes yes Vintage Humbucker 1 yes Mini Humbucker 2 yes yes P-‐90 3 yes yes Junior P-‐90 4 yes Nashville Single Coil 5 yes yes California Single Coil 6 yes yes Vintage Lipstick-‐tube 7 yes Acoustic 8 yes yes Bass 9 yes Table 9: Model MIDI control values Essential Pack yes yes yes Discussion of some of the Control Change Messages: Tone and Global Tone Offset: The tone control was initially implemented using a low pass filter with a very wide range from about 200 Hz to 10,000 Hz. One of our partners, after testing a prototype, complained the guitar was harsh. I responded, "turn down the tone". He (nicely) explained to me: "Guitar players always automatically crank the tone control all the way up." So I set the tone control back to a typical guitar range and introduced Global Tone Offset. Using Global Tone Offset, you can re-‐map the tone control to cover a very low to very high range. Be careful here: If you've been to too many rock concerts, you may have lost some hearing, and what may sound good to you may be very irritating to someone else. Pitch Shift Configuration and Pitch Shift: The Pitch Shift Control is typically used with a MIDI expression pedal (foot pedal) to do big glissandos up or down. The choice to go up or down is set with the Pitch Shift Configuration. This way you can program a MIDI button to send Pitch Shift Configuration and have the pedal go up an octave at one moment, hit the button, then the pedal goes down an octave at the next moment. While I did this, I also added up and down by an octave or a whole step. Carful with those, they will pretty much guarantee you cannot find zero. Or, in the ageless wisdom of Buckaroo Banzai, in The Adventures of Buckaroo Banzai Across the 8th Dimension, "Remember: no matter where you go... there you are". Global Transpose: In case you missed this from above, Global Transpose was created by Eric to solve the following problem: Eric had programmed different Presets, 36 including Capo changes, for his gigs. At one concert his singer showed up with a sore throat and announced everything had to be brought down a couple of whole steps. So there he was with half a dozen Presets he had to rework during the hassle of getting everything else done. So he invented the variable: Global Transpose. "Global" means this setting is permanent , at least until you set it again. Solid-‐Tunetm on/off: Yes, you can turn it off. But now your pitch is only good on the open strum, for a brief instant somewhere in the sustain. Solid-‐Tunetm is turned back on every time you power on or switch Packs. Global Gain: This is basically to address that the ATG volume is not very loud on some amps. The allowed range of this parameter is from 0 to +12dB, with a default value of +6dB. The software that implements this does not clip. Rather it uses an sample by sample remapping of amplitudes as data approaches the internal limits. The parameter has to be limited to +12dB to prevent distortion. repetitive: "Global" means this setting is permanent , at least until you set it again. Global Detune: This is for when A = 440 Hz will not do. Remember that global parameters stay set forever or until you change them again. Even if you power off and then power on. If the -‐63 cent to +64 cent is not enough, and you need to go flatter, bump Global Transpose and try again. If you need to go sharper than +64 cents (who has to go sharp?), you're going to have to change your Capos. redundant: "Global" means this setting is permanent , at least until you set it again. Start New Feature Pack: Over time, we will develop new and bizarre Feature Packs for the ATG, like a Sitar, or a Pedal Steel simulator. The Start New Pack control lets you switch Feature Packs on the fly using MIDI control. A switch takes about 200 milliseconds, so you can do that during a couple of beats rest. The current String Tune is brought forward as well. This saves having to select a Feature Pack by turning down Volume, turning off power, plucking, then turning on power, doing a String Tune, then turning volume up in the middle of a song. 37 Pickup Select: The trick here is the parameter, 0 to 4. This MIDI command directly accesses the Model software, as compared to a guitar’s three position selector which first goes through interface software. The three position hardware selector accesses model parameter values 0, 2 and 4. The parameter values, in turn, access model pickups as follows: • On 1 pickup models, the parameter is ignored. • On 2 pickup models, the parameter values work as follows: • 0 accesses neck • 1, 2, 3 access neck + bridge • 4 accesses bridge • On 3 pickup models • 0 accesses neck • 1 accesses neck + middle • 2 accesses middle • 3 accesses middle + bridge • 4 accesses bridge In Addition to Control Change Messages... Besides MIDI Control messages, there are two other MIDI messages that can be processed by the ATG. Both of these messages have a Channel Number, which can be any value (OMNI mode). Program Change Message: This is normally used to recall a patch change in a synthesizer. ATG uses this to recall presets. Set the patch number to 0 for preset 1, 1 for preset 2, etc. Complete Pack can recall 64 Presets, Pro Pack 32 and Essential Pack 16. Pitch Bend Change Message: This message is typically output when moving the Pitch Bend Wheel on a keyboard. These wheels go from low to high and when released return to the middle position. On the ATG, the full range of the Pitch Bend Setting maps from one octave down to one octave up, and is independent of the current Pitch Shift Configuration Control setting. 38 Chapter 7 Brief Instructions and User Tip Summary This summary assumes you already know how to turn on your guitar, do a String Tune and operate the basic guitar controls. If you don't know this stuff, read the manual that came with your guitar. Also, if you have not read the introduction, go back to page 3, and read it. If you have read through the entire manual, this summary Chapter is redundant, unless your mind is like mine ... sort of a strainer with big holes. My purpose here is to provide a resource to get you started without having to read the entire manual. In which case I assume you want me to be brief. Which is not easy, ... but here it goes: If you want to download software, go to autotuneforguitar.com and click on STORE and GUITAR CONNECT. If you have downloaded software, you need to know how to make it do stuff: Make your software do stuff: MIDI, Fret Control and Presets The demo Feature Packs do nothing new, except their intended purpose plus the basic controls and String Tune. These Feature Packs are to let you test your MIDI download functionality and to introduce you to the high quality sounds of the ATG guitar. The product software Feature Packs come in three flavors; Essential Pack, Pro Pack and Complete Pack. If these were food, they would be tasty, spicy and HOT. If they were quarks, they would be Up, Charm and Top. The Strange quark is reserved for me, which you would be too after coding 80,000 lines of DSP machine instructions. The product software Feature Packs allow you to control the guitar using MIDI or Fret Control. 39 Fret Control Fret Control is the place for you to start. Fret Control uses the guitar’s fret board to access Virtual Capos, Tunings, Doublings, Global Transposes, Models and Presets. Presets can be read or written using Fret Control. Using Fret Control, you can save and recall twenty-‐one presets (16 in Essential Pack) using string 1 (the high E string). A preset recalls Solid-‐Tunetm on/off, Tuning, Doubling, Virtual Capo, Model, and Pitch Shift Configuration (the configuration -‐ not the actual pitch shift). Presets do not recall Tone, Pickup Select, Global Gain, Global Detune or Global Transpose. Here's how it works. Hold down the String Tune button and, while continuing to hold down the button, pluck a note. A setting will change. To avoid issues with unintended "plucks", like a finger hitting a fret or a pick hitting a string, the pluck has to be a strong enough amplitude. While the String Tune button is down, you can pluck multiple notes, even quickly in a strum, to set multiple settings. Here is the assignment of parameters to strings: String # Function High E B G D A Low E 1 2 3 4 5 6 Presets Capo down Capo up Doublings and Global Transpose Alternate Tunings Models Table 1 (repeated): Fret Control String Assignments Please note that Virtual Capo, Doubling, Alternate Tuning and Model are stored in a Preset. However Global Transpose will remain in force for eternity, or until you change it again. See Chapter 5 "Fret Control" for more details. 40 MIDI MIDI is an abbreviation of Musical Instrument Digital Interface. On ATG, MIDI is used to set control values. This can be done with an iPad program we support, or you can program your own MIDI foot switch, MIDI sequencer, or any other source of MIDI Control Change, Program Change and Pitch Bend messages to control the ATG. MIDI allows control of all ATG settings. Presets can be written and recalled using MIDI. Some controls can only be set by MIDI. These are: Solid-‐Tunetm on/off, Global Tone Offset, Global Gain, Global Detune, Pitch Shift Configuration and Pitch Shift. Most settings are controlled with MIDI Control Change messages. These include all of the controls that can be accessed from the guitar itself: String Tune, Tone, Pickup Selector, Models, Doublings, Alternate Tunings, Capo, Global Transpose, Preset recall, and Preset Save. Start New Feature Pack can be accessed from MIDI or by plucking a string before power-‐on. The iPad application we support is "MIDI Designer Pro". This allows you to connect an iPad via the Apple USB adapter connected to a MIDI interface cable, which is in turn connected to the guitar , and a standard MIDI cable carrying output from the computer to the guitar. (See http://www.autotuneforguitar.com/support/documentation.php for detailed information how to do this. ) Antares provides a control file for the "MIDI Designer Pro" iPad application. Chapter 6 "MIDI Control" discusses using MIDI with the ATG. User Tip Summary User Tip #1: Using ATG guitars with piezos, when palm muting be aware that the piezo pickup will make noise if you touch it, so make sure your palm sits in front of the pickup/bridge at all times. You may have to adjust your hand slightly forward from your typical palm muting technique. User Tip #2: If you don't like the scooping sound, turn down the volume, strum, press and watch for the LED flash. User Tip #3: When using fretting with String Tune, be careful to press down lightly at the fret to minimize having the results be flat. 41 User Tip #4: When using fretting with String Tune, Fret Control will no longer function as documented. The frets will be shifted. User Tip #5: Solid-‐Tunetm does wonky things (engineering lingo) to pitch if String Tune is not done, or if a string changes its natural pitch too much. Do a String Tune frequently after changing strings. User Tip #6: Be careful with Fret Control plucking. As you get casual, you will have plucks fail because of the amplitude threshold. Then you will get an unwanted String Tune with your finger down on a fret. Once the pluck is accepted as a Fret Control event, then no String Tune will happen when you lift the button. User Tip #7: Use Preset #1 (open string) as a default preset. Set it to whatever you like, then keep it. That way you can always pull up Preset #1 and know what you are going to get. 42