1
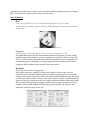
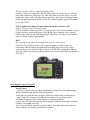
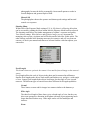
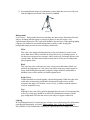
“Say Cheese!” – A close-up look at digital photography
by Lyn Hart
My immigrant grandparents, both of whom worked for Eastman Kodak in Rochester, NY during
the early part of the last century, would no doubt be astounded by the amazing transformation the
process of photography has undergone. No longer must we endure holding that cheesy grin for
eternity while waiting for the photographer to get everything just right. In the modern world of
digital imaging, we can now take dozens of pictures in what seems like the blink of an eye,
sorting through them instantly to pick out the best ones instead of waiting for days to see how
they turned out, tweaking them with image editing software to add finishing touches.
Digital photography has brought about significant changes in the art world as well. Many artists
have become skillful enough behind the lens to document their own works without having to pay
a professional photographer, and shooting slides for gallery and exhibit submissions, once de
rigueur, is now almost obsolete. However, many of us (including myself) are unwittingly
underutilizing the powerhouses that these little gizmos really are. The instant gratification of
digital photography leads us to quickly turn on, point, shoot, and edit our photos almost the
instant we get the camera out of the box without ever delving further into what our cameras are
actually capable of or exploring the technology behind the magic. Much of that post imaging
editing, which is time consuming, and which also irreparably corrupts the original image file
with every change, might be eliminated if we took the time to really explore the features of our
cameras. Let’s rewind and revisit the basics… pull out your camera and instruction manual to see
if you can learn something new!
A rundown of every available digital camera is beyond the scope of this article, but there are
research resources available if you are either a first time buyer or are seeking to upgrade. See the
end of this article for a brief list of online resources for researching the different models and
capabilities of currently available cameras. Before we explore the categories of digital cameras,
becoming familiar with the following brief definitions will help you decide which camera is
appropriate to purchase and will help you become more skilled in using the camera you already
have. A description of general camera categories will follow.
Basic Definitions
Pixel
A tiny dot of light that is the basic unit from which digital images are made.
A photo has a set number of pixels across its width and height, which are the pixels per
inch or “ppi”.
A detail of the Venus of Urbino, coarsely pixellated i Megapixel
A unit of image resolution equal to 1,048,576 pixels, designated as “MP”.
Each individual camera has its own maximum number of megapixels, which is usually
included as part of the camera’s name; for example, my camera is a Nikon Coolpix P80
MP10.1, which indicates the camera has a maximum resolution of 10.1 megapixels. For
creating large prints, publishing, or creating image files that can stand up to extensive
editing, an 8MP or higher camera would be the most versatile.
Resolution
The image size measured in megapixels.
Most cameras have the capability of setting the resolution, from a range of lower
resolutions to the maximum that the camera is capable of producing. Lower resolution
settings create smaller image files which can be uploaded/downloaded quickly and which
use less space on the camera’s memory card. Low resolution images are good for sharing
photos via email or for posting on the web. Higher resolution settings create larger image
files; you should shoot images in higher resolution because larger image files are more
capable of being edited without affecting image quality and they can easily be (and
should be) resized for email or the web.
Two screen shots showing Image Size at resolutions of 72 and 300 pixels per inch.ii
Byte
A unit of computer memory equal to that needed to store a single character.
Larger units of memory are composed of multiple bytes as follows:
1 Kilobyte (KB) = 1024 Bytes
1 Megabyte (MB) = 1,048,576 Bytes
1 Gigabyte (GB) = 1,073,741,824 Bytes
File Type Descriptions*
*Not all cameras are capable of creating every one of the following file formats. Check the
camera’s manual to determine what types of files it is capable of producing. Image editing
programs (such as Photoshop Elements) will allow you to convert files to JPEG, TIFF, and GIF,
but RAW files can only be created by the camera.
Various image file types iii
JPEG (Joint Photographic Experts Group File, denoted by the file extension “.jpg”)
The standard and universally readable file compression format that condenses large
digital images into small file sizes using lossy compression.
This format is designed to preserve the broad color range and subtle brightness variations
of continuous-tone images and can represent images using millions of colors. Lossy
compression selects portions of data in the original file to discard to make the file as
small as possible, rendering the file easier to store and transmit. JPEG compression has
levels of low, medium, and high compression. Higher compression creates smaller files
with more detail loss in the photo. Low compression creates larger files and photos of
finer quality with the least amount of detail loss. Compression levels are usually available
as settings in a camera’s menu system and are listed as “Fine (least compression),
Normal, and Basic (highest compression)” under the Image Quality menu option.
TIFF (Tagged Image File Format, denoted by the file extension “.tif”)
The most popular nonlossy compressed image format.
Nonlossy compression makes files smaller with no data loss, but the files are still quite
huge when compared to JPEG files. The TIFF file format is used for storing very large,
high quality images, either for publication or archiving, and is the favored image format
in many graphic applications. RAW or JPEG files edited in graphic applications should
be saved as TIFFs.
GIF (Graphics Interchange Format, denoted by the file extension “.gif”)
Another nonlossy compressed image format.
GIFs are suitable for sharp-edged line art (such as logos) with a limited number of colors
because nonlossy compression works well with flat areas of uniform color with welldefined edges. But since the GIF image palette is limited to 256 colors, it is not usually
used as a format for digital photography.
RAW
Pure, uncompressed, unprocessed image data from the camera sensor.
RAW files are used when extensive post-exposure editing is planned such as for
publication, difficult lighting situations, and for making large prints. Each camera
company has its own version and file extension for RAW files, making them different
from one another. Not all image editing software can read each individual manufacturer’s
RAW files.
Digital camera iv
Basic Digital Camera Categories
Point & Shoot
- simplest to operate, relatively cheap, and primarily designed for casual photography:
family/vacation photos, internet/email quality photos
-small and convenient, but the size makes it difficult to hold steady for sharp images
- have a simple LCD monitor with either no viewfinder or just a simple optical
viewfinder; neither provide accurate framing or focusing capabilities
-usually have fixed (permanent & not interchangeable) moderate wide-angle / moderate
telephoto focal length zoom lens
-have lowest resolution capabilities, usually 4MP or less, and usually do not have true
macro capability for shooting small objects or details
EVF or Electric Viewfinder (also known as advanced compact, advanced digicam,
all-in-one [U.S.], bridge [Europe])
-convenient package of more sophisticated features for advanced amateurs
-the EVF is similar to a small television screen in the viewfinder
-have fixed zoom lenses of higher quality than most point & shoot models
-have true macro settings for detail images
-have higher resolutions of usually 6 to 10MP
-the fixed zoom lens may not be as versatile for advanced photographers, but if the lens is
of good quality it should be capable of doing everything an advanced amateur needs
D-SLR (digital single-lens-reflex)
-most costly and versatile for professional or highly advanced photographers
-the “single lens” term was coined in the 50s to differentiate SLRs from the twin lens
cameras of that era
-a mirror located behind the lens reflects light entering the lens, usually into a pentaprism
viewfinder system (the “reflex” part of the name); the five-faced prism deviates light at a
90º angle presenting an image in the viewfinder that allows the photographer to see
exactly what the lens sees
-have interchangeable zoom lenses; some lenses are so specialized that they may cost
more than the actual camera
-have resolutions from 6 to 12 and larger MPs
How Digital Cameras Work (for the mechanically minded)
Sensor
An integrated circuit board behind the camera’s lens composed of millions of pixels.
When you take a photo, light enters the camera’s lens and comes into contact with the
sensor; the sensor’s pixels record the various intensities of light energy that strike it. The
number of pixels on the sensor is used to define the camera; i.e., a camera with 8 million
pixels is called an 8MP (megapixel) camera. The total number of pixels on the sensor
also determines how high its resolution is; more pixels produce higher resolution images.
High resolution sensors can record finer detail and allow for the printing of larger images.
Analog-Digital (A/D) Converter
A processor within the camera that converts the analog signal from the Sensor into
digital information.
The light that is recorded by the sensor’s pixels is turned into analog electrical signals,
which in turn must be converted into digital bytes in order to be read by a computer.
Image Processor
Integrates the digital data received from the A/D Converter with the camera’s settings to
configure and form an image file.
The file will have an identifying extension to tell the computer that it is a photo (.jpg, .gif,
.tif, or .raw).
Buffer
Temporarily stores the file created by the Image Processor for transfer to the Memory
Card.
The image processor creates files much quicker than they can be transferred to the
memory card and the buffer acts as a temporary storage space for the file while it is being
constructed, which prevents having to shut the camera down and allows the camera to
continue taking photos.
Memory Card
A non-volatile integrated circuit chip that stores digital files in byte format.
This is the little removable card inside the camera that stores the photos… non-volatile means
that it keeps information even if no electrical current is present. The cards come in different
storage capacities, usually denoted in MB (megabytes) or GB (gigabytes); usually cameras come
from the manufacturer with cards that do not have a very high storage capacity. The number of
images a card can store depends upon the card’s capacity, the resolution set on the camera, even
the subject matter of photos. For instance, a subject with many smooth tonal areas will create a
smaller file than a subject composed of many different tones and textures. Shooting video also
consumes memory quickly. Consider buying a larger capacity memory card if you take many
high quality photos and/or want to shoot video. For normal usage, I keep a 2GB card in my
camera, but if I go on a trip or take a workshop, I use a 16GB card. Some cameras only use
specific cards, so make sure you know what type yours needs!
Memory Card Reader
A device, typically having a USB interface, for accessing the data on a memory card.
To transfer photos to a computer, many cameras use a cable that plugs into the camera on
one end and then the other end plugs into a USB port in the computer. The camera must
then be turned on to transfer photos. A memory card reader makes the process much
easier— the memory card is removed from the camera, inserted into a slot in the card
reader, and then the card reader is plugged into a USB port in the computer. The camera
doesn’t need to be turned on and the very small card reader, about the size of a domino, is
much less cumbersome than a cable, making it also perfect for travel or for use with a
laptop.
Memory Card Port/Drive
Many newer computers are equipped with a port or drive that will accept the memory
card directly. Similar to the slot where CDs are inserted, this port is sized specifically for
memory cards and eliminates the need for either a cable or memory card reader. Look for
the port in the same areas where you would find USB ports: on laptop computers it is
usually located on the side and on desktop computers on the hard drive cabinet (either
front or back). It may also be referred to as the flash drive or port.
Digital Basics
Exposure
The process of image creation which occurs when light contacts the camera’s sensor.
Exposure can make or break a photo; too much light results in a “washed out” image with
little detail, while too little light creates a very dark image with areas that may be
completely blacked out. Exposure is controlled by:
Aperture
The adjustable opening in the lens, known as the “f/stop”, denoted by an
“f/number”.
The aperture controls the amount of light entering the camera; the smaller the
opening, the larger the f/number and the larger the opening, the smaller the
f/number. The aperture setting also affects the Depth of Field, the distance behind
and in front of the plane of focus that is acceptably sharp in the photo. Using
larger f/number settings reduces the size of the aperture and increases the depth of
field, which results in the best photos of small objects.
Aperture ring on a camera showing the F stop numbers.v
Shutter Speed
Controls the length of time light contacts the sensor.
Faster shutter speeds reduce the blurriness caused by camera shake and produce
sharp, clear photos.
Camera dial showing shutter speed and ISO numbervi
ISO (International Standards Organization)
A standard measurement of light sensitivity.
ISO settings are usually 100, 200, 300, and higher. Higher ISO settings create
higher sensitivity to light (so less light is needed for taking a photograph), but
higher settings can also cause a grainy effect in the photo. ISO settings of 100 or
200 are usually the most versatile.
Exposure Compensation
Some cameras may have an Exposure Compensation feature, either as an actual button on
the back of the camera or as a menu option. The button and/or icon is a little square
divided diagonally into a black and white triangle with a “+” sign in the white triangle
and a “-” sign in the black triangle. Selecting this feature allows you to adjust the
lightness or darkness of the image in increments while looking at your subject through
the viewfinder before shooting the photo. Another way to adjust exposure is by selecting
a specific Exposure Mode setting.
Exposure Compensation settingsvii
Exposure Modes
A dial with letters and symbols located on top of most cameras allows the photographer
to choose between Exposure Modes. Here are basic descriptions of the modes, but refer
to your camera’s manual for specifics on choosing and using the modes…
Ring showing various Exposure Modesviii
Auto
Usually indicated by a camera icon or the word “Auto”; also known as “pointand-shoot” mode, the camera chooses the aperture settings and shutter speed. In
this exposure mode some cameras may allow the photographer to also use the
Exposure Compensation feature and Focus Modes (Autofocus, Macro, Infinity,
and Manual focus… read about these in your camera’s manual since how they
work varies with each camera).
Programmed (P)
In this mode the camera can choose the aperture settings and shutter speed or it
allows the photographer to select either the aperture setting or shutter speed and
the camera then adjusts the exposure by setting the other.
Shutter Priority (S)
The photographer chooses the shutter setting and the camera selects the aperture
for the best exposure. This mode is useful for controlling the exposure of moving
objects.
Aperture Priority (A)
The photographer chooses the aperture setting and the camera selects the shutter
speed for the best exposure. This mode works well for Macro and 3-D object
photography because the ability to manually choose small apertures results in
overall sharpness and greatest depth of field.
Manual (M)
The photographer chooses the aperture and shutter speed settings and has total
control over exposure.
Shooting Menu
Within each of the Exposure Mode settings (P, S, A, M), there is a Shooting Menu that
can be accessed by pushing the Menu button after the Exposure Mode has been selected.
The shooting menu allows for further management of a photo’s exposure and quality.
Two of these settings, White Balance and Optimize Image, are very important for
managing color accuracy in photos and will be discussed a little later in this article. The
other settings available in the shooting menu may be extensive and will vary between
cameras, so check your manual and camera to become familiar with what options your
camera has.
Shooting Menuix
Focal Length
The distance between a point in the camera’s lens and the focused image on the camera’s
sensor.
Focal length affects the scale of objects in the photo and is measured in millimeters.
Smaller focal lengths make objects look smaller and further away, and give a wider angle
of view. Longer focal lengths make objects look larger, but the angle of view is much
narrower. The different types of camera lenses have different focal length capabilities:
Normal
These lenses see near and far images in a manner similar to the human eye.
Wide Angle
The short focal length of these lenses gives a broad angle of view, but they can
also create perspective distortion in the photo with near objects appearing much
larger than those further away. Wide angle works well for landscapes and
interiors.
Zoom
The most well-known and popular type of lens; it can be set to different focal
lengths within a specified range.
Telephoto
These lenses function exactly as a telescope does, making far away objects appear
to be closer, but they can also create perspective distortion in the photo because
the compacted distance can make distant and near objects seem closer together
than they really are.
Macro
Although many digital cameras have a “macro” setting for taking close-up photos,
it is not a true macro lens, which has a special construction to correct optically for
the flat images it creates via magnification.
Photographing Tapestries
The physical structure of fibers, the weave structure, and the properties of chemical dyes all
impact the way a tapestry will be represented in a photograph. Fiber length affects the
appearance of color values: long staple fibers (worsted wool; mohair; combed cotton; line linen;
ramie) and filament fibers (reeled silk; synthetic fibers) have longer reflecting surfaces that
create higher values of yarn colors than do short staple fibers (lamb’s wool; spun wool; carded
cotton; staple cut silk; tow linen). A yarn’s diameter affects light reflection and color value.
Yarns composed of many fine fibers have a greater total light-reflecting surface than a same
weight yarn constructed of fewer, heavier fibers. A tapestry woven with fine yarns with more
wefts per inch will appear lighter in value than one woven in a coarser yarn of the same fiber,
and the more highly textured surface of a tapestry woven with the coarser yarn will appear darker
in value. If weft floats are used, the float areas will reflect more light than the areas of regular
weft faced weaving.
The weft faced surface texture of tapestry can be affected by the size of the underlying warp
which may produce subtle or prominent ribbing if either the weft yarn is very fine or the warp is
of large diameter. In photographs pronounced ribbing can cast a series of fine shadow lines on
the tapestry’s surface. Extensive use of eccentric weaving can cause slight or obvious rippling
that can cast dark areas of shadow in a photograph.
Fluorescing agents present in many synthetic dyes absorb UV radiation from light and may cause
distortion of reflectivity and color (light areas may appear washed out or take on a bluish or
abnormal color cast). Another oddity involving chemical dye formulations is illuminant
metameric failure, which occurs when two colors appear the same when viewed under one light
source but appear different when viewed with another. All of these issues create the need for
understanding how to control lighting and set up a tapestry properly while it is being
photographed in order to represent it as accurately as possible.
Managing Color Representation & Lighting
Optimize Image or Color
Most cameras have options within their Shooting Menu for setting the intensity at which
the camera records color, usually designated as Optimize Image or Color. Under those
options, the choices for color may be listed in a variety of ways, such as “Normal,
Natural, or sRGB”; Adobe RGB; “Hot, Saturated, or Vivid”; Portrait. For the best color
accuracy and optimal computer representation, the “Normal, Natural, or sRGB” setting
should be used and if available Adobe RGB is best for printing. Altering the color for
increased vividness is more easily achieved and controlled with image editing software
and trying to correct unnaturally saturated colors after a photo has already been taken is
much harder. If your camera is capable of recording photos as uncompressed RAW or
minimally compressed TIFF files, these files can sometimes achieve more pure colors
than JPEG files, which have degrees of detail loss related to the file’s level of
compression.
Color mode menu x
White Balance
Allows the photographer to set the camera for the type of lighting being used to ensure
that colors are portrayed correctly.
Different types of light have different temperatures, which affect the color of the light.
The color of light reflected from an object is directly influenced by the color of light
shining on it. Our brain and eyes can usually adapt to compensate for any differences in
lighting… we can see that an apple is red whether we see it in sunlight, in the shade, or
inside under a lamp. A camera must have the White Balance set for the lighting
conditions in order to “see” the colors of the subject correctly or it will record the actual
color of the light, creating an unwanted colorcast.
Image uncorrected (left) and corrected (right) for white balancexi
Most cameras have standard White Balance settings, such as Auto, Daylight,
Incandescent, Fluorescent, Cloudy, and Flash. However, these settings may not be the
most advantageous depending on the subject and lighting conditions. The most
dependable method of achieving accurate color is to use the Manual option in the White
Balance menu if your camera has this function. To use the Manual setting a white
balance reference card, usually neutral white or grey, is placed under the lighting that will
be used during shooting and the camera takes a reading to set the White Balance for the
specific lighting conditions. Sounds complicated, but it is actually a simple process and
the camera’s instruction manual gives exact instructions. White Balance reference cards
are easily found on Amazon.com.
White balance cardsxii
As mentioned earlier, different light sources can interact with the chemical dyes in fibers,
creating undesirable effects such as discoloration, wash out, and illuminant metameric
failure. The culprit in this case, UV radiation, is produced by most light sources,
including fluorescent lights, camera flashes, tungsten lights, and sunlight. The exception
is the common household incandescent bulb, which produces the smallest amounts of UV
radiation. If after setting the White Balance the subject’s color is still not represented
accurately in the photo, try using different light sources, resetting the White Balance for
each.
Setting Up for Photography
Most weavers know that seeing a tapestry in a photo versus seeing it in person are two very
different experiences. In photographing a tapestry, the most important aspects to capture in order
to represent the tapestry as accurately as possible are its texture, color, shape, and design.
Background and lighting play important roles in the final photographic results.
Tripod
If you do not own a tripod, you must obtain one to produce quality images of your work.
Purchase one that is meant to hold the weight of the camera you own because it is a
crucial element in producing professional images and should not be scrimped on. A
tripod is essential for:
1) Maintaining the framing of the tapestry for taking multiple or detail shots and
allowing for adjustments to camera settings and lighting.
2) Preventing blurred images by eliminating camera shake that can occur with even
with the slightest movement if the camera is handheld.
Tripodxiii
Backgrounds
Less is more… backgrounds function to eliminate any unnecessary distractions from the
subject. Including unrelated props or objects in photos of artwork creates a very
unprofessional impression. The work itself should be the sole focus. When photographing
a tapestry for submission, not much background is usually visible; keeping the
background simple prevents it from becoming a distraction.
White
This color is the simplest background, but it may work better for some woven
pieces than others. White can make an object look as if it is floating in space, it
can showcase an open weave structure, and it works well for images that are to be
viewed online, but dark colored subjects may look as if they are receding when
placed against white.
Black
This color may also work better for some woven pieces than others. Black can
intensify the appearance of vivid colors, but darker colors may tend to appear to
merge with the black background, losing their shape definition, and neutral or
subdued colors will be muted even further against black.
Bright Colors
Caution should be used with brightly colored backgrounds. While the right color
could make an interesting and dynamic background, bright colors can also
overpower the subject, be hard on a viewer’s eyes, or interact with the subject’s
colors in undesirable ways.
Grey
Although it may seem like a good background choice because of its neutrality that
is the very reason grey should be avoided. The simultaneous contrast with the
grey background will cause the colors in the subject to appear washed out.
Lighting
In researching this article, I found only one reference source that had specific information
regarding the photography of textiles: Photographing Arts, Crafts, & Collectibles by
Steve Meltzer. I have included the following as a general guide, but I highly recommend
his book, which devotes an entire section of the chapter Photographing Two-Dimensional
Objects to fabrics. It is not possible to include all of that information here without
plagiarizing the author’s work. Information on the book is included in the bibliography at
the end of this article.
Most tapestry is two-dimensional. The most important elements to consider when
photographing woven tapestry are texture, color, form, and design. For best photographic
representation two uniform light sources are necessary for illumination during shooting.
The primary light source provides the main illumination and highlights, while the second
light source functions to control the darkness and lightness of shadows.
Controlling shadows, which are caused by unbalanced lighting, is crucial in textile
photography. The lightness or darkness of shadows directly affects the textural quality
represented in the photograph. While accurately representing a tapestry as a handwoven
object is desirable, apparent ripples and folds create distracting effects. Textures are more
visible in lighter colored textiles and harder to capture in darker textiles.
The tapestry should be hung at a height similar to that for a painting. The primary light
should be placed to the left of the tapestry, approximately six feet from the tapestry, but
higher than the tapestry so that it shines down at it. Light shining directly onto a tapestry
does not show textural qualities well because shadows are completely eliminated. The
second light should be placed opposite the first at a similar height and angle. After
turning on the primary light, move it horizontally until the texture of the tapestry is
illuminated as you wish it to be. The angle of light in the horizontal plane controls
texture; the light’s position can increase or decrease its textural characteristics. Next, turn
on the second light and move it horizontally until any shadows are only lightly visible.
After positioning the lights, take a photo and evaluate it carefully because shadows
appear darker in photographs than what the human eye perceives. Capturing the best
image of a tapestry may take several trials of positioning the light sources.
Photographing a large tapestry may be difficult if you cannot get enough distance
between the camera and the tapestry. A wide-angle focal length may help to capture the
entire tapestry in the photograph. If the problem is that you do not have a large enough
wall space to hang the tapestry for photography, another method is to place the tapestry
on the floor (consider using a backdrop underneath), place the lights on either side of the
tapestry, positioning them as described above, and use a ladder to get a distance of 8 to
12 feet between the camera and the tapestry.
Do not expect to be able to use the same lighting arrangement for every tapestry;
positioning of lighting will have to be modified in order to best represent each individual
tapestry.
Resources
The first three resources listed below are the ones I consulted when I purchased my last
four cameras. I found it very valuable to cross-reference between them before I made my
decision to buy. The last resource listed is an online link that contains articles written by
the author of the book that served as the main reference source for this article.
PCWorld
http://www.pcworld.com/reviews
On PCWorld you can either research specific cameras by clicking on the “Find A
Review” tab and entering the information for the camera in the drop down menu,
or by clicking on the “Top-Rated Products” tab and scrolling down to the
Cameras section to choose from the links given there. Reviews are written by
PCWorld staff and reviews from consumers may also be included. Make sure you
check the date the review was written and exactly which model of camera the
review is discussing. Manufacturers update cameras very frequently and often the
only difference in a camera model’s name is a new letter or number that has been
added or changed (For example, the Canon PowerShot SX200 IS vs. the Canon
PowerShot SX210 IS. The SX210 is the latest version of this model and has new
and improved features that the SX200 lacks).
Another feature is the “Check Prices” option which allows you to quickly see the
online merchants who are selling the camera, what the cost will be (including
shipping to your location), and the rating each particular merchant has received
from consumers. If you are very sure about the camera you want to purchase, this
can be a cost effective way to purchase (perhaps even better than Amazon)
because the merchants often offer package deals that include accessories such as a
higher capacity memory card, rechargeable battery, camera case, mini-tripod, etc.,
which would cost much more if purchased separately. Make certain the camera
you are considering is listed as “New” and not “Refurbished”. Unbelievably low
prices are often for refurbished cameras. Consider the merchants carefully and
choose the best deal for your needs.
Amazon.com
http://www.amazon.com/Camera-Photo-Film-CanonSony/b/ref=sa_menu_p5?ie=UTF8&node=502394
Amazon has a giant section for digital cameras and accessories, e.g., memory card
readers, white balance reference cards, tripods, camera cases, etc. It is very
comprehensive and useful for looking at different models and reading consumer
reviews. Some reviews are written by professional photographers and may be
worth considering when choosing your camera.
Flickr
http://www.flickr.com/cameras/
Flickr is Yahoo’s online photo management application and the link above is to a
Camera Finder page that includes graphs illustrating which cameras are most
popular amongst their subscribers. Another feature on this link is the ability to
view actual photos taken with a wide range of cameras. A caveat: It may not be
clear whether the photos represented for each model were manipulated with
image processing software, such as Photoshop.
The Crafts Report
http://craftsreport.com/crafts-photography.html
This organization publishes a monthly business magazine for “crafts
professionals” and it is where I first encountered articles written by Steve Meltzer.
about digital photography basics related to photographing arts and crafts. To my
knowledge, he is the only author currently writing articles on the photography of
art and craft objects. His book is listed in the bibliography. This above link
usually contains several articles written by Meltzer.
Bibliography
Lambert, P., Staepelaere, B., & Fry, M.G. (1986). Fiber structure and light reflectance. In
Sachs, D., Gray, S. (Eds.) Color and fiber (pp 90 – 125). West Chester, PA: Schiffer.
Meltzer, S. (2007). Photographing arts, crafts & collectibles. New York: Lark Books.
Meltzer, S. (2007). Photographing two-dimensional objects. In Photographing arts,
crafts & collectibles (pp 78 – 82). New York: Lark Books.
Nikon Corporation (2008). Digital camera Coolpix P80 user’s manual. Melville, NY.
Wikipedia. Retrieved July – August 2010 from http://en.wikipedia.org
i
http://www.google.com/imgres?imgurl=http://1.bp.blogspot.com/_rf2RN2_qBG0/SMcWVoRouI/AAAAAAAAAqM/DeYH57dnByQ/s400/niem
ann.jpg&imgrefurl=http://bestof3.blogspot.com/2008_09_01_archive.html&usg=__TwWm5WaR5F8FSDEPqsJ7Fi0rEf0=&h=321&w=337&sz=
35&hl=en&start=217&zoom=1&tbnid=XfJlsGeRk2ekM:&tbnh=147&tbnw=154&prev=/images%3Fq%3Dfree%2Bimages%2Bpixellated%2Bi
mage%26um%3D1%26hl%3Den%26client%3Dsafari%26rls%3Den%26biw%3D1137%26bih%3D483%26tbs%3Disch:10%2C7600&um=1&it
bs=1&iact=hc&vpx=358&vpy=159&dur=690&hovh=219&hovw=230&tx=105&ty=194&ei=gktzTLrDOYWesQOmv5CnDQ&oei=6UpzTL7X
D5CmsQOjsPyTDQ&esq=29&page=22&ndsp=10&ved=1t:429,r:1,s:217&biw=1137&bih=483
ii
Screen shot by Mary Lane iii
Screen shot by Mary Lane iv
http://www.google.com/imgres?imgurl=http://www.sexycameras.net/wp-content/uploads/2010/04/Casio-Exilim-EX-FH25-Digital-
Camera.jpg&imgrefurl=http://www.sexycameras.net/tag/casioexilim/&usg=__S1IRVbIGKhkI1AgjZdOy4y9JO4w=&h=265&w=400&sz=53&hl=en&start=345&zoom=1&tbnid=pwKM22fKUEe8M:&tbnh=147&tbnw=181&prev=/images%3Fq%3Ddigital%2Bcamera%2Bscreen%26um%3D1%26hl%3Den%26client%3Dsafari%26rls%
3Den%26biw%3D1137%26bih%3D483%26tbs%3Disch:10%2C13013&um=1&itbs=1&iact=hc&vpx=474&vpy=161&dur=2987&hovh=183&h
ovw=276&tx=149&ty=152&ei=j1NzTK76IYuisAP83pyxDQ&oei=_FJzTKiUC4WsQPlkvyGDQ&esq=42&page=36&ndsp=10&ved=1t:429,r:7,s:345&biw=1137&bih=483 v
http://www.google.com/imgres?imgurl=http://www.kenrockwell.com/nikon/images1/300mm-f45-ais/D3S_4220-
aperture.jpg&imgrefurl=http://www.kenrockwell.com/nikon/300ais.htm&usg=__7wt1dHQaVoX3xrVNARa3StIbHpc=&h=372&w=600&sz=59
&hl=en&start=10&zoom=1&tbnid=L2TcF_UNCo5zM:&tbnh=123&tbnw=198&prev=/images%3Fq%3Daperture%2Bring%26hl%3Den%26gbv%3D2%26biw%3D1137%26bih%3D483%
26tbs%3Disch:10%2C369&itbs=1&iact=hc&vpx=125&vpy=127&dur=700&hovh=177&hovw=285&tx=119&ty=96&ei=dHx4TNj6F8SFnAfE3
Z2dCw&oei=Rnx4TJ6QHNOh4QbLu6noBQ&esq=2&page=2&ndsp=10&ved=1t:429,r:0,s:10&biw=1137&bih=483 vi
http://www.google.com/imgres?imgurl=http://www.notesonphotography.com/wp-content/uploads/shutter-speed-dial-on-nikon-fm-10-
570x380.jpg&imgrefurl=http://www.notesonphotography.com/info&usg=__nrdKX_i6syZa4O3s2GwzYOq5QA=&h=380&w=570&sz=42&hl=en&start=0&zoom=1&tbnid=96gnTAvuWm2AZM:&tbnh=156&tbnw=190&prev=/i
mages%3Fq%3Dshutter%2Bspeed%2Bdial%26hl%3Den%26gbv%3D2%26biw%3D1137%26bih%3D483%26tbs%3Disch:1&itbs=1&iact=hc&
vpx=343&vpy=211&dur=1152&hovh=183&hovw=275&tx=87&ty=146&ei=C314TKenIIO-4gacitTqBQ&oei=C314TKenIIO4gacitTqBQ&esq=1&page=1&ndsp=9&ved=1t:429,r:5,s:0 vii
http://www.deepgreenphotography.com/blog/?p=226 viii
http://www.google.com/imgres?imgurl=http://www.imaging-
resource.com/PRODS/AA350/ZMODEDIAL.JPG&imgrefurl=http://www.imagingresource.com/PRODS/AA350/AA350A5.HTM&usg=__dfz9uZVlIeJ1RSSR916fOjMXObk=&h=180&w=180&sz=10&hl=en&start=0&zoom=1
&tbnid=M9q6KjnCkCMhEM:&tbnh=111&tbnw=120&prev=/images%3Fq%3Dexposure%2Bmode%2Baperture%2Bpriority%2Bmenu%26hl%
3Den%26gbv%3D2%26biw%3D1137%26bih%3D483%26tbs%3Disch:1&itbs=1&iact=rc&dur=473&ei=M394TPWODI0ngeAupydCw&oei=JX94TLzcA46H4Qa3yM3fBQ&esq=3&page=1&ndsp=18&ved=1t:429,r:12,s:0&tx=60&ty=78 ix
http://www.google.com/imgres?imgurl=http://www.steves-
digicams.com/2007_reviews/d40/d40_shooting_menu.jpg&imgrefurl=http://www.steves-digicams.com/camera-reviews/nikon/d40-slr/nikon-d40slr-review14.html&usg=__Hy_S5nU7lSTwdFx8gYonkxrBdGQ=&h=240&w=320&sz=16&hl=en&start=0&zoom=1&tbnid=sMgvQkpDiAhcwM:&tbnh=
110&tbnw=153&prev=/images%3Fq%3Dshooting%2Bmenu%26hl%3Den%26gbv%3D2%26biw%3D1137%26bih%3D483%26tbs%3Disch:1&
itbs=1&iact=rc&dur=72&ei=_H94TOfUOcP54Abkm_X-BQ&oei=_H94TOfUOcP54Abkm_XBQ&esq=1&page=1&ndsp=18&ved=1t:429,r:8,s:0&tx=79&ty=72 x
http://www.digitalreview.ca/cams/NikonD2Hpg_2.shtml xi
http://www.techdigest.tv/gadget_shows/gadget_show_liv/ xii
http://www.google.com/imgres?imgurl=http://farm1.static.flickr.com/152/427128174_0ed8ca3a21.jpg&imgrefurl=http://www.flickriver.com/pho
tos/tags/improv/interesting/&usg=__Hvj8sce7u-2Crff7MeRcMWlJR3E=&h=333&w=500&sz=33&hl=en&start=0&zoom=1&tbnid=UicaHfKNhNBpM:&tbnh=95&tbnw=143&prev=/images%3Fq%3Dwhite%2Bbalance%2Bcard%26hl%3Den%26gbv%3D2%26biw%3D1137%26bih%3D
483%26tbs%3Disch:1&itbs=1&iact=hc&vpx=588&vpy=69&dur=2667&hovh=183&hovw=275&tx=144&ty=128&ei=RoR4TOb6Gof24AaF4Zj
1BQ&oei=RoR4TOb6Gof24AaF4Zj1BQ&esq=1&page=1&ndsp=21&ved=1t:429,r:4,s:0 xiii
http://3.bp.blogspot.com/_I7xomCeKJCA/SRnXUbzqaQI/AAAAAAAAAQo/DTuKeCd10fs/s1600-
h/savage_td_100_digital_camera_tripod_three_reviews_167875_300.jpg