1
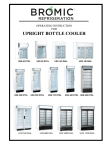
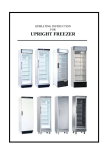
Glass Door Refrigerator
INSTRUCTIONS FOR INSTALLATION & USE
Dear customer
Please be sure to read this operating manual carefully before putting your
new refrigerated cabinet into use. The manual contains important notes on
safety and proper installation, use and maintenance of the plug-in refrigerated
cabinet.
Please keep the manual ready for reference and hand it over to any future
new owner of the cabinets.
Make sure the manual is read by all staff who may work with the
merchandiser and that they understand and observe the contents.
Should you or your staff be unable to understand any instruction in this
manual, please contact your Service Organization.
We would point out that the refrigerated cabinet is occasionally referred to on
the following pages with options which do not form part of the standard
equipment.
Note for delivery
On arrival, first inspect the refrigerated cabinet for any damage sustained in
transit, All such damage must be reported immediately to your Service
Organization.
Contents
Section
Title
page
1
Proper use
3
2
Safety regulations
3
3
Installation
4
3.1
3.2
3.3
3.4
3.5
3.6
Selecting the place of installation
Stand-alone installation
Hanging instructions (optional)
Siting the cabinet
Installation procedure
Requirements for electrical connection
4
5
6
7
7
8
4
Starting
9
4.1
4.2
Measures prior to starting
Setting into operation
9
9
5
Setting the storage temperature
10
5.1
5.2
Information on the product temperature
Setting the temperature set point
10
10
6
Product loading and pricing
10
6.1
7
Loading the cabinet with products
Evaporator Defrosting
10
11
8
Cleaning
12
8.1
8.2
Cleaning the outer casing
Cleaning the internal surfaces
12
13
9
Maintenance
13
9.1
10
Cleaning the condenser
Shut down
13
14
11
Troubleshooting
15
12
Environment protection and disposal notes
16
13
Regulations, standards, codes
16
14
Specifications
17
15
Drawings
18-19
1 Proper use
The refrigerated cabinets USS as described in this operating manual are particularly intended
for storing beverages in bottles or cans.
Do not load the refrigerated cabinet with non refrigerated products or use it to cool products.
Proper use only means the use as described above, adhering to the specifications on
installation, connection, operation and service. Any other use is regarded as being contrary to
specification and is prohibited.
2 Safety regulations
The plug-in refrigerated cabinets as described in this operating manual are designed and
manufactured in compliance with the international safety regulations. Like any electrical
appliance, it must be handled with all due care, particularly with consideration to ensuring
electrical safety.
WARNING!
To ensure safe operation in all service conditions, the following safety precautions must be
observed:
-
-
-
The power plug must be connected in regulation matter and as instructed in this
manual.
If the power cable is damaged it has to be replaced by a qualified electrician or a
person with experience in electrical engineering through a cable available from the
manufacturer or Service Organization.
Contact your Service Organization if you are in any doubt about electrical connection,
working or safety of your plug-in refrigerated cabinet.
Remove the cabinet from use if it is not working properly or exhibits any damage.
Disconnect the power plug, transfer the merchandise to other cabinets or a cold-room
and call your local Service Organization.
When disconnecting the power plug, always pull on the plug itself and never the
cable.
Never detach any cover except where specifically instructed in this manual. Doing so
might expose live electrical parts.
If any damage occurs to the power cable, pull the plug to disconnect the cabinet.
Never use a water hose or high-pressure jet to clean the cabinet.
All work on electrical equipment must be left to a qualified electrician. Safety first!
Never connect the cabinet to the power supply if it is damaged (in transit or
otherwise). When in doubt, contact your Service Organization or dealer.
Please pay attention to the maximum load limits when filling the display shelves or
compartments with merchandise! See Chapter 15 Specifications!
Electronic elements may only be replaced by a qualified electrician or person with
experience in electrical engineering!
WARNING!
-
-
-
Only for R600a and R290 flammable refrigerant. Keep clear of obstruction all
ventilation openings in the appliance enclosure or in the structure for buildingin (IEC/EN 60335-2-89:2002)
Do not use mechanical devices or other means to accelerate the defrosting
process, other than those recommended by the manufacturer (IEC/EN 60335-289:2002)
Do not damage the refrigerant circuit (IEC/EN 60335-2-89:2002)
Do not use electrical appliances inside the food storage compartments of the
appliance, unless they are of the type recommended by the manufacturer
(IEC/EN 60335-2-89:2002)
-
-
Appliances which use flammable insulation blowing gases, instructions shall
include information regarding disposal of the appliance (IEC/EN 60335-289:2002)
In order to reduce flammability hazards the installation of this appliance must
only be carried out by a suitably qualified person (IEC/EN 60335-2-89:2002)
3. Installation
3.1 selecting the place of installation
In selecting the place of installation, ensure that the following instructions are observed, this
being vital for a proper and trouble free working of the cabinet:
-
Do not install the cabinet out-doors.
Do not install the cabinet in the vicinity of heating radiators or other heat sources. Do
not install the cabinet where it is exposed to direct sun light (e.g. through windows)
Do not install the cabinet where it is exposed to drafts from ventilators or open doors
Pay attention to air outlet from air conditioners/ ventilators.
The following temperatures and air humidity’s apply as upper limits for the place of
installation: 30 ºC, 55% rel. humidity
Keep the air intake and outlet area around the plinth area of the cabinet clear of
cartons and other obstacles.
When installing the cabinet against a wall, make sure that the refrigeration unit fan is
free to take in the ambient air from the room via the plinth area and discharge it
through the ventilation slots on the back.
In case of free-standing installation in a room, the original accessory rear wall panel
must be screwed to the cabinet back.
Adhere to the specified minimum distances!
-
When installing several cabinets alongside or behind one another, be sure to
observe the specific installation plan.
The drip tray may over-flow in extreme ambient conditions. We thus recommend that
wall and floor surfaces in the installation area be chosen so that moisture or water
have no damaging effects.
3 Installations
Installation options are:
-
Stand-alone installation against a wall or in a corner
In all installation options, air exit must be unhindered through the ventilation slots in
the cabinet top to exclude accumulation of heat.
Only then is trouble-free operation guaranteed.
3.2 Stand-alone installation
When the cabinet is installed as a stand-alone unit against a wall, a min. distance of 50 mm
must be maintained between cabinet back and room wall to ensure free air exit on the cabinet
back. When the cabinet is installed as a stand-alone unit in a corner, no minimum distance
between end wall and room wall is required. USS95xxxx have distance elements on the rear
ex-works
3. Installation
3.3 Hanging instructions
Figure 1
Drill 2 holes with the diameter of 7mm and a depth of 40mm to a surface which you are
confident of its solidity according to your product on the A axis.
Figure 2
Into the holes nail 8mm wall plugs on firmly.
Figure 3
To the wall plugs fix 2 pieces of 4,8*38mm
YSB DIN NO: 7981 screws.
Figure 4
In order the hanger metal plates to fit onto the screws; it is needed to arrange a space of 23mm between the wall plug and the screw head.
Note: Leaving the screw extended from the wall plug may cause cooler fall.
Figure 5
Be sure that the slot hole on the hanger metal plates fit perfectly to the screw. You can axis
the slot hole to the screw when hanging the cooler from the hole on the side of the metal
plate.
3. Installation
3.4 Siting the cabinet
The refrigerated cabinet should be best sited whilst still packed to avoid damages.
If the refrigerated cabinet cannot be sited whilst still packed because of narrow
doors the packaging and transport base should be removed beforehand.
3 Installation
3.5 Installation procedure
-
Remove packaging and transport guards.
When lifting please consider the weight of the cabinet (see specifications).
-
Mount accessories as described in the specific mounting instructions.
Only use original accessories to avoid possible damage to the cabinet.
-
Install cabinet at the desired location
Observe specifications on the desired installation form.
-
Perform horizontal alignment of the registered cabinet on the sides and ends
using water level. If necessary, correct height alignment per hand at the leveller
feet.
3. Installation
3.6 Requirements for electrical connection
The cabinet is connected by inserting the power plug in a socket.
The cabinet must not be plugged into a multiple outlet power strip.
The cabinet has no ON/OFF switch, which is why we recommend provision of a remote
load-break switch. The remote switch must disconnect all poles of the cabinet from the
mains, guarantee a contact opening width of at least 3mm and must be able to be
secured against accidental reactivation. Please ask your electrician.
The socket employed must be firmly installed, properly earthed and separately fuse-protected
by a 16A-circuit breaker, type C.
Supply voltage and frequency of the socket must be in accordance with the data shown on
the type plate of the cabinet. Therefore, the cross-section of the wires must be increased, if
necessary, for long wires to the socket. The local utility company’s regulations on the power
connection 9e.g. earth-fault protection, additional equipotential bonding, and remote control
switch etc.) must be observed. If in doubt, consult a qualified electrician.
Run the power cables so that they are protected from risk of damage and there is no
risk of tripping.
The power cable may not come into contact with parts over 70 ºC.
4 Starting
4.1 Measures prior to starting
If the cabinet has been sharply tilted while being sites on for mounting of accessories it must
be left to stand for at least three hours before being started to allow the lubricating oil to
settle in the compressor! Failure to do so can cause total destruction of the compressor
refrigerating system.
4.2 Setting into operation
Start the cabinet only if it has been installed as described.
-
Plug power plug in socket
When selecting the socket, observe the requirements stated in section 4.6. The cabinet must
not be plugged into a multiple-outlet power strip
-
Switch on remote control switch if provided.
Starting is signalled by the low running noise of fans and refrigeration systems. The fan is
stopped by a switch when door is opened.
-
Switch on cabinet lighting with switch and on the underside of the display
superstructure.
5 Setting the storage temperature
5.1 Information on the product temperature
A precisely defined product temperature is stipulated for the storage of each product group in
refrigerated cabinets by the legislative bodies in EU states.
This temperature range is shown on the digital thermometer.
5.2 Setting the temperature set point
The internal temperature can be regulated only with thermostat.
Pos 1 is maximum high temperature
Pos 4 is best position for products
Pos 7 is minimum low temperature
6 Product Loading
6.1 Loading the cabinet with products
Reaching the prescribed storage temperature following the start of operation depends on the
ambient temperature.
Load the display compartment with the corresponding products.
Ensure that a free circulation of air is possible between the products and the display rack
above them.
7 Evaporator defrosting
Defrosting of the ice and frost deposits that form on the evaporator and evaporation of the
drip water that forms during defrosting is controlled by the temperature controller and carried
out automatically.
During automatic defrosting, the temperature in the display compartment may rise slightly.
Defrost frequency as well as duration and time are factory-set. Defrosting is carried out
automatically during the day, This is why no intervention is necessary in the cabinet. Defrost
water is collected in a tray above the compressor. The defrost water that forms is
automatically evaporated via the waste heat of the compressors. The defrost water tray
should be cleaned at intervals.
8 Cleaning
Turn off power supply to the cabinet by disconnecting the power plug before cleaning.
When remote control switch is provided, this must be protected (e.g. by lock) against any
unauthorised reswitching-in.
Wear safety gloves when cleaning and servicing the device (risk of injuries).
Do not use any aggressive or abrasive cleaning agents. Never use a water hose or a high
pressure jet to clean the cabinet.
8.1 Cleaning the outer casing
Wipe the outer casing with a cotton cloth moistened with lukewarm water.
8.2 Cleaning the internal surfaces
-
Remove the merchandise from the display compartment and transfer it to another
storage place.
Unplug power plug
Do not start cleaning before the internal surfaces have risen near room temperature.
Wear safety gloves when cleaning and servicing the device (risk of injuries).
-
Take accessories out of the display compartment.
-
Moisten cotton cloth with luke-warm water and a little detergent. Clean display
compartment and display racks.
Carefully dry display compartment with a dry cotton cloth.
Carefully dry all cleaned surfaces with a dry cotton cloth.
After cleaning, no humidity must remain in the display compartment.
-
Replace return air grille in reverse order and screw in again. Restart cabinet.
The cabinet can be reloaded with refrigerated merchandise approx. 1…2 hours after putting
into operation. Observe the instructions in section 7.
9 Maintenance
Turn off power supply to the cabinet by disconnecting the power plug before starting any
maintenance on the cabinet. When a remote control switch is provided, it must be protected
(e.g. by lock) against unauthorised reswitching-in.
Wear safety gloves when cleaning and servicing the device (risk of injuries).
9.1 Cleaning the condenser fins
The refrigerated cabinet normally requires no maintenance except for cleaning the condenser
fins twice or three times a year.
-
Disconnect cabinet as described above (see section 11).
The condenser only needs cleaning when a layer of dust, fluff and the like begins to build up
between the fins over the full width.
Regular cleaning of the condenser is important to saving power and avoiding unnecessary
servicing.
10 Shut down
-
Remove the merchandise from the display compartment and transfer it to another
storing place.
Unplug power plug or switch off remote control switch, if provided.
If the cabinet is to be shut down for any length of time, proceed as follows.
-
Clean cabinet (see section 9).
When cabinet is stored in a storage room:
-
Cover cabinet with a cotton sheet.
Do not use plastic tarpaulins as these may encourage formation of moisture and
odours inside the cabinet.
11 Troubleshooting
Any trouble occurring might be due to a minor problem that you can correct yourself following
the instructions below. Do not try any further action if the pointers given cannot solve the
problem!
Repairs on the cabinet must be made only by qualified specialists. Incompetent repair
work can constitute a serious risk to you, your staff and customers, contact your
Service Organization or Dealer for any repairs needed.
12 Environment protection and disposal notes
UGUR refrigerated cabinets are designed to high standards of environmental protection and
recycling convenience. Cyclopentane, an environmentally friendly foaming agent, has been in
use. Cyclopentane is distinguished by zero ozone depletion potential (ODP) and zero global
warming potential (GWP). The refrigerant used and contained within an hermetically tight
circuit is environmentally friendly R134a and R600a, which does not contain chlorine and has
zero ODP.
The device must be disposed of in accordance with applicable regulations. The WEEE
regulations must be observed.
In the interest of preventing environmental nuisance and promoting re-use of the high-quality
materials employed, used commercial refrigeration equipment must be collected for expert
disposal and recycling. Therefore, observe the following disposal regulations:
-
The cabinet must not be discarded with regular municipal waste.
The refrigeration circuit must not be damaged.
Before discarding the cabinet for disposal, make it unserviceable by disconnecting
the power plug and cutting off the power cable.
Consult your local authorities or authorised UGUR dealer for details of collection and
disposal facilities.
Children are often unable to recognise the dangers associated with commercial
refrigeration equipment. Proper supervision must be maintained and children must be
prevented from playing with discarded refrigerated cabinets.
13 Regulations, standards, codes
The plug- in refrigerated cabinet is intended for commercial use in the food trade has been
designed and manufactured in accordance with the standards governing such use.
In particular, it has been designed and manufactured in compliance with the provisions
required under the German Equipment Safety Law (GSG), the VDE Electrical Codes and the
provisions of the European EN standard for refrigerated display cabinets.
The refrigeration circuit have been subjected to leak test.
This appliance complies with EC Directive on Machinery 98/37/EC, the EC Directive on the
Electromagnetic Compatibility 89/336/EEC, and the EC Directive on Low Voltage 73/23/EEC.