1
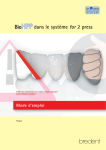
SYSTEM in the for 2 press system Please read these processing instructions and the associated user manual carefully prior to using the product! Processing instructions English Content Introduction................................................................................................................. 3 Important information............................................................................................. 3 Safety information.................................................................................................... 3 Device Setting the pressing pressure................................................................................. 4 Location of the for 2 press...................................................................................... 4 Preparation of the substructure Preparation of the die............................................................................................... 5 Waxing up, substructure fabrication................................................................... 5 Thicknesses of connectors....................................................................................... 6 Distribution of masticatory forces........................................................................ 6 Modelling the basal support on the gingiva...................................................... 6 Spruing and investing the model Separating the sprueing base................................................................................. 7 Investing....................................................................................................................... 7 Checking the angle.................................................................................................... 8 Controlling the expansion of the investment material Dosing recommendation for the for 2 press investment material fluid..... 9 Preheating Preheating process for the investment material mould...............................10 Fill quantities Conversion table wax/granular material...........................................................10 Melting the material Filling the thermoplastic resin into the muffle............................................... 11 Filling the muffl e with the disposable plunger.............................................. 11 The pressing process Pressing with for 2 press.......................................................................................12 Removing the investment material Soaking.......................................................................................................................13 Devesting process....................................................................................................13 Fitting and finishing Step 1..........................................................................................................................13 Step 2..........................................................................................................................14 Step 3.........................................................................................................................14 Step 4.........................................................................................................................14 Step 5.........................................................................................................................14 Veneering with composites....................................................................................15 Cleaning.........................................................................................................................15 2/16 Tel. (+49) 0 73 09 / 8 72-4 40 · Fax (+49) 0 73 09 / 8 72-4 44 · www.bredent.com · e-mail [email protected] Introduction The vacuum press system for 2 press was developed for constructing the framework structure for fixed and removable dental prostheses. These processing instructions include all relevant information required for the fabrication of the respective substructures. When developing the 2 for press system, the focus was on high mechanical strength of the pressed product and high process reliability during the pressing process. The desired mechanical and physical properties are only achieved if the mould is cooled down under pressure after fi lling in the thermoplastic resin. The for 2 press device ensures this procedure thanks to the fully automatic process sequence. Please use only the components of the for 2 press system. Important information Use of symbols: In addition to the special warning information, the processing instructions ! also include symbols to facilitate processing by offering special processing tips. Safety information Intended use: The „for 2 press“ system is intended to be used for the indications described in the instructions for use. Any other use is considered to be use other than intended. The use of thermal protective gloves and safety goggles during the use of this system is strongly recommended. Qualification of the processor: Users who work with the system must • have adequate skills and training for the respective activities. • know the safety requirements concerning the use. It must be ensured that these processing instructions are always at the disposal of the user. 3/16 The device Setting the Press pressure Required inlet air pressure: 4.5 to 6 bar. If the inlet air pressure exceeds 6 bar, a pneumatic maintenance unit should be connected to the pressure inlet. This pneumatic maintenance unit is an optional accessory. A pneumatic maintenance unit removes moisture from the compressed air, thereby protecting the pneumatic sensors and control units of the for 2 press vacuum pressing device. Press pressure at the manometer: for muffle size 3: max. 2.3 bar for muffle size 9: max. 4.5 bar for muffle size 9 XXL: max. 6 bar ! It is important to first check whether other systems may change the pressure adjusted. The dynamic inlet air pressure in the line must not drop below 4.5 bar and not exceed 6 bar. ! Your preheating furnace is used for preheating the investment muffle and for melting Bio HPP. It is recommended to measure the accuracy of your preheating furnace (at 400 °C) before using the system. ! Please also pay attention to the user manual for monitoring the temperature of your preheating oven. It details the process incl. the measurement of the core mould temperature. This measurement requires a special digital thermometer that your responsible bredent field service consultant will provide, or they will carry out the measurement at your laboratory. Please contact your responsible bredent field service consultant for the oven measurement. Location of the for 2 press device To avoid any decrease in temperature when removing the muffle from the preheating furnace and inserting it into the pressing device, we recommend to place the pressing device very close to the preheating furnace. Time for placement in the pressing device: max. 10 seconds (comparable to casting of alloys). 4/16 Tel. (+49) 0 73 09 / 8 72-4 40 · Fax (+49) 0 73 09 / 8 72-4 44 · www.bredent.com · e-mail [email protected] Preparation of the substructure Preparation of the die 1 2 Chamfer or step preparation are required to ensure perfect support of the framework structure. (Fig. 1). A tangential preparation is not recommended (Fig. 2). Waxing up, substructure fabrication All the customary modelling plastics and waxes in dental technology that burn up completely and without leaving residue are suitable. We recommend plastics that do not develop an excessive volume during the burning process, thereby stressing the investment material. A wax layer should also be applied when these types of plastics are used. 3 A customary wax insulation has proven to be suitable when using modelling wax. If the model consists of modelling plastic, Vaseline must be used for the insulation. When producing the framework structure for subsequent veneering with composite veneers, the framework must be modelled anatomically scaled down. The minimum framework thickness must be 0.5 mm. Circular modelling provides additional strength at the crown margin. This area can be reduced to 0.3 mm and sharply tapered after the pressing process. 4 To optimise the accuracy of the fit in the crown margin area, it is recommended that the preparation margin is designed more thickly. Individual abutments, such as the special SKY elegance, can be produced in the moulding process (Fig. 4). When modelling back protection plates for veneering, the transition must be positioned outside the functional surface for veneering. Sharp-edged transitions must be avoided in the modelling. Garland modelling has proven successful for veneer bridges in the front and posterior area in order to increase stability. It is recommended that retaining elements (coarse retention splinters or large retention beads) are also attached to the surface to be veneered (Fig. 5). 5 5/16 Thicknesses of connectors 6 min. 14 mm2 The connector between the bridge units and the bridge unit toward the crown must have an area of 11 to 12 mm2 in the anterior region and an area of 14 mm2 in the posterior region. (Fig. 6). Distribution of masticatory forces - modelling ca. 4 mm Connector cross-sections Posterior region: approx.12 mm2 Anterior region: approx. 14 mm2 ca. 3,5 mm 7 The vertical diameter in the central-basal area of the bridge unit has the largest size. This way it is ensured that occlusal forces are distributed in the best possible manner. For the occlusal to the basal direction - the largest diameter should be in the extension of the central fi ssure, which is important for the stability of the substructure. Modelling the basal support on the gingiva 9 We recommend not veneering the basal application of the bridge pontics on the gingiva of the alveolar ridge with composite veneers. This area must be designed from BioHPP in order to ensure the greatest possible strength in the vertical extension. In the transitions from the composite veneer to the BioHPP framework material, an undercutting retentive end strip must be modelled in the form of an hour glass (Fig. 9). The BioHPP has extremely good polishing properties, while direct contact to the gingiva is possible. 6/16 Tel. (+49) 0 73 09 / 8 72-4 40 · Fax (+49) 0 73 09 / 8 72-4 44 · www.bredent.com · e-mail [email protected] 8 Spruing and investing the model Separating the sprueing base 1 To simplify the subsequent removal of the mould plate from the investment material, we recommend slightly greasing the mould plate with Vaseline . Investing 2 The investments can be performed in two different ways. Either the plastic or wax modelling is taken from the master model and completely invested (Fig. 2), or the modelling is performed on an investment material duplicate model as per the model casting technique and subsequently invested (Fig. 3). To reduce the risk of the mould bursting, as much of the investment material as possible should remain on the object to be pressed. The mould wall may be damaged if the cavity, which is formed by the size of the model, is too large compared to the investment material, which encloses the press object. IMG_0060.JPG 3 Model pressing: For some indications, e.g. telescope secondary designs, the modelling of the secondary part is performed on a duplicate investment material model. In this case, it is important that the investment material model is significantly reduced in order to provide as much space as possible for the investment coverage. This significantly reduces the risk of the mould bursting. In extreme cases, with extremely large models, it is possible to additionally strengthen the mould by investing metal wire. The following points must be observed in order to achieve perfect pressing results: 4 • The object must be placed at least 5 to 10 mm away from the inside of the silicone ring. • The object must be placed outside the heat centre. • The object must be placed at least 10 mm away from the top edge of the mould ring. ! Note: No sharp-edged transitions to the objects. The use of retention beads or retention crystals is recommended. ! Note: In order to avoid the risk of mould separations in a level, it is recommended that these are placed at different heights in the case of several individual objects. 5 - 10 mm 5 10 mm 7/16 To prevent air pockets inside the crowns, it is recommended that a brush or a special "transfuser" (REF 39050001) is used during the investment process. This ensures that the crown interior is free of bubbles. (Fig. 6). The entire mould can then be filled with investment material (Fig. 7). After 20 min. setting time, the hot mould is removed from the plastic base mould using a slight turning motion (Fig. 8). Please always remove the mould keeping the opening facing downwards. This prevents the risk of investment material parts entering the mould. ! 6 7 8 Note: No sharp-edged transitions to the objects. The use of retention beads or retention crystals is recommended. Checking the angle 9 Mixing the investment material: Investment material and liquid are mixed manually for approx. 30 seconds using a spatula. Vacuum mixing unit: If possible, we recommend to use a prevacuum (approx. 10 sec.). Speed: approx. 390 rpm Mixing time: 90 seconds under vacuum 8/16 Tel. (+49) 0 73 09 / 8 72-4 40 · Fax (+49) 0 73 09 / 8 72-4 44 · www.bredent.com · e-mail [email protected] 90 If required, the muffle can be carefully trimmed at the side opposite the filling opening to ensure a straight position of the muffle during the pressing process. The angle should be 90°. (Fig. 9).. ° In order to enable trouble-free pressing, the muffle must always be positioned straight and at a right angle. Controlling the expansion of the investment material Dosing recommendation for the brevest for 2 press investment material fluid Scope of application Concentration of the investment material fluid in % Bresol liquid in ml distilled water in ml Total in ml Powder quantity in g Crowns and bridges (normal stump length) 54 % 25 21 46 210 g * Crowns and bridges (long stump length) 56 % 26 20 46 210 g * Telescope work (secondary part) for short stump lengths 90 % 41,4 4,6 46 210 g * Telescope work (secondary part) for normal stump lengths 95 % 43,7 2,3 46 210 g * Bridgework (secondary part) for very low bars 95 % 43,7 2,3 46 210 g * Bridgework (secondary part) for normal bar heights 100 % 46 0 46 210 g * If no friction over the secondary part made of BioHPP is desired, rather only over inserted, replaceable friction elements, then 110% as core investment. 100 % 41,5 0 41,5 210 g * For normal investment coverage and the production of investment material duplicate models (e.g. model casting technique) 54 % 25 21 46 210 g * * 210 g corresponds to a bag of investment material, mould size 3. 2 bags of investment material are used for mould sizes 9 and 9 XXL. Double the volume of the investment material fluid accordingly! 9/16 Preheating Preheating process of the investment material mould Speed heating process: The setting time of the investment material is 20 min. For the speed process, the mould is then placed directly into a preheated pre-heater oven that is set to the end temperature. The max. preheating temperature of 850 °C may not be exceeded. The preheating temperature of 630 °C may not be exceeded, as otherwise the transition process for controllingthe expansion cannot be fully completed. The disposable press plunger must also run through the entire preheating process, parallel to the mould. After 60 min. at the end temperature, the oven is cooled to 400 °C, keeping the oven door closed, for another 60 min. The mould is now ready for the melting process. 1 2 Caution! The conventional heating process must be performed for large volume plastic models. In order to save time, it is recommended that the preheating is performed overnight and then cooled to the 400 °C melt temperature. ! Conventional heating process: After 20 min. the mould can be directly heated to an end temperature of 630 to 850 °C with a max. heating speed of 8 °C/min. In order to control the expansion of the investment material, there are no waiting periods at lower temperature levels. The investment material is designed for a progressive heating phase. There is a 60 min. waiting period on reaching the end temperature. The mould is then slowly cooled to 400 °C, keeping the oven door closed. ! Caution! When investing titanium patterns, such as the individual SKY elegance abutment, a maximum end temperature of 630 °C may not be exceeded, as an Alpha Case layer is otherwise formed! Control the temperature of your preheater oven ( see page 4) (Fig. 2 and Fig. 3) Fill quantities 3 4 Conversion table Wax / Bio HPP granular material Wax weight incl. sprues Weight BioHPP Muffle size 3 <1g <2g 3,1 g 4,6 g Muffle size 9 <3g <4g 7,2 g 8,7 g max. 7,5 g 1 Pellet =15 g Muffle size 9 XXL 10/16 Maximum fill quantities: Muffle size 3: 5 g BioHPP Muffle size 9: 8 g BioHPP Muffle size 9 XXL: 15 g BioHPP Pellet Tel. (+49) 0 73 09 / 8 72-4 40 · Fax (+49) 0 73 09 / 8 72-4 44 · www.bredent.com · e-mail [email protected] Melting the material Filling the thermoplastic resin into the muffle (at 400° C) 1 Filling the granular material into the melt channel. Then the muffle is placed back into the preheating furnace for 20 minutes (Bio HPP) at a temperature of 400°C. Melting time: 20 minutes (Bio HPP). ! Molten or used material must not be used. The material would become brittle during an additional melting process and major physical properties may be affected. ! Thermoplastic material molten properly The molten thermoplastic material (Fig. 2) exhibits a creamy and uniform appearance. NO brown discoloration may be visible. The material is ready for the pressing process. ! ! Overheated thermoplastic material The thermoplastic material was melted too long or at an excessive temperature. A brown „skin“ has formed on the surface. (Fig. 3). The material can not be used any longer. Filling the muffle with the disposable plunger 2 3 4 When filling the muffle with the disposable plunger (for 2 press filler) the surface with the marking must be facing upward (Fig. 4). The round edge of the plunger is inserted into the muffle to avoid tilting of the plunger during the pressing process. (Fig. 5). The conical press plungers for the XXL mould size are fixed in the mould with the large surface facing downwards. ! 5 The disposable plunger should be pressed down slightly using the muffle tongs Then the muffle (with the molten BIO HPP) is placed immediately into the pressing device. Make sure to avoid long distances between preheating furnace and pressing device! 11/16 The pressing process Pressing with for 2 press 1 Prior to each pressing process, the parameters that were set, such as press pressure or vacuum time, should be checked: Vacuum time (BioHPP): 3 minutes (pre-set) Pressdruck Muffle size 3: 2,3 bar Muffle size 9: 4,5 bar Muffle size 9 XXL: 5,5 - 6 bar 2 The filled muffle is placed on the pressing table of the for 2 press device. Then close the pressing chamber, using both hands to raise the pressing table. Then the entire pressing process is started. ! The vacuum is built up automatically before the pressing chamber is closed. The status LED changes from blue to red and the pressing process starts once the maximum vacuum has been built up. Press the pressing table firmly upward until the silicone seal fits tightly and completely and the status LED changes from blue to red. At the end of the set vaccum time, the pressing table is automatically lowered into the cooling position and cooling under press pressure starts. Cooling under press pressure is completed in 35 minutes. 3 4 At the end of the entire pressing process an acoustic signal is heard and the press plunger is raised automatically into the standby position.. The pressed muffle can be removed from the device. The device is ready for the next pressing process. ! 12/16 Interrupting the active program by pressing the „Program Stop“ button to save time must be avoided. This button is used to stop the entire program sequence. Premature interruption of the repressing time would have a negative influence on the physical properties of the pressed material. The „Program Stopp“ button should only be used if the muffle is not in a straight position inside the device or if a vaccum is not built up owing to contamination. Tel. (+49) 0 73 09 / 8 72-4 40 · Fax (+49) 0 73 09 / 8 72-4 44 · www.bredent.com · e-mail [email protected] Removing the investment material Soaking 1 Soak the muffle in a water bath for approx. 10 minutes to facilitate removal of the material and to minimize the formation of dust. Devesting process The mould can be roughly removed with a hammer. The remaining investment material must be removed with a pneumatic devesting chisel. No distortion takes place, such as for dental casting alloys, due to the elastic material properties of BioHPP. 2 The remainder of the investment material is blasted with aluminium oxide with 110 µm and 2.5 bar. The distance between the object and the nozzle should be at least 3 cm during sandblasting. If the distance is too small, the resin may be heated excessively and damaged. ! 3 Fitting and finishing For wide-span objects, it may be beneficial if the pressing channels are not removed during the fitting process. These are extremely well suited for a firm hold. After fitting, the press channels can be most easily removed with cross-toothed mills. Generally, the object is fitted to the stumps without using occlusal spray or similar aids, as these chemical substances are difficult to remove from the objects. A perfect high gloss polish ensures an optimal surface quality. This requires the following five steps using select rotating tools. 13/16 Step 1 1 Carbide mill, coarse serration, light pressing pressure, 6 - 8,000 rpm. REF Designation H244GH23 Carbide mill, slim bud, coarse serration with relief H194GH40 Carbide mill, conical/round, coarse serration with relief Step 2 2 Diagen Turbogrinder, green, light pressing pressure, 6 - 8,000 rpm. REF Designation 34000200 Diagen-Turbo-Grinder Step 3 Ceragum rubber polishing cylinder, light press pressure, 6-8,000 rpm. Caution: Very light press pressure. REF Designation PWKG00650 Ceragum coarse cylinder, 6 x 19 mm PLKG2250 Ceragum coarse lens, 22 x 4 mm PRKG2250 Ceragum coarse wheel, 22 x 4 mm Step 4 3 4 Goat-hair brush with pumice stone powder, at the dental technician's workplace, approx. 5000 rpm, or on the polishing lathe with pumice stone level II. REF Designation 35000610 Goat-hair brush Step 5 5a Goat-hair brush with Abraso-Starglanz and then cotton buffing wheel without polish 6-8000 rpm on the handpiece (Image 5a) or wool buffing wheel without polish on the polishing lathe level II (Image 5b). 14/16 REF Designation 52000163 Abraso-Starglanz Tel. (+49) 0 73 09 / 8 72-4 40 · Fax (+49) 0 73 09 / 8 72-4 44 · www.bredent.com · e-mail [email protected] 5b Veneering with composites Only composite veneers that harden without additional thermal treatment may be used. The bredent composite veneer with all the visio.lign system components has proven to be most suitable. Numerous scientific studies verify this assertion. Mechanical retentions in the form of beads or splinters have proven to improve the bond strength between BioHPP and the composite veneer (Fig. 1). Bond strength according to DIN EN ISO 10477/Jena Uni 1 Material Bonding strength 40 [MPa] 30 24,10 40,10 38,55 38,30 38,30 1 day 37°C 26,53 Mean values (after 25,000 LW) 20 10 0 Framework material Source: K. Eichner. H.F. Kappert: Dental materials and how these are processed). breCAM BioHPP without retentions for 2 press BioHPP Retention beads for 2 press BioHPP Retention splitters The following order must be followed when conditioning the BioHPP surface. 1. Blast with 2.5 bar and 110 µm Al2O3 2. Do not steam off! 3. Thinly apply the visio.link bonding agent according to the UM* (Fig. 2) 4. Apply the opaquer according to the UM* 5. Apply the composite veneer according to the UM* potentially use the visio.lign system veneers 326-372, 1996 2 In order to prevent undesired stresses or warpage in the frame, it is advisable to separate the individual veneers up to the opaquer and only combine them after polymerisation (e.g. with crea.lign). When using novo. lign veneers, it is also important to separate these and only add the crea. lign after final polymerisation. Cleaning A steam blaster may only be used briefly and with a large clearance between the nozzle and the BioHPP surface for final cleaning. The best cleaning option is ultrasound baths with a bath temperature of max. 40 °C. Highly corrosive solutions may not be used. * UM = visio.lign user manual 15/16 Inserting the substructures All tests were carried out with „Variolink 2“ adhesive material from Ivoclar. Variolink is a dual-curing adhesive cementation system for reliable cementation of thermoplastic resins. Problem Cause Remedy Cavities in the object. Press pressure too low. Press pressure drops owing to additional systems connected. Incorrect sprueing. Objects not outside the center of heat. Restoration needs to be refabricated. Adhere to the instructions! Failed bridge or crown sections. Press pressure too low. Melting temperature too low. Melting time too short. Not enough material. Press plunger tilted or inserted with the wrong side. Restoration needs to be refabricated. Adhere to the instructions! Brown surface areas. Excessive pressure of blasting unit, insufficient distance to the nozzle. Grinding of the surface or refabrication (remake). Adhere to the instructions! Muffle burst during the pressing process. Muffle was not cooled down slowly to the required press temperature. Preheating temperature too low or preheating time too short. Mould plates were removed from the investment material mould with too much force. Restoration needs to be refabricated. Muffle needs to be lukewarm when it is removed from the device. Adhere to the instructions! Use more Vaseline to grease the mould plate Problems of fit. Muffle was removed too early from the pressing device. Incorrect mixing ratio of the investment material. Restoration deformed during removal. Restoration needs to be refabricated. Muffle needs to be lukewarm when it is removed from the device. Adhere to the instructions! Brown streaks on the surface after devesting. Material overheated. Melting time too long. Use BioHPP as granulate for mould size 9 with 30 mm press plunger diameter. Restoration needs to be refabricated. Adhere to the instructions! Use BioHPP in pellet form for large work over 8 g. Unsuccessful pressing. No or only insufficient press pressure. Muffle at an oblique angle in the device. Not enough material. Material overheated. Restoration needs to be refabricated. Observe press pressure. Check manometer for pressure drop when other devices, which consume compressed air, are being operated. Fractured bridge. Cavities in the connector, see item 1. Connector diameter not adhered to. Restoration needs to be refabricated. GmbH & Co.KG · Weissenhorner Str. 2 · 89250 Senden · Germany · Tel. (+49) 0 73 09 / 8 72-4 40 · Fax (+49) 0 73 09 / 8 72-4 44 www.bredent.com · e-mail [email protected] Mistake and subject to change reserved 009127GB-20130226 Trouble Shooting