1
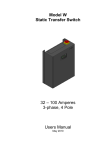
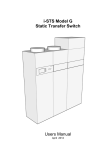
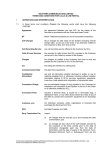
Network Infrastructure Directorate Road Permit System User Manual Road Permit System – User Manual Title: Transport Malta – Network Infrastructure Directorate / Road Permit System / User Manual Version: 1.0 Release Date: 09/02/2011 Document Name: User Manual Page 2 of 30 Road Permit System – User Manual Contents 1 System Overview ............................................................................................................................................................... 4 2 Maintenance Section ....................................................................................................................................................... 5 3 4 2.1 User Profile ................................................................................................................................................................. 5 2.2 Contractors ................................................................................................................................................................ 6 2.3 Stakeholders .............................................................................................................................................................. 8 2.4 Insurance Agencies............................................................................................................................................. 10 2.5 Standard Conditions ........................................................................................................................................... 11 2.6 Works Definitions ................................................................................................................................................. 12 2.7 Roads Inspectors................................................................................................................................................... 12 Trenching Permits Section.......................................................................................................................................... 13 3.1 Create Permit ......................................................................................................................................................... 13 3.2 New Permits ........................................................................................................................................................... 15 3.3 Permits Pending Feedback .............................................................................................................................. 16 3.4 All Permits Pending Feedback........................................................................................................................ 17 3.5 Permits Pending Feedback Review .............................................................................................................. 18 3.6 Permits Issued But Not Valid ........................................................................................................................... 20 3.7 Permits Licenses .................................................................................................................................................... 21 3.8 Permits Created ..................................................................................................................................................... 21 3.9 Permit Reports........................................................................................................................................................ 23 Inspections Section ........................................................................................................................................................ 24 4.1 Inspections Pending ........................................................................................................................................... 24 4.1.1 Edit Inspection ............................................................................................................................................. 24 4.1.2 Works in Progress Reports ..................................................................................................................... 25 4.1.3 Works Completion Reports ................................................................................................................... 27 4.1.4 Compliance Reports ................................................................................................................................. 27 4.2 Inspections Completed ...................................................................................................................................... 30 Page 3 of 30 Road Permit System – User Manual 1 System Overview The new Road Permit System has been designed to be accessed through a web browser. To access the system open your web browser and go to the following address: https://www.roadpermits.gov.mt. The following login screen will appear: If you are logging in for the first time you must use the default password (123456). However the system will immediately ask you to change your password to something more secure. Change your password to anything 6 characters or longer that is not the default password. The menu on the left side of the screen shows that the system is split into three main areas: Maintenance Trenching Permits Inspections The maintenance section can only be accessed by the system administrator and is used to maintain all the data needed by the system such as contractors, stakeholders and insurance agencies. The trenching permits section is used to create and view trenching permits. This section also allows entities to provide feedback for trenching permits as well as print permits that have been issued. Finally the inspections section is used to update information about the inspections of a permit. Here the inspections users can assign the next inspection date, fill in works in progress forms and compliance reports. Page 4 of 30 Road Permit System – User Manual 2 Maintenance Section This section is used to edit information used by the system. All pages within this section are only accessible to the administrator of the system with the exception of the User Profile screen. 2.1 User Profile This screen is accessible to any user that has access to the system since it is used to edit information about the user that is logged in: From this screen you may change your full name as you want it to be displayed along with your email address. If you require you may also change your password by ticking the Change Password check box: Page 5 of 30 Road Permit System – User Manual You may change your password to anything as long as it is 6 characters or longer and is not the default password which is 123456. Clicking the save button will save any information you have edited. 2.2 Contractors This menu item will open a list of all the contractors in the system along with some of the details of each contractor in a table: The administrator may delete a contractor by clicking the Delete button in the row of a contractor. Note that this is only possible if the contractor is not in use in any permits in the system. Clicking on the Edit button will open up a form allowing you to edit the details of a contractor: Page 6 of 30 Road Permit System – User Manual The above screenshot shows the details of a contractor. If the Active checkbox is not ticked that means this contractor will not appear in the list of contractors which may be assigned to a permit. This allows the administrator to blacklist a contractor if it is required. The Not Valid For Works checkbox is used to indicate that if a permit is issued with this contractor then it will not be valid for works. Therefore a permit may be created with this contractor but when the permit is issued, works cannot start until the NID assign a contractor that is valid for works. Each contractor also has a list of Applicant, Insurance Policies and Bank Guarantees. These can be viewed by selecting the required list from the drop down list as follows: Insurance Policies: Bank Guarantees: Note that for a permit to have a contractor assigned to it, the contractor must have both a valid insurance policy and a valid bank guarantee. Page 7 of 30 Road Permit System – User Manual 2.3 Stakeholders This menu opens up the list of all the stakeholders in the system. Stakeholders can be Utilities, Local Councils, Architects or Entities: The administrator may delete a stakeholder by clicking the Delete button in the row of a stakeholder. Note that this is only possible if the stakeholder is not in use in any permits in the system. Clicking on the Edit button will open up a form allowing you to edit the details of a stakeholder: The checkbox Always Required is used to indicate that the stakeholder is always required to provide feedback for a permit. Therefore any stakeholders with this box ticked will always be added to the list of stakeholders that need to provide feedback for trenching permits and there will be no need to add these stakeholders manually to each permit. A stakeholder may be of the type: Utility, Council User and Private. Only one stakeholder of the type Private needs to be added and this stakeholder may be used in a permit when a private individual Page 8 of 30 Road Permit System – User Manual is applying for a trenching permit. The individual’s actual details can be added in the create permit screen. Also each stakeholder has a number of Application Users. Note that these are the actual users of the system. Therefore to add a user to the system, the administrator must add a user to a stakeholder and then assign the relevant permissions to this user. The password of each Application User may be reset by clicking the Reset Password button. The administrator can assign the roles a user has by clicking the User Roles… button which will open the following form: The system makes use of the following roles: Administrator NID User TPCreator Entity User Council User Inspections User Compliance User The roles that a user has will determine which menus will be able to be accessed by the user. It is important that the administrator does not remove the role Administrator from his own User Roles. Page 9 of 30 Road Permit System – User Manual 2.4 Insurance Agencies This menu opens the list of Insurance Agencies in the system: The administrator may delete an Insurance Agency by clicking the Delete button in the row of an Insurance Agency. Note that this is only possible if the Insurance Agency is not in use in any of the insurance policies of the stakeholders in the system. Clicking on the Edit button will open up a form allowing you to edit the details of an Insurance Agency: The Save button will save any updated information of the Insurance Agency. Page 10 of 30 Road Permit System – User Manual 2.5 Standard Conditions This menu opens the list of Standard Conditions in the system: The administrator may delete a Standard Condition by clicking the Delete button in the row of a Standard Condition. Note that this is only possible if the Standard Condition is not in use in any of permits in the system. Clicking on the Edit button will open up a form allowing you to edit the details of a Standard Condition: The Is Memorandum checkbox is used to indicate that the condition will be added to every permit that is issued. This means that when the permit is issued the condition will be automatically attached to the permit. Page 11 of 30 Road Permit System – User Manual 2.6 Works Definitions This menu opens up the list of Works Conditions in the system: Each Work Condition may be added, edited or deleted from this screen as required by the administrator. 2.7 Roads Inspectors This menu opens up the list of all the Roads Inspectors in the system: Each Roads Inspector may be added, edited or deleted from this screen as required. Page 12 of 30 Road Permit System – User Manual 3 3.1 Trenching Permits Section Create Permit This menu is only accessible by users with the TPCreator role assigned to them. It opens up the screen that is used to create a Trenching Permit application: As is shown in the screenshot above the form is disabled until a contractor is selected from the list of active contractors in the system. Once a contractor is selected and the contractor has a valid insurance policy and bank guarantee, the contractor’s insurance details are shown and the form is enabled. To add a work detail to the permit application, click the Insert New Work Detail button. This will show the fields required to add a work detail: Page 13 of 30 Road Permit System – User Manual Choose the correct locality and street of the works and fill in the details about the trench and click the Insert button. This will add the work details to the permit application: You may add more work details to the permit by repeating the process above. Fill in the rest of the application by adding Road Remarks, the Start Date and Duration as shown in the screenshot above. Works Definitions may be added to the application by selecting the works definition from the drop down list and clicking the Insert button next to it. Works Definitions already added may be removed from the list using the Delete button or simply changed to other works definitions using the Edit button. Also do not forget to add a Road Diagram to the application by clicking the Browse button and selecting the diagram from your computer. When you have filled in all the details, click the Save button to send in the Trenching Permit application. The system will display the permit reference that has been assigned to your permit: Page 14 of 30 Road Permit System – User Manual 3.2 New Permits This menu may only be accessed by users with the NID User role. It is used by these users to view any permits in the system which have been created and need to be reviewed: To review a permit, click on the Review button. This will open up the Permit Review screen: From this screen the NID User may view and modify the details of the permit. To check the road image sent in by the applicant, click the View Site Plan button. This screen is also used to add entities to the permit so that they may provide feedback. If the details of the permit are acceptable select VALID from the Action drop down list. If NOT VALID is selected the permit will be invalidated once you click the Save button. Page 15 of 30 Road Permit System – User Manual First it is important to select a Local Council to be associated with this permit from the drop down list Local Council. Then other entities may be added to the permit by selecting the entity from the drop down list under Entities Related to Permit and clicking the Insert Related Entity button: Once all the relevant entities have been added click the Save button to save the permit application. Once this button is clicked the system will notify all entities that you added to the permit that they must provide their feedback within 10 days of the date that you reviewed the permit. 3.3 Permits Pending Feedback This menu is used to view the permits for which your entity needs to provide feedback. It is accessible to users with the Entity User role. Therefore if you are an Application User of a stakeholder that needs to provide feedback for a permit, that permit will show in this screen: Page 16 of 30 Road Permit System – User Manual The screen will also show any permits where you have placed an Objection so that you may return to the permit and remove your objection if you so wish. To leave feedback for a permit, click on the Leave Feedback button. This will open the following form: If you require an extension to the deadline you may tick the Extension box and click the Save button. This will grant you an extension of 5 days to the deadline to provide feedback. Note that this extension may only be applied for once for a permit. Therefore if another entity has already asked for this extension you may not request a further extension. If you need to attach a diagram tick the Attach Diagram check box and click the Browse button to select a file on your computer to attach to your feedback. To place an objection you must tick the Objection check box and click the Save button. This will extend the deadline by 45 days. Alternatively if you find no objection to the permit simply leave the check box un-ticked and provide your conditions in the Conditions text box and click Save. 3.4 All Permits Pending Feedback This menu is only accessible to the NID Users since it shows all the permits that are pending feedback from entities: Page 17 of 30 Road Permit System – User Manual Any permit may be reviewed and then issued if necessary by the NID User by clicking on the Response Review button. The feedback of each permit may be viewed by clicking on the View Feedback button: The feedback of each entity that must provide feedback is shown on the above form. Any diagrams which have been attached may be viewed y clicking on the View Diagram button. 3.5 Permits Pending Feedback Review This screen is only accessible to NID Users since it shows those permits for which the feedback deadline has passed or for which feedback has been provided by all the entities: To review the permit and the feedback, click on the Response Review button. This will bring up the Response Review form which allows you to review the permit application along with the feedback that has been provided by the approving entities. You may then set the Actual Start Date and Duration of the permit and add any particular conditions that will be added to the permit. To issue the permit select ACCEPT from the Action drop down list. Selecting DO NOT ACCEPT will invalidate the permit permanently. Finally click the Save button. Page 18 of 30 Road Permit System – User Manual The above screenshot shows a permit being issued. You also have the option of issuing the permit with a contractor that is Not Valid For Works: Once this permit above is issued it may be printed but on the print out it will state clearly that the permit is not valid for works. You will need to change the contractor to a valid for works contractor for the permit to be considered valid for works. Page 19 of 30 Road Permit System – User Manual 3.6 Permits Issued But Not Valid This menu is only accessible to the administrator since it shows the list of permits that have been issued with a contractor that is not valid for works: To make the permit valid for works you must click the Review Contractor button. This will show the Response Review form enabling you to change the contractor to one that is valid for works: Note that once you click the Save button with a contractor that is valid for works, the permit printout will not state that the permit is not valid for works and works may commence. The permit will also be moved to the Inspections stage. Page 20 of 30 Road Permit System – User Manual 3.7 Permits Licenses This menu is only accessible to those users that are Council Users since it shows the list of issued permits which do not have the license paid: If you are a Council User and you are an Application User of a local council you will be able to see the permits that are related to the local council that you are an Application User of. Once you receive the license fee, from this screen click the Edit button near the permit required and tick the License Paid check box and click the Update button. Once you have ticked this box and update the permit will not show up any longer in this list. Clicking the Details… button will show the details of the permit. 3.8 Permits Created This screen is accessible to any user in the system and it shows a list of all the permits that have been created in the system: Page 21 of 30 Road Permit System – User Manual The list is searchable using any of the following fields: Permit Reference Creator Permit Date Status Project Owner Contractor Applicant Requested Start Date Requested Duration To view all the details of a permit, click on the View button: The above form shows a static representation of the permit. Therefore no details may be changed from this screen. However if the permit has been issued, as is the case in the above screenshot, the permit may be printed using the Print Permit button or the Inspections of the permit may be viewed by clicking the Permit Inspections button. Note that if the site plan attached to the permit is a PDF file it will not be printed with the report. Instead a warning will be displayed stating that you will need to print the site plan separately. To print the site plan separately, click on the View Site Plan button and the site plan will be shown in a new window. From this window you may print the site plan and attach it to the permit print out if required. All the feedback of the permit may be viewed on the screen above along with the Works Definitions, Road conditions and Particular Conditions. Page 22 of 30 Road Permit System – User Manual 3.9 Permit Reports This menu shows a list of reports that are only accessible to NID Users: Various Reports may be viewed by selecting the required report from the drop down list, filling in the required parameters and clicking on the Generate button. All reports (including the Permit Printout) will open in a new window in your browser and will have the following toolbar at the top of the report: The first button is the Export button and is used to export your report to various formats. Simply click the button, select the format to export to and the number of pages and click OK. The second button is the Print button used to print your report. Page 23 of 30 Road Permit System – User Manual 4 Inspections Section 4.1 Inspections Pending This menu is only accessible to users with the Inspections User role. It shows all the permits that are in the inspections stage: When a permit has been issued and is valid for works it will show up in the list above. To edit the inspections of a permit, click on the Edit button. 4.1.1 Edit Inspection This screen above is used by the administrator to edit information about the inspections. The administrator must set a Next Inspection date and click the Save button. This will inform the Field Officer selected in the drop down list of the next inspection date. If it is required an extension may be granted by ticking the Extension needed checkbox. You will need to provide the extension start and end dates. Click Save to save the extension and the system will automatically send notifications by email to inform the project owner about the extension. Page 24 of 30 Road Permit System – User Manual 4.1.2 Works in Progress Reports If you need to fill in a Works in Progress report then click on the View WIP Reports button. This will show all the Works in Progress reports that are associated with the permit: To view a previously entered WIP report click on the View button. To fill in a new WIP report click on the Fill in New WIP Report button. This will open up the WIP report screen: If any defects were found tick the Defects checkbox. You can then tick the required boxes if the contractor has been informed of defects or action has been taken. If you require a written warning to be sent tick the Written Warning checkbox. This will send a notification email to the administrator informing him that a written warning needs to be sent. Five photos may be attached to the report of necessary. Click Insert Report to save the report. Page 25 of 30 Road Permit System – User Manual Note that if you insert a WIP report with the Defects Found check box ticked then the permit’s status will be set to TEMPORY RE-INSTATEMENT and you will not be able to file a Works Completion report until a new WIP report is entered with no defects found. If you are an administrator and you need to send the warning email then find the WIP report requiring the email and open it. The screen will show a textbox for you to type the required email. Click Send to send the email to the contractor: The WIP form above is editable since it has already been filled in but you will be able to print the report by clicking on the Print Report button. Page 26 of 30 Road Permit System – User Manual 4.1.3 Works Completion Reports When the works have been completed a Works Completion Report must be filled in. This can be accessed by clicking the Works Completion Form button in the Edit Inspection screen. The following form will be displayed: Fill in the required details and attach any photos if necessary. Click the Insert Report button to file the works completion report. The permit’s status will now be COMPLETED. Once a works completion report is filled in you can view this report but the form will not be editable. However you will be able to print the report by clicking on the Print Report button. 4.1.4 Compliance Reports If a permit has been sent to the compliance stage you may tick the Compliance Sent check box to indicate that you have sent for the compliance certificate. Page 27 of 30 Road Permit System – User Manual Once the compliance certificate has been received and is verified as compliant you may tick the Compliance Received check box and the Works Compliant check box: Once this is done and you click the Save button, the compliance inspections will be scheduled. One will be scheduled immediately and the next four will be scheduled over the next two years. Page 28 of 30 Road Permit System – User Manual Only users with the Compliance User role can fill in compliance reports, by clicking on the Compliance Inspection Reports button which is now enabled in the screenshot above. The 5 compliance reports for the permit will be displayed: If the scheduled date of the compliance inspection has passed you may fill in the compliance report by clicking on the Edit button: Once a compliance report is filled in you can view this report by clicking on the Edit button. The form will not be editable but you will be able to print the report by clicking on the Print Report button. Page 29 of 30 Road Permit System – User Manual 4.2 Inspections Completed After a Works Completion Report has been filled in and the permit status is COMPLETED, the permit is shown in this list. This menu is only accessible to a user with the Compliance User role: From this screen you may decide whether a permit needs to be moved to the compliance stage that was mentioned previously or whether it can be closed permanently. Once you have clicked on either button the permit is not shown in this screen anymore. Page 30 of 30