1
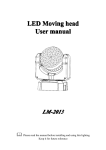
LM-3109 manual Fixture dimensions Net weight 337x228 x220mm 10kg NOTE : Due to improvement , the product specifications and this manual are subject to change without prior notice LED MOVING HEAD LM-3109 USER MANUAL 19 Please read the manual before installing and using this lighting Keep it for future reference LM-3109 manual CATALOG LM-3109 manual │ ├Scan BlackOut │ │ ├ScanBlackOut:ON │ │ └ScanBlackOut:OFF │ └Feed Back │ ├Feed Back:ON │ └Feed Back:OFF └Information ├Time:tt/mm/ss └Date:mm/dd/yy ; Blackout during pan/tilt movement ; Return the head to the correct starting position after changing the position ; Information consultation SPECIFICATIONS CATALOG ....................................................................................1 DESCRIPTION ............................................................................2 OVERVIEW .................................................................................3 SAFETY INFORMATION .............................................................4 POWER CONNECTION ..............................................................5 DATA CONNECTION ...................................................................6 INSTALLATION............................................................................8 OPERATION................................................................................8 CHANNEL FUNCTIONS ..............................................................9 CONTROL PANEL..................................................................... 13 MENU INSTRUCTION...............................................................13 SPECIFICATIONS ..................................................................... 18 1 Electrical Power supply Power consumption Fuse Photometric data Light source LED rated life Beam angle Dynamic effects Color changing effects 90~260V AC , 50/60Hz 400W 5A 5*20 108 pcs 3W LEDs , 28R , 28G , 28B, 24W 100,000 hours □15°, □25°, □30°, □35°, □40°, □45°, □60° Can create excellent color mixing with high even and uniform distribution of brightness and light output Strobe Variable electronic strobe 0~25F.P.S Dimmer Variable electronic dimmer 0~100% Pan 540° or 630°(8/16 bit movement resolution) , automatic self-correction Tilt 270°(8/16 bit movement resolution),automatic self-correction Other featrues Electronic strobe with pulse effects Control and programming DMX channels 11 or 13 channels (depend on 8/16 bit movement resolution) Protocols DMX-512 Operation modes DMX mode,Master/Slave mode,Sound Activated mode Construction Color Black Housing ABS Protection rating IP20 Thermal Working temperature -20℃~ +35℃ Thermalstat Built-in thermalstat for overheating protection Physical 18 LM-3109 manual LM-3109 manual │....... └Program Step 62 DESCRIPTION Thanks for using our Products , this device is a great and reliable unit that can meet most of your requirements for professional markets . This product SET menu SET Menu: ├Reset Machine │ ├Reset:ON │ └Reset:OFF ├Load Parameter │ ├Load ON │ └Load OFF ├Master / Alone │ ├Master Mode │ └Alone Mode ├Auto / Sound │ ├ Auto Mode │ └Sound Mode ├MIC Sense:00~99% ├TC Switch │ ├TC Switch Mask │ │ ├Switch Mask ON │ │ └Switch Mask OFF │ └TC Switch Temp │ ├TC Temp Cap │ │ ├TC Temp Cap:Yes │ │ └TC Temp Cap:No │ └TC Temp Set ├Scan Setting │ ├Reverse Pan │ │ ├Reverse Pan :ON │ │ └Reverse Pan :OFF │ ├Reverse Tilt │ │ ├Reverse Tilt:ON │ │ └Reverse Tilt:OFF │ ├Scan 16 Bit │ │ ├Scan 16 Bit:ON │ │ └Scan 16 Bit:OFF │ ├Pan Degree │ │ ├Pan Degree:630 │ │ └Pan Degree:540 can be operated as a single unit or in multiple units for large applications. This moving head has got the nice sculpt, efficient, save electricity and durable. It is suitable for saloon, disco, hotel, showplace, studio, stage,etc. This product complies with the following standards: GB7000.1-2007/IEC60598-1:2003 GB7000.217-2008/IEC60598-2-17:1984+A2:1990 Upon receiving products, please check carefully that there has been no ; MIC sensitivity adjusting ; Reduce output if over temperature damage caused in transportation and that the following parts are enclosed: User manual------------------- 1 Pcs ; ; (Pass-word protected,common user taboo) ; TC Temperature Capture Omega clamp------------------ 1 Pcs Main features ; TC Temperature set Super bright 3 Watt LED, long lifespan 100,000 hours Electronic strobe with pulse effects 11 or 13 standard DMX channels 3 control modes:DMX 512, master/slave mode,sound activated ; 16 bit resolution mode Maximum Pan-movement: 540°or 630°,self-correcting Maximum Tilt-movement: 270°, self-correcting ; 630° ; 540° Electronic strobe with pulse effects 17 2 LM-3109 manual LM-3109 manual Smooth electronic dimming make the light more colorful ├Cal Green:-15~+16 Onboard control panel and LCD graphic display ├Cal Blue:-15~+16 ├Cal White:-15~+16 OVERVIEW ├Cal Pan:-128~+127 └Cal Tilt:-128~+127 Red __ Static red Green __ Static green Blue __ Static blue Yellow __ Static yellow Cyan __ Static cyan PureWhite __ Static Pure White White __ Static white White __ Static white 3200K __ 3200K color temperature 5600K __ 5600K color temperature 6500K __ 6500K color temperature 8500K __ 8500K color temperature 10000K __ 10000K color temperature ChangeColor __ Changecolor program A. Carrying handle Twinkling __ Twinkling program B. Safety cable hole Fade __ Fade program C. Installation holes Macro __ Auto program , enter can edit it D. DMX IN socket/ DMX OUT socket E. Power switch Macro Menu: ├Step Quantity:62 ├Program Step 01 F. Fuseholder │ ├ChangeColor G. Power supply │ ├Twinkling H. Control pannel │ └Fade 3 16 LM-3109 manual LM-3109 manual SET menu←ESC― Fade ―ENTER→null UP↑↓DOWN SET menu←ESC― Macro ―ENTER→Macro menu UP↑↓DOWN SAFETY INFORMATION The Menu functions provided are described in the following sections . Function menu A001(with actually stored address) __ DMX mode Important Every person involved with the installation , operation and maintenance of this device has to be qualified and follow the instructions of this manual . Press ENTER enter to the submenu DMX Menu: Manufacturer will not with responsibility for those operation not according ├DMX Address: 001 ; Set the DMX address └No DMX Signal ; Run if there is no DMX signal to this Instruction ├Stop Run Verify that the voltage matches the rated voltage. ├Hold Run Always disconnect the power before attempting to open the ├Auto Run equipment housing or carrying out any maintenance. └Sound Run Always ground (earth) the fixture electrically . ManualDimmer ManualDimmer: Do not expose the fixture to rain or moisture. ├Light Switch Verify that the feed cables are undamaged and rated for the │ ├Light ON current requirements of all connected devices before use . │ └Light OFF ├Light Red:000 ; Red dimmer ├Light Green:000 ; Green dimmer ├Light Blue:000 ; Blue dimmer ├PureWhite:000 ; PureWhite dimmer ├Light White:000 ; White dimmer ├Light Strobe:000 ; Strobe adjustment ├Scan Pan:128 ; Pan -movement with 8 Bit-resolution ├Scan Tilt:128 ; Tilt -movement with 8 Bit-resolution ├Scan PanFine:000 ; Pan -movement with 16 Bit-resolution ├ScanTiltFine:000 ; Tilt -movement with 16 Bit-resolution └Light Calibrate Never attempt to bypass the thermostatic switch or fuses. Always replace defective fuses with ones of the specified type and rating. Ensure that the air flow through fans and vents is free and unobstructed. Avoid looking directly into the light source (especially those who suffer from epileptic fits) When suspending the fixture above ground level, verify that the structure can hold at least 10 times the weight of all installed devices. ├Cal Red:-15~+16 Verify that all external covers and rigging hardware are securely 15 4 LM-3109 manual LM-3109 manual fastened and use an approved means of secondary attachment such as a safety cable. Block access below the work area whenever installing or removing the fixture. Avoiding hit the Light when you are move or install the light . Maximum ambient temperature (Ta) is 35°C. Do not operate fixture at temperatures higher than this . The surface temperature of the light can reach to 50°C, cool down at least 15 minutes before you operate the light. The minimum distance between light-output and the illuminated surface must be more than 0.5 meters. Keep all combustible materials (for example fabric, wood, paper) at least 0.3 meters away from the fixture . If the exterior cord of the fixture is damaged, it must be replaced by manufactory, agent or a qualified technician . POWER CONNECTION Please ensure that the voltage matches the rated voltage and the device is always connected to the earth properly . Depending on the application, the lighting fixture may require a different connector. Please refer to the below wire color code if installing a new connector Wire Connection Brown AC Live Blue Neutral 5 Menu navigation SET menu←ESC― A001(with actually stored address) ―ENTER→ DMX menu UP↑↓DOWN SET menu←ESC― ManualDimmer ―ENTER→ManualDimmer menu UP↑↓DOWN SET menu←ESC― Red ―ENTER→null UP↑↓DOWN SET menu←ESC― Green ―ENTER→null UP↑↓DOWN SET menu←ESC― Blue ―ENTER→null UP↑↓DOWN SET menu←ESC― Yellow ―ENTER→null UP↑↓DOWN SET menu←ESC― Cyan ―ENTER→null UP↑↓DOWN SET menu←ESC― Purple ―ENTER→null UP↑↓DOWN SET menu←ESC― PureWhite ―ENTER→ null UP↑↓DOWN SET menu←ESC― White ―ENTER→ null UP↑↓DOWN SET menu←ESC― 3200K ―ENTER→null UP↑↓DOWN SET menu←ESC― 5600K ―ENTER→null UP↑↓DOWN SET menu←ESC― 6500K ―ENTER→null UP↑↓DOWN SET menu←ESC― 8500K ―ENTER→null UP↑↓DOWN SET menu←ESC― 10000K ―ENTER→null UP↑↓DOWN SET menu←ESC― ChangeColor ―ENTER→null UP↑↓DOWN SET menu←ESC― Twinkling ―ENTER→null UP↑↓DOWN 14 LM-3109 manual Green/Yellow Channel 13 – Tilt fine (16 bit mode) Value Function 000~255 Tilt fine LM-3109 manual AC Ground DATA CONNECTION The fixtures may be conected via 3-Pin signal cables. CONTROL PANEL In DMX mode , at the last fixture in the chain , the DMX output has to connected with a DMX terminator . This prevents electrical noise from Button ESC disturbing and corrupting the DMX control signals . Call the main menu, or escape the current menu(i.e. return to the upper menu and give up the selected item or parameter) UP Browse the menu item forward or increase the parameter DOWN Browse the menu item backward or decrease the parameter ENTER Confirm the selected item or parameter(i.e. enter the next menu, or escape the current menu and save the selected item or parameter) Controller termination plug Master/slave connection MENU INSTRUCTION Power on the fixture , use UP or DOWN button could scroll all function menu step by step as follow: A001,ManualDimmer,Red,Green,Blue,Yellow,Cyan,Purple,PureWhite, Master Slave Slave White,3200K,5600K,6500K,8500K,10000K,ChangeColor,Twinkling,Fade, Occupation of the XLR-connection: Macro Press Enter-button if you wish to select one of them . Press ECS-button enter SET menu , press again return . 13 DMX-output XLR mounting-socket: DMX-input XLR mounting-plug: 6 LM-3109 manual LM-3109 manual 1: Ground 1: Ground 060 - 069 Green 2: Signal - 2: Signal - 070 - 079 Blue 3: Signal + 3: Signal + 080 - 089 Yellow 090 - 099 Cyan 100 - 109 Purple 110 - 119 White 120 - 129 Color temperature 3200K 130 - 139 Color temperature 5600K 140 - 149 Color temperature 6500K 150 - 159 Color temperature 8500K Termination plug The termination plug is a male XLR plug with a 120 ohm, 0.25 watt resistor soldered between pins 2 and 3 . If you are making your own cables, be sure to use standard two conductor shielded cable (This cable may be purchased at almost all professional sound and lighting stores). Your cables should be made with a male and 160 - 169 Color temperature 10000K female XLR connector on either end of the cable. Also remember that DMX 170 - 174 ChangeColor (The motors rotate automatically) cable must be daisy chained and cannot be split. 175 - 179 ChangeColor (The motors controlled by controller) 180 - 184 Twinkling (The motors rotate automatically) 185 - 189 Twinkling (The motors controlled by controller) 190 - 194 Fade (The motors rotate automatically) 195 - 199 Fade (The motors controlled by controller) 200 - 219 No function 220 - 229 Reset 230 - 234 Auto macro (The motors rotate automatically) 235 - 239 Auto macro (The motors controlled by controller) If you use a controller with a 5 pin DMX output connector, you will need to 240 - 244 Sound macro (The motors rotate automatically) use a 5 pin to 3 pin adapter. The chart below details a proper cable 245 - 249 Sound macro (The motors controlled by controller) conversion: 250 - 255 No function DMX512 OUT DMX512 IN 3-PIN XLR 3-PIN XLR Ground Signal – Signal + 1 3 2 1 3 2 3-PIN TO 5-PIN CONVERSION CHART Conductor 3 Pin Female (output) 5 Pin Male (Input) Ground Pin 1 Pin 1 signal - Pin 2 Pin 2 signal + Pin 3 Pin 3 7 Channel 12 – Pan fine (16 bit mode) Value Function 000~255 Pan fine ` 12 LM-3109 manual 236~255 Natural speed(fast) LM-3109 manual Do not use Pin 4 Do not use Pin 5 Channel 8 - Strobe Value Function 000~009 No strobe function 010~149 Strobe 150~199 Fast in slow out 200~249 Slow in fast out 250~255 No strobe function INSTALLATION When suspending the fixture above ground level, verify that the structure can hold at least 10 times the weight of all installed devices. Verify that all external covers and rigging hardware are securely fastened and use an approved means of secondary attachment such as a safety cable. Channel 9 - General dimmer Value Function 000~255 General dimmer 0~100% Channel 10 – Rainbow effects Value Function 005 - 031 R(↑)G( 0 )B( 0 ) 032 - 063 R(↓)G(↑)B( 0 ) 064 - 095 R(↑)G(255)B( 0 ) 096 - 127 R(↓)G(↓)B(↑) 128 - 159 R(↑)G( 0 )B(255) 160 - 191 R(↓)G(↑)B(255) 192 - 223 R(↑)G(255)B(255) 224 - 255 R(↓)G(↓)B(↓) Screw clamp onto the Omega-holder Insert quick lock fasteners Tighten quick-lock fasteners into the installation holes fully clockwise . Use safety-cable for second protection Channel 11 – Auto program,reset OPERATION Value Function 000 - 049 RGB dimmer in operation 050 - 059 Red 11 Stand-alone operation 8 LM-3109 manual Stand-alone opreration allows the fixture works without controller and be LM-3109 manual Channel 1 - Red dimmer controlled by the control panel directly . Please refer to the menu Value Function instruction . 000~255 Red dimmer 0~100% Master / slave operation Setting the first fixture to master-device and the following devices to slave-devices (work in DMX mode), then all devices will run synchronously . Please refer to the menu instruction . Channel 2 - Green dimmer Value Function 000~255 Green dimmer 0~100% Channel 3 - Blue dimmer DMX operation You can control the devices individually or synchronously by the Value Function 000~255 Blue dimmer 0~100% DMX-controller . You should set the device’ s start address in the DMX menu by control panel .After setting the address , the device enter DMX mode . Channel 4 - White dimmer Value Function 000~255 White dimmer 0~100% Setting the start address Each fixture requires a "start address" from 1 to 512. A fixture requiring one Channel 5- Pan or more channels for control begins to read the data on the channel Value Function indicated by the start address. For example, a fixture that uses 4 DMX 000~255 Pan 0 - 630° channels and was addressed to start on DMX channel 1, would read data from channels: 1, 2, 3, 4. Choose start addresses so that the channels used do not overlap, and note the start address selected for future reference. Note that Assign the same address to the different lightings,they will receive the same signal . Channel 6 - Tilt Value Function 000~255 Tilt 0 - 270° Channel 7 - Scan speed Value CHANNEL FUNCTIONS 9 Function 000~225 Fast to slow 226~235 blackout during pan/tilt movement 10