1
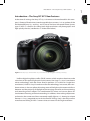
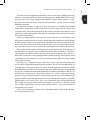
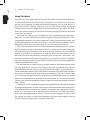
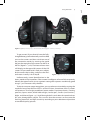
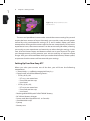
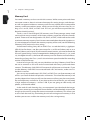
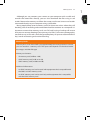
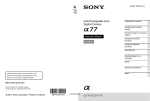
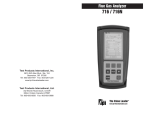
1
2
Chapter 1: Getting Started
Chapter 1: Getting Started
Introduction—The Sony SLT-A77: New Features
3
Introduction—The Sony SLT-A77: New Features
At the time of writing, the Sony SLT-A77 is the most advanced model in this company’s lineup of fixed mirror interchangeable lens cameras. It is an update of the
discontinued Sony A33 and A55 and is one of the best Advanced Photo System
type-C (APS-C) cameras for taking both high-resolution still photographs and
high-quality movies (see Movies vs. Videos box below).
Figure 1-1: Sony A77 camera with 16-50 mm kit lens (Photograph courtesy of Sony)
Unlike a digital single lens reflex (DSLR) camera, which requires the mirror to be
raised out of the optical light path to the sensor, the Sony A77 uses “translucent
mirror technology” with the mirror fixed in position. SLT stands for “single-lens
translucent,” which is Sony’s brand name for this technology. In essence, the translucent mirror is a beam splitter, diverting some of the light to the automatic focus
detector and the majority of the light to the imaging sensor for real time viewing
and recording of the subject. This combination of mirror and sensor allows for
simultaneous focusing and movie recording. In addition, when taking still pictures
and movies, the camera can focus extremely rapidly (figure 1-2). Among its unique
features is a 24.3 megapixel sensor. At the time of writing, Sony is the only camera
manufacturer selling an APS-C camera that can record at this high resolution.
1
1
4
Chapter 1: Getting Started
Movies vs. Videos and Sensor Size
What is the difference? From a dictionary perspective, a movie is a captured series
of pictures (e.g., in the motion picture industry) and a video is a series of images
recorded onto videotape or some other electronic video recording device (e.g., for
the television industry).
Both of these definitions ignore the camera’s role in capturing the picture.
Although we would prefer to refer to the recording of moving pictures on the
Sony A77 as a “video,” Sony has chosen to use the term “movie.” To be in synch
with Sony’s terminology we will be utilizing the term “movie” when referring to
the recording of moving pictures through the camera. There may be some cases
where industry terminology is so strong that we will use “video” but those will be
the exceptions rather than the rule.
What makes the Sony’s sensor so advantageous for movie making is that it uses
a sensor with an overall size that is greater than that found in camcorders. It is often
referred to as an APS-C (Advanced Photo System). Its sensor is 23.5 mm x 15.6 mm,
which is the size of sensors that is used in most digital SLRs. For video work this
allows the camera to record with a much narrower depth of field and when shooting in low light levels, recording less noise.
Figure 1-2: Light path through the Sony A77 (Photograph courtesy of Sony)
Introduction—The Sony SLT-A77: New Features
5
The absence of a hinged mirror provides several advantages. Perhaps the most
obvious is automatic focusing when recording movies. While other DSLRs can do
this, only Sony uses a high-speed phase detection system. Other cameras, assuming they automatically focus while recording movies, use the slower contrast
detection method.
A second advantage is a high burst rate: the camera can rapidly fire multiple
shots with a single press of the shutter button. Most cameras have a mirror that
must be swung out of the light path to the sensor and then returned to its rest
position to again direct light to the optical viewfinder. This cycle limits how fast
the camera can be fired.
Finally, an underappreciated aspect of translucent mirror technology is the
inclusion of an electronic first curtain shutter. Because of the fixed mirror design
and this shutter, there is no mechanical movement for initiating exposure. This
means that the camera is virtually vibration-free, an advantage for discriminating users who do not want to sacrifice sharpness because of camera movement.
Sony replaced the optical viewfinder with an electronic one. Early designs of
the electronic viewfinder were inadequate: they lacked sharpness, and movement appeared to flicker when viewing rapidly moving objects. Now, the A77’s
electronic viewfinder is sharp enough to be used for focusing, and subjects move
smoothly across the screen. You can also see how settings affect the image before
releasing the shutter.
The Sony 24.3 megapixel sensor works best at ISO 100, providing the greatest dynamic range and generating the least noise. The ISO can be reduced to 50
on bright days when you wish to use a long shutter speed to blur motion. Under
lower light levels, the ISO can be increased to 1600, which provides an acceptable
image. For surveillance work under extremely low lighting conditions, the ISO can
be raised to a maximum of 16000. Because the A77 sensor’s high pixel density
requires using smaller photosites, the generation of sensor noise is theoretically
greater. However, with the improvement in sensor design, the Sony A77 generates
good images at ISO 1600. For us, this is not a limitation since we rarely go above
this setting. Previously, when working with the A33 and the A55, the ISO’s range
was smaller, ranging from 100 to 12800, whereas the A77 has an expanded ISO
range from 50 to 16000.
If you want one camera that can do an excellent job for still and movie work,
this is the camera for you.
1
1
6
Chapter 1: Getting Started
Using This Book
The Sony A77 works effectively for all users, regardless of their level of expertise.
It can be used with automatic settings, so beginners can take pictures by simply
pointing and shooting. As you become more proficient, you can alter the A77’s
exposure and focus settings. Eventually, you can take full control by setting the
camera to manual and disregarding its recommendations. This allows you to elevate your picture taking to a new level and create images that depict the mood
and results you intend.
This book has chapters for the beginner, the intermediate, and the expert.
Beginners can find helpful information in chapter 4, “Automatic Settings”; intermediate photographers can turn to chapter 6, “Taking Control of the Camera”; and
expert photographers can refer to chapter 7, “Manual Operation of the Camera.”
Regardless of your skill or interest level, this is an exciting camera to use.
At first, the abundance of commands and controls can make the Sony A77 confusing. The book starts with a description of the A77’s automatic functions, then goes
on to semiautomatic functions, and then to manual functions. We describe the
camera’s capabilities in simple terms to help you learn what the camera can do.
We cover movie-making features, managing your still pictures and movies, and
quick tips to help reduce errors and improve your use of the camera. In addition,
we put it all together with some real-life scenarios, which is especially helpful for
novice and intermediate users.
For the beginner, it makes sense to use the camera’s automatic modes. After
gaining experience, you can start using commands to override the camera’s
recommended settings. There are two fully automatic modes—Auto and Auto+—
which make the camera a point-and-shoot instrument. The Auto option enables
the camera to automatically adjust exposure and focus. The Auto+ option does
the same thing, but goes further by attempting to identify the scene and set the
aperture and shutter most appropriate for the subject. As in a point-and-shoot
camera, you cannot override the camera’s exposure recommendation in Auto or
Auto+ modes.
The Sony A77 uses advanced image processing techniques to improve pictures
by firing multiple shots. At times, the camera will automatically take several shots
and combine them to render one superior image from the aggregate in Auto+
mode. It is not always easy to determine which mode to use. Auto will record a
technically good photograph, which is sharp and well exposed; but Auto+ may
do a better job when it successfully identifies the scene and employs advance
multiple exposure techniques to improve the image.
Using This Book
7
Figure 1-3a: Top of Sony A77 camera body (Photograph courtesy of Sony)
To get started, if you already have the fullycharged battery pack and memory card installed,
turn on the camera and then switch on one of
the automatic modes by moving the mode
dial on the top right of the camera to AUTO or
AUTO+ (figures 1-3 a–b). The Auto or Auto+ icon
will display in the upper left corner of the LCD
screen. All you need to do is find your subject,
let the camera do its thing, and press the shutFigure 1-3b: Close-up of mode dial
ter button. It really is that simple.
Unfortunately, scene identification in the
Auto+ mode can be imperfect. If the camera’s intelligent software fails to correctly
identify the type of scene, it uses a generic setting that captures a technically good
image—just not necessarily the best.
To obtain accurate scene recognition, you can take an active role by turning the
mode dial away from AUTO or AUTO+ to the SCN icon. Once there, the LCD screen
will present a list of eight predefined scene modes: Daytime portraits, Evening
portraits, Sports action, Hand-held twilight, Landscapes, Sunsets (and sunrises),
Night, and Macro (figure 1-4). Scroll through the list and select the one that best
fits your photographic subject. This ensures that the camera can fine-tune the
focusing, exposure, and light sensitivity according to your selection and produce
an excellent quality picture.
1
1
8
Chapter 1: Getting Started
Figure 1-4: SCN predefined scene
modes menu
The auto and predefined scene modes control the camera settings for you and
require the least amount of input. Ultimately, you can take a step toward greater
control by using semiautomatic settings (P, A, and S modes) where you select
one exposure setting and the camera adjusts the rest automatically. For the most
experienced users, the camera controls can be set manually (M mode), allowing
you to rely on your experience and creativity to select the right settings. In this
case, all of the camera menu and button controls are at your disposal. This gives
you the opportunity to fully exercise your artistic creativity to capture unique
images. Also, you can be confident when you set the white balance, shutter speed,
or aperture that the camera will not override your settings.
Setting Up Your New Sony A77
When you take your camera out of the box, you will have the following
components:
• Camera body: 23.4 effective megapixel Sony A77
• If purchased, one of the following lenses:
- SLT-A77K/A77VK
• DT18-55 mm zoom lens
• Front and rear lens cap
• Lens hood
- SLT-A77Q/A77VQ
• DT16-50 mm zoom lens
• Front and rear lens cap
• Lens hood
• Rechargeable NPFM500H “InfoLITHIUM” battery
• BC-VM10A battery charger
• Power cord (Not supplied in U.S. or Canada)
• Shoulder/neck strap
• Eyecup
• Battery case
Battery
•
•
•
•
•
•
9
USB cable
Body cap
AV cable
Accessory shoe cap
CD-ROM featuring Image Data Converter and Picture Motion Browser (PMB)
Camera manual
Make sure you have everything before assembling your new camera. It is very
easy: fully charge your battery, attach the lens, and insert a memory card on which
to store your pictures and movies. When you are done, you’re ready to start.
Battery
The supplied “InfoLITHIUM” lithium ion battery needs to be fully charged before
use. It can be damaged if allowed to drain completely. Use Sony certified batteries only. Noncertified batteries will void your warranty and may ruin your camera.
Why Use a Certified Battery?
Counterfeit batteries may not be assembled under the same guidelines and regulations as Sony certified batteries. They may not hold as much of a charge or may
drain too quickly. Although they are less expensive, the money saved is not worth
risking your investment in a high-end camera.
A battery charger is supplied with your camera. For U.S. and Canadian battery
chargers, unfold the prongs on the charger and plug it directly into an electrical
socket. For cameras sold outside of the U.S. and Canada, use the supplied cable
to plug the battery charger into an electrical socket and then insert the battery
into the charger. The charge indicator light glows while charging and extinguishes
when it is complete. If the light flashes, this indicates there is a problem such as a
defective battery. Sony estimates it takes 175 minutes to fully charge a completely
depleted battery. Future charges will take less time, since there should always be
some residual charge within the battery.
How many shots can you take on a fully charged battery? Well, that depends on
how you use the camera, how much time you leave the camera powered on between
shots, and your combination of movies, panorama pictures, and still pictures. Sony
estimates that you can record approximately 470 images using the viewfinder and
530 images using the LCD screen. This may seem like a lot of recording, but it isn’t.
We can easily take this many pictures in one afternoon of photography. Keep in mind
that if you are also recording movies, the number of images drops considerably.
Therefore, we recommend you get a second battery, keep it charged, and have
it available in the event your camera’s battery runs low on power.
1
1
10
Chapter 1: Getting Started
Memory Card
You need a memory card to use with this camera. Unlike some point-and-shoot
consumer cameras, there is no internal memory for storing images, and the camera will not operate without a memory card! You may already have a compatible
memory card from another camera, which you can use for your new Sony A77 as
long as it is an SD, SDHC, or SDXC card. If it isn’t, you will have to purchase one.
But what should you buy?
The A77 uses a Secure Digital (SD) memory card. These postage-stamp-sized
cards come in many varieties, with various memory capacities and data transfer
speeds. These cards are designated as SD, SDHC, or SDXC, which refer to the card’s
maximum memory capacity. Don’t be too concerned about these designations as
it is more important to know the memory capacity of the card (see the following
“Memory Card” box) and its class rating.
At the time of writing, Sony sells an SDHC Class 10 card that holds 32 gigabytes
(GB) of data for about $100. But you can opt for a 16 GB card (about $60) or an 8
GB card (about $40) instead. If you intend to record movies, you need to check the
SD card’s speed rating. Cards are categorized as belonging to classes (2, 4, 6, 8 and
10); the higher the class, the faster the memory card can receive and record data.
According to Sony, the Class 4 card is the minimum speed needed for recording
movies in AVCHD format.
Instead of using an SD card, you may decide to use Sony’s Memory Stick. These
are not as common as SD cards and are associated with Sony’s point-and-shoot
cameras. The Memory Stick PRO-HG Duo records still pictures and movies. If you
use the Memory Stick PRO Duo to record both stills and movies, make sure it is
the Mark 2 version.
You can use any manufacturer’s SD, SDHC, or SDXC Class 4 or faster memory card
of Class 4 or faster for both still pictures and movies. The size of the memory card
you buy depends on how you will use the camera and how you plan to maintain
the stored pictures and movies. If you plan to take a lot of movies, you will need
a large amount of memory—at least 8 GB. If you are going to take mainly still
photos, 4 GB should suffice.
At the end of each shooting day, we recommend you download the images
from your camera to your computer. Once the files are downloaded, we erase the
images on the card by using the camera commands to reformat. This allows you
to start fresh the next day, minimizing the risk of running out of memory. It also
enables you to use a smaller size memory card, thus saving money.
Memory Card
11
Although you can connect your camera to your computer with a cable and
transfer the stored files directly, you can also download the files using a card
reader. Remove the memory card from the camera and insert it into a card reader
connected directly to your computer using a USB cable.
Many people keep several memory cards for those occasions when they will
be doing a lot of recording and cannot download the contents to a computer. It’s
important to note that memory cards can fail, and having a backup will ensure
that you can resume shooting if your primary card fails. For our own photography,
we tend to use 16 GB cards since they provide plenty of space to accommodate a
day’s worth of shooting and movie recording.
Memory Cards
The Sony A77’s user manual tells you approximately how many pictures or movies
you can record on a memory card. The space used depends on the detail within
the images and their file type.
Memory card criteria:
• SD memory card (8 MB to 2 GB)
• SDHC memory card (4 GB to 32 GB)
• SDXC memory card (48 GB to 64 GB)
Additional information:
• An SDHC memory card can be used with equipment that’s compatible with
the SDHC or SDXC memory cards.
• An SDXC memory card can be used only with equipment that’s compatible
with the SDXC memory card.
1