1
2010
Owner and Operator’s Manual
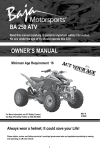
100 % ELECTRIC RANCH-HAND ATV
We know you want to start riding right away, but it is critically important to….
READ THESE IMPORTANT FIRST STEPS
BEFORE EVEN THINKING OF RIDING!
ATV Start-Up Procedure
Step 1: Plug-in vehicle and charge fully. Charge at least once a month for full charge even when not in use. Failure to
do so will greatly shorten the life of the batteries.
Step 2: Verify that the charger is unplugged.
Step 3: Place key in key slot located in the center gauge pod.
Step 4: Verify the gear selector is in the “N” position.
Step 5: Verify the Red Cut–Out Button is pulled to the “OUT” position.
Step 6: Turn the key clockwise to the ON position the center orange power light will light up. This indicates power is
active. The State of Charge meter will also activate showing the battery charge level.
Step 7: Choose the drive selector. D for Drive or N for Neutral or R for Reverse. When D or R are selected the D or
R light will light up in the center dash pod.
Step 8: Verify the front park brake and side-mounted hand brakes are released.
Step 9: Drive.
2