1
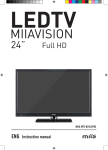
LEDTV MIIAVISION 19” HD Ready MIIA MTV-H19LEHD ENG User Manual CONTENTS • Introduction ................................................................................................................. 2 • Warning ....................................................................................................................... 3 • Caution ........................................................................................................................ 4 • Main Unit Description ................................................................................................. 6 • Remote Control ........................................................................................................... 8 • OSD basic adjustment .............................................................................................. 10 • DTV Features ............................................................................................................. 19 • USB Features ............................................................................................................ 21 ............................................................................................................ 26 • Trouble Shooting ....................................................................................................... 27 • After-sale Service ...................................................................................................... 28 ENG1 INTRODUCTION Thank you very much for your purchase of our product of LED TV. It serves as a normal color TV and PC monitor. To enjoy your TV to the full from the very beginning, read this manual carefully and keep it handy for ready reference. INSTALLATION Locate the TV in a room where direct light does not strike the screen. Total darkness or a reflection on the picture screen can cause eyestrain. Soft and indirect lighting is recommended for comfortable viewing. Allow enough space between the receiver and the wall to permit ventilation. Avoid excessively warm locations to prevent possible damage to the cabinet or premature component failure. This TV can be connected to AC100-240V 50/60HZ. Do not install the TV in a location near heat sources such as radiator, air ducts, direct sunlight, or in a place somewhere like close compartment and close area. Do not cover the ventilation openings when using the TV. The indicator light will last about 30 seconds to go out after cutting off the electricity, during this period, you cannot repower it on until the indicator light goes out, thanks a lot for your attention! ENG2 WARNING CAUTION RISK OF ELECTRIC SHOCK DO NOT OPEN CAUTION: to avoid the risk of electric shock. Do not remove cover (or back). No user- serviceable parts inside. Refer servicing to qualified service personnel. This symbol is intended to alert the user to avoid the risk of electric shock, do not disassemble this equipment by anyone except a qualified service personnel. This symbol is intended to alert the user to the presence of important operating and maintenance instructions in the literature accompanying the equipment. Class I structures of equipment should be connected to the grid power output with a protective earth connection on the socket. Power plug as a broken appliance, broken installations should be easy to operate. ENG3 CAUTION CAUTION: To prevent fire or electrical shock hazard, do not expose the main unit to rain or moisture, do not place objects filled with liquids, such as vases, on the apparatus. CAUTION: High voltages are used in the operation of this product. Do not open the product’s casing. Refer servicing to qualified service personnel. CAUTION: Do not drop or push objects into the television cabinet slots or openings. Never spill any kind of liquid on the television receiver. CAUTION: Avoid exposing the main unit to direct sunlight and other sources of heat. Do not stand the television receiver directly on other products which give off heat. E. g. video cassette players, Audio amplifiers. Do not block the ventilation holes in the back cover. Ventilation is essential to prevent failure of electrical component. Do not squash power supply cord under the main unit or other heavy objects. ENG4 CAUTION CAUTION: Never stand on, lean on, push suddenly the product or its stand. You should Pay special attention to children. CAUTION: Do not place the main unit on an unstable cart stand, shelf or table. Serious injury to an individual, and damage to the television, may result if it should fall. CAUTION: When the product is not used for an extended period of time, it is advisable to disconnect the AC power cord from the AC outlet. CAUTION: The LED panel used in this product is made of glass. Therefore, it can break when the product is dropped or applied with impact. Be careful not to be injured by broken glass pieces in case the LED panel breaks. ENG5 MAIN UNIT DESCRIPTION Control Panel Button Function VOL+: Volume up. VOL-: Volume down. CH+: TV channel up. CH-: TV channel down. MENU: Press to select the main menu. SOURCE: Select the input signal. POWER: Turn the TV on or off. TV Terminal Connections 1. USB input terminal. 2. HDMI input terminal. 3. Video input terminal. 4. AUDIO input terminal. 5. SCART input terminal. 6. CI slot. 7. TV antenna. ENG6 Optional Configuration as below: Connect the USB to the USB jack on the set. NOTE • It is only 500 mA MAX of DC current output when you connect with USB jack • To ensure the Mobile HD works well, you should use other power supply for the Mobile HD. And do not use the USB jack in the same time. • It supports Mobile HD by connecting with USB jack (must more than 2 GB). The partitions of the Mobile HD can’t be more than 4 partitions. The max partition is 2TB. It supports FAT/FAT32 document. The max FAT document is 4GB and the max FAT32 document is 2TB. ENG7 1 2 3 2. Tasto MUTE: consente di attivare o disattivare l'audio. 3. Tasti numerici (0-9): consentono di cambiare canale in modalità TV. 4 8 5 9 6 7 10 11 12 13 14 18 15 19 16 17 22 20 21 24 25 28 29 32 33 23 26 27 30 31 34 35 36 4. Tasto -/--: consente di selezionare canali digitali. REMOTE CONTROL 5. Tasto EPG: Premere per controllare la programmazione prevista per iltocanale corrente : Press this button turn the TV on or off. visualizzato. : Press this button to mute or restore sound. 6. Tasto SUBTITLE: consente di selezionare una lingua per i sottotitoli durante la visione/ NICAM/A2: In the TV condition, riproduzione di un programma DTV. press this key to select the stereo mode. Nota: sottotitoli e televideo sono disponibili solo se l'emittente fornisce servizio. ASPECT: Pressil to adjust picture ratio. PMODE: Select picture mode. 7. Tasto DISPLAY: consente di visualizzare sullo SMODE: Select sound mode. schermo le informazioni relative alla modalità corrente.0-9: Select and switch to a channel using 0 - 9. -/---: Switch the program digit. 8. Tasto :: consente di tornare all'ultimo Switch back and front betweencanale the current visto in modalità DTV.channels. Repeat the program in MEDIA and previous DISPLAY: Display TV information. 9. Tasto AUDIO: consente di selezionare differenti modalitàFREEZE: audio. Press to hold the picture. : Start to record. (The U disk mayconsente be formatted when recorded 10. Tasto TV/RADIO: di passare dalla , please do modalitànot DTV allaimportant modalitàfiles RADIO eU viceversa. store in the disk) RED, GREEN, YELLOW, BLUE: Correspond to the 11. Tastidifferent direzionali: consentono colored subjects. di selezionare opzioni di menu o impostazioni. nuale_MTV-B22LEHD/MTV-B24LEHD_ITA+ENG.indd 3 SLEEP: Set the sleep timer. SOURCE: Press to change signal source. la 12. Tasto OK: consente di confermare ENTER: Enter di theimpostazione. selected option or execute the selected selezione in un menu Tasto Ch.List: consente visualizzare sullo “Channel list” operation, and pressdithis button to display schermoinl'elenco dei canali. TV mode. MENU: Press this button to enter the main menu for 13. Tasto MENU: consente di accedere al menu various optional adjustable setting. di impostazione o uscirne. EXIT: Exit the OSD (On-screen display). CH▼/CH▲: Change the channel up and down. IT-7 VOL▼/VOL▲: Adjust the volume. SUBTITLE: Open or close subtitle. (Used for models with DTV and MEDIA function) T.SHIFT: Press the button to pause current DTV program 12/10/13 11.39 and start record background (Used for models with DTV function only) ENG8 REMOTE CONTROL HOLD: Freeze a multi-page passage on screen in teletext mode. Press to start playing the MEDIA, or to pause playing. (Used for models with MEDIA function only) REVEAL: Press this button to reveal the hidden information in teletext page. Press again to hide the information. Press to play backward. (Used for models with MEDIA function only) SIZE: Display the top, bottom or all of page to read easily in Teletext mode. Press to play forward. (Used for models with MEDIA function only) INDEX: Press this button to go to the index page in Teletext. Stop playing the Media. (Used for models with MEDIA function only) Skip to previous chapter (Used for models with MEDIA function only) S.PAGE: Carry out the function of SUBCODE in the text while enter the text display mode. Skip to next chapter (Used for models with MEDIA function only) TEXT: Press to enter the Teletext mode. FAV: Switch between customer set “ Favorite List” AUDIO: Press to select the DTV audio. (Used for models with DTV and MEDIA functions) DTV: Press to switch to DTV (Digital TV) mode, and press this button to display “record list” in DTV mode. EPG: Enter electronic program guide. (Used for models with DTV function only) TV/RADIO: Switch between TV and RADIO (Used for models with DTV function only) ENG9 OSD BASIC ADJUSTMENT Installation Guide If this is the first time you are turning on the TV and there are no programs in the TV memory, “Installation Guide” menu will appear on the screen. 1. Energy Mode selected Press “▲/▼” and “ENTER” buttons to select your preferred picture mode, or press “GREEN” to next page. Home mode: Suitable for a dark room, Backlight brightness will be lower Store model: Normal state. 2. Local country selected Press “▲/▼” and “ENTER” buttons to select the local country, or press “GREEN” button to next page and “RED” button previous page. 3. OSD language selected Press “▲/▼” and “ENTER” buttons to select the local language, or press “GREEN” button to next page and “RED” button previous page. 4. No operation TV AUTO POWER OFF setting selected Press “▲/▼” and “ENTER” buttons to select the time of no operation TV auto power off, or press “GREEN” button to next page and “RED” button previous page. ENG10 5. Auto search channel way selected Press “▲/▼” and “ENTER” buttons to select auto search channel way. or press “RED” button previous page. Note: 1. The picture is provided for reference only since the info displayed may be different. 2. Searching for platform will take a long time, please be patient! ENG11 PICTURE You can select the type of picture, which best corresponds to your viewing. Press the “MENU” button to enter the OSD menu, Then press “▲/▼” and “◄/►” buttons to select the “PICTURE” menu. 1. Press “▲/▼” buttons to select “Picture Mode” and press the “ENTER” button to enter sub-menu, Then you can select the picture mode you desire. 2. Press “▲/▼” button to select “Brightness” and press the “◄/►” button to enter brightness adjustment menu to adjust brightness. 3. Press “▲/▼” button to select “Contrast” and press the “◄/►” button to enter contrast adjustment menu to adjust contrast. 4. Press “▲/▼” button to select “Sharpness” and press the “◄/►” button to enter sharpness adjustment menu to adjust sharpness. 5. Press “▲/▼” button to select “Colour” and press the “◄/►” button to enter color adjustment menu to adjust colour. 6. Press “▲/▼” button to select “Tint” and press the “◄/►” button to enter hue adjustment menu to adjust tint. Note: The ‘Tint’ item is used in NTSC mode only. 7. Press “▲/▼” button to select “Colour Temperature” and press the “ENTER” button to enter sub-menu. Then press “▲/▼” and “enter” button to select. 8. Press “▲/▼” button to select “Aspect Ratio” and press the “◄/►” button to enter sub-menu. Then you can select the option you desire. 9. Press “▲/▼” button to select “Noise Reduction” and press the “ENTER” button to enter sub-menu, Then you can select the option you desire ENG12 SOUND You can select the type of sound, which best corresponds to your listening. Press the “MENU” button to enter the OSD menu, Then press “▲/▼” and “◄/►” buttons to select the “SOUND” menu. 1. Press “▲/▼” button to select “Sound Mode” and press the “ENTER” button to enter sub-menu, Then you can select the picture mode you desire. 2. Press “▲/▼” button to select “Bass” and press the “◄/►” button to enter bass adjustment menu to adjust bass. 3. Press “▲/▼” button to select “Treble” and press the “◄/►” button to enter treble adjustment menu to adjust treble. 4. Press “▲/▼” button to select “Balance” and press the “ENTER” button to enter balance adjustment menu to adjust balance. 5. Press “▲/▼” button to select “Surround” and press the “ENTER” button to enter sub-menu, then you can select “On” or “Off”. 6. Press “▲/▼” button to select “AVL” and press “ENTER” button to enter submenu, then you can select “On” or “Off”. ENG13 FEATURE Press the “MENU” button to enter the OSD menu. Then press “▲/▼” and “◄/►” buttons to select the “Feature” menu. 1. Press “▲/▼” button to select “Lock” menu and press “ENTER” button to input password, then you can see the sub-menu and set related parameters. Note: The default password is “0000”. 2. Press “▲/▼” button to select “Language” and press the “ENTER” button to enter sub-menu , then you can select the languages which you desire. 3. Press “▲/▼” button to select “clock” and press the “ENTER” button to enter sub-menu, then you can see the sub-menu and set related parameters. 4. Press “▲/▼” button to select “Sleep Timer” and press the “ENTER” button to enter sub-menu, then you can set TV sleep time. 5. Press “▲/▼” button to select “Auto Power Off” and press the “ENTER” button to enter sub-menu, then you can set the auto power off time when no operation. 6. Press “▲/▼” button to select “Hearing Impaired” and press “ENTER” button to enter sub-menu, then you can select “On” or “Off”. 7. Press “▲/▼” button to select “CI Info” and press the “ENTER” button to check CI card information. 8. Press “▲/▼” button to select “PVR” and press the “ENTER” button to enter sub-menu, then you can set PVR parameters. Note: The concrete operations see following the “PVR “ introduction ENG14 SETUP Press the “MENU” button to enter the OSD menu. Then press “▲/▼” and “◄/►” buttons to select the “Setup” menu. 1. Press “▲/▼” button to select “OSD Timer” and press the “ENTER” button to enter sub-menu, then you can select OSD display time you desire. 2. Press “▲/▼” button to select “Blue Screen” and press “ENTER” button to enter sub-menu, then you can select “On” or “Off”. 3. Press “▲/▼” button to select “Energy Mode” and press the “ENTER” button to enter sub-menu, Then you can select the energy mode you desire. 4. Press “▲/▼” button to select “Reset TV Setting” and press the “ENTER” button to select “OK” or “Cancel”. 5. Press “▲/▼” button to select “Software Update” and press “ENTER” button to update software using USB. Note: It is only use for service ENG15 ▲/▼ CHANNEL Press the “MENU” button to enter the OSD menu. Then press “▲/▼” and “◄/►” buttons to select the “Channel” menu. ▲/▼ ◄/► 1. Press “▲/▼” button to select “Channel Management” and press the “ENTER” button to enter sub-menu. ◄/► a. DELETE Press “▲/▼” button to select the program and press “RED” button once to delete the program. ENG16 b. LOCK Press “▲/▼” button to select the program and press “GREEN” button to lock the program. The default password is “0000”. c. SKIP Press “▲/▼” button to select the program and press the “YELLOW” button to skip the program, and Press “YELLOW” button again to cancel the setting. d. MOVE Press “▲/▼” button to select the channel and press the “BLUE” button to select, moving the channel to the position to which you want to move by press the “/” button, then Press “BLUE” button again to confirm. 2. Press “▲/▼” button to select “Favorite Management” and press the “ENTER” button to enter sub-menu. Then you can add channels to different favorite list by pressing “RED, GREEN, YELLOW, BLUE” buttons. You can call the favorite list by press “FAV” button after setting. 3. Press “▲/▼” button to select “Country” and press the “ENTER” button to enter sub-menu, Then you can select the local country which is connect to auto channel search. 4. Press “▲/▼” button to select “TV Connection” and you can select the air or cable. (air for DVB-T and cable for DVB-C) ENG17 5. Press “▲/▼” button to select “Auto search” menu and press the “ENTER” button to enter sub-menu, Then you can select auto search channel way. NOTE: Searching for platform will take a long time. Please be patient! 6. Press “▲/▼” button to select “DTV Manual Search” and press the “ENTER” button to enter sub-menu, Then you can set the related parameters and press “start” to start searching. NOTE: It is used only in DTV mode 7. Press “▲/▼” button to select “ATV Manual Search” and press the “ENTER” button to enter sub-menu, Then you can set the related parameters. NOTE: It is used only in ATV mode ENG18 DTV FEATURES Favorite List When the source is selected as DTV, user can enter favorite list by pressing “FAV” button. The favorite list window is illustrated as follow. Program Information When the source is selected as DTV, you can press “DISPLAY” button to display the channel’s information. The program information window is illustrated as follow. Audio When the source is selected as DTV, users can enter “Audio Language” by pressing “AUDIO” button. The “audio language” window is illustrated as follows Press “▲/▼” button to select the “audio language” menu . Subtitle When the source is selected as DTV, users can view subtitles (broadcast dependent) by pressing “SUBTITLE” button. ENG19 TV/Radio Switch “TV/RADIO” button is used to switch between DTV programs and Digital Radio broadcasts. EPG (Electronic Program Guide) When the source is selected as DTV, users can view EPG by pressing “EPG” button, press different color buttons to do different operation according to instructions at the bottom. ENG20 USB FEATURES Pulse «SOURCE» (Fuente) y los botones “▲/▼” para seleccionar la fuente «MEDIA» (Multimedia). 1. Press the “◄/►” button enter the “PHOTO” option, and press “ENTER” button to enter. 1.1 Press the “▲/▼” button to select drive disk you want to watch, and press “ENTER” button to enter. 1.3 Press the “▲/▼” and “ENTER” button to select the file you want to watch in the file selecting menu, then press “ ” button to play picture. 1.4 Press the “◄/►”button to select menu in the bottom you want to run, and then press “ENTER” button to operate. 2. Press the “◄/►” button to enter the “MUSIC” option, and press “ENTER” button to enter. ENG21 2.1 Press the “▲/▼” button to select drive disk you want to watch, and press “ENTER” button to enter. 2.2 Press the “▲/▼” and “ENTER” button to select the file you want to listen in the file selecting menu, then press “ ” button to play. 2.3 Press the “▲/▼”button to select menu in the right bottom you want to run, and then press “ENTER” button to operatee. 3. Press the “◄/►”button to play the “MOVIE” option, and press “ENTER” button to enter. 3.1 Press the “◄/►” button to select drive disk you want to watch, and press “ENTER” button to enter. 3.2 Press the “◄/►” button to select the file you want to watch in the file selecting menu, then press “ENTER” button to play. ENG22 2.3 Press the “◄/►” button to select menu in the bottom you want to run, and then press “ENTER” button to operate. 4. Press the “◄/►” button to enter “TEXT” option, and press “ENTER” button to enter. 4.1 Press the “◄/►” button to select drive disk you want to watch, and press “ENTER” button to enter. 4.2 Press the “◄/►” button to select the file you want to watch in the file selecting menu, then press “ENTER” button to play. 5. Press different colored button to do different operation according to instruction at the bottom. Note: These pictures about function are provided for reference only which will be in accordance with exact circumstances. ENG23 Miia TV MTV-H19LEHD ENG24 Miia Led TV 19” HD Ready ENG25 SPECIFICATIONS HDMI INPUT Mode Resolution Horizontal Frequency (KHz) Vertical Frequency (HZ) VGA 640 x 480 31.47 59.94 480i 720 x480i 15.73 59.94/60 576i 720 x 576i 15.63 50 480p 720 x480p 31.47 59.94/60 576p 720 x 576p 31.26 50 720p 1280 x 720p 37.50 50 44.96 59.94/60 28.13 50 33.75 59.94/60 56.25 50 67.5 59.94/60 1080i 1080p 1920 x 1080i 1920 x 1080p ENG26 TROUBLE SHOOTING Before consulting service personnel, check the following chart for possible solutions. PROBLEM TV will not turn on No picture, no sound Poor picture, sound OK Audio noise SOLUTION • Make sure the power cord is plugged in. • The batteries in the remote control may be Exhausted; replace the batteries. • Check the cable between TV and antenna/ external AV device. • Press the power button on the remote. • Press the SOURCE button the remote, then press the “▲/▼”button repeatedly to select the TV source. • Check the cable between TV and antenna/ external AV device. • Try another channel, the station may have broadcast difficulties. • Adjust the brightness/contrast in the Video menu. Check that the unit is set to PAL • Move any infrared equipment away from the TV. The TFT LED panel uses a panel consisting of sub pixels which requires sophisticated technology to produce. However, there may be a small number of bright or dark pixels on the screen. These pixels will have no impact on the performance of the product. ENG27 AFTER-SALE SERVICE In case any problem mostly like a fault occurs while your using LED TV ,please contact the store where you purchased this unit or the service agency. ENG28