1
www.nitedevil.com
Doc XCAM190
NiteDevil Traditional Wide Dynamic
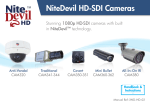
NiteDevil CAM190/192/194
These NiteDevil Cameras have Digital WDR
functionality allowing improved picture
quality in mixed lighting conditions. They are
complimented with an OSD menu, allowing
access via camera or RS485, privacy masking,
digital zoom to 32x and adjustable NiteDevil
settings. The cameras are supplied in three
versions:
Lens supplied separately
3 fitted lens options
CAM190 12v DC only
CAM192 Dual voltage 12vDC/24vAC
CAM194 240v AC
All 3 cameras provide a resolution of 600TVL in colour and 700TVL in b/w. These cameras come
with many of the NiteDevil features including an OSD menu, the SENS-UP feature allowing minimum
illumination down to an incredible 0.00019 Lux and a WDR option.
Features
1/3” Sony Super HAD CCD 600/700 TVL
Wide Dynamic Range setting
3 Lens Options
Built-in OSD menu
Privacy Masking
Electronic Shutter
Digital Zoom up to 32x
Low Light 0.00019Lux
Maximum 2watts power consumption
SENS-UP auto function 2x – 256x
Built-in 3DNR function
RS485 menu control
Motion Detection Alarm Function
Contrast & Sharpness adjustments
Powering the Camera
CAM190
The CAM190 requires a 12v DC regulated power supply providing a minimum of
140mA. When connecting to any 12v DC power supply, always use a regulated
supply. The camera has a terminal connection. This camera is polarity sensitive so
ensure that the positive and negative connections are correct. If incorrectly
connected damage to the camera may result. The 12V DC cameras require a power
supply that has a continuous rating of 140mA or higher per camera. It is
recommended that you allow headroom per camera to be on the safe side especially
taking into account any extra load created by adding an auto-iris lens (typically
10mA). The power supply you choose must be a well regulated one giving a smooth
regulated 12V DC output and it is recommended that it should be rated at no less
than 200mA.
CAM190
WARNING - This power supply must not be a security type used in intruder alarms as the over voltage may damage the
camera and void the warranty. The earthing arrangement of an intruder type alarm PSU may give rise to problematic
“earth-loops” and poor voltage regulation can give poor/noisy image quality. We offer no technical support or warranty
with the camera if you use a 13.8V intruder alarm PSU as it is contrary to the installation & usage instructions of the
camera. The terminal strip will facilitate easier and faster power connection without the hassle of soldering. The terminal
connection can be seen in the picture above. The 12V+ and -0v connections from the power supply must be connected
correctly. If you have a 2.1mm jack plug connected to your power supply you will need to cut this off and use the bare
wires to connect to the terminal strip. Note that the 12V positive is the wire that was connected to the centre pin of the
jack plug and the 0V wire was connected to the outer case.
Email: [email protected]
Last Revised: 03/011/2010
www.nitedevil.com
Doc XCAM190
NiteDevil Traditional Wide Dynamic
CAM192
The CAM192 is a dual voltage camera allowing connection of 12vDC or 24vAC
power supply. This camera is not polarity sensitive so the positive or negative can be
connected either way round. The 12V DC cameras require a power supply that has a
continuous rating of 140mA or higher per camera. It is recommended that you allow
headroom per camera to be on the safe side especially taking into account any extra
load created by adding an auto-iris lens
(typically 10mA). The power supply you choose must be a well regulated one giving a
smooth regulated 12V DC output and it is recommended that it should be rated at no
less than 200mA.
CAM192
CAM194
The CAM194 is a mains 240vAC controlled camera and a mains power cable
is supplied.
Fitting the Camera Lens
CAM194
Fit the Auto Iris Direct Drive Lens connector to
connection shown.
Auto-Iris Direct Drive Connections
Auto Iris type lenses require the 4-pin connector to be attached to the camera. It is important that this connector is
wired correctly. If you bought the lens from SystemQ and it’s a direct drive lens, this will be pre-wired and you can
simply plug the lens into the camera.
Auto Iris Direct Drive Connections
C or CS Mount Lenses
Most lenses are available in 2 different mounting options - C mount and CS mount. CS mount lenses are now the most
popular size as they are shorter and more compact than C mount lenses. Most cameras are now manufactured to accept
CS mount lenses. Before fitting the lens you need to verify that you are using a CS mount lens with the camera. You
can confirm this with your lens supplier or the literature that came with your lens, check the instructions or packaging
to see if your lens is a C or a CS mount version. If your lens is a C mount type you can still fit it to the camera by
following the instructions under the heading Using a C Mount lens.
Using a CS Mount lens
If you are using a standard CS mount lens you can screw the lens straight into the camera without the need for the CCS adapter ring (supplied).
Email: [email protected]
Last Revised: 03/011/2010
www.nitedevil.com
Doc XCAM190
NiteDevil Traditional Wide Dynamic
Adjusting the inner focus ring - Once you have fitted the lens, if you have a picture on the monitor but cannot
correctly focus the lens by the fine focal adjust on the lens itself, you may need to alter the inner adjusting ring that is
screwed into the end of the camera. To do this you will need a small Allen key.
This ring enables the lens to either “sit” a little closer or a little further away from the camera to get a sharp focused
image when using lenses from different manufacturers. To adjust the inner focus ring you will need to slacken the ring
by loosening the grub screw(s) with an Allen key. This is a trial and error process by moving the ring in or out say ½
turn then locking it again and trying to refocus the lens. It is possible (with common sense!) to work out whether the
lens needs to be nearer or further away from the camera by watching for improvements in focus at each attempt.
NOTE – If it appears that the lens will never be in focus then it is possible that you are trying to fit a C-mount lens on
the camera, not a CS- mount lens. If this is the case you will have to add the spacer ring to the lens that was provided
free with the camera.
The spacer ring looks something like this:
Using a C Mount Lens
If you are using a C mount lens you will need to add the C-CS mount adapter ring. This ring effectively moves the C
mount lens an extra 5mm away from the camera body to achieve the correct focusing of the lens. Once you have fitted
the adapter ring you can carefully screw the lens to the camera. If the picture is out of focus, try focusing it in using the
focus adjust on the lens itself. If you can nearly get the focus right but not quite (because the lens runs out of
adjustment) then you probably need to adjust the inner focus ring with the Allen key. See Adjusting the inner focus
ring above.
It is important that you never force a lens when it becomes tight on the camera or you may damage one or the other
device. A C-mount lens fitted on a CS-mount camera may protrude too far into the camera and cause irreparable
damage.
Setting Up an Auto Iris Direct Drive Lens for different Light Levels
The brightness setting in the menu determines when the IRIS of the lens opens and closes. It is important to set this
correctly as if the brightness level is set too low, you may get satisfactory pictures during the day but at night not
enough light can enter the camera giving poor quality pictures. The trick to setting up the brightness level is to set it up
in the brightest possible conditions, i.e. midday on a sunlight day and keep the IRIS open to its maximum without a
too bright picture. This means at night in low light, the IRIS will be open as much as possible and give the
best results.
To do this, follow these steps:
With the camera in the brightest light conditions that it will be expected to work,
1- Enter the LENS menu and set to MANUAL. The enter EXPOSURE menu, increase to 100% and then reduce level
until the picture is okay. Do not adjust further. This will ensure that the iris is set to its widest setting.
2- Now return to the LENS menu and select DC. Then exit the menu. Once you have done the above the lens will
restrict the light sufficiently in bright sunlight but open up to its maximum in low light giving the best night time
performance.
Further details on the menu setup and operation are covered below.
Connecting Video
The video out from the camera is provided from the BNC connector located at the rear of the camera. The camera’s
video signal is carried by a suitable cable (usually RG59 or similar) to the monitor or other video input, ie, of a
switcher, quad, DVR etc. Remember that the Video out from the camera is like any other electrical circuit and requires
two wires to complete the circuit. When using a co-ax type cable such as RG59 or similar, the outer braid of the co-ax
provides the “0V GROUND” connection and the inner core provides the “Video” connection. A typical connection is
shown as follows:
Video Cable
Video Out
(BNC)
Video Input on DVR,
monitor, etc
RG59 Cable – Outer braid to body of BNC plug
Solid centre core to middle pin of BNC plug
Email: [email protected]
Last Revised: 03/011/2010
www.nitedevil.com
Doc XCAM190
NiteDevil Traditional Wide Dynamic
It is recommended that when you are first setting up the cameras that you use a short BNC-BNC cable to link the camera
directly to the monitor and to set it up at the same time. This allows you to both understand the camera and get the very
best out of this great product, as you will be able to adjust the camera whilst looking at the monitor screen. Obviously
whilst you are setting up the camera, it does need to be powered!
This camera has an RS485 terminal connection on the rear of the camera to allow the camera menu to be updated using
an RS485 keyboard or using the PTZ option in a DVR. You will need to use the direction keys, Zoom and Focus
controls to edit the menu. Alternatively you can change the menu settings using the menu control buttons on the rear of
the camera.
Precautions
Do not install the camera in extreme temperature conditions. Only use the camera where temperatures are between –20
degrees centigrade and +50 degrees centigrade.
Never install the camera in damp or humid conditions. This can affect image quality.
This camera requires stable lighting conditions to operate effectively.
Do not touch the front lens of the camera. Fingerprints can stain the lens glass.
The camera must not be placed directly facing the sun or strong light. This may damage the camera CCD.
Never expose the camera to rain or liquids. These will corrode the camera electronics.
Do not subject the camera to vibration as it may cause camera malfunctions.
Only use this camera in a housing if used externally.
To display the OSD menu press the SET button.
Menu closes when no operation.
Menu Settings
1.
2.
3.
4.
5.
6.
7.
8.
9.
LENS
EXPOSURE
WHITE BAL
DAY NIGHT
3DNR
SPECIAL
ADJUST
RESET
EXIT
LENS
EXPOSURE
WHITE BAL
DAY NIGHT
3 DNR
SPECIAL
ADJUST
RESET
EXIT
DC
AWB
AUTO
ON
SET BUTTON: Displays menu
on the screen. Press button down
to confirm status or after
changing a selected item.
UP/ DOWN BUTTON: Used
to move cursor up and down to
select a menu item.
LEFT & RIGHT BUTTONS:
Moves cursor left and right or
change the value of a selected
item.
FUNCTION MENU STRUCTURE
DC
MANUAL
SHUTTER
BRIGHTNESS
AGC
SENSE-UP
BLC / HSBLC
D-WDR
AWB
AWC- SET
MANUAL
INDOOR
OUTDOOR
ATW
COLOUR
AUTO
EXT
ON
OFF
CAM TITLE
D-EFFECT
RS485
PRIVACY
SYNC
LANGUAGE
SHARPNESS
BLUE
RED
FACTORY
Email: [email protected]
B/W
MOTION
Last Revised: 03/011/2010
www.nitedevil.com
Doc XCAM190
NiteDevil Traditional Wide Dynamic
NOTE: All menu items with the
icon require the SET button to be depressed.
If - - - is displayed then feature is unavailable on this camera.
Menu Settings
1. LENS
MANUAL
2. EXPOSURE
3. WHITE BAL
4. DAY NIGHT
AWB
AUTO
5. 3DNR
ON
LENS
When the SETUP menu screen is displayed, select LENS by
using the UP & DOWN buttons so that the arrow selects
LENS.
Select the connected type by using the LEFT & RIGHT
buttons.
Selecting MANUAL selects manual lens
6. SPECIAL
7. ADJUST
Selecting DC selects Auto Iris Lens. When MANUAL is
selected you can select the brightness control by pressing the
SET button. Set range between 0 ~ 100. Then select DC.
8. RESET
9. EXIT
MENU SETTINGS
EXPOSURE
1. LENS
MANUAL
2. EXPOSURE
3. WHITE BAL
4. DAY NIGHT
AWB
AUTO
5. 3DNR
ON
6. SPECIAL
7. ADJUST
SHUTTER
BRIGHTNESS
AGC
SENSE-UP
BLC
D-WDR
1/250
- - MIDDLE
OFF
OFF
INDOOR
RETURN
RET
8. RESET
9. EXIT
SHUTTER AUTO, 1/50, FLK, 1/250, 1/500, 1/2000, 1/5000, 1/10000, 1/100000, x256, x128, x64, x32, x16, x8,
x4, x2
Select EXPOSURE by using UP & DOWN buttons and then select desired mode.
AUTO Select this mode to control the shutter speed automatically.
FLK Select this mode if flickering occurs on screen.
BRIGHTNESS (1 – 100) You can control the brightness by using the LEFT & RIGHT buttons in Manual lens
mode. If using a DC lens, switch LENS to manual, adjust brightness, then return to LENS and select DC.
AGC OFF / LOW / MIDDLE / HIGH
Set AGC from low to high gain. Note that the higher the gain level, the brighter the screen but the higher noise level.
Note that if AGC shows - - - then RESET the camera.
SENSE-UP OFF / AUTO
x2 / x4 / x8 / x16 / x32 / x64 / x128 / x256
When it is dark the camera automatically detects the light level and tries to compensate by maintaining a clear picture.
OFF The option is deactivated when the OFF option is selected or when AGC is OFF or DAY&NIGHT is OFF.
AUTO You can adjust brightness by increasing/decreasing the shutter speed (x2 ~ x256)
Note that noise can be amplified as SENSE-UP in increased.
Email: [email protected]
Last Revised: 03/011/2010
www.nitedevil.com
Doc XCAM190
NiteDevil Traditional Wide Dynamic
BLC OFF / BLC
/ HSBLC
Backlight compensation allows you to get a clear picture even when objects are in a strong backlight.
BLC
Selecting BLC and pressing SET button enters the BLC menu.
BLC / HSBLC MENUS
GAIN
This menu allows a selected area of the picture to be viewed more
clearly in varying light conditions.
LOW
DEFAULT
GAIN LOW / MIDDLE / HIGH
Select the level of gain by selecting low, middle or high.
LEFT/RIGHT
____I_____
WIDTH
___I______
TOP/BOTTOM
_____I____
DEFAULT Press SET button to select default option.
HEIGHT
___I______
RETURN
The LEFT/RIGHT, WIDTH, TOP/BOTTOM and HEIGHT are
used to create a window and place it in the picture view using BLC.
When there is a bright light e.g headlights on a car, using the
HSBLC menu may compensate for this condition so allowing you
to view a car number plate that would otherwise be obliterated by
the light level.
D-WDR OFF / INDOOR / OUTDOOR
Digital Wide Dynamic Range allows de-saturation of light in a single pixel so providing the mean light level overall.
This allows a scene that may include for example objects that show light and shade and then compensates by providing
an overall balanced light view. WDR can be set to INDOOR, OUTDOOR or OFF.
WHITE BAL
MENU SETTINGS
1. LENS
MANUAL
2. EXPOSURE
3. WHITE BAL
4. DAY NIGHT
5. 3DNR
6. SPECIAL
AWB
AUTO
ON
ATW / AWB / AWC SET / MANUAL /
INDOOR / OUTDOOR
ATW Auto Tracking White Balance. Suitable for viewing
objects with changing colour temperature. Select when colour
temperature between 2,500°K and 9,800°K.
AWB Auto White Balance. This uses stored settings for
white balance and is most suitable where there is little change in
light source.
7. ADJUST
8. RESET
9. EXIT
AWC SET The auto white-balance control analyses the
incoming light and estimates the best camera setting for pleasing
colors.
MANUAL
manually set.
This option allows the blue and red colours to be
INDOOR Select this when the colour temperature is around 3,100°K.
OUTDOOR Select this when the colour temperature is around 5,100°K.
SPECIAL NOTE:
In the event that problems are found with the white balance settings, it is recommended that the AWC mode is selected.
These problems can be:(i)
When the colour temperature in the environment is beyond the control range.
(ii)
If the camera is situated close to a fluorescent light white balance may become unstable.
Email: [email protected]
Last Revised: 03/011/2010
www.nitedevil.com
Doc XCAM190
NiteDevil Traditional Wide Dynamic
/ EXT / BW
DAY NIGHT COLOUR / AUTO
MENU SETTINGS
COLOUR The option will always display in colour.
1. LENS
MANUAL
2. EXPOSURE
3. WHITE BAL
4. DAY NIGHT
5. 3DNR
AWB
AUTO
AUTO
This option allows colour mode during day
and b/w at night or when ambient light levels are low. To setup
the switching time or speed press the SET button.
ON
6. SPECIAL
7. ADJUST
DAY NIGHT AUTO
8. RESET
DELAY
9. EXIT
__________ 8
S-LEVEL
__________ 63
E-LEVEL
__________ 55
RETURN
DELAY The seconds before the switch from one mode to the next mode.
S-LEVEL The setting of the brightness illumination before switching from colour to b/w
E-LEVEL The setting of the brightness illumination before switching from b/w to colour
EXT This deactivates the EXT function.
BW This option will always display in black and white.
SPECIAL NOTE: You cannot control the DAY/NIGHT menu when AGC in the EXPOSURE menu is set to OFF.
If it is, then DAY and NIGHT mode will operate only in COLOUR mode.
MENU SETTINGS
1. LENS
MANUAL
2. EXPOSURE
3. WHITE BAL
4. DAY NIGHT
AWB
AUTO
5. 3DNR
3DNR OFF / ON
Digital Noise Reduction reduces the background noise in a
low light environment.
Select ON and press SET button to enter 3DNR menu.
ON
3DNR
6. SPECIAL
7. ADJUST
LEVEL
____________ 56
RETURN
RET
8. RESET
9. EXIT
OFF
ON
Deactivates 3DNR. Noise is not reduced.
Activates 3DNR so that noise is reduced.
SPECIAL NOTE:
You cannot set the 3DNR to ON or OFF when the AGC mode in the EXPOSURE menu is set to OFF.
When adjusting the noise reduction level in this mode, the higher the setting the more the noise level will be reduced
but the more likely ghosting will occur.
Email: [email protected]
Last Revised: 03/011/2010
www.nitedevil.com
Doc XCAM190
NiteDevil Traditional Wide Dynamic
MENU SETTINGS
SPECIAL
1. LENS
MANUAL
1. CAM TITLE
2. EXPOSURE
3. WHITE BAL
4. DAY NIGHT
AWB
AUTO
5. 3DNR
ON
6. SPECIAL
7. ADJUST
8. RESET
OFF / ON
2. D-EFFECT
3.
4.
5.
6.
7.
RS485
MOTION
PRIVACY
SYNC
LANGUAGE
OFF
OFF
INT
ENGLISH
8. RETURN
9. EXIT
CAM TITLE Allow the display of a 15 character camera title displayed on the monitor.
CAM TITLE
0123456789
AB CDEF GHIJK
LMNOPQRSTUV
WXYZ >
_
_
_
/ = & “ ~ , ..
CLR
POS
()
END
__ __ __ __ __ __ __ __ __ __ __ __ __ __ __
CAM TITLE
If you wish to display the camera title you must switch
camera title to ON.
Note that if the CAM TITLE is OFF no title is
displayed on the monitor even if one is entered.
Move up and down buttons to select CAM TITLE and
switch it ON. Then press the SET button and move to
the required character using the direction buttons and
press the SET button to select. Repeat to select up to 15
characters. If you move to CLR and press the SET
button all characters are cleared.
To edit a character select the character bottom left arrow
and press SET button, move the cursor over the
character to be edited, then select the character required
and press the SET button. Then select POS to position
cam title, press SET, move to the position required and
select END. Press SET again to return to SPECIAL
menu.
SPECIAL
D-EFFECT
1. CAM TITLE
OFF / ON
2. D-EFFECT
3.
4.
5.
6.
7.
RS485
MOTION
PRIVACY
SYNC
LANGUAGE
OFF
OFF
INT
ENGLISH
8. RETURN
Email: [email protected]
FREEZE
MIRROR
OFF / ON
MIRROR / V-FLIP / ROTATE
OFF
D-ZOOM
OFF / ON
GAMMA
NEG IMAGE
0.45
OFF / ON
RETURN
RET
Last Revised: 03/011/2010
www.nitedevil.com
Doc XCAM190
NiteDevil Traditional Wide Dynamic
D-EFFECT
This option covers the display effects that can be selected.
FREEZE
OFF / ON
This option if set to ON will freeze current picture. Select OFF to revert to normal video
MIRROR
MIRROR / ROTATE / V-FLIP / OFF
This option allows the normal video displayed to be switched to vertical flip, horizontal flip, both or none.
MIRROR
This flips the camera view vertically on the screen.
ROTATE
This flips the camera view horizontally on the screen.
V-FLIP
This flips the camera horizontally and vertically on the screen.
D-ZOOM
OFF / ON
GAMMA
The standard value is O.45 The values 0.05 ~ 1.00 can be set.
NEG IMAGE
OFF / ON A colour negative image can be set.
RETURN
Returns to the SPECIAL menu.
D-ZOOM
This option switches on digital zoom
DZOOM
PAN
TILT
x1 ~ x32
_______ 0
_______ 0
RETURN
RET
SPECIAL
1. CAM TITLE
OFF / ON
RS485
2. D-EFFECT
CAM ID
3.
4.
5.
6.
7.
ID DISPLAY
RS485
MOTION
PRIVACY
SYNC
LANGUAGE
OFF
OFF
INT
ENGLISH
BAUDRATE
1
2400
RETURN
8. RETURN
The RS485 option allows you to control these menu settings by connecting a CAT5 matched pair to the RS485
connections on the back of the camera and the other end of the cable to an RS485 keyboard controller or a DVR that
has PTZ functionality. Ensure that the polarity is correct to the control device. On the DVR you will need to connect
to the T+ and T- RS485 transmit connections.
In order to see the camera menu it will be necessary to set the
camera ID number and the baud rate. The camera is set to the
Pelco-D protocol and this cannot be changed. The baud rate is
usually set to 2400 baud. This will give the longest distance
coverage. These settings will have to be reflected in the control
device, whether it is a keyboard or a DVR.
Note that you need to check that the DVR used has this
functionality.
Email: [email protected]
Last Revised: 03/011/2010
www.nitedevil.com
Doc XCAM190
NiteDevil Traditional Wide Dynamic
Note if using the Alien DVR then by selecting the PTZ option and clicking on ZOOM+ this will display the menu.
Use the up and down arrow keys to locate an option and use the right arrow key or ZOOM+ to select option.
SPECIAL
1. CAM TITLE
OFF / ON
2. D-EFFECT
MOTION This option allows motion detection to be set
and to display MOTION DETECTION on the monitor.
An output on the camera allows a closed contact to be made
by using the M/D OUT and ground.
3. RS485
4.
5.
6.
7.
MOTION
PRIVACY
SYNC
LANGUAGE
OFF
OFF
INT
ENGLISH
8. RETURN
MOTION
Motion can be detected in 1 – 4 areas. You can
select 1-4 areas in SENSITIVITY setting. To see
the MOTION DETECTION message displayed on
the monitor, MOTION VIEW must be set.
MOTION
AREA SELECT
AREA DISPLAY
LEFT / RIGHT
WIDTH
AREA 1 ~ 4
ON / OFF
__________ 51
______ ____ 42
TOP / BOTTOM
__________ 38
HEIGHT
________ __ 30
SENSITIVITY
_________ _ 34
MOTION VIEW
OFF / ON
RETURN
END
AREA SELECT 1 ~ 4
Select the area required.
AREA DISPLAY ON / OFF Determines whether to use the motion area selected in SENSITIVITY.
LEFT/RIGHT
Determines the vertical axis for area.
WIDTH
Adjusts the selected vertical area.
TOP/BOTTOM Determines the horizontal axis for area.
HEIGHT
Adjusts the selected horizontal area.
SENSITIVITY
You can select up to 4 areas. The higher the sensitivity the smaller the change to initiate
motion detection.
MOTION VIEW If you set this option to ON you can select an area colour and display MOTION
DETECTION on the monitor.
RETURN
Return to SPECIAL menu.
Use the M/D (Motion Detection) and G (Ground)
connection if you wish to use the motion alarm switch.
Email: [email protected]
Last Revised: 03/011/2010
www.nitedevil.com
Doc XCAM190
NiteDevil Traditional Wide Dynamic
PRIVACY ON / OFF
Allows an area on screen to be hidden.
SPECIAL
1. CAM TITLE
PRIVACY
OFF / ON
2. D-EFFECT
AREA SELECT
AREA 1 ~ 8
AREA DISPLAY
ON / OFF
LEFT / RIGHT
__________
WIDTH
__________
TOP / BOTTOM
__________
HEIGHT
__________ 30
COLOUR
__________
3. RS485
4.
5.
6.
7.
MOTION
PRIVACY
SYNC
LANGUAGE
OFF
OFF
INT
ENGLISH
8. RETURN
RETURN
51
42
38
34
END
AREA SELECT 1 ~ 8
Select the area required.
AREA DISPLAY ON / OFF Determines whether to use the area selected in AREA SELECT.
LEFT/RIGHT
Determines the vertical axis for area.
WIDTH
Adjusts the selected vertical area.
TOP/BOTTOM Determines the horizontal axis for area.
HEIGHT
Adjusts the selected horizontal area.
COLOUR
You can select area colour from 0 ~ 15.
RETURN
Return to SPECIAL menu.
SPECIAL
1. CAM TITLE
OFF / ON
2. D-EFFECT
3. RS485
4. MOTION
5. PRIVACY
OFF
OFF
6. SYNC
7. LANGUAGE
INT
ENGLISH
SYNC INT
This option is not selectable.
LANGUAGE
English, Chinese or Japanese.
If you change this you can work out how to return to
English by selecting option 7.
RETURN
Returns to SPECIAL menu.
8. RETURN
Email: [email protected]
Last Revised: 03/011/2010
www.nitedevil.com
Doc XCAM190
NiteDevil Traditional Wide Dynamic
MENU SETTINGS
ADJUST
1. LENS
MANUAL
2. EXPOSURE
3. WHITE BAL
4. DAY NIGHT
AWB
AUTO
5. 3DNR
ON
6. SPECIAL
SHARPNESS
________ 21
BLUE
________ 81
RED
________ 88
RETURN
END
7. ADJUST
8. RESET
9. EXIT
ADJUST
This option is used to improve the sharpness of the picture and balance the blue and red colour.
SHARPNESS
This sets the sharpness by moving the direction keys to right or left. Parameter ranges from 0 ~ 31.
BLUE
This sets the overall blue hue. Parameter ranges from 0 ~ 100.
RED
This sets the overall red hue. Parameter ranges from 0 ~ 100.
RETURN
This returns to the main menu.
MENU SETTINGS
RESET
1. LENS
MANUAL
FACTORY
RESET
2. EXPOSURE
3. WHITE BAL
4. DAY NIGHT
AWB
AUTO
RETURN
RET
5. 3DNR
ON
6. SPECIAL
RESET
This option resets the camera to factory defaults.
7. ADJUST
8. RESET
RETURN
Returns to main menu
9. EXIT
EXIT
This saves the changes made and exits the main menu.
Email: [email protected]
Last Revised: 03/011/2010
www.nitedevil.com
Doc XCAM190
NiteDevil Traditional Wide Dynamic
TECHNICAL SPECIFICATIONS
FUNCTION
Camera Model
Imaging Sensor
Signal System
Scanning System
Scanning Frequency
S/N Ratio
Horizontal Resolution
Video Output Level
Minimum Illumination
Sync System
On Screen Display
Electronic Shutter Speed
White Balance
Backlight Compensation
D-WDR
Gain Control
Adjust
Language
Camera Title
Day & Night
Digital Zoom
Motion Detection
Privacy Masking
3DNR Digital Noise Reduction
Sens-up (Frame Integration)
D-Effect
RS485
Supplied Voltage
Power Consumption
Infra Red Sensitive
Dimensions
Weight
CAMERA MODEL
CAM192
CAM194
1/3” SONY Super HAD CCD 11
NTSC: 525 Lines / PAL: 625 Lines
2:1 Interlace
H:15.625Hz / V:50Hz
More than 52dB (AGC Off)
600 TVL (Colour) / 700 TVL (B/W)
1.0 vp~p (75 ohm, composite)
Colour: 0.03Lux([email protected]), 0.00019(Sens-up 256x)
Internal
Built-in (Multi-language support)
Auto/FLK
PAL: 1/50sec ~ 1/100,000sec
AWB / AWC-Set / Manual / Indoor / Outdoor / ATW
BLC / HSBLC / Off
Indoor / Outdoor / Off
Low / Middle / High / Off
Contrast / Sharpness / CB_Gain / CR_Gain (Level Adjustable)
Korean / English / Chinese / Japanese (selectable)
On / Off (Selectable)
Auto / B.W / Colour (selectable) / EXT
On / Off (0x ~ 32x)
On / Off (4 zone selectable) & external closed contact
On / Off (8 zone selectable)
On /Off (Selectable)
On / Off (Selectable limit ~ 256x)
Freeze / Mirror / D-Zoom / Gamma / Neg. Image
Menu Control
12vDC
12vDC / 24vAC
240vAC
140mA / 2.0W
Yes
65mm x 65mm x 127mm excluding lens
Approx. 50g
CAM190
All specifications are approximate. nitedevil.com reserves the
right to change any product specifications or features without
notice. Whilst every effort is made to ensure that these
instructions are complete and accurate, nitedevil.com cannot be
held responsible in any way for any losses, no matter how they
arise, from errors or omissions in these instructions, or the
performance or non-performance of the equipment that these
instructions refer to.
Email: [email protected]
This symbol on the products and/or accompanying documents means that
used electronic equipment must not be mixed with general household waste.
For treatment, recovery and recycling please return this unit to your trade
supplier or local designated collection point as defined by your local council.
WEE/CG0783SS
Last Revised: 03/011/2010