1
SANTOS SAS:
140-150 AVENUE ROGER SALENGRO
SANTOS : Instruction
and maintenance manual
69120 VAULX-EN-VELIN
(LYON) - FRANCE
PHONE 33 (0) 472 37 35 29 - FAX 33 (0) 478 26 58 21
E-Mail :[email protected]
www.santos.fr
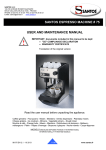
SANTOS ESPRESSO MACHINE # 75
USER AND MAINTENANCE MANUAL
IMPORTANT: documents included in this manual to be kept:
• "CE" COMPLIANCE DECLARATION
• WARRANTY CERTIFICATE
!
ORIGINAL VERSION
Coffee grinders - Fruit juicers - Mixers - Blenders - Drinks dispensers - Planetary mixers
Cheese graters - Ice crushers - Mincers - Vegetable slicers – Dough mixer
Moulins à café - Presse-fruits - Mixers - Blenders - Distributeurs de boissons - Batteurs mélangeurs - Pétrin - Râpes à fromage - Broyeurs à glaçons - Hache-viande - Coupe-légumes
MODELS MODELES DEPOSES FRANCE ET INTERNATIONAL
INTERNATIONALLY PATENTED MODELS
98175 US 2.0 - 01 2007
1 / 22
www.santos.fr
SANTOS : Instruction and maintenance manual
CONTENTS
“CE” COMPLIANCE DECLARATION ................................................................................4
ATTENTION - IMPORTANT ..............................................................................................5
Precautions and risks: ....................................................................................................5
IMPROPER USE: ...........................................................................................................5
RECYCLING THE PRODUCT AT THE END OF ITS SERVICE LIFE............................5
ELECTRICAL CONNECTION ........................................................................................6
SANTOS ESPRESSO # 75 ...............................................................................................6
MACHINE DESCRIPTION:.............................................................................................6
INSTALLATION AND HANDLING ..................................................................................7
USING THE APPLIANCE ..................................................................................................7
PRELIMINARY OPERATIONS:......................................................................................7
USING FOR THE 1st TIME: ...........................................................................................7
Cleaning: .....................................................................................................................7
Priming the pump and filling the boiler:........................................................................8
START-UP:.....................................................................................................................8
Assembly, preparation and use: ..................................................................................8
MAKING TEA, CHOCOLATE OR cappuccinos ..............................................................9
Obtaining hot water from the nozzle: ...........................................................................9
Obtaining steam: .........................................................................................................9
Making a cappuccino: ..................................................................................................9
HOW TO STOP THE MACHINE ..................................................................................10
CLEANING: ..................................................................................................................10
SAFETY / MAINTENANCE..............................................................................................11
OVERHEATING SAFETY FEATURE: ..........................................................................11
PRESSURE SAFETY FEATURE: ................................................................................11
1st level MAINTENANCE ..............................................................................................11
Re-priming the pump .................................................................................................11
Descaling – Limescale removal .................................................................................12
2nd level MAINTENANCE ............................................................................................12
Complete descaling ...................................................................................................12
Spare parts: ...............................................................................................................13
SERVICING:.................................................................................................................13
FAULT FINDING .............................................................................................................14
The machine will not start: ............................................................................................14
The coffee runs out too slowly (cream is too dark): ......................................................14
The coffee runs out too quickly (cream is too light): .....................................................14
The coffee is too bitter: .................................................................................................14
The coffee is tepid ........................................................................................................14
The filter holder is leaking at the edges: .......................................................................14
There are grounds in the coffee....................................................................................14
The steam does not come out from the nozzle.............................................................14
The filter holder cannot be positioned into the Group ...................................................15
Water constantly drips or runs out of the unit’s diffuser ................................................15
The pump makes noise ................................................................................................15
The coffee is completely cold .......................................................................................15
The coffee does not run out (On/off button (4) on) .......................................................15
TECHNICAL SPECIFICATIONS .....................................................................................16
98175 US 2.0 - 01 2007
2 / 22
www.santos.fr
SANTOS : Instruction and maintenance manual
WIRING DIAGRAMS .......................................................................................................17
Wiring diagram: 100-120V 50/60Hz and 220-240V 50/60Hz ........................................17
FIGURES......................................................................................................................19
WARRANTY CERTIFICATE..........................................................................................22
APPLIANCE IDENTIFICATION PLATE ........................................................................22
98175 US 2.0 - 01 2007
3 / 22
www.santos.fr
SANTOS : Instruction and maintenance manual
“CE” COMPLIANCE DECLARATION
THE MANUFACTURER:
SANTOS SAS - 140-150, Av. Roger SALENGRO 69120 VAULX-EN-VELIN (LYON)
FRANCE
HEREBY DECLARES THAT THE MACHINE DESIGNATED ON THE IDENTIFICATION
PLATE AFFIXED:
• UNDER THE APPLIANCE,
• ON THE WARRANTY CERTIFICATE ON THE LAST PAGE OF THIS MANUAL,
COMPLIES WITH THE PROVISIONS OF THE "machines" DIRECTIVE AS MODIFIED
(Directive 98/37/CEI)
AND THE NATIONAL LEGISLATION TRANSPOSING IT.
IT ALSO COMPLIES WITH THE PROVISIONS OF THE FOLLOWING EUROPEAN
DIRECTIVES:
No. 73/23 dated 19/02/73 (Low voltage directive)
No. 89/336 (CEM directive)
No. 2002/95/CE (RoHS directive)
No. 2002/96/CE (WEEE directive)
Pressure equipment Directive 97/23/EC. The machine comes within the scope of
this directive but is only subject to the rules of the trade
The machine complies with the provisions of the following harmonised European
standards:
EN ISO 12100 -1 and 2 : 2004 - Machine safety devices - General design
principles
NF EN 60204-1: 1998: Machine safety devices - Machine electrical equipment General regulations
SIGNED IN VAULX-EN-VELIN ON: 01/01/2007
SIGNATORY'S TITLE: CHIEF EXECUTIVE OFFICER
SIGNATORY'S NAME: JACQUES FOUQUET
SIGNATURE
98175 US 2.0 - 01 2007
4 / 22
www.santos.fr
SANTOS : Instruction and maintenance manual
ATTENTION - IMPORTANT
!
DO NOT PLUG THE APPLIANCE INTO THE MAINS SUPPLY BEFORE
READING THE FOLLOWING.
The heating element must not operate without water. Follow the instructions
in the chapter: « first-time start-up » before plugging in.
For all handling operations including unpacking the machine, do not handle or lift
the appliance by the access door to the tank (1).
Precautions and risks:
!
Be wary of being burnt.
During normal operation, the Group (9) reaches temperatures exceeding
60°C. You are strongly advised against touching the Group (9) when in use.
IMPROPER USE:
• Do not place anything other than drinking water inside the tank or the bottle.
• The machine is designed only for the use of ground roasted coffee beans or
standard commercial pods.
RECYCLING THE PRODUCT AT THE END OF ITS SERVICE LIFE
This equipment is marked with the selective sorting symbol relating to
wastes from electrical and electronic equipment. It signifies that this
product should be taken over by a selective collection system conforming
to the Guideline 2002/96/EC (WEEE) – part Professional Equipment – so
that it can be either recycled or dismantled in order to reduce any impact on
the environment.
For more information, please contact your Retailer or the SANTOS.
For eliminating or recycling components of equipment, please contact a specialized
company or contact SANTOS.
The electronic products not undergoing a selective sorting are potentially dangerous for
the environment.
The damaging materials should be eliminated or recycled according to the regulations in
force.
Note : For better understanding of the following paragraphs, please refer to the
diagrams at the end of this manual.
98175 US 2.0 - 01 2007
5 / 22
www.santos.fr
SANTOS : Instruction and maintenance manual
ELECTRICAL CONNECTION
•
The electric power supply for the machine is available in 2 single-phase voltages:
- 110-120 V 50/60 Hz: Model 75V1
- 220-240 V 50/60 Hz: Model 75
Line protection: the machine should be connected to a standard 2-pole + earth electric
socket. The system should be fitted with an RCD and a fuse rated at 16A. The appliance
must be earthed.
CARE:
•
Before connecting the machine, check that the mains electrical voltage is the
same as the voltage for your appliance. Its value is shown:
either on the identification plate (34) under the machine.
or on the identification plate on the last page of this manual.
• If the power cable (24) is damaged, it should be replaced by a special assembly
available from approved SANTOS dealers or from SANTOS.
!
SANTOS ESPRESSO # 75
MACHINE DESCRIPTION:
• The « SANTOS espresso » is made up of an espresso machine, a filter holder with
2-cup nozzle, a 1-cup nozzle, 3 filters (1 cup, 2 cups and standard dose), a 7 g
measuring spoon and a 1.5 liter bottle of spring water.
Filter for
1 cup, 7g
Filter for standards
Dose (Pods)
Filter for
2 cups, 14g
• The SANTOS espresso N°75 is designed for professional use making
approximately 50 to 100 cups of coffee per day.
• The exclusive functions of this machine are as follows:
1. It can make professional quality espresso coffee: frothy like in bars. To do this,
a quality coffee ground in accordance with the SANTOS instructions should be
98175 US 2.0 - 01 2007
6 / 22
www.santos.fr
SANTOS : Instruction and maintenance manual
2.
3.
4.
5.
used (the use of the SANTOS grinder N°40A would meet with these
requirements).
Possibility of positioning a 1.5 liter bottle of commercially-used water straight
into the machine.
Hot water outlet for making instant drinks or tea.
Steam nozzle to heat up beverages or to make cappuccinos.
« Water low » control light on top part, heating control light on front.
INSTALLATION AND HANDLING
The machine can be handled by a single person. It is recommended that the appliance
be placed on a table or worktop for more comfortable use, so that the controls are in front
of you (recommended height: 90 cm, to be adapted as required for the user).
USING THE APPLIANCE
!
ATTENTION:
• Before plugging the appliance in, check that its operating voltage
matches your power supply and the value featured on the warranty sheet
supplied with the appliance or on the rating plate underneath the
appliance.
• If the power cable is damaged, it should be replaced with a special unit
available from SANTOS or a SANTOS-approved dealer.
PRELIMINARY OPERATIONS:
Ground coffee
Ideally freshly ground using the SANTOS coffee grinder N°40A. The ground should be
fine but palpable. The perfect grain size can be found by doing a few tests on the
machine:
If the coffee runs out too quickly, the grind is too coarse or the quantity is insufficient and
vice-versa. The recommended throughput time to make 2 coffees is 20 to 30 seconds.
Water
Use soft cold water. The best coffee is obtained using commercial flat mineral water.
Hard water will quickly cause scale build-up in the machine. The chlorine content of
certain tap water can alter the espresso flavor.
Sugar?
Every knows that the purists do not take sugar in coffee, however granulated sugar is
preferred to sugar cubes.
USING FOR THE 1st TIME:
Cleaning:
1. Open the tank door (1), take out the bottle of water (19) and the tank (20) Fig.1.
98175 US 2.0 - 01 2007
7 / 22
www.santos.fr
SANTOS : Instruction and maintenance manual
2. Wash all the elements in contact with the coffee in clean water: the tank (20), filter
holder (10) and 3 filters (21). Fig.2.
Priming the pump and filling the boiler:
The machine is factory-tested, the water suction pipes and the boiler may contain
drinking water. You are advised to run out water by priming the pump before making the
first cups of coffee.
1. Do not press the on/off button (4) and coffee button (5). Fig.3.
2. Put the tank (20) into the machine being careful not to obstruct the water suction
tube (22). Fig.4.
3. Fit the bottle of water (19) into the tank or fill the tank up with water.
4. Insert the water suction tube (22) into the water checking that the strainer (23) is
immersed as far down as possible. Fig.5.
5. Connect the power supply cord plug (10) to the mains supply socket. Note: no
button should light up. If not, press the buttons to make them go out Fig.3.
6. Place a recipient under the steam nozzle (15).
7. Turn the steam tap (17) anti-clockwise to open it.
8. Push the Water button (7) and keep it depressed to prime the pump. When
priming, the water is sucked into the pipe thereby expelling the air out. Fig.6.
Careful: Never start the pump when the strainer (23) is not immersed. If so, you
may destroy the pump.
9. If the boiler is completely empty, it may take 40 to 50 seconds to fill. The boiler
is considered as full when water escapes from the steam nozzle (15).
10. Stop by pressing the Water button (7) and close the steam tap (17).
START-UP:
Assembly, preparation and use:
!
1. Check there is water in the tank (20) or in the bottle (19), the strainer (23) is
immersed and the “lack of water” indicator (18) is off.
Note: when the “lack of water” light goes on, there is enough water left to make 2
espresso coffees.
2. Fit the drip tray (13) and drip tray plate (12) under the Group (9)
3. Connect the power supply cord (24) to your mains supply socket.
4. Press the on/off button (4) to start the heating of the Group. The heating control
light (3) is on to indicate that the temperature has not been reached.
Note: when used on a daily basis, you are advised to leave the machine on so that
the boiler stays at a constant temperature.
5. Fit the suitable filter into the filter holder (10): 1 cup, 2 cups or standard pods. The
filters fit in by pressing down flatly with your hand and are removed by sliding and
turning with a small metal blade (for example the handle of a metal spoon).
98175 US 2.0 - 01 2007
8 / 22
www.santos.fr
SANTOS : Instruction and maintenance manual
6. Measure the grind with the measuring spoon (25): 1 x 7 g spoon for 1 espresso, 2
spoons for 2 espressos equal to 14 g. If you use a SANTOS grinder N°40A, this is
also set at 7 g.
7. Pack down the grind on the built-in Tamping device (8), to the left hand side of the
filter holder location. The quality of the espresso froth depends on the tamping of
the grind.
8. Fix the filter holder by lifting it up and turning it to the right like a barman would.
9. Position one or two preheated cups on the top part on the cup-warming plate (2).
10. Press the coffee button (5)
a. The flow of water should pass through the grind for 20 to 30 seconds
b. The pressure should reach 3 to 6 bars for mild coffee, 6 to 9 bars for
stronger coffee and 9 to 12 bars for the standard pods. Read the reading on
the manometer (14).
c. The temperature is approximately 85 to 92 °C
11. Press the coffee button (5) again when the desired quantity has been obtained.
12. Serve or taste...
13. Throw away the coffee grounds by tapping the edge of the filter holder, the edge
of your grounds drawer should preferably be made of plastic or wood. Do not
worry about the small amount of remaining coffee on the filter as this will not alter
the taste of the next coffee.
Never leave powder in standby in the filter holder as the next coffee will have a
« burnt » taste as the powder would deteriorate and loose its flavor due to
overheating.
MAKING TEA, CHOCOLATE OR cappuccinos
!
Attention: Never touch the water/steam nozzle (15) with your fingers until it
has cooled down fully.
Handle the steam tube using the rubber antiscorching protection device
(16).
Obtaining hot water from the nozzle:
Open the tap (17), then press the hot water button (7). After obtaining the desired
quantity of water, release the button and close the tap.
Obtaining steam:
1. Drain any remaining water from the nozzle (15) by opening the tap (17), then
closing it as soon as the steam appears.
2. Press the steam button (6), the heating control light (3) then goes on.
3. Keep the button pressed until the control light goes off again. (When not very
much steam is required, keeping the button pressed for 15 seconds is
sufficient).
4. Plunge the nozzle (15) into the liquid to be heated up or emulsified.
5. Open the tap gradually (17).
6. When completed, close the tap (17).
Making a cappuccino:
Proceed in the same way as for steam but taking the following precautions:
98175 US 2.0 - 01 2007
9 / 22
www.santos.fr
SANTOS : Instruction and maintenance manual
1. The jug must contain at least 8 cm of milk.
2. Keep the jug inclined so that the nozzle is always plunged into the milk without
touching the edges.
3. The tap (17) must be opened slowly and always stir the jug in circular
movements until the milk starts to froth up.
4. When the milk has frothed up, close the tap (17) quickly.
5. Then take out the jug and pour the contents over the espresso coffee. The
amount of steam can make the equivalent of 3 to 4 cappuccinos.
Attention: Clean the nozzle thoroughly immediately using a damp cloth as deposits
of milk can be very sticky and difficult to remove when they have dried.
HOW TO STOP THE MACHINE
The appliance is stopped either by pressing:
1. the « stop » push button (4),
2. or by unplugging the mains cord plug (24)
CLEANING:
You are advised to perform the following operations at the end of every day:
1. Clean the Shower head (26), filter seal (27) filter holder slides (28) with a damp
cloth (the whole part in contact with the coffee). Do not scratch or clean the filter
seal with a metal blade. Fig.7.
2. Rinse the filters (21) and filter holder (10) in hot water using a common household
detergent to dissolve any deposits of coffee.
3. Clean the drip tray (13) and its plate (12)
4. Clean the hot water/steam nozzle (15) immediately after use. Certain deposits,
especially milk may clog up the holes of the nozzle when drying or alter the taste
of drinks.
98175 US 2.0 - 01 2007
10 / 22
www.santos.fr
SANTOS : Instruction and maintenance manual
SAFETY / MAINTENANCE
OVERHEATING SAFETY FEATURE:
nd
2
level
In the event of the Group overheating, the manually reset thermal protection device is
tripped, thereby cutting out the power supply to the heating element.
!
•
Attention: these maintenance operations are reserved for SANTOS
approved dealers.
The machine must be unplugged before any intervention is made
inside it.
Reset the machine’s safety thermostat
- Unplug the power supply cord from the machine (24) (with the machine
switched off)
- Take down the rear plate from the machine (4 screws)
- Press the manual reset button (29) of the machine’s safety thermostat. Fig.8.
- Put the rear plate back and plug the machine back in.
If the problem persists, switch off the power supply to the machine (unplug the cord from
the mains socket (24)) and call in the maintenance service or contact a SANTOS
approved dealer.
PRESSURE SAFETY FEATURE:
The pressurized circuit is fitted with a pressure limiter preventing the system from
reaching a pressure of over 16 bars.
st
1
level
1st level MAINTENANCE
Re-priming the pump
Although the pump is of the self-priming type, there are certain rare cases when it may
be difficult to re-prime (particularly when the suction strainer (23) has been removed from
the tank (20), then put back without filling up the tank. Re-priming is difficult when the
water level is low).
When the pump is not primed, it makes a peculiar noise warning that it is operating
"empty".
Proceed as follows:
1. The machine must be plugged in but not necessarily switched on (On/off button
(4) in the Off position, not lit up).
2. Open the tap (17) and press the hot water button (7) (several short presses may
enhance priming and eliminate any air bubbles).
3. You can hear the pump is being re-primed and the boiler is full when water comes
out of the nozzle (15).
98175 US 2.0 - 01 2007
11 / 22
www.santos.fr
SANTOS : Instruction and maintenance manual
Descaling – Limescale removal
Any process involving the heating of water leads to scaling, particularly if the water is
hard (tap water). This is why you are advised to use bottled water which limits scaling
and ensures a better quality coffee.
Excess lime scale can lead to damage to the heating element which is why you are
advised to descale:
- once a year if the mineral water recommended by SANTOS is used
- once a month in the other cases.
1. The machine must be plugged in but switched off (On/off button (4) in Off position
not lit up) as the handling can be performed with the machine cold.
2. Fill the tank with water and diluting 3 to 4 spoons of white vinegar (citric acid) in it
to dissolve the lime scale.
3. Allow to react for a few minutes in order to descale the water tank.
4. open the tap (17) and press the hot water button (7). Empty 3/4 of the tank into a
suitable container.
5. The bottom of the tank could be emptied by pressing the coffee button after
switching the machine on in order to also make the mixture work on the filter
holder part.
6. Rinse the machine thoroughly by repeating the operation with clean water. Rinse
the whole circuit thoroughly so as not to alter the taste of the following coffees.
nd
2
level
2nd level MAINTENANCE
!
Attention: these maintenance operations are reserved for SANTOS
approved dealers.
The machine must be unplugged before any intervention is made
inside it.
Complete descaling
In the event of heavy scaling up which hinders the operation of the machine, proceed as
in the previous paragraph but make the whole mixture come out of the « scale outlet »
(30) especially provided for this purpose:
1. The machine must be plugged in but switched off (On/off button (4) in Off position
not lit up) as the handling can be performed with the machine cold.
2. Fill the tank with water and diluting 4 to 5 spoons of white vinegar (citric acid) in it
to dissolve the lime scale.
3. Allow to react, if required, for a few minutes in order to descale the water tank.
4. Open the tap by pressing the hot water button until the tank is half empty then
close the tap.
5. Allow to stand for a few minutes or overnight in the event of heavy scaling up. In
this case, unplug the machine.
98175 US 2.0 - 01 2007
12 / 22
www.santos.fr
SANTOS : Instruction and maintenance manual
6. Loosen the screw (31), take down the shower head (26), water diffuser (32), and
unscrew the « scale outlet » (30) plug. The water from the tank runs out into the
drip tray. Fig.7, 9 and 10.
7. Press the hot water button to empty the tank via the scale outlet (The deposits of
dissolved lime scale could come out of the scale outlet whereas they could not
come out through the nozzle as the diameter is too small).
8. Repeat the operation using clean water in order to rinse out the circuit thoroughly.
9. Screw the « scale outlet » plug back up, adding a high temperature sealing gel to
the threads. The plug should not stick out from the bearing surface of the water
diffuser.
10. Put back the shower head (26), water diffuser (32), change the water diffuser seal
(33) if required (fit the seal the unit end).
Spare parts:
!
IMPORTANT: The use of spare parts other than those certified by
SANTOS is prohibited
If any intervention is necessary to replace parts subject to wear, such as the filters, the
seal of the unit, electrical or other components, please refer to the parts list (see the
exploded view at the end of this manual or download from the internet www.santos.fr).
For all spare part orders (see references in the exploded view at the end of the
manual), state:
the type,
the machine serial number and
the electrical specifications (34)
recorded under the machine.
SERVICING:
Neither a hose nor a pressure hose should be used for cleaning
•
•
After use, clean the filter holder (10), filters (21), drip tray (13) and plate (12) with
clean water or a dishwashing product provided for this purpose. Then rinse and
dry.
The stainless steel sides and plates are to be cleaned with a soft wet sponge then
dried.
Do not use abrasive products or pads to clean the stainless steel plates.
98175 US 2.0 - 01 2007
13 / 22
www.santos.fr
SANTOS : Instruction and maintenance manual
FAULT FINDING
st
1
level
st
1
level
st
1
level
st
1
level
st
1
level
st
1
level
st
1
level
st
1
level
The machine will not start:
•
Check: the mains power supply and the condition of the power supply cord,
The coffee runs out too slowly (cream is too dark):
•
•
•
The coffee is too finely ground
The coffee is over-dosed (always use the spoon = 7 g) and too tampered
The machine is scaled up.
The coffee runs out too quickly (cream is too light):
•
•
The coffee is too coarsely ground
The coffee is under-dosed (always use the spoon = 7 g)
The coffee is too bitter:
•
•
The grind has stayed too long in standby in the filter holder (" burnt " grind).
The coffee runs out too slowly (see above)
The coffee is tepid
•
•
•
•
The grind is too coarse
The cups are cold
The machine is scaled up.
The machine is not yet hot enough.
The filter holder is leaking at the edges:
•
•
•
•
Check the filter holder (10) is positioned properly in the Group (9)
Tighten the filter holder more
Clean the edge of the filter (21), or change it
Clean the seal of the filter (27), or change it.
There are grounds in the coffee
•
•
•
•
Clean the edge of the filter (21)
Clean the seal of the filter (27), or change it.
The grind may be too fine
The filter holder (10) is not positioned properly
The steam does not come out from the nozzle
•
The nozzle (15) is clogged up. Unblock the holes of the nozzle outlet with a needle
(scale or milk)
98175 US 2.0 - 01 2007
14 / 22
www.santos.fr
SANTOS : Instruction and maintenance manual
The filter holder cannot be positioned into the Group
st
1
level
•
•
Check that there is not too much coffee in the filter holder
Check that there is no coffee stuck on the diffuser (26) of the Group or the seal of
the Group (27).
Water constantly drips or runs out of the unit’s diffuser
nd
2
level
•
Descale the Group and the solenoid valve
The pump makes noise
st
1
level
•
•
If the “lack of water” light (18) is on, add water.
If there is water, see the re-priming paragraph
The coffee is completely cold
nd
2
level
•
Call in a Santos approved repair man to check the heating element and thermostats
of the boiler.
The coffee does not run out (On/off button (4) on)
•
st
1
level
•
•
•
nd
2
level
•
•
•
There is no water in the tank
- Add water
The strainer (23) is not immersed
- Immerse the strainer
The filter (21) or spout (11) of the filter holder is clogged
- Clean with water
The pump is not primed or damaged
- Re-prime the pump or change it if the machines does not make any noise
when the coffee button (5) is pressed.
The machine’s safety thermostat is tripped
- Check the thermostat, see « unit overheating safety feature » chapter
The solenoid valve is scaled up or damaged
- If you can make steam but not coffee then clean and test the solenoid valve.
The Group is scaled up
- Descale.
98175 US 2.0 - 01 2007
15 / 22
www.santos.fr
SANTOS : Instruction and maintenance manual
TECHNICAL SPECIFICATIONS
Power supply voltage (V)
Frequency (Hz)
Mains power supply:
220-240
50 / 60
Heating element:
1260
5.2
Power input (W)
Power requirement (A)
Coffee thermostat (°C)
Steam thermostat (°C)
Machine safety thermostat (°C)
Group capacity (l)
Max. pump pressure (bars)
Noise level (2) (dBA) Measured during
operation
LAeq, dB
Performance :
Tank capacity (l)
Bottle capacity (l)
100-120
50 / 60
1260
10.4
107
145
165
0.38
16
44
2.4
1.5
20 espressos for 1.5 liters
espresso quantity
31 espressos for 2.4 liters
Maximum height of cup (mm)
83 to 130 (removing grid)
Dimensions and weight :
Height (mm)
400
Width (mm)
265
Depth (mm)
320
Net weight (kg)
17
Packaged weight (kg)
19
(2) ref 20µPa
98175 US 2.0 - 01 2007
16 / 22
www.santos.fr
SANTOS : Instruction and maintenance manual
WIRING DIAGRAMS
Wiring diagram: 100-120V 50/60Hz and 220-240V 50/60Hz
WATER
Purple
24
23
14
13
Blue
PUMP
Orange
Black
Blue
HEATING ELEMENT
White
Black
Yellow
STEAM
107°
24
145°
Brown
Brown
23
Heating control light
Yellow
White
13
14
COFFEE
SOLENOID VALVE
White
24
23
14
13
Blue
Brown
Orange
White
Brown
On/Off
Blue
~
Brown
Purple
Black
24
14
23
13
Inter
detection
– water
level
Water level control
Brown
Red
Orange
165°
Green / yellow
Grommet earth
Green / yellow
Pump earth
Green / yellow
98175 US 2.0 - 01 2007
Orange
Solenoid valve earth
17 / 22
www.santos.fr
SANTOS : Instruction and maintenance manual
TRANSLATION TABLE OF MACHINE COMPONENTS
Ite
English
m
1 Tank door
2 Cup heating plate
3 Heating control light
4 On/Off switch
5 Coffee switch
Over-heating switch, for
6
steam
7 Hot water switch
8 Tamping device
9 Group
10 Filter holder
11 1 cup / 2 cups spout
12 Drip tray plate
13 Drip tray
14 Manometer
15 Steam nozzle
16 Anti-scorching device
17 Water/Steam tap
18 Lack of water indicator
19 Water bottle
20 Tank
21 Coffee filters
22 Water suction tube
23 Strainer
24 Mains power supply plug
25 Measuring spoon
26 Shower head
27 Filter seal
28 Filter holder slides
29 Thermostat reset button
30
31
32
33
34
Scale outlet plug
Shower head screw
Water diffuser
Water diffuser seal
Identification plate
98175 US 2.0 - 01 2007
Français
Trappe de réservoir
Chauffe tasses
Voyant lumineux de
chauffe
Bouton Marche /Arrêt
Bouton café
Bouton chauffe vapeur
Bouton eau chaude
Tasseur
Groupe
Porte filtre
Bec 1 tasse / 2 tasses
Grille de bac à gouttes
Bac à gouttes
Manomètre
Buse vapeur
Anti-brûlure
Robinet vapeur
Voyant manque d’eau
Bouteille d’eau
Réservoir
Filtres à café
Tube d’aspiration d’eau
Crépine
Pise d’alimentation secteur
Cuillère doseuse
Douchette
Joint de filtre
Glissières de porte filtre
Bouton de réarmement
thermostat
Bouchon de purge
Vis de douchette
Porte douchette
Joint de porte douchette
Plaque signalétique
18 / 22
www.santos.fr
SANTOS : Instruction and maintenance manual
FIGURES
Figure 2
Figure 1
1
20
10
21
19
23
22
25
Figure 4
Figure 3
3
20
4
5
6
7
22
17
Figure 5
Figure 6
17
22
20
15
7
98175 US 2.0 - 01 2007
19 / 22
www.santos.fr
SANTOS : Instruction and maintenance manual
Figure 7
Figure 8
26
27
29
28
31
Figure 9
Figure 10
32
30
26
31
33
24
98175 US 2.0 - 01 2007
20 / 22
www.santos.fr
1
SANTOS : Instruction and maintenance manual
18
2
3
17
4
5
6
7
8
16
9
10
11
15
12
14
13
98175 US 2.0 - 01 2007
21 / 22
www.santos.fr
SANTOS : Instruction and maintenance manual
WARRANTY CERTIFICATE
WARRANTY
This appliance is guaranteed for twelve months from the date of manufacture appearing
on the identification plate.
The guarantee is strictly limited to the free replacement of any original part acknowledged
by us as being defective as a result of a fault or a manufacturing defect and identified as
belonging to the appliance in question.
It does nor apply to damage resulting from an installation or use which does not comply
with the instructions supplied with each appliance (user manual) or in the event of an
obvious lack of maintenance or non-observance of basic electrical safety rules.
All part replacements under warranty are made after return of the defective part to our
workshops carriage paid, accompanied by a copy of this warranty certificate on which the
serial number of the appliance is shown.
All appliances have an identification plate bearing a serial number identical to that on this
warranty certificate.
In the event of serious damage which is deemed only to be repairable in our workshops,
and after agreement from our services, all appliances under warranty are to be
dispatched by the client carriage paid. If the appliance is repaired outside the warranty,
the forwarding and return transport is the responsibility of the client. Parts and labour are
invoiced at the prices in force (spare parts price - hourly labour cost). All repairs will be
subject to a prior estimate which should be agreed before repair.
In the event of a dispute, the Courts for the manufacturer's area (Lyon) alone have
jurisdiction.
APPLIANCE IDENTIFICATION PLATE
SPECIMEN
For all documents not supplied with
the appliance.
Printed, Faxed and Downloaded
98175 US 2.0 - 01 2007
22 / 22
www.santos.fr