1
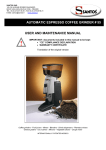
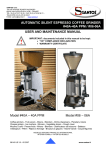
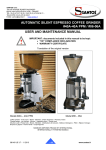
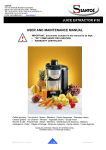
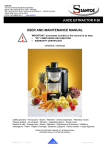
SANTOS SAS:
140-150 AVENUE ROGER SALENGRO
69120 VAULX-EN-VELIN (LYON) - FRANCE
TEL. 33 (0) 472 37 35 29 - FAX 33 (0) 478 26 58 21
FAX 33 (0) 478 26 58 21
www.santos.fr
E-Mail: [email protected]
AUTOMATIC ESPRESSO COFFEE GRINDER # 55
USER AND MAINTENANCE MANUAL
!
IMPORTANT: documents included in this manual to be kept:
• "CE" COMPLIANCE DECLARATION
• WARRANTY CERTIFICATE
ORIGINAL VERSION
Coffee grinders - Fruit juicers - Mixers - Blenders - Drinks dispensers - Planetary mixers
Cheese graters - Ice crushers - Mincers - Vegetable slicers – Dough mixer
INTERNATIONALLY PATENTED MODELS
SANTOS: User and maintenance manual
CONTENTS
“CE” COMPLIANCE DECLARATION ........................................................................................4
YOUR BAR ESPRESSO COFFEE GRINDER No. 55..................................................................5
INSTALLATION AND HANDLING.................................................................................................5
CONTROL PANEL PERSONALISATION.......................................................................................5
RECYCLING THE PRODUCT AT THE END OF ITS SERVICE LIFE..........................................6
IMPROPER USE .............................................................................................................................6
ELECTRICAL CONNECTION ........................................................................................................6
USING THE MACHINE...................................................................................................................7
CONTROL PANEL DESCRIPTION................................................................................................7
MEASURE SELECTION..................................................................................................................7
DISPLAY MODE SELECTION .......................................................................................................7
Mode 1: Display of the Total measures distributed.....................................................................7
Mode 2: Display of the Partial measures distributed since last reset...........................................7
Mode 3: Display of the current selection (the counters are hidden) ............................................8
USING FOR THE 1ST TIME ............................................................................................................8
STARTING UP:................................................................................................................................8
USING: ............................................................................................................................................8
Grinding adjustment: ...................................................................................................................9
Setting the measured dose of ground coffee (timers): ...............................................................10
Initialising the factory parameters .............................................................................................11
CLEANING:...................................................................................................................................11
MAINTENANCE ............................................................................................................................12
Spare parts: ................................................................................................................................12
Replacing the grindstones:.........................................................................................................12
FAULT FINDING............................................................................................................................14
The machine will not start: ........................................................................................................14
The machine stops as a result of motor over-heating: (the motor unit is hot) ...........................14
The machine stops as a result of an overload: ...........................................................................14
The ground coffee dose measurement is not consistent ............................................................15
The machine runs but without the filling filter holder...............................................................15
The espresso coffees are getting weaker and weaker ................................................................15
The machine does not work after having changed the timer settings........................................15
The machine does not work following a power cut...................................................................15
MACHINE TECHNICAL SPECIFICATIONS ...........................................................................16
TECHNICAL SPECIFICATIONS ..................................................................................................16
110-120V 50/60Hz and 220-240V 50/60Hz wiring diagram.........................................................17
98155 US 3.0 - 04 2007
2 / 21
www.santos.fr
SANTOS: User and maintenance manual
Element cross-reference table......................................................................................................18
WARRANTY CERTIFICATE.....................................................................................................21
APPLIANCE IDENTIFICATION PLATE................................................................................21
98155 US 3.0 - 04 2007
3 / 21
www.santos.fr
SANTOS: User and maintenance manual
“CE” COMPLIANCE DECLARATION
THE MANUFACTURER:
SANTOS SAS - 140-150, Av. Roger SALENGRO 69120 VAULX-EN-VELIN (LYON)
FRANCE
HEREBY DECLARES THAT THE MACHINE DESIGNATED ON THE IDENTIFICATION
PLATE AFFIXED:
• UNDER THE APPLIANCE,
• ON THE WARRANTY CERTIFICATE ON THE LAST PAGE OF THIS MANUAL,
COMPLIES WITH THE PROVISIONS OF THE "machines" DIRECTIVE AS MODIFIED
(Directive 98/37/CEI)
AND THE NATIONAL LEGISLATION TRANSPOSING IT.
IT ALSO COMPLIES WITH THE PROVISIONS OF THE FOLLOWING EUROPEAN
DIRECTIVES:
No. 73/23 dated 19/02/73 (Low voltage directive)
No. 89/336 (CEM directive)
No. 2002/95/CE (RoHS directive)
No. 2002/96/CE (WEEE directive)
The machine complies with the provisions of the following harmonised European
standards:
EN ISO 12100 -1 and 2 : 2004 - Machine safety devices - General design principles
NF EN 60204-1: 2006 - Machine safety devices - Machine electrical equipment General regulations
NF EN 60335-1 : 2003 - Safety of household and similar electrical appliances
SIGNED IN VAULX-EN-VELIN ON: 01/04/2007
SIGNATORY'S TITLE: CHIEF EXECUTIVE OFFICER
SIGNATORY'S NAME: JACQUES FOUQUET
SIGNATURE
98155 US 3.0 - 04 2007
4 / 21
www.santos.fr
SANTOS: User and maintenance manual
YOUR BAR ESPRESSO COFFEE GRINDER No. 55
•
•
•
•
The silent bar espresso coffee grinder No. 55 is designed for bars, cafés, hotels and
restaurants. It is suitable for all types of espresso coffee machine.
The machine consists of an aluminium grinder unit and base, a transparent plastic
bean container, and an electronic system combining the dose measurer and a dose
counter.
The machine can be used to grind roasted coffee and to dispense it via an electronic
dose measurer.
The following adjustments can be made:
o Adjustment of the grinding fineness (from Filter, Fine to Espresso)
o Adjustment of the ground coffee measure dispensed (from approximately
5.5g to 20g).
INSTALLATION AND HANDLING
Just one person is required for handling the appliance. For ease of use, it is
recommended that the machine is placed on a table or work surface so a to have the
control panel in front of you (recommended height: 90 cm, to be adapted to suit the user).
CONTROL PANEL PERSONALISATION
You can personalise the control panel label, for example to show the brand of coffee
served and the type of coffee, or simply to identify the coffee used if you have more than
one appliance side by side (with more than one type of coffee).
Templet for the personalised label. Print to scale 1:1 then cut out.
You can produce a personalised label directly on our Internet site (Word document).
Note: For easier understanding of the sections below, please refer to the
diagrams at the end of the manual
98155 US 3.0 - 04 2007
5 / 21
www.santos.fr
SANTOS: User and maintenance manual
RECYCLING THE PRODUCT AT THE END OF ITS SERVICE LIFE
This equipment is marked with the selective sorting symbol relating to
wastes from electrical and electronic equipment. It signifies that this product
should be taken over by a selective collection system conforming to the
Guideline 2002/96/EC (WEEE) – part Professional Equipment – so that it
can be either recycled or dismantled in order to reduce any impact on the
environment.
For more information, please contact your Retailer or the SANTOS.
For eliminating or recycling components of equipment, please contact a specialized
company or contact SANTOS.
The electronic products not undergoing a selective sorting are potentially dangerous for
the environment.
The damaging materials should be eliminated or recycled according to the regulations in
force.
IMPROPER USE
!
1. The appliance is not intended for a continuous operation (maximum
usage range: 10 seconds in operation and 20 seconds stopped)
2. Never operate the machine without coffee beans in the bean container.
3. Do not use this machine for grinding anything other than roasted
coffee beans.
4. Remove from the coffee beans any foreign bodies which may damage
the grindstones (metal staples, stones, etc.).
ELECTRICAL CONNECTION
•
The electric power supply for the machine is available in 2 single-phase voltages:
- 110-120 V 50/60 Hz: Model 55V1
- 220-240 V 50/60 Hz: Model 55
Line protection: the machine should be connected to a standard 2-pole + earth electric
socket. The system should be fitted with an RCD and a fuse rated at 16A. The appliance
must be earthed (fig. B).
CARE:
•
Before connecting the machine, check that the mains electrical voltage is the same
as the voltage for your appliance. Its value is shown:
either on the identification plate (16) under the machine.
or on the identification plate on the last page of this manual.
• If the power cable (10) is damaged, it should be replaced by a special assembly
available from approved SANTOS dealers or from SANTOS.
!
CARE: Check that the On / Off switch (11) is in the 0 position before connecting the
power cable plug (10) to your mains electric power socket (fig. A).
!
98155 US 3.0 - 04 2007
6 / 21
www.santos.fr
SANTOS: User and maintenance manual
USING THE MACHINE
The machine provides automatic delivery of the required measure of coffee ground there
and then for making:
• 1 espresso coffee (1 measure selection)
• 2 espresso coffees (2 measures selection).
CONTROL PANEL DESCRIPTION
The control panel is made up of: (fig. A)
• a screen (19) (measure counter and adjustment display),
• a "1 coffee" selection button (20),
• a "2 coffees" selection button (21)
• 2 "+" and "-" setting buttons (22).
MEASURE SELECTION
2 separate buttons provide selection by pushing just once.
• Selection button 1 for 1 coffee (20)
• Selection button 2 for 2 coffees (21)
A luminous indicator showing the measure selected lights up according to the selection.
The measure selected is automatically dispensed as soon as the user places the
filter holder under the ground coffee outlet tube (23) (fig. H).
DISPLAY MODE SELECTION
Pressing the "1 coffee" or "2 coffees" selection key which is already illuminated provides
the means for changing the display mode.
Note: On turning on the power or after having changed the timer values, "mode 1" is
automatically active. Operating either of the 2 measure selection keys, or changing
the timers, activates the active display mode before the appliance stops.
Mode 1: Display of the Total measures distributed
The Total counter cannot be reset
Mode 1 display format "XXXXX" i.e. "00001" to "99999"
Mode 2: Display of the Partial measures distributed since last reset
Partial counter initialisation.
Pressing and holding down both the "1 cup" and "2 cups" selection keys for 2 seconds
causes the Partial counter value to flash. After flashing 3 times, the value is reset to zero.
Mode 2 display: "PXXXX" i.e. "P---1" to "P9999"
98155 US 3.0 - 04 2007
7 / 21
www.santos.fr
SANTOS: User and maintenance manual
Mode 3: Display of the current selection (the counters are hidden)
Mode 3 provides the means for hiding the counters.
Mode 3 display:
"__1__" for the 1 cup selection
"__2__" for the 2 cup selection
USING FOR THE 1ST TIME
Carefully clean the parts in contact with the coffee (fig. A).
• Take off the lid (1), the bean container (2) and the ground coffee collector (3) and
wash them with a standard dish washing product.
STARTING UP:
Assembly and preparation:
(fig. A)
1. Clip the ground coffee collector (3) onto the base (4).
2. Placer the bean container (2) on the grinder unit adjustment nut (5).
3. Pour the roasted coffee beans into the bean container and put the lid on the bean
container.
4. Open the bean container shutter (6).
USING:
1. Switch the electric current on to the machine by putting the On / Off switch (11) to
the 1 position (the control panel display (19) shows the total number of measures
dispensed) (fig. A).
2. Press the selector button (20 or 21) according to your selection (1 coffee or 2
coffees).
3. Place the filter holder under the measurer outlet (23) using the filter holder support
(24) to help.
4. The coffee beans are then ground by the grindstones and the grounds come out of
the grinder unit to fill the filter holder.
5. Remove the filter holder and tamp down the coffee with the tamper (15).
Note: If the 1 coffee button is already selected and you want to make 1 coffee again, you
do not need to press the 1 coffee button again. Simply put the filtre holder under the
coffee outlet tube to obtain the measure selected.
If the 1 coffee button is already selected and you want to make 2 coffees, you have
to press the 2 coffees button and then place the filter holder under the coffee outlet
tube to obtain the measure selected
98155 US 3.0 - 04 2007
8 / 21
www.santos.fr
SANTOS: User and maintenance manual
Grinding adjustment:
!
CARE: Changing the grinding setting will always require resetting the
timers. See the information chart in the next section:
Note: Never operate the machine with the two grindstones in contact. Letting the
grindstones come into contact may result in the grindings jamming in the grinder unit and
premature wear of the grindstones.
The machine is set in the factory for the "0" marker on the nut (5) graduated plate to
correspond to the finest grinding without the grindstones touching (fig. C).
On delivery, the machine is set to an espresso-type grinding with the adjusting nut (5) on
the 6 marker
1. Hold the adjustment nut (5) with one hand and press the indexing pointer (7)
with the other
2. Tighten the adjustment nut by turning in a clockwise direction (right-handed
thread) by one or two notches for finer grinding.
3. Loosen the adjustment nut by turning in an anti-clockwise direction (righthanded thread) by one or two notches for coarser grinding.
4. Release the indexing pointer (7) to lock the nut in position.
5. Draw off a few measures of coffee to check the grinding adjustment.
The machine can provide very fine grinding. However, depending on the type of coffee
used, be careful not to bring the grindstones into contact as this would cause the output to
drop considerably and alter the coffee aroma.
98155 US 3.0 - 04 2007
9 / 21
www.santos.fr
SANTOS: User and maintenance manual
Setting the measured dose of ground coffee (timers):
The ground coffee outlet tube (23) should be cleaned regularly to prevent the coffee which
has built up on the walls from interfering with the consistency of the coffee dose
measurement (fig. H).
IMPORTANT: Check or adjust the grinding before setting the timers.
Where the timers are being set following adjustment
of the grinding, you can use the chart BELOW
!
11
10
Measure dispensed (g)
9
Timer
60
8
70
7
80
90
6
5
4
3
2
3
4
5
6
7
8
9
10
11
12
Adjusting the fineness of grinding
(Mark on the nut graduated plate (5))
Approximate values for one measure and for new SANTOS grindstones
Explanatory notes for the table:
For example: you have made your grinding setting, which corresponds to "Notch 6" on the
grinding adjustment nut (5). If you want to obtain a 7g measure of coffee, you will need to
set the value of the timer to between 080 and 090 for an espresso type coffee.
98155 US 3.0 - 04 2007
10 / 21
www.santos.fr
SANTOS: User and maintenance manual
The 2 selector buttons are set independently (fig. D).
Generally speaking:
The 2 "+" and "-" buttons (22) are used to increase or decrease the values and
the "Selection" buttons (20 and 21) are used to confirm the timer values.
Pressing simultaneously on both the "+" and "-" buttons (22) for 2 seconds activates the
"timer setting" mode".
1 XXX
"
" appears on the screen (timer 1 value) and the "1 coffee" button (20) flashes
(indicating setting of the value of the 1 coffee timer)
o pressing the "+" button increases the value by one unit
o pressing the "-" button decreases the value by one unit
o pressing either of the 2 "Selection" buttons confirms the value displayed and
gives access to setting of the timer "2". The value of the timer "2" appears.
2 XXX
"
" appears on the screen (timer 2 value) and the "2 coffee" button (21) flashes
(indicating setting of the value of the 2 coffees timer).
o pressing the button "+" increases the value by one unit
o pressing the button "-" decreases the value by one unit
pressing either of the 2 "Selection" buttons confirms the value displayed, saves it and
returns the machine to the normal operating mode.
Timer setting range
No. 1 "1 coffee": from 40 to 499
No. 2 "2 coffees": from 80 to 999
The machine is set in the factory. You can initialise the factory parameters at any time.
Initialising the factory parameters
1. Turn the machine off (On / Off switch (11) to the (0) position)
2. With one hand, press and hold down both the "+" and "-" adjustment buttons and
then at the same time turn the power on (On / Off switch (11) to the (1) position). A
test procedure is launched at the end of which the factory parameters are
reinitialised.
If you release either of the buttons during the test phase, the initialisation is cancelled
and your settings retained.
CLEANING:
IMPORTANT:
!
• In all circumstances, the machine should be stopped and the machine's
power supply cable (10) unplugged.
• Do not clean with a water spray or pressure jet
98155 US 3.0 - 04 2007
11 / 21
www.santos.fr
SANTOS: User and maintenance manual
The ground coffee outlet tube (23) should be cleaned regularly using a commerciallyavailable bottle-brush (fig. H).
MAINTENANCE
Before carrying out any work on the machine, it must be unplugged from the mains and
the motor start capacitor discharged.
Discharging the capacitor:
!
• Unscrew the 2 screws located under the machine in the middle of the base plate
(fig. E).
• Pull the electrical components unit (26) out of the base plate.
• Using a screwdriver with an insulated handle, touch the 2 capacitor connections
(14). You should see an electric arc which means that the capacitor has been
discharged.
Spare parts:
This machine requires no specific maintenance. The bearings are lubricated for life.
If work is required to replace worn parts such as the grindstones or the electric or other
components, refer to the parts list (see exploded view at the end of the manual).
For all spare part orders (see references in the exploded view at the end of the manual),
state:
the type,
the machine serial number and
the electrical specifications (16)
recorded under the machine.
Replacing the grindstones:
!
IMPORTANT: always replace both 2 grindstones (9) at the same time. (use
SANTOS reference 00001B).
The 2 grindstones are identical and can be fitted equally either on the moving plate
(8) (moving grindstone) or on the adjusting nut (5) (fixed grindstone) (fig. F).
1. Close the bean shutter (6) (fig. G).
2. Run the machine until the coffee beans waiting in the grinder body have passed
through.
3. Stop the machine and unplug the mains power lead (10).
4. Take off the bean container (2).
5. With one hand, press the indexing pointer (7) and with the other unscrew the
adjustment nut by turning it in an anti-clockwise direction (fig. I).
Care: When this part is fully unscrewed, handle it with care so as not to damage the
brass thread.
98155 US 3.0 - 04 2007
12 / 21
www.santos.fr
SANTOS: User and maintenance manual
6. Unscrew the three screws of each grinder (fig. J). For blocking the rotation of grinder
holding plate while unscrewing or screwing the fastening screws of movable grinder,
place a screwdriver, non aggressive, between the grinding body and one of the fins
of the plate.
!
ATTENTION: Do not introduce the screwdriver in the coffee output hole.
This may destroy the anti-static strip and damage the operation of the
equipment.
7. Carefully clean the whole grinder body, in particular the grindstone facing areas.
8. Place each grindstone on its support making sure that there is no coffee dust
between the grindstone and its support.
!
CARE: The slightest small coffee particle under the grindstone may
prevent the machine from operating correctly. It is recommended that the
grinder body is cleaned with a compressed air jet or a dry brush.
CARE: Do not unscrew the retaining shaft (17) from the grindstone
carrier plate (8) so as not to upset the assembly geometry (fig. K).
9. Once the 2 grindstones have been replaced, with one hand press the indexing
pointer (7) and with the other place the ground coffee adjustment nut (5) onto the
grinder body taking care not to damage the thread. Without using force, put the "nut"
(5) on the grinder body unscrewing it gently to feel for alignment of the two threads
and thus to be able to feed them in without using force. Then tighten until the 2
grindstones come into contact (fig. L).
10. Unscrew the "adjustment nut" (5) by ten or so notches to free the grindstones in
contact.
11. Plug the machine in and switch it on with no coffee.
12. While pressing the indexing pointer with one hand, with the other screw up the
"adjustment nut" (5) until the 2 grindstones make slight contact (slight noise).
13. Stop the machine.
14. Unscrew the graduated plate (12) retaining screws and re-index the graduated plate
"0" with the indexing pointer (7) (fig. M).
15. Loosen the "adjustment nut" (5) by 5 to 10 notches.
16. With coffee in, adjust the ground coffee setting (see "Grinding adjustment"
section).
17. Next, set the timers if the new grindstones have changed the machine output (see
"Setting the measured dose of ground coffee" section).
98155 US 3.0 - 04 2007
13 / 21
www.santos.fr
SANTOS: User and maintenance manual
FAULT FINDING
Carefully determine the reason for the machine stopping.
In all circumstances, if the problem persists, disconnect the electric power supply (unplug
the mains supply lead plug (10)) and call on someone from the maintenance department or
contact an approved SANTOS dealer.
Where appropriate, do not forget to close the bean container shutter (6) before removing the
container.
The machine will not start:
•
•
•
•
•
•
•
•
•
Check that the On / Off switch indicator (11) lights up when the switch is in the 1
position. If not, check the following 2 points, then replace the switch.
Check that the amperometric protector has not tripped following an overload. (See
"The machine stops as a result of a motor overload" paragraph)
Check: the mains power supply and the condition of the power supply lead (10).
Check that the display (19) lights up (it shows the total number of measured doses) If
not, replace the control part of the electronic module.
Check that the 2 selector buttons are on (press one of the buttons).
Check that the grindstones (9) are not making contact preventing the motor from
starting.
Check that there are no foreign bodies stuck between the grindstones.
Inside the machine, check the condition of the electric wiring and the connections (on
the switch (11), on the component support module (26) (fig. N) (the electric
components can be accessed without dismantling the machine), on the control panel
(19) and on the filter holder micro-switch (25).
Check the electric components, replacing them one by one.
The machine stops as a result of motor over-heating: (the motor unit is hot)
(220V version)
The motor is protected by an integral thermal protection. If the motor overheats, it stops.
• Check that there are still coffee beans in the bean container (2).
• Put the On / Off switch (11) to the 0 position and unplug the machine.
• Wait for the motor to cool down (20 to 45 minutes) then press the On / Off switch (11)
(position 1).
The machine stops as a result of an overload:
A foreign body between the grindstones, grindstones making contact, too fine coffee
grinding or intensive operation may result in a motor overload.
Under these circumstances, either the thermal protection or the excess current protection
may be activated and stop the machine from operating.
If the machine is hot, refer to the section "The machine stops as a result of motor overheating").
Otherwise:
• Turn off the electric power supply (unplug the mains power lead (10))
98155 US 3.0 - 04 2007
14 / 21
www.santos.fr
SANTOS: User and maintenance manual
• Move the On / Off switch (11) to the 0 position.
• Under the machine (fig. O), press the button (13) to reset the excess current
protection. If the button does not remain in the "reset" position, allow the machine to
cool down before repeating the operation.
If the problem persists, turn the machine electric power off (unplug the mains power lead
(10)) and call on someone from the maintenance department or contact an approved
SANTOS dealer.
The ground coffee dose measurement is not consistent
Check that there are coffee beans in the bean container. It is recommended that
there is a minimum of 400g of coffee beans in the hopper.
• Clean the ground coffee outlet tube (23) (fig. H).
•
The machine runs but without the filling filter holder
• Check that there are coffee beans in the bean container.
• Check that the bean container shutter (6) is in the open position.
• Try with a coarser grind setting
• Replace the grindstones (9).
The espresso coffees are getting weaker and weaker
• Check and adjust the grinding setting then
• Check and adjust the timer settings. (The timer values increase depending on the
wear on the grindstones. If the values are too high, then replace the grindstones (9).
The machine does not work after having changed the timer settings
For safety reasons, the motor is disabled during the timer setting stage. To prevent
any sudden motor start at the end of that phase, the user must activate the machine
manually by selecting one of the 2 buttons (20 or 21).
• Select one of the 2 buttons (20 or 21).
•
•
•
The machine does not work following a power cut
Ditto previous point
Select one of the 2 buttons (20 or 21).
98155 US 3.0 - 04 2007
15 / 21
www.santos.fr
SANTOS: User and maintenance manual
MACHINE TECHNICAL SPECIFICATIONS
TECHNICAL SPECIFICATIONS
Model 55
Power supply voltage
Frequency
Motor: rating
Input power
Speed:
Bean container capacity
Grindstone diameter
Average output
Timer no. 1 setting
Timer no. 2 setting
Dose measurement settings (approx.)
.(V)
(Hz)
Single phase
220-240 100-120
50/60
50/60
(W)
(rpm)
1150
800
2850 at 50Hz 3400 at 60Hz
(kg)
(mm)
(Kg/h)
2.2
63.5
25
40 to 499
80 to 999
From 5.5 to 20
(g)
The appliance is not intended for a
continuous operation
Dimensions: Height
Width
Depth
Weight:
Net weight
Packaged weight
Noise: (2)
10 seconds operating and 20
seconds stopped
(mm)
(mm)
(mm)
(kg)
(kg)
(dBA)
577
198
397
14
16
63
(1) These values are given as an indication only. The exact electrical specifications for your machine are
recorded on the identification plate.
(2) Noise level measured in acoustic pressure with the machine under load at 1 m from its axis in
accordance with standard EN 31201.
98155 US 3.0 - 04 2007
16 / 21
www.santos.fr
SANTOS: User and maintenance manual
110-120V 50/60Hz and 220-240V 50/60Hz wiring diagram
Black
Black
Motor
PP
Red
Blue
PA
White
Red
Brown
Capacitor
10
1
Electronic card
2 Power part
3
4
Blue
9
5
8
6
White
White
Harness
Control panel
Control part
Purple
Filter holder
presence
micro-switch
Purple
7
Orange
Orange
1
4
2
5
On / Off
Filter carrier presence
micro-switch
White
~
Black
White
Black
Green / yellow
98155 US 3.0 - 04 2007
17 / 21
www.santos.fr
SANTOS: User and maintenance manual
Element cross-reference table
ITEM
1
2
3
4
5
6
7
8
9
10
11
12
13
14
15
16
17
18
19
20
21
22
23
24
25
26
Description
Bean container lid
Bean container
Ground coffee collector
Base
Grinder unit
Bean container shutter
Indexing pointer
Grindstone holder plate
Grindstone
Power supply lead.
On / Off switch
Graduated plate
Current overload protector
Capacitor
Ground coffee tamper
Identification plate
Motor shaft nut
Control panel
Luminous display
1 coffee selection button
2 coffees selection button
Setting buttons
Ground coffee outlet tube
Filter holder support
Filter holder micro-switch
Electric components unit
Templet for the personalised label. Print to scale 1:1 then cut out.
You can produce a personalised label directly on our Internet site (Word document).
98155 US 3.0 - 04 2007
18 / 21
www.santos.fr
Fig. A
1
SANTOS: User and maintenance manual
Figures
10
Fig. B
2
21
19
6
20
5
Fig. C
22
4
5
15
25
24
3
7
11
Fig. E
Fig. D
19
16
21
14
20
22
Fig. G
13
26
6
Fig. H
23
Fig. F
9
9
98155 US 3.0 - 04 2007
19 / 21
www.santos.fr
Fig. I
5
Fig. J
SANTOS: User and maintenance manual
Meule fixe
!
Meule mobile
7
Fig. L
Fig. K
17
7
5
8
Fig. N
Fig. M
12
7
5
26
Fig. O
13
98155 US 3.0 - 04 2007
20 / 21
www.santos.fr
SANTOS: User and maintenance manual
WARRANTY CERTIFICATE
WARRANTY
This appliance is guaranteed for twelve months from the date of manufacture appearing
on the identification plate.
The guarantee is strictly limited to the free replacement of any original part acknowledged
by us as being defective as a result of a fault or a manufacturing defect and identified as
belonging to the appliance in question.
It does nor apply to damage resulting from an installation or use which does not comply
with the instructions supplied with each appliance (user manual) or in the event of an
obvious lack of maintenance or non-observance of basic electrical safety rules.
All part replacements under warranty are made after return of the defective part to our
workshops carriage paid, accompanied by a copy of this warranty certificate on which the
serial number of the appliance is shown.
All appliances have an identification plate bearing a serial number identical to that on this
warranty certificate.
In the event of serious damage which is deemed only to be repairable in our workshops,
and after agreement from our services, all appliances under warranty are to be dispatched
by the client carriage paid. If the appliance is repaired outside the warranty, the forwarding
and return transport is the responsibility of the client. Parts and labour are invoiced at the
prices in force (spare parts price - hourly labour cost). All repairs will be subject to a prior
estimate which should be agreed before repair.
In the event of a dispute, the Courts for the manufacturer's area (Lyon) alone have
jurisdiction.
APPLIANCE IDENTIFICATION PLATE
SPECIMEN
For all documents not supplied with
the appliance.
Printed, Faxed and Downloaded
98155 US 3.0 - 04 2007
21 / 21
www.santos.fr