1
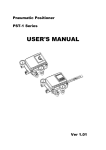
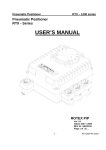
Pneumatic Positioner
YT-1200 Series
USER'S MANUAL
YTC
Ver 1.01
P neumatic P ositioner
YT-1200 S eries
Table of Contents
Introduction
3
Manufacturer Warranty
3
Product Description
4
Main Features and Functions
4
Operation Logic
4
Label Description
5
Suffix Symbol
5
Specification
6
Parts and Assembly
7
YT-1200L
7
YT-1200R
7
Dimension
8
YT-1200L
8
YT-1200R
8
Installation
9
Safety Warning
9
Tools for Installation
9
YT-1200L Installation
9
YT-1200R Installation
12
Bracket Information
13
Piping Connection
16
Supply Pressure Condition
16
Pipe Condition
16
Piping Connection with Actuator
16
Single Acting Actuator
16
Double Acting Actuator
17
Adjustment
17
Adjustment - Cam
17
Adjustment - Zero
18
Adjustment - Span
18
Adjustment - A/M Switch (Automatic/Manual)
19
Adjustment - Seat Adjuster
19
Troubleshooting
20
- 2 -
P neumatic P ositioner
YT-1200 S eries
Introduction
Thank you for choosing YTC product.
Each product is fully inspected after the
production to offer you the highest quality. In order to fully utilize the product, we
strongly recommend users to read this manual carefully and understood.
The manual should be given to the end user.
The manual can be changed or revised without any prior notice.
Any changes in
product's specification, structure, and/or any components may not result immediate
revised version of the manual.
The manual should not be duplicated or reproduced for any purpose without any
approval from Young Tech Co., Ltd, South Korea.
Manufacturer Warranty
-
For the safety, it is imperative to follow instructions in the manual. It is not
manufacturer's liability for any damages which caused by users' negligences.
-
It is not manufacturer's liability for any damages or accidents which resulted by
any alteration or modification of the product and parts.
If alteration or
modification is necessary, please contact the manufacturer directly.
-
Manufacturer warrants the product from the date of original retail purchase of
the product for one (1) year, except as otherwise stated.
-
Manufacturer warranty will not cover the products that the product have been
subjected to abuse, accident, alteration, modification, tampering, negligence,
misuse, faulty installation, lack of reasonable care, repair or service in any way
that is not contemplated in the documentation for the product, or if the model
or serial number has been altered, tampered with, defaced or removed;
damages that occurs in shipment, due to act of God, failure due to power
surge, and cosmetic damage.
Improper or incorrectly performed maintenance or
report voids this Limited Warranty.
-
For detailed warranty information, please contact the corresponding local Young
Tech Co., Ltd office or main office in South Korea.
- 3 -
P neumatic P ositioner
YT-1200 S eries
Product Description
Main Features and Functions
The product can operate normally in very extreme environment, such as vibration.
The durability has proven after testing of 1 million times, at least.
Response time is very short and accurate.
Simple part change can set 1/2 Split Range.
It is economical due to less air-consumption.
Direct/Reverse action can be set easily.
Zero & Span adjustment process is simple.
Feedback Connection is easy.
Operation Logic
<YT-1200L>
<YT-1200R>
Bellows(①) push flapper(②) if input pressure increases. Then the gap between
nozzle(③) and flapper(②) increases, which results pressure in upper spool(⑤) exhaustion.
This would cause spool(⑤) to rise upward.
As the spool(⑤) rises, it pushes format(⑧),
and the air pressure will be supplied to the actuator(⑩). As the actuator's inner
pressure increases, the actuator stem(⑫) will move.
to <Figure 1>.
<Figure 1>
- 4 -
For graphical diagram, please refer
P neumatic P ositioner
YT-1200 S eries
Label Description
Model Number:
Indicates model name and any options (if any).
Input Signal:
Indicates current input signal range.
Supply Pressure:
Indicates the range of supply pressure.
Serial Number:
Indicates unique serial number.
Suffix Symbol
YT-1200 series follows suffix symbols as follows.
YT-1200
Motion Type:
L : Linear
R : Rotary
Acting Type:
S : Single
D : Double
=
Feedback Lever
(YT-1200L)
1 : 10 ~ 40mm
2 : 30 ~ 70mm
3 : 60
100mm
4 : 100 ~ 150mm
-------------------------------------------------------------------------1 : M6 x 40L
Feedback Lever
2 : M6 X 63L
(YT-1200R)
3 : M8 X 40L
4 : M8 X 63L
5 : NAMUR
*
Connection Type
1 : PT
2 : NPT
Ambient Temp.
S : -20
H : -20
L : -40
~ 70
~ 120
~ 70
For special specification, please contact our sales department.
- 5 -
P neumatic P ositioner
YT-1200 S eries
Specification
Category
YT-1200L
YT-1200R
Single
Double
Single
Input Signal
0.2~1.0kgf/cm (3~15psi)
Supply Pressure
1.4~7.0kgf/cm2 (20~100psi)
Stroke
Double
2
0
10 ~ 150mm
0~90
Air Connection
PT (NPT) 1/4
Gauge Connection
PT (NPT) 1/8
Protection
IP66
Cam
Linear
Standard: -20~70
Ambient Temp
High: -20~120
Low: -40~70
*
Linearity
±1.0% F.S
±2.0% F.S
Hysteresis
±0.75% F.S
±1.0% F.S
Sensitivity
±0.2% F.S
±0.5% F.S
Repeatability
±0.3% F.S
±0.5% F.S
2
Air Consumption
3.0LPM(Sup=1.4kgf/cm ), 11LPM(Sup=4.0kgf/cm2)
Flow Capacity
80LPM(Sup=1.4kgf/cm2), 200LPM(Sup=4.0kgf/cm2)
Material
Aluminum Diecasting
Weight
1.7kg
Test under ambient temperature of 20 , absolute pressure of 760mmHg, and humidity of 65%.
contact us for the more detailed specification.
- 6 -
Please
P neumatic P ositioner
YT-1200 S eries
Parts and Assembly
<YT-1200L>
<YT-1200R>
- 7 -
P neumatic P ositioner
YT-1200 S eries
Dimensions
<YT-1200L Dimension>
<YT-1200R Dimension>
- 8 -
P neumatic P ositioner
YT-1200 S eries
Installation
Safety Warning
When installing positioner, please ensure to read and follow safety instruction.
All input and supply pressure to valve, actuator, and other related devices must be
turned off.
Use bypass valve or other equipment to avoid entire system "shut down."
Make sure there is no remaining pressure in the actuator.
Tools for installation
① Hexagonal wrench
② Screw drivers (+) & (-)
③ Spanners for hexagonal-head bolts
YT-1200L installation
YT-1200L should be installed on linear motion valve such as globe valve or gate valve
using spring return type diaphragm or piston actuator.
Before installation, be sure to
check for following installation components.
① YT-1200L main body
② Feedback lever and lever spring
③ Flange nut (bottom side of YT-1200L)
④ 4 pcs. of hexagon head bolts (M8 X 1.25P)
⑤ 4 pcs. of M8 plate washer
Installation Steps
(1) Proper bracket must be made in order to attach positioner on the actuator yoke.
Please consider following when making a bracket.
① Feedback lever should be leveled at 50% of valve stroke.
(Refer to Step 7)
② Feedback lever connection bar of actuator clamp should be installed at the
position that the valve stroke and numbers which indicated on the feedback
must be fitted. (Refer to Step 8)
(2) Attach YT-1200L to the bracket, which was
produced in earlier step, by using bolts.
<Figure 1>
Please refer to backside of the
product for size of bolts.
The standard size of
bolt is M8 X 1.25P, and other bolt sizes are
available.
Please contact YTC sales
department.
<Figure 1>
- 9 -
lever
P neumatic P ositioner
YT-1200 S eries
(3) Attach YT-1200L (with bracket) to the actuator yoke - DO NOT TIGHTEN
COMPLETELY.
(4) Connect YT-1200L feedback lever to the actuator clamp. The gap on the
YT-1200L feedback lever is 6.5mm. The connection bar thickness should be less
than 6.3mm. <Figure 2>
<Figure 2>
(5) Connect air filter regulator to the actuator temporarily.
Set supply pressure of the
regulator in order to position the actuator clamp at 50% of valve stroke.
3>
<Figure 3>
(6) Insert connection bar into the YT-1200L feedback lever.
The connection bar should be inserted at the 50%
point on the feedback lever, which would help to
reduce hysteresis.
<Figure 4>
- 10 -
<Figure
P neumatic P ositioner
YT-1200 S eries
<Figure 4>
(7) If connection bar does not point at 50% point, then adjust bracket or feedback link
bar position.
Failure to position at 50% would lower the linearity of the positioner.
<Figure 5>
<Figure 5>
(8) Check valve stroke. The stroke numbers are indicated on the feedback lever.
Position connection bar at the number on the feedback lever according to the valve
stroke. <Figure 6> To adjust, move the bracket or connection bar.
Stroke 30mm
Stroke 70mm
<Figure 6>
Note
After instaling YT-1200L, operate the valve from
0% to 100% stroke by using air filter regulator
on the actuator.
feedback
lever
Both of 0% and 100%, the
should
not
touch
the
lever
stopper, which is located on the backside of
YT-1200L.
<Figure 7>
If the feedback lever
touches the lever stopper, YT-1200L should be
installed further away from the center of the
<Figure 7>
yoke.
(9) After the proper installation, tighten all of the bolts on the bracket, the feedback
lever, and the connection bar.
- 11 -
P neumatic P ositioner
YT-1200 S eries
YT-1200R Installation
YT-1200R should be used for rotary motion valve, that is ball valve, butterfly valve using
rack and pinion, scotch yoke or complex type actuator, which its stem rotates 90
degrees.
Before installation, be sure to check for following installation components.
① YT-1200R main body
② Fork lever and lever spring
③ 1 set of bracket (3 pcs)
④ 4 pcs. of hexagon head bolt M8 X 1.25P
⑤ 4 pcs. of M8 plate washer
YT-1200R Install Layout
YT-1200R on Fork Lever
YT-1200R on NAMUR Lever
- 12 -
P neumatic P ositioner
YT-1200 S eries
Bracket Information
YT-1200R is supplied with standard bracket.
The bracket can be used for Fork lever
and NAMUR bracket. Please see <Figure 8> for more detailed information.
Upper Bracket B
Upper Bracket A
YT-1200R
하부브라켓
<Figure 8>
(1) Standard actuator stem height (H) is 20, 30, or 50mm.
After checking "H",
assemble with the bracket as shown in <Figure 8 & 9>
Actuator Stem (H)
Actuator
<Figure 9>
(2) Attach bracketed YT-1200R to the actuator by using hexagon-headed and wrench
bolts. Size of the bracket hole is 6mm. When tightening bolts, use spring washer
or similar for firm attachment to the actuator, so YT-1200R will not shake by
vibration or any other impact. The direction of bracket is different by the
operating condition, but normally, the positioner is installed as shown in <Figure
10>.
- 13 -
P neumatic P ositioner
YT-1200 S eries
<Figure 10>
(3) Set rotation position of the actuator stem at zero point, "0%."
For a single type
of actuator, it is easy to check zero point, because the actuator stem is
positioned at zero point when there is no supply pressure. If double acting
actuator is used, check actuator stem's rotation direction (clockwise or
counter-clockwise) by supplying pressure.
(4) Install the fork lever as shown in <Figure 11> after setting actuator stem at zero
point. Check the direction of the actuator stem - clockwise or counter-clockwise.
Installation angle of the fork lever should be 45 degrees based on the linear
shaft. For NAMUR shaft, the angle does not matter.
Counter-clockwise
Clockwise
<Figure 11>
(5)
After setting fork lever position, lock nuts which are assembled on bottom of
the fork lever.
(6) Attach YT-1200R to the bracket. Fix the clamping pin on the main shaft of
YT-1200R and insert connection bar into the fork lever slot, so it can be locked
to the fork lever spring. This sets the alignment of the main shaft of YT-1200R
- 14 -
P neumatic P ositioner
YT-1200 S eries
and center of the actuator stem.
Bad alignment of the main shaft and the
actuator stem lowers YT-1200R's durability, because too much force will be on the
main shaft of YT-1200R. <Figure 12>
<Figure 12>
Fork Lever
Clamping Pin
Connection Bar
(7)
Main Shaft
Tighten YT-1200R base and the bracket with hexagon-headed bolts and plate
washer.
It is recommended to tighten four bolts after checking YT-1200R's
position. <Figure 13>
<Figure 13>
- 15 -
P neumatic P ositioner
YT-1200 S eries
Piping Connection
Note
To avoid entering moisture, oil, or dust into the product, please carefully make
selection of supply pressure compressor.
It is recommended to attach air filter regulator before supply port of YT-1200.
Supply Pressure Condition
① Dry air with at least 10
lower than ambient temperature.
② Avoid from dusty air. Filter can only sort 5 micron or larger.
③ Avoid any oil.
④ Comply with ANSI/ISA-57.3 1975(R1981)이나 ISA S7.3-1975(R1981).
⑤ Not to be used beyond the range of 1.4 - 7 kgf/cm2(140 - 700 kPA).
⑥ Set air filter regulator's supplied pressure 10% higher than actuator's spring range
pressure.
Pipe Condition
① Make sure inside of pipe is emptied.
② Do not use pipeline that is squeezed or has hole.
③ To maintain flow rate, use the pipeline that has more than 6mm inner diameter.
(10mm outer diameter)
④ Do not use extremely long pipeline system.
It may affect flow rate due to the
friction inside of the pipeline.
Piping connection with actuator
Single acting actuator
YT-1200 series single acting type is set to use OUT1 port.
OUT1 port should be
connected with supply pressure port from actuator when using single acting type of
spring return actuator. <Figure 14 & 15>
<Figure 14: YT-1200L>
<Figure 15: YT-1200R>
- 16 -
P neumatic P ositioner
YT-1200 S eries
Double acting actuator
For YT-1200 series double acting type, when inputting current signal, supply pressure
is out from OUT1.
Please refer to <Figure 16 & 17>
<Figure 16: YT-1200L>
<Figure 17: YT-1200R>
Adjustments
Adjustment - Cam
① Direction of actuator's stem rotation must be checked when supply signal is supplied.
When actuator's stem rotates clockwise, the face of cam must be shown "DA."
On
the other hand, when the stem rotates counter-clockwise, adjust cam so "RA" shows
on the face of cam.
② Check whether actuator's angle is at the initial point.
③ After checking the initial point, release the hexagonal flange nut and adjust the
position of the bearing so it is at 0 point. <Figure 18>
④ When produced, the cam is set as RA.
<Figure 18>
- 17 -
P neumatic P ositioner
YT-1200 S eries
Adjustment - Zero Point
① Set supply signal at 3 psi and rotate adjuster clockwise or counter-clockwise to
adjust actuator's rotation angle. <Figure 19>
② When adjusting zero for single actuator, rotation angle is equal to positioner's
pressure gauge.
<Figure 19>
Adjustment - Span
<Figure 20>
(1) After setting zero, rotate Span screw so supply signal reaches at the span point
on the indicator.
(2) Changing span point affects zero point setting.
So zero setting must be set
again. After setting zero point, confirm the span point.
This step must be
repeated until both points are properly set.
(3) If 1/2 split range is used, YT-1200L can be used after span and zero point are
set. For YT-1200R with 1/2 split range, the span spring must be changed.
(4) After setting is completed, tighten Lock Screw.
- 18 -
<Figure 20>
P neumatic P ositioner
YT-1200 S eries
Adjustment - A/M Switch (Auto/Manual)
1) A/M switch adjusts the valve operation to automatic or
manual.
2) When
produced,
"A(Automatic)".
YT-1200
series
is
set
at
If user prefers the positioner's setting
as "M(Manual)," the setting can be changed by turning
the switch counter-clockwise. <Figure 21>
3) If it is set as "M(Manual)", the air pressure will be
supplied to the actuator directly.
Always set back to
"A(Automatic)" after setting change.
4) If OUT2 in single acting actuator or double acting
actuator is used, A/M Switch will not operate.
<Figure 21>
Adjustment - Seat Adjuster
① Seat Adjuster is set according to the customer's request before the positioner is
delivered. Please do not adjust the Seat Adjuster.
② Seat Adjuster is used for double acting actuator always.
Please do not touch the
Seat Adjuster, because it can affect the positioner's performance.
- 19 -
P neumatic P ositioner
YT-1200 S eries
TROUBLESHOOTING
Positioner does not respond to the input signal.
2.
(1)
Check supply pressure level. The level must be at least 1.4 kgf/cm
(2)
Check if input signal is properly supplied to the positioner. The signal should
be 3~15 psi.
(3)
Check if the positioner's nozzle has been blocked. Also, check if the pressure
is supplied to the positioner and the pressure is being exhausted through the
nozzle.
If the nozzle has been blocked by any substances, please send the
product to YTC for repair.
(4)
Check if feedback lever has been installed properly.
The pressure of OUT1 reaches exhausting pressure level and does not come back
down.
(1)
Check A/M Switch.
If the switch has been damaged, replace the switch or pilot
relay-valve.
(2)
Check for a gap or damages between the nozzle and the flapper.
If damaged,
please send the product to YTC for repair.
The pressure is exhausted only by A/M Switch.
(1)
Check if the positioner's nozzle has been blocked. Also, check if the pressure
is supplied to the positioner and the pressure is being exhausted through the
nozzle.
If the nozzle has been blocked by any substances, please send the
product to YTC for repair.
Hunting occurs.
(1)
Check if safety spring has been displaced. (Next to Pilot relay valve)
(2)
Check if the size of actuator is too small. If so, insert an orifice in order to
reduce the pressure flow rate.
(3)
Check if there is any friction between the valve and the actuator.
If so,
increase actuator's size or reduce the friction level.
Actuator only operates by On/Off.
(1)
Check pipe connection.
(2) Check cam direction.
Linearity is too low.
(1)
Check if the feedback lever is properly installed. Especially check if the
feedback lever is parallel to the ground at 50% point.
(2)
Check if zero and span have been properly adjusted, that is not too low or not
too high.
(3)
Check if supply air pressure level is stable from the regulator. If the level is
unstable, replace the regulator.
Hysteresis is too low.
(1)
In case of double acting actuator, check if seat adjustment has been properly
done.
Please contact YTC for any further inquiries regarding the seat
adjustment.
- 20 -
P neumatic P ositioner
(2)
YT-1200 S eries
Backlash can occur when feedback lever and lever spring is loosen. To avoid
backlash, adjust the lever spring.
(3)
Check if the connection bar to the feedback lever is tightly fastened.
- 21 -