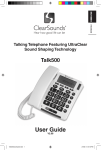
1
Hello, Thank you for purchasing VK cellular phone. VK4000 is a fabulous slide type camera MP3 phone only for brilliant people. 260K TFT LCD allows you to enjoy multimedia functions through clear and precise screen. The 64 poly brings you incredible sound that is almost similar to that of the original sound quality and it will be your take-out audio system. VK4000 is embedded with cutting edge camera that features 1.3mega pixels, 4x digital zoom, self-timer function, and video clip recording function. Thank you again for choosing VK product and we hope you have greatest success in your business with VK4000. Please read Safety Precaution prior to use. The content of this manual and functions of cellular phone are subject to change depending on the software version and conditions in business. 1 Contents 2 6 7 11 12 13 16 17 18 19 19 20 BASIC FUNCTIONS Basic Operation Switching On/Off Making a Call Answering a Call Hanging up Options During a Call Missed Calls Volume Adjustment Etiquette Mode Using Ear-microphone Standby Screen Function 22 23 23 24 26 26 27 30 30 31 32 33 Contacts Storing Phone Numbers Search Phone Number 34 34 38 BASIC FUNCTIONS Contacts Menu Function Menu Function of Selected Items 42 47 Character Input Mode T9 Mode ABC Mode Numeric Mode Symbolic Mode Changing Text Input Mode 50 50 53 56 56 57 MENU FUNCTIONS Menu Tree 58 59 Message Short Message Multimedia Message Voice Message Info. Message Memory Status 65 65 72 78 79 80 Calls Call History Network Services 81 81 85 Gallery Photo 89 89 3 CONTENTS PRIOR TO USE Safety Precaution Unpacking Phone Layout and Keys Function Keys Description LCD Icon Description Inserting SIM Card and Battery Charging Battery Reference About Battery Charging Handset Power off Status Handset Power on Status Contents 93 96 99 102 105 108 110 Camera Photo Video Clip Settings 111 112 113 114 Settings Display 116 116 4 MENU FUNCTIONS Sound Phone Setting Bluetooth Security PC Connection 119 122 126 128 131 Organizer Calendar Alarm Memo Calculator Unit Converter World Time Stop Watch 133 133 138 142 143 144 144 145 MENU FUNCTIONS MP3 Player Music Play Edit Playlist 146 146 149 Joy World Internet Games 151 151 157 OTHER FUNCTIONS PCSync Installation Guide 158 159 Safety Information Using the Batteries Safety Information Care and Maintenance Radio Frequency (RF) Signals 161 164 166 171 172 Glossary 174 5 CONTENTS MENU FUNCTIONS Video-Clip Image Animation Sound Music T-Flash Manager Memory Status Safety Precaution Unpacking Phone Layout and Keys Function Keys Description LCD Icon Description Inserting SIM Card and Battery Charging Battery Reference About Battery Charging PRIOR TO USE Safety Precaution Please read safety precaution before using your cellular phone. Precaution contains contents that prevent users from potential health and financial hazards. Read carefully and use the product accordingly. If the following regulation stated in precautions is not followed, you may be subject to penalties or may cause illegal conditions. For more information, refer to Health and Safety Precaution described in the appendix of this manual. Traffic Safety Do not use a hand-held mobile phone while driving a vehicle. Follow traffic related regulations while driving. Using hand-held device while driving can be direct and indirect cause of accidents. If it is necessary to use a hand-held phone, park the vehicle before conversing or use hands-free/earmicrophone. Potentially Explosive Atmosphere Switch off your phone when in any area with a potentially explosive atmosphere and obey all signs and instructions. 7 PRIOR TO USE PRIOR TO USE Effective Phone Usage Please use your cellular phone for proper purpose. Avoid unnecessary contact with the antenna when the phone is switched on. It may deteriorate the conversation quality and may incur extra power usage. Switch Off in Aircraft Electronic frequency generated from your cellular phone can influence electronic equipments that are not radio frequency shielded on an airplane and cause dangerous conditions. Backup Data from Cellular Phone Phone numbers, message and data stored in the phone book can be lost due to user s negligence. When cellular phone may be damaged and your data may be lost while repairing. Back up important data in safe medium. We do not take responsibility for damages incurred due to data loss. Switch Off in Hospitals Follow any regulations or rules in force. Switch off your phone near medical equipment. All wireless phones may be subject to interference that can influence the performance of medical equipment. Consult with the medial equipment manufacturer to assure the equipment is safe from high-frequency energy. Keep Cellular Phone in Dry Place This cellular phone is not water-proof. Keep it in dry place. Special Regulations Meet any special regulations in force in any area and always switch off your cellular phone whenever the use if forbidden such as concert hall, public area, and etc. Also, avoid using your phone where the use of phone can cause serious danger (hospital, potentially explosive area, while driving). 8 Cellular Phone and Frequency Interference All cellular phone are subject to radio frequency interruption. Radio frequency interference may influence the performance of your cellular phone. Accessories and Batteries Use only VK-approved accessories and batteries. If original accessories are not used, battery can explode or damage your cellular phone. 9 PRIOR TO USE Switch Off While Refueling Users are advised to switch off the phone while at a refueling point (gas station). Unpacking 2. Battery and Travel Adapter PRIOR TO USE Approved Service Center When repairing your cellular phone, use only VK approved service centers. 1. Handset Emergency Calls The cellular phone needs to be switched on and had to be in service area. If other functions are in use, finish the other function by pressing END key. Then, press emergency number and press CALL button. Describe your location and the emergency condition. Emergency call does not end until you hang up. Cellular Phone Battery Travel adapter 3. Accessories User’s Manual Hand Strap Ear-microphone PC Sync CD Data Cable Actual product may look different from the above picture. 10 11 Phone Layout and Keys Function Keys Description Earpiece Display WAP/Ok key Volume Keys CLR key Left soft Key Ear-microphone Jack T-Flash card Cover Camera Key Charger connection Cover 12 Send/Dial key Make/Answer a calls. When this button is pressed in standby mode, the last number you dialed will be redialed. Right soft Key End/Power on-off key Sand/Dial Key Alphanumeric Keys Navigation key Up : MP3 Player Left : Message Down : Gallery Right : My Favorite WAP/OK key Enter WAP from standby mode. Access function indicated on the bottom of the display. Special Function Keys 13 PRIOR TO USE Left soft key Enter the left bottom menu of the display. key Hold down to activate Manner mode on/off. Right soft key Enter the Right bottom menu of the display. In standby mode enters Contacts. key Hold down to activate Lock mode on/off. End/Power on-off key End a call. Hold down to switch the phone on and off. In menu mode, cancels input and returns the phone to standby mode. 14 Alphanumeric keys Enter number and characters. PRIOR TO USE Camera key In standby mode enters Camera. CLR key Delete charaters from the display. Volume key Adjust the button volume from standby mode. Conversation volume adjustment while speaking on the phone. While slide is closed hold down the volume key turns on LCD. 15 LCD Icon Description Inserting SIM Card and Battery Weak : ] Appears when a call is in progress. Appears when you are out of a service area. Appears when you set the key pad lock function. Appears when you have new or unread message. Appears when you set the alarm to ring at a specific time. Appears when you set the alert type for incoming calls to vibration. Appears when you set the Bluetooth function. Shows the level of your battery. 16 1. Turn off the power of cellular phone. Remove battery as shown in the figure below. 2. Face the gold color contact point of SIM card towards the cellular phone and push in the SIM card into the slot. 4. Push in the battery until it makes Click sound. 5. Switch on the cellular phone. 3. Push in the battery as shown in the figure below. Align the battery as shown in the figure. 17 PRIOR TO USE Shows the received signal strength. [Strong : Charging Battery Handset Power off Status Battery can be charged without desktop charger, thus, it is easier to take the charger with you. Charging through traveler s kit may take longer than using the desktop charger. PRIOR TO USE Charging with traveler s kit Reference About Battery Charging TA LED status It is normal charging status that the LED displays Green Color. Connect traveler s kit to the external connector of cellular phone. Connect the traveler s kit to the power outlet. Charging Handset DISPLAY Status Shows Battery charging status. 18 19 PRIOR TO USE Handset Power on Status TA LED status It is normal charging status that the LED displays Green Color. Handset DISPLAY Status Charging Display Icon. 20 21 BASIC FUNCTIONS Contacts Character Input Mode Basic Operation Switching On/Off Switch On : Hold down button for 2 seconds or longer. If no SIM card is inserted in the cellular phone, a message window that states no SIM card is inserted is displayed. In this case, only emergency call can be used and the rest of functions cannot be used. If you are asked with password, enter the password and press OK button. The default password is set to 0000 . Switch Off : Hold down button for 2 seconds. 23 BASIC FUNCTIONS Basic Operation BASIC FUNCTIONS Making a Call [Making a Call from Contacts] You can make a call without entering phone number. Using phone numbers that are pre-stored, you can make a call. Press the right soft key to enter the contacts. For more details on contacts, see page 34. [Latest Call List] You can make a call using the latest call list. 1. Press button shortly to display the latest call list in order of call time. Or, enter by accessing Menu 3. Calls 1. Call History 2. Select desired phone number using the key. 24 3. Press button. For more detail, refer to “Call History” on page 81. [Speed Dialing] You can make a call using speed dialing. Using number keys from 2 to 9, hold down the pre-stored speed dial number for 2 seconds. If the phone number is stored in your cellular phone hold down the speed dial number. If the phone number is stored on SIM card press the speed dial number first, press key, and press Speed dial number can be configured from 2 to 99. For more detail, refer to “Contacts” on page 34. [Making an International Call] 1. Holding down 0 button for 2 seconds displays symbol. 2. Enter the country code, area code, and phone number after 3. Press button. key. symbol. 25 BASIC FUNCTIONS [Dialing] 1. Enter area code and phone number in standby mode. 2. Press button. When you entered a wrong number, press button to erase one number at a time. Hold down button for 2 seconds to erase all entered numbers. Answering a Call Options During a Call 1. When there is an incoming call, either bell tone or vibration is activated depending on the configuration. button. 3. To hang up, either close the slide or button. If a caller ID service is activated and if the incoming phone number is already stored in your contacts, the name you have stored for the phone number is displayed. Hanging up Close the slide or press button to hang up. [Call Standby] This function is available only when a network service is provided. Using this function, you can make a call or answer other calls during any time of call. [Ending a Call] End a call during a Call : This function ends the current call. End a call on hold : This function ends a call on hold. End all calls : This function ends both the current call and the call on hold. [Adding a call] With this function, you can make a new call during a call. [Waiting a call] When there is a new incoming call, you can either answer the call or put it on hold. [Swap] You can switch the current call with the new incoming call. 26 27 BASIC FUNCTIONS 2. Open the slide or press You can use a variety of functions while talking on the phone. [Mute] You can turn off the microphone so that the caller on the other side cannot hear you. Select a call list and select Mute . When a call is ended, Mute function is automatically released. [Contacts] You can search the contacts during a call. [SMS Function] When this function is used during a call, you can send/SMS without handing up a call. 28 [Conference Call] This function is available when a network service is provided. Up to 6 people can talk at a time. For more details, please contact your service provider. [Private Call] While using Conference Call function, you can use this function to talk to a specific person. [Using Menu Function] Menu function can be used during a call. During a call, use either the left soft key or option key to enter the call option. However, the available menu function during a call is limited. For more details, refer to “Menu Tree” on page 59. [Volume Adjustment During a Call] You can adjust the volume during a call using The volume can be adjusted in five steps. button located on the side of your cellular phone. 29 BASIC FUNCTIONS [DTMF Function] You can enter numbers and send it during a call. In case where you need to enter a long sequence of numbers such as paging, ARS, or Telebanking, you can store the frequently used numbers (social security number or bank account number) to send them with greater convenience. Missed Calls Volume Adjustment You can adjust the conversation volume using button located on the side of your cellular phone during a call. Open the slide in standby mode and press button on the side of the cellular phone to adjust the button volume. Press UP button of key to increase the volume. Press down button of key to decrease the volume. 30 Etiquette Mode This function puts the cellular phone into Etiquette mode. Bell tone and button sound are changed to vibration, ramp blinking and Etiquette mode. In areas where etiquette is required, such as public area, concert hall, lecture hall and conference room, this function is convenient. Hold down key to setup Etiquette Mode. Hold down button again to release Etiquette Mode. When Etiquette Mode is configured, icon is displayed on the screen. When Etiquette Mode is set up, schedule/anniversary/alarm/message are notified through vibration. When the cellular phone is turned off in Etiquette Mode, the cellular phone stays in Etiquette Mode when it is turned on later. 31 BASIC FUNCTIONS Missed calls are displayed with the Caller s phone number and how many times the caller had called you. Press key to exit Missed Call window. Missed call phone number can be edited. For more detail, refer to “Call History” on page 81. Using Ear-microphone 32 Standby Screen Function Run the standby screen function using and keys. The left soft key executes function that left bottom line of the display. The right soft key executes function that right bottom line of the display. In standby mode, pressing this key enters menu. In standby mode, pressing this key enters Contacts. BASIC FUNCTIONS Ear-microphone frees your hand during a call. To use ear-microphone, insert the ear-microphone into ear-microphone slot on the side of the cellular phone. 33 Contacts Storing Phone Numbers Phone numbers can be stored using either of two methods. Directly Entering Phone Number. Access Contacts and store a new phone number. [Directly Entering Phone Number] 1. First, enter the phone number you want to store in the standby screen. 2. Save is displayed on the left-bottom of the screen. 3. Confirm the entered phone number and press key to save. When you entered incorrect number, press key to erase. Press key once to erase one number at a time. Hold down key for longer than 2 seconds to erase all entered number. 34 4. Select whether to save on your cellular phone or on SIM card. 5. Set up the type of phone number. Phone number types such as Mobile, Home, Office number can be saved on the cellular phone. When the phone number is stored on SIM card, only one representative phone number for the individual can be saved. 6. Enter the name. For more detail, refer to “Character Input Mode” on page 50. 7. Set up the group type. 8. Two more phone numbers other than the first phone number you have saved, can be stored. Enter the related phone numbers next to each icon. Note that only one phone number can be saved for the individual on SIM card. 9. Set up the default phone number. 10. Configure the speed dial number. The speed dial number can be configured form 2 to 99. 11. Configure the image to be displayed for the phone number. 12. Enter e-mail address. 13. Enter homepage address. 14. Enter fax number. 35 BASIC FUNCTIONS You can store phone numbers and name in the contacts and retrieve to make a call. Data can be stored both in SIM card and your cellular phone, while you can search through one contacts list for data. Note that the maximum amount of data stored depends on the type of SIM card. When you purchase a new cellular phone, the phone numbers stored on SIM card can be inserted into the new cellular phone and retrieved. Functions from 8 to 19 can only be used when the phone number is stored on the cellular phone. Only name, phone number, group type, and speed dial be configured on SIM card. [Access Contacts and store a new phone number] 1. Press key in standby mode to enter contacts. 2. The entire phone list is displayed. 3. Enter option screen by pressing key. 4. Press 1 to enter New screen. 36 5. Select whether to store phone number on the cellular phone or SIM card. 6. Enter the name. For more detail, refer to “Character Input Mode” on page 50. 7. Configure group type. 8. Enter phone number and relevant phone number into fields located next to each icon. Note that only one phone number can be stored on SIM card. 9. Set up the default phone number. 10. Configure speed dial number. Speed dial numbers can be configured from 2 to 99. 11. Configure the image to be displayed for the phone number. 12. Enter email, homepage URL, fax number, home address. 13. Configure the bell tone. 14. Enter occupation, name of company, and note. 15. Confirm all the entries and press keys to save. BASIC FUNCTIONS 15. Enter home address. 16. Configure special bell tone. When this bell phone is configured, an incoming call from the configured phone number plays the selected number. 17. Enter Job title. 18. Enter name of company. 19. Enter note. 20. Confirm all the entries and press key to save. Functions from 11 to 14 can be used only when the phone number is stored on the cellular phone. Only name, phone number, group type, and speed dial be configured on SIM card. 37 Search Phone Number You can search phone number from the entire contacts list or perform selective search using various methods. 5. Press key to make a call to the selected individual. BASIC FUNCTIONS (name, phone number, speed dial, group and etc.) [By Group] [Search All] This function displays all phone numbers stored in the contacts. (The list includes stored in the cellular phone and SIM card) 1. Press key in standby mode to enter the contacts. [By Name] key in standby mode to enter contacts. 2. Press key to enter the search option. 6. Press key to make a call to the selected individual. You can save the phone number and then dial them easily whenever you want, simply by pressing the associated number key. key. Entering only one character searches all names that contain the entered character. 38 key to select a group. 5. Search a phone number from the selected group. [By Speed Dial] 3. Select 1 to enter By Name . 4. When an edit window is displayed, enter the name of individual and press key to enter the search option. 4. Using left and right button on key to make a call to the selected individual. 1. Press key in standby mode to enter the contacts. 2. Press 3. Select 2 to enter By Group . 2. The entire contacts list is displayed. 3. Select a phone number and press 1. Press 1. Press key in standby mode to enter the contacts. 2. Press key to enter the search option. 39 [SDN] You can search special service dial number via SDN. You can use this function in emergency paging. You can want to search, press key to enter the entire speed dial number list. search items such as address, phone number, and voice mailbox number. The entire speed dial number list is searched. Telephone numbers supplied by your network provider and giving access to special services, such as voice mail, Using directory inquiries, customer support and emergency services. 5. Press key, either select or enter the speed dial number to be searched. key to make a call to the selected individual. [By Number] 1. Press key in standby mode to enter the contacts. 2. Press key to enter the search option. 3. Select 4 to enter By Number . 4. Enter the number to search. Entering only one number searches all phone numbers that contain the entered number. 5. Press 40 key to make a call to the selected individual. 1. Press key in standby mode to enter the contacts. 2. Press key to enter the search option. 3. Select 5 to enter SDN . 4. Using 5. Press key, select a phone number. key to make a call to the selected phone number. [DDD] With this function, you can search for the area code. 1. Press key in standby mode to enter the contacts. 41 BASIC FUNCTIONS 3. Select 3 to enter By Speed Dial . 4. Enter the speed dial number that you want to search. If you don’t know the speed dial number that you [Details] This function shows details of the selected item. key. Standby Mode Press 2 You can also enter this function by pressing Contact Menu Function You can use variety of contacts functions. 1. Press key in standby mode to enter the contacts. 2. Press key to enter the option. [New] This function stores a new phone number. Standby Mode Press 1 For more information, refer to “Storing Phone Numbers” on page 34. 42 BASIC FUNCTIONS 2. Press key to enter the search option. 3. Select 6 to enter DDD . 4. When the list of area code appears, select an area code using key in the entire phone number list of contacts. [Delete] You can either delete an item or the entire contacts. Delete Standby Mode Press 3 Press 1 Only the selected phone numbers are deleted. Delete All Standby Mode Press 3 Press 2 Select among the Phone, SIM and Both. All phone numbers in contacts are deleted. 43 Standby Mode Press 4 Press 1 Press 4 Press 2 Copy All Standby Mode Selete phone to SIM or SIM to phone [Move] A selected phone number is moved from the cellular phone to SIM card, and vice versa. Standby Mode 44 Press 5 [Group Manager] Phone numbers can be categorized into groups. Selected bell tones can be configured for each group. Standby Mode BASIC FUNCTIONS [Copy] Selected phone numbers can be copied. When a phone number stored in the cellular phone is copied, the phone number is copied to SIM card and vice versa. When copy all is selected, all phone numbers are copied from the current storage medium to the other. Copy Press 6 Select a group using key. New 1. Press key to enter to make a new group. 2. Enter the new group name. 3. Configure the bell tone. 4. Configure the image to be displayed for the phone number. 5. Select the members of the new group. 6. Confirm all the entries and press key to save. Edit Group bell tone, image, and group members can be edited. Selecting image enters gallery. Select one of stored images from the gallery and press to save. Group member can be selected from all phone number list stored in the cellular phone. Delete Delete a selected group. 45 [Speed Dial] Press 7 Standby Mode Press 9 This function shows the status of SIM card and the cellular phone separately. Menu Function of Selected Items 1. Press in standby mode to enter the contacts. 2. Select a phone number to edit and press [Own Number] Enter a desired number to set up speed dial. Standby Mode BASIC FUNCTIONS Standby Mode A list of phone number for speed dial numbers is displayed. Press key from a selected item to display Add or Edit , Delete and Goto menus. It appears Add at display, if the selected speed dial number didn’t indicate the phone number, otherwise it displays Edit . Press Add to edit the selected speed dial number to other number. Press Edit to move the selected phone number to other speed dial number. Pressing Delete removes the selected speed dial number item. Press Goto , if you want to confirm in use, you can check speed dial number whether you can use it or not. If you have not set up speed dial number, <Empty> message is displayed. [Memory Status] This function displays the currently used memory by numbers. Or, press 3. Press key to see the details. key and press 2 key to see the details. key to display the option for the selected number. Press 8 Only name and phone number can be stored using Own Number . 46 47 Standby Mode Select a phone number Standby Mode Press 2 Select a phone number Press 5 Select ‘Short message’ or Standby Mode [Send Contact] You can send the selected phone number to other people. Select a phone number Press 4 [Move] This function moves a selected phone number from the cellular phone to SIM card, and vice versa. For more details, refer to “Message” on page 65. Standby Mode Select a phone number [Copy] This function copies a selected item. A phone number stored in a cellular phone is copied to SIM card, and vice versa. [Send message] You can send SMS message to a selected phone number. Select a phone number Enter message Send Standby Mode Press 1 For more details, refer to “Storing Phone Numbers” on page 34. Standby Mode ‘Multimedia message’ [Delete] This function deletes the selected item. Select a phone number Press 6 Press 3 Via Short Message : Send the selected phone number via SMS. Via Bluetooth : Send the selected phone number via Bluetooth. 48 49 BASIC FUNCTIONS [Edit] All configured items such as name, group, phone number, default number, speed dial number, image, email address, address, and etc. can be edited. Character Input Mode T9 Mode [Typing English Words] To type a word, press keys corresponding to the letters you need. Remember the following as you are typing : 1. Press key on the phone just once per desired letter. For example, to enter ‘hello’, press the following keystrokes : 4,3,5,5,6. 2. The word you are typing appears in the display. It may change with each key you press. 3. Press the key, you can display alternate word choices for the keys that you have pressed. 4. Complete each word with a space by pressing the key. 50 5. If the word that appears in the display is not the word that you desire, press the one or more times to display alternate word choices for the keys you have typed. (For example, ‘of’ and ‘me’ both share the sequence 6, 3) The phone displays the most commonly used choice first. This mode displays all the words which are containing the letters you have entered. By doing this, the T9 mode saves you typing extra keypress. [Smart Punctuations] Full stop, hyphen and apostrophe are available on the 1 key. The T9 mode applies rules of grammar to insert the correct punctuation. Notice that the 1 key is used twice in this example to display two punctuation marks : or L e t ’ s e a t . 51 BASIC FUNCTIONS This mode allows you to enter English words with only one keypress per letter. Each key on a keypad has more than one letter a single press on the 5 key could be J, K or L. The T9 mode automatically compares your key presses to an internal linguistic database to determine the correct word. This mode is based on a built-in dictionary. This mode requires far fewer keystrokes than the traditional multi-tap method. ABC Mode key or the key. Lower case, Capital lock and Initial capital [Scrolling] The key scrolls to the alternative characters corresponding the keypress. To view your message without moving the cursor, press keys on the left side of the phone. To move the cursor left or right through your text message, press the key. Note that pressing the key without completing a word by the 0 key displays the alternative word. [Clearing Characters] Press the key one or more times to remove characters from the text area. When typing in ABC mode, you should press numbers key labeled with the required character: - Once for the first character. - Twice for the second character and so on. For example, you press the 2 key three times quickly to display the character “C”, the 5 key three times quickly to display the character “L”. So, this method is called Multi-tap typing. The cursor moves to the right when you press a different key. When entering the same character twice (or a different character on the same key), just wait for a few seconds for the cursor to move right automatically, and then select the next character. Refer to the table on page 55 for the list of characters assigned on each key. [Shifting a Case] To change the case in ABC mode, press the are available. 52 key or the key. Lower case, Capital lock and lnitial capital 53 BASIC FUNCTIONS [Shifting a Case] To change the case in T9 mode, press the are available. Characters in the Order Displayed Key abc N L _ A QM O` N L _ A QM O` abcR R de f S S gh i T T j k l U U mn o V V pqrs W W tuv X X wx y z Y Y P ⍣ \ ^ ECᴴ 54 PK H I F D C 55 BASIC FUNCTIONS [Scrolling] To view your message without moving the cursor, press keys on the left side of the phone. To move the cursor left or right through your text message, press the key. Note that pressing the key without completing a word by the 0 key displays the alternative word. [Clearing Strokes and Characters] Press the key one or more times to remove characters from the Text Area. For list of characters available see table. Numeric Mode Symbolic Mode Symbolic mode enables you to enter symbols into a text message. To scroll through the available symbol categories, press the key. When you see the desired symbol on the display, press the appropriate number key (1 to 8) to insert the symbol. The phone automatically switches back to the text entry mode used just prior to selecting Symbolic mode. Changing Text Input Mode When you are in a field that allows characters entry, you should notice the text input mode indicator in the display. To change to another text input mode : 1. Press the key repeatedly until you find the desired input mode. 2. Press the key. You will see the text input mode indicator in the top line of the display. - T9 mode > T9 ABC (T9 Abc, T9 abc) - ABC > ABC (Abc, abc) - Simplified Chinese > Pinyin - Traditional Chinese > Stroke - Numeric > 123 - Symbol > Symbol Directions for using each of the text input modes appear later in this chapter. You can also change the text input mode by pressing the key repeatedly in text entry screen. Each time you press the key, the mode is changed in the following order : T9 ABC (T9 Abc, T9 abc) > ABC (Abc, abc) > Pinyin > Stroke > 123 > Symbol 56 57 BASIC FUNCTIONS Numeric mode is indicated by 123. It enables you to enter numbers into a text message. Press number keys corresponding to the desired digits. MENU FUNCTIONS Menu Tree MENU FUNCTIONS Menu Tree Message Calls Short Message Gallery Camera Settings Organizer MP3 Player Joy World Inbox Outbox Write Settings Multimedia Message Inbox Outbox Write Settings Calls Voice Message Listen to Voice MSG Set Voice MSG No. info. Message Read Receive Topics Memory status MENU FUNCTIONS Message Call History Missed calls Received calls Dialed calls Delete All Call Duration Network Services Call Diverting Call Barring Call Waiting Send My Number Select Network Select Band 59 Gallery Send Use as Wallpaper Copy to T-Flash Move to T-Flash Delete Rename Lock Details Video-clip Send Copy to T-Flash Move to T-Flash 60 Delete Rename Lock Details Image Send Use as Wallpaper Copy to T-Flash Move to T-Flash Delete Rename Details Animation Send Use as Wallpaper Copy to T-Flash Move to T-Flash Delete Rename Details Sound Send Use Copy to T-Flash Move to T-Flash Delete Rename Details Music Send Use Copy to T-Flash Move to T-Flash Delete Rename Details Go to play T-Flash Manager Copy to Phone Move to Phone Delete Rename Details Memory status Memory status Photo MENU FUNCTIONS Photo Camera Video Clip Settings Quality Sound Auto Save Default Title Name Memory Use 61 Settings Main LCD Lighting Sound Incoming Calls Message Alert Key Tone Slide Tone Volume Phone Setting Date & Time Language Answer Key Auto Answer Auto Redial Factory Set My Favorite Bluetooth Swith Paired Devices Phone Visibility Phone Name 62 Security PIN Change PIN Lock FDN Change PIN 2 PC Connection PC Sync USB Mass Storage T-Flash Card Calendar New Delete All Schedule List Go to Date Calculator MENU FUNCTIONS Display Organizer Unit Converter World Time Stop Watch Alarm Morning Call Reminder Memo Edit Delete Delete All 63 Message Joy World Music Play Internet Edit Playlist Select All Clear All Invert About Track Home Bookmarks Go to URL Profile Settings General Settings History WAP Inbox Clear Cache Games 64 Messaging is a network service. Using this function, you can input, send, receive, check and edit messages. The VK4000 model supports sending and receiving both Short Messaging Service (SMS) and Multimedia Message (MMS) types. A new message notification is displayed on the screen when a message arrives. In Standby mode, press the left key to quickly enter Messages mode. Short Message This function enables a user to write and send a new message. You can check and save received or sent messages. 1. In Standby mode, press the key to display the menu screen. 2. Press number 2 to enter Message. 3. Press number 1 to enter Short Message. 65 MENU FUNCTIONS MP3 Player [Inbox] Check received messages. Press 2 Press 1 Press 1 Inbox key to enter the Options menu. Press 1 Delete All Deletes all the messages stored in your Inbox. Inbox Press 2 On the screen with the list of received messages, press the key to display the content of the received messages. On the screen displaying the message content, press the key to enter the Options menu. 66 MENU FUNCTIONS Standby mode On the screen with the list of received messages, press the Delete Deletes messages stored in your Inbox. Delete : Deletes the selected message. Reply : Send a reply to the message sender. Forward : Forward (with or without editing) a received message to another recipient. Call Back : Call the message sender. Copy to SIM(Phone) : Copies the message to SIM or phone. Move to SIM(Phone) : Moves the message to SIM or phone. Details : Displays the time and sender info for the selected message. [Outbox] The Outbox can store sent messages and message drafts to be sent. Standby mode Press 2 Press 1 Press 2 Unsent Items Unsent messages, whether due to a sending failure or those explicitly saved before sending, are stored. Delete Deletes stored messages in the Outbox. Outbox Press 1 Press 1 67 Delete All Deletes all the messages stored in the Outbox. Outbox Press 1 Press 2 Select among 1 : Phone, 2 : SIM and 3 : Both. Outbox 68 Press 2 Press 1 Outbox Press 2 Press 2 Select among 1 : Phone, 2 : SIM and 3 : Both. On the screen with the list of sent messages, press the On the screen displaying the message content, press the key to display the content of the sent messages. MENU FUNCTIONS On the screen with the list of unsent messages, press the key to display the content of those unsent messages. On the screen displaying the message content, press the key to enter the Options menu. Send : Resend a selected message. Edit : Edit a selected message. Delete : Delete a selected message. Copy to SIM(Phone) : Copies the item to SIM or phone. Move to SIM(Phone) : Moves the item to SIM or phone. Sent Items Stores sent messages. Delete Delete All key to enter the Options menu. Send : Resend a selected message. Edit : Edit a selected message. Delete : Delete a selected message. Copy to SIM(Phone) : Copies the item to SIM or phone. Move to SIM(Phone) : Moves the item to SIM or phone. [Write] This function enables the user to write and send new messages. Standby mode Press 2 Press 1 Press 3 1. Write the message to send. 69 If you have forgotten the telephone number, press the key, while on the screen for keying in the sender’s number, to enter the telephone directory. SMS Center No. Set SMS Center No. Delivery Report Report whether the message successfully reached the SMS Center. On : Reports whether or not the sent message was delivered. Off : Does not report whether or not the sent message was delivered. Validity Period Sets the storage period of a message. If this function is selected, received messages will expire and be automatically deleted after a set period of time. Be sure to save important pictures, sound clips and messages in the gallery before they expire. [Settings] You can set various options for SMS Center No., delivery report, and validity period. Standby mode 70 Press 2 Press 1 Press 4 71 MENU FUNCTIONS 2. After inputing the message, press the key to enter the Options menu. Add Object : Using this function, you can add simple images, animations and sound to your message. Save : You can save edited messages to send later. These messages will be saved under the Unsent Messages tab in the Outbox and you can edit and send them later. Exit : Return to the Message menu. 3. Press the key to enter the screen for keying in the sender’s number. After you input the number, press the key to send it. Multimedia Message [Inbox] Check received Multimedia messages. Standby mode Press 2 Press 2 Press 1 On the screen listing the received messages, press the Delete Deletes messages stored in your Inbox. 72 key to enter the Options menu. Inbox Press 1 Delete All Deletes all messages stored in your Inbox. Inbox Press 2 On the screen listing the messages received, press the key to display the content of the received message. On the screen displaying the content, press the key to enter the Options menu. Delete : Deletes the selected message Reply : Send a reply to the message sender. Reply All : Send a reply to all people. Forward : Forward or send after editing a received Multimedia MSG to another recipient. Call Back : Call the message sender. Extract : Extracts the message sender’s pictures, animation, sound and other items. Details : Displays the message topic, storage capacity, sender, all the recipients, and delivery time. 73 MENU FUNCTIONS Multimedia message is a service that enables the sending of messages including images, pictures and sound clips in addition to the text. Using this function, you can send a message to mobile phones and e-mail recipients. In addition, you can save multimedia resources such as images, pictures and sound files attached to received multimedia messages, into your gallery. Multimedia message service is available only when the service provider supports the service, and can be displayed only on a mobile phone that supports the service. 1. In Standby mode, press the key to display the Menu screen. 2. Press 2 to enter Message. 3. Press 2 to enter Multimedia Message. [Outbox] The Outbox stores both sent messages and messages wating to be sent. Standby mode Press 2 Press 2 Press 2 Outbox Press 1 Outbox Press 1 Press 1 On the screen displaying the message content, press the 74 Outbox Press 2 Press 2 On the screen listing the sent messages, press the Press 2 On the screen listing the unsent messages, press the Press 1 Delete All Delete All Deletes all messages stored in your Outbox. Outbox Press 2 MENU FUNCTIONS Unsent Items Unsent messages, whether due to a sending failure or those explicitly saved before sending, are stored here. Delete Deletes messages stored in your Outbox. Send : Resend the selected message Edit : Edit the selected message. Delete : Delete the selected message. Details : Displays the time the selected message was saved, sent and the number to which it was sent. Sent Items Stores sent messages. Delete key to display the content of the unsent message. key to enter the Options menu. key to display the content of sent messages. On the screen displaying the message content, press the Send : Resend the selected message. Edit : Edit the selected message. key to enter the Options menu. 75 Delete : Delete the selected message. Details : Displays the time the selected message was saved, sent and the number to which it was sent. Standby mode Press 2 Press 2 Press 3 1. Write the message to send. 2. After inputing the message, press the key to enter the Options menu. Add Object : Using this function, you can add text, edit text, add image, animation and sound to your message. Remove Object : Using this function, you can delete the object. Page : The page function enables you to send several pictures, ring tones and other items in a row, rather than splitting them into several segments. A single page can include one picture and one voice attachment. You can send several pages in a row. Save : Save edited messages to send later. The messages will be kept under the Unsent Messages tab in the Outbox. You can edit and send these messages later. Edit Subject : Using this function, you can edit the subject of message. 76 Exit : Return to the Message menu. 3. Press the key to enter the screen for keying in the recipient’s number. Send the message by pressing the key. If you have forgotten the telephone number, press the key, while on the screen with the recipient’s name, to enter the telephone directory. [Settings] You can set various options for the SMS Center, delivery reports, validity periods, as well as setup a proxy server. Standby mode Press 2 Press 2 Press 4 General Displays the validity period, delivery report, read report, and auto download, report sending. Profile Settings You can setup the option of a WAP browser using this function. 77 MENU FUNCTIONS [Write] This function enables the user to write and send a new message. Preview : Check the message before sending. Voice Message Info. Message [Listen to Voice MSG] Listen to Voice Mail waiting in the Voice Mailbox. Voice Message Press 1 78 Press 2 [Read] You can search and read the desired message. Info. Message Press 1 Select a desired message Enter a Voice MSG No. [Set Voice MSG No.] Stores the Voice Mailbox Number. Voice Message Informational Msg. is a network service that provides Informational Messages to many GSM mobile phone users. For example, it provides information on weather forecast, traffic and stock prices. 1. In Standby mode, press the key to display the Menu screen. 2. Press 2 to enter Message. 3. Press 4 to enter Info. Message. [Receive] Choose whether to receive informational messages or not. Info. Message Press 2 Please select an item 1 : On, 2 : Off Enter a Voice MSG No. 79 MENU FUNCTIONS When a new voice mail arrives, an indicator icon is displayed on the screen. You can listen to the voice mail using this function. Press the voice mailbox number if the number is stored in the handset’s memory, or input the number manually. Voice mail is a network service. For further details, consult your nearest service center. 1. In Standby mode, press the key to display the Menu screen. 2. Press 2 to enter Message. 3. Press 3 to enter Voice Message. Calls [Topics] Choose the message topics. Info. Message Press 3 You can check your call history and utilize various network services in Calls. Select a message topic. Memory Status You can check the Memory Status of your handset’s memory. 1. In Standby mode, press the key to enter the Menu screen. 2. Press 2 to enter Message. 3. Press 5 to enter Memory Status. 80 Using this function, you can check recent calls you made, calls received and missed calls. Also, you can check the time of each call. 1. In Standby mode, press the key to display menu screen. 2. Press number 3 to enter Calls. 3. Press number 1 to enter Call History. 4. Full list of the Call History is displayed. Pressing the key displays currently selected call s information such as phone number, name and time spent. Press the keys to enter menu screen and following menu items will be displayed: Save : Saves the phone number in your Contacts. Delete : Deletes the phone number. 5. When the full list of Call History is displayed, press the key to enter option screen. 81 MENU FUNCTIONS At the topics list, press the key to display the option menu. Edit : Edit the selected message topic. Delete : Delete the selected message topic. Call History [Missed Calls] Displays phone numbers of calls you missed. Pressing the Number 3 Number 1 Displays phone numbers of dialed calls you made. Number 1 key displays information of caller s phone number, name and calling time. Press the key to enter menu screen and following menu items will be displayed : Save : Saves the phone number in your Contacts. Delete : Deletes the phone number. [Received Calls] Displays phone numbers of received calls. Standby Mode Pressing the Number 3 Number 1 Pressing the Press the Number 3 Number 1 Number 3 key displays currently selected call s information such as phone number, name and call time. key to enter menu screen and following menu items will be displayed : Save : Saves the phone number in your Contacts. Delete : Deletes the phone number. [Delete All] Number 2 key displays currently selected call s information such as phone number, name and time spent. Press the key to enter menu screen and following menu items will be displayed : Save : Saves the phone number in your Contacts. Delete : Deletes the phone number. 82 Standby Mode Deletes call History information. Standby Mode Number 3 Number 1 Number 4 Select among Missed Calls / Received Calls / Dialed Calls / All Calls. 83 MENU FUNCTIONS Standby Mode [Dialed Calls] Network Services Standby Mode Number 3 Number 1 Number 5 Voice Call Show the every variety of call duration. Last Call : Displays last call s duration. All Calls : Displays the sum of all received and dialed calls duration. Received Calls : Displays the sum of all received calls duration up to now. Dialed Calls : Displays the sum of all dialed calls duration up to now. Reset : Press the key, you can delete the selected call duration. Data Call All Sent Data : Displays the sum of all sended data duration. All Received Data : Displays the sum of all received data duration. Reset : Press the key, you can delete the selected data duration. 84 Using this function, you can configure various network services. Before using this service, check available services from your service provider. 1. In Standby mode, press the key to display menu screen. 2. Press number 3 to enter Calls. 3. Press number 2 to enter Network Services. [Call Diverting] Using this function, you can divert incoming calls to a specified phone number. For example, if you are off business and enjoying a movie in a theatre, you can divert incoming calls to your *(kidding -) HATRED* colleague s phone number. Standby Mode Number 3 Number 2 Number 1 Always : Diverts all incoming calls to the specified number. If Busy : Diverts incoming calls to the specified number if your line is busy. If Out of Reach : Diverts incoming calls to the specified number if your handset is turned off, not in a service area or unreachable for other reason. If No Reply : Diverts incoming calls to the specified number if you don t reply to the call. Cancel All : Releases the all Call Diverting settings. 85 MENU FUNCTIONS [Call Duration] Displays the duration of selected calls including received and dialed. Call Duration time displayed on your handset may differ from the actual time recorded by the service provider according to network performance, calculation formula and other reasons. [Call Barring] Using this network service, you can limit incoming and outgoing calls from your handset. You can limit following calls : Number 3 Number 2 Outgoing Calls : You cannot make an outgoing call from your handset. International Calls : You cannot make an international call from your handset. Int. Calls Except to Home : You can make an international call to only a domestic phone number or the number serviced by a domestic service provider. Incoming Calls : You cannot receive an incoming call. When Roaming : You cannot receive an incoming call when you are not in a serviced area. Cancel All : Cancels all Call Barring settings and all incoming / outgoing calls are made properly. Change password : You can set and change the password given by the service provider. 86 Standby Mode Number 3 Number 2 Number 3 Number 2 [Send My Number] This function sends your previously specified phone number automatically. It is convenient to use this function when you need to send your phone number for a call, ARS, phone banking and other services not to press your phone number by manual. Standby Mode Number 3 Number 2 Number 4 Default : Sends the default number specified. Hide Number : Does not send any number. Send Number : Sends your phone number. 87 MENU FUNCTIONS Standby Mode [Call Waiting] Using this network service, you are notified with an incoming call when you are on another call. Gallery Standby Mode Manual. Number 3 Number 2 Number 5 Select an option among Automatic and [Select Band] Using this function, you can select network band. Standby Mode 900/1800Mhz Number 3 Number 2 Number 6 Using gallery function, you can manage various contents such as still photo, Video clip, Image, Animation, Sound, Music and Memory Status. Photo This function manages digital still photos stored on your cellular phone. Using this function, selected still photos can be sent to your friends, and it can be assigned as a wallpaper. 1. Press in standby mode to enter the menu screen. 2. Select 4 to enter Gallery. 3. Select 1 to enter photo. 4. When a list of stored photos appears, press key to enter the option screen. For more details, refer to “Camera” on page 111. Select an option among 850/1900Mhz and [Send] One of the stored photo can be selected and sent to your friends. Standby Mode 88 Press 4 Press 1 Press 1 89 MENU FUNCTIONS [Select Network] Select Network is a function to choose a network when you are using an international roaming service whether by manual or by automatic selection. However, a roaming network is available to choose when your network provider has an agreement on roaming service with the roaming network provider. [Move To T-Flash] You can move the selected photo to T-Flash. [Use as Wallpaper] You can assign a selected photo as a wallpaper. [Delete] Selected photos can be deleted. Standby Mode Press 4 Press 1 Press 2 Standby Mode [Copy To T-Flash] You can copy the selected photo to T-Flash. Standby Mode Press 4 Press 1 Standby Mode Press 4 Press 4 Press 1 Press 4 Press 1 Press 5 Select ‘Delete’ or ’Delete All’ Press 1 Press 6 Enter a new name MENU FUNCTIONS Send via MMS : You can send the selected photo via MMS. For more details, refer to “Message” on page 65. Send via Bluetooth : You can send the selected photo via Bluetooth. For more details, refer to “Bluetooth” on page 126. [Rename] Selected photo can be renamed. Press 3 Select ‘Copy’ or ‘Copy All’ Standby Mode Press 4 For more details, refer to “Character Input Mode” on page 50. 90 91 Video-Clip [Lock] You can hide selected photos so that others cannot view the selected photos. Lock Press 4 Press 1 Press 7 Enter password Select a private folder Enter password Press 7 Enter password 6. Press [Details] You can view details such as title, data & time, size and resolution of selected photo. Standby Mode Press 4 Press 1 Press 8 MENU FUNCTIONS Standby Mode Release This function manages video clips filmed with your cellular phone. For more detail, refer to “Camera” on page 102. 1. Press key in standby mode to enter the menu screen. 2. Select 4 to enter Gallery. 3. Select 2 to enter the video clip. 4. When a video clip list appears, select a file to replay and press 5. Press key to stop. key. to go back to the previous screen. 7. When a list of stored video clips appears, press key to enter the option menu. [Send] One of the stored video-clip can be selected and sent to your friends. Standby Mode Press 4 Press 2 Press 1 Send via Bluetooth : You can send the selected video-clip via Bluetooth. For more details, refer to “Bluetooth” on page 126. 92 93 [Copy To T-Flash] You can copy the selected video-clip to T-Flash. Standby Mode Press 4 Press 2 [Rename] Selected video clips can be renamed. Press 2 Select ‘Copy’ or ‘Copy All’ Standby Mode Press 4 Press 2 Press 5 Enter a new filename MENU FUNCTIONS For more details, refer to “Character Input Mode” on page 50. [Move To T-Flash] You can move the selected video-clip to T-Flash. Standby Mode Press 4 Press 2 [Lock] You can hide selected video clips so that others cannot view the selected video clips. Lock Press 3 Standby Mode [Delete] Selected video clip files or all stored movie files can be deleted. Standby Mode Press 4 Press 2 Press 4 Press 4 Press 2 Press 6 Enter password Release Select a private folder Enter password Press 6 Enter password Select ‘Delete’ or ’Delete All’ [Details] You can view details such as title, data & time, size and length of selected video clip. Standby Mode 94 Press 4 Press 2 Press 7 95 Image [Send] Selected image among stored images can be sent to your friends. Standby Mode Press 4 Press 3 Press 1 Send via MMS : You can send the selected image via MMS. For more details, refer to “Message” on page 65. Send via Bluetooth : You can send the selected image via Bluetooth. For more details, refer to “Bluetooth” on page 126. 96 [Use as Wallpaper] Selected image among stored images can be assigned as a wallpaper. Standby Mode Press 4 Press 3 Press 2 MENU FUNCTIONS You can manage image files stored on your cellular phone. Using this function, selected image files can be sent to your friends or can be configured as a wallpaper. 1. Press key in standby mode to enter the menu screen. 2. Select 4 to enter Gallery. 3. Select 3 to enter Image. 4. When a list of stored images appears, press key to enter the option screen. [Copy To T-Flash] You can copy the selected image to T-Flash. Standby Mode Press 4 Press 3 Press 3 Select ‘Copy’ or ‘Copy All’ [Move To T-Flash] You can move the selected image to T-Flash. Standby Mode Press 4 Press 3 Press 4 97 Animation [Delete] Selected image files can be deleted. Standby Mode Press 4 Press 3 Press 5 Enter a new name [Send] Selected animation among stored animation can be sent to your friends. [Rename] Selected image among store images can be renamed. Standby Mode Press 4 Press 3 Press 6 For more details, refer to “Character Input Mode” on page 50. Standby Mode [Details] You can view details such as title, data & time, and size of selected image. Standby Mode 98 Press 4 Press 3 Press 7 Press 4 Press 4 MENU FUNCTIONS Select ‘Delete’ or ’Delete All’ This function manages animation files stored in your cellular phone. 1. Press key in standby mode to enter the menu screen. 2. Select 4 to enter Gallery. 3. Select 4 to enter Animation. 4. When a list of stored animations appears, press key to enter the option screen. Press 1 Send via MMS : You can send the selected animation via MMS. For more details, refer to “Message” on page 65. Send via Bluetooth : You can send the selected animation via Bluetooth. For more details, refer to “Bluetooth” on page 126. 99 [Use as Wallpaper] Selected animation among stored animations can be assigned as a wallpaper. Standby Mode Press 4 Press 4 Standby Mode Press 2 Press 4 Standby Mode Press 3 100 Press 4 Press 4 Press 5 Select ‘Delete’ or ’Delete All’ Select ‘Copy’ or ‘Copy All’ Press 4 Press 4 Press 6 Enter a new name For more details, refer to “Character Input Mode” on page 50. [Details] You can view details such as title, data & time, and size of selected animation. [Move To T-Flash] You can move the selected animation to T-Flash. Standby Mode Press 4 MENU FUNCTIONS Press 4 Press 4 [Rename] Selected animation among stored animations can be renamed. [Copy To T-Flash] You can copy the selected animation to T-Flash. Standby Mode [Delete] Selected animation can be deleted. Standby Mode Press 4 Press 4 Press 7 Press 4 101 Sound This function manages ring tones stored in your cellular phone. Using this function, a selected ring tone can be assigned. 1. Press in standby mode to enter menu screen. 2. Select 4 to enter Gallery. 3. Select 5 to enter Sound. 4. When a list of stored ring tone appears, press key to enter option screen. [Use] Selected sound among stored sound can be assigned as bell sound. [Send] One of the stored sound can be selected and sent to your friends. [Copy To T-Flash] You can copy the selected sound to T-Flash. Press 4 Press 5 Press 1 Send via MMS : You can send the selected sound via MMS. For more details, refer to “Message” on page 65. Send via Bluetooth : You can send the selected sound via Bluetooth. For more details, refer to “Bluetooth” on page 126. 102 Press 4 Press 5 Press 2 MENU FUNCTIONS Standby Mode Standby Mode As Ringtone : You can set the selected sound as ringtone. As Morning call : You can set the selected sound as morning call bell sound. Standby Mode Press 4 Press 5 Press 3 Select ‘Copy’ or ‘Copy All’ [Move To T-Flash] You can move the selected sound to T-Flash. Standby Mode Press 4 Press 5 Press 4 103 Music [Delete] Selected sound can be deleted. Standby Mode Press 4 Press 5 Press 5 Select ‘Delete’ or ’Delete All’ Standby Mode Press 4 Press 5 Press 6 Enter a new name For more details, refer to “Character Input Mode” on page 50. [Details] You can view details such as title, data & time, and size of selected ring tones. Standby Mode 104 Press 4 Press 5 Press 7 [Send] One of the stored MP3 file can be selected and sent to your friends. Standby Mode Press 4 Press 6 Press 1 Send via Bluetooth : You can send the selected MP3 file via Bluetooth. For more details, refer to “Bluetooth” on page 126. 105 MENU FUNCTIONS [Rename] Selected sound among stored sound can be renamed. This function manages music files stored in your cellular phone. You can manage MP3 files in Gallery music folder and assign a music file as your ring tone. 1. Press key in standby mode to enter the menu screen. 2. Select 4 to enter Gallery. 3. Select 6 to enter the music. 4. When a list of stored music files appears, press key to enter the option screen. [Use] Select to use the ringtone as seleted MP3 file. Press 4 Press 6 Standby Mode Press 2 As Ringtone : You can set the selected MP3 file as ringtone. As Morning call : You can set the selected MP3 file as morning call bell sound. [Copy To T-Flash] You can copy the selected MP3 file to T-Flash. Standby Mode Press 4 Press 6 106 Press 4 Press 6 Press 5 Select ‘Delete’ or ’Delete All’ Press 4 Press 6 Press 6 Enter a new name For more details, refer to “Character Input Mode” on page 50. [Details] You can view details such as title, data & time, and size of selected MP3. [Move To T-Flash] You can move the selected MP3 file to T-Flash. Standby Mode Select ‘Copy’ or ‘Copy All’ Press 6 [Rename] Selected MP3 file among stored MP3 files can be renamed. Standby Mode Press 3 Press 4 MENU FUNCTIONS Standby Mode [Delete] Selected MP3 files can be deleted. Standby Mode Press 4 Press 6 Press 7 Press 4 107 [Go to Play] You can go back to player mode. Press 4 Press 6 Press 8 1. In Standby mode, press the key to enter the Menu screen. 2. Press 4 to enter Gallery. 3. Press 7 for T-Flash Manager 4. On the screen listing the saved music files, press the key to enter the options menu. Press 4 Standby Mode Press 7 Press 2 Press 4 Press 7 Press 3 Press 4 Press 7 Press 4 [Rename] Rename selected files. Standby Mode [Copy to phone] Copy selected files to the handset. 108 Press 4 [Delete] Delete just the selected files or all stored files. T-Flash Manager Standby Mode Standby Mode MENU FUNCTIONS Standby Mode [Move to phone] Move the selected files to the handset. Enter the message name For more details, refer to “Character Input Mode” on page 50. Press 7 Press 1 109 Camera [Details] You can view details of the selected file, such as: title, date&time and size. Standby Mode Press 4 Press 7 Press 5 Standby Mode Press 4 Press 7 Press 6 Memory Status You can check the Memory Status of your handset’s memory or T-Flash. 1. In Standby mode, press the key to enter the Menu screen. 2. Press 4 to enter Gallery. 3. Press 8 to enter Memory Status. 110 Before Using the Camera Do not take photos of people or any subject without proper permission. Do not take photos which violate anyone s privacy. Because the camera sensor requires a little time to automatically adjust the exposure, you will get better results if your subject is still. For best results, ensure that the subject has better lighting than the background. Avoid lighting your subject directly with fluorescent or other light bulbs. Have your back to the light source when taking a photo. For best results, take photos in bright indoor and outdoor environments. The Camera has a high-precision image sensor which is fragile and susceptible to shock, do not drop the handset. Also, use it in moderate climates as it is sensitive to temperature and humidity. The Image may appear blurry when the lens part of the camera (on the back side of your handset) is dirty, please keep it clean. Using the Camera consumes more battery power. 111 MENU FUNCTIONS [Memory Status] Check the memory status of T-Flash. You can use the Camera embedded in your handset to take photos or video clips and save them in your Gallery. In Standby mode, press the key to enter Camera mode directly. Photo [Icons] Image Size : Sets the image size. Zoom : Zooms in and out. Brightness : Sets the Brightness of the picture. There are five levels. Rotate : Selects the Rotate option for the picture from flip / Mirror which rotates or flips the image. Effect : Applies various special effects to the picture. Frame : Takes a photo with various frames. After taking the assigned number of photos, thumbnails are displayed and you can select and save the desired pictures. Self-Timer : Sets the timer for automatic shutter release. A picture is taken according to the Self Timer setting. Go to Video Clip : Moves to Video Clip. Go To Gallery : Moves to Photo in your Gallery. 112 Video Clip Using the digital camera embedded in your handset, you can take video clips in a variety of ways. 1. In Standby mode, press the key to display the menu screen. 2. Press number 5 to enter Camera. 3. Press number 2 to enter Video Clip. 4. Press the key to take a Video Clip. 5. The file is saved under Video Clip in your Gallery. 6. Press the key to display the option. MENU FUNCTIONS Using the digital camera embedded in your handset, you can take photos in a variety of ways. 1. In Standby mode, press the key to display the menu screen. 2. Press number 5 to enter Camera. 3. Press number 1 to enter Photo. 4. Press the key to take a picture. 5. The picture is saved under Photo in your Gallery. 6. Press the key to display the option. [Icons] Zoom : Zooms in and out. Brightness : Sets the Brightness of the picture. There are five levels. Rotate : Selects the rotate option for the Video Clip. Effect : Applies various special effects to the Video Clip. Go to Photo : Moves to Photo. Go to Gallery : Moves to Video Clip in your Gallery. 113 Settings Press 5 Press 3 Press 1 Select an option of the photo and the Video-clip from Normal/High/Low. [Sound] Sets the Shutter Sound effect for the shutter release. Standby Mode Press 5 Standby Mode Press 5 Press 3 Press 3 On : Photos and video clips will be automatically stored in your Gallery. Off : Photos and video clips will require your confirmation before they are stored in your Gallery. [Quality] Sets the quality of the image. Standby Mode [Auto Save] Sets the type of automatic saving for photos and video clips. MENU FUNCTIONS You can set various options regarding photos and video clips. 1. In Standby mode, press the key to display the menu screen. 2. Press number 5 to enter Camera. 3. Press number 3 to enter Settings. Press 3 Press 2 [Default Title Name] Sets the title name of Photos and Video Clips which don’t have a given name. Standby Mode Press 5 Press 3 Press 4 [Memory Use] You can check memory status of your photo and video clip in your handset’s memory and T-Flash. Standby Mode Press 5 Press 3 Press 5 Phone : Photos and video clips will be stored in your handset. T-Flash card : Photos and video clips will be stored in T-Flash memory. 114 115 Settings Using this function, you can set various options of Display, Sound, Phone setting, Bluetooth, Security and PC Connection. [Main LCD] You can set an image and clock displayed in Standby mode, and also you can input words and set the color of characters. Standby Mode Press 6 Press 1 Press 1 Image You can select an image or a photo from images provided with your handset and those stored in your Gallery to set it as your Standby screen. 116 117 MENU FUNCTIONS Display Using this function, you can set various Standby and Lighting options. 1. In Standby mode, press the key to display menu screen. 2. Press number 6 to enter Settings. 3. Press number 1 to enter Display. Select Image, and then select an image from provided images using the left and right side of key to set it as your Standby screen. Alternatively, you can select an Imges or Photo from your Gallery by pressing the key for your Standby screen. Animation You can select an Animation from animations provided with your handset and those stored in your Gallery to set it as your Standby screen. Select Animation, and then select an animation from provided animations using the left and right side of key to set it as your Standby screen. Alternatively, you can select an Animation from your Gallery by pressing the key for your Standby screen. Clock Sets the Clock type displayed on your Standby screen. You can select from None / Digital / Dual / Analogue options. If Dual is set, your time and the selected region s time are displayed. You can adjust the dual zone s time by -1, off, +1 hour to apply the summertime or other adjustment. Calendar Sets a calendar as your Standby screen. Sound Text Input You can display words on your Standby screen. After inputting words, you can select the font color. Standby Mode Press 6 Press 1 Press 2 Time Sets the Lighting duration time for the LCD backlight. Select from 5 sec / 10 sec / 20 sec / Always On. Brightness Sets the Brightness of the LCD display. Five levels are available. LED Sets to appear the LED light in the Service area. Select an option from on/off. 118 [Incoming Call] You can select a ring tone from various ring tones provided for Incoming Calls. Standby Mode Press 6 Press 2 Press 1 Mode Sets the way of notification for Incoming Calls. Ring Tone Only : The Ring Tone rings only. Vibration Only : The handset vibrates only. Ring Tone + Vib : Ring Tone rings, and your handset vibrates at the same time. Silent : Your handset does not vibrate nor ring. Ring Tone to Vib : Ring Tone rings, and then your handset vibrates afterwards. 119 MENU FUNCTIONS [Lighting] Using this function, you can set Time, Contrast, and Brightness of Lighting. Using this function, you can set the Sound and its volume for incoming calls, Message Alert, Key tone, opening and closing the handset’s slide, and volume. 1. In standby mode, press the key to display menu screen. 2. Press number 6 to enter Settings. 3. Press number 2 to enter Sound. [Message Alert] You can set the sound for incoming messages. Standby Mode Press 6 Press 2 Press 2 You can set various options for message arrivals. Alert Period : Sets the interval between repeating alerts when a message arrives. Select from Once / Every 2 Min / None. Alert Sound : Sets the Ring Tone for the message alert when you selected Ring Tone Only or Ring Tone + Vib option for your Alert Mode. Alert Mode : Sets the type of notification for arriving messages. Select from Ring / Vibrator / Vib + Ring / Silent. 120 [Key Tone] You can set the key tone for number and menu keys. Standby Mode Press 6 Press 2 Press 3 MENU FUNCTIONS Vib to Ring Tone : The handset vibrates, and then the Ring Tone rings. Ascending : Ring Tone rings increasingly loud. Ring Tone You can select your Ring Tone from various tones and melodies provided with your handset and those stored in your Gallery. Select Ring Tone, and then press the key to select a Ring Tone or a Melody from your Gallery. Key tone Sets the Dial Sound. Menu Sound Sets the sound for a menu traversal. [Slide Tone] You can set the sound for opening and closing the slide of your handset. Standby Mode Press 6 Press 2 Press 4 Sets the sound for slide opening and closing. 121 [Volume] Sets the Volume of the ring tone which listed above, Incoming Calls / Message / Keytone / Slidetone / Power On/Off / Others. Press 6 Press 2 Press 5 Five levels are available. Phone Setting You can set the date, time, language and other various options of your handset. 1. In Standby mode, press the key to display menu screen. 2. Press number 6 to enter Settings. 3. Press number 3 to enter Phone Setting. 122 Standby Mode Press 6 Press 3 Press 1 MENU FUNCTIONS Standby Mode [Date & Time] You can set Date, Time and Time Zone. You can select the indication formats for Date and Time. 1. Set the date. 2. Select input type among YYYY / MM / DD, DD / MM / YYYY, MM/DD / YYYY. 3. Set the Time Zone. 4. Set the time. 5. Select the time format from 12hours / 24hours. 6. After finishing, press the key to save your settings. When user changed time value, the schedule could be deleted, which saved on handset. 123 [Language] You can set the Language for your handset. Standby Mode Press 6 Press 3 [Auto Redial] Using this function, you can automatically redial the number from missed and other failed calls. Press 2 Standby Mode Press 6 Press 3 Press 3 Select an option from Any Key / Send Key / Slide up. Standby Mode Press 6 Press 3 Select an option from Off / 5 sec / 10 sec. 124 Press 4 Press 3 Press 5 Select an option from Off / On. [Factory Set] Using this function, you can reset all settings of your handset to factory default values. Entering password will enable the Factory Set. Standby Mode [Auto Answer] You can take advantage of this function when you use an ear-mic-phone (hands-free) connected to your handset. When the ear-mic-phone is connected to your handset and Auto Answer is set, an incoming call will be answered automatically without pressing the Answer Key. Press 6 MENU FUNCTIONS [Answer Key] You can set a key as the Answer Key to answer an incoming call. Standby Mode Press 6 Press 3 Press 6 [My Favorite] Using this function, you can configure your own menu screen with frequently used and preferred menu items. Standby Mode Press 6 Press 3 Press 7 After saving menu items, press the right side of the Select a desired menu by pressing the key key in Standby mode to directly enter Favorite menu screen. 125 Bluetooth [Switch] Enable or disable Bluetooth. Standby Mode Press 6 Press 1 [Paired Devices] Search for other Bluetooth devices that are available for connection. Press 6 [Phone Visibility] Allow connections from other Bluetooth mobile phones to my mobile phone. Standby Mode Press 4 O n : Enable Bluetooth. Off : Disable Bluetooth. Standby Mode Press the key to go to “Add” and then all available Bluetooth devices found will be displayed. Select a desired Bluetooth device and enter a password for that device to complete connection. (The initial password is set to “0000”.) Press 4 MENU FUNCTIONS You can use this function to make a wireless connection to other Bluetooth devices for data exchange or to make a call or configure your mobile phone without using your hands. 1. In the standby screen, press the key to go to the menu screen. 2. Press number 6 to enter Settings. 3. Press number 4 to enter Bluetooth. Press 6 Press 4 Press 3 Show Phone : Allow other mobile phones to search for and connect to my mobile phone. Hide Phone : Do not allow other mobile phones to search for my mobile phone. [Phone Name] Specify the name of my mobile phone that is shown to other Bluetooth devices. Standby Mode Press 6 Press 4 Press 4 Press 2 If Bluetooth is not set to “On”, a pop-up window appears asking whether to enable Bluetooth or not. Select “Yes” to enable Bluetooth. 126 127 Security [PIN] PIN (Personal Identification Number) prevents the use of an unapproved SIM card. PIN is usually provided with the SIM card. When your PIN has been approved, you must enter the PIN each time you switch the phone on. Standby Mode Press 6 Press 5 Press 1 Enable PIN : As the SIM card is locked, you must enter your PIN whenever you switch the phone on. [Change PIN] To some SIM cards, PIN is also provided on some SIM cards. To use a function, this number may be required. This feature requires supprt of the SIM card. Standby Mode 128 Press 6 Press 5 Press 2 Change PIN : You can change your current PIN to a new one. You must enter the current PIN before you can specify a new one. [Lock] You can lock a selected menu item or your entire handset for your privacy. Standby Mode Press 6 Press 5 MENU FUNCTIONS Sets security numbers for your privacy and protection of your handset. 1. In Standby mode, press the key to display menu screen. 2. Press number 6 to enter Settings. 3. Press number 5 to enter Security. Press 3 Private Lock Locks a selected menu item. A locked menu item requires access password for each use. Select a menu to be locked by pressing the key and then press the key to save your setting. The initial password is 0000 . Power on Lock Locks your entire handset. If this function is set, a password input is required every time the handset is turned on. Change Password Changes the password. Enter the current password and then enter the new password to be set. 129 PC Connection [FDN] FDN : With the phone FDN (Fixed Dialing Numbers) is provided, you can dial only several numbers you specify. To use this mode, you have to enter PIN2 number. Press 6 Press 5 Press 4 The following options are available : Enable : Activates or deactivates the FDN mode. The number of your phone may be different from the number of the SIM card. [Change PIN2] To some SIM cards, PIN2 is also provided. To use a function, this number may be required. This feature requires support of the SIM card. Standby Mode Press 6 Press 5 Press 5 Change PIN2 : You can change your current PIN to a new one. You must enter the current PIN before you can specify a new one. 130 [PC Sync] Connects your handset to PC Sync in the computer software. You can receive or send data for the telephone directory, calendar, and memo function. Standby Mode Press 6 Press 6 Press 1 [USB Mass Storage] Connects the storage stick to your computer. You can receive and send pictures, animations, photos, video clips, sounds and music. Standby Mode Press 6 Press 6 Press 2 131 MENU FUNCTIONS Standby Mode You can connect your handset to a computer for receiving or sending your data. You need to pre-set the connection method. 1. In Standby mode, press the key to display the Menu screen. 2. Press 6 to enter Settings. 3. Press 6 to connect your computer. Organizer Available saving extension at USB Mass Storage Folder Extension .jpg (only camera) My Video .mjp (only video) My Image .jpg / .bmp / .wbmp / .png / .ems / .gif (not animation) My Animation .gif (animation) My Sound .wav / .mid / .imy My Music .mp3 (only) [T-Flash Card] Connects T-Flash to your computer. You can receive and send pictures, animations, photos, video clips and other data. 132 Press 6 Press 6 Using this function, you can input and check your anniversaries, important appointments, and other events of which you can be reminded by setting the alarm. 1. In Standby mode, press the key to display menu screen. 2. Press number 7 to enter Organizer. 3. Press number 1 to enter Calendar. 4. After the calendar is displayed, press the key to select a date and then press the key to display a submenu screen of the selected date. To check your schedule, press the key to select a date and then press the key, and number 3 to display the Schedule List. Press 3 133 MENU FUNCTIONS Calendar My Camera Standby Mode Organizer provides various functions such as Calendar, Alarm, Memo, Calculator, World Time, Unit Convert and Stop watch. [New] Inputs a new schedule item. Press 7 Press 1 Press 1 134 [Delete All] Deletes all the schedule items stored on the selected date. To delete all the schedule items, confirm the prompt message displayed by pressing the Standby Mode Press 7 Press 1 Press 2 MENU FUNCTIONS Standby Mode 1. Input following items : Subject Input the subject of the schedule item. Start Date & Time Input the start date and time of the schedule item. End Date & Time Input the end date and time of the schedule item. Location Input the location of the schedule item. Notes Input a reminding note of the schedule item. Alarm Set the alarm time. Alarm Sound Set the ring tone for the alarm. 2. After finishing, press the key to save the schedule item. key. Enter the password [Schedule List] Displays all the schedule items stored on the selected date. Standby Mode Press 7 Press 1 Press 3 New Inputs a new schedule item for the selected date. 1. Input respective schedule data items. 135 136 If you change the Date & Time of Phone Setting in Settings menu to the one following the date and time of a preset schedule item, this schedule item will not be automatically deleted by the Auto Delete setting. [Go to Date] Moves to the selected date when you press the Standby Mode Press 7 Press 1 MENU FUNCTIONS 2. After inputting schedule data items, press the key to save it. For further details, please refer to “New” of “Calendar” on page 134. Send via Bluetooth Using Bluetooth wireless communication, you can send data to anther device. When Bluetooth is activated, an indicator is displayed. For further details on Bluetooth, please refer to “Bluetooth” of “Settings” on page 126. Delete Deletes one selected schedule item only. To delete selected item, confirm the prompt message displayed by pressing the key. Delete All Deletes all the schedule items stored on the selected date. To delete all the schedule items, confirm the prompt message displayed by pressing the key. Go to Date Moves to the selected date when you press the key. Auto Delete Deletes schedule items automatically according to the selected expiry date. You can select from Never / After 1 Day / After 1 Week / After 1 Month. key. Press 4 137 Alarm [Morning Call] You can set the Morning Call time. The Morning Call repeats after an interval set unless you stop it by pressing Standby Mode Press 7 Press 2 key. Press 1 1. Input following items to set the Morning Call : Time : Using number keys, set the time of Morning Call. Days : Select the day on which you want to set the Morning Call. Select from Everyday / Once / Mon - Fri / Mon - Sat / None. Snooze : Select the Snooze interval of the Morning Call. The Morning Call will repeat with a selected ring tone after an interval you set. 138 If Snooze is set to a value other than Off, you need to open up the folder of the handset and then press the key to release the Snooze not to repeat the ring. Select from Off / 1 min / 5 min / 10 min / 30 min / 1 hour. Alarm Mode : Sets the Alarm Mode of the Morning Call. Select from Sound / Vibration / Vibration + Sound. Alarm Sound : Sets the Alarm Sound of the Morning Call. 2. After finishing, press the key to save and complete your Morning Call settings. [Reminder] You can set a Reminder to ring alarms for anniversaries, important and repeating schedule events at the time you set. Standby Mode Pressing the Press 7 Press 2 Press 2 key displays the Menu. 139 MENU FUNCTIONS Sets the Alarm to notify you at the time you set. 1. In Standby mode, press the key to display menu screen. 2. Press number 7 to enter Organizer. 3. Press number 2 to enter Alarm. 140 Monthly : Reminder will alarm every month on the date you set. Subject : Set the Subject of the Reminder. Date : Set the dates of the Reminder. Set the dates using number keys. Time : Set the time of the Reminder. After finishing, press the key to save and complete your Reminder settings. Delete Deletes a selected Reminder. Delete All Deletes all the Reminder items stored. Alarm Option Sets Alarm Mode and Alarm Sound. MENU FUNCTIONS New Sets a new Reminder item. Select repeating interval from Once / Daily / Weekly / Monthly. Once : Reminder will alarm on the date you set only. Subject : Set the Subject of the Reminder. Date : Set the date of the Reminder. Time : Set the time of the Reminder. Daily : Reminder will alarm everyday at the time you set. Subject : Set the Subject of the Reminder. Time : Set the time of the Reminder. Weekly : Reminder will alarm every week on the day you set. Subject : Set the Subject of the Reminder. Date : Set the day of the week of the Reminder. Time : Set the time of the Reminder. 141 Memo Calculator Using this function, you can edit and delete Memos. Standby Mode Press 7 Press 3 [Edit] After editing a Memo, press the [Delete] Deletes a selected Memo. [Delete All] Deletes all the Memo items stored. 142 Standby Mode Press 7 Press 4 MENU FUNCTIONS Press the key, you can enter a new Memo. Enter the contents in the selected empty item. Press the key to save it. Press the key to display the option menu. Using this function, you can perform simple calculations such as addition, subtraction, multiplication, and division. [Function Keys] Resets the Calculator. Returns to previous screen. key to save it. : Multiply X Divide : Add + Subtract - : Shows the result. Deletes a number wrong fully entered. Enters a decimal point. Enters a plus or minus sign. 143 Unit Converter Stop Watch You can convert one length, weight, volume, area and temperature unit into another unit. Standby Mode Press 7 Press 5 Standby Mode Press 7 Press 7 Start : Press the key to start. Stop : Press the key to stop, when you use the Stop Watch function. MENU FUNCTIONS After selecting the original unit, select your target unit to convert into by using left and right side of the key. You can use a stop watch function. Lap : Use this function, you can measure the lap time. World Time Reset : Use this function, you can reset the measured time recording. Displays the World Time for the selected region. Standby Mode Using the 144 Press 7 Press 6 key, select the region you want to display the time for. 145 MP3 Player You can always enjoy music using the embedded MP3 Player. In Standby mode, press the upper key of to enter MP3 Player mode. Using this function, you can playback MP3 music files. 1. In Standby mode, press the key to display menu screen. 2. Press number 8 to enter MP3 Player. 3. Press number 1 to enter Music play. Returns to menu screen from MP3 playback mode. Shows the list of MP3 files currently played back. MENU FUNCTIONS Music Play [Function Keys] : Volume Control. : Moves to the previous and next music file. : Play / Pause Volume Control. Returns to the previous stage. Returns to Standby mode. 146 147 Edit Playlist [Set] Standby Mode Press 8 Press 1 148 MENU FUNCTIONS Display You can choose the MP3 player Display. Equalizer You can choose a equalizer effect of the MP3 player. Shuffle Shuffles and plays back music files in the list. Setting it to On shuffles and plays back music files in arbitrary order where Off plays back music files sequentially in the order of list. Repeat Sets the repeating option of MP3 playback. Off : Does not repeat. Once : Repeats the MP3 file currently played back. All : Plays back all the MP3 files in the list and then repeats from the beginning. You can choose an MP3 file to playback. 1. In Standby mode, press the key to display menu screen. 2. Press number 8 to enter MP3 Player. 3. Press number 2 to enter Edit Playlist. [Function Keys] Returns to the option screen. Returns to the MP3 Player mode. : Selects a Playlist. : Selects a music file. Returns to the previous stage. Returns to Standby mode. 149 Joy World [Option] Standby Mode You can enjoy various functions such as Internet and Game. Press 8 Press 2 Internet Your handset supports WAP browser so that you can connect to and use wireless internet connection. 1. In Standby mode, press the key to display menu screen. 2. Press number 9 to enter Joy World. 3. Press number 1 to enter Internet. Or, press the key in Standby mode to enter Internet directly. [Home] Select this item to connect to the internet and it will display the Home page of the wireless internet service provider. Standby Mode Press 9 Press 1 Press 1 150 151 MENU FUNCTIONS Select All : Selects all music files in the list to playback. Clear All : Deselects all selected music files in the list. Invert : Inverts your selection by deselecting selected files and selects not selected files. About Track : Shows the details of the selected file. [Bookmarks] Using this function, you can store a URL of your favorite site. Press 9 Press 1 Press 2 Add 1. Press the key to display the option screen. 2. Press number 1 to add a new bookmark. 3. Give the bookmark a URL, Title, and assign a Folder. Press the key to save the bookmark. Edit 1. Select a URL to edit and then press the key to display the option screen. 2. Press number 2 to edit the bookmark. 3. Edit selected bookmark as in Adding a New Bookmark, and then press the key to save it. Delete 1. Select a URL to delete and then press the key to display the option screen. 2. Press number 3 to delete the selected URL only. 152 key to display the option screen. MENU FUNCTIONS Standby Mode Set as Home 1. Select a URL to Set as Homepage and then press the 2. Press number 4 to set the selected URL as home. [Go to URL] You can enter the URL directly and connect to the site. Standby Mode Press 9 Press 1 Press 3 [Profile Settings] Using this function, you can setup WAP browser options. Standby Mode Press 9 Press 1 Press 4 Select a service provider Profile Name Enter Profile Name. Homepage Enter Homepage. 153 [General Settings] Standby Mode Press 9 Press 1 Press 5 Access Type Select the Access Type option from GPRS preferred / GSM only / GPRS only. 154 Push Access Sets the WAP push access option. Load Images Sets to display the image in WAP. Data Account GSM Settings Setup : Using this function, you can set the selected service provider’s data call type, dial-up number, log-in name and password. Add : Using this function, you can add a new service provider. Edit : Using this function, you can edit the name of the selected service provider. Delete : Using this function, you can delete the selected service provider. GPRS Settings Setup : Using this function, you can set the selected service provider’s APN, Log-in Name, Password and Local address. Add : Using this function, you can add a new service provider. Edit : Using this function, you can edit the name of the selected service provider. Delete : Using this function, you can delete the selected service provider. 155 MENU FUNCTIONS Connect Mode Select the connect mode option from CL / CO / TCP. IP Address Enter IP Address GPRS Data Attach Attach the selected service provider. GSM Data Attach Attach the selected service provider. Detach Data Account Detach the selected service provider. Games [History] Shows the list of the contacted URL records. Standby Mode Press 9 Press 6 Press 1 Press 7 [WAP Inbox] Stores the WAP Push Messages. Standby Mode Press 9 MENU FUNCTIONS Press 1 You can enjoy games using your handset. 1. In Standby mode, press the key to display menu screen. 2. Press number 9 to enter Joy World. 3. Press number 2 to enter Games. Enjoying Games may consume more battery power. 4. Select the game and press the key to start the game. [Clear Cache] Clears the WAP browser s cache memory. Standby Mode 156 Press 9 Press 1 Press 8 157 OTHER FUNCTIONS PCSync Installation Guide PCSync Installation Guide PCSync package is optional product. Safety Information Glossary What is PCSync? Operation requirements CPU : Pentium II 300 (x86 compatible processor) RAM : 64 MB or higher (128 MB recommended) VGA : 800 x 600 (16 bit color or higher) HDD : 20 MB free space OS : Microsoft Windows 2000, XP or higher CD-ROM : CD-ROM/DVD-ROM (4x or higher) Mouse : Serial mouse / PS / 2 Mice / USB mouse 159 OTHER FUNCTIONS PCSync is a program that allows PC to connect to a mobile terminal for transmitting data such as phone numbers compiled by PC, reading and editing data of a mobile terminal on PC, and uploading and downloading images and melodies between PC and a mobile terminal. Safety Information Installation Media Password Input You are sure to need the Installation Package File (EXE or ZIP) that in the Accessory CD offered from provider or Internet download. Need more information, contact provider website. (http://www.vkmobile.com) There are several passwords that are used by your phone and its SIM card. These passwords help you protect your phone against unauthorized use. Phone Password Install VK PCSync package according to instructions Installation Package file name has the format like that PCSyncM.N.R_VK.EXE . M = Major Number, N = Minor Number, R = Revision Number. The phone password is used for unlocking the keys, deleting all Phonebook entries, restoring the factory setting, and locking or unlocking the phone. If the Phone Lock feature is enabled, you must enter the password each time the phone is turned on. This password can be used to avoid unauthorized use of your phone. The password is usually preset to 0000 . Plug in the cable to PC PIN Code Plug in the cable to the phone Windows should recognize the cable and find the driver for it, and install VK USB driver according to instructions. PIN(Personal Identification Number)code protects your SIM card against unauthorized use. The PIN code is usually supplied with the SIM card. When the PIN code request is enabled, the code is asked each time the phone is switched on. Execute VK PC Sync Checking the power of mobile, connecting the cable between PC and mobile. If you key in incorrect PIN code three times in succession, the phone will lock and you will be required to enter 160 161 OTHER FUNCTIONS Installation a PUK code. When you enter a new PIN code, you will have no enter your new password twice to confirm correct. PIN2 code If you key in an incorrect PIN2 code three times in succession, enter the PUK 2 code and then press the When you enter a new PIN2 code, you will have to enter it twice for confirmation and then press the key. The PUK2 code, supplied with some SIM cards, is required to change a blocked PIN2 code. If you key in an incorrect PUK2 code ten times in succession, you cannot use the functions requiring the PIN2 code. Contact your service provider for a new card. You cannot change the PUK2 code. If you lose the code, contact your service provider. Barring Password The 4-digit barring password is required when you use the Call Barring function. You can obtain the password from your service provider when you subscribe to this function. key. PUK code The PUK (Personal Unblocking Key) code is used for changing a blocked PIN code. This code is usually supplied with the SIM card, if not contact your service provider. If you key in an incorrect PUK code ten times in succession, the SIM card will become void and you must obtain a new card. As the PUK code cannot be changed, contact your service provider if you forget the code. 162 163 OTHER FUNCTIONS Some SIM cards are provided with a PIN2 code. To use a function this code may be required. The use of this code requires the support of the SIM card. PUK2 code Using the Batteries The battery provided with the phone is a Lithium slim battery. Precautions When Using Batteries Never use any charger or battery that is damaged in any way. Use only approved batteries and recharge your battery only with approved chargers. When a charger is not in use, disconnect it from the power source. Do not leave the battery connected to a charger for more than a week, since overcharging may shorten its life. Use the battery only for its intended purpose. If you use the phone near the network base station, it uses less power ; talk and standby times are greatly affected by the signal strength on the cellular network and the parameters set by the network operator. Battery charging times depend on the remaining battery charge, the type of battery, and charger used. The battery can be charged and discharged hundreds of times, but it will gradually wear out. When the operation time (talk time and standby time) is noticeably shorter than normal, it is time to buy a new battery. Do not leave the battery in hot or cold places, such as in a car in summer or winter conditions, as you will reduce the capacity and life-time of the battery. Always try to keep the battery at room temperature. A phone with a hot or cold battery may temporarily not work, even when the battery is fully charged. Li-ion batteries are particularly affected by temperatures below 0 C (32 F). Accidental short circuiting can occur when a metallic object (coin, clip or pen)causes a direct connection between the + and - terminals of the battery (metal strips on the back of the battery), for example when you carry a spare battery in a pocket or bag. Short-circuiting the terminals may damage the battery or the object causing the short-circuit. If left unused, a fully charged battery will discharge itself over time. Dispose of used batteries in accordance with local regulations. Always recycle. Do not dispose of batteries in a fire. 164 165 OTHER FUNCTIONS Extreme temperatures will affect the charging capacity of your battery: it may require cooling or warming first. Safety Information Traffic Safety Electronic Devices Do not use a hand-held mobile phone while driving a vehicle. If using a hand-held phone, park the vehicle before conversing. Always secure the phone in its holder, do not place the phone on the passenger seat or where it can break loose in a collision or sudden stop. The use of an alert device to operate a vehicle lights or horn on public roads is not permitted. Most modern electronic equipment is shielded from radio frequency (RF) signals. However, certain electronic equipment may not be shielded against the RF signals from your mobile phone. Remember, road safety always comes first! Persons with pacemakers: Operating Environment Remember to follow any special regulations in force in any area and always switch off your phone whenever it is forbidden to use it, or when it may cause interference of danger. When connecting the phone or any accessory to another device, read its users guide for detailed safety instructions. Do not connect incompatible products. As with other mobile radio transmitting equipment, users are advised that for the satisfactory operation of the equipment and for the safety of personnel, it is recommended that the equipment should only be used in the normal operating position (held to your ear with the antenna pointing over your shoulder). Should always keep the phone more than 6 inches (15cm) from their pacemaker when the phone is switched on. Should not use the phone near around their chests. Should use the ear opposite the pacemaker to minimize the potential for interference. If you have any reason to suspect that interference is taking place, switch off your phone immediately. 166 167 OTHER FUNCTIONS Pacemakers Using the phone within 6 inches (20cm) may cause a potential interference with a pacemaker. Hearing Aids Some digital mobile phones may interfere with some hearing aids. For more information, contact your service provider. Car Electromagnetic wave signals may affect improperly installed or inadequately shielded electronic systems in a car. Check with the manufacturer regarding your car before using your phone. Potentially Explosive Atmospheres Switch off your phone when in any area with a potentially explosive atmosphere and obey all signs and instructions. Sparks in such areas could cause an explosion or fire resulting in bodily injury or even death. Users are advised to switch off the phone while at a refueling point (service station). Also switch your phone off when you are below deck on boats; in chemical transfer or storage facilities and in vehicles using liquefied petroleum gas as the air may contain chemicals or particles such as grain, dust or metal powders. 168 Only qualified personnel should service the phone, or install the phone in a vehicle. Faulty installation or service may be dangerous. Check regularly that all mobile phone equipment on your vehicle is mounted and operating properly. Do not store or carry flammable liquids, gases or explosive materials in the same compartment as the phone, its parts or accessories. Do not install your mobile phone equipment near an air bag. If the air bag inflates, your phone may be damaged. Switch off your phone before boarding an aircraft. The use of mobile phones in an aircraft may be dangerous to the operation of the aircraft, disrupt the wireless telephone network and may be illegal. Failure to observe these instructions may lead to the suspension or denial of telephone services to the offender, or legal action, or both. 169 OTHER FUNCTIONS Other Medical Devices Electromagnetic waves generated from the cellular phones may dangerously affect medical devices. Switch off your phone in health care facilities in accordance with their regulations. Vehicles Care and Maintenance Emergency Calls To Make an Emergency Call : 1. If the phone is not on, switch it on. 2. Key in the emergency number for your present location (for example, 999 or other official emergency number). Emergency numbers vary by location. 3. Press the SOS key. If certain features are in use (key guard, restrict calls, etc.), you may first need to turn those features off before you can make an emergency call. Consult this document and your local cellular service provider. When making an emergency call, remember to give all the necessary information as accurately as possible. Remember that your phone may be only means of communication at the scene of an accident-do not cut off the call until given permission to do so. 170 171 OTHER FUNCTIONS Important! This phone, like any mobile phone, operates using radio signals, wireless and landline networks as well as user-programmed functions that cannot guarantee connection in all conditions. Therefore, you should never rely solely upon any wireless phone for essential communications (for example, medical emergencies). Remember, to make or receive any calls the phone must be switched on and in a service area with adequate signal strength. Emergency calls may not be possible on all wireless phone networks or when certain network services and phone features are in use. When you cannot use this function, contact your local service provider. Your phone is a product of superior design and craftsmanship and should be treated with care. Carefully read the following information : Keep it and all its parts and accessories out of small children's reach. Keep it dry. Precipitation humidity and liquids contain minerals that will corrode electronic circuits. Do not use or store it in dusty, dirty areas. Do not store it in hot or cold areas. High or low temperatures can shorten the life of electronic devices, damage batteries, and warp or melt certain plastics. Do not store it in cold areas. When the phone warms up (to its normal operating temperature), moisture can form inside the phone, which may damage the phone. Do not drop, knock or shake it. Rough handling can break internal circuit boards. Do not use harsh chemicals, cleaning solvents, or strong detergents to clean it. Wipe it with a soft cloth slightly dampened in a mild soap and water solution. Do not paint the phone. Paint can clog the devices moving parts and prevent proper operation. Use only the supplied or an approved replacement antenna. Unauthorized antennas, modifications of attachments could damage the phone and may violate regulations governing radio devices. If the phone, battery, charger, or any accessory is not working properly, take it to your nearest qualified service facility. Radio Frequency (RF) Signals This VK4000 model meets international standards for exposure to radio waves. The exposure standard for wireless mobile phones employs a unit of measurement known as the Specific Absorption Rate, or SAR. Under the guidelines for your phone model, the SAR limit is 2.0 W/kg. Tests for SAR are conducted in accordance with CENELEC testing procedures using standard operating positions with the phone transmitting at its highest certified power level in all tested frequency bands. Although the SAR is determined at the highest certified power level, the actual SAR level of the phone while operation can be well below the maximum value. This is because the phone is designed to operate at multiple power levels so as to use only the power required to reach the network. In general, the closer you are to a wireless base station antenna, the lower the power output of the phone. 172 Please note that improvements to this product model could cause differences in the SAR value for later products; in all cases, products are designed to be within the guidelines. The SAR limit recommended by international guidlines (ICNIRP) for mobile phones used by the public is 2.0 watts/kilogram (W/kg) averaged over ten grams of tissue. The limit incorporates a substantial margin for safety to give additional protection for the public and to account for any variations in measurements. CENELEC is a European Union standard body. 173 OTHER FUNCTIONS Your mobile phone is a radio transmitter and receiver. It is designed and manufactured not to exceed the emission limits for exposure to radio frequency (RF) energy. These limits are part of comprehensive guidelines and establish permitted levels of RF energy for the general population. Those guidelines are based on standards that were developed by independent scientific organizations through periodic and thorough evaluation of scientific studies. The guidelines include a substantial safety margin designed to assure the safety of all persons, regardless of age and health. Before a phone model is available for sale to the public, it is tested to confirm compliance with the guidelines. The tests are performed in positions and locations (e.g.,at the ear and worn on the body) that conform to a uniform testing methodology determined by an expert standards body. The highest SAR values of this model are DCS band head SAR : 0.102 mW/g, GSM band head SAR : 0.641 mW/g. While there may be differences between the SAR levels of various phones and at various positions, they all meet the governmental requirement for safe exposure. Glossary Call Divert Ability to reroute calls to another mobile or fixed line. Conference Calling Ability to establish a conference call involving up to five additional parties. LCD (Liquid Crystal Display) Commonly used to refer to the screen display on the wireless phone. Antenna A device for transmitting or receiving signals. The size and shape of antennas is determined, in part, by the frequency of the signal they receive. Wireless phones and the base station must have antennas. Call Holding Ability to put one call on standby while answering or making another call; you can then switch between the two calls, as required. DTMF (Dual-tone Multi Frequency) You send DTMF signals when you enter numbers by pressing the digit keys. LED (Light Emitting Diode) Commonly used to refer to a small light on the wireless phone or on the Desktop Charger. The lights on the charger indicate that battery charging is taking place. ALS (Alternate Line Service) ALS provides the capability of associating two alternate lines with one SIM card. You can make and receive calls on either line as desired with this service. Call Barring Ability to restrict outgoing and incoming calls. 174 Call Waiting Ability to inform users that they have an incoming call when engaged on another call. CLI (Caller Line Identification) Service Service allowing subscribers to view or block the telephone numbers of callers. Hands-Free A feature that permits a driver to use a wireless phone without lifting or holding the handset an important safety feature for automobiles, tractors and most other motorized vehicles. GSM (Global System for Mobile Communication) International standard for cellular communication, guaranteeing compatibility between the various network operators. GSM covers most European countries and many other parts of the world. PIN (Personal Identification Number) Security code that protects the phone against unauthorized use. The PIN is supplied by the service provider with the SIM card. It may be a four to eight-digit number and can be changed, as required. 175 OTHER FUNCTIONS Airtime Actual time spent talking on the wireless phone. You are billed according to this reference. PUK (PIN Unblocking Key) Security code used to unlock the phone when an incorrect PIN has been entered three times in succession. The eight-digit number is supplied by the service provider with the SIM card. SIM (Subscriber Identification Module) A card containing an integrated circuit. The circuit contains the information about the phone operation. 176 Soft Keys The function of this key : Varies according to the function that you are currently using. Is indicated on the bottom line of the display just above the corresponding key. Voice Mail When you cannot be reached, you can record your voice using this function. Wireless Receives signals. There is not need to connect using a physical connection, such as a metal wire (copper) or fiber optic cable. For more details, contact your local service provider. There may be some differences between the phone and user manual. OTHER FUNCTIONS Roaming Use of your phone when you are outside your home area (when traveling for example). SMS (Short Message Service) A network service sending and receiving messages to and from other persons without the need to call. The incoming messages immediately appear on the display, and you can edit, receive and send the messages. 177 MEMO 178 MEMO 179