1
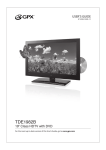
USER’S GUIDE V: 889-01 TDE3253B 32” LED HDTV + DVD For the most up-to-date version of this User’s Guide, go to www.gpx.com Warnings and Precautions CAUTION: TO PREVENT ELECTRIC SHOCK, MATCH WIDE BLADE OF PLUG TO WIDE SLOT, FULLY INSERT. WARNING: To reduce the risk of fire or electric shock, do not expose this apparatus to rain or moisture. Avertissement: Pour réduire le risque d’incendie ou de choc électrique, ne pas exposer cet appareil sous la pluie et l’humidité. CAUTION: Use of any controls or adjustments or performance of procedures other than those herein specified may result in hazardous radiation exposure. WARNING: Changes or modifications to this unit not expressly approved by the party responsible for compliance could void the user’s authority to operate the equipment. WARNING: Do not place this unit directly onto furniture surfaces with any type of soft, porous, or sensitive finish. As with any rubber compound made with oils, the feet could cause marks or staining where the feet reside. We recommend using a protective barrier such as a cloth or a piece of glass between the unit and the surface to reduce the risk of damage and/or staining. WARNING: Use of this unit near fluorescent lighting may cause interference regarding use of the remote. If the unit is displaying erratic behavior move away from any fluorescent lighting, as it may be the cause. WARNING: The battery, batteries, and battery pack shall not be exposed to excessive heat such as sunshine, fire, or the like. WARNING: Shock hazard - Do Not Open. AVIS: RISQUE DE CHOC ÉLECTRIQUE - NE PAS OUVRIR Mains Plug or Direct plug-in adapter is used as disconnect device and it should remain readily operable during intended use. In order to disconnect the apparatus from the mains completely, the Mains Plug or Direct plug-in adapter should be disconnected from the mains socket outlet completely. La fiche d’alimentation ou adaptateur de courant est utilisé comme dispositif de déconnexion et doit rester accessible pendant l’utilisation. Pour mettre l’appareil hors tension, la fiche ou adaptateur de courant doit être débranché de la prise de courant. Do not mix old and new batteries. Do not mix alkaline, standard (carbon-zinc), or rechargeable (ni-cad, ni-mh, etc) batteries. No mezcle baterías viejas y nuevas. No mezcle baterías alcalinas, estándar (carbono-zinc) o recargables (ni-cad, ni-mh, etc.). CAUTION: Danger of explosion if battery is incorrectly replaced. Replace only with the same or equivalent type. PRÉCAUTION: Danger d’explosion si les piles sont remplacées de façon incorrect. Remplacer les piles seulement par le même type de pile ou l’équivalent. CAUTION RISK OF ELECTRIC SHOCK DO NOT OPEN ATTENTION RISQUE D' ÉLECTROCUTION NE PAS OUVRIR WARNING: TO REDUCE THE RISK OF ELECTRIC SHOCK, DO NOT REMOVE COVER (OR BACK). NO USERSERVICEABLE PARTS INSIDE. REFER SERVICING TO QUALIFIED SERVICE PERSONNEL. The lightning flash with arrowhead symbol, within an equilateral triangle, is intended to alert the user to the presence of uninsulated "dangerous voltage" within the product's enclosure that may be of sufficient magnitude to constitute a risk of electric shock to persons. The exclamation point within an equilateral triangle is intended to alert the user to the presence of important operating and maintenance (servicing) instructions in the literature accompanying the appliance. This product utilizes a Class 1 laser to read Compact Discs. This laser Compact Disc Player is equipped with safety switches to avoid exposure when the CD door is open and the safety interlocks are defeated. Invisible laser radiation is present when the CD Player’s lid is open and the system’s interlock has failed or been defeated. It is very important that you avoid direct exposure to the laser beam at all times. Please do not attempt to defeat or bypass the safety switches. 2 Important Safety Instructions 1. Read these Instructions. 2. Keep these Instructions. 3. Heed all Warnings. 4. Follow all instructions. 5. Do not use this apparatus near water. 6. Clean only with a dry cloth. 7. Do not block any ventilation openings. Install in accordance with the manufacturer’s instructions. 8. Do not install near any heat sources such as radiators, heat registers, stoves, or other apparatus (including amplifiers) that produce heat. 9. Do not defeat the safety purpose of the polarized or grounding - type plug. A polarized plug has two blades with one wider than the other. A grounding type plug has two blades and a third grounding prong. The wide blade or the third prong are provided for your safety. When the provided plug does not fit into your outlet, consult an electrician for replacement of the obsolete outlet. 10. Protect the power cord from being walked on or pinched particularly at plugs, convenience receptacles, and the point where they exit from the apparatus. 11. Only use attachments/accessories specified by the manufacturer. 12. Use only with a cart, stand, tripod, bracket, or table specified by the manufacturer, or sold with the apparatus. When a cart is used, use caution when moving the cart/apparatus combination to avoid injury from tip-over. 13. Unplug this apparatus during lightning storms or when unused for long periods of time. 14. Refer all servicing to qualified service personnel. Servicing is required when the apparatus has been damaged in any way, such as power-supply cord or plug is damaged, liquid has been spilled or objects have fallen into the apparatus, the apparatus has been exposed to rain or moisture, does not operate normally, or has been dropped. Special note: When placing your unit on a lacquered or natural finish, protect your furniture with a cloth or other protective material. Customer Support: 1-888-999-4215 FCC Warnings Warning: Changes or modifications to this unit not expressly approved by the party responsible for compliance could void the user’s authority to operate the equipment. NOTE: This equipment has been tested and found to comply with the limits for a Class B digital device, pursuant to Part 15 of the FCC Rules. These limits are designed to provide reasonable protection against harmful interference in a residential installation. This equipment generates, uses, and can radiate radio frequency energy and, if not installed and used in accordance with the instructions, may cause harmful interference to radio communications. However, there is no guarantee that interference will not occur in a particular installation. If this equipment does cause harmful interference to radio or television reception, which can be determined by turning the equipment off and on, the user is encouraged to try to correct the interference by one or more of the following measures: • Reorient or relocate the receiving antenna. • Increase the separation between the equipment and receiver. • Connect the equipment into an outlet on a circuit different from that to which the receiver is connected. • Consult the dealer or an experienced radio/TV technician for help. Additional Warnings The apparatus shall not be exposed to dripping or splashing and that no objects filled with liquids, such as vases, shall be placed on apparatus. L’appareil ne doit pas être exposé aux écoulements ou aux éclaboussures et aucun objet ne contenant de liquide, tel qu’un vase, ne doit être placé sur l’objet. Battery shall not be exposed to excessive heat such as sunshine, fire or the like. Les piles ne doivent pas être exposées à de forte chaleur, tel qu’à la lumière du soleil, au feu ou autres choses de semblable. Caution marking is located at the rear or bottom of the apparatus. Attention marquage est situé sur le paneau arrière ou inférieur de l’unité. The marking information is located at the rear or bottom of apparatus. Le marquage est situé sur le paneau arrière ou inférieur de l’unité. This symbol indicates that this product incorporates double insulation between hazardous mains voltage and user accessible parts. This product incorporates copyright protection technology that is protected by U.S. patents and other intellectual property rights. Use of this copyright protection technology must be authorized by Rovi Corporation, and is intended for home and other limited viewing uses only unless otherwise authorized by Rovi Corporation. Reverse engineering and disassembly are prohibited. 3 32” LED HDTV + DVD Includes • • • Remote control: requires 2 AAA batteries (included) 3.5 mm to RCA cable Removable stand * Some pixels may be visible on the screen, appearing as tiny red, green, blue or black spots. This is normal and is not a defect on the TV nor does it negatively affect the performance. Setup Power Remote AC power input: plug the AC cord into a standard wall outlet. Requires 2, AAA-size, batteries (included) OPEN 4 Table of Contents Warnings and Precautions . . . . . . . . . . . . . . . . . . . . . . . . . . . . . . . . . . . . . . . . . . . . . . . . . . . . . . . . . . . . . . . . . . . . . . . . . . . . . . . . . . . . . . . 2 Important Safety Instructions. . . . . . . . . . . . . . . . . . . . . . . . . . . . . . . . . . . . . . . . . . . . . . . . . . . . . . . . . . . . . . . . . . . . . . . . . . . . . . . . . . . . 3 32” LED HDTV + DVD . . . . . . . . . . . . . . . . . . . . . . . . . . . . . . . . . . . . . . . . . . . . . . . . . . . . . . . . . . . . . . . . . . . . . . . . . . . . . . . . . . . . . . . . . . . . 4 Includes Setup. . . . . . . . . . . . . . . . . . . . . . . . . . . . . . . . . . . . . . . . . . . . . . . . . . . . . . . . . . . . . . . . . . . . . . . . . . . . . . . . . . . . . . . . . . . . . . . . . . . . . . . . . . . 4 Power Remote Table of Contents. . . . . . . . . . . . . . . . . . . . . . . . . . . . . . . . . . . . . . . . . . . . . . . . . . . . . . . . . . . . . . . . . . . . . . . . . . . . . . . . . . . . . . . . . . . . . . . . 5 Introduction. . . . . . . . . . . . . . . . . . . . . . . . . . . . . . . . . . . . . . . . . . . . . . . . . . . . . . . . . . . . . . . . . . . . . . . . . . . . . . . . . . . . . . . . . . . . . . . . . . . . 6 Setup. . . . . . . . . . . . . . . . . . . . . . . . . . . . . . . . . . . . . . . . . . . . . . . . . . . . . . . . . . . . . . . . . . . . . . . . . . . . . . . . . . . . . . . . . . . . . . . . . . . . . . . . . . . 8 Connecting a TV Antenna Connecting a Set-Top box Auto Scanning for Channels Connecting Basic Cable Favorites and Clock. . . . . . . . . . . . . . . . . . . . . . . . . . . . . . . . . . . . . . . . . . . . . . . . . . . . . . . . . . . . . . . . . . . . . . . . . . . . . . . . . . . . . . . . . . . . . . 9 Adding Favorites Viewing Favorites Setting the Clock TV Menu and Parental Controls . . . . . . . . . . . . . . . . . . . . . . . . . . . . . . . . . . . . . . . . . . . . . . . . . . . . . . . . . . . . . . . . . . . . . . . . . . . . . . . . . 10 Parental Controls (V-Chip) DVD and CD. . . . . . . . . . . . . . . . . . . . . . . . . . . . . . . . . . . . . . . . . . . . . . . . . . . . . . . . . . . . . . . . . . . . . . . . . . . . . . . . . . . . . . . . . . . . . . . . . . . . 11 Loading a DVD or CD Playing a DVD or CD Programming a DVD or CD Ejecting a DVD or CD DVD Setup Menu Connecting Other Devices . . . . . . . . . . . . . . . . . . . . . . . . . . . . . . . . . . . . . . . . . . . . . . . . . . . . . . . . . . . . . . . . . . . . . . . . . . . . . . . . . . . . . . 12 Connecting a Set-Top Box Connecting a Gaming Device Connecting a DVD Player or VCR Connecting Other Devices . . . . . . . . . . . . . . . . . . . . . . . . . . . . . . . . . . . . . . . . . . . . . . . . . . . . . . . . . . . . . . . . . . . . . . . . . . . . . . . . . . . . . . 13 Connecting a Computer Using the Optical Audio Out Using the 3.5 MM Audio Out USB and SD, MMC, MS Memory Card . . . . . . . . . . . . . . . . . . . . . . . . . . . . . . . . . . . . . . . . . . . . . . . . . . . . . . . . . . . . . . . . . . . . . . . . . . . . 14 Connecting a USB Thumb Drive Using a USB Thumb Drive Connecting an SD, MMC, or MS Memory Card Using an SD, MMC, or MS Memory Card Mounting. . . . . . . . . . . . . . . . . . . . . . . . . . . . . . . . . . . . . . . . . . . . . . . . . . . . . . . . . . . . . . . . . . . . . . . . . . . . . . . . . . . . . . . . . . . . . . . . . . . . . . 15 Mounting the Television Company Information . . . . . . . . . . . . . . . . . . . . . . . . . . . . . . . . . . . . . . . . . . . . . . . . . . . . . . . . . . . . . . . . . . . . . . . . . . . . . . . . . . . . . . . . . . 16 International Support Contact Information Warranty Green Initiative Customer Support: 1-888-999-4215 5 Introduction Eject Press to eject a loaded disc. Play/Pause Press to play or pause a loaded disc. SD/MMC/MS Card Reader ACK • DI USB Port Volume ± BACK Press to adjustSC the volume. Channel± Press to adjust the television channel. • DISC B DVD/CD Player Setup Press to access the television setup menu. Source Press to adjust the source. Power Press to turn the television off and on. Audio Output HDMI Input 1 RF Input RCA Input AC Input Component Video Input/ Composite Video Input PC Audio VGA/PC In 6 Optical Output HDMI Input 3 HDMI Input 2 Power Press to power the television off or on. Source Press to switch between sources. Aspect Press to adjust the aspect ratio between ZOOM, WIDE, CINEMA, and NORMAL. Number Keypad Freeze Press to freeze or unfreeze the current frame in TV mode. Display Press to view the on-screen display. Favorites In TV mode, press to view your favorites list. Picture Press to adjust the picture between STANDARD, SOFT, USER, and DYNAMIC. The user mode can be customized by accessing Picture Settings in the menu. Guide In TV mode, press to view the on-screen television guide. Sound Press to adjust the sound between STANDARD, MUSIC, USER, MOVIE, and SPORTS. The user mode can be customized by accessing Sound Settings in the menu. FAVORITES Volume ± Press to adjust the volume. Channel ± Press to adjust the television channel. Audio/CC Press to adjust the current audio settings for the loaded DVD. In TV mode, press to turn closed captioning off or on. Prev In TV mode, press to switch to the previous channel. Mute Press to mute the volume. AUDIO Stop Press to stop a disc during play. Exit Press to exit the current on-screen menu. Setup Press to view the television setup menu. Skip Press to skip between chapters or tracks on a loaded disc. Repeat Press to repeat a title, chapter, track, or entire disc. DVD Setup Press to access the DVD setup menu. Prog Press to program a loaded disc to play titles, chapters, or tracks in a specified order. Angle Press to view alternate angles on supported DVDs. Eject Press to eject a loaded disc. Wide Press to switch between 4:3 LB, 4:3 PS, and 16:9. Customer Support: 1-888-999-4215 Arrows/Enter Press to make selections in the on screen or disc menus. Play/Pause Press to play or pause a loaded disc. Skip Press to skip between chapters or tracks on a loaded disc. Rewind Press to search through an individual chapter or track. Sleep Press repeatedly to set the sleep timer. After the set time has expired the television will automatically power off. SETUP A-B Press to create a repeating loop on a specified section of a loaded DVD. Fast Fwd Press to search through an individual chapter or track. Menu Press to access the loaded DVD’s menu. Title Press to access the title menu on a loaded DVD. Zoom Press to zoom in or out on a loaded DVD. 7 Setup Connecting a TV Antenna Requires a TV antenna (not included). Connecting Basic Cable Requires a cable connection. 1. Connect a VHF, UHF, or HDTV antenna to the RF Input on the television. 1. Connect a cable to the RF Input on the television. 2. Press the Source button to switch to TV mode. 2. Press the Source button to switch to TV mode. 3. Press the Setup button to access the setup menu. 3. Press the Setup button to access the setup menu. 4. Press the Arrow () buttons to highlight the CHANNEL icon. Press the Enter button. 4. Press the Arrow () buttons to highlight the CHANNEL icon. Press the Enter button. 5. Press the Arrow () buttons to highlight Air/ Cable. Press the Arrow () buttons to select AIR. 5. Press the Arrow () buttons to highlight Air/ Cable. Press the Arrow () buttons to select CABLE. 6. Press the Arrow () buttons to highlight AUTO SCAN. Press the Enter button to begin scanning for available channels. 6. Press the Arrow () buttons to highlight Auto Scan. Press the Enter button to begin scanning for available channels. Connecting a Set-Top box Requires a Set-Top Box (not included). If your Set-Top Box has an HDMI Output: • Connect the HDMI output on the Set-Top Box to the HDMI Input on the television using an HDMI cable (not included). If your Set-Top Box has a Composite Video Output: • Connect the video output on the Set-Top Box to the Composite Video Input on the television using an A/V RCA cable (not included). Connect the audio output on the Set-Top Box to the RCA Audio Input on the television. If your Set-Top Box has a Component Video Output: • Connect the component video output on the Set-Top Box to the Component Video Input on the television using a component RCA cable (not included). Connect the audio output on the Set-Top Box to the RCA Audio Input on the television. After connecting your Set-Top Box: • Press the Source button to switch to YPbPr/AV, or HDMI 1, 2 or 3 to match the connection used. Auto Scanning for Channels The Auto Channel Scan must be run before any channels can be viewed on the television. 1. Press the Source button to switch to TV mode. 2. Press the Setup button to access the setup menu. 3. Press the Arrow () buttons to highlight the CHANNEL icon. Press the Enter button. 4. Press the Arrow () buttons to highlight Air/Cable. Press the Arrow () buttons to select AIR. 5. Press the Arrow () buttons to highlight Auto Scan. Press the Enter button to begin scanning for available channels. Note: Initial channel scanning process may take up to 15 min. 8 Favorites and Clock Adding Favorites Setting the Clock 1. Press the Source button to switch to TV mode. 1. Press the Setup button to access the setup menu. 2. Press the Setup button to access the setup menu. 3. Press the Arrow () buttons to highlight the CHANNEL icon. Press the Enter button. 4. Press the Arrow () buttons to highlight the Favorites icon. Press the Enter button. 5. Use the Arrow () buttons to select the desired channels and then press the Enter button. Viewing Favorites 1. Press the Source button to switch to TV mode. 2. Press the Favorites button to view a list of your saved favorites. Customer Support: 1-888-999-4215 2. Press the Arrow () buttons to highlight the TIME icon. Press the Enter button. 3. Press the Arrow () buttons to highlight TIME ZONE. Press the Arrow () buttons to select your current time zone. 4. Press the Arrow() buttons to highlight AUTO CLOCK. Press the Arrow() buttons to turn auto clock off and on. When the correct time zone is set, auto clock will automatically set your clock and date for you. 5. To set the time and date manually, turn auto clock off, highlight CLOCK, and use the Arrow and Enter buttons to manually set the time and date. 9 TV Menu and Parental Controls Parental Controls (V-Chip) 1. Press the Source button to switch to TV mode. 2. Press the Setup button. 3. Press the Arrow () buttons, highlight LOCK, and press the Enter button. 4. The default passcode for the parental lock is: 0000 5. Enter the passcode to access the LOCK preferences. 6. From this menu, you can lock specific ratings from the United States rating system or the Canadian rating system by accessing the V-CHIP settings. You can also lock the buttons on the television or lock specific sources from access. 10 DVD and CD Note: This unit is not compatible with MP3 CDs. Loading a DVD or CD 1. Insert a DVD or CD into the slot-load disc drive, with the label side of the DVD or CD facing the rear of the television. K• ACK • DI Once a DVD or CD is loaded into the television, the TV will automatically switch to DVD mode. This feature may not function in USB/SD mode. CB DIS AC BACK • SC DISC B Playing a DVD or CD 1. Follow the instructions for Loading a DVD or CD. 2. Press the Play/Pause button on remote to begin playing the loaded disc. Programming a DVD or CD 1. While a DVD or CD is playing, press the Program button on the remote. DVD Setup Menu In DVD mode, press the DVD Setup button to access the DVD setup menu. Press the DVD Setup button to exit the DVD setup menu. 2. Using the Number Keypad enter in the chapters or tracks in the order you want them to play. 3. Highlight the on-screen Start button using the Arrow buttons and press the Enter button. 4. The programmed chapters and tracks will now play in the designated order. 5. To cancel a program, press the Stop button twice. Ejecting a DVD or CD 1. Press the Eject button to eject the disc. Note: The Eject button is located on the front of the unit. Customer Support: 1-888-999-4215 11 Connecting Other Devices Connecting a Set-Top Box You will need: a set-top box, composite and RCA stereo cables or component and RCA stereo cables or an HDMI cable (not included). 1. Connect the set-top box’s audio and video outputs to the corresponding audio and video inputs on the television. 2. Power the television on and press the Source button to switch to the connected input ( YPbPr/AV, or HDMI 1,2 or 3). Connecting a Gaming Device You will need: a gaming device, composite and RCA stereo cables or component and RCA stereo cables or an HDMI cable (not included). 1. Connect the gaming device’s audio and video outputs to the corresponding audio and video inputs on the television. 2. Power the television on and press the Source button to switch to the connected input (YPbPr/AV, or HDMI 1,2 or 3). HDMI Connecting a DVD Player or VCR HDMI You will need: a DVD player or VCR, composite and RCA stereo cables or component and RCA stereo cables or an HDMI cable (not included). 1. Connect the DVD player or VCR’s audio and video outputs to the corresponding audio and video inputs on the television. 2. Power the television on and press the Source button to switch to the connected input (YPbPr/AV, or HDMI 1, 2 or 3). HDMI 12 Connecting Other Devices Connecting a Computer You will need: a PC with a VGA output, and a VGA cable (not included). 1. Connect the computer’s VGA output to the VGA/PC Input on the television. 2. Power the television on and press the Source button to switch to the PC Mode. 3. Audio from the connected PC can be input to the television through the TV’s PC Audio Input by using a 3.5mm audio cable (not included). Using the Optical Audio Out You will need: a (home theater) with an Optical Audio Input and a Digital Optical Audio Cable (not included). 1. Connect the Digital Optical Audio Cable to the (home theater system) and the television. 2. Adjust the settings on your (home theater) to play audio from the connected Optical Audio Input. Please note: home theater systems may label the Optical Audio Input source differently, such as “PCM”, or “Digital Audio Input”. Please consult your home theater system’s user manual in order to select the correct input source. 3. Audio from the television will now be played through the connected (home theater system). Using the 3.5 MM Audio Out Requires a 3.5 mm to RCA audio cable (included) Note: This is not a headphone jack, please do not attempt to use headphones with this port. 1. Connect a 3.5 mm to RCA cable to the Audio Output on the unit and an audio input on an external stereo system. 2. Adjust the external stereo systems source to the input used in step one. 3. Audio played through the unit will now be heard through the connected stereo system. Customer Support: 1-888-999-4215 13 USB and SD, MMC, MS Memory Card Connecting a USB Thumb Drive 1. Load a USB thumb drive into the USB Port as shown in the image to the right. Using a USB Thumb Drive 1. Follow the instructions for Connecting a USB thumb drive. 2. Press the Source button to switch to USB mode. 3. Use the Arrow and Enter buttons to select and play content from the connected USB thumb drive. Supports: MP3, JPEG, AVI, MPEG 1, 2 and 4 Connecting an SD, MMC, or MS Memory Card 2. Press the Source button on the remote to switch to SD mode. 3. Use the Arrow and Enter buttons to select and play content from the connected SD, MMC, or MS memory card. Supports: MP3, JPEG, AVI, MPEG 1, 2 and 4 14 MS 1. Follow the instructions for Connecting an SD, MMC, or MS Memory Card. MMC Using an SD, MMC, or MS Memory Card SD 1. Load an SD, MMC, or MS memory card into the Card Slot as shown in the image to the right. Mounting Mounting the Television Please consult a professional before attempting to mount the television. Due to it’s large size, it is recommended to have two or more people when attempting to move or mount this unit. Customer Support: 1-888-999-4215 200mm 100mm 15 Company Information International Support Green Initiative To download this User’s Guide in English, Spanish, and French, or to get answers to frequently asked questions, visit the support section at: www.gpx.com Para descargar este Manual del Usuario en inglés, español y francés, o para obtener respuestas a preguntas frecuentes, visite la sección de apoyo en: www.gpx.com Pour télécharger ce guide de l’utilisateur en anglais, espagnol ou français, ou pour obtenir des réponses à des questions fréquemment posées, consultez la rubrique d’assistance sur: www.gpx.com Contact Information Email Support: [email protected] Email Parts: [email protected] Phone Support: 1-888-999-4215 Website: www.gpx.com Warranty For Warranty Information and the most up-to-date version of this User’s Guide, go to: www.gpx.com Environmental Commitment to ‘Protect for Today and Sustain for Tomorrow’ On a continual basis DPI, Inc. is making efforts to sustain the environment and improve the recyclability of its products and packaging. Focusing on “protecting for today and sustaining for tomorrow” DPI, Inc. has committed to reducing packaging size, increasing the usage of recyclable plastics, and ensuring that packaging and manuals are made with up to 85% recycled material. In addition to material consideration, DPI, Inc. has also focused on the finer details that positively impact the environment such as employing the usage of soy-based inks. DPI, Inc. also ensures that the factories that produce the company’s wide variety of consumer electronics adhere to environmentally friendly air and water restrictions. This is yet another example that every step of the way DPI, Inc. is making efforts to lessen any impact on the environment. In 2011 DPI, Inc. also began conversations with Energy Star in order to ensure that the consumer electronics being produced meet high standards of energy efficiency. The ultimate goal is keeping energy costs for consumers low while providing quality, feature-rich products. Copyright © 2013 Digital Products International (DPI, Inc.) | All other trademarks appearing herein are the property of their respective owners. Specifications are subject to change without notice