1
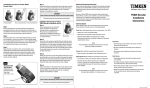
List of contents
Barkhausen effect meter
type MEB-2c
User manual
2.1.
2.2.
2.3.
2.4.
2.5.
2.6.
2.7.
2.8.
2000
“Mag-Lab”
1. Basic features of the meter
2. Main specifications of the meter
s.c.
Magnetic NDT
POLAND
80-335 Gdańsk ul. Sztormowa 1A/6
tel/fax (48 58) 557 82 44
3
5
5
Magnetisation conditions
Measurements of Barkhausen effect intensity
5
Measurement of magnetisation control parameter 6
Measurement rate
6
Temperature range
6
Power consumption
6
Dimensions
6
Meter ensemble specification
7
3. Background of the Barkhausen effect
4. Meter structure and its operating
4.1. Meter structure
4.2.
Meter control points and plugs
4.3.
Work with meter
4.3.1 Installation and start operating the meter
4.3.2. Measurement of the v1 parameter
4.3.3. Measurement of the x parameter
4.3.4. Measurement of the counter parameter
4.3.5. Measurement of the v2 parameter
4.3.5. Accumulator and ‘charger’ unit service
4.3.6. Data transfer
Figures
8
10
10
12
14
14
14
15
15
16
17
18
1. Basic features of the meter
The MEB-2c meter it is a fully portable low power
consumption measuring set designed mainly for in
field fast two-parameter measurements of the
Barkhausen effect intensity with control of
magnetisation conditions. The Barkhausen effect
intensity depends on two factors: microstructure as well
on the mechanical stress level (external or residual).
The MEB-2c meter can be used for evaluation of both
these factors, respectively.
The MEB-2c meter includes the probe to activate
and to detect Barkhausen effect signal from a sample
and the central unit to supply the probe, to process,
display and send to external PC the data. The central
unit includes the analogue part for input voltage
waveform processing and the digital part with
microprocessor system that controls the analogue to
digital conversion of signals, the output data
visualisation with LED screen and communication with
external digital systems by means of the RS232 port.
The probe of MEB-2c meter contains magnetising
electromagnet type C and two sensors: ferrite core with
pick-up coil (A) for the Barkhausen effect detection
and reference pick-up coil (B) wounded on the magnet
core for magnetisation process control, respectively.
Voltage of Barkhausen effect from pick-up coil (A)
is filtered, amplified and analysed by analogue part
and then by digital part. The MEB-2c meter provides
values of two parameters that are related to the
Barkhausen effect intensity over one period of
magnetisation:
3
- v1 - voltage Us proportional to effective intensity of
the Barkhausen effect waveform;
- counter - number Nc related to the number of
Barkhausen effect pulses. The number of pulses
depends on the voltage threshold which can be
selected by user in order to achieve the highest
resolution of BE inspection .
The MEB-2c meter makes also subtraction from the
parameter v1 of its value measured at chosen
reference point and stored by meter. The resulting
difference (parameter x) depicts thus the relative
change of the Barkhausen effect intensity. This option
allows to perform quick evaluation of differences of or
magnetic properties or stress level over the tested
material.
Voltage from the reference pick-up coil (B) is
analysed by central unit in order to detect the parameter
v2 - the amplitude of voltage value Uc that
is
proportional to maximal level of magnetic flux
derivative in the magnetising core. This parameter can
be used in order to optimise the probe position against
the sample as well to evaluate the magnetic properties
of the sample.
The three parameters (v1 (or x), counter and v2)
are displayed with the LCD screen and also
transferred to the RS232 port.
User can tune the gain of the Barkhausen effect
voltage amplifier and threshold level of
the
Barkhausen effect pulses analyser.
4
2. Main specifications of the meter
2.1. Magnetisation conditions
Magnetisation current - driving a magnet core - has
triangular waveform with frequency of about 25 Hz
and amplitude of about 100 mA.
2.2. Measurements of Barkhausen effect intensity
A. Amplifier gain variation
Gain can be varied in range from 0 up to 50 dB with 1
dB resolution.
B. Parameter v1 (effective intensity of the BE)
Range of measurement with LCD screen: 0 ÷ 1023 mV.
C. Parameter x (differential mode of v1 measurement)
Parameter x it is the difference between actual and
reference value of v1.
Range of x measurement with LCD screen: 0 ÷ 1023
mV.
D. Parameter counter (number Nc of Barkhausen
pulses within a 25 periods)
Range of counter measurement with LCD screen : 0
÷ 65536.
Number of pulses depends on threshold level. This
level is tuned in range from 0 up to 9 (in arbitrary
units).
5
2.3. Measurement of magnetisation control parameter
Parameter v2 depicts the amplitude of magnetic flux
derivative in the magnetising core. Range of the v2
parameter measurement with LCD screen:
0-1023 mV.
2.4. Measurement rate
Magnetisation frequency and signal processing rate are
permanents. The values of three parameters are
provided to the LCD screen and to the RS232 port with
frequency of about 1 Hz.
2.5. Temperature range
Central unit: from 0 oC to +40 oC. Lower limit is due
to applied LCD screen
Probe: from -20 oC to +40 oC.
2.6. Power consumption
Power consumption: maximal - 3.6 W (with LCD back
light ON) and minimal - 2.9 W (with LCD back light
OFF).Time of work with accumulator (Ni-Cd; 2400
mAh) : of about 4 hours. Alimentation by external
power pack: 220V/50 Hz or 120V/60 Hz.
2.7. Dimensions
A. Central unit: height - 70 mm, width: 145 mm,
length: 52 mm; weight - about 1000 G
B. Probe (type MEB-2c2): height - 48 mm, width: 21
mm, length: 32 mm; cable length: about 1.5 m.
6
2.8. Meter ensemble specification
- measuring unit,
- probe with cable
- charger
- external power pack
- transformer
- user manual
- software for data storage with PC
- metallic case.
3. Background of the Barkhausen effect
The Barkhausen effect (BE) is related to the abrupt
change of magnetic domain wall (DW) position in the
ferromagnetic body subjected to the change of external
magnetic field strength. Such jump, producing abrupt
changes in local magnetisation, can be detected by
means of a voltage pulse induced in a pick-up coil
placed near the sample surface. The voltage signal of
BE as induced for magnetisation frequency or order of
Hz, has a frequency spectrum from magnetising
frequency up to 300 kHz. The electromagnetic waves
generated by BE jump are attenuated by conducting
material due to eddy currents and this determines the
depth of layer of about 1 mm from which an
information about the BE events can be obtained.
Intensity of the BE depicts hysteresis process due
to local defects and thus depends mainly on
microstructure of the material. The BE intensity
maximum peaks at the magnetic field strength close to
the coercitvity field Hc. The height of this maximum
is lower for the magnetically hard materials than for the
magnetically soft materials. Such dependence of BE
intensity is used for nondestructive evaluation of
magnetic properties of tested material. The mechanical
stress applied to the ferromagnetic material with nonzero magnetostriction parameter has an effect on the
BE intensity.
8
7
For materials with positive magnetostriction (case of
most ferromagnetic steels), tensile stress increases
volume of magnetic domains with magnetisation vector
ax parallel to the stress ax. Compressive stress leads
to increase
of magnetic domain volume with
magnetisation vector perpendicular to the load ax. Thus
tensile stress increases and compressive stress
decreases a surface of DW population which perform
the BE jumps at given field strength during cycling. It
leads to increase or decrease of BE intensity in function
of tensile or compressive stress, respectively. The
mostly monotonous dependence of the BE intensity on
stress has made it a tool for nondestructive evaluation
of the residual stress, too.
The BE intensity and it dependence on stress is
strongly specific for a given material. It makes evident
that calibration procedures are necessary for
application of BE for NDE purpose.
9
4. Meter structure and its operating
4.1. Meter structure
Block diagram of MEB-2c meter is shown in
Fig. 1. There are presented three main parts: probe,
central unit and external power source (charger - C,
power pack - S and transformer - T).
The Barkhausen effect (BE) probe (G in Fig. 1)
contains a C-core with a primary driving coil
magnetising the specimen (output s1 of central unit)
and a secondary reference coil (input s3 of central
unit) detecting the magnetic flux changes. The C-core
has high permeability and low hysteresis loss. The
poles of the magnet are rounded in order to fit the
poles to curved surfaces. The BE is detected with a
sensor coil which is positioned halfway between the
pole pieces. This sensor coil has movable ferrite core,
which is pressed by a spring to contact the specimen
surface. The voltage induced in sensor coil is at first
amplified with a primary amplifier (within the probe
box) and then provided to the central unit (input s2 of
central unit). The central unit of MEB-2c meter is
powered by internal power block (BZ) including the
accumulator and voltage stabilisation system. The
external power source is used for accumulator service
(charging and discharging) and for powering directly to
central unit.
The magnetisation current (s1) is provided to the
probe (G) with the current generator (GM).
10
The BE voltage (s2) from probe (G) is amplified by
amplifier (K1). Its gain can be tuned with switches P1
and P2. The output voltage of K1 is analysed by block
UA. The UA block contains two parts: 1 - an ac to dc
converter with RMS like system providing output
signal Us and 2 – the Barkhausen effect pulses
analyser with the BE pulse amplitude discriminator,
providing output standard signal Up when pulse
amplitude is higher then threshold voltage level.
Discrimination is tuned with switch P3 that changes the
threshold voltage (provided by block UR). The control
signal (s3) from probe G is proportional to the
magnetic flux derivative in the magnetising core. This
signal is analysed by block K2. The output voltage Uc
from this block is proportional to the amplitude of the
envelope of the reference signal s3.
The main part of central unit of MEB-2c it is the
microprocessor unit (UC). The UC unit acquires the
signals from the BE signal analyser (UA) and from
block K2, drives the LCD screen and transfers data to
the RS232 port (RS). The UC unit makes analogue to
digital conversion of signals Us and Uc from UA and
counts the BE pulses Up. This unit evaluates in real
time the values of three parameters: parameter V1 –
related to the voltage Us (effective intensity of the
BE), parameter v2 related to voltage Uc (flux
derivative) and parameter counter – related to signal
Up (number Nc of the BE pulses).
The UC block makes also subtraction from the
parameter v1 of the reference value recorded in the
UC memory. The resulting difference signal (parameter
x) replaces the v1 parameter on the LCD screen. This
option is switched to ON or to OFF with switches P5
and P6, respectively.
The data from RS232 port can be transmitted to
any type of PC (IBM compatible) using software
provided by Mag-Lab. Three parameters (counter, v1
(or x) and v2 are displayed on LCD screen. The back
light option of screen can be switched with W2 using
ON or OFF buttons. Using switch P4 (option INFO)
one can display short information about MEB-2c meter
serial number and Mag-Lab Company address.
4.2. Meter control points and plugs
Fig. 2 shows the front panel and Fig. 3 depicts the back
panel of the MEB-2c meter, respectively. The red
labels in these figures refer to the parts of blockdiagram as shown in Fig. 1.
Front Panel
Button W1 (MAIN) switches ON or OFF the power to
the meter from the
internal accumulator.
Button W2 (BL) switches ON or OF the back light to
the LCD screen.
11
LCD screen
shows values of the
12
following parameters:
1) counter – number of the BE pulses,
2) v1 – effective intensity of the BE voltage or –
optionally –
x – difference between actual and memorised
value of v1,
3) v2 – magnetisation process control signal.
Button P4 switches the INFO option to the LCD
screen. Second press on this button switch off this
INFO from the screen.
Button P5 switches ON the option when the x
parameter is shown against the v1
Button P6 switches OFF the ‘x parameter’ option, the
v1 is shown again.
Three switches (P1, P2, and P3) have double knobs
system to decrease (upper) and increase (bottom) their
state within the range from 0 to 9.
Switches P1 and P2 are used for setting of the amplifier
gain.
Switch P3 increases the threshold voltage level for the
BE pulse counter.
Back Panel
Input G1 is used for probe (G).
Input G2 is used for + 7.2 V dc voltage from
external power source (positive voltage on the external
side of plug!).
Output G3 is for data transfer with RS232
Input G4 connects to the accumulator and is
13
used for its charge and for discharge, respectively.
(positive voltage on central pine of plug).
4.3. Work with meter
4.3.1. Installation and start operating the meter
The meter is ready for use within a time of about few
seconds from the beginning when probe is plugged into
central unit. There is no need of any regulations or
corrections of meter parameters.
The meter can be supplied with power by external
power source using module ‘charger’ and power pack.
The probe position should be perpendicular to the
surface. This position is controlled by means of
parameter v2 and counter level check. The optimal
position of the probe is when all readings are maximal.
4.3.2. Measurement of the v1 parameter
Counter: 1000
v1: 500 v2: 600
The v1 parameter depicts effective intensity of the BE.
Its level depends on the gain of BE signal amplifier
selected with switches P1 and P2 (see Fig.1, K1).
It is recommended to set the v1 parameter value close
to one half of measuring range – e.g. level v1 = 500.
14
4.3.2. Measurement of the x parameter
Counter: 1000
x: +200 v2: 600
The MEB-2c meter allows measurements of parameter
x which provides a difference between actual level of
v1 parameter and its stored value. The reference value
of v1 parameter is stored each time in meter memory
when reference mod UR is set on with switch P5. The x
parameter allows to perform inspection of BE
intensity variation against reference level evaluated at
given place. It can be also used for quick detection of
areas with positive or negative stress, respectively.
Switch to standard mode when v1 parameter is shown
on screen is made with button P6.
4.3.3. Measurement of the counter parameter
Counter: 1000
v1: 500 v2: 600
The counter parameter depicts the number of
BE pulses with amplitude higher then given threshold
counted within given number of magnetisation periods.
Threshold level is tuned with switch P3.
It is recommended to set the P3 so that the
counter ≈ 1000 for unstressed material and
counter ≈ 100 for the highest compressive 15
stress.
Attention: The number of counted BE pulses for a
given threshold depends on amplifier gain. It makes
that gain (switches P1, P2) and threshold (switch P3)
should be chosen simultaneously
to match
recommended levels of parameter v1 and counter.
The appropriate levels of gain and threshold can be
determined during stress calibration procedure.
4.3.4. Measurement of the v2 parameter
Counter: 1000
v1: 500 v2: 600
The v2 parameter depicts
level of magnetic flux derivative amplitude in
magnetising core. Its level depends thus on probe
position, quality of surface as well on permeability of
the material in question. That last factor makes, that v2
parameter depends also on stress level: it decreases for
compressive
and increases for tensile stress,
respectively. These dependencies make the v2
parameter suitable mainly for probe position control
and also for material quality inspection (together with
v1 and counter parameters).
16
standard.
4.3.5. Accumulator and ‘charger’ unit service
The accumulator in the MEB-2c meter allows BE
measurements in the field during a time of about 4
hours. The level of accumulator capability is not
signaled. Its low voltage leads to decrease of LCD
screen brightness. The accumulator is charged
automatically with ‘charger’ unit. The ‘charger’ unit
is plugged to the meter by two cables. Theirs plugs are
different in order to protect the meter against wrong
connections. Cable called ‘OUT DC 7.2 V’, ended with
longer plug, fits the input G2 of the meter. Cable
called ‘OUT 11 V’ fits the input G4 of the meter.
Accumulator is disconnected from internal power pack
when plug is in the G2 and is automatically charged
when plug is in G4 input. The Ni-Cd type accumulators
, which are applied in meter, should be discharged to
‘zero’ level after some times of charging and fully
charged with control of ‘charger’ unit. To start this
full ‘discharge’ and ‘charge’ mode , press the
‘discharge’ button on the backside of ‘charger’ unit.
Two LED lamps of ‘charger’ unit signalise the actual
state of work of this unit: green light for ‘discharge’
state and red light for ‘charge’ state, respectively. The
red lamp goes out when accumulator is fully charged.
The ‘charger’ unit is powered by external power pack
that provides + 12 V dc voltage and current of about
1.5 A. The as delivered power pack needs 220 V on
input and so the extra transformer 110/220
(50 VA) is used in order to fit USA 17
4.3.6. Data transfer
In order to use RS232 port of the MEB-2c meter for
data transfer, connect meter to PC (IBM type) input
‘com2’ with standard RS cable.
Data transfer is made with software ‘RS-MEB2c.exe’
which works with DOS and WIN system. Program
asks for name of file, where data will be stored. This
program allows to make measurements for twodimensional matrix of points. The dimensions of this
matrix are set by user when program starts work.
Program shows on PC screen actual values of three
parameters: counter, v1 and v2. These parameters can
be stored in virtual memory with <space> key pressed
and then transferred to the file with <z> key pressed.
Program is stopped with <k> key pressed. This
commend closes also the file.
Attention: program does not work when MEB-2c
meter is off.
Fig. 2. Front panel of MEB-2c: W1 – power switch (MAIN); W2 – back light switch (BL);
LCD - screen; P4 – switch INFO; P5 – switch UR ON; P6 - switch UR OFF;
P1, P2 – gain switches G [dB]); P3 – threshold voltage switch.
Fig. 3. Back panel of MEB-2c: G1 – probe input; G2 – charger input 1;
G3 – RS232 output; G4 - charger input 2.
1
G
G1
s2
a
b
3
b
a
W2
UA 3
4
2
(Uo)
K2
1 UR
2
G2
S
LCD
T
(Up)
(Us)
1
3
2
7
UC
4
8
5
6
G3
RS
(Uc)
GM
s1
C
BZ
1
s3
G4
W1
P2
K1
P3
a
b
2
P1
OFF b
ON a
P4
P5
ON
INFO
P6
OFF
UR
Fig. 1. Block diagram of MEB-2c: G -probe; K1- amplifier of Barkhausen voltage; K2 – amplifier and
analyzer of reference signal; BZ – internal supplier; UA - Barkhausen signal analyzer;
UR – threshold voltage source; UC – microprocessor unit; GM - current generator; LCD - screen;
W1 – power switch; W2 – back light switch; ; P1, P2- gain switches; P3 - threshold voltage switch;
P4 – INFO switch; P5 – UR ON switch; P6 – UR OFF switch; C – charger, S - power pack,
T - transformer;