1
Before commencing assembly,please read these instructions thoroughly.
ALMOST - READY - TO - FLY
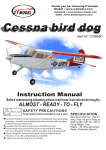
Cessna bird dog
SAFETY PRECAUTIONS
This radio control model is not a toy!
lFirst-time builders should seek advice from people having building
experience in order to assemble the model correctly and to produce
its performance to full extent.
,
lAssemble this kit only in places out of childrens reach!
lTake enough safety precautions prior to operating this model.
,
You are responsible for this models assembly and safe operation!
lAlways keep this instruction manual ready at hand for quick
reference,even after completing the assembly
l Could cause serious injury or even death.
SPECIFICATION
Wing Span:2500 mm (98.4 in)
2
Wing Area:81.4 dm (1126.1sq.in)
Total Length: 1700 mm (63.8 in)
Engine : 2C 1.40-1.60 cu.in
26cc gas engine
Radio : 5channels ,8servos
REQUIRED FOR OPERATION (Purchase separately)
A minimum 5channel radio for airplanes (with 8servos).
And dry batteries.
1
!
5
B
Glue
A
CAUTION: Only use a minimum 5channel radio for
airplanes! (No other radio may be used!)
Epoxy Glue
6
A minimum 8 channel
transmitter for airplanes.
required for engine starting
!
Receiver
12 AA-size Batteries
Instant glue
Glow engine fuel only.
WARNING: Normal gasoline cannot
be used with glow engines.
remote control
For handing the radio properly.refer to its instruction manual.
2
Battery (need 2)
3
Servo(need 8 servos )
4
Engine and Muffler
Model A irplane engine:26cc gas engine
Switch (need 2)
Fuel Pump
7
8
Plug Wrench
Silicone Tube
Fuel Filter
Other equipment for enhancing
airplane operation & perormance
Engine Starter
Muffler
Ignition
9
12V Battery (for starter)
Purchase a propeller that
will match your engine
16X10----18X10
TOOLS REQUIRED ( Purchase separately)
Sharp Hobby Knife
Phillips Screw Driver
Awl
Needle Nose Pliers
Wire Cutters
Scissors
BEFORE YOU BEGIN
. Read through the manual before you begin ,so you will have an overall idea of what to do.
2 . Check all parts .if you find any defective or missing parts .contact your local dealer.
1
Symbols used throughout this instruction manual,comprise.
3
A B
Drill holes with the specified
Diameter(here:2mm)
Must be purchased
separately!
Apply instant glue
(CA glue,super glue).
Ensure smooth non-binding
movement while assembling.
Pay close attention
here!
Assemble left and right
Sides the same way.
Cut off shaded portion.
Cut off excess.
2mm
!
Warning!
50
2
Apply epoxy glue.
C.A
L
R
2
Do not overlook this symbol.
3
Accessory list for this page.
!
Horn
3mm washer
----4
3X12mm
----4
----4
Screw
----4
Connecting rod head
Servo line
3X20mm
Tp Screw
----4
8mm nylon nut
----4
Hinge
----4
1.8X100mm Rod
----4
2X30mm Screw
- - - - 12
- - - - 18
Install the aileron and flap
Blcak line
----2
----2
----2
----4
----4
----2
Connecting rod head
1.8X100mm Rod
----2
2X30mm Screw
----6
Rod adjuster
----2
2X8mm Screw
Horn
2X8mm Screw
Rod adjuster
1
Install the flap servo
4
Main wing
5
Main wing
light
Battery
The light line
1.5V
1.5V
Red line
A
B
Hinge
2
-----18
Flap
Aileron
Install the aileron servo
3X12mm
Screw
----4
3mm washer
----4
3X20mm Tp Screw
----4
The servo line
1.8X100mm Rod
----2
2X30mm
Horn
Screw
----6
----2
20X864mm tube
Rod adjuster
----2
Connecting rod head
----2
----2
2X8mm
8mm nylon nut
----4
Screw
----2
3
12X660mm tube
!
8
Accessory list for this page.
3X3mm Screw
Horizontal tail
2.6X12 Tp screw
----2
----1
A
B
2.6mm Nylon Collar
----1
----1
----2
----1
2.6mm Collar
Hinge
3X12 Tp screw
----3
----9
3X8mm Tp screw
Hinge
--------6
-----4
6
9
Install tail whell
Horizontal /Vertical tail
3X3mm Screw
----2
2.6mm Nylon Collar
----1
Install the elevator support
2.6mm Collar
----2
3X12 Tp screw
----3
2.6X12 Tp screw
----1
A
----1
3X8mm Tp screw
-----4
----1
7
B
10
Vertical tail
Horizontal /Vertical tail
,
A
C= C
,
B= B
,
A= A
B
2.5mm
Diameter
(here:2.5mm)
Hinge
--------3
Securely glue together
,if coming off during flights.
You lose control of your airplane
which leads to accidents!
Fold flection
4
!
13
Accessory list for this page.
4X20mm
Screw
----4
4X65mm
Screw
Horn
3X3mm Screw
----2
----2
----2
5mm lock nut
------2
----2
----2
Connecting rod head
----4
1.8X235mm Rod
----2
2X16mm Screw
----9
Rod adjuster
----6
2X8mm
Screw
Rod
4mm washer
----5
5X40mm Screw
Horn
----4
----2
Connecting rod head
5.2mm Nylon Collar
----1
Install the elevator servo
----4
1100mm steel wire
----2
2mm Nut
----3
5mm washer
----4
----2
1.8X235mm Rod
----2
2X16mm
Screw
----6
Rod adjuster
----6
2X8mm
----2
Screw
----2
11
14
Instal the main landing gear
Install the rudder servo
Rod
----4
1100mm steel wire
----2
Horn
----2
Connecting rod head
----2
Nut
----3
2X16mm Screw
----3
Rod adjuster
----4
2X8mm
Screw
----4
2mm
4X20mm
Screw
----4
4X65mm
Screw
5mm Lock Nut
----1
4mm
Washer
----5
12
------2
5mm
Washer
----4
5X40mm
Screw
----2
3X3mm Screw
----2
5.2mm Collar
----2
15
Instal the main landing gear
Install the engine
Engine:
2C , 1.40-1.60 cu.in
26cc gas
5
18
Accessory list for this page.
!
Install the cowl
Linkage Stopper
----1
2mm
Nut
----1
1.8X550mm Rod
------1
3X3mm Screw
------1
2.3X10mm Tp Screw
2.3X10mm Tp Screw
- - - - 12
----4
16
19
Assembly of the full tank
Install the front canopy
After confirming the
position(see front of
fuel tank).
Insert and tighten
the screw.
Cut away the surplus pats of canopy
Carefully along the shaded line
17
20
Radio Equipment
2.3X10mm Tp Screw
----4
Install the back canopy
Battery
Fuel tank
Receiver
Throttle servo
1.8X550mm rod
Linkage Stopper
----1
2mm
Nut
----1
Cut away the surplus pats of canopy
Carefully along the shaded line
1.8X550mm Rod
------1
2.3X10mm Tp Screw
----4
3X3mm Screw
------1
6
!
23
Accessory list for this page.
2.3X10mm Tp Screw
----4
Install the door
A B
Latch
----1
loose sheet
Latch
--------6
----1
2.3X8mm Tp Screw
loose sheet
--------4
21
--------2
24
Install the window
Install the door
A B
2.3X8mm Tp Screw
A B
--------4
22
25
Install the cover
Install the door
A B
This door
can open
loose sheet
--------4
2.3X10mm Tp Screw
Here , install the servo
----4
7
26
28
Adjustment.
Adjust the travel of each control surface to the
values in the diagrams.
These values fit general flight capabilities.
Readjust according to your needs and flight level.
Side view
Adjustment
Adjust the travel of each control surface to the
values in the diagrams.
These values fit general flight capabilities.
Readjust according to your needs and flight level.
Rudder
AILERON
Flap
Side view
Top view
Top view
27
29
Adjustment.
Adjustment.
Never fly before checking the Cg s required position.
In order to obtain the CG specified ,reposition the
receiver and battery.
Adjust the travel of each control surface to the
values in the diagrams.
These values fit general flight capabilities.
Readjust according to your needs and flight level.
ELEVATOR
Side view
110-115mm
CG
Top view
!
5
8
Warning!
NEVER fly the model
without well balancing.