1
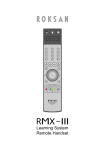
Learning System Remote Handset TABLE OF CONTENT Quick Launch Page 1 Before you start Page 2 Connecting to a PC for the first time Page 3 - 5 Registering the RMX111 for the first time Page 3 - 5 Setting codes via online database Page 3 -5 Storing IR codes manually Page 6 Operating the RMX111 Page7 Restoring the RMX111 to default Page 7 Maintenance / Trouble Shooting Page 8 Lock up & Reset Page 9 ROKSAN - RMX111 USER MANUAL QUICK LAUNCH 4 1 2 3 K2 M2 TV SAT DVD VID1 VID2 AUD 1. 2. 3. 4. 5. 6. 7. 8. 9. 10. 11. 12. 5 6 1 2 3 4 5 6 7 8 9 +10 0 AV Infrared Transmitter LED Indicator Power Button Mute Button Devices selector keys Function Keys Battery Compartment USB Connector CD Transport keys Tuner Section Keys Input Selector Master Volume 9 SHUF 1/ALL MENU +V 12 OK Input Input + - 11 Please Note: -V << FREQ STORE >> The "Tape" function on both K2 & M2 Integrated Amplifier is actuated Manually. 10 i FAV LIVE X 7 8 ROKSAN LEARNING SYSTEM REMOTE HANDSET RMX-III 1 BEFORE YOU START Congratulations! Your Roksan RMX111 Universal Remote Control is a state of the art device which integrates many different Infra-red remote controls to deliver instant A/V control action to your fingertips. Before operating the remote, please read thoroughly. Please keep this manual for future use. PACKAGE CONTENTS 1. 2. 3. Roksan RMX111 USB Cables type A to USB Type B mini Manual PC SYSTEM REQUIREMENTS (MINIMUM) Microsoft Windows XP/Vista/7 512MB RAM & 300MB Free Disk Space Available USB2.0 Port x 1 Installed Microsoft Internet Explorer 8.0 (or newer) Established Reliable Internet Connection Please note: Due to security reason of Microsoft Windows Vista / 7, the set-up program and drivers of your RMX111 will not be executed automatically (Program auto-run is prohibited). Please double click pop-up window - CD ROM Drive KRMAP and KRMAP.exe to install the program and drivers manually. HOW TO INSTALL BATTERIES Alkaline batteries are always recommended. The Roksan RMX111 requires two batteries. 1. 2. 3. 4. Remove the battery cover on the back side of your RMX111. Observe the polarity of the batteries and the "+/-" marks inside the battery compartment. Insert the batteries accordingly. Push the battery cover back in place. Please Note: Whenever you see the LED indicator of your remote flashes 3 times after you have pressed any key, it tells your batteries are running out. Please replace with the new and fresh alkaline batteries to ensure proper operation and performance. HOW TO SET UP YOUR REMOTE Your RMX111 can replace up to 8 original A/V remote controls. Before your remote can operate your A/V devices, you firstly have to register it. Once this step is complete, you can go through the following easy online setup procedure (Page 4) procedures to set your remote control handset. 2 EASY ONLINE SETUP A reliable internet connection and PC system loaded with Windows XP / Vista / 7 is required. Please make sure you have a PC system loaded with Windows XP / Vista / 7, installed with Microsoft Internet Explorer 8 and it is connected to a reliable internet connection throughout the whole setup process. Please also have your various other devices and model number ready. BY SMART LEARNING Please follow the simple setup procedures on the Online Remote Code Database web page throughout the whole setup: 1. 2. 3. 4. 5. Remove the battery cover on the back side of your remote. Make sure your remote is loaded with fresh batteries. Locate the mini USB connector inside the battery compartment. Connect your remote with the supplied USB cable to your PC (via one of the available USB Ports). Once, your remote is connected to your PC, the installation program will be started automatically ( all necessary device drivers will be installed to your PC automatically, only for the 1st time connection/setup). When the installation is completed your PC will launch a browser ( Internet Explorer ) to reach out online database server. Remark: If your browser is not running after the connection of your remote to the PC, you have to double-click the Windows Vista / 7 users). icon ( KRMAP.exe) manually on your desktop to start ( for Register your RMX111 - Required only once! New user-Please register your RMX111 by filling in your name and email address. Simply follow the below procedure and you can activate your new Roksan RMX 111 in a very short time. Once all the necessary drivers and the auto-run program have been installed, you will be prompted at the following page. Simply fill in your information under the space provided with marks * and then click Confirm to send your file. Your RMX111 will be activated and ready for a further setup. 3 Set up your Roksan RMX111 via one of the methods below: 1. Easy Online Setup 2. Smart Learning EASY ONLINE SETUP 1. 2. Select Remote Setup page 3. On the Remote Setup page, simply select your Device type (e.g. TV), type in your Device name (e.g. SONY KV-J29MH9), select Brand - SONY from the drop down list and select model from the drop down list. Repeat step 2 for the rest of your other devices, such as VCR, DVD, SAT, CBL, STB, etc. 4. Press 5. Press 4 to re-confirm your selected setting. to activate the data file 6. Press ! to download the data file automatically to your remote. WARNING: Do Not try to press for data file download. For security reasons, each remote has been limited to 5 attempts for SAVING the data file to the user's local computer. After that, your remote will be LOCKED. Please make sure that this is really necessary for such action. (For more information please see Page 9) 7. Disconnect the USB cable from the remote. Turn on your device (e.g. TV), try the function keys on the remote. If your device (e.g. TV) responds to your invoked function correctly, your remote has been loaded with the right Device Code. Otherwise, repeat the above set-up instructions with the rest available Device Codes until your device (e.g. TV) responds to your invoked function, and most keys work correctly. Remarks: Always keep secure connection of the remote and the PC system throughout the whole "Easy Online Setup" process. After the remote code is downloaded to the remote, simply disconnect it from the USB cable and try the functions. If you cannot find a correct Device Code for you equipment, you should try to select a code with a similar description of your device. (e.g if your TV is 29XUMH, where you can see a 32XUMH on the available code, you can try to use this code 32XUMH), as the manufacturers tend to use the same remote code for a series of products, simply reconnect your remote with your computer and try another available codes. (refer to the above steps.) Should only some of the commands work for your device, you can either select another code or try to copy the rest of the commands to your remote from your original remote, see the "By Smart Learning" section. Do Not try to press for data file download. For security reason each RMX111 has been limited to 5 attempts for SAVING the data file to the users local computer. After that, your remote will be LOCKED. Please make sure that this is really necessary for such action (See more information on page 9). 5 SMART LEARNING - STORING IR CODES MANUALLY If you cannot find a correct device code for your equipment from the Online Database, you can copy your device's original remote control commands to your RMX111. Your RMX111 allows you to store up to 360 additional remote control commands and all 8 device modes can facilitate learning in seconds. Please follow the instructions below to start the process: (Please have your original remote controls ready for the code copying process) 1. 2. 3. 4. 5. 6. 7. Select a desired Device Mode (e.g. TV, if you want to set up your RMX111 to operate your TV). Press and Hold the Device Mode key e.g TV for 3 seconds, the LED indicator will light up. Release the Device Mode key e.g. TV Press and Release a desired key on the RMX111 you want to hold the function key, the LED will flash slowly. (Now aim your device remote control to the RMX111 Infra Red Lens on a flat surface with 1-3 cm apart. Make sure your A/V remote control is loaded with fresh batteries). Press and hold the corresponding key on your original A/V remote control to transfer the command. The LED indicator of the 1-3 cm RMX111 will flash. When the command has been copied successfully, the LED indicator will stay on. You can release the key on the A/V remote control. If the LED indicator keeps flashing quickly, it shows an error in learning process. Please adjust the position of both remote controls and repeat steps 4 & 5 again. Repeat step 4 & 5 to transfer other commands into the rest of the function keys. When you have finished the whole device mode. Press and hold the corresponding device Mode Key e.g. TV for 3 seconds to save all the copied commands and exit the learning mode. Remarks: Your RMX111 will quit the learning mode automatically after 30 seconds of idle period. If you want to quit the learning mode at any time, simply Press and Hold the corresponding Device Mode key for 3 seconds. Downloading a new Device Code from the Online Setup will automatically erase and replace all learned commands in the chosen device mode. When you have finished copying and teaching the original device's commands to your RMX111 you can upload your RMX111 to our online database for future retrieval. Please connect your RMX111 to your PC, the system will prompt a set of automatic actions. A MASTER RESET OF YOUR RMX111 WILL ERASE ALL NEWLY LEARNED COMMANDS 6 OPERATING THE RMX111 Normal Operation Once you have set up the RMX111 for your system's equipment, it works like your original remote controls. To operate, just aim it at your equipment, press an appropriate device mode key and invoke the desired function by pressing a corresponding key on the RMX111. The indicator flashes during signal transmission and as confirmation of key being pressed. Master Reset/Reset/Default Master reset allows you to reset your RMX111 to its factory default state. After Master Reset, you have to setup the remote all over again. Before you press master reset, please make sure it is really necessary. 1. 2. 3. 4. 5. 6. 7. Remove the battery cover on the back side of your remote. Make sure your RMX111 is loaded with fresh batteries. Locate the mini USB connector inside the battery compartment. Connect your RMX111 with the provided USB cable to your PC (via one of the available USB Port). Once, your RMX111 is connected to your PC, it will launch an Window Internet Explorer browser to reach our online database setup server. if your browser is not running after the connection of the RMX111 to your PC, you have to double-click the icon (KRMAP.exe) on your desktop. On the remote set up page simple click the Click Create factory default. ResetDefault button once. button once and wait for 1 minute, your RMX111 will be reset to 7 Remarks: Master Reset of RMX111will erase all previously copied commands as well. MAINTENANCE 1. 2. 3. 4. 5. Do not expose your URC to dust, strong sunlight, humidity, high temperature or mechanical shock. Do not use old and new batteries together as old batteries tend to leak. Do not use corrosive or abrasive cleaner on your URC. Keep the unit always dust free by wiping it only with a soft and dry cloth. Do not disassemble your URC, it contains no user- serviceable parts TROUBLE - SHOOTING Q. A. A. A. A. A. A. A. Q. A. A. 8 My URC does not work at all! Check if you have set up your URC by Easy Online Setup or Smart Learning. IMPORTANT Windows / 7 users, after youtend connect your URC to 2. Do notREMARKS use old andfor new batteriesVista together as old batteries to leak. your computer, please double click to pop up window - CD ROM Drive - KRMAP and the KRMAP.exe to install the program and drivers. Check your A/V device, if the device's mains switch is turned off, your URC could not operate your device. Check whether your batteries are inserted properly and are in correct +/- marks. Check whether you have pressed the corresponding device mode key for your device. If the batteries are low, replace the batteries. Try to connect your URC to your PC and reload the user data by selecting UserConfig on the Remote Setup Page. If several Device Codes are listed under the brand of my A/V device, how can I select the correct Device code? To locate the correct Device Code that is similar to your device model number, as 2. Do not use oldto and together old batteries tend to leak. manufacturers tend usenew thebatteries same remote for as a series of products. To locate the correct Device Code for your A/V device, test the code one by one until most keys work properly. Q. A. A. My A/V equipment responds only to some of the commands. You have set a code for which only some commands work properly but some do not. Docodes not use old most and new together as old batteries tend to leak. Try2.other until keysbatteries work properly. You can learn the rest of the missing commands from your original remote, see Smart Learning section. Q. Some learned commands in my URC do not work. A. Those commands are not learned properly. Try to teach your URC again for those 2. Do not use old and new batteries together as old batteries tend to leak. functions. Check the batteries inside both A/V remote and your URC. If the batteries are weak, the URC cannot learn command properly. You have to replace all batteries for proper functioning. A. RMX111 LOCK UP AND RESET If the RMX111 becomes locked, you will have to reset the remote to factory default set up which will erase all your devices codes and unlock the RMX111. However, all codes can be backed up in advance on an online facility. (When you finished copying and teaching the original remote to your RMX111, you can upload your RMX111 to your online database for future retrieval. Please connect your RMX111 with your PC, the system will prompt an action automatically.) Master Reset/Reset/Default Master reset allows you to reset your RMX111 to its factory default state. (After Master Reset, you have to setup the remote all over again. Before you do this, please make sure it is really necessary.) 1. 2. 3. 4. 5. Remove the battery cover on the back side of your remote. Make sure your RMX111 is loaded with fresh batteries. Locate the mini USB connector inside the battery compartment. Connect your RMX111 with the provided USB cable to your PC (via one of the available USB Ports). Once, your RMX111 is connected to your PC, it will launch Internet Explorer browser to reach our online database setup server. If your browser is not running after the connection of the RMX111 to your PC, you have to double-click the icon(KRMAP.exe) on your desktop. 9 FOR MORE INFORMATION PLEASE CONTACT ROKSAN AUDIO LIMITED Jubilee Close, Townsend Lane London, NW9 8TR Tel: +44 (0)20 8900 6801 FAX: +44 (0)20 8205 2644 Website: www.roksan.co.uk Email: [email protected] Follow us on: facebook.com/roksan.audioltd twitter.com/roksan goo.gl/NRtKc roksan.co.uk/forum/ Roksan Audio Ltd User Manual CLASSIFICATION: General Use Version: 1.06.2012 All specifications are liable to change without notice. E&OE