1
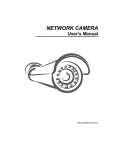
DLK6710-3
10” Polycarbonate Housing
Installation and Operations Manual
Model Number: DLK6710-3
Description: 10” Indoor/Outdoor
Polycarbonate Housing
Table of Contents DLK6710-3
page
Description
3
Features
3
1. Safety Measures
4
2. Installation Guide
5
3. Optional Accessories
5
4. Parts List
5
5. Connection Diagram
6
6. Outline Dimensions
6
DESCRIPTION
The DLK6710-3xx Series are Indoor/Outdoor Mini housings for small box style
cameras. Esthetically designed with back open style for easy access and
maintenance, they are fabricated with Polycarbonate materials and beige colors.
Additional features are Cable Entry Glands and mounting holes on bottom and for
outdoor versions sun-shields, heaters and blowers are options. Units are available
with 12VDC, 24VAC and 230VAC input voltages for greater flexibility.
FEATURES
* Indoor/Outdoor Housings for Cameras
* Polycarbonate Materials, Wall mount
* 2.45” (62mm) dia. Glass Window
* Easy Access with Cable Entry Glands
* Sunshield, Heater and Blower (optional)
* 12VDC, 24VAC and 230VAC input voltages
* Regulatory Compliance with CE
1. Safety Measures
1.
2.
3.
4.
5.
6.
Read the instruction carefully before installing the housing.
Keep the instructions in a safe place for future use.
Observe all warnings on the housing and in the instructions.
Observe all operations indicated and use illustrations.
Before cleaning, turn off the power, only wet cloth is permitted for cleaning.
To minimize problems, use accessories recommended by our company or
distributors.
7. Keep the housing stable. Do not install on unstable dolly or tripod. It
may damage the housing.
8. Transport the housing carefully to avoid damage.
9. The housing should use the power and voltage specified in the instruction.
Please contact factory or the distributors if the power and the voltage of the
installation site are unknown.
10. Take extra care in the installation of power cable, especially through the cable
entry plug and connection to camera
11. To avoid over loading, please do not install power cables that are too long. It
may cause fire or electric shock.
12. Prevent the spatter of corrosive liquid to avoid possible danger.
13. Do not install the housing on the unstable mounting, wall or roof/ceiling to
avoid injury to persons and damage the housing.
14. If not qualified, do not try to repair the unit. The opening or the removing of
the cover may cause electric shock or other dangers. Please contact factory for
repair instructions.
15. If user has any of the following problems, please contact Dante Security:
A. Power supply and control line are damaged
B. Incorrect use of power supply or voltage
C. Falling or damage of the housing shell
D. Malfunction of the housing
E. Malfunction after operating in accordance with the instructions
16. When replacing spare parts, please use the ones specified by the factory that
have the same replacement function as the original ones. Any substitute that is not
certified by factory may cause danger and voiding warranty.
2. Installation Guide
1. Open the enclosure lid. The spring will hold the lid in place when it is fully opened.
2. Take the camera plate out. Install the camera on the plate. Lock the camera on the
plate with the screw. Please pay attention to the size of the enclosure when you
install larger than standard lenses.
3. There are two threaded mounting holes and two cable entry glands at the bottom of
the enclosure. Maximum size of the cable entry is 13mm.
4. Install the camera plate and camera in the enclosure:
A.
If the camera lens is adjustable, adjust the lens to its maximum length.
B.
Slide the camera plate until the camera lens and the plate in the best place
in the enclosure.
C.
Lock camera on the plate with four screws.
5. Get the video line from the camera output.
6. Connect the camera, lens and power with power connection.(Please refer to the
figure 1 and figure 2.)
7. After connecting the power wires fasten off the terminals.
8. Adjust the camera focus and close the enclosure lid.
3. Optional Accessories
Model
DLK6710-3
Heater
Blower
Wiper
YES
YES
NO
4. Parts with Unit
Item
User Manual
Cable-connection-tip
M6 x 12 screw
Quantity
DLK6710-3
1
1
2
5. Connection Diagram
DLK6710-3
CABLE
COLOR
RED
BLACK
WHITE
WHITE
YELLOW
LINE
NOTES
POWER
SUPPLY
WIPER
CONTROL
GROUND
Please operate under
the right power.
6. Outline Dimensions
N/A
For ground.