1
UK-300T USER’S MANUAL
2Band EQ with Chromatic LED tuner
Functions
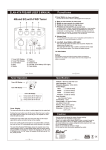
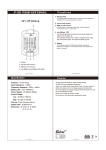
1. Tuner LED Display
Tuner LED Display
: Tuning Guide LED for Sharp tune
: Tuning Guide LED for right tune
: Tuning Guide LED for flat tune
1
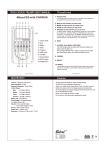
2. Bass (for bass tones)
4
5
6
2
3. Treble (for high tones)
The BASS, TREBLE controls are a 3-band equalizer for controlling
tone.
The center detent on these tone controls yields a flat tone response.
“+12" boosts the tone; “12"cuts the tone.
3
7
4. Volume Knob
The VOLUME controls the output volume. At “0" it is completely OFF.
At “10" it is loud.
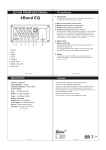
5. Low Batt. (Low Battery LED Light)
1.
2.
3.
4.
5.
6.
7.
Tuner LED Display
Bass
Treble
Volume Knob
Low Batt. (Low Battery LED Light)
Tuner on/off Button
Battery box
The LED will light when the battery has lost power. Replace the
battery when this light is on.
This LED light will flash when a cable is connected to the output
jack of the pickup system. This shows the battery is good.
6. Tuner on/off Button
Power switch of built-in Chromatic LED tuner.
Automatic power off after 5 minutes
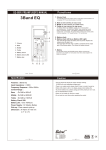
7. Battery box
2 X CR2032 Coin Battery
1
Specification
2
Caution
Features : 2Band EQ with Chromatic LED tuner
Input Impedance : 22 MΩ
Frequency Response : 20Hz ~ 20KHz
Control Range
Bass : +/-12dB at 100Hz
Treble : +/-12dB at 10KHz
Battery Status LED
Power Supply : 2 X CR2032 Coin Battery
Battery Life
Only Eq : Over 200Hours
Tuner on : Over 100Hours
Pick-up : Omega II Piezo Cable pick-up
Dimension : W 56mm X H 40mm (2.2" X 1.6")
3
- The jack should be pluged for proper Preamp working.
(TUNER will works regardless pluging jack)
- There is no output sound, please check if tuner or mute is turned on.
- When LCD screen is dim or no display, please check battery life.
- To prevent battery loss, please unplug jack when preamp is not in use.
- Do not disassemble for repair.
Return to your dealer for service or repair.
- Do not use too much force when operating the control.
4
INSTALLATION MANUAL
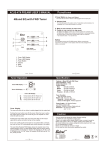
1. Cut out the hole with template
Masking
Tape
1. Contents
Cutting
Template
Masking
Tape
12mm
2. Output Jack
3. Pick-Up
1. Preamp
4. Clip
5. Screw
2. Tool
Preamp
Out put Jack
2.Drilling hole for pick-up
1. Electric Drill
4. Router and Grinder
(cutting-edge 3mm)
2. Drill Bit
(2.3mm or 3mm and 12mm )
5. Round File
3. Phillips Screwdriver
6. Masking Tape
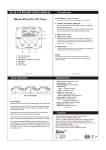
3. Insert EQ and battery box into hole of guitar.
4. Fasten screws properly.
7. Fix wire with clip .
Clip
Out put jack
Cable
EQ
Pick-up
Wire
Out put
Jack
5. Put plugs
into jacks.
Solution
6.Installing the pick-up
Pick-up
wire
1) When there is no sound or sound is stopped,
- Check guitar cable, amp or Mixer
- Check if there is batter or not. When it happens noise or distortion,
please exchange battery.
- Check if the pickup and battery connector is connected correctly
or not.
- Check if out put jack is connected correctly.
2) When there is hum-noise,
- Check the pickup is connected well or not.
- Check if the connectors are connected to correct position well
or not.
3) Some causes of the balance problem
- When the bottom of saddle or the groove of saddle is not flat.
- When saddle is installed to the groove of saddle loosly.
- When the connection is not good between the bottom of saddle
and the groove of saddle.
- When Saddle is very short
- When there is grounds on the groove of saddle.
- When Saddle is declined toward front or back.
- When the top of guitar is bended.
- When the pickup is installed to only a part of the groove of saddle.
(back page)
Cutting Template
1.Print this file without scaling option.
2.Check the size with actual ruler.
3. Cut out the dotted line or desire model.
4. Adhere to location use double stick tape.
5. Cut follow solid line use cutter.
Print>Page Handling>Page Scaling
None
Fit to print margins
Reduce to print margins
34.6mm
50.9mm
Ø2.0mm
Preamp Opening
1
2
3
4
5
6
7
8
9
10
11
12
13
14
15