1
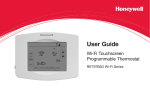
Quick Start Guide
Wi-Fi Touchscreen
Programmable
Thermostat
RET97B5D Wi-Fi Series
Welcome
Getting set up and ready is simple.
1
2
3
Install your thermostat.
Connect your home Wi-Fi network.
Register online for remote access.
Before you begin
View the installation video at
wifithermostat.com/support
Gather
• Small screw driver
• Thermostat ID card
• Your home Wi-Fi
network password
2
1
Install your thermostat
1.1 Switch OFF power to your
heating/cooling system
1.1a Important! To protect your
equipment, switch OFF the
power to your heating/cooling
system at the breaker box or
the system switch.
or
1.1b Confirm power is OFF.
Try to turn on heating/
cooling equipment by
changing temperature
on your old thermostat.
Your power is OFF if your
system does not turn ON.
Circuit
breaker
box
M31535
Heating/cooling
system power
switch
This thermostat works with common 24 volt
systems such as forced air, hydronic, heat
pump, oil, gas, and electric.
It will not work with millivolt systems, such as
a gas fireplace, or with 120/240 volt systems
such as baseboard electric heat.
3
1.2 Remove old thermostat
faceplate and leave wires
connected
If you have an older thermostat with a
sealed mercury tube, see warning page
for proper disposal instructions.
1.2a Take a picture of the
wire connections for
later reference.
1.2b If no wire is connected
to a terminal labeled C
or no C terminal exists
on the old thermostat,
view the Alternate Wiring videos at
wifithermostat.com/videos
C
C
Important! C wire is required and is the
primary power source for your thermostat.
Without a C wire, your thermostat will not
power up.
4
MCR33823
1.3 Label wires
Do not label by wire color.
Use the supplied sticky tags to label
each wire as you disconnect it. Label wires according to old thermostat terminal designations, not by wire
color.
Sticky
tag
Note: If no tag matches a terminal
designation, write the appropriate
letter on a blank sticky tag.
Blank
sticky
tag
1.4 Remove wallplate
Remove the old wallplate from
the wall after all wires are
labeled and disconnected.
C
Terminal
designation
C
MCR31537
5
1.5 Separate Wi-Fi thermostat
and its wallplate
On your new thermostat, grasp the finger holds on the top and bottom of
the wallplate with one hand and the thermostat (front) with the other
hand. Pull pieces apart.
Finger holds
Thermostat
Wallplate (back view)
6
M31538
1.6 Mount wallplate for Wi-Fi thermostat
Mount your new wallplate using screws and anchors included with the thermostat.
If necessary:
• Drill 3/16-in holes for drywall
• Drill 7/32-in holes for plaster
Wallplate
HEAT PUMP
CONVENTIONAL
Note: You may be able to use your
existing wall anchors. Hold the wallplate
up to the existing anchors to check
for alignment.
Y2
RC
L
E/AUX
W2
W
O/B
K
K
Y
Y
G
G
C
C
R
RC
M31543
R
Y
W
G
C
R
MCR31539
7
1.7 Connect wires
Remove metal jumper only if you
have both R and RC wires
1.7a Starting with the C Wire, match the
sticky tag on the wire to the terminal
labels.
Important! C wire is required and is the
primary power source. Without a C wire,
your thermostat will not power up.
HEAT PUMP
CONVENTIONAL
R
R
E/AUX
W2
W
W
K
K
Y
1.7c Verify wire is firmly secured by gently
pulling on wire.
1.7d Repeat steps 1.7a–1.7c for all other wires.
1.7e Push any excess wire back into the wall
opening after all wires are installed.
Labels don’t match or have heat pump system?
See User Guide.
8
C
1.7b Loosen screw, insert wire on inside
edge of terminal, then tighten screw.
G
L
View the Alternate Wiring videos at
wifithermostat.com/videos
RC
Y2
RC
R
O/B
Y
Y
G
G
C
C
Insert wires here
MCR31541A
Note: The wiring for your
application might be different
than the wiring from above.
1.8 Install battery
Insert the coin cell battery
(included), observing
the correct polarity.
Note: A correctly inserted battery will
extend about halfway out of the battery
slot on the thermostat, allowing for
easier removal.
This battery maintains time and date
during power outages. It does not
power the thermostat (C wire
required).
Thermostat interior
M31542
Wallplate
HEAT PUMP
CONVENTIONAL
L
AUX
/E
K
1.9 Attach thermostat
to wallplate
RC
Y2
RC
W2
W
O/B
K
Y
Y
G
G
C
C
R
M31543
R
Align the thermostat onto wallplate and snap into place.
Thermostat
9
1.10 Switch heating/cooling system ON
Important!
1.10a Verify that the C
wire is connected at the
thermostat and at the
heating/cooling system.
or
1.10b Make sure the heating/cooling
system door is firmly secured.
1.10c Switch power back ON for
your heating/cooling system
at the breaker box or its
power switch.
Circuit
breaker
box
10
M31544
Heating/cooling
system power
switch
1.11 Set date and time
Touch s or t buttons to change displayed time and date.
Press and hold a button to
quickly change a setting.
Time
Year, Month, Day(Top)
Day
Year, Month, Day(Top)
Year
Set Time
11
Set Time
Month
1.12 Determine your heating/cooling system type
Important! Heating/cooling system type must be set so that your thermostat
operates properly and does not damage your system.
1.12a If you have a traditional system (natural gas forced air with A/C), your
thermostat is set up by default to control this system.
Go to Step 2
1.12b If your system is:
•
•
•
•
Multistage equipment
Any type of heat pump
Hydronic
Other
You MUST change the system type by setting system function 0170.
See “Setting functions and options” in the User Guide.
Not sure of your heating/cooling system type?
Refer to FAQ on wifithermostat.com/support
12
1.13 Test your thermostat
Congratulations! Your thermostat is operational
1.13a Touch the SYSTEM button to
change to heating or cooling
and begin operation.
Inside
1.13b For remote access to your
thermostat, continue to Step 2 .
13
MORE
MCR31580
Heating/cooling system not turning on?
Refer to User Guide or FAQ at
wifithermostat.com/support
2
Connect to your Wi-Fi network
2.1 Connect to your thermostat
Getting Help
2.1a Connect your wireless device to
your home network.
Any of these device types
will work:
• Tablet (recommended)
• Laptop (recommended)
• Smartphone
View the Wi-Fi Enrollment video
at wifithermostat.com/videos
If you get stuck... At any point in
this process, restart the thermostat
by removing the thermostat from
the wallplate, wait for 5 seconds,
and snap it back into place.
Return to 2.1.
Need more help? Find additional
information in the User Guide.
14
2.1b Make sure the thermostat message
center displays Wi-Fi SETUP.
Message Center
2.1c On the wireless device (tablet,
laptop, smartphone), view the list of available Wi-Fi networks.
Note: If you are asked to specify a home, public, or office network, select Home Network.
15
Inside
MORE
M31566
2.1d Connect to the network called NewThermostat_123456
(the number will vary).
2.2 Join your home network
2.2a Open your web browser to access
the Thermostat Wi-Fi Setup page.
The browser should automatically
direct you to the correct page; if it
does not, go to http://192.168.1.1
Thermostat Wi-Fi-Setup page
2.2b Find the name of your home network
on this page and select it.
Note: Some routers have enhanced
features such as guest networks; use
your home network.
2.2c Complete the instructions for joining
your Wi-Fi network and click on the
Connect button. (Depending on your
network setup, you may see an
instruction such as Enter Password
for your home network.)
Note: If you did not correctly connect to
the thermostat, you may see your home
router page. If so, return to Step 2.1.
16
2.3 Make sure your thermostat is
connected
The message center on your thermostat
will now display CONNECTING… for up to
30 seconds.
If you see one of these messages,
continue to Step 3 .
17
MORE
Note: If you see CONNECTION
FAILURE or Wi-Fi SETUP in
the message center, confirm
you correctly entered your home
network password in step 2.2c. If
correct, refer to the FAQ at
wifithermostat.com/support
M31568
2.3a Look at the thermostat display.
Verify that the message center
displays one of the following:
CONNECTION SUCCESSFUL
JOINED: [WI-FI NETWORK NAME]
YOU ARE ALMOST DONE
REGISTER AT TOTAL CONNECT
Inside
3
Register online for remote access
To view and set your Wi-Fi thermostat remotely,
you must have a Total Connect Comfort
account. Follow the instructions below.
View the Wi-Fi Thermostat Registration
video at wifithermostat.com/videos
3.1 Open the Total Connect Comfort web site
Go to www.mytotalconnectcomfort.com
18
3.2 Login or create an account
If you have an account,
click Login
– or –
click Create An Account.
3.2a Follow the instructions on the screen.
3.2b Check your email for a response from My Total Connect Comfort.
This may take several minutes.
Note: If you do not receive a response,
check your junk mailbox or use an
alternate e-mail address.
3.2c Follow activation instructions in
the email.
3.2d Log in.
19
3.3 Register your Wi-Fi thermostat
After you are logged in to your Total Connect Comfort account, register
your thermostat.
3.3a Follow the instructions on
the screen. After adding
your thermostat location
you must enter your
thermostat’s unique
identifiers:
• MAC ID
• MAC CRC
Note: These IDs are listed on the
Thermostat ID Card included
in the thermostat package.
The IDs are not case sensitive.
Thermostat ID Card
Use the MAC ID and CRC ID to register
this product at mytotalconnectcomfort.com
Carte d’identification de thermostat
HONEYWELL MODEL:
MAC ID:
MAC CRC:
Utilisez l’identification MAC et l’identification CRC pour
enregistrer ce produit à mytotalconnectcomfort.com
Tarjeta de identificación del termostato
Utilice la identificación MAC y la identificación CRC para
inscribir este producto en mytotalconnectcomfort.com
® U.S. Registered Trademark.
© 2012 Honeywell International Inc.
69-2723EFS—01 M.S. 04-12
Printed in U.S.A.
69-2723EFS-01
MAC ID
20
MAC CRC
3.3b Notice that when the thermostat is successfully registered, the Total Connect Comfort registration screen will display a SUCCESS message.
In the thermostat message
center you will see:
CONGRATULATIONS
SETUP COMPLETE!
21
3.3c Also notice that your thermostat
will now display its signal strength.
Congratulations! You’re done.
You can now control your thermostat from anywhere
through your tablet, laptop, or smartphone.
Total Connect Comfort free app
is available for Apple® iPhone® , iPad® and iPod touch® devices
at iTunes® or at Google Play®
for all Android™ devices.
Download on
GET IT ON
iTunes
22
This thermostat contains a Lithium battery which may contain Perchlorate material.
Perchlorate Material—special handling may apply.
See www.dtsc.ca.gov/hazardouswaste/perchlorate
MERCURY NOTICE: Do not place your old thermostat in the trash if it contains mercury in a sealed tube. Contact the Thermostat Recycling Corporation at www.thermostat-recycle.org or 1-800-238-8192 for information on how and
where to properly and safely dispose of your old thermostat.
NOTICE: To avoid possible compressor damage, do not run air conditioner
if the outside temperature drops below 50°F (10°C).
Need more help? Visit wifithermostat.com or call 1-855-733-5465 for assistance before
returning the thermostat to the store.
23
Apple, iPhone, iPad, iPod touch and iTunes are
trademarks of Apple Inc. All other trademarks
are the property of their respective owners.
69-2804-01
Automation and Control Solutions
Honeywell International Inc.
1985 Douglas Drive North
Golden Valley, MN 55422
wifithermostat.com
® U.S. Registered Trademark.
© 2013 Honeywell International Inc.
69-2804—01 M.S. 03-13
Printed in U.S.A.