1
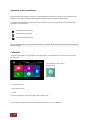
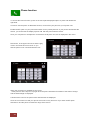
Contents
General Information ................................................................................................................................. 3
General safety instructions ...................................................................................................................... 5
Product features ...................................................................................................................................... 6
Installation Instructions ............................................................................................................................ 7
2 Din Most-connection ..................................................................................................
7
1 Din Most-connection ..................................................................................................
8
2 Din CAN connection ...................................................................................................
9
Buttons on the front panel and their meaning ....................................................................................... 10
First steps .............................................................................................................................................. 11
System settings ..................................................................................................................................... 14
Main menu ............................................................................................................................................. 20
Change icons ......................................................................................................................................... 21
Radio function ........................................................................................................................................ 22
Radio-Options ...........................................................................................................
23
CD/DVD function ................................................................................................................................... 24
CD/DVD movie playback .............................................................................................
25
Phone function ....................................................................................................................................... 26
Button functions in phone menu ....................................................................................
27
Call History ...............................................................................................................
28
Phonebook ...............................................................................................................
29
Contact from the phonebook ........................................................................................
30
iPod function .......................................................................................................................................... 31
Functions of t he iPOD® menu
..................................................................................... 32
Display symbol for Repeat ...........................................................................................
Display symbol for Shuffle
33
........................................................................................... 33
iPod options menu .....................................................................................................
34
Menu for the albums ...................................................................................................
35
Menu for the artists
.................................................................................................... 36
Menu for playlists .......................................................................................................
Menu for the songs
37
.................................................................................................... 38
USB function .......................................................................................................................................... 39
Functions in USB mode ...............................................................................................
40
USB Options .............................................................................................................
41
Menu for the albums ...................................................................................................
42
Menu for the artists
.................................................................................................... 43
Menu for the songs
.................................................................................................... 44
The menu for movie playback .......................................................................................
45
The menu to view images ............................................................................................
46
The menu for the folder structure...................................................................................
48
SD-Card ................................................................................................................................................. 49
Menu for the Albums ..................................................................................................
50
Menu for the Artists ....................................................................................................
51
Menu for the songs
.................................................................................................... 52
A2DP These are only displayed when the played songs contain this information. ................... 53
AUX Function ............................................................................................................54
Internal memory ..................................................................................................................................... 55
Menu for the Albums ..................................................................................................
56
Menu for the Artists ....................................................................................................
57
Menu for the songs
.................................................................................................... 58
Folder options ........................................................................................................................................ 59
Function of the Menu ..................................................................................................
60
Copying files to the internal memory ..............................................................................
60
Navigation .............................................................................................................................................. 61
Navigation software path ....................................................................................................................... 61
Start up the Navigation software....................................................................................
62
Sound Settings ...................................................................................................................................... 63
Fader – Balance – Delay .............................................................................................
Bass – Middle – Treble
Equalizer
Source
64
............................................................................................... 65
................................................................................................................. 66
.................................................................................................................... 67
Other settings ...........................................................................................................
68
DAB ....................................................................................................................................................... 69
DVB-T .................................................................................................................................................... 69
OBC ....................................................................................................................................................... 70
Time synchronization (except MC 2000) ............................................................................................... 71
Update your unit .................................................................................................................................... 72
APPs ...................................................................................................................................................... 74
Product Specfication .............................................................................................................................. 75
2
FAQ / Troubleshooting .......................................................................................................................... 77
General Information
Dear buyer,
Thank you for choosing a product of the brand Dynavin.
Dynavin is a brand that has been around for over 5 years, is now on the market and has developed
into one of the best retrofit equipment vendors.
Since 2008, based on an idea to the ambitious driver an opportunity to offer a multimedia device
retrofit not only significantly better features than the original system provides, but also the same optical
properties of the original installed radios has more the vehicle's optics were.
Be the first days Dynavin has worked restive at the continuation of the idea and to confirm an
improvement of the equipment.
Thus one can say today that multimedia devices of Dynavin have grown steadily and currently have
the largest technical standard on the market.
In the development of the product has been special attention to your personal safety combined with
maximum ease of use, modern design and the latest production techniques respected.
But despite all the care it can cause injury and / or damage due to improper installation or use, or
incorrect handling.
Please read the This instruction manual completely and carefully and keep them with you!
This product meets the requirements of the applicable European and national guidelines. Conformity
has been established and the relevant documents and explanations are in the manufacturer.
We reserve the right, without notice and at any time due to changes in product perform in the interest
of technical progress and adapting to the vehicle market.
Before installing the unit, the legal regulations in your country. For non-compliance with the law, this
can otherwise lead to significant penalties.
The device has to be your dealer for warranty in the original packaging with the attached bill of
purchase and detailed defect description. Note in this case it's return requirements of each dealer
(RMA procedure). The statutory warranty regulations.
Despite all efforts and various carried out by Dynavin and its recognized partners, suppliers and
distributors tests can not be guaranteed on all vehicles or equipment variations of the vehicles that are
offered and given by us are 100% compatible. Please inform Therefore, always install in your vehicle
manufacturer or installation workshop if the desired device you can also be used to.
If the electrical system of your vehicle suddenly have an irregular or improper function, unplug the
product from the vehicle electronics and call for inspection to an authorized workshop.
Dynavin and its recognized partners and distributors are liable neither for any direct or indirect
damages or losses or assume Dynavin and its recognized Distributors and Resellers possible resulting
entry and / or expansion costs or fees incurred diagnosis.
3
All necessary for the installation steps are performed upon customer request, to be present with the
knowledge of the possible incompatibility or the product used can vary for operational reasons. All
applicable installation and removal costs or losses will not be taken over by the company Dynavin or
its recognized distributors and dealers.
The guarantee claim as well as the operation permission by:
a) tampering with the device or accessories which have not been carried out or approved by the
manufacturer or its partners
b) Open the housing of the device
c) repairs carried out on the device
d) Improper use / improper usage / operation
e) brute force to the device (drop, willful damage, accident, etc.)
Install in accordance with all safety relevant and legal directions.
For these reasons:
Can the installation be carried out only by trained specialist staff. Installation should only be performed
when de-energized. In certain installations so the battery must be disconnected from the electrical
system. Make sure that the provisions of the vehicle manufacturer as an intrusion into the vehicle
electronics may result in loss of warranty.
Never use safety-related connections or mounting points. Such as steering, braking systems or other
vehicle-related safety components for your own safety and that of other road users not to compromise.
Connect the device only to those car-specific power and ground points specified by us.
Avoid settings on the device causing them to be distracted from the actual driving process and thereby
endanger yourself and other road users. Note also that the legal provisions of their country.
References of legal regulations for operation
Put the device only in the intended domain.
If the unit is not installed properly, or where alterations void the approval and the warranty.
Use only original CD/DVD no Mini-Disks or other shaped disks. This can damage the disk drive oft he
unit
The CD / DVD drive is provided with transport locks. Remove this before installation. Otherwise no
media can be introduced into the drive.
Marking of products using laser scanners
Class 1
Laser Product
This marking indicates the contained components in the appliance
using a weaker class 1 laser for scanning media.
Konformitätserklärung in Bezug auf die EMC Vorschrift ETSI EN301 489
Konformitätserklärung in Bezug auf die Radio Vorschrift ETSI EN300328
Konformitätserklärung in Bezug auf die Safty Vorschrift EN60065
4
General safety instructions
The references in this chapter apply to most of our products, but not to all. If you have further
questions, please contact your local dealer.
Warning do not open the case. Only open the case if you get the permission from the
manual or an authorized technician. In contravention the warranty expired.
Do not try to repair the unit yourself. If its needed to repair the unit use only our service
partner. In contravention the warranty expired.
Attention ! Do not overload the power cords or extension cables. Fire risk
Attention! Do not use foreign objects and put them into the opening of the unit. Danger of
short circuit and damaged board.
Attention! If any cable or connector is damaged please make the unit powerless and
contact your dealer.
Attention! If any cable is squeezed make the unit powerless and contact your dealer.
Attention! If the unit makes noises smolder or smell bad turn off the unit and contact your
dealer !
Attention! Don´t put the unit in direct sunrays heat sources or heater. The Unit can be
damaged by to high temperatures.
Attention! Be sure that the unit has a good airflow. Do not close the openings with
anything.
If you must change a fuse be sure that the power connection is separated and that you
use the same fuse as before.
Attention! On different units a Laser is installed do not open the case and do not look into
the light. Risk of eye injury.
Attention! Do not use any magnetic part or lay down a magnet to the unit. Danger of lost
files or damaged units.
5
Product features
The unit offers a variety of new uses.
The new Dynavin developed by combination of multimedia device and the new
operating system based on Microsoft © Windows, you have a number of new optical
and technical properties.
Operating system : DynOS – self programmed system from Dynavin
CPU :
833 MHz
Internal memory :
4 GB
Multitouch TFT
6.2/7“ Display
Resolution von 800 x 480
16:9
Navigation
Navi-SW : IGO-Primo ( Preinstalled )
Handsfree Parrot
A2DP Music playback
iPod© controlling
Connecting an iPod ® and iPhone ® via USB with an
additional connection cable.
Aux-In
SD / Micro-SD slot for navigation and media playback
USB 2.0 for music and video playback well as the connection for iPod and iPhone
Supports depending on the vehicle, the original PDC and camera system.
External connections
Video-Out
Audio-Out
A/V-In
Possible connection of a DAB or DVB-T device with control via the touch screen.
6
Installation Instructions:
2 Din Most-connection
7
1 Din Most-connection
8
2 Din CAN connection
9
Buttons on the front panel and their meaning
The keys given here are not to be found in view of all of Dynavin devices.
This just gives you an overview of the keys and their functions in general. Therefore, pay attention in
your specific product and which keys to this present.
=
Previous track
=
Next track
=
CD/DVD eject
=
Play/Break
Disc
=
CD/DVD Option
iPod®
=
iPod® Option
USB
=
USB Option
TV
=
TV/DVB-T Option
Right-hand rotary knob
- Press = phone function
- Turn = Depending on the function Next / Previous for example, songs
Left knob
- Press = on / off switch (standby)
- Turn = loud / quiet
SRC
=
Select Medium / Go to the main menu
NAV
=
Call navigation menu
Mute
=
Mute
Radio
=
Call the Radio menu
BND
=
Switching from FM and AM
TEL
=
Opens the phone mode
SD
=
Opens the SD Card Menu
AUX
=
Opens the AUX menu
1-6
=
Radio station memory buttons
10
First steps
If you have connected the device as indicated, turn on the ignition of the vehicle. The multimedia
device will then turn on the first time. This may take about 30 seconds. This takes you to the radio
interface.
Radio screen
11
Operation of the touchscreen
Most functions of the Dynavin device are controlled through the touch surface. This means that you
should to ensure the most accurate possible control perform a calibration of the screen.
To facilitate the operation, some functions and actions you can perform on the screen shown with
symbols in the instructions.
Touch the screen (short)
Touch the screen (long)
Press and hold and move
As on a smartphone you can move the surfaces. To do this, touch the screen and slide the surface to
the left or right.
Calibration
To do this, first press on the left side of the SRC button. This will take you to the main menu of the
Dynavin unit.
Now select the main menu
Setting icon.
Touch just the icon
with a finger on the
screen.
This can be found on the second page of the main menu
In the settings menu press on the lower part of the menu screen - calibration.
12
If you feel that the screen does not respond accurately to your commands, you can perform on the
menu a screen calibration again. To do this press as indicated in the image a sequence 1-5 and
following the cross as central as position in the circle.
Once you have selected the last point you will automatically return to the setup menu.
13
System settings
In the system settings you can now make even some of the basic options and settings of
the device. Through a brief touch of the box next to the words, the option will be Enable.
A hook
indicates that the option is selected
Brake
So that you are not distracted during the journey, the playback from movies or DVB-T will be inhibited.
You get when you release the handbrake an information image that this is not allowed while traveling.
If you still want to activate the image while traveling make this one the menu with the brake option.
Warning :
Find out by those in force in their country guidelines and legal regulations. If you enable this option
illegally, this can lead to substantial fines.
This is a setting that is not enabled for general use of Dynavin and is no acquisition of said fines
concedes.
This setting is only activated by the user and owner, and thus this also assumes all responsibility
activation.
14
Brightness
You have several ways to adjust the brightness and control. This includes also the dimming function
Touch first the down arrow key right of the menu item Auto / Manual
After touching the arrow there will be open the sub-menu.
Depending on the selected function will be
another option in the settings unlocked.
Auto
=
Manual =
Automatic switching the dimming function
Illumination = switch when light is turned on
Sensor = light detection in the interior of the vehicle
Manually adjust the backlight
Only when you have completed the selection the submenu close automatically.
After selecting a new button will be displayed. In Manual right of the lettering or car below the buttons.
Then press on the slider to set the setting lever
for the dimming function.
Through a Side Slide-motion you can adjust the slider to the desired value.
15
Navi Media Info
If you have enabled this option will be displayed in navigation mode in an additional shot.
You can display a variety of media:
Radio, iPod, USB, Aux and so on
If you need the full navigation screen, you can also reduce the displayed image by pressing the button
in the picture. To represent this again press the button again.
Dual Zone
If you have enabled the option is displayed on the navigation Monitor and played back a movie in the
passenger area.
Language
Here you can set your desired menu language.
You have a choice of up to
10 languages.
It may happen that in one of the selected languages the meaning is not clear to translate or the text
is too long.
Then it may be that the English text of which is to be seen.
16
Reverse
If your car have an ORIGINAL PDC system installed or have an original rear view camera, you can reenable these depending on vehicle type.
This is NOT at all Vehicle types and construction
possible. Please refer to the compatibility
information from Dynavin.
None
:
When no system is installed
PDC
:
If only one PDC system is installed
CAM
:
If only a rear view camera is installed
PDC+CAM :
When both systems are installed in the vehicle.
If you selected None and use than the reverse gear nothing happens, the screen remains in the
current menu.
If you have selected PDC and you take the reverse gear a new image appears.
Depending on the vehicle and vehicle system it is also possible that the front PDC information is
displayed.
Please note that this systems have only a supporting role. Faulty measurements caused by not
properly built in systems or by environmental effects caused interference can not be compensated by
the system.
These systems do not replace the personal control and the minimum clearances
17
Have you selected CAM is transmitted the image of the rear view camera.
Please note that during the transmission of the image by settings of the camera and by the installation
of angle or externally caused interference visibility may be disturb.
These systems do not replace the personal control and the minimum clearances.
When activated PDC + CAM both information will be displayed in one screen.
If you get a call in that time when you are using the PDC system of your car the call will be displayed
as a 2nd window in the screen corner.
18
For more functions move the menu bar to
the bottom. The easiest way you can do this
with reach the scroll bar on the right side of
the screen.
Time Zone
In this menu item you can set the time zone in which you are located.
Touch Screen Adjust
If you feel that the screen does not respond accurately to your commands, you can perform on the
menu a screen calibration again. To do this press as indicated in the image a sequence 1-5 and
following the cross as central as position in the circle.
Once you have selected the last point you will automatically return to the setup menu.
19
Main menu
The device features for common across different levels (pages). The main menu is divided into three
sites. You can move the window on a slide motion.
Touch the screen with a finger and
then move it to the right or to the left. This moves
you to the individual pages of the main menu.
You can do this in almost every menu on the
same way.
The three points on the lower side of the display
shows you which side is open and to which
direction you can move.
If you just touch one of the icons on the
screen with a finger, thus opens the selected
menu. This is only possible if the selected
device is connected or the function has been
enabled.
The marked symbols on the first image have a special function. These can be replaced according to
your wishes.
20
Change icons
To move a function icon proceed as follows.
You have the option to change two of the
options from the first page by functions of the last
(third) menu page.
In the left picture you see the interchangeable
functions are Highlighted.
Go through a scrolling movement to the
page.
third menu
Touch and hold to the function you want to
finger.
move with a
After the first
two seconds, the icon for the selected function is caused and you will automatically be on the first
menu page. Continue holding your finger on the screen.
Move the function you selected on that function you
wish to exchange
Now take your finger off the screen. The functions
will be exchange thereby automatically.
21
Radio function
To get to the radio function, press in the Main
Menu the radio icon, or use the radio button
on the front of the device.
Overview of buttons
= Manual tuning
= Station keys 1-15
By scrolling to the left or right to access all presets.
= back to main menu
= Radio options
= Frequency adjust manually
APS
BAND
AM
22
= Automatic search
The five strongest stations will be stored automatic
= Change frequency between AM/FM
Radio-Options
– Radio options
Through a brief
touch the box next to
the words the option
is Enable.
A hook
indicates that the
option is selected
AF
= Alternative
frequency
When choose it, will appear AF characters on the top of the radio menu. this allows a receiver
to transform a different frequency providing the same station when the first signal becomes too
weak.
Automatic
This additional function of AF,You can select whether the AF function of the station you are
listening is to be exchanged for another (Automatic) or that the station is to be maintained and
only a new stable frequency to be searched.
TA = Traffic Announcement
If this option is enabled, traffic messages can be recorded in the current
program automatically.
Radio Text
If you have activated this function, information can be transmitted by the radio station to your
radio. For example, information about played song or information about the current program
as well as the station name.
Dual Radio Antenna
If this feature is enabled, the original vehicle diversity system can still be used. For example, in
cars from Audi
Region
Select the region where you are located. This is necessary to the radio tuner to provide the
required frequency ranges.
TMC Frequency adjust
Here you can set whether always the strongest stations in the region to be selected for the TA
function, or the station you hear in the moment.
23
CD/DVD function
To access the CD / DVD feature, insert a disk into the drive, or if already a medium is in the drive,
press the button labeled disc on the front of the device or from the main menu via the touch screen. By
touching the icon Disk
After you insert the disc the playback of the music or movie will start automatically.
To eject the CD again press the front panel button to eject the medium.
If you do not want to eject the media, but want to return to the previous menu, briefly press the SRC
button on the front of the device.
Menu for the music playback via CD / DVD
With a short press on the buttons you can select the following.
Previous track
Next track
Play
:
/ Pause
Repeat
:
Press one´s - The song is repeated once
Press twice - The song is repeated at constant.
The symbol for repetition is in the upper line displayed as confirming the
selection.
:Shuffle
In this setting, the songs are purely coincidental from the folder played where
you are.
24
CD/DVD movie playback
By a slight pressure on the
touch screen, you can call the functions listed below.
Previous
:
track
Next
: track
: Play / Pause
: Without function
: Back to main menu
:More Features
This additional button opens provides you more
control options to control the movie.
: Fast forward
: Fast rewind
: Repeat
: Shuffle
: Switch the audio channel
: Select subtitles
25
Phone function
To access the Phone function, press on the touch panel displayed option or press and release the
right knob.
In order to use the phone or Bluetooth function, connect first your phone to your Dynavin unit.
Enable the BT option on your phone and search for any nearby devices. If your phone has finished the
search, you should see the display Dynavin-N6. Pair the phone with the device.
Once your cell phone or smartphone connected to the Dynavin unit, this is displayed in the menu.
Disconnect, in the upper left corner and the gray
icons in the lower left corner show to you
that the phone is not connected with the unit.
When the connection is established, the name
of the phone is at the top left. Top right when the phone transmits information of the state of charge
and the field strength is displayed.
Left below the icons for the phone book and favorites are displayed.
Once the connection is made your phone will connect every time even if you have the BT option
switched on and the phone is within the range of the device.
26
Button functions in phone menu
By a slight pressure on the touch screen, you can call the functions listed below.
C :
Delete input
Each time you press the button, the last digit is the
deleted entered numbers
: Call History
Here are the most recent incoming and outgoing calls appropriate
: Phonebook
Here are all the entries from the phonebook of your mobile phone
displayed. When they were transferred.
:
Answering a call
Accept incoming calls or call the selected numbers.
: Hang up call
End calls or reject incoming calls.
: Enabling private mode
When calls are not to be reproduced through the speakers but only
over the phone.
: Back to main menu
Call History
27
: Call History
Here are the most recent incoming and outgoing calls appropriate
By scrolling movement to the left or right, you can call all contacts displayed.
With a short press on the icons you can select the following.
: Display the Phonebook
: Calling the last incoming calls
There are the last 20 calls Showing
: Call the last outgoing calls
There are the last 20 calls Showing
: Call the last missed calls
There are the last 20 calls Showing
: Calling Favorites
: Back to previous menu
28
Phonebook
: Phonebook
All entries from the phone book of your phone are displayed.
When they were transferred from the mobile phone.
When you call the phone book option it will take you directly to the search mode.
By briefly pressing the function keys, you can select the following.
: Select the keyboard language
You have the option between Cyrillic, Greek, Latin
: Delete the last entry
123 : Switch between numeric / special characters and letters
: Show and hide the keyboard
Touching one of the letters or symbols of the on-screen virtual keyboard is considered as input for the
search and is presented on the top line.
Here you can search by name or phone numbers. The selection of the contacts found will be shown
immediately.
If you select a contact, it will be displayed in a new window.
29
Contact from the phonebook
You can now access the following functions on the three buttons below the contact.
: Call contact
: Select another phone number that is stored under the contact
Depending on how many numbers you have assigned to a contact
You can select this button, the stored numbers
: Save to favorites
From this moment, this contact is also guided to your favorites.
If you connect a different phone with the Dynavin unit, the in-memory contacts are overwritten.
It is only possible to connect one phone to the machine.
Should you connect a phone to the device wherein the transmission of the phonebook has been
deactivated, all entries are so that these can not be grayed out for strangers.
30
iPod function
To access the iPod function, briefly press the touch screen and iPod ® option or press and release the
push button on the front of the Dynavin device is labeled with iPod.
You can only enter the menu if you have also connected an iPod to the unit via USB.
Use only USB to iPod® cable were also given by Apple® free to use. Otherwise, it may result in
malfunction or your iPod® is not recognized by the device.
After pressing the iPod button the home screen will open and the contents of the iPod® is charging.
Depending on the size and amount of data, this can take a few seconds.
After all required information has been loaded the playback interface appears on the screen.
You can run almost all of the options as you are used to from your iPod® on the screen.
31
Functions of the iPOD® menu
With a short press on the buttons you can select the following.
: Previous track
: Next track
: Play / Pause
: Repeat
Press one´s - The song is repeated once
Press twice - The song is repeated at constant.
The symbol for repetition is in the upper line displayed as confirming the selection.
: Shuffle
In this setting, the songs are purely coincidental from the folder played where you are.
The symbol for Shuffle is in the upper line displayed as confirming the selection.
: iPod® option menu
: Back to main menu
Note :
You can not play any kind of video in iPod® mode
32
Display symbol for Repeat
Display symbol for Shuffle
33
iPod options menu
With a short press on the buttons you can select the following.
With an up and down scroll motion, you can search the songs, artists,or playlists in the
displayed table.
:
Open the iPod® album menu
: Open the iPod® artist menu
: Open the iPod® song menu
: Open the iPod® playlist menu
:
Opens the Input menu to search
Opens the search window with a virtual keyboard.
:
34
The scroll bar will show you where you are in the list and gives an indication
of how many files are to be found in the list.
Menu fort the albums
If you have opened the menu for the Albums you will see all albums which are stored like the picture
above.
A short press on the name of an album opens this and all the songs stored in the album are
displayed.
With a further pressure on one of the saved songs will be selected and played..
With an up and down motion, you can browse the songs or albums in the table which is
displayed to you.
If you want to browse the contents of the folder, use the search function in the menu. By pressing
the keyboard icon, the virtual input option will be shown. Beginning with the first letter of a title you
can then browse the contents.
: Press these button and return back to the previous menu.
35
Menu for the artists
If you will open the menu for the performers all stored
artist with name will be displayed to you.
A short press on the name of an artist opens up new
window with either all albums of the artist or the
stored songs when no album has been deposited
With a further pressure on one of the saved songs will be selected or start to play.
With an up and down motion, you can browse the songs or artists or albums in the table which
is displayed to you.
If you want to browse the contents of the
folder, use the search function in the menu. By pressing the keyboard icon, the virtual input option
will be shown. Beginning with the first letter of a title you can then browse the contents
: Press this button and return back to the previous menu.
36
Menu for playlists
If you have opened the menu for the playlists you will see all of them like the picture above
A short press on the name of a playlist will open this and all the songs stored in the album are
displayed.
With an up and down motion, you can browse the songs or artists or albums in the table which
is displayed to you.
If you want to browse the contents of the folder, use the search function in the menu. By
pressing the keyboard icon, the virtual input option will be shown. Beginning with the first letter
of a title you can then browse the contents
: Press this button and return back to the previous menu.
37
Menu for the songs
If you will open the menu for the songs all stored songs with title will be displayed to you
A short press on the title of a song that is shown to you will start playing the song.
An icon to the left side of the song title will show you what song is currently playing
With an up and down motion, you can browse the songs in the table which is displayed to you.
If you want to browse the contents of the folder, use the search function in the menu. By
pressing the keyboard icon, the virtual input option will be shown. Beginning with the first letter
of a title you can then browse the contents
: Press this button and return back to the previous menu.
38
USB function
To access the USB function press on the touch screen this option or press the push button on the front
of the Dynavin device that is labeled USB.
You can only enter the menu when you used to connect a USB device to the device via USB.
Use only USB media formatted with FAT16/32. Otherwise it can happen that the unit can not be read
in the media. The connected USB media should not exceed a maximum of 64 GB.
After pressing the USB button the USB menu is invoked and the content will be loaded. Depending on
the size and amount of data, this can take a few seconds.
If you want to use a hard disk, please pay attention to the necessary operating current. Since some
hard drives have a higher consumption as it can be supplied by Dynavin unit.
It can therefore happen that you have to use an external power source.
39
Functions in USB mode
With a short press on the buttons you can select the following.
: Previous track
: Next track
: Play / Break
: Repeat
Press one´s - The song is repeated once
Press twice - The song is repeated at constant.
The symbol for repetition is in the upper line displayed as confirming the selection.
: Shuffle
In this setting, the songs are purely coincidental from the folder played where you are.
The symbol for Shuffle is in the upper line displayed as confirming the selection.
: iPod® option menu
: Back to main menu
40
USB Options
With a short press on the buttons you can select the following.
With an up and down scroll motion, you can search the songs, artists, or playlists in the
displayed table.
: Opens all music information on the USB media
.
: Opens all movie files on the USB media
: Opens all image formations on the USB media
: Opens all the information of the USB stick in a directory structure
: Opens the Input menu to search
Opens the search window with a virtual keyboard.
:
The scroll bar will show you where you are in the list and gives an indication of how
many files are to be found in the list.
41
Menu for the albums
If you have opened the menu for the Albums you will see all albums which are stored like the picture
above.
A short press on the name of an album opens this and all the songs stored in the album are
displayed.
With a further pressure on one of the saved songs will be selected and played.
With an up and down motion, you can browse the albums in the table which is
displayed to you.
If you want to browse the contents of the folder, use the search function in the menu. By pressing
the keyboard icon, the virtual input option will be shown. Beginning with the first letter of a title you
can then browse the contents
: Press this button and return back to the previous menu..
42
Menu for the artists
If you will open the menu for the performers all stored artist with name will be displayed to you
A short press on the name of an artist opens up new window with either all albums of the artist
or the stored songs when no album has been deposited
With a further pressure on one of the saved songs will this be selected or start to play.
With an up and down motion, you can browse the artists in the table which
is displayed to you.
If you want to browse the contents of the folder, use the search function in the menu. By pressing
the keyboard icon, the virtual input option will be shown. Beginning with the first letter of a title you
can then browse the contents.
: Press this button and return back to the previous menu.
43
Menu for the songs
If you will open the menu for the songs all stored songs with title will be displayed to you.
Back to previous menu
A short press on the title of a song that is shown to you will start playing the song.
An icon to the left side of the song title will show you what song is currently playing
With an up and down motion, you can browse the songs in the table which is displayed to you.
If you want to browse the contents of the folder, use the search function in the menu. By
pressing the keyboard icon, the virtual input option will be shown. Beginning with the first letter
of a title you can then browse the contents
: Press this button and return back to the previous menu.
44
The menu for movie playback
A short press on the title of a movie will start playing it.
With an up and down motion, you can scroll the list of films in the table which is displayed.
With a short press on the buttons you can select the following.
: Previous track
: Next track
: Play / Pause
: Stop
: Fast forward
: Back to previous menu
: Back to main menu
45
The menu to view images
A short press on one of the pictures this is in large format will be shown.
With an up and down motion, you can scroll through the pictures in the displayed table.
You can save images which are saved on the SD-Card or USB device in the initial screen. These are
then displayed when the Dynavin unit starting up.
You can use any kind of picture you have stored on the card like JPG, PNG or BMP files.
To do this, press on the icon in the bottom left corner. As shown in the picture above.
46
That your chosen image is saved as the startup screen, will be confirmed by the green icon in the
bottom left corner.
If you want to delete this again, press again the memory button in the image.
For confirmation, you will instead of a green symbol, a red appears when the image was deleted as
the start screen.
47
The menu for the folder structure
With an up and down motion, you can scroll the directories in the Browse in the displayed
table.
If you select a folder, you can go to the other sub-directories and then access the desired content.
If you touch the keyboard icon, you can open the search function. By typing on the keyboard, you can
search for specific files and folders.
48
SD-Card
To access the SD card function, an SD card in the MMC slot on the front panel must be plugged.
The card can have a storage capacity of up to 64GB.
With a short press on the buttons you can select the following.
With an up and down scroll motion, you can search the songs, artists, or playlists in the
displayed table.
: Opens all music information on the SD media
: Opens all movie files on the SD media
: Opens all image formations on the SD media
: Opens all the information of the SD in a directory structure
: Opens the Input menu to search
Opens the search window with a virtual keyboard.
: The scroll bar will show you where you are in the list and gives an indication of how
many files are to be found in the list.
49
Menu for the Albums
If you have opened the menu for the Albums you will see all albums which are stored like the picture
above.
A short press on the name of an album opens this and all the songs stored in the album are
displayed.
With a further pressure on one of the saved songs will be selected and played.
With an up and down motion, you can browse the songs or albums in the table which is
displayed to you
If you want to browse the contents of the folder, use the search function in the menu. By pressing
the keyboard icon, the virtual input option will be shown. Beginning with the first letter of a title you
can then browse the contents
: Press this button and return back to the previous menu.
50
Menu for the Artists
If you will open the menu for the performers all stored artist with name will be displayed to you.
A short press on the name of an artist opens up new window with either all albums of the artist
or the stored songs when no album has been deposited
With a further pressure on one of the saved songs will be selected or start to play
With an up and down motion, you can browse the songs or albums in the table which
is displayed to you.
If you want to browse the contents of the folder, use the search function in the menu. By pressing
the keyboard icon, the virtual input option will be shown. Beginning with the first letter of a title you
can then browse the contents
: Press this button and return back to the previous menu..
51
Menu for the songs
If you will open the menu for the songs all stored songs with title will be displayed to you.
A short press on the title of a song that is shown to you will start playing the song.
An icon to the left side of the song title will show you what song is currently playing
With an up and down motion, you can browse the songs in the table which is displayed to you
If you want to browse the contents of the folder, use the search function in the menu. By
pressing the keyboard icon, the virtual input option will be shown. Beginning with the first letter
of a title you can then browse the contents
: Press this button and return back to the previous menu.
52
A2DP Bluetooth function
To use the A2DP function you need to have your phone connected to the device and the mobile
phone must support A2DP function.
In the main menu scroll to the page with the source options. Select the icon for A2DP and
apply it by a short pressure on the menu field.
: Previous Track
: Next track
: Play / Pause
: Back to main menu
In the window you will find the following information about the playing song:
: Artist
: Album
Title
: of the track
These are only displayed when the played songs contain this information.
53
Aux Function
If you attach an external audio source, you can control this only on the connected device. A control
device on the Dynavin is not possible.
To do this, use an adapter to the RCA connectors to the backwards inputs.
In the main menu scroll to the page with the source options. Select the icon for HDD and
apply it by a short pressure on the menu field
: Back to main menu
Or, briefly press the SRC button on the front of the Dynavin-Unit.
54
Internal memory
The Dynavin unit has an internal memory where you can store media such as music, pictures or
movies.
In the main menu scroll to the page with the source options. Select the icon for HDD and
apply it by a short pressure on the menu field
With an up and down scroll motion, you can search the songs, artists,or playlists in the
displayed table.
: Opens all music information on the HDD media
: Opens all movie files on the HDD media
: Opens all image formations on the HDD media
: Opens all the information of the HDD in a directory structure
:
Opens the Input menu to search
Opens the search window with a virtual keyboard.
: The scroll bar will show you where you are in the list and gives an indication of how
many files are to be found in the list.
55
Menu for the Albums
If you have opened the menu for the Albums you will see all albums which are stored like the picture
above.
A short press on the name of an album opens this and all the songs stored in the album are
displayed.
With a further pressure on one of the saved songs will be selected and played.
With an up and down motion, you can browse the songs or albums in the table which is
displayed to you.
If you want to browse the contents of the folder, use the search function in the menu. By pressing
the keyboard icon, the virtual input option will be shown. Beginning with the first letter of a title you
can then browse the contents
: Press this button and return back to the previous menu..
56
Menu for the Artists
If you will open the menu for the performers all stored artist with name will be displayed to you.
A short press on the name of an artist opens up new window with either all albums of the artist
or the stored songs when no album has been deposited
With a further pressure on one of the saved songs will this be selected or start to play.’
With an up and down motion, you can browse the songs or albums in the table which
is displayed to you.
If you want to browse the contents of the folder, use the search function in the menu. By pressing
the keyboard icon, the virtual input option will be shown. Beginning with the first letter of a title you
can then browse the contents
: Press this button and return back to the previous menu.
57
Menu for the songs
If you will open the menu for the songs all stored songs with title will be displayed to you
A short press on the title of a song that is shown to you will start playing the song.
An icon to the left side of the song title will show you what song is currently playing
With an up and down motion, you can browse the songs in the table which is displayed to you.
If you want to browse the contents of the folder, use the search function in the menu. By
pressing the keyboard icon, the virtual input option will be shown. Beginning with the first letter
of a title you can then browse the contents
: Press this button and return back to the previous menu.
58
Folder options
The option is used to copy or to transfer files from storage media to the internal memory.
You can copy the files only from an SD card which is inserted in the MMC slot into the internal memory.
First touch the button Storage Card.
You get a list of all files on the card. These are displayed in a folder structure.
Like one a PC, you can now select files and by the shown keyboard shortcuts you can copy, past, or
delete files.
59
Function of the Menu
Ctrl+C
: Copy file
Ctrl+V
: Paste file
Ctrl+A
: Choose all files
: Delete selected file
: Back to previous menu
: Back to main menu
Copying files to the internal memory
Select a file that you would like to copy to the internal memory.
The file is marked as shown above. If you want you can also select multiple files. Simply tap to another
file.
Now press Ctrl+C Button then copies the files you want to transfer.
Now press the Back key until you are in the main menu.
Now select the button Internal memory (HDD).
If you see the directories, you can either choose a subfolder in which the files are to be stored or
directly into the root directory.
Now press Ctrl+V to paste the files.
60
Navigation
To use the Navigation there must be inserted the SD-Card with the software on it to the Navi-Slot on
the front of the navigation system.
It can be used almost any Windows-based navigation on it. Normally Dynavin will preinstall the IGOPrimo Navigation software and all settings are done already.
If you want to use your own software now or the enclosed from Dynavin SW can not be run, check first
of the following settings.
Navigation software path
Go in the main menu to the button labeled Navi Path.
Now click on the icon for the folder.
This takes you to the directory structure of the
slot.
navigation map which is inserted into the SD card
Once there, go now the executive. EXE file is needed from the to start.
Depending on the software, this can also be located in a subfolder.
Touch this file with your finger.
61
The path of the file should be shown like in the image as a specified path now.
Press these button and return back to the previous menu.
Start up the Navigation software
Now go to the main menu, click the icon for navigation.
You will see when you start the navigation first a loading screen is shown.
When you start the navigation the first time, this may take several minutes to complete.
Also you must set for the first time some options of the Navigation software like language time voice
and so on.
Please refer for all of the functions and options of the navigation to the manual for the used navigation
software.
The Navigation Software will be included by Dynavin but is not a permanent part of the device.
62
Sound Settings
The Dynavin N6 offers a wide range of Settings to adjust the sound conditions at your requirements.
This includes the possibility to set the delay times on the seating position and also the possibility to
activate an original active sound system such as BMW with DSP system.
Please read on the homepage of Dynavin in which vehicle which sound system can be activated
Through a brief touch of the lettering the option is selected.
For some options, you will be taken to a new menu in this you can set more options.
: Press this button and return back to the previous menu.
63
Fader – Balance – Delay
In the menu for fader, balance and delay you can set up the speakers so that they are leveled
perfectly to your position.
Through a brief touch of the arrow representations option will select and change the specified value.
When you press a long time on one of the settings, the setting shifts continue automatically.
Use the directional pad displayed on the right side to control the volume of individual speakers.
The arrows indicate the direction in which you move the center.
One press on the circle in the middle of the directional pad centered again the setting.
The displayed crosshair on the vehicle display tells you where the acoustic center is located.
With the shown speakers at each corner of the vehicle, you can set the duration. Once there, you can
set the approximate distance in cm on how far your ear is located away from the speaker.
This can greatly enhance your music experience.
With the No-Delay button you can reset the settings.
: Press this button and return back to the previous menu.
64
Bass – Middle – Treble
In this menu you can adjust the highs and lows of your sound system.
With the four controls you have shown the possibility by simply moving the bass, high and mediumsound and when you have also connected a subwoofer you can control the subwoofer output.
With an up and down motion scrolling, you can get the scrollbar to the desired position.
To do this, press the scroll bar. If the blue bar turns red you know that the controller is selected.
: Press this button and return back to the previous menu.
65
Equalizer
In this menu you have the opportunity to set one frequency in a certain range. You can do this in five
different frequency ranges. 80 Hz, 320 Hz, 1.9 kHz, 6.4 kHz and 12.8 kHz.
But you have also the possibility to select some preset values.
How, for example, Flat, Pop, Classic, rock, or if you can select the User button to make your own
personal setting.
With an up and down motion scrolling, you can get the scrollbar to the desired position.
To do this, press the scroll bar. If the blue bar turns red you know that the controller is selected.
: Press this button and return back to the previous menu.
66
Source
In this menu you can set whether the volume level of an audio source when switching the source it´s
automatically adjusted.
If the controller is in the 0 position the volume that is set by the volume control will be assumed. In the
areas above or below 0 the volume is automatically adjusted by this value.
With an up and down motion scrolling, you can get the scrollbar to the desired position.
To do this, press the scroll bar. If the blue bar turns red you know that the controller is selected.
: Press this button and return back to the previous menu.
.
67
Other settings
Confirmation tone
:
With this option you can set the key confirmation sound.
With the shown controller you can set the volume of the
sound. Touch the scroll bar for this function.
Warning &PDC
:
This option is just for special cars like BMW E9X and E8X.
If you select this option you can hear warning signal through the
speakers. The warning beep includes seat belt and so on.
Loud
:
This option is for turning up the bass and treble to make
the speakers sound a lot louder than normal settings.
Dyna-Bass
:
This option is to improve the sound reproduction of low frequencies
The result is that the listener gets the illusion of deep bass reproduction
OE DSP AMP
:
This option is for cars with an original DSP amplifier, if the car has a
DSP system you can select it to adjust DSP output.
This option is just for special cars (BMW E46 & BMW E39, E53)
without DSP amplifier system, selecting it can avoid sound distorted if
you adjust the volume to high.
Factory amplifier Hifi :
With a slide movement you can bring the controller to the desired position.
68
DAB
The New Dynavin unit will enable you to connect with other accessories.
Therefore Dynavin has a DAB tuner in preparation that allows you to upgrade your multimedia
device with an external tuner that is developed by Dynavin itself. You can connect it external to
the Unit. This combination allows you to receive and control of the multimedia unit Digital
television.
Please inform yourself on the homepage of Dynavin when this is available.
www.dynavin.com
DVB-T
The New Dynavin unit will enable you to connect with other accessories.
Therefore Dynavin has a DVB-T tuner in preparation that allows you to upgrade your multimedia
device with an external tuner that is developed by Dynavin itself. You can connect it external to
the Unit. This combination allows you to receive and control of the multimedia unit Digital
television.
Please inform yourself on the homepage of Dynavin when this is available.
www.dynavin.com
69
=
OBC
The Dynavin unit provides you with the option to display some of vehicle internal car information.
The information displayed depending upon manufacturers, vehicle, year and on the software version
of the vehicle.
This information may therefore be different from vehicle to vehicle.
On the possibilities to read out the car information Dynavin have only a limited impact and can not be
referred in detail before the installation of the unit is done.
If some information were not displayed in the system it can be that the unit from Dynavin can´t read
out this information at the time of delivery.
Perhaps this needs to specified at a later date by a software update.
Information that can be read out by Dynavin with if the information is available from the vehicle.
Engine Oil Temperature
Battery Voltage
Coolant Liquid Temperature
Outside Temperature
The information displayed does not replace the vehicle's information.
If warnings from the vehicle's own monitoring stations take place, immediately seek a specialist
workshop even if the information of the Dynavin unit may be displayed normally.
70
Time synchronization (except MC 2000)
This function may only be used in Mercedes vehicle.
Dynavin offers you the opportunity by removing the original Mercedes navigation device to match the
time of the on board clock with the new device.
Only If you have connected the unit through a car which is supported you will find this option in the
menu.
To press through a short touch on the display the Clock Sync option in the main menu will be
activated.
The clock in the cluster display will then be synchronized with the time of the Dynavin unit.
71
Update your unit
You can find some System information´s of the unit and the possibility to make an update of the unit.
Here you can see, for example, the version of the
operating system or serial number or even how much
internal memory you have left to use.
If it is necessary to install any update, you can do this in this menu.
Note:
If your device is functioning normal or you should not be explicitly informed on the homepage of
Dynavin to update the unit, you don´t need to use this feature.
Each update will be installed at your own risk.
If an error occurs during the update, or if the appliance should no longer be run after the update takes
Dynavin no guarantee.
Make sure that if you install an update you should be able to ensure a constant voltage supply of the
device and it does not occur to a power failure or any other voltage fluctuations. This may interfere
with the update process and make the device unusable.
Use only media cards which are 100% failure free. If you use a memory card which is defect it can
happen that the Update can`t be installed or that the update will damage your unit.
Inform yourself on the homepage of Dynavin for an update and if you need this and if its necessary to
install it.
www.dynavin.com
Use only updates for your device approved by Dynavin and which can be found on the homepage of
Dynavin.
72
Download on our homepage the permissible update software for your device and save them on an
SD-Card.
The card must be formatted with the FAT 16/31 file system.
Then insert the card into the MMC SD card slot.
Now click the on the Upgrade now box.
If no update software or a non-extracted file is located on the SD card, you will get a note that you
have to download the software from the Dynavin website.
Only when the system find the correct files on the card, the process is continued.
If the system software is detected, the device restart and install the update.
It may happen that you see a black screen.
While updating a progress bar will be displayed.
Has this reached 100% the unit will make a restart and the update is installed.
73
APPs
You have the possibility to install additional apps or functions and added to the
Dynavin unit.
This is only possible with the applications made by Dynavin available app's. You
should not install any self-created app or third-party app on the device.
This can cause that you damage the software or hardware and your device is not
longer working properly.
This already enshrined function will be activated at a later date. Visit therefore in
intervals the homepage from Dynavin.
www.dynavin.com
On this page you can inform yourself about the possibility which functions and
options you can install.
74
Produkt Spezifikationen
Allgemeines :
Betriebsspannung
12 V DC
Arbeitsbereich 11V – 16V
Stromaufnahme
Max. 15A
Abmessungen
Variiert je nach Ausführung des Gerätes
Gewicht
Variiert je nach Ausführung des Gerätes
Display Abmessung
6,2“-7“ Je nach Ausführung
Hintergrundbeleuchtung
LED
Temperatur Arbeitsbereich
-10°C bis +70°C
Interner Speicher
4 GB
iPod® Steuerung über den USB-Eingang
Automatische Signalerkennung NTSC/PAL
Kompatibel mit Original PDC und Rückfahrkamera ( Je nach Fahrzeug und
Kompatibilität )
Display Spezifikationen :
Seitenverhältniss
16 : 9
Auflösung
800*480
Display Typ
TFT - Touchdisplay
Temperaturbereich
-20°C bis +80°C
Radio Spezifikationen :
FM Tuner
Frequenzbereich 87,5-108 MHz
AF 80 dB
Signal to Noise 64 dB
Erfassungsbereich 2dB
Mono Empfindlichkeit 8.1 dBf (0.7 µV / 75 ohms)
MW Tuner
Frequenzbereich 531Hz-1,602kHz
Empfindlichkeit (IEC Standard): 25.1/28.0 (µV/dBf)
75
CD-Player
Frequenzgang 20Hz~27kHz ± 2dB
Kanaltrennung 1kHz – 65dB
Dynamischer Bereich 1kHz 85 dB
Harmonische Verzerrung bei 1 kHz 0,01%
Signal to Nois 100dB
Video Out 1V p-p (75 ohm)
Video Singnal to Nois 60dB
USB – Spezifikationen :
USB-Standard 1.1 / 2.0
Max. Stromabgabe ~ 1000mA
Dateisystem : FAT 16/32
DecodingWMA / AAC / MP3
Zwei Kanal ( Stereo )
SD – Spezifikationen :
Dateisystem : FAT 16/32
Decoding WMA / AAC / MP3
Zwei Kanal ( Stereo )
Bluetooth® - Spezifikationen :
Parrot Bluetooth® Chip
Bluetooth Version V2.0
Frequenzbereich
Ausgangsleistung +4dBm Max
HFP ( Hands Free Profile)
HSP ( Head Set Profile )
PBAP ( Phonebook Access Profile )
Audio – Spezifikationen :
Maximale Ausgangsleistung : 4*50W
Lautsprecher Impedanz 4-8 Ohm
Pre Out : 4V
Audiodateiformat MP3(MP1/MP2/MP3). AAC. FLAC. APE
Subwoofer Level Adjustment: 0 to 7
Bass Level Control Range: -7 to +7
Bass Center Frequency: 100Hz
Treble Level Control Range: -7 to +7
Treble Center Frequency: 10
Time Correction: 0-5 ms (0.1ms)
Graphic Equalizer: 7-Band (80, 250, 500, 1k, 4k, 8k, 16kHz),
Adjustable Output Level -6 to +6dB
76
Supported Video files :
MPEG: *.mpg, *.mpeg, *.dat, *.vob
AVI: *.avi, *.xvid
RM: *rm, *rmvb
FLV , ASF/ WMV
MP4: *.mp4, *.mov
MKV , OGM
Supported image files :
JPEG, PNG, GIF
FAQ / Troubleshooting
If you encounter during installation or in the operating of the device to not mentioned settings or
problems, Ask us personally or look on our website under the FAQ's or the Trouble shooting
information.
These can be found on our homepage:
www.dynavin.com
77