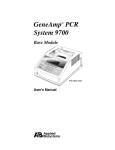
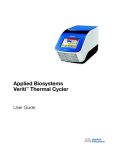
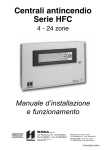
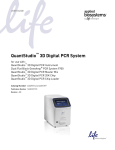
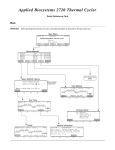
1
GeneAmp PCR System 9700 ® Base Module GR0873 F1 F2 STOP F3 1 Gen PCR S eAmp ® ystem 9700 F4 2 4 F5 3 5 7 6 8 ENTE R POWE R 9 0 CE P/N N805-0200 User’s Manual GeneAmp® PCR System 9700 Base Module User’s Manual © Copyright 2003, 2010 Applied Biosystems. All rights reserved. Information in this document is subject to change without notice. Applied Biosystems assumes no responsibility for any errors that may appear in this document. This document is believed to be complete and accurate at the time of publication. In no event shall Applied Biosystems be liable for incidental, special, multiple, or consequential damages in connection with or arising from the use of this document. NOTICE TO PURCHASER: LABEL LICENSE The GeneAmp® PCR System 9700 thermal cycler is covered by US patent claims and claims in their non-US counterparts, owned by Applied Biosystems. No right is conveyed expressly, by implication, or by estoppel under any other patent claim, such as claims to apparatus, reagents, kits or methods such as 5’ nuclease methods. Further information on purchasing licenses may be obtained by contacting the Director of Licensing, Applied Biosystems, 850 Lincoln Centre Drive, Foster City, CA 94404, USA. ABI Prism, Applied Biosystems, and BigDye are registered trademarks of Applied Biosystems or its subsidiaries in the U.S. and/or certain other countries. AB (Design) is a trademark of Applied Biosystems or its subsidiaries in the U.S. and/or certain other countries. AmpliCyle, AmpliTaq, AmpliTaq Gold, and GeneAmp are registered trademarks of Roche Molecular Systems, Inc. All other trademarks are the sole property of their respective owners. 12/2010 Part Number 4303481 Rev. H Contents 1 Introduction and Safety Overview . . . . . . . . . . . . . . . . . . . . . . . . . . . . . . . . . . . . . . . . . . . . . . . . . . . . . . . . . . . . . . . . . . 1-1 About This Chapter . . . . . . . . . . . . . . . . . . . . . . . . . . . . . . . . . . . . . . . . . . . . . . . . . . . . . 1-1 In This Chapter . . . . . . . . . . . . . . . . . . . . . . . . . . . . . . . . . . . . . . . . . . . . . . . . . . . . . . . . 1-1 About This Manual. . . . . . . . . . . . . . . . . . . . . . . . . . . . . . . . . . . . . . . . . . . . . . . . . . . . . . . . . . . 1-2 Overview . . . . . . . . . . . . . . . . . . . . . . . . . . . . . . . . . . . . . . . . . . . . . . . . . . . . . . . . . . . . . 1-2 Instrument Safety . . . . . . . . . . . . . . . . . . . . . . . . . . . . . . . . . . . . . . . . . . . . . . . . . . . . . . . . . . . . 1-3 Before Operating the Instrument . . . . . . . . . . . . . . . . . . . . . . . . . . . . . . . . . . . . . . . . . . . 1-3 Documentation User Attention Words. . . . . . . . . . . . . . . . . . . . . . . . . . . . . . . . . . . . . . . 1-3 Symbols on Instruments . . . . . . . . . . . . . . . . . . . . . . . . . . . . . . . . . . . . . . . . . . . . . . . . . . . . . . . 1-4 Electrical Symbols . . . . . . . . . . . . . . . . . . . . . . . . . . . . . . . . . . . . . . . . . . . . . . . . . . . . . . 1-4 Safety Symbols . . . . . . . . . . . . . . . . . . . . . . . . . . . . . . . . . . . . . . . . . . . . . . . . . . . . . . . . 1-4 Safety Labels on Instruments . . . . . . . . . . . . . . . . . . . . . . . . . . . . . . . . . . . . . . . . . . . . . . . . . . . 1-5 Chemical Safety . . . . . . . . . . . . . . . . . . . . . . . . . . . . . . . . . . . . . . . . . . . . . . . . . . . . . . . . . . . . . 1-6 Chemical Hazard Warning. . . . . . . . . . . . . . . . . . . . . . . . . . . . . . . . . . . . . . . . . . . . . . . . 1-6 Chemical Waste Hazard Warning . . . . . . . . . . . . . . . . . . . . . . . . . . . . . . . . . . . . . . . . . . 1-6 About MSDSs . . . . . . . . . . . . . . . . . . . . . . . . . . . . . . . . . . . . . . . . . . . . . . . . . . . . . . . . . 1-7 Ordering MSDSs . . . . . . . . . . . . . . . . . . . . . . . . . . . . . . . . . . . . . . . . . . . . . . . . . . . . . . . 1-7 About Waste Disposal . . . . . . . . . . . . . . . . . . . . . . . . . . . . . . . . . . . . . . . . . . . . . . . . . . . 1-8 GeneAmp PCR System 9700 Labels and Warnings. . . . . . . . . . . . . . . . . . . . . . . . . . . . . . . . . . 1-9 Instrument Safety Labels . . . . . . . . . . . . . . . . . . . . . . . . . . . . . . . . . . . . . . . . . . . . . . . . . 1-9 Instrument Warnings Diagram. . . . . . . . . . . . . . . . . . . . . . . . . . . . . . . . . . . . . . . . . . . . . 1-9 Danger of Burns. . . . . . . . . . . . . . . . . . . . . . . . . . . . . . . . . . . . . . . . . . . . . . . . . . . . . . . 1-10 Grounding and Electrical Safety . . . . . . . . . . . . . . . . . . . . . . . . . . . . . . . . . . . . . . . . . . 1-10 Fuses . . . . . . . . . . . . . . . . . . . . . . . . . . . . . . . . . . . . . . . . . . . . . . . . . . . . . . . . . . . . . . . 1-10 Laboratory Environmental Requirements . . . . . . . . . . . . . . . . . . . . . . . . . . . . . . . . . . . . . . . . 1-11 Introduction . . . . . . . . . . . . . . . . . . . . . . . . . . . . . . . . . . . . . . . . . . . . . . . . . . . . . . . . . . 1-11 Temperature, Humidity, and Environment. . . . . . . . . . . . . . . . . . . . . . . . . . . . . . . . . . . 1-11 Pollution. . . . . . . . . . . . . . . . . . . . . . . . . . . . . . . . . . . . . . . . . . . . . . . . . . . . . . . . . . . . . 1-11 Emission/Immunity Statement . . . . . . . . . . . . . . . . . . . . . . . . . . . . . . . . . . . . . . . . . . . 1-11 Routine Maintenance for Safe Operation . . . . . . . . . . . . . . . . . . . . . . . . . . . . . . . . . . . 1-11 U.S. and Canadian Safety Standards . . . . . . . . . . . . . . . . . . . . . . . . . . . . . . . . . . . . . . . 1-12 Canadian EMC Standard . . . . . . . . . . . . . . . . . . . . . . . . . . . . . . . . . . . . . . . . . . . . . . . . 1-12 European Safety and EMC Standards . . . . . . . . . . . . . . . . . . . . . . . . . . . . . . . . . . . . . . 1-12 Australian EMC Standards . . . . . . . . . . . . . . . . . . . . . . . . . . . . . . . . . . . . . . . . . . . . . . 1-12 iii 2 Product Overview Overview . . . . . . . . . . . . . . . . . . . . . . . . . . . . . . . . . . . . . . . . . . . . . . . . . . . . . . . . . . . . . . . . . . 2-1 About This Chapter. . . . . . . . . . . . . . . . . . . . . . . . . . . . . . . . . . . . . . . . . . . . . . . . . . . . . 2-1 In This Chapter . . . . . . . . . . . . . . . . . . . . . . . . . . . . . . . . . . . . . . . . . . . . . . . . . . . . . . . . 2-1 About the GeneAmp PCR System 9700 . . . . . . . . . . . . . . . . . . . . . . . . . . . . . . . . . . . . . . . . . . 2-2 About the Instrument . . . . . . . . . . . . . . . . . . . . . . . . . . . . . . . . . . . . . . . . . . . . . . . . . . . 2-2 Control Panel . . . . . . . . . . . . . . . . . . . . . . . . . . . . . . . . . . . . . . . . . . . . . . . . . . . . . . . . . 2-2 Control Panel Diagram . . . . . . . . . . . . . . . . . . . . . . . . . . . . . . . . . . . . . . . . . . . . . . . . . . 2-2 Using the Keys . . . . . . . . . . . . . . . . . . . . . . . . . . . . . . . . . . . . . . . . . . . . . . . . . . . . . . . . 2-3 Selecting a Field . . . . . . . . . . . . . . . . . . . . . . . . . . . . . . . . . . . . . . . . . . . . . . . . . . . . . . . 2-3 Entering Numeric Values . . . . . . . . . . . . . . . . . . . . . . . . . . . . . . . . . . . . . . . . . . . . . . . . 2-3 Transfer or Storage of Methods . . . . . . . . . . . . . . . . . . . . . . . . . . . . . . . . . . . . . . . . . . . 2-4 Upgrading the Firmware . . . . . . . . . . . . . . . . . . . . . . . . . . . . . . . . . . . . . . . . . . . . . . . . . 2-4 How the 9700 Differs from the GeneAmp PCR System 9600 . . . . . . . . . . . . . . . . . . . . 2-5 3 Instrument Setup Overview . . . . . . . . . . . . . . . . . . . . . . . . . . . . . . . . . . . . . . . . . . . . . . . . . . . . . . . . . . . . . . . . . . 3-1 About This Chapter. . . . . . . . . . . . . . . . . . . . . . . . . . . . . . . . . . . . . . . . . . . . . . . . . . . . . 3-1 In This Chapter . . . . . . . . . . . . . . . . . . . . . . . . . . . . . . . . . . . . . . . . . . . . . . . . . . . . . . . . 3-1 Unpacking the Instrument . . . . . . . . . . . . . . . . . . . . . . . . . . . . . . . . . . . . . . . . . . . . . . . . . . . . . 3-2 Inspecting the Instrument . . . . . . . . . . . . . . . . . . . . . . . . . . . . . . . . . . . . . . . . . . . . . . . . 3-2 Additional Part Numbers . . . . . . . . . . . . . . . . . . . . . . . . . . . . . . . . . . . . . . . . . . . . . . . . 3-2 Setting Up your Laboratory . . . . . . . . . . . . . . . . . . . . . . . . . . . . . . . . . . . . . . . . . . . . . . . . . . . . 3-3 Choosing a Location . . . . . . . . . . . . . . . . . . . . . . . . . . . . . . . . . . . . . . . . . . . . . . . . . . . . 3-3 Operating Temperature . . . . . . . . . . . . . . . . . . . . . . . . . . . . . . . . . . . . . . . . . . . . . . . . . . 3-3 What to Avoid . . . . . . . . . . . . . . . . . . . . . . . . . . . . . . . . . . . . . . . . . . . . . . . . . . . . . . . . . 3-3 Do Not Block Air Vents . . . . . . . . . . . . . . . . . . . . . . . . . . . . . . . . . . . . . . . . . . . . . . . . . 3-3 Fuse Service Configuration. . . . . . . . . . . . . . . . . . . . . . . . . . . . . . . . . . . . . . . . . . . . . . . 3-4 Input Voltage. . . . . . . . . . . . . . . . . . . . . . . . . . . . . . . . . . . . . . . . . . . . . . . . . . . . . . . . . . 3-4 Interchangeable Sample Block Modules . . . . . . . . . . . . . . . . . . . . . . . . . . . . . . . . . . . . 3-4 Double-Line Fuse . . . . . . . . . . . . . . . . . . . . . . . . . . . . . . . . . . . . . . . . . . . . . . . . . . . . . . . . . . . 3-5 Introduction. . . . . . . . . . . . . . . . . . . . . . . . . . . . . . . . . . . . . . . . . . . . . . . . . . . . . . . . . . . 3-5 Fuse Part Number . . . . . . . . . . . . . . . . . . . . . . . . . . . . . . . . . . . . . . . . . . . . . . . . . . . . . . 3-5 Power Entry Module Diagram . . . . . . . . . . . . . . . . . . . . . . . . . . . . . . . . . . . . . . . . . . . . 3-5 Turning On the Instrument . . . . . . . . . . . . . . . . . . . . . . . . . . . . . . . . . . . . . . . . . . . . . . . . . . . . 3-6 Turning On the Instrument . . . . . . . . . . . . . . . . . . . . . . . . . . . . . . . . . . . . . . . . . . . . . . . 3-6 Setting Custom Parameters . . . . . . . . . . . . . . . . . . . . . . . . . . . . . . . . . . . . . . . . . . . . . . . . . . . . 3-7 Overview. . . . . . . . . . . . . . . . . . . . . . . . . . . . . . . . . . . . . . . . . . . . . . . . . . . . . . . . . . . . . 3-7 Displaying the Configuration Screen . . . . . . . . . . . . . . . . . . . . . . . . . . . . . . . . . . . . . . . 3-7 Setting the Time . . . . . . . . . . . . . . . . . . . . . . . . . . . . . . . . . . . . . . . . . . . . . . . . . . . . . . . 3-8 Setting the Date. . . . . . . . . . . . . . . . . . . . . . . . . . . . . . . . . . . . . . . . . . . . . . . . . . . . . . . . 3-8 Enabling or Disabling a Printer . . . . . . . . . . . . . . . . . . . . . . . . . . . . . . . . . . . . . . . . . . . 3-8 iv Turning the Run-Time Beeper On or Off . . . . . . . . . . . . . . . . . . . . . . . . . . . . . . . . . . . . 3-9 Setting the Pause Time Out . . . . . . . . . . . . . . . . . . . . . . . . . . . . . . . . . . . . . . . . . . . . . . . 3-9 Defining the Idle State Setpoint Temperature . . . . . . . . . . . . . . . . . . . . . . . . . . . . . . . . 3-10 Defining the Baud Rate for Your Printer Port . . . . . . . . . . . . . . . . . . . . . . . . . . . . . . . . 3-10 Configuring the Contrast and Screen Saver Options . . . . . . . . . . . . . . . . . . . . . . . . . . . 3-11 Setting the IP Address . . . . . . . . . . . . . . . . . . . . . . . . . . . . . . . . . . . . . . . . . . . . . . . . . . 3-11 Running Instrument Diagnostics . . . . . . . . . . . . . . . . . . . . . . . . . . . . . . . . . . . . . . . . . . . . . . . 3-13 Overview . . . . . . . . . . . . . . . . . . . . . . . . . . . . . . . . . . . . . . . . . . . . . . . . . . . . . . . . . . . . 3-13 Viewing the Diagnostic Screen . . . . . . . . . . . . . . . . . . . . . . . . . . . . . . . . . . . . . . . . . . . 3-13 Testing the Electrical Components . . . . . . . . . . . . . . . . . . . . . . . . . . . . . . . . . . . . . . . . 3-14 Testing the Display Screen . . . . . . . . . . . . . . . . . . . . . . . . . . . . . . . . . . . . . . . . . . . . . . 3-15 Testing the Keypad . . . . . . . . . . . . . . . . . . . . . . . . . . . . . . . . . . . . . . . . . . . . . . . . . . . . 3-16 Using the Tm Calculator . . . . . . . . . . . . . . . . . . . . . . . . . . . . . . . . . . . . . . . . . . . . . . . . . . . . . . 3-17 How to Use the Tm Calculator . . . . . . . . . . . . . . . . . . . . . . . . . . . . . . . . . . . . . . . . . . . . 3-17 Upgrading the System Firmware . . . . . . . . . . . . . . . . . . . . . . . . . . . . . . . . . . . . . . . . . . . . . . . 3-18 Introduction . . . . . . . . . . . . . . . . . . . . . . . . . . . . . . . . . . . . . . . . . . . . . . . . . . . . . . . . . . 3-18 Upgrading Through the Serial Port . . . . . . . . . . . . . . . . . . . . . . . . . . . . . . . . . . . . . . . . 3-18 Downloading Firmware Using Windows 95 or Windows NT. . . . . . . . . . . . . . . . . . . . 3-20 Downloading Firmware Using Windows 3.1 . . . . . . . . . . . . . . . . . . . . . . . . . . . . . . . . 3-21 Upgrading Firmware from a PCMCIA Flash Memory Card. . . . . . . . . . . . . . . . . . . . . 3-22 Copying Methods . . . . . . . . . . . . . . . . . . . . . . . . . . . . . . . . . . . . . . . . . . . . . . . . . . . . . . . . . . . 3-24 How to Copy Methods. . . . . . . . . . . . . . . . . . . . . . . . . . . . . . . . . . . . . . . . . . . . . . . . . . 3-24 Connecting and Configuring a Printer . . . . . . . . . . . . . . . . . . . . . . . . . . . . . . . . . . . . . . . . . . . 3-26 Connecting a Printer . . . . . . . . . . . . . . . . . . . . . . . . . . . . . . . . . . . . . . . . . . . . . . . . . . . 3-26 Configuring the Printer . . . . . . . . . . . . . . . . . . . . . . . . . . . . . . . . . . . . . . . . . . . . . . . . . 3-26 4 Running PCR Samples Overview . . . . . . . . . . . . . . . . . . . . . . . . . . . . . . . . . . . . . . . . . . . . . . . . . . . . . . . . . . . . . . . . . . 4-1 About This Chapter . . . . . . . . . . . . . . . . . . . . . . . . . . . . . . . . . . . . . . . . . . . . . . . . . . . . . 4-1 In This Chapter . . . . . . . . . . . . . . . . . . . . . . . . . . . . . . . . . . . . . . . . . . . . . . . . . . . . . . . . 4-1 Selecting a Method . . . . . . . . . . . . . . . . . . . . . . . . . . . . . . . . . . . . . . . . . . . . . . . . . . . . . . . . . . . 4-2 Introduction . . . . . . . . . . . . . . . . . . . . . . . . . . . . . . . . . . . . . . . . . . . . . . . . . . . . . . . . . . . 4-2 What Is a Method . . . . . . . . . . . . . . . . . . . . . . . . . . . . . . . . . . . . . . . . . . . . . . . . . . . . . . 4-2 Predefined Methods . . . . . . . . . . . . . . . . . . . . . . . . . . . . . . . . . . . . . . . . . . . . . . . . . . . . . 4-2 Selecting a Method . . . . . . . . . . . . . . . . . . . . . . . . . . . . . . . . . . . . . . . . . . . . . . . . . . . . . 4-3 Viewing Method Parameters . . . . . . . . . . . . . . . . . . . . . . . . . . . . . . . . . . . . . . . . . . . . . . 4-4 Searching for Methods. . . . . . . . . . . . . . . . . . . . . . . . . . . . . . . . . . . . . . . . . . . . . . . . . . . 4-4 Sorting Methods . . . . . . . . . . . . . . . . . . . . . . . . . . . . . . . . . . . . . . . . . . . . . . . . . . . . . . . 4-5 Running a Method . . . . . . . . . . . . . . . . . . . . . . . . . . . . . . . . . . . . . . . . . . . . . . . . . . . . . . . . . . . 4-6 Starting a Run . . . . . . . . . . . . . . . . . . . . . . . . . . . . . . . . . . . . . . . . . . . . . . . . . . . . . . . . . 4-6 About the Run Time Screen. . . . . . . . . . . . . . . . . . . . . . . . . . . . . . . . . . . . . . . . . . . . . . . 4-7 Viewing Method Information . . . . . . . . . . . . . . . . . . . . . . . . . . . . . . . . . . . . . . . . . . . . . 4-8 v Pausing a Run . . . . . . . . . . . . . . . . . . . . . . . . . . . . . . . . . . . . . . . . . . . . . . . . . . . . . . . . . 4-8 Stopping a Run Before It Completes . . . . . . . . . . . . . . . . . . . . . . . . . . . . . . . . . . . . . . . 4-9 Reviewing the History of a Run . . . . . . . . . . . . . . . . . . . . . . . . . . . . . . . . . . . . . . . . . . . . . . . 4-10 How to Review the History of a Run . . . . . . . . . . . . . . . . . . . . . . . . . . . . . . . . . . . . . . 4-10 History Formats . . . . . . . . . . . . . . . . . . . . . . . . . . . . . . . . . . . . . . . . . . . . . . . . . . . . . . 4-10 History File Records . . . . . . . . . . . . . . . . . . . . . . . . . . . . . . . . . . . . . . . . . . . . . . . . . . . 4-11 When a Run Completes . . . . . . . . . . . . . . . . . . . . . . . . . . . . . . . . . . . . . . . . . . . . . . . . . . . . . . 4-12 End of Run Screen . . . . . . . . . . . . . . . . . . . . . . . . . . . . . . . . . . . . . . . . . . . . . . . . . . . . 4-12 Method Not Stored Screen . . . . . . . . . . . . . . . . . . . . . . . . . . . . . . . . . . . . . . . . . . . . . . 4-12 5 Creating and Editing Methods Overview . . . . . . . . . . . . . . . . . . . . . . . . . . . . . . . . . . . . . . . . . . . . . . . . . . . . . . . . . . . . . . . . . . 5-1 About This Chapter. . . . . . . . . . . . . . . . . . . . . . . . . . . . . . . . . . . . . . . . . . . . . . . . . . . . . 5-1 In This Chapter . . . . . . . . . . . . . . . . . . . . . . . . . . . . . . . . . . . . . . . . . . . . . . . . . . . . . . . . 5-1 Adding or Changing Users . . . . . . . . . . . . . . . . . . . . . . . . . . . . . . . . . . . . . . . . . . . . . . . . . . . . 5-2 Introduction. . . . . . . . . . . . . . . . . . . . . . . . . . . . . . . . . . . . . . . . . . . . . . . . . . . . . . . . . . . 5-2 Adding a New User Name . . . . . . . . . . . . . . . . . . . . . . . . . . . . . . . . . . . . . . . . . . . . . . . 5-2 Protecting Methods . . . . . . . . . . . . . . . . . . . . . . . . . . . . . . . . . . . . . . . . . . . . . . . . . . . . . 5-3 Changing a User Name . . . . . . . . . . . . . . . . . . . . . . . . . . . . . . . . . . . . . . . . . . . . . . . . . . 5-5 Deleting a User Name. . . . . . . . . . . . . . . . . . . . . . . . . . . . . . . . . . . . . . . . . . . . . . . . . . . 5-5 Creating Methods . . . . . . . . . . . . . . . . . . . . . . . . . . . . . . . . . . . . . . . . . . . . . . . . . . . . . . . . . . . 5-6 About the Default Method . . . . . . . . . . . . . . . . . . . . . . . . . . . . . . . . . . . . . . . . . . . . . . . 5-6 Basic Parameters. . . . . . . . . . . . . . . . . . . . . . . . . . . . . . . . . . . . . . . . . . . . . . . . . . . . . . . 5-6 Displaying the Create Methods Screen. . . . . . . . . . . . . . . . . . . . . . . . . . . . . . . . . . . . . . 5-7 Entering Temperature Control Parameters . . . . . . . . . . . . . . . . . . . . . . . . . . . . . . . . . . . 5-8 Defining Pre-PCR Holds. . . . . . . . . . . . . . . . . . . . . . . . . . . . . . . . . . . . . . . . . . . . . . . . . 5-9 Defining PCR Parameters . . . . . . . . . . . . . . . . . . . . . . . . . . . . . . . . . . . . . . . . . . . . . . . . 5-9 Defining Post-PCR Holds . . . . . . . . . . . . . . . . . . . . . . . . . . . . . . . . . . . . . . . . . . . . . . . 5-10 Modifying Cycling . . . . . . . . . . . . . . . . . . . . . . . . . . . . . . . . . . . . . . . . . . . . . . . . . . . . . . . . . 5-11 Introduction. . . . . . . . . . . . . . . . . . . . . . . . . . . . . . . . . . . . . . . . . . . . . . . . . . . . . . . . . . 5-11 Changing Temperature Control Parameters . . . . . . . . . . . . . . . . . . . . . . . . . . . . . . . . . 5-11 Modifying Ramp Rates . . . . . . . . . . . . . . . . . . . . . . . . . . . . . . . . . . . . . . . . . . . . . . . . . 5-12 Inserting Holds . . . . . . . . . . . . . . . . . . . . . . . . . . . . . . . . . . . . . . . . . . . . . . . . . . . . . . . 5-13 Deleting Holds . . . . . . . . . . . . . . . . . . . . . . . . . . . . . . . . . . . . . . . . . . . . . . . . . . . . . . . 5-14 Inserting Cycles . . . . . . . . . . . . . . . . . . . . . . . . . . . . . . . . . . . . . . . . . . . . . . . . . . . . . . 5-14 Inserting Programmed Pauses. . . . . . . . . . . . . . . . . . . . . . . . . . . . . . . . . . . . . . . . . . . . 5-14 Editing Programmed Pauses . . . . . . . . . . . . . . . . . . . . . . . . . . . . . . . . . . . . . . . . . . . . . 5-16 Naming and Storing Methods . . . . . . . . . . . . . . . . . . . . . . . . . . . . . . . . . . . . . . . . . . . . 5-16 Printing a Method . . . . . . . . . . . . . . . . . . . . . . . . . . . . . . . . . . . . . . . . . . . . . . . . . . . . . . . . . . 5-17 Introduction. . . . . . . . . . . . . . . . . . . . . . . . . . . . . . . . . . . . . . . . . . . . . . . . . . . . . . . . . . 5-17 Printing a Method . . . . . . . . . . . . . . . . . . . . . . . . . . . . . . . . . . . . . . . . . . . . . . . . . . . . . 5-17 Editing or Deleting Methods . . . . . . . . . . . . . . . . . . . . . . . . . . . . . . . . . . . . . . . . . . . . . . . . . . 5-18 vi Introduction . . . . . . . . . . . . . . . . . . . . . . . . . . . . . . . . . . . . . . . . . . . . . . . . . . . . . . . . . . 5-18 Editing a Method . . . . . . . . . . . . . . . . . . . . . . . . . . . . . . . . . . . . . . . . . . . . . . . . . . . . . . 5-18 Deleting a Method . . . . . . . . . . . . . . . . . . . . . . . . . . . . . . . . . . . . . . . . . . . . . . . . . . . . . 5-20 6 Converting Hold Times Overview . . . . . . . . . . . . . . . . . . . . . . . . . . . . . . . . . . . . . . . . . . . . . . . . . . . . . . . . . . . . . . . . . . 6-1 About This Chapter . . . . . . . . . . . . . . . . . . . . . . . . . . . . . . . . . . . . . . . . . . . . . . . . . . . . . 6-1 In This Chapter . . . . . . . . . . . . . . . . . . . . . . . . . . . . . . . . . . . . . . . . . . . . . . . . . . . . . . . . 6-1 About Setting Hold Times . . . . . . . . . . . . . . . . . . . . . . . . . . . . . . . . . . . . . . . . . . . . . . . . . . . . . 6-2 Introduction . . . . . . . . . . . . . . . . . . . . . . . . . . . . . . . . . . . . . . . . . . . . . . . . . . . . . . . . . . . 6-2 Hold Time Differences . . . . . . . . . . . . . . . . . . . . . . . . . . . . . . . . . . . . . . . . . . . . . . . . . . 6-2 Guidelines for Converting Hold Times . . . . . . . . . . . . . . . . . . . . . . . . . . . . . . . . . . . . . . . . . . . 6-3 Introduction . . . . . . . . . . . . . . . . . . . . . . . . . . . . . . . . . . . . . . . . . . . . . . . . . . . . . . . . . . . 6-3 What to Base the New Hold Times On . . . . . . . . . . . . . . . . . . . . . . . . . . . . . . . . . . . . . . 6-3 Setting Up Ramps . . . . . . . . . . . . . . . . . . . . . . . . . . . . . . . . . . . . . . . . . . . . . . . . . . . . . . 6-3 Table of Conversions . . . . . . . . . . . . . . . . . . . . . . . . . . . . . . . . . . . . . . . . . . . . . . . . . . . . 6-3 Up Ramp Example. . . . . . . . . . . . . . . . . . . . . . . . . . . . . . . . . . . . . . . . . . . . . . . . . . . . . . 6-4 Setting Down Ramps . . . . . . . . . . . . . . . . . . . . . . . . . . . . . . . . . . . . . . . . . . . . . . . . . . . . 6-4 Table of Conversions . . . . . . . . . . . . . . . . . . . . . . . . . . . . . . . . . . . . . . . . . . . . . . . . . . . . 6-5 Down Ramp Example . . . . . . . . . . . . . . . . . . . . . . . . . . . . . . . . . . . . . . . . . . . . . . . . . . . 6-5 7 Routine Maintenance Overview . . . . . . . . . . . . . . . . . . . . . . . . . . . . . . . . . . . . . . . . . . . . . . . . . . . . . . . . . . . . . . . . . . 7-1 About This Chapter . . . . . . . . . . . . . . . . . . . . . . . . . . . . . . . . . . . . . . . . . . . . . . . . . . . . . 7-1 In This Chapter . . . . . . . . . . . . . . . . . . . . . . . . . . . . . . . . . . . . . . . . . . . . . . . . . . . . . . . . 7-1 Changing the External Fuses . . . . . . . . . . . . . . . . . . . . . . . . . . . . . . . . . . . . . . . . . . . . . . . . . . . 7-2 Introduction . . . . . . . . . . . . . . . . . . . . . . . . . . . . . . . . . . . . . . . . . . . . . . . . . . . . . . . . . . . 7-2 Power Entry Module Diagram. . . . . . . . . . . . . . . . . . . . . . . . . . . . . . . . . . . . . . . . . . . . . 7-2 Changing Fuses . . . . . . . . . . . . . . . . . . . . . . . . . . . . . . . . . . . . . . . . . . . . . . . . . . . . . . . . 7-3 8 Troubleshooting Overview . . . . . . . . . . . . . . . . . . . . . . . . . . . . . . . . . . . . . . . . . . . . . . . . . . . . . . . . . . . . . . . . . . 8-1 About This Chapter . . . . . . . . . . . . . . . . . . . . . . . . . . . . . . . . . . . . . . . . . . . . . . . . . . . . . 8-1 In This Chapter . . . . . . . . . . . . . . . . . . . . . . . . . . . . . . . . . . . . . . . . . . . . . . . . . . . . . . . . 8-1 If There Is a Power Failure . . . . . . . . . . . . . . . . . . . . . . . . . . . . . . . . . . . . . . . . . . . . . . . . . . . . . 8-2 Introduction . . . . . . . . . . . . . . . . . . . . . . . . . . . . . . . . . . . . . . . . . . . . . . . . . . . . . . . . . . . 8-2 During a Power Failure . . . . . . . . . . . . . . . . . . . . . . . . . . . . . . . . . . . . . . . . . . . . . . . . . . 8-2 Display Screen Error Messages . . . . . . . . . . . . . . . . . . . . . . . . . . . . . . . . . . . . . . . . . . . . . . . . . 8-3 Error Messages Table . . . . . . . . . . . . . . . . . . . . . . . . . . . . . . . . . . . . . . . . . . . . . . . . . . . 8-3 Troubleshooting Information . . . . . . . . . . . . . . . . . . . . . . . . . . . . . . . . . . . . . . . . . . . . . . . . . . . 8-6 Troubleshooting Table . . . . . . . . . . . . . . . . . . . . . . . . . . . . . . . . . . . . . . . . . . . . . . . . . . . 8-6 vii A Instrument Specifications Overview . . . . . . . . . . . . . . . . . . . . . . . . . . . . . . . . . . . . . . . . . . . . . . . . . . . . . . . . . . . . . . . . . . A-1 About This Appendix . . . . . . . . . . . . . . . . . . . . . . . . . . . . . . . . . . . . . . . . . . . . . . . . . . . A-1 In This Appendix . . . . . . . . . . . . . . . . . . . . . . . . . . . . . . . . . . . . . . . . . . . . . . . . . . . . . . A-1 System Specifications . . . . . . . . . . . . . . . . . . . . . . . . . . . . . . . . . . . . . . . . . . . . . . . . . . . . . . . . A-2 Dimensions . . . . . . . . . . . . . . . . . . . . . . . . . . . . . . . . . . . . . . . . . . . . . . . . . . . . . . . . . . . A-2 Power Configurations . . . . . . . . . . . . . . . . . . . . . . . . . . . . . . . . . . . . . . . . . . . . . . . . . . . A-2 Electrical Requirements . . . . . . . . . . . . . . . . . . . . . . . . . . . . . . . . . . . . . . . . . . . . . . . . . A-2 Control Panel Specifications . . . . . . . . . . . . . . . . . . . . . . . . . . . . . . . . . . . . . . . . . . . . . . . . . . . A-4 Display Screen . . . . . . . . . . . . . . . . . . . . . . . . . . . . . . . . . . . . . . . . . . . . . . . . . . . . . . . . A-4 Keys . . . . . . . . . . . . . . . . . . . . . . . . . . . . . . . . . . . . . . . . . . . . . . . . . . . . . . . . . . . . . . . . A-4 Sample Temperature Information . . . . . . . . . . . . . . . . . . . . . . . . . . . . . . . . . . . . . . . . . . . . . . . A-4 Temperature . . . . . . . . . . . . . . . . . . . . . . . . . . . . . . . . . . . . . . . . . . . . . . . . . . . . . . . . . . A-4 Printer Specifications. . . . . . . . . . . . . . . . . . . . . . . . . . . . . . . . . . . . . . . . . . . . . . . . . . . . . . . . . A-4 Serial Interface Board Specifications . . . . . . . . . . . . . . . . . . . . . . . . . . . . . . . . . . . . . . . A-4 Cable Part Number . . . . . . . . . . . . . . . . . . . . . . . . . . . . . . . . . . . . . . . . . . . . . . . . . . . . . A-4 B Supplied Methods Overview . . . . . . . . . . . . . . . . . . . . . . . . . . . . . . . . . . . . . . . . . . . . . . . . . . . . . . . . . . . . . . . . . . B-1 About this Appendix . . . . . . . . . . . . . . . . . . . . . . . . . . . . . . . . . . . . . . . . . . . . . . . . . . . . B-1 In This Appendix . . . . . . . . . . . . . . . . . . . . . . . . . . . . . . . . . . . . . . . . . . . . . . . . . . . . . . B-1 About the Methods . . . . . . . . . . . . . . . . . . . . . . . . . . . . . . . . . . . . . . . . . . . . . . . . . . . . . . . . . . B-2 Introduction. . . . . . . . . . . . . . . . . . . . . . . . . . . . . . . . . . . . . . . . . . . . . . . . . . . . . . . . . . . B-2 AmpliCycle Sequencing . . . . . . . . . . . . . . . . . . . . . . . . . . . . . . . . . . . . . . . . . . . . . . . . . B-2 AmpliTaq Gold DNA Polymerase . . . . . . . . . . . . . . . . . . . . . . . . . . . . . . . . . . . . . . . . . B-2 BigDye Terminators . . . . . . . . . . . . . . . . . . . . . . . . . . . . . . . . . . . . . . . . . . . . . . . . . . . . B-3 General PCR . . . . . . . . . . . . . . . . . . . . . . . . . . . . . . . . . . . . . . . . . . . . . . . . . . . . . . . . . . B-3 LMS2 . . . . . . . . . . . . . . . . . . . . . . . . . . . . . . . . . . . . . . . . . . . . . . . . . . . . . . . . . . . . . . . B-4 Time Release PCR . . . . . . . . . . . . . . . . . . . . . . . . . . . . . . . . . . . . . . . . . . . . . . . . . . . . . B-4 Touchdown PCR . . . . . . . . . . . . . . . . . . . . . . . . . . . . . . . . . . . . . . . . . . . . . . . . . . . . . . . B-5 XL PCR. . . . . . . . . . . . . . . . . . . . . . . . . . . . . . . . . . . . . . . . . . . . . . . . . . . . . . . . . . . . . . B-5 C Contacting Services and Support D Limited Warranty Statement Computer Configuration . . . . . . . . . . . . . . . . . . . . . . . . . . . . . . . . . . . . . . . . . . . . . . . . . . . . . . D-1 Limited Product Warranty . . . . . . . . . . . . . . . . . . . . . . . . . . . . . . . . . . . . . . . . . . . . . . . . . . . . . D-1 viii Damages, Claims, and Returns. . . . . . . . . . . . . . . . . . . . . . . . . . . . . . . . . . . . . . . . . . . . . . . . . .D-3 Damages . . . . . . . . . . . . . . . . . . . . . . . . . . . . . . . . . . . . . . . . . . . . . . . . . . . . . . . . . . . . .D-3 Claims . . . . . . . . . . . . . . . . . . . . . . . . . . . . . . . . . . . . . . . . . . . . . . . . . . . . . . . . . . . . . . .D-3 Returns. . . . . . . . . . . . . . . . . . . . . . . . . . . . . . . . . . . . . . . . . . . . . . . . . . . . . . . . . . . . . . .D-3 Index ix Introduction and Safety 1 1 Overview About This Chapter This chapter provides information to help you safely operate the GeneAmp PCR System 9700. In This Chapter The following topics are covered in this chapter: Topics See Page About This Manual 1-2 Instrument Safety 1-3 Chemical Safety 1-6 GeneAmp PCR System 9700 Labels and Warnings 1-9 Laboratory Environmental Requirements 1-11 Introduction and Safety 1-1 About This Manual Overview This manual describes how to use the GeneAmp® PCR System 9700. It includes the following chapters and appendixes: 1-2 Introduction and Safety ♦ Chapter 1, “Introduction and Safety,” contains safety information. ♦ Chapter 2, “Product Overview,” describes the instrument, its components, and requirements for installation. ♦ Chapter 3, “Instrument Setup,” provides information on how to set up the instrument and place it correctly in the laboratory, how to configure the instrument, and how to connect and configure a printer. ♦ Chapter 4, “Running PCR Samples,” provides information on selecting a method, starting and stopping a run, reviewing the history of a run, and what to do when the run is completed. ♦ Chapter 5, “Creating and Editing Methods,” describes how to create and edit PCR methods and how to work with stored methods. ♦ Chapter 6, “Converting Hold Times,” provides information about setting hold times for the GeneAmp® PCR System 9700 compared to the DNA Thermal Cycler or DNA Thermal Cycler 480. ♦ Chapter 7, “Routine Maintenance,” provides procedures for routine maintenance on the instrument. ♦ Chapter 8, “Troubleshooting,” lists error messages and suggestions for dealing with other problems you may encounter. ♦ Appendix A, “Instrument Specifications,” describes the dimensions, power, and electrical specifications of the GeneAmp® PCR System 9700 system, including the control panel, sample temperature information, and printer specifications. ♦ Appendix B, “Supplied Methods,” contains information about the methods that are supplied with the instrument. ♦ Appendix C, “Contacting Services and Support,” explains how to contact Applied Biosystems’ Technical Support staff. ♦ Appendix D, “Limited Warranty Statement,” contains the instrument warranty statement. Instrument Safety Before Operating the Ensure that everyone involved with the operation of the instrument has: Instrument ♦ Received instruction in general safety practices for laboratories ♦ Received instruction in specific safety practices for the instrument ♦ Read and understood all related MSDSs Avoid using this instrument in a manner not specified by Applied Biosystems. Although the instrument has been designed to protect the user, this protection can be impaired if the instrument is used improperly. Documentation User Five user attention words appear in the text of all Applied Biosystems user Attention Words documentation. Each word implies a particular level of observation or action as described below. Note Calls attention to useful information. IMPORTANT Indicates information that is necessary for proper instrument operation. Indicates a potentially hazardous situation which, if not avoided, may result in minor or moderate injury. It may also be used to alert against unsafe practices. Indicates a potentially hazardous situation which, if not avoided, could result in death or serious injury. Indicates an imminently hazardous situation which, if not avoided, will result in death or serious injury. This signal word is to be limited to the most extreme situations. Introduction and Safety 1-3 Symbols on Instruments Electrical Symbols The following chart is an illustrated glossary of all electrical symbols that are used on Applied Biosystems instruments. Whenever such symbols appear on instruments, please observe appropriate safety procedures. Indicates the On position of the main power switch. Indicates the Off position of the main power switch. Indicates the On/Off position of a push-push main power switch. Indicates a terminal that may be connected to the signal ground reference of another instrument. This is not a protected ground terminal. Indicates a protective grounding terminal that must be connected to earth ground before any other electrical connections are made to the instrument. Indicates a terminal that can receive or supply alternating current or voltage. Indicates a terminal that can receive or supply an alternating or direct current or voltage. Safety Symbols The following is an illustrated glossary of all nonelectrical safety alert symbols found on Applied Biosystems instruments. Each symbol may appear by itself or in combination with text that explains the relevant hazard (see “Safety Labels on Instruments” on page 1-5). These safety symbols may also appear next to DANGERS, WARNINGS, and CAUTIONS that occur in the text of this and other product-support documents. Symbol Description Indicates that you should consult the manual for further information and to proceed with appropriate caution. Indicates the presence of an electrical shock hazard and to proceed with appropriate caution. Indicates the presence of a hot surface or other high-temperature hazard and to proceed with appropriate caution. 1-4 Introduction and Safety Symbol Description Indicates the presence of a laser inside the instrument and to proceed with appropriate caution. Indicates the presence of moving parts and to proceed with appropriate caution. Safety Labels on Instruments The following CAUTION, WARNING, and DANGER statements may be displayed on Applied Biosystems instruments in combination with the safety symbols described in the preceding section. English Francais CAUTION Hazardous chemicals. Read the Material Safety Data Sheets (MSDSs) before handling. ATTENTION Produits chimiques dangeureux. Lire les fiches techniques de sûreté de matériels avant la manipulation des produits. CAUTION Hazardous waste. Read the waste profile (if any) in the site preparation guide for this instrument before handling or disposal. ATTENTION Déchets dangereux. Lire les renseignements sur les déchets avant de les manipuler ou de les éliminer. CAUTION Hazardous waste. Refer to MSDS(s) and local regulations for handling and disposal. ATTENTION Déchets dangereux. Lire les fiches techniques de sûreté de matériels et la régulation locale associées à la manipulation et l'élimination des déchets. WARNING Hot lamp. AVERTISSEMENT Lampe brûlante. WARNING Hot. Replace lamp with an Applied Biosystems lamp. AVERTISSEMENT Composants brûlants. Remplacer la lampe par une lampe Applied Biosystems. CAUTION Hot surface. ATTENTION Surface brûlante. DANGER High voltage. DANGER Haute tension. WARNING To reduce the chance of electrical shock, do not remove covers that require tool access. No user-serviceable parts are inside. Refer servicing to Applied Biosystems qualified service personnel. AVERTISSEMENT Pour éviter les risques d'électrocution, ne pas retirer les capots dont l'ouverture nécessite l'utilisation d'outils. L’instrument ne contient aucune pièce réparable par l’utilisateur. Toute intervention doit être effectuée par le personnel de service qualifié de Applied Biosystems. CAUTION Moving parts. ATTENTION Parties mobiles. Introduction and Safety 1-5 Chemical Safety Chemical Hazard Warning Chemical Waste Hazard Warning 1-6 Introduction and Safety CHEMICAL HAZARD. Some of the chemicals used with Applied Biosystems instruments and protocols are potentially hazardous and can cause injury, illness, or death. ♦ Read and understand the material safety data sheets (MSDSs) provided by the chemical manufacturer before you store, handle, or work with any chemicals or hazardous materials. ♦ Minimize contact with chemicals. Wear appropriate personal protective equipment when handling chemicals (e.g., safety glasses, gloves, or protective clothing). For additional safety guidelines, consult the MSDS. ♦ Minimize the inhalation of chemicals. Do not leave chemical containers open. Use only with adequate ventilation (e.g., fume hood). For additional safety guidelines, consult the MSDS. ♦ Check regularly for chemical leaks or spills. If a leak or spill occurs, follow the manufacturer’s cleanup procedures as recommended on the MSDS. ♦ Comply with all local, state/provincial, or national laws and regulations related to chemical storage, handling, and disposal. CHEMICAL WASTE HAZARD. Wastes produced by Applied Biosystems instruments are potentially hazardous and can cause injury, illness, or death. ♦ Read and understand the material safety data sheets (MSDSs) provided by the manufacturers of the chemicals in the waste container before you store, handle, or dispose of chemical waste. ♦ Handle chemical wastes in a fume hood. ♦ Minimize contact with chemicals. Wear appropriate personal protective equipment when handling chemicals (e.g., safety glasses, gloves, or protective clothing). For additional safety guidelines, consult the MSDS. ♦ Minimize the inhalation of chemicals. Do not leave chemical containers open. Use only with adequate ventilation (e.g., fume hood). For additional safety guidelines, consult the MSDS. ♦ After emptying the waste container, seal it with the cap provided. ♦ Dispose of the contents of the waste tray and waste bottle in accordance with good laboratory practices and local, state/provincial, or national environmental and health regulations. About MSDSs Some of the chemicals used with this instrument may be listed as hazardous by their manufacturer. When hazards exist, warnings are prominently displayed on the labels of all chemicals. Chemical manufacturers supply a current MSDS before or with shipments of hazardous chemicals to new customers and with the first shipment of a hazardous chemical after an MSDS update. MSDSs provide you with the safety information you need to store, handle, transport and dispose of the chemicals safely. We strongly recommend that you replace the appropriate MSDS in your files each time you receive a new MSDS packaged with a hazardous chemical. CHEMICAL HAZARD. Be sure to familiarize yourself with the MSDSs before using reagents or solvents. Ordering MSDSs You can obtain from Applied Biosystems the MSDS for any chemical supplied by Applied Biosystems. This service is free and available 24 hours a day. To obtain MSDSs: 1. Go to https://docs.appliedbiosystems.com/msdssearch.html 2. In the Search field, type in the chemical name, part number, or other information that appears in the MSDS of interest. Select the language of your choice, then click Search. 3. Find the document of interest, right-click the document title, then select any of the following: • Open – To view the document • Print Target – To print the document • Save Target As – To download a PDF version of the document to a destination that you choose 4. To have a copy of a document sent by fax or e-mail, select Fax or Email to the left of the document title in the Search Results page, then click RETRIEVE DOCUMENTS at the end of the document list. 5. After you enter the required information, click View/Deliver Selected Documents Now. For chemicals not manufactured or distributed by Applied Biosystems, call the chemical manufacturer. Introduction and Safety 1-7 About Waste As the generator of potentially hazardous waste, it is your responsibility to perform the Disposal actions listed below. ♦ Characterize (by analysis if necessary) the waste generated by the particular applications, reagents, and substrates used in your laboratory. ♦ Ensure the health and safety of all personnel in your laboratory. ♦ Ensure that the instrument waste is stored, transferred, transported, and disposed of according to all local, state/provincial, or national regulations. Note Radioactive or biohazardous materials may require special handling, and disposal limitations may apply. 1-8 Introduction and Safety GeneAmp PCR System 9700 Labels and Warnings Instrument Safety Safety labels are located on the instrument. Each safety label has three parts: Labels ♦ A signal word panel, which implies a particular level of observation or action (e.g., CAUTION or WARNING). If a safety label encompasses multiple hazards, the signal word corresponding to the greatest hazard is used. ♦ A message panel, which explains the hazard and any user action required. ♦ A safety alert symbol, which indicates a potential personal safety hazard. GR1069 Instrument The following diagram shows the hazards and warnings labels located on the back of Warnings Diagram the GeneAmp® PCR System 9700 instrument. Introduction and Safety 1-9 Danger of Burns PHYSICAL INJURY HAZARD. Hot Surface. Use care when working around this area to avoid being burned by hot components. Grounding and The system 9700 must be grounded for protection against electrical shock. Electrical Safety ELECTRICAL HAZARD. Do not use an adapter to a two-terminal outlet since this does not provide positive ground protection. Fuses Improper fuses can damage the wiring system and cause a fire. FIRE HAZARD. For continued protection against the risk of fire, replace fuses only with fuses of the type and rating specified for the instrument. ELECTRICAL SHOCK HAZARD. Improper fuses or high voltage supply can damage the instrument wiring system and cause a fire. Before turning on the instrument, verify that the fuses are properly installed and that the instrument voltage matches the power supply in your laboratory. 1-10 Introduction and Safety Laboratory Environmental Requirements Introduction Take the precautions described in this section whenever you operate the system 9700. Read this section before you install the instrument. The instrument should be used according to the instructions provided in this manual. If used otherwise, the protection provided by this instrument may be impaired. Temperature, IMPORTANT This instrument is designed for indoor use. Humidity, and IMPORTANT Do not operate in a Cold Room or a refrigerated area. The system 9700 will Environment operate safely when the ambient temperature is 5 °C to 40 °C (41 °F to 104 °F) and will meet performance specifications when the ambient temperature is 15 °C to 30 °C and the ambient relative humidity is 20 to 80%. These specifications have been calculated for altitudes between 0 and 2,000 meters. FIRE HAZARD. This instrument is not designed for operation in an explosive environment. Do not place the instrument close to potentially explosive materials or objects. IMPORTANT The instrument should be stored between –20 °C and 60 °C (–4 °F and 140 °F) at altitudes between 0 and 12,000 meters. Note This instrument is able to withstand transient overvoltage according to Installation Category II as defined in IEC 1010-1. Pollution The installation category (overvoltage category) for this instrument is II, and it is classified as portable equipment. The instrument has a pollution degree rating of 2 and may be installed in an environment that has non-conductive pollutants only. Emission/Immunity For our European customers, any product marked with the CE label meets the Statement European EMC directive 89/336/EEC and the Low Voltage Directive 72/23/EEC. This product meets Class B emission limits. Routine If you use any cleaning or decontamination method, except those recommended in Maintenance for the manual, you may risk damaging the equipment. Safe Operation Maintain your instrument in good working order. In the event that the instrument has been subjected to adverse environmental conditions (such as fire, flood, earthquake, etc.), contact your local sales office for advice. Introduction and Safety 1-11 Safety and Electromagnetic Compatibility (EMC) Standards This section provides information on: • U.S. and Canadian Safety Standards • Canadian EMC Standard • European Safety and EMC Standards • Australian EMC Standards U.S. and Canadian This instrument has been tested to and complies with standard UL 3101-1, “Safety Safety Requirements for Electrical Equipment for Laboratory Use, Part 1: General Standards Requirements.” This instrument has been tested to and complies with standard CSA 1010.1, “Safety Requirements for Electrical Equipment for Measurement, Control, and Laboratory Use, Part 1: General Requirements.” Canadian EMC This instrument has been tested to and complies with ICES-001, Issue 3: Industrial, Standard Scientific, and Medical Radio Frequency Generators. European Safety and Safety EMC This instrument meets European requirements for safety (Low Voltage Directive Standards 73/23/EEC). This instrument has been tested to and complies with standards EN 61010-1:2001, “Safety Requirements for Electrical Equipment for Measurement, Control and Laboratory Use, Part 1: General Requirements” and EN 61010-2-010, “Particular Requirements for Laboratory Equipment for the Heating of Materials.” EMC This instrument meets European requirements for emission and immunity (EMC Directive 89/336/EEC). This instrument has been tested to and complies with standard EN 61326 (Group 1, Class B), “Electrical Equipment for Measurement, Control and Laboratory Use – EMC Requirements.” Australian EMC This instrument has been tested to and complies with standard AS/NZS 2064, “Limits Standards and Methods Measurement of Electromagnetic Disturbance Characteristics of Industrial, Scientific, and Medical (ISM) Radio-frequency Equipment.” 1-12 Introduction and Safety Product Overview 2 2 Overview About This Chapter This chapter describes the GeneAmp® PCR System 9700, its components, and requirements for installation. In This Chapter The following topics are contained in this chapter: Topic About the GeneAmp PCR System 9700 See page 2-2 Product Overview 2-1 About the GeneAmp PCR System 9700 About the The GeneAmp PCR System 9700 is an automated instrument, specifically designed Instrument for the amplification of nucleic acids using the Polymerase Chain Reaction (PCR) process. The user interface consists of a control panel with a full numeric keypad, soft keys, and a graphical display screen that shows the time and temperature profile for each run. Control Panel The instrument control panel consists of a display screen and 22 keys. The display screen shows a graphical representation of PCR events, including pre-PCR holds, PCR cycling, and post-PCR holds. You use the keys to enter information into fields on the display screen. Control Panel The following diagram shows the control panel. Diagram Soft keys (F1–F5) F1 Numeric keys F2 F3 F4 1 2 3 4 5 6 7 8 9 ENTER 0 CE F5 POWER STOP GeneAmp® PCR System 9700 GR0876 Power on/off Stop key Clear Entry key Enter key 2-2 Product Overview Circular Key Pad Using the Keys The following table describes the Control Panel keys in the previous figure. Key Use to... Soft keys (F1-F5) Select the function specified above the key. The function of each key is defined on the display screen above the key, and is redefined as you view different screens. Numeric keys Enter numbers from left to right into a field you highlight. Stop key Stop a method while it is running. Enter key Enter information typed into a field and advance the highlight box to the next field on a screen. Clear Entry key (CE) Remove information from a field. Circular Key Pad Move the highlight box to different fields on the display screen in the direction of the arrow. Selecting a Field There are two ways to select a field. If you want to... Then.... move the highlight box in one of four directions Use the Circular Key Pad. advance the box to the next field Press the Enter key. Entering Numeric The following table lists how to enter numeric values for the Temperature and Hold Values Time parameters. Parameter Description Temperature parameters Enter values for temperature in decimal form. It is not necessary to type a decimal point. Hold Time parameters A hold time is the length of time the samples will be maintained at a specified temperature. For example, to specify 89.0 °C, press 8 9 0, then press Enter. Specify all hold times in minutes and seconds, then press Enter. For example, to specify one minute and five seconds, press 1 0 5, then press Enter. Product Overview 2-3 Transfer or Storage You can transfer or store methods using a Methods Storage Card. The instrument can of Methods run a method from its own software or from the methods stored on a Methods Storage card. Use... To... See... Methods Storage Card, Centennial 256kb SRAM (P/N 0940-1064) transfer methods from the Methods Storage card to the instrument or from the instrument to the card for storage. “Copying Methods” on page 3-24. Upgrading the There are two ways to upgrade the firmware: Firmware ♦ With a serial cable connection (PC communication cable P/N N805-1327 or Macintosh® communication cable P/N N805-1328) from the instrument’s RS485 ports ♦ With a PCMCIA Flash Memory Card Note Upgrade firmware can be ordered from the Applied Biosystems web site or by contacting PCR Technical Support. For more information about upgrading the firmware, see the following. 2-4 Product Overview If you are using... See... a serial cable connection (RS485 ports) “Upgrading Through the Serial Port” on page 3-18. a PCMCIA Flash Memory Card “Upgrading Firmware from a PCMCIA Flash Memory Card” on page 3-22. Microsoft Windows® 95 or Windows NT® “Downloading Firmware Using Windows 95 or Windows NT” on page 3-20. Windows® 3.1 “Downloading Firmware Using Windows 3.1” on page 3-21. How the 9700 Differs The GeneAmp PCR System 9700 differs from the GeneAmp® PCR System 9600 in from the GeneAmp the following ways: PCR System 9600 ♦ Reaction volumes of up to 50 µL only can be run and in the “9600 Mode”, as opposed to 100 µL in the GeneAmp PCR System 9600. ♦ Methods are stored under a user name, allowing users to keep track of and protect their own methods. ♦ Hold, Cycle, and Auto programs no longer exist as menu items under the Create function. Instead of linking programs together to create a method, you create a single method on the GeneAmp PCR System 9700. ♦ If the allowed pause time elapses during a manual pause of a method, the method will continue running (instead of stopping). ♦ The last method run cannot be re-run or edited unless it is first saved. ♦ The history file no longer includes individual setpoint time and temperature information. ♦ An automated restart or incubate function is available for use after a power outage. Product Overview 2-5 Instrument Setup 3 3 Overview About This Chapter This chapter provides information on how to set up the GeneAmp® PCR System 9700 and place it correctly in the laboratory, how to configure the instrument, and how to connect and configure a printer. In This Chapter The following topics are covered in this chapter: Topic Unpacking the Instrument See page 3-2 Setting Up your Laboratory 3-3 Double-Line Fuse 3-5 Turning On the Instrument 3-6 Setting Custom Parameters 3-7 Running Instrument Diagnostics 3-13 Using the Tm Calculator 3-17 Upgrading the System Firmware 3-18 Copying Methods 3-24 Connecting and Configuring a Printer 3-26 Instrument Setup 3-1 Unpacking the Instrument Inspecting the Inspect the GeneAmp® PCR System 9700, and all other supplied parts, for any Instrument damage that may have occurred during shipment. If there has been any damage during transit, notify the carrier and Applied Biosystems immediately. Note Save the shipping container and all packing materials in case it becomes necessary to reship the instrument. To order additional instruments or supplies, contact one of the regional offices listed in Appendix C, “Contacting Services and Support.” Additional Part You can order modules, accessories, and disposables from Applied Biosystems. Numbers To order this part... Use P/N... GeneAmp PCR System 9700 Base Module N805-0200 60-Well 0.5 mL Sample Block Module 4309131 Auto-Lid Sample Block Module 4312904 96-Well Gold Sample Block Module 4314443 96-Well Aluminum Sample Block Module 4314445 Dual 384-Well Sample Block Module N805-0400 Temperature Verification System N801-0435 PC (method storage) card 940-1064 Printer cable N805-1326 PC communication cable N805-1327 Macintosh® N805-1328 communication cable Note See the Interchangeable Sample Block Module Users Manual for part numbers of disposable items. 3-2 Instrument Setup Setting Up your Laboratory Choosing a Location To prevent vibration, place the GeneAmp PCR System 9700 on a solid, stable, level surface that allows free airflow overhead and around the sides and back. You should keep all ventilation slots in the instrument cover free of obstruction, for example from excess printer paper. Operating The instrument will meet performance specifications when the ambient temperature is Temperature 15 °C to 30 °C (59 ° to 86 °Fahrenheit) and the ambient relative humidity is 20% to 80%. What to Avoid When setting up the instrument, avoid: ♦ Placing the instrument under overhanging shelves, especially when there is a wall behind the unit. ♦ Proximity to other instruments on the same bench or other heat-generating equipment. ♦ Locations subject to wide temperature fluctuation, such as direct sunlight, or air drafts. ♦ Damp areas. ♦ Environments where there is an oil mist. Do Not Block Air Do not block the circulation of air to the vents located on the sides and bottom of the Vents instrument GR0879 GR0877 GR0878 air vents Note When operating multiple 9700 instruments, provide at least 8 in. of space in-between the instruments. Instrument Setup 3-3 Fuse Service The instrument is shipped with double-line service configuration. Configuration ELECTRICAL SHOCK HAZARD. To protect yourself against shock hazards, use a properly wired three-terminal outlet. Do not use an adapter to a two-terminal outlet. FIRE HAZARD. Improper fuses can damage the wiring system and cause a fire. Before turning on the instrument, verify that the fuses are properly installed. Input Voltage IMPORTANT You must be able to disconnect the main power supply to the instrument immediately if necessary. The following table specifies the electrical operating range for the instrument in various parts of the world. Select the appropriate fuse configuration based on the voltage used. Voltage (VAC)a Frequency Amperage (A) Nominal Japan 100 ±10% 50/60 Hz ±1% 3.16 USA/Canada 120 ±10% 50/60 Hz ±1% 4.20 EC 230 ±10% 50/60 Hz ±1% 3.14 Location a. Acceptable AC line voltage tolerances: 100, 120, 220, 230 ±10%; 240 VAC +6%/–10%, 50/60 Hz ± 1%. Note The Volt-Amp number for this instrument is 725 Volt Amps. Interchangeable The instrument features an interchangeable sample block module allowing portability Sample Block and versatility in sample configuration. Modules Sample Block Module Part Number 96-Well Gold Sample Block Module 4314443 96-Well Aluminum Sample Block Module 4314445 60-Well 0.5 mL Sample Block Module 4309131 Dual 384-Well Sample Block Module N805-0400 Auto-Lid Sample Block Module 4312904 Note The GeneAmp PCR System 9700 will not operate without an interchangeable sample block module installed. For an example, refer to the GeneAmp PCR System 9700 96-Well Sample Block Module User Guide, for instructions on how to install a block and configure the samples. 3-4 Instrument Setup Double-Line Fuse Introduction FIRE HAZARD. For continued protection against the risk of fire, replace fuses only with listed and certified fuses of the same type and rating as those currently in the instrument. IMPORTANT For proper operation, you must know the power source(s) available and determine if the instrument fuse configuration is correct. The instrument is shipped configured for single-line operation. Fuse Part Number The correct fuse is an 8 amp Type T 250 V 5x20 mm fuse, P/N 0999-1683. GR0878 Power Entry Module The following is a diagram of the Power Entry Module. Diagram GR0961 Fuse Compartment door Jumper clip Fuse Fuse compartment Instrument Setup 3-5 Turning On the Instrument Turning On the To turn on the instrument: Instrument Step Action 1 Plug the power cord into the side of the instrument and into an outlet. 2 Press the power switch to the ON position. The cooling fan powers up, and the Start-up screens appear. APPLIED BIOSYSTEMS www.appliedbiosystems.com F1 F2 F3 F4 F5 Applied Biosystems GeneAmp® PCR System 9700 Copyright © 1996 F1 3 F2 F3 F4 F5 After several seconds the Main menu appears. You can use any of the functions displayed above the soft keys. 08:00 AM 4/25/01 GeneAmp® PCR System 9700 Name:tc001 User:<<pe>> 25.0°C Run Create Edit Util User F1 F2 F3 F4 F5 Note The Main menu should appear within a few seconds. If any permanent patterns of lines or bars display on the screen, contact Applied Biosystems Technical Support. 3-6 Instrument Setup Setting Custom Parameters Overview The instrument is shipped with default configuration values. The following procedure describes how to set customized values as well as how to enable or disable optional features. Displaying the To display the Configuration Screen: Configuration Step Action Screen 1 From the Main menu, press Util. The Utilities screen appears. Utilities Diag - Instrument diagnostics TmCalc - Calculates melting temp Config - Instrument configuration Diag TmCalc Config More Exit F1 F2 F3 F4 F5 From the Utilities screen, you can take the following action: 2 If you want to... See page Delete a method 5-20 Run instrument diagnostics 3-13 Review the history of a run 4-10 Access the Tm calculator 3-17 Copy methods to or from a methods transportability card 3-24 Press Config. The first Configuration screen appears. Instrument Configuration Time: Date: Run Time Printer: Run Time Beep: Accept 24Hr F1 F2 11:30 AM 01/25/00 M/D/Y Off Off PM More Cancel F3 F4 F5 Instrument Setup 3-7 Setting the Time In the first Configuration screen, you can set the current time and date for file memory maintenance, and run-time displays. You can also enable or disable the run-time printer and the run-time beep. To set the time: Step Action 1 Use the Circular Key Pad to select the Time field. 2 Press the 24 Hr or PM (AM) soft keys until the format you want for the current time displays in the Time field. 3 Use the numeric keys to type in the hours followed by minutes. 4 Press Accept when your entries are complete. Note CE clears an entry. Setting the Date You must set the instrument to the correct date. To set the date: Step Action 1 Use the circular key to select the Date field. 2 The three fields to set in the Date field are the: ♦ Days field ♦ Month field ♦ Year field 3 Press the D/M/Y or Y/M/D soft keys until the format you want for the current date displays in the Date field. 4 Use the numeric keys and type in a number for each of the three fields. The order of these three fields depends on the format you chose in step 3. Enabling or Enabling the printer allows you to print method parameters or records of run time Disabling a Printer events directly from the display screen. The default value for the optional printer is Off. Note For connection and configuration see “Connecting and Configuring a Printer” on page 3-26. To enable or disable the optional printer: Step 3-8 Instrument Setup Action 1 Select the Run Time Printer field. This changes the functions of the soft keys. 2 You can take the following action: If you want to... Then... enable the printer Press ON. disable the printer Press Off. 3 Press Enter to accept your entry. 4 Press Cancel to cancel all entries and return to the previous screen. Turning the When turned on, the run-time beeper beeps during a pause and once at the Run-Time Beeper completion of a run. The default value is Off. On or Off To turn the Run Time-Beeper on or off: Step Action 1 Select the Run Time Beep field. This changes the value of the soft keys. 2 You can take the following action: 3 If you want to... Then... turn the beeper on Press ON. turn the beeper off Press Off. Press Enter to accept your entry. Setting the Pause The Pause Time Out field sets the time in minutes:seconds format for the length of a Time Out pause when you use the Pause soft key to pause a run from the Run Time screen. For more information on Pausing a Run, see “Pausing a Run” on page 4-8. To set the pause time out: Step 1 Action Select More to display the second configuration screen. Instrument Configuration Pause Time Out: 10:00 (00:01-99:59) Idle State Setpoint: 25.0°C (4.0-99.9) Baud Rate: 9600 Accept F1 2 F2 More Cancel F4 F5 F3 Set the Pause Time Out field by using the numeric keys to enter a time in minutes and seconds. From this screen, you can also define the: ♦ Idle state setpoint temperature. ♦ Baud rate for your printer port. 3 Press Accept when all information on this screen is correct. Note CE clears an entry. Instrument Setup 3-9 Defining the Idle The Idle State Set Point temperature is the temperature at which the instrument will State Setpoint remain when powered up, but idle. Temperature IMPORTANT After a run is completed or terminated, there is approximately a 30 second delay before the instrument attains the specified idle state temperature. This allows you to stop one method and start another before the instrument temperature changes. To define the Idle State Set Point temperature: Step Action 1 Select the Idle State Set Point field. 2 Use the numeric keys and type in a temperature between 4.0° C and 99.9 °C. Note 3 The default is 25 °C. Press Enter to accept your entry. Defining the Baud The following section contains a table that lists serial board specifications and a Rate for Your procedure that describes how to define the printer port value in the Baud Rate field. Printer Port Serial Board Specifications You can connect the GeneAmp PCR System 9700 to any printer with a serial interface board and the following specifications. Baud Rate 9600 Parity NONE Data Bits 8 Stop Bits 1 How to Set the Baud Rates To set baud rates: Step Action 1 Select the Baud Rate field. 2 You can take the following action: If you want to... increase the baud rate Press Up. decrease the baud rate Press Down. Note 3 3-10 Instrument Setup Then... Available baud rates are 19200, 9600, 4800, 1200, 600, and 300. Press Enter to accept your entry. Configuring the You can use the third Configuration screen to set: Contrast and Screen ♦ Screen contrast from 1 to 20 (light to dark) Saver Options ♦ Screen saver mode Displaying the Screen From the second Configuration screen, choose More to display the third Configuration screen. Screen Saver Options The following table lists the screen saver options: Use This Option... To Activate the Screen Saver... Smart After 15 minutes unless a method is running Always After 15 minutes Never Never Setting the You can use the fourth Configuration screen to set the IP address for the instrument. IP Address The instrument can be linked to a network via the RS485 ports located on the right-rear side of the instrument (see the figure on page 3-18). Once connected and configured, the instrument will be visible from the network under the IP address and instrument name you select in the following procedure. Note See the System 9700 Networking Software User’s Manual (P/N 4309575) for more information about networking GeneAmp PCR System 9700 instruments. To set the IP Address for an instrument: Step 1 Action Select More to display the second configuration screen. Instrument Configuration Set IP: RS485 Name: Cycler 01 IP: 0. 0. 0. 1 Accept F1 2 F2 - + Cancel F3 F4 F5 Set the Set IP field using the + and – keys. The following settings are available: Setting Definition RS485 Activates the RS 485 ports. Must be used with the networking software Off Turns off the networking capability and turns on the RS232 ports. 3 Use the Circular Key Pad to select the Name field. 4 Select Name. Instrument Setup 3-11 To set the IP Address for an instrument: (continued) Step 5 Action Using the Circular Key Pad and Enter key, enter up to a 16 character name for identifying the instrument on the network. abcdefghi jklmnopqr stuvwxyz IP Name: Cycler 01 .,-+/():= Press ENTER key to select a character. Accept Back sp Cancel F1 6 F2 F3 F4 F5 Press Accept when finished entering a name. The software returns to the previous screen and displays the new name in the Name field. 7 Use the Circular Key Pad to select the last IP field. 8 Set the IP field by using the numeric keys to enter an IP address for the instrument. Instrument Configuration Set IP: RS485 Name: Cycler 01 IP: 0. 0. 0. .1 Accept F1 9 3-12 Instrument Setup F2 F3 More Cancel F4 F5 Press Accept when all information on this screen is correct. Running Instrument Diagnostics Overview The instrument provides a number of internal diagnostic utilities, tests you can run to verify that the instrument hardware and software components meet performance specifications. Viewing the The following procedure describes how to view the Diagnostic screen. Diagnostic Screen To view the Diagnostic screen: Step 1 Action From the Main menu, press Util. The Utilities screen appears. Utilities Diag - Instrument diagnostics TmCalc - Calculates melting temp Config - Instrument configuration 2 Diag TmCalc Config More Exit F1 F2 F3 F4 F5 From the Utilities screen, press Diag. The Diagnostics screen appears. Hard System TmpVer Upgrad 3 - Diagnostics Hardware Diagnostics System Performance Tests Temperature Verification Firmware Upgrade Hard System TmpVer Upgrad Exit F1 F2 F3 F4 F5 Press the soft key that accesses the diagnostic utility you want to run: Press this soft key... To... Hard Access hardware diagnostic utilities that allow you to test hardware and electrical components such as the Display screen and Keypad. System Access the system performance tests. You can run these two system tests to test the rate of system heating and cooling, and the performance of PCR cycling. TmpVer Access the temperature verification tests that allow you to verify sample block calibration and uniformity. These two tests are discussed in the users manual for the interchangeable sample block. Upgrade Access a utility that allows you to update the 9700 instrument firmware through the RS485 serial port or using a PCMCIA Flash Memory card. Instrument Setup 3-13 Testing the Use the hardware diagnostic utilities to test the electrical components of the 9700 Electrical instrument. Components To test the electrical components: Step 1 Action From the Diagnostics screen, press Hard. The Hardware Diagnostics appears. Hardware Diagnostics Disp Keypad F1 2 3-14 Instrument Setup - LCD Display Diagnostic - Keypad Diagnostic Disp Keypad F2 F3 Exit F4 F5 Use the corresponding soft key to select the hardware component for which you want to perform one of the following tasks: Press this soft key... To... Display Visually determine if the Liquid Crystal Display (LCD) screen is functioning properly. Keypad Verify the operation of the keypad. Testing the Display The Display diagnostic test allows you to visually determine if the display screen is Screen properly functioning by turning on and off all the LCD pixels. To test the display screen: Step 1 Action From the Hardware Diagnostics screen, press Display. The Display Diagnostic screen appears. 1. 2. 3. 4. Run Display Diagnostics Read all instructions first. Press Run to turn ON all pixels. Press STOP to turn OFF all pixels. Press STOP to exit. Exit F1 2 F2 F3 F4 F5 You can take the following action: Press... To... Run Turn ON all pixels. Stop Turn OFF all pixels. Check display. Check display. Stop, again Exit. Instrument Setup 3-15 Testing the Keypad Use the Keypad diagnostic test to verify that all 22 keys on the control panel are functioning properly. To test the keypad: Step 1 Action From the Hardware Diagnostics screen, press Keypad. The Keypad Diagnostic screen appears. Keypad Diagnostic After pressing Run, press the blinking key or press STOP twice to exit. Run F1 2 Exit F2 F3 F4 F5 Press Run. The Control Panel screen appears. F1 F2 1 4 7 ENTER STOP F1 3 3-16 Instrument Setup F2 F3 2 5 8 0 F3 Press the indicated flashing key. F4 3 6 9 CE F5 F4 F5 Using the Tm Calculator How to Use the Use the Tm Calculator to determine the annealing temperature of a primer set of Tm Calculator known sequence. To use the Tm Calculator: Step 1 Action From the Main menu, press Util. The Utilities screen opens as shown below. Utilities Diag - Instrument diagnostics TmCalc - Calculates melting temp Config - Instrument configuration 2 Diag TmCalc Config More Exit F1 F2 F3 F4 F5 Press TmCalc. The Tm Calculator appears. [Salt]: 50 mM [Primer] 0.20 uM P1: 5’ P2: 5’ Tm of P1= Tm of P2= Press ENTER to calculate Tm’s 3 Enter the salt concentration. Note 4 The default is 50. Enter values 5 to 1000. Enter the primer concentration. Note The default it 0.20. Enter values 0.01 to 10.00. 5 Enter primer sequence in P1. 6 Enter primer sequence in P2 and press Enter to calculate the Tms. The melting points are displayed. Use this information to program a run. For more information, see Chapter 5, “Creating and Editing Methods.” 7 Press Return to display the Utilities screen. Instrument Setup 3-17 Upgrading the System Firmware Introduction You can update the GeneAmp PCR System 9700 firmware from a serial connection to the RS485 port or from a PCMCIA Flash Memory Card. Contact your local Applied Biosystems representative to obtain a PCMCIA Flash Memory Card. \ Upgrading Through The following procedure describes how to upgrade the firmware through the RS485 the Serial Port serial port. To upgrade the firmware through the RS485 serial port: Step 1 Action Connect the appropriate communication cable from a computer to the RS485 port on the 9700 instrument Base Module (see the figure below). You can use the following cables: Communication cable Part number PC communication cable N805-1327 Macintosh® communication cable N805-1328 For information on connecting the printer cable, see page 3-26. GR0877 RS485 Ports 2 From the Diagnostics screen, press Upgrade. The Firmware Upgrade screen appears. Firmware Upgrade PCcard - Upgrade from PC card Serial - Upgrade from serial port PCcard Serial F1 3-18 Instrument Setup F2 Exit F3 F4 F5 To upgrade the firmware through the RS485 serial port: (continued) Step 3 Action From the Firmware Upgrade screen, press Serial. Serial Port Firmware Upgrade Attach cable from RS485 port on 9700 to serial port on computer. Press Update, then begin download of file from the computer. Update Exit F1 F2 F3 F4 F5 IMPORTANT Do not remove the cable or turn off the instrument until the upgrade is completed. 4 From the Serial Port Firmware Upgrade screen, press Update. DO NOT TURN OFF THE INSTRUMENT OR REMOVE SERIAL CABLE! Upgrading over the serial port will take approximately 10 minutes. Instrument will re-boot when complete. F1 5 F2 F3 F4 F5 Take the following action: If you are using... See... Microsoft™ “Downloading Firmware Using Windows 95 or Windows NT” on page 3-20. Windows® 95, or Microsoft Windows NT® Microsoft Windows® 3.1 “Downloading Firmware Using Windows 3.1” on page 3-21. Instrument Setup 3-19 Downloading To download the system firmware using Windows 95 or Windows NT: Firmware Using Step Action Windows 95 or 1 Click Start > Programs > Accessories > HyperTerminal. Windows NT 2 Click the HyperTerminal icon. The Connection Description dialog box appears. 3 4 In the Connection Description dialog box, enter the following information and click OK. The Connect Using dialog box appears. In this field... Take this action... Name Enter a name, for example TEC. Icon Choose one of the icons. In the Connect Using dialog box, connect using either Direct to Com 1 or Direct to Com 2, depending on the port to which the cable is attached. Note For Windows NT applications this dialog box is titled Connect To, and the fields are COM1and COM2. 5 Depending on whether you chose Com 1 or Com 2 in the previous step, in the Properties dialog box, enter the following. In this field... Enter... Bits Per Second 9600 Data Bits 8 Parity None Stop Bits 1 Flow Control None When you have competed entering the information, click OK. 6 From the Transfer menu, choose Send file. The Send File dialog box appears. 7 In the Send File dialog box, enter the following and click Send. z In this field... Take this action... Filename Locate the upgrade file with the name under which you saved the file. Protocol Enter Kermit. A dialog box appears that displays the current packet number and the number remaining. When the download is complete, the GeneAmp PCR System 9700 automatically resets. 8 3-20 Instrument Setup From the File menu, choose Save to save the parameters. Downloading To download the system firmware using Windows 3.1: Firmware Using Step Action Windows 3.1 1 From the Program Manager, click the Terminal program icon. 2 From the Settings menu, choose Communication. A dialog box appears. 3 Enter the following information in the dialog box and click OK. In this field... Enter... Baud Rate 9600 Data Bits 8 Stop Bits 1 Parity None Flow Control None Connector Com1 or Com2 (depending on the port to which the cable is attached). 4 From the Binary Transfers menu, choose Settings. A dialog box appears. 5 Select Kermit and click OK. 6 From the Send Binary File menu, choose Transfers. A directory dialog box appears. 7 From the directory dialog box, find and select the 9700 upgrade file, and click OK. A message at the bottom of the window indicates that the program is sending the file and a progress bar appears. When the download is complete the GeneAmp PCR System 9700 automatically resets. 8 When the download is complete, from the File menu, choose Save to save these parameters. Instrument Setup 3-21 Upgrading Firmware from a PCMCIA Flash Memory Card The following procedure describes how to upgrade the firmware using a PCMCIA Flash Memory Card. Contact your local Applied Biosystems representative to obtain a PCMCIA Flash Memory Card. Note To upgrade using a PCMCIA Flash Memory Card: Step 1 Action Insert a PCMCIA Flash Memory Card that contains the updated firmware into the slot at the rear of the right side of the instrument. The label and arrow on the card face forward and toward the instrument. GR0877 Note PCMCIA Flash Memory Card 2 Press the card firmly to ensure the card is seated in the slot. IMPORTANT Do not remove the card or turn off the instrument until the upgrade is completed. 3 From the Diagnostics screen, press Upgrade. 4 From the Diagnostics screen, press PCcard. 5 The Checksum screen appears while the instrument checks the inserted PCMCIA Flash Memory Card to ensure that it contains a valid firmware upgrade. Checking PC card checksums... Update F1 3-22 Instrument Setup F2 F3 Exit F4 F5 To upgrade using a PCMCIA Flash Memory Card: (continued) Step 6 Action If the PCMCIA Flash Memory Card contains a valid firmware upgrade, the Upgrade screen appears. DO NOT TURN OFF THE INSTRUMENT OR REMOVE THE PC CARD! Upgrading the instrument firmware will take approximately 30 seconds. Instrument will re-boot when complete. F1 F2 F3 F4 F5 If successful, the Firmware Upgrade Successful screen displays the firmware version to which you have upgraded. Pressing the Run key in the lower right corner brings up the Main menu with the new revision number of the software listed on the screen. 7 Remove the PCMCIA Flash Memory Card after you have successfully upgraded the firmware. Instrument Setup 3-23 Copying Methods How to Copy You can copy methods from a Methods Transportability card to the instrument or from Methods the instrument to a Methods Transportability card (P/N 940-1064). Runs can be made directly from methods on a Methods Transportability card. To copy a method: Step 1 Action Insert a Methods Transportability card that contains the updated firmware into the slot at the rear of the right side of the instrument. The label and arrow on the card face forward and toward the instrument. GR0877 Note Methods Transportability Card 2 Press the card firmly to ensure the card is seated in the slot. IMPORTANT Do not remove the card or turn off the instrument until the upgrade is completed. 3 From the Utilities screen, press More, and from this secondary utility screen, press Copy. The Copy Method dialog box appears. Copy Method ToInst - Copy a method to the instrument ToCard- Copy a method to the PC card ToInst F1 3-24 Instrument Setup ToCard F2 Cancel F3 F4 F5 To copy a method: (continued) Step 4 Action In the Copy Method dialog box, you can take the following action: Press... To... ToInst Transfer a method from a Methods Transportability card to the instrument. ToCard Transfer a method from the instrument to a Methods Transportability card. A screen appears with a list of the methods on the instrument or the Methods Transportability card, depending on whether you selected ToInst or ToCard. User Size Stored 9/9/96 11 <<pe>> 9/9/96 6 <<pe>> 9/9/96 9 <<pe>> 9/9/96 8 <<pe>> Methods on Inst XL PCR Touchdown PCR AmpliTaq Gold™ AmpliCycle Seq Copy View User Sort Cancel F1 F2 F3 F4 F5 5 Use the Circular Key Pad to select a method and press Copy. 6 Confirmation appears when the method has been successfully copied. Copy Method Method XXXXX was successfully copied to the PC card. Copy another method? Yes No F1 F2 F3 F4 F5 Instrument Setup 3-25 Connecting and Configuring a Printer Connecting a Printer If you connect an optional printer to your 9700 instrument, you can print out a hard copy of the time and temperature parameters for the PCR methods you create. Connect one end of your printer cable (N805-1326) to the RS-485 serial port on the side panel of the 9700 instrument and connect the other end to the RS-232C interface serial adapter on the rear panel of the printer. Configuring the After you have connected the printer cable to the printer, you must configure the Printer instrument for the printer. You can connect the 9700 instrument to any printer with a serial board and the following specifications: Baud Rate 9600 Parity NONE Data Bits 8 Stop Bits 1 See your printer manual for instructions on how to complete any other necessary installation steps. 3-26 Instrument Setup 4 Running PCR Samples 4 Overview About This Chapter This chapter provides information on selecting a method, starting and stopping a run, reviewing the history of a run, and what to do when the run is completed. In This Chapter The following topics are covered in this chapter: Topic Selecting a Method See page 4-2 Running a Method 4-6 Reviewing the History of a Run 4-10 When a Run Completes 4-12 Note For information on loading and unloading samples, see the instructions accompanying your interchangeable sample block module. Running PCR Samples 4-1 Selecting a Method Introduction After you have prepared your samples and loaded them in the sample block, you can run a PCR amplification with a new or a stored method. What Is a Method A method is a set of instructions in which you specify how the instrument should heat and cool your samples in a PCR thermal profile. Methods are stored in the instrument software. Predefined Methods The GeneAmp® PCR System 9700 supplies eight predefined methods that you can run: ♦ AmpliCycle® Sequencing ♦ AmpliTaq Gold® DNA Polymerase ♦ BigDye® Terminators ♦ General PCR ♦ LSM2 ♦ Time Release PCR ♦ Touchdown PCR ♦ XL PCR Each of these methods is stored under the user name <<pe>>. You can edit these methods and store them under a different name, a different user name, or select any one and run it. For a detailed description of each of these pre-coded methods, and how you can use them, see Appendix B, “Supplied Methods.” 4-2 Running PCR Samples Selecting a Method If the method you want to run has already been created and stored, you can select it from a list. If the method you want to run has not been created, see Chapter 5, “Creating and Editing Methods.” To select a method: Step 1 Action From the Main menu, press Run. Note If a PC card is inserted, choose whether to run the method from the PC card or the instrument. The Stored Methods screen appears. Methods on Inst exp001 exp002 User Size Stored lisa 10 06/23/96 lisa 15 06/25/96 Start View User Sort Cancel F1 F2 F3 F4 F5 Note Stored represents the date the method was last saved. In the appropriate case, this column designates the date last used. 2 The units for the Size field are based on a calculation of the complexity and length of a method relative to a maximum size of 1102 size segments for the storage capacity of the instrument. If you need help deciding which method to select you can: ♦ View method parameters. ♦ Sort methods by different categories. ♦ Search for a method by user name. 3 Select a method by using the Circular Key Pad to move the highlight box to a method listed on the Stored Methods screen. Note 4 You can use the up and down keys as repeat keys for quick scrolling. The top line of the display continuously cycles between the following three lines: ♦ Methods on Inst User Size Stored. ♦ Used Mem: xxx methods xxx segments. Note The Used Mem field displays the number of size segments used by all stored methods. ♦ Free Mem: xxx methods xxx segments. Note The Free Mem field displays the number of size segments available to store created methods. 5 Press Start and start running your samples (see “Running a Method” on page 4-6). Running PCR Samples 4-3 Viewing Method To view parameters of a method before running: Parameters Step 1 Action From the Stored Methods screen, press View. The View Method screen appears. The screen shows all the parameters of the method you selected. 2 Hld 55.0 2:00 3 Tmp 25 Cycles 94.0 94.0 10:00 0:30 Start F1 2 F2 55.0 0:30 2 Holds 72.0 72.0 0:30 5:00 4.0 Method: exp 001 Return F3 F5 F4 After reviewing PCR and post-PCR parameters of a stored method, you can: ♦ Press Start to start the method. ♦ Press Return and return to the Stored Methods screen. Note You cannot edit parameters from the View Method screen. Searching for You can find any method that has been stored under a user name. Methods To search for a method: Step 1 Action From the Stored Methods screen, press User. Select which user’s methods to view by taking the following action. If you want to... Then... list all the methods currently stored on the instrument Press All. display the methods stored under that user’s name Press Accept. Note 2 4-4 Running PCR Samples You cannot add, delete, or modify a user name from this screen. Making a selection returns you to the Stored Methods screen which now displays the methods of the user you selected. Sorting Methods If you have a large number of stored methods, you can sort them by name, date last used, date stored and size. To sort methods: Step 1 Action From the Stored Methods screen, press Sort. The sorting criteria screen appears. Sort Methods By: Method name Date last used Date stored Method size Accept F1 2 Cancel F2 F3 F4 F5 Use the up and down Circular Key Pad to select the type of sort. The following table describes the sort methods: Choose this item... To sort... Method name Methods alphabetically. Date last used Methods chronologically in descending order by date of use. The last method which ran or was stored is listed first. Date stored Note Uses the most recent title and date, between date last used and the data stored. Method size Methods chronologically by date stored. The last method stored is listed first. Methods in increasing order by the amount of memory used to store each method. The largest size method is listed first. 3 Press Accept to accept a selection. This returns you to the Stored Methods screen where the displayed methods are sorted according to your selection in step 2. Running PCR Samples 4-5 Running a Method Starting a Run After choosing a method, follow these steps to start a run. To start a run: Step Action 1 From the Main menu, press Run to display stored methods. 2 Use the up and down Circular Key Pad to select the method. 3 a. Press Start. The Select Method Options screen appears. b. Choose from the following options: 96-Well Gold Sample Block Module Select 9600 or MAX mode first, and then select volume. Select Method Options Reaction Volume: 50 µL Ramp speed: 9600 Enter a value from 5 to 50 µL Start 9600 MAX F1 96-Well Aluminum Sample Block Module F2 F3 F4 Select Method Options Reaction Volume: 50 µL Ramp speed: 9600 F1 F2 F3 F4 Cancel F5 If the displayed reaction volume differs from your reaction volume, enter the volume of your reactions in the Reaction Volume field. The reaction volume range is dependent on the mode selected. For... The range is... 9600 mode 5 to 50 µL. MAX/STD mode 5 to 100 µL. Note Each method remembers the reaction volume. Press the CE key to clear an entry. 4-6 Running PCR Samples F5 Select 9600 or STD mode first, and then select volume. Enter a value from 5 to 50 µL Start 9600 STD 4 Cancel To start a run: (continued) Step 5 Action Press Start to start a run. If the temperature of the heated cover is less than 103 °C, this message, “Cover is heating” appears. Please wait. Cover is heating Current temperature: 65°C The run will begin when the heated cover reaches 103°C. Cancel F1 6 F2 F3 F4 F5 When the heated cover reaches 103 °C, the Run Time screen displays and the method you selected starts running. For a description of this screen, see “About the Run Time Screen” on page 4-7. Sample 56.7 55.0 2:00 Cycle 1 of 25 94.0 94.0 10:00 0:30 55.0 0:30 HOT 72.0 0:30 72.0 5:00 4.0 Pause Info F1 F2 F3 F4 F5 About the Run Time You can use the Run Time screen to chart progress at any time during the run. The Screen Run Time screen displays the executing segment, and the next segment to execute. Horizontal lines flash as Cycles count up when hold times decrement run is in PCR segment Sample 56.7 55.0 2:00 Cycle 1 of 25 94.0 94.0 10:00 0:30 55.0 0:30 Pause F1 72.0 0:30 Temperature parameters are displayed above the graph HOT HOT displays when the sample block exceeds 50 °C 72.0 5:00 4.0 Info F2 Pre-PCR segment F3 PCR segment Calculated sample temperature updated as run progresses Use the Run Time screen for... F4 Post-PCR segment F5 Hold times are displayed below the graph Ramps flash when system is approaching next temperature value For more information, see page Viewing Method Information 4-8 Pausing a Run 4-8 Stopping a Run Before It Completes 4-9 Running PCR Samples 4-7 Viewing Method You can view the Method Information screen during a run by pressing Info. Press Information Return to return to the Run Time screen. 02:32 PM Information 55.2°C User: lisa Method: XL PCR Run started at 01:32:30 PM, 01/01/00. Run will end at 06:35:30 PM, 01/01/00. Reaction vol: 50 µL Ramp Speed: 9600 Return F1 F2 F3 F4 F5 Pausing a Run You can manually pause a run for a ten minute period of time during a run by pressing Pause (Figure 4-1). If you want to specify a different period of time for a pause, see “Setting the Pause Time Out” on page 3-9. Press Resume to resume running a method before a pause expires. Note You can pause a run in order to add a reagent. Do not to touch the sample block or the bottom of the heated cover during a pause. Sample 56.7 55.0 2:00 Resume F1 Figure 4-1 94.0 10:00 Cycle 1 of 25 94.0 0:30 55.0 0:30 72.0 0:30 HOT 72.0 5:00 4.0 Paused. Will resume in mm:ss F2 F3 F4 F5 Pause screen Your samples remain at the temperature of the instrument when you pause the run. The time remaining in a pause appears at the bottom of the screen in minutes:seconds format. It decrements to zero, and the paused run resumes at the point where you paused it. 4-8 Running PCR Samples Stopping a Run The following procedure describes how to stop a run before it completes. Before It Completes To stop a run before it completes: Step 1 Action Press the Stop key. The Stop confirmation screen appears. Sample 50.1 HOT Confirm Stop Press STOP to abort. Press Resume to continue. Resume F1 F2 F3 F4 F5 The run pauses for a pre-programmed period of time. When the pause time expires, the run aborts. Press Resume to resume. Note The stop and pause times are configured by setting the Pause Time Out. See “Setting the Pause Time Out” on page 3-9. 2 Press the Stop key again. This stops the run and the End of Run screen appears. 11:30 AM End of Run 25.1°C Method:exp001 Run aborted at 11:30:05 AM 01/01/00. Length of run is 01:34:25. Hist F1 Exit F2 F3 F4 F5 If any errors occur during a run the following message appears, “Exception occurred, check history file.” Press HIST to review the history file. 3 Press Exit to return to the Main menu. Running PCR Samples 4-9 Reviewing the History of a Run How to Review the You can read a record of the events and errors that occurred during a run by reviewing History of a Run the history file. The instrument stores the history file until it is overwritten by the next method used. To review the history: Step 1 Action To display the History File screen: ♦ From the Utilities screen, press More, and then press Hist. ♦ From the End of Run screen, press Hist. History of method exp002 User: lisa Reaction volume: 50 µL Run started at 02:30:45 PM, 01/01/00. Run aborted at 02:50:42 PM, 01/01/00. Length of run 00:19:57 Ramp speed: 9600 No exceptions PageDn Print Return F1 F2 F3 F4 2 Press PageUp to move up through the record, or PageDn to move down. 3 Press Print to print the record. ] History Formats The following table lists the history line formats. 4-10 Running PCR Samples F5 Pre-PCR hold <Exception> in Pre-PCR xx Setpt xx PCR segment <Exception> in Cycle xx Setpt xx Repxx Any other hold <Exception> in Hold xx Setpt xx History File Records The following table lists the history file records. Record Description Type History of method xxxxxxxxxxxxxxx User xxxxxx Reaction volume xxx µL Run started at hh:mm:ss am mm/dd/yy This header record is always created. Report Run ended at hh:mm:ss am mm/dd/yy Length of run hh:mm:ss RampSpeed: 9600 Note If you stopped a method before it completed running, then the message, Run ended at..., will be Run aborted at... Power failure in Cycle xx at Setpt xx. Power failed at hh:mm:ss am for hh:mm:ss. Run resumed at hh:mm:ss am There was a power failure during a specified point in a cycle. Report Drift error in Cycle xx Setpt xx Repxx. Temperature drifted x.x°c from setpt Block drift error. Cover error in Cycle xx Setpt xx Repxx. Heated cover at xx.x°c Heated cover drift error. Sensor error in Cycle xx Setpt xx Repxx. Block sensor failure. Block sensor failure. Sensor error in Cycle xx Setpt xx Repxx. Cover sensor failure. Heated cover sensor failure. Fatal error. Setpt error in Cycle xx Setpt xx Repxx. Could not reach xx.x in hh:mm:ss This setpoint error is only logged for setpoints above 15 °C. Fatal error. The message, for >18, indicates that the power was off for more than 18 hours. Report The block has drifted ± 2 °C from set point during the hold segment of a run. Report The cover has drifted ± 5 °C from 105 °C anytime during the run. Fatal error. Call for service. Call for service. Call for service. The limit is 5 times the normal ramping time. Program pause in Cycle xx Setpt xx Rep xxx Method paused at xx °C for hh:mm:ss A programmed pause was encountered. Report Manual pause in Cycle xx Setpt xx Rep xxx Method paused at xx °C for hh:mm:ss You paused the run. Report Running PCR Samples 4-11 When a Run Completes End of Run Screen At completion of a run, the instrument beeps and the End of Run screen appears. From the End of Run screen you can perform the same functions as you can from the Stop Run screen. End of Run 11:30 AM 25.1°C Method: XL PCR Run completed at 11:30:05 AM, 01/01/00. Length of run is 01:34:25. Hist F1 Exit F2 F3 F4 F5 If you have not yet stored the method, you must store it before exiting, or you will lose the settings. The Store soft key appears if the method has not yet been stored. Method Not Stored If you attempt to exit the End of Run screen before storing the method, the Method Not Screen Stored screen displays. Method Not Stored Press Store to save the method. Press Exit to delete the method. Store F1 F2 Exit F3 F4 F5 The following table lists the actions you can take. If you... Then press... want to store the method Store. do not want to store the method Exit. Note The Method Not Stored screen appears for a few seconds before the Exit key is recognized. This prevents you from losing a newly created method. You return to the top level screen and the method you created is not saved. 4-12 Running PCR Samples Creating and Editing Methods 5 5 Overview About This Chapter This chapter provides information about how to create and edit PCR methods and how to work with stored methods. In This Chapter The following topics are covered in this chapter: Topic Adding or Changing Users See page 5-2 Creating Methods 5-6 Modifying Cycling 5-11 Printing a Method 5-17 Editing or Deleting Methods 5-18 Creating and Editing Methods 5-1 Adding or Changing Users Introduction The GeneAmp® PCR System 9700 stores methods by user’s names. You can add up to 19 different user names to the instrument. Once you’ve added your name to a list of users, and stored a method under that name, you can run the method at any time by selecting it from the Stored Methods screen (See “Selecting a Method” on page 4-3). Use the User function on the Main menu to add new users or edit existing user names. The name you add or the name you select from a list of existing user names becomes the current user name. All new methods that you create are stored by default under the current user name. Adding a New User You add a new user name by entering an alphanumeric name on the User Name Name screen. To add a new user name: Step 1 Action From the Main menu, press User. The Select User Name screen appears. A list of names of all users who have been added to the instrument displays in a 4 x 5 matrix. Select User Name <<pe>> adrian doug peter Accept New F1 2 F2 Edit Delete Cancel F3 F4 F5 Press New to add a new name to the above list. The User Name screen appears. Note The blank space after the z is used to insert the blank spaces. abcdefghi jklmnopqrj stuvwxyz User Name .,-+/():= Use ENTER key to select a character. Accept Backsp Cancel F1 5-2 Creating and Editing Methods F2 F3 F4 F5 To add a new user name: (continued) Step 3 Action In the User Name field, enter an alphanumeric name up to six characters in length. You can take the following action: 4 If you want to... Then... select a character in the list shown in the upper right portions of the screen use the Circular Key Pads. put the alphabetic character in the User Name field press Enter. enter the numbers directly into the User Name field use the numeric keys. go back one space and remove a single character hold down the Soft key and go back multiple spaces. Press Accept to accept a name. The Security Code screen appears. You can take the following action: If you... Then... do not want to protect your method press Accept again. want to protect your method see the following section titled “Protecting Methods.” want to return to the Main menu without adding the new user name press Cancel. Note An error message appears if you enter a name that already exists. Protecting Methods You can protect methods and prevent other users from accidentally overwriting or deleting them by entering a Personal Identification Number (PIN#) on the Security Code screen. PIN number: None Protection: Unlocked Press PIN # to create a #. Then you set protection to Locked to prevent methods from being overwritten or deleted. User Name: hank Accept Name PIN# F1 F2 F3 Cancel F4 F5 The following table lists the two levels of protection. If a... Then other users cannot... user has entered a PIN # edit that user’s name without knowing the PIN #. method is locked delete/overwrite the method. Creating and Editing Methods 5-3 Follow the procedure below to protect a method. To protect a method: Step 1 Action Press PIN #. The New PIN Number screen appears. Create a PIN Number Your PIN number protects the access to your user name and protection level Enter a PIN number. New PIN #: XXXX Accept F1 Cancel F2 F3 F4 F5 2 In the New PIN # field, use the numeric keys and type in a four-digit PIN. 3 Press Enter. The PIN Confirmation screen appears. Confirm PIN Number Your PIN number protects the access to your user name and protection level Enter a PIN number again. PIN #: XXXX Press Accept to confirm your PIN #. Accept Cancel F1 F2 F3 F4 F5 4 Confirm your PIN by typing your four-digit PIN in the Confirm PIN # field. 5 Press Enter. The Protection Status screen appears. PIN number: XXXX Protection: Unlocked Press PIN # to create a #. Then you set protection to Locked to prevent methods from being overwritten or deleted. Accept Name PIN# Lock Cancel Username: hank F1 6 F2 F3 F4 F5 Press Lock to lock your method. This toggles between a Locked and Unlocked state. The Protection field displays the status of the method. 7 Press Accept when you have entered a PIN you want to keep. The Select User Name screen appears. The new name you entered should now display on the screen. Press Cancel to cancel your entry and return to the previous screen. 5-4 Creating and Editing Methods Changing a User If you know the personal identification number for a user name, you can use the Name Circular Key Pad to select that name, and change it. To change a user name: Step 1 Action From the Main menu, press User. The Select User Name screen appears. 2 Use the Circular Key Pad to select the name you want to change. 3 Press Edit. If a PIN has been previously entered, the Security Check screen appears. 4 Type in the four-digit PIN of the user name you selected. 5 Press Name to enter a new user name. 6 Press the CE key to clear the previous name. 7 Enter a new user name. 8 Press Accept. The Security Code screen appears again. Deleting a User If there aren’t any methods stored under a user name, you can delete that name from Name the Select User Name screen. To delete a user name: Step Action 1 Use the Circular Key Pad from the Select User Name screen to select a user name. 2 Press Delete to delete the name. This removes the name from the Select User Name screen and allows you to add a new name to the instrument. Creating and Editing Methods 5-5 Creating Methods About the Default The GeneAmp PCR System 9700 comes with a default PCR thermal profile called a Method method. The create screen displays this default method. For information on displaying the create screen, see “Displaying the Create Methods Screen” on page 5-7. You can run the default method shown above, or use it as a template to create a customized method. Number of temperature control parameters in the PCR segment Number of temperature control parameters in the pre-PCR segment Number of cycles the PCR segment will run 1 Hld 3 Tmp 94.0 5:00 94.0 0:30 Number of temperature control parameters in the post-PCR segment 25 Cycles 2 Holds 72.0 0:30 55.0 0:30 72.0 7:00 4.0 Start Store Print More Cancel F1 F2 F3 F4 F5 Pre-PCR segment PCR segment Post-PCR segment Basic Parameters To create a method, you need to define the following four basic parameters: ♦ Temperature Control Parameters ♦ Pre-PCR Holds ♦ PCR Parameters ♦ Post-PCR Holds For detailed information about these parameters refer to the table below: For information about... See page Entering Temperature Control Parameters 5-8 Defining Pre-PCR Holds 5-9 Defining PCR Parameters 5-9 Defining Post-PCR Holds 5-10 5-6 Creating and Editing Methods Displaying the Follow the steps below to display the Create Methods screen. Create Methods To display the Create Methods screen Screen Step 1 2 Action From the Main menu, press Create. The create screen appears. 1 Hld 3 Tmp 94.0 5:00 94.0 0:30 25 Cycles 2 Holds 72.0 0:30 55.0 0:30 72.0 7:00 4.0 Start Store Print More Cancel F1 F2 F3 F4 F5 From the Create screen, you can take the following action: If you want to... Then... start running the default method press Start. store the method under a user’s name press Store. print a record of the method parameters press Print. enter temperature control parameters enter the information on the create screen and create a new method. display more functions for modifying methods press More. return to the previous screen Note The More function only displays when you select a time or temperature parameter. For detailed information on using the More function to modify cycles, see “Modifying Cycling” on page 5-11. press Cancel. Creating and Editing Methods 5-7 Entering When you enter temperature control parameters, you define values for parameters in Temperature each of the three segments of a method: pre-PCR, PCR, and post-PCR. Control Parameters To enter temperature control parameters: Step Action 1 On the Create screen, select a field. When you first display the Create screen, the Hld field is highlighted. 2 Use the numeric keys to enter values. 3 Press Enter to accept a value. The next field is then selected in the order shown in Figure 5-1. 4 6 1 1 Hld 3 Tmp 2 94.0 5:00 94.0 0:30 F1 F2 Pre-PCR segment Figure 5-1 Number 5-8 Creating and Editing Methods 12 13 15 25 Cycles 2 Holds Store 7 10 5 4.0 16 Print 9 72.0 7:00 72.0 0:30 55.0 0:30 3 Start 8 F3 More 11 PCR segment F4 Cancel 14 F5 Post-PCR segment Order of advancement of the highlight box Description 1 Number of pre- PCR holds 2 Pre-PCR temperature parameter 3 Pre-PCR hold time parameter 4 Number of PCR segment temperatures 5 Number of cycles for the PCR segment 6 PCR segment temperature parameter 7 PCR segment time parameter 8 PCR segment temperature parameter 9 PCR segment time parameter 10 PCR segment temperature parameter 11 PCR segment time parameter 12 Number of post-PCR holds 13 Post-PCR temperature parameter 14 Post-PCR hold time parameter 15 Post-PCR temperature parameter 16 Post-PCR hold time parameter Defining Pre-PCR The Hld field on the Create screen defines the number of holds for the pre-PCR Holds segment of your method. One (1) is the typical setting for most PCR amplifications and is the default value for the Hld field. Generally, pre-PCR holds define a temperature and hold-time sufficient to denature any endonucleases or exonucleases that may contaminate your prepared samples. To define pre-PCR holds: Step 1 Action On the Create screen, in the Hld field, type in the number of pre-PCR holds for your method. Note You can enter 0 in this field to delete the pre-PCR hold segment from your method. 2 Create the first temperature parameter: a. Press Enter. b. Type in a temperature value between 4.0 °C and 99.9 °C. 3 Create the first hold-time parameter: a. Press Enter. b. Type in a hold-time value between 00:00 and 98:59 (minutes:seconds). 4 Enter information for the next pre-PCR hold: a. Press Enter. b. Repeat step 2 and step 3 until you have hold-time and temperature values for each of the pre-PCR hold parameters you defined in step 1. Defining PCR The Tmp field on the Create screen defines the number of temperature control Parameters parameters in the PCR cycling segment of your method. Three temperature PCR is the typical setting for many PCR amplifications: ♦ Template denaturation ♦ Primer annealing ♦ Primer extension To define the PCR parameters: Step 1 Action On the Create screen, in the Tmp field, type in the number of temperature control parameters (2–6) you want for the PCR segment of your method. Note Specifying only the minimum number of PCR cycles required for analysis will minimize the chance that unwanted targets will amplify competitively. 2 Enter the number of cycles you want the method to run: a. Press Enter to select the Cycles field. b. In the Cycles field, type in the number of cycles (from 2–99). Note 3 Twenty-five cycles is the default setting. Create the first temperature parameter: a. Press Enter. b. Type in a temperature value between 4.0 °C and 99.9 °C. Creating and Editing Methods 5-9 To define the PCR parameters: (continued) Step 4 Action Create the first hold-time parameter: a. Press Enter. b. Type in a hold-time value between 00:00 and 98:59 (minutes:seconds). 5 Repeat step 3 and step 4 until you have time and temperature values for each of the segment temperature control parameters you defined in step 1. Defining Post-PCR On the Create screen, the Holds field defines the number of temperature control Holds parameters in the post-PCR segment of your method. The post-PCR incubation temperature and hold time parameters define how to hold your samples at a specified temperature until you are ready to analyze them. Note If the idle state setpoint, or the last hold of the Method are below 15 °C, then the heated cover will automatically set to 50 °C. Post-PCR Parameter Settings Typical Post-PCR parameter settings: Temperature Time (min:sec) Use For 72 °C 7:00 Complete extension of all amplicons 72 °C 99:59 (×) AmpErase™ applications 4 °C 99:59 (×) General storage Follow the procedure below to define Post-PCR Holds To define post-PCR holds: Step Action 1 Select the Holds field. 2 In the Holds field, type in the number of post-PCR steps for your method. 3 Press Enter to select the first post-PCR temperature parameter. 4 Type in a temperature value between 4.0 °C and 99.9 °C. 5 Press Enter to select the first post-PCR hold time parameter. 6 Type in a hold time value between 00:00 and 98:59 (min:sec). Note The hold time × indicates a hold that lasts indefinitely. You can enter an × hold time, by typing a hold time value of 99:00 or greater. 7 Press Enter. This selects the next temperature parameter. 8 Repeat step 4 through step 7 until you have time and temperature values for each of the post-PCR hold parameters you defined in step 2. 5-10 Creating and Editing Methods Modifying Cycling Introduction In addition to customizing values for PCR temperature control parameters, you can use the More function on the create screen and access cycle modification functions that allow you to: ♦ Auto-increment/decrement time and temperature parameters. ♦ Modify up-ramp and down-ramp rates in the cycling segment of a method. ♦ Insert holds, cycles, and programmed pauses. ♦ Delete temperature control parameters. The time or temperature parameter you select on the create screen, determines which modification function you can access when you press More. Different modification functions are available depending on whether you select a temperature control parameter in the pre-PCR segment, the PCR segment, or the post-PCR segment of a method. Changing Using the AutoX function, you can automatically increase or decrease the value for Temperature any PCR segment parameter by a fixed amount every cycle. Control Parameters Note This feature is particularly useful towards the end of the amplification process since the amount of PCR product, available to be extended, increases with the number of cycles while the amount of available enzyme remains constant. To automatically change temperature control parameters: Step Action 1 From the Create screen, use the Circular Key Pad to select a time or temperature parameter in the PCR segment. 2 Press More. The Modify screen appears. 3 Press Modify. The Select Modification screen appears. 4 Press AutoX. The AutoX screen appears. 2 Pre-PCR 3 Tmp 25 Cycles +0.0 +0:00 2 Holds +0.0 * +1.0 +0:00 -0:30 * Accept + - F1 F2 F3 Cancel F4 F5 Note If you have inserted a programmed pause, the AutoX screen displays the pause, but you cannot modify it from the AutoX screen. 5 Select the PCR time or temperature parameter that you want modified when you run your method. Note From the AutoX screen, you cannot modify the number of parameters in each segment or the number of cycles. Creating and Editing Methods 5-11 To automatically change temperature control parameters: (continued) Step 6 Action You can take the following action: If you want to... Then press... increase the value every cycle + (plus sign). (a plus sign displays in the current field) decrease the value every cycle - (minus sign). (a minus sign displays in the current field) An asterisk * appears on method screens for parameters that have been modified. 7 Press Accept to accept all entries on the AutoX screen. Modifying Ramp The ramp time is the time it takes the instrument to change from one temperature to Rates another. Using functions accessible from the Modify screen, you can modify the up-ramp and down-ramp rates of the instrument by defining it as a percentage of the temperature’s maximum rate of increase. The default maximum up-ramp and down-ramp rates is 100%. To modify ramp rates: Step Action 1 Press Modify from the Modify screen. The Select Modification screen appears. 2 Press Ramp. The Ramp Rate Modification screen appears. 2 Pre-PCR 3 Tmp 25 Cycles 94.0 100% 55.0 100% Accept Faster Slower F1 F2 F3 2 Holds 72.0 100% Cancel F4 F5 In this example, you can modify the rate at which the instrument ramps up from 72.0 °C to 94.0 °C, down from 94.0 °C to 55.0 °C, or up from 55.0 °C to 72.0 °C. 3 Use the Circular Key Pad to select a ramp that you want to modify. 4 Move the highlight box to the third temperature in the cycling segment of the default method to modify the highlighted ramp rate. The third ramp rate defines the rate at which the instrument increases from 55.0 °C to 72.0 °C each time the method cycles. 2 Pre-PCR 3 Tmp 25 Cycles 2 Holds 94.0 100% 5-12 Creating and Editing Methods 55.0 100% Accept Faster Slower F1 F2 F3 72.0 100% Cancel F4 F5 To modify ramp rates: (continued) Step 5 Action Modify the up-ramp and down-ramp rates you selected by defining them as a percentage of the maximum of 100%: If you want to... Then press... increase the ramp rate by 10% up to a maximum of 100% the Faster key. decrease the ramp rate by 10% from 100% to 10%, and by 5% from 10% to 5% the Slower key. Note You can also use the numeric keys to enter a value that defines the percentage by which you want to decrease the ramp rate for each cycle of the method. You can enter values between 5 and 95, or 100. For ramp rates less than 100%, an asterisk * appears next to modified ramps. The asterisk remains beneath the modified temperature parameter to remind you that the method has been modified. Note The following message appears if you enter a numeric value outside the range of acceptable values, “Valid range is 5 to 95 and 100.” 6 Press Accept to accept all entries, and return to the previous screen. Inserting Holds Use the Insert function to insert holds and cycles into your method, and program pauses that the instrument automatically inserts into your method as it runs. To insert holds: Step Action 1 From the Create screen, use the Circular Key Pad to select a time or temperature parameter to the right of where you want to insert a hold. 2 Press More. Depending on the parameter you select in step 1, one of three screens displays from which you can access the insert function. 3 Press Insert. The Insert screen appears. 2 Pre-PCR 3 Tmp 25 Cycles 55.0 2:00 94.0 94.0 10:00 0:30 * 55.0 0:30 Hold Cycle Pause F1 F2 F3 72.0 0:30 2 Holds 72.0 5:00 4.0 Cancel F4 F5 Note The Pause function will not display on the Insert screen if the highlighted segment already has a pre-programmed pause or if highlight box is not on a PCR segment parameter. 4 Press Hold to insert a hold of 4.0 °C for 30 seconds to the left of the parameter you selected in step 1. 5 Type in a value for the hold temperature. 6 Type in a value for the hold time. 7 Press More to return to the Create screen. Your modified method now appears. Creating and Editing Methods 5-13 Deleting Holds Follow the procedure below to delete holds. To delete holds: 1 From the Edit screen, select a hold parameter and press More. 2 Use the Circular Key Pad to a select a time or temperature hold parameter. 2 Pre-PCR 3 Tmp 25 Cycles 55.0 2:00 94.0 94.0 10:00 0:30 F1 3 * 55.0 0:30 72.0 0:30 2 Holds 72.0 5:00 4.0 Insert Delete More F2 F3 F4 F5 Press Delete. Inserting Cycles Follow the procedure below to insert cycles. To insert cycles: Step Action 1 From the Create screen, use the Circular Key Pad to select a time or temperature parameter to the right of where you want to insert a cycle. 2 Press More. Depending on the parameter you select in step 1, one of three screens displays from which you can access the insert function. 3 Press Insert. The Insert screen appears. 2 Pre-PCR 3 Tmp 25 Cycles 94.0 94.0 55.0 10:00 0:30 2:00 4 * 55.0 0:30 Hold Cycle Pause F1 F2 F3 2 Holds 72.0 72.0 0:30 5:00 4.0 Cancel F4 F5 Press Cycle to insert a cycle to the left of the segment you selected in step 2. Note You can delete a cycle by entering 0 in the Tmp field. Inserting Follow the procedure below to insert a programmed pause. Programmed Pauses To insert a programmed pause: Step Action 1 From the Create screen, use the Circular Key Pad to select a PCR segment time or temperature parameter where you want to insert a programmed pause. 2 Press More. 3 Press Insert. The Insert screen appears. 5-14 Creating and Editing Methods To insert a programmed pause: (continued) Step 4 Action From the Insert screen, press Pause . The Programmed Pause screen appears. Define Programmed Pause Start first pause at cycle 1 of 25. Pause every 25 cycles for 00:30. Beep during the pause? No Accept F1 Cancel F2 F3 F4 F5 5 In the Start first Pause at Cycle field, type in the cycle number where you want the method to first pause. 6 In the Pause Every field, type in the pause frequency in cycles. The pause frequency specifies the number of cycles that will run between each pause. 7 In the Cycles For field, type in the length of the pause in minutes:seconds (00:01–98:59) format. 8 In the Beep During The Pause? field, press Yes or No. 9 Press Accept to accept the pause information on the screen. The word Pause now displays to the right of the incubation step where you programmed the pause. Note You can only insert one pause in each cycle. = Creating and Editing Methods 5-15 Editing If you have inserted a programmed pause in your method, you can edit the Programmed Pauses parameters for the pause at any time. To edit programmed pauses: Step Action 1 From the Create screen, use the Circular Key Pad to highlight the word Pause. The Edit soft key appears. 2 Press Edit to access the programmed pause screen. From this screen, you can ♦ Change any of the pause parameters, or ♦ Use the Circular Key Pad to select the pause time parameter on the screen, and edit it by entering a different time. After you have entered all modifications to the customized method you are creating, you should store the method before running it (see “Naming and Storing Methods” below). Naming and Storing Naming and storing completes the creation of the method. Methods To name and store methods: Step Action 1 From the Create screen, press Store. 2 You can take the following action: If you want to... Then... store the method under the name displayed in the user field and name the method the default name displayed in the method field Accept key. press the The default method name is expxxx where xxx= a number from 0 to 999. rename the method 3 go to step 3. From the Store screen, press Method. The Method Name screen appears. Note The blank space after the letter Z is used to insert blank spaces. abcdefghi jklmnopqrj stuvwxyz Method Name exp001 .,-+/():= Use ENTER key to select a character. Accept F1 5-16 Creating and Editing Methods Backsp F2 F3 Cancel F4 F5 To name and store methods: (continued) Step 4 Action In the Method Name field, follow these steps to enter a 1–16 character alphanumeric name. Step a. b. Action Use the Circular Key Pad to select a character in the list shown in the upper right portion of the screen. After selecting a character, press Enter to place the character in the Method Name field. c. 5 If you want to... Then... enter a number press the appropriate number key. go back one space press the Backsp key. clear the method name press the CE key. Press Accept after you have entered a method name. The Store screen appears again. The method name you entered should now display in the Method Name field. 6 From the Store screen, press Accept. This stores the method under the name you entered. Printing a Method Introduction If you have configured your instrument for a printer, you can print a record of the parameters in a method. For more information on configuring a printer, see “Setting Custom Parameters” on page 3-8. \ Printing a Method To print a method: Step 1 Action Access the Create or Edit screen. From the Create or Edit screen you can print a copy of the parameters for the method displayed on the screen. 2 Press Print. Creating and Editing Methods 5-17 Editing or Deleting Methods Introduction After you create a method, you can edit its parameters, and store the method by the same name, or change its name. At some time, you may also want to delete a method if you are no longer using it. You can access all editing functions from the Main menu. The delete screen is accessed through the utility menu. Editing a Method The following procedure describes how to edit a method. To edit a method: Step 1 Action From the Main menu, press Edit. Note If an (SRAM) PC Card is detected in the Card slot, you will get a choice of editing a method on the PC Card or the instrument. The top line of the display continuously cycles between the following three lines: Methods on Inst [or on PC card] User Size Stored [or Last Used] Used Mem: xxx methods xxx segments Free Mem: xxx methods xxx segments The following table describes these fields. 2 Field Description units for the Size field Based on a calculation of the complexity and length of a method relative to a maximum size of 1102 size segments for the storage capacity of the instrument. Used Mem field Displays the number of segments used by all stored methods. Free Mem field Displays the number of segments available to store created methods. Select one of the methods displayed on the screen, or select another method as follows: If you want to... Then press... view the parameters of a method before making a selection the View key. (Refer to “Viewing Method Parameters” on page 4-4.) search for a method by user name the User key. (Refer to “Searching for Methods” on page 4-4.) sort methods by different criteria (Refer to “Sorting Methods” on page 4-5.) 5-18 Creating and Editing Methods the Sort key. To edit a method: (continued) Step 3 Action Press Edit after selecting a method. The Edit screen appears. 2 Pre-PCR 3 Tmp 25 Cycles 94.0 94.0 55.0 10:00 0:30 2:00 . 55.0 0:30 Hold Cycle Pause F1 F2 F3 2 Holds 72.0 72.0 0:30 5:00 4.0 Cancel F4 F5 4 Choose a temperature or time parameter within a PCR segment. 5 Edit temperature control or time parameters. Note Editing parameters on the Create screen involves the same tasks and uses the same key combinations as you use when creating a method. The same functions for modifying methods are also available. 6 From the Edit screen, press Store to store the method. Creating and Editing Methods 5-19 Deleting a Method The following procedure describes how to delete a method. To delete a method: Step 1 Action From the Utilities screen, press More and then press Delete. The Delete Method screen appears. Delete Method Methods on Inst User Size Stored exp001 lisa 15 01/01/00 Press Yes to delete the method Yes F1 F2 F3 Cancel F4 F5 Note If a PC Card is detected in the Card slot, you will get a choice of deleting a method on the PC Card or the instrument. The top line of the display continuously cycles between the following three lines: Methods on Inst [or on PC card] User Size Stored [or Last Used] Used Mem: xxx methods xxx segments Free Mem: xxx methods xxx segments The following table describes these fields. 2 Field Description Units for the Size field Based on a calculation of the complexity and length of a method relative to a maximum size of 1102 size segments for the storage capacity of the instrument. Used Mem Field Displays the number of segments used by all stored methods. Free Mem Field Displays the number of segments available to store created methods. Select one of the methods displayed on the screen, or select another method as follows: If you want to... Then press... view method parameters the View key. (Refer to “Viewing Method Information” on page 4-8.) sort methods by different criteria (Refer to “Sorting Methods” on page 4-5.) 3 the Sort key. Press Delete. The Delete Confirmation screen appears. If the method is protected, enter a four-digit PIN and press Accept when the number is correct. 5-20 Creating and Editing Methods To delete a method: (continued) Step 4 Action Press Yes to confirm the deletion. This deletes the method and returns you to the Delete screen. Note Even after you delete the last method stored under a User name, the name is removed from the instrument. To delete the name, see “Deleting a User Name” on page 5-5. Creating and Editing Methods 5-21 Converting Hold Times 6 6 Overview About This Chapter This chapter provides information about setting hold times for the GeneAmp® PCR System 9700 compared to the DNA Thermal Cycler or DNA Thermal Cycler 480. This information is based upon differences in how the instruments heat and cool samples. Note Protocols using sample volumes between 5 µL and 50 µL, developed on either the GeneAmp® PCR System 2400 or 9600, may be transported to the GeneAmp PCR System 9700 without change when using the 9600 emulation mode. In This Chapter The following topics are covered in this chapter: Topic See page About Setting Hold Times 6-2 Guidelines for Converting Hold Times 6-3 Converting Hold Times 6-1 About Setting Hold Times Introduction The hold times specified for the GeneAmp PCR System 9700 are shorter than those used for the Step-Cycle or ThermoCycle files on the DNA Thermal Cycler and the DNA Thermal Cycler 480. This is because the DNA Thermal Cycler and the DNA Thermal Cycler 480 starts counting the hold time when the block reaches a temperature one degree before the target temperature, while the GeneAmp PCR System 9700 starts counting the hold time when the samples reach a temperature one degree before the target temperature. Hold Time As shown in the figures below, since the block reaches the target temperature before Differences the sample, the programmed hold time on the DNA Thermal Cycler and the DNA Thermal Cycler 480 must include enough time for the samples to reach the target temperature. A hold time of one minute or greater is required on the DNA Thermal Cycler and the DNA Thermal Cycler 480 for samples to reach the target temperature. On the GeneAmp PCR System 9700, hold times of less than one minute are generally used. DNA Thermal Cycler and DNA Thermal Cycler 480 Hold Time 94 93 Block Temp (˚C) Sample Clock starts when block reaches target temperature Time 1 minute GeneAmp PCR System 9700 Hold Time 94 93 Block Temp (˚C) Sample Time 6-2 Converting Hold Times Clock starts when sample reaches target temperature Guidelines for Converting Hold Times Introduction This section describes guidelines on how to convert hold times for the DNA Thermal Cycler or the DNA Thermal Cycler 480 to hold times for the GeneAmp PCR System 9700 when using the 9600 mode. What to Base the The following table lists what to base the new hold time on if you are using an up ramp New Hold Times On or down ramp. If you are using... Then base the new hold time... For more information see... an up ramp on the change in the temperature required to reach the next target temperature. Table 6-1 on page 6-3. a down ramp on the starting temperature of the ramp and the change in temperature required to reach the next temperature. Table 6-2 on page 6-5. Setting Up Ramps The following table lists the process of setting the up ramp temperature. Step Action 1 Determine the change in temperature required to reach the next target temperature and round this value off to the closest value found in Table 6-1. 2 Subtract the number of seconds indicated from the hold time used for the DNA Thermal Cycler or the DNA Thermal Cycler 480. The result is the hold time to use for the GeneAmp PCR System 9700. Note The typical hold time is 10 to 15 seconds for denaturation. Table of Conversions The following table lists the times for converting up ramp hold times greater than one minute from the DNA Thermal Cycler and the DNA Thermal Cycler 480 to the GeneAmp PCR System 9700. Table 6-1 Converting up ramp hold times ∆ Temp (°C) Seconds to subtract from DNA Thermal Cycler or DNA Thermal Cycler 480 hold times (>1 min.) 10° 38 sec. 15° 45 sec. 20° 49 sec. 30° 54 sec. 40° 55 sec, 50° 57 sec. 60° 57 sec. Converting Hold Times 6-3 Up Ramp Example In this example, the temperature was increased by 17 °C. This value was rounded to 15 °C. According to Table 6-1, subtract 45 seconds from the hold time on the DNA Thermal Cycler or the DNA Thermal Cycler 480, resulting in a new hold time of 35 seconds (see the figure below). Note If methods developed on the GeneAmp PCR System 9700 will be used on the DNA Thermal Cycler or the DNA Thermal Cycler 480, you can also use Table 6-1 to convert the hold times. Add the indicated times instead of subtracting them. GeneAmp PCR System 9700 DNA Thermal Cycler Temp. (˚C) Temp. (˚C) 72 72 Hold Hold 55 55 ∆ temp=17˚ (round to 15˚) 80 sec. 35 sec. Time Time Setting Down Ramps The following table lists the process of setting the down ramp temperature. Step Action 1 Determine the change in temperature required to reach the next target temperature and round this value off to the closest value found in Table 6-2. 2 Based on the starting temperature of the ramp, determine the number of seconds to subtract from the DNA Thermal Cycler or DNA Thermal Cycler 480 hold time to arrive at the new hold time. Note 6-4 Converting Hold Times The typical hold time is 10 to 15 seconds for annealing. Table of Conversions The following table lists the times for converting down ramp hold times greater than one minute from the DNA Thermal Cycler or the DNA Thermal Cycler 480 to the GeneAmp PCR System 9700. Table 6-2 Converting down ramp hold times Starting temperature of ramp (°C) A Temp (°C) 35-55° 56-75° 76-96° 10° 39 sec. 39 sec. 40 sec. 15° 45 sec. 47 sec. 48 sec. 20° 49 sec. 52 sec. 53 sec. 30° — 56 sec. 59 sec. 40° — 57 sec. 62 sec. 50° — — 62 sec. 60° — — 60 sec. Down Ramp In the example below, the temperature was decreased by 22 °C. This value was Example rounded to 20 °C. According to Table 6-2, with a starting temperature of 94 °C, we should subtract 53 seconds from the hold time on the DNA Thermal Cycler or the DNA Thermal Cycler 480, resulting in a new hold time of 27 seconds. Note If the methods developed on the GeneAmp PCR System 9700 will be used on the DNA Thermal Cycler or the DNA Thermal Cycler 480, use Table 6-2 to convert the hold times. Add the indicated times instead of subtracting them. GeneAmp PCR System 9700 DNA Thermal Cycler Temp. (˚C) Starting Temp=94˚ 94 72 Temp. (˚C) Starting Temp=94˚ 94 72 Hold Hold ∆ temp=22˚ (round to 20˚) 80 sec. 27 sec. Time Time Converting Hold Times 6-5 Routine Maintenance 7 7 Overview About This Chapter This chapter describes how to perform routine maintenance on the GeneAmp® PCR System 9700. ELECTRICAL SHOCK HAZARD. Severe electrical shock can result from operating the GeneAmp PCR System 9700 Base Module without its instrument panels in place. Do not remove instrument panels. High-voltage contacts are exposed when instrument panels are removed from the instrument. There are no components inside the GeneAmp PCR System 9700 that you can safely service yourself. If you suspect a problem, contact an Applied Biosystems Technical Support Representative. In This Chapter The following topics are covered in this chapter: Topic Changing the External Fuses See page 7-2 Routine Maintenance 7-1 Changing the External Fuses Introduction FIRE HAZARD. For continued protection against the risk of fire, replace fuses only with Listed and Certified fuses of the same type and rating as those currently in the instrument. All instruments have factory installed fuses. However, if you should ever need to change a fuse, follow the instructions in “Changing the External Fuses” on page 7-2. GR0878 Power Entry Module The Power Entry Module is located at the rear of the left side of the instrument. Diagram GR0961 Fuse Compartment door Fuse Fuse compartment 7-2 Routine Maintenance Changing Fuses Instruments have two 8 amp Type T 250 V 5x20 mm fuses (P/N 0999-1683). To change the fuses: Step 1 Action Turn off the instrument and disconnect the power cord from the side of the instrument. ELECTRICAL SHOCK HAZARD. Severe electrical shock, which could cause physical injury or death, can result from working on an instrument when the high voltage power supply is operating. To avoid electrical shock, disconnect the power supply to the instrument, unplug the power cord, and wait at least 1 minute before working on the instrument. The fuses are located in the Power Entry Module. 2 Insert a small flat-tip screwdriver into the slot in the upper portion of the power entry module, and open the door. 3 Pull the fuse compartment out. There are two fuses in the fuse compartment. 4 Pull out the fuse from the back of the fuse compartment and replace the blown fuse with one 8 amp Type T 250 V fuse. 5 Place the fuse compartment back into the Power Entry Module and close the door. Press the door until it locks in place. 6 Connect the instrument power cord. Routine Maintenance 7-3 Troubleshooting 8 8 Overview About This Chapter This chapter describes instrument problems you may have, the probable causes of these problems, and any display screen messages you may encounter when using the GeneAmp® PCR System 9700. In This Chapter The following topics are covered in this chapter: Topic See page If There Is a Power Failure 8-2 Display Screen Error Messages 8-3 Troubleshooting Information 8-6 Troubleshooting 8-1 If There Is a Power Failure Introduction An automated restart function allows for power failures and safe continuation of a PCR run after resumption of power. During a Power The following table lists the actions the instrument takes if the power is interrupted and Failure the instrument turns off while you are operating it. Note If the power is off for 15 seconds or longer and fails during execution of a cycle then the cycle currently running will restart. If the power fails while executing a hold, or approaching a hold, then that hold temperature will restart from the beginning. Note If the power failure lasts longer than 18 hours, the Resume will not occur. Do the following in a power failure: Step 1 Action Restart or continue the PCR experiment. The instrument determines what temperature was being approached, or was holding. Upon resumption of power, it will go to that temperature and countdown the time remaining in the hold as soon as the temperature is within the specified clock start limits. 8-2 Troubleshooting 2 Incubate the samples until you can continue the experiment. 3 Enter a record for any power outage in the history file. Display Screen Error Messages Error Messages Refer to the following table for a description of error messages, and recommended Table actions that you should take. Table 8-1 Error Messages Message Description Recommended Action Battery RAM version number lost This error is generated when the battery RAM has been lost and re-initialized. Call Technical Support. Block Calibration initialized Software or hardware failure. Call Technical Support. Block Calibration reset to default System error. Call Technical Support. Block isn’t configured The instrument has defaulted to a 96-well configuration. Call Technical Support. Block initialized Block module has been re-initialized. Call Technical Support. Block version unknown, update firmware The calibration data in the block is not recognized by the firmware. Upgrade the firmware. Bus Error System error. Call Technical Support. Calibration battery RAM initialized Calibration lost. Instrument may not perform to specification. Call Technical Support. Can only enter an infinity hold at end A method can only have a HOLD segment with an infinity hold as the last segment in a method. Assign finite time segments to holds within a method. Block data reset to defaults. This message occurs when you try to enter an infinity hold segment in the middle of a method. Can’t allocate timer System error. Call Technical Support. Delete your methods first User tried to delete a user name that has methods stored under it. Delete or transfer the associated methods before deleting a user name. Enter a name or CANCEL You did not enter at least one character on the User Name screen before pressing the Accept key. Enter the user name to which the desired method is assigned. Enter oligo sequence Incomplete TmCalc data. Enter a value in the P1P2 fields of the TmCalc. Enter user and method names or CANCEL You did not enter a user name and a method name before storing a method. Specify the method name and choose a user to store a method. FATAL – Block shut off by hardware Block thermal runaway. Call Technical Support. FATAL – Block thermal runway Fatal error. Turn off system. FATAL – Cover shut off by hardware Heated cover thermal runaway. Call Technical Support. FATAL – Heat sink is too hot Ambient conditions may be too warm. Call Technical Support. FATAL – Heat sink sensor failure System error. Call Technical Support. FATAL – Heated cover thermal runaway Fatal error. Turn off system. Call Technical Support. Call Technical Support. Troubleshooting 8-3 Table 8-1 Error Messages (continued) Message Description Recommended Action FATAL – Sample block sensor failure Fatal error. Turn off system. Fatal – Stack Overflow A warning or error message that displays which task stack overflowed. Call Technical Support. Call Technical Support. The warning message is issued when the stack has reached within 10% of overflowing. Field is full You tried to enter more data in a field than the field size allows. Reenter data within the specifications of the field. Heated cover sensor failure The heated cover sensor failed. Call Technical Support. Infinity hold not allowed in cycle A method can have an infinity hold segment as the last segment in the method. Use finite values for cycle segments within the method. This message occurs when you tried to enter an infinity time in a CYCLE segment. Invalid password/pin# You entered an incorrect PIN#. Enter the correct PIN#. LCD screen timed-out System error. Call a Technical Support. Display screen and firmware have a faulty connection. List of user names is full The maximum number of users has been entered into the system. Delete unused user names. Maximum of 6 segments allowed You tried to insert more than six temperature control parameters into a hold or cycle. Do not assign more than six hold or cycle parameters to a method. Method battery RAM initialized Stored methods have been reset due to hardware or software failure. Not all methods may be lost. Check method directory. Call Technical Support. Method requires at least one segment You deleted all temperature control parameters in a method. Review and correct the method to include the temperature parameter(s). A method must have at least one time and temperature parameter. No seconds in time field You did not include seconds in the time field. Include seconds when entering the time. Not enough method memory left This error occurs: ♦ Determine how much storage memory is available on the instrument or PC card. ♦ When you attempt to exceed the limit of 137 methods. ♦ When you attempt to store or create a new method which is larger than the available storage space. ♦ Delete or store rarely used methods elsewhere. Not implemented yet The feature is not implemented in the current firmware version. Upgrade firmware when the new version is available from Applied Biosystems. PC card and Flash do not verify The PC (upgrade) card and instrument memory do not match. Call Technical Support. Firmware upgrade unsuccessful. PC card does not contain valid data 8-4 Troubleshooting The PC card being used to upgrade the instrument does not contain a valid program. Call Technical Support. Table 8-1 Error Messages (continued) Message Description Recommended Action Preferences battery RAM initialized User configuration has been reset due to software error. Call Technical Support. Printer not responding The printer has been disconnected or is off line. Check printer connections and power switch. Remove infinity hold first A method can have an infinity hold segment as the last segment in the method. Add segments prior to the post-PCR infinity hold. This message occurs when a user tries to add a segment after one which contains an infinity hold. Setpoint could not be reached ♦ The instrument could not reach a temperature parameter set by the user. Call Technical Support. The unit has a Peltier or power amplifier failure. ♦ Ambient conditions may be out of recommended range. SYSTEM ERROR invalid pointer System error. Call Technical Support. Tm temperature out of range Tm out of range. Check input value and retry. Call Technical Support. User name already defined You entered a user name that already exists. Do not duplicate user names. WARNING: Block version unknown Some data in the block is unrecognized. Upgrade firmware. Watchdog timeout Software failure. Call Technical Support. Write to block failed Information written to the Interchangeable Sample Block Module has failed. Call Technical Support. Write to default block failed System error. Call Technical Support. Write to default Xicor failed System error. Instrument operation will not be effected. Write to memory in block failed. Call Technical Support. Write to memory in the block failed. Write to Xicor failed Information written to the Interchangeable Sample Block Module has failed. Call Technical Support. Valid range is You entered a number out of range. Reenter a value within the parameters of the field. The message include the valid range limits. Troubleshooting 8-5 Troubleshooting Information Troubleshooting Refer to the following table for a description of potential problems, possible causes, Table and recommended actions that you should take. Table 8-2 Troubleshooting Information Problem Control panel not responding Possible Causes Check and/or Remedy Keypad failure. Run keypad diagnostic. Call Technical Support. Cooling rate too slow ♦ Ambient temperature is too warm. ♦ Peltier failure. ♦ Move instrument to well-ventilated location(15-30°C). ♦ Run rate test diagnostic. Call Technical Support. Cycling time too long Peltier failure. Run cycle test diagnostic Displayed temperature does not match specified temperature Instrument may require calibration. Run the Temperature Verification test. Heated cover not responsive Heated cover failure. Call Technical Support. Heating rate too slow ♦ Run Rate Test diagnostic. Peltier failure. Call Applied Biosystems Technical Support. Instrument can’t reach high or low temperature range ♦ Ambient temperature is too warm. ♦ Run Rate Test diagnostic. ♦ Peltier failure. ♦ Run Cycle Test diagnostic. Call Technical Support. Instrument making too much noise Fan failure. Check for sidevent obstructions. No beep ♦ Run time beeper disabled. Check Run-Time Beep configuration. ♦ Beeper failure. Call Technical Support. No screen display ♦ Fuse blown. ♦ Is power switch ON? No response when you turn the instrument on ♦ Not connected to power source. ♦ Is power cord connected? ♦ Interchangeable module not installed correctly. ♦ Check fuses. Printer fails ♦ Incorrect printer configuration. ♦ Check printer settings: baud rate = 9600, no parity, one stop bit, eight data bits. ♦ Incorrect printer cable. ♦ Purchase Applied Biosystems printer cable. Instrument cooling fan does not make whirring sound 8-6 Troubleshooting ♦ Fuse blown. ♦ Is power switch ON? ♦ Not connected to power source. ♦ Is power cord connected? ♦ Interchangeable module not installed correctly. ♦ Check fuses. Instrument Specifications A A Overview About This This appendix describes the dimensions, power, and electrical specifications for the Appendix GeneAmp® PCR System 9700 system, including the control panel, sample temperature information, and printer specifications. In This Appendix The following topics are covered in this appendix: Topic System Specifications See page A-2 Control Panel Specifications A-4 Sample Temperature Information A-4 Printer Specifications A-4 Instrument Specifications A-1 System Specifications Dimensions The following tables list the footprint and the weight of the instrument with the 96–Well or 60–Well sample block module. Footprint (With Sample Block Module Installed) Height 26 cm (10 in) Width 28 cm (11 in) Depth 41 cm (16 in) Note You must provide sufficient space around the instrument for unrestricted air circulation. Weight Base Module 8.6 kg (19 lbs) 96-Well Gold/Aluminum Sample Block Modules 3.2 kg (7 lbs) Note See the sample block module user’s manual for physical information on a module. Power There is one version of the instrument. The power requirements of the instrument Configurations under various power configurations are: VAC ~100/120 VAC ~220/230/240 8 AMP T (5x20 mm) or 50/60 Hz 8 AMP Slow Blow (3 AB) Use 250 V fuses 8 AMP T (5x20 mm) Max Power 725 VA Electrical IMPORTANT You must be able to disconnect the main power supply to the instrument Requirements immediately if necessary. In areas where the supplied power is subject to voltage fluctuations exceeding +/-10% of the nominal value, a power line regulator may be required. High or low voltages can have adverse effects on the electronic components of the instrument. The following table specifies the electrical operating range for the instrument in various parts of the world. Select appropriate fuse configuration based on the voltage used. In Japan, the unit must have a dedicated 220-volt outlet! The unit will not operate properly with a 100-volt outlet. A-2 Instrument Specifications Location Voltage (VAC)a Frequency Amperage (A) Nominal Japan 220 ±10% 50/60 Hz ±1% 3.16 USA/Canada 120 ±10% 50/60 Hz ±1% 4.20 Europe (pre-1992) 220 ±10% 50/60 Hz ±1% 3.16 EC 230 ±10% 50/60 Hz ±1% 3.14 UK (pre-1992) 240 +6%/–10% 50/60 Hz ±1% 3.12 Australia 240 +6%/–10% 50/60 Hz ±1% 3.12 a. Acceptable AC line voltage tolerances: 100, 120, 220, 230 ±10%; 240 VAC +6%/–10%, 50/60 Hz ± 1%. Note The Volt-Amp number for this instrument is 725Volt Amps. Instrument Specifications A-3 Control Panel Specifications Display Screen The display screen is a 7 x 40 character display with a graphics mode of 60 x 240 pixel resolution. Keys The instrument control panel consists of a display screen and 22 keys. The keys are: ♦ Function keys ♦ Arrow keys ♦ Stop key ♦ Enter key ♦ 10 number keypad Sample Temperature Information Temperature The following table lists sample temperature information. Note Sample temperatures are displayed in degrees Celsius to the nearest 0.1 °C. Sample Temperature Range 4.0 to 99.9 °C. Temperature Calibration Traceable to National Institute of Standards and Technology (NIST). Printer Specifications Serial Interface The instrument can use any printer with a serial (RS-232C) interface board with the Board Specifications following parameters. Baud Rate 9600 Parity NONE Data Bits 8 Stop Bits 1 Cable Part Number Connect the printer to the Instrument port with printer cable part number N805-1326. A-4 Instrument Specifications Supplied Methods B B Overview About this Appendix This appendix provides information about the methods that are supplied with the GeneAmp® PCR System 9700. In This Appendix The following topics are covered in this appendix: Topic About the Methods See page B-2 AmpliCycle Sequencing B-2 AmpliTaq Gold DNA Polymerase B-2 BigDye Terminators B-3 General PCR B-3 LMS2 B-4 Time Release PCR B-4 Touchdown PCR B-5 XL PCR B-5 Supplied Methods B-1 About the Methods Introduction The instrument supplies you with eight pre-coded methods stored under the user name <<pe>>. The eight pre-coded methods are: ♦ AmpliCycle® Sequencing ♦ AmpliTaq Gold® DNA Polymerase ♦ BigDye® Terminators ♦ General PCR ♦ LSM2 ♦ Time Release PCR ♦ Touchdown PCR ♦ XL PCR See the following sections for detailed information about the methods. AmpliCycle Cycle sequencing has revolutionized Sanger sequencing of PCR products and other Sequencing DNA templates. The AmpliCycle Sequencing protocol is for 3-temperature cycling and for achieving clean sequence ladders from femtomole amounts of template. 1 Hld 3 Tmp 25 Cycles 95.0 1.00 Start 95.0 0:30 68.0 72.0 0:30 1:00 1 Hold 4.0 45:00 Method: AmpliCycle Seq F1 F2 F3 Return F4 F5 This cycle sequencing process and the benefits of AmpliTaq® DNA Polymerase, CS, are described in the product insert for the AmpliCycle® Sequencing Kit (P/N N808-0175). AmpliTaq Gold DNA The AmpliTaq Gold protocol specifies a 5-minute pre-PCR heat step, required for the Polymerase activation of AmpliTaq Gold DNA Polymerase. This additional step provides seamless “hot start” PCR and replaces labor intensive methods such as manual hot start or wax bead-mediated hot start techniques. 1 Hld 95.0 5:00 Start F1 B-2 Supplied Methods 3 Tmp 35 Cycles 95.0 0:15 55.0 0:15 2 Holds 72.0 72.0 0:30 7:00 Method: AmpliTaq Gold F2 F3 F4 4.0 Return F5 Utilizing hot start techniques helps to minimize the formation of primer-dimers or non-specific products, thus increasing specificity and sensitivity of PCR. You can find further information on AmpliTaq Gold DNA Polymerase in the product insert (P/N N808-0241) or at the Applied Biosystems website. BigDye Terminators The BigDye® method consists of cycle sequencing parameters for dideoxy (Sanger) terminator sequencing using ABI PRISM® BigDye® Terminator Cycle Sequencing Ready Reaction Kits (available from Applied Biosystems). It consists of 25-cycle, three-temperature cycle sequencing followed by an infinite hold at 4 °C. 3 Tmp 25 Cycles 1 Hld 96.0 0:10 60.0 4:00 50.0 0:05 Start 4.0 Return Method: BigDye™ F1 F2 F3 F4 F5 The pre-coded conditions in the BigDye® method are optimized for AmpliTaq® DNA Polymerase, FS and the cycle sequencing reagents supplied with the BigDye terminator kits. This process is further described in the ABI PRISM BigDye Terminator Cycle Sequencing Ready Reaction Kits Protocol (P/N 4303237). General PCR The General PCR method is a basic one and can be easily modified with both preand post-PCR holds. 1 Hld 3 Tmp 35 Cycles 2 Holds 95.0 1.00 Start F1 95.0 0:15 55.0 72.0 72.0 0:15 0:30 7:00 4.0 Method: General PCR F2 F3 F4 Return F5 Supplied Methods B-3 LMS2 The GeneAmp PCR System 9700 software includes a pre-coded LMS2 method for ABI PRISM® Linkage Mapping Set Version 2 (LMS2) thermal cycling. Linkage Mapping Set 2 employs over 400 fluorescent-labeled PCR primer pairs for analysis of select microsatalite loci from the Généthon human linkage map.1,2,3 The following figures illustrate the thermal cycling profile for the LMS2 method. 1 Hld 3 Tmp 10 Cycles 95.0 94.0 12:00 0:15 55.0 0:15 Start 72.0 0:30 3 Tmp 20 Cycles 89.0 0:15 Return Method: LMS2 F1 F2 3 Tmp x 10 55.0 0:15 F3 F4 F5 3 Tmp 20 Cycles 2 Holds 72.0 0:30 Start 89.0 0:15 55.0 0:15 72.0 72.0 0:30 10:00 F2 F3 4.0 × Return Method: LMS2 F1 72.0 0:30 55.0 0:15 F4 F5 This supplied method consists of an initial hold at 95.0 °C, two sets of three temperature cycles, followed by two additional holds at 72.0 °C and 4.0 °C. See the ABI PRISM Linkage Mapping Set Version 2 User’s Manual (P/N 904999) for comprehensive information on PCR amplification conditions, electrophoresis conditions, detection, and data analysis. Time Release PCR The Time Release PCR method is designed for use with AmpliTaq Gold DNA Polymerase. The enzyme is activated more slowly than with the AmpliTaq Gold method. Here the pre-PCR hold is only 1 minute, and the number of cycles is increased to 40. 1 Hld 3 Tmp 40 Cycles 2 Holds 95.0 1.00 Start F1 95.0 0:15 55.0 72.0 72.0 0:15 0:30 7:00 4.0 Method: Time Release PCR Return F2 F3 F4 F5 1. Weissenbach, J. et al. 1992. A second-generation linkage map of the human genome. Nature 359:794–801. 2. Gyapay, G., et al. 1994. Généthon Human Genetic Linkage Map. Nature Genet. 7:246–339. 3. Dib, C., et al. 1996. Nature 380: 152–154. B-4 Supplied Methods Touchdown PCR When the optimal annealing temperature is unknown, one strategy, touchdown PCR, incrementally decreases the annealing temperature in early cycles in order to maximize the yield of specific products. 2 Tmp x 20 94.0 0:15 2 Tmp x 10 65.0 0:30 * Start F1 94.0 0:15 55.0 0:30 Method: Touchdown PCR F2 F3 Return F4 F5 This supplied method has an initial annealing temperature (65 °C) that incrementally decreases by an additional 0.5 °C in each of the first 20 cycles, followed by 10 cycles at 55 °C. XL PCR XL PCR is the protocol specified for amplification of 5 kb-40 kb PCR products, using rTth DNA Polymerase, XL, and unique reaction conditions. 1 Hld 2 Tmp X 16 2 Tmp X 12 94.0 94.0 1:00 0:15 68.0 10:00 Start F1 94.0 0:15 2 Holds 72.0 68.0 10.00 10.00 * Return Method: XL PCR F2 F3 4.0 F4 F5 This protocol uses two-temperature cycling (94 °C for 15 seconds; 68 °C for 10 minutes) and invokes a 15 second AutoX (automatic segment extension) for the anneal/extend step in the last 12 cycles. By providing longer templates, XL PCR complements technologies for rapid, long-range PCR. More complete genes can be amplified in one reaction from known expressed sequences, thus more introns can be crossed. You can use XL PCR for the amplification of the control target, a 20.8 kb product from Lambda DNA, supplied in the kit. This process is further described in the product insert for the GeneAmp® XL PCR Kit (P/N N808-0192). Supplied Methods B-5 Contacting Services and Support C C How to Obtain Services and Support To contact Applied Biosystems Technical Support from North America by telephone, call 1.800.899.5858. For the latest services and support information for all locations, go to http://www.appliedbiosystems.com, then click the link for Services and Support. At the Services and Support page, you can: • Search through frequently asked questions (FAQs) • Submit a question directly to Technical Support • Order Applied Biosystems user documents, MSDSs, certificates of analysis, and other related documents • Download PDF documents • Obtain information about customer training • Download software updates and patches In addition, the Services and Support page provides access to worldwide telephone and fax numbers to contact Applied Biosystems Technical Support and Sales facilities. Contacting Services and Support C-1 Limited Warranty Statement D D Computer Configuration Applied Biosystems supplies or recommends certain configurations of computer hardware, software, and peripherals for use with its instrumentation. Applied Biosystems reserves the right to decline support for or impose extra charges for supporting nonstandard computer configurations or components that have not been supplied or recommended by Applied Biosystems. Applied Biosystems also reserves the right to require that computer hardware and software be restored to the standard configuration prior to providing service or technical support. For systems that have built-in computers or processing units, installing unauthorized hardware or software may void the Warranty or Service Plan. Limited Product Warranty Limited Warranty Applied Biosystems warrants that all standard components of its GeneAmp® PCR System 9700 Base Module will be free of defects in materials and workmanship for a period of one (1) year from the date the warranty period begins. Applied Biosystems will repair or replace, at its discretion, all defective components during this warranty period. After this warranty period, repairs and replacement components may be purchased from Applied Biosystems at its published rates. Applied Biosystems also provides service agreements for post-warranty coverage. Applied Biosystems reserves the right to use new, repaired, or refurbished instruments or components for warranty and post-warranty service agreement replacements. Repair or replacement of products or components that are under warranty does not extend the original warranty period. Applied Biosystems warrants that all optional accessories supplied with its GeneAmp PCR System 9700 Base Module, such as peripherals, printers, and special monitors, will be free of defects in materials and workmanship for a period of ninety (90) days from the date the warranty begins. Applied Biosystems will repair or replace, at its discretion, defective accessories during this warranty period. After this warranty period, Applied Biosystems will pass on to the buyer, to the extent that it is permitted to do so, the warranty of the original manufacturer for such accessories. With the exception of consumable and maintenance items, replaceable products or components used on or in the instrument are themselves warranted to be free of defects in materials and workmanship for a period of ninety (90) days. Applied Biosystems warrants that chemicals and other consumable products will be free of defects in materials and workmanship when received by the buyer, but not thereafter, unless otherwise specified in documentation accompanying the product. Limited Warranty Statement D-1 Applied Biosystems warrants that for a period of ninety (90) days from the date the warranty period begins, the tapes, diskettes, or other media bearing the operating software of the product, if any, will be free of defects in materials and workmanship under normal use. If there is a defect in the media covered by the above warranty and the media is returned to Applied Biosystems within the ninety (90) day warranty period, Applied Biosystems will replace the defective media. Applied Biosystems does not warrant that the operation of the instrument or its operating software will be uninterrupted or error free. Warranty Period Any applicable warranty period under these sections begins on the earlier of the date Effective Date of installation or ninety (90) days from the date of shipment for hardware and software installed by Applied Biosystems personnel. For all hardware and software installed by the buyer or anyone other than Applied Biosystems, and for all other products, the applicable warranty period begins the date the product is delivered to the buyer. Warranty Claims Warranty claims must be made within the applicable warranty period, or, for chemicals or other consumable products, within thirty (30) days after receipt by the buyer. Warranty The above warranties do not apply to defects resulting from misuse, neglect, or Exceptions accident, including without limitation: operation with incompatible solvents or samples in the system; operation outside of the environmental or use specifications or not in conformance with the instructions for the instrument system, software, or accessories; improper or inadequate maintenance by the user; installation of software or interfacing, or use in combination with software or products, not supplied or authorized by Applied Biosystems; and modification or repair of the product not authorized by Applied Biosystems. THE FOREGOING PROVISIONS SET FORTH APPLIED BIOSYSTEMS’ SOLE AND EXCLUSIVE REPRESENTATIONS, WARRANTIES, AND OBLIGATIONS WITH RESPECT TO ITS PRODUCTS, AND APPLIED BIOSYSTEMS MAKES NO OTHER WARRANTY OF ANY KIND WHATSOEVER, EXPRESSED OR IMPLIED, INCLUDING WITHOUT LIMITATION, WARRANTIES OF MERCHANTABILITY AND FITNESS FOR A PARTICULAR PURPOSE, WHETHER ARISING FROM A STATUTE OR OTHERWISE IN LAW OR FROM A COURSE OF DEALING OR USAGE OF TRADE, ALL OF WHICH ARE EXPRESSLY DISCLAIMED. Warranty THE REMEDIES PROVIDED HEREIN ARE THE BUYER'S SOLE AND Limitations EXCLUSIVE REMEDIES. WITHOUT LIMITING THE GENERALITY OF THE FOREGOING, IN NO EVENT SHALL APPLIED BIOSYSTEMS BE LIABLE, WHETHER IN CONTRACT, TORT, WARRANTY, OR UNDER ANY STATUTE (INCLUDING WITHOUT LIMITATION, ANY TRADE PRACTICE, UNFAIR COMPETITION, OR OTHER STATUTE OF SIMILAR IMPORT) OR ON ANY OTHER BASIS, FOR DIRECT, INDIRECT, PUNITIVE, INCIDENTAL, MULTIPLE, CONSEQUENTIAL, OR SPECIAL DAMAGES SUSTAINED BY THE BUYER OR ANY OTHER PERSON OR ENTITY, WHETHER OR NOT FORESEEABLE AND WHETHER OR NOT APPLIED BIOSYSTEMS IS ADVISED OF THE POSSIBILITY OF SUCH DAMAGES, INCLUDING WITHOUT LIMITATION, DAMAGES ARISING FROM OR RELATED TO LOSS OF USE, LOSS OF DATA, FAILURE OR INTERRUPTION IN THE OPERATION OF ANY EQUIPMENT OR SOFTWARE, DELAY IN REPAIR OR REPLACEMENT, OR FOR LOSS OF REVENUE OR PROFITS, LOSS OF GOOD WILL, LOSS OF BUSINESS, OR OTHER FINANCIAL LOSS OR PERSONAL INJURY OR PROPERTY DAMAGE. NO AGENT, EMPLOYEE, OR REPRESENTATIVE OF APPLIED BIOSYSTEMS HAS ANY AUTHORITY TO MODIFY THE TERMS OF THIS LIMITED WARRANTY STATEMENT OR TO BIND APPLIED BIOSYSTEMS TO ANY AFFIRMATION, REPRESENTATION, OR WARRANTY CONCERNING THE PRODUCT THAT IS NOT CONTAINED IN THIS LIMITED WARRANTY STATEMENT, AND ANY SUCH MODIFICATION, AFFIRMATION, REPRESENTATION, OR WARRANTY MADE BY ANY AGENT, EMPLOYEE, OR REPRESENTATIVE OF APPLIED BIOSYSTEMS WILL NOT BE BINDING ON APPLIED BIOSYSTEMS, UNLESS IN A WRITING SIGNED BY AN EXECUTIVE OFFICER OF APPLIED BIOSYSTEMS. THIS WARRANTY IS LIMITED TO THE BUYER OF THE PRODUCT FROM APPLIED BIOSYSTEMS AND IS NOT TRANSFERABLE. Some countries or jurisdictions limit the scope of or preclude limitations or exclusion of warranties, of liability, such as liability for gross negligence or wilful misconduct, or of remedies or damages, as or to the extent set forth above. In such countries and jurisdictions, the limitation or exclusion of warranties, liability, remedies or damages set forth above shall apply to the fullest extent permitted by law, and shall not apply to the extent prohibited by law. Damages, Claims, and Returns Damages If shipping damage to the product is discovered, contact the shipping carrier and request inspection by a local agent. Secure a written report of the findings to support any claim. Do not return damaged goods to Applied Biosystems without first securing an inspection report and contacting Applied Biosystems Technical Support for a Return Authorization (RA) number. Claims After a damage inspection report is received by Applied Biosystems, Applied Biosystems will process the claim unless other instructions are provided. Returns Do not return any material without prior notification and authorization. If for any reason it becomes necessary to return material to Applied Biosystems, contact Applied Biosystems Technical Support or your nearest Applied Biosystems subsidiary or distributor for a return authorization (RA) number and forwarding address. Place the RA number in a prominent location on the outside of the shipping container, and return the material to the address designated by the Applied Biosystems representative. Limited Warranty Statement D-3 Index Numerics 480 DNA Thermal Cycler converting hold times 6-2 to 6-5 A alphanumeric characters, entering 5-3 AmpliCycle Sequencing 4-2, B-2 about supplied method B-1, B-2, B-3 AmpliTaq Gold 4-2, B-2 about supplied method B-2 AutoX function 5-11 to 5-12 B baud rate, setting 3-10 beeper, run-time, turning on/off 3-9 BigDye 4-2, B-2 about supplied method B-3 C calculator, TM, how to use 3-17 Changing 7-2 changing temperature control parameters 5-11 to 5-12 chemical hazard warning 1-6 chemical waste hazard warning 1-6 Circular Key Pad, definition of 2-3 claims, processing D-3 computer configuration requirement D-1 technical support for altered configuration D-1 Config, function of 3-7 Configuration Screen, displaying 3-7 Contacting Technical Support C-1 Control Panel diagram 2-2 entering numeric values, how to 2-3 selecting a field, how to 2-3 specifications A-4 using the keys 2-3 counting cycles.See cycles CPU board testing 3-15 Create Methods screen, displaying 5-7 custom parameters, setting 3-7 to 3-11 baud rate, setting 3-10 date, setting 3-8 Idle State Setpoint temperature, setting 3-10 Pause Time Out, setting 3-9 printer, enabling/disabling 3-8 screen contrast/saver mode, setting 3-11 time, setting 3-8 custom parameters, settings Configuration Screen, displaying 3-7 run-time beeper, turning on/off 3-9 cycles counting of 4-7 inserting 5-14 cycling, modifying 5-11 to 5-17 AutoX function, using 5-11 to 5-12 cycles, inserting 5-14 deleting holds 5-14 holds inserting 5-13 ramp rates, modifying 5-12 to 5-13 D damage, reporting D-3 damaged items, returning D-3 data bit, serial board specifications 3-10, 3-26 date last used, sorting methods by 4-5 setting 3-8 deleting methods 5-18 to 5-21 user name 5-5 diagnostic (tests), running 3-13 to 3-16 CPU board, testing 3-15 Diagnostic screen, viewing 3-13 Display screen, testing 3-15 electrical components, testing 3-14 keypad, testing 3-16 Diagnostic screen, viewing 3-13 dimensions, instrument A-2 display screen.See diagnostic (tests), running Display softkey, function of 3-14 DNA Thermal Cycler, converting hold times 6-2 to 6-5 E editing methods 5-18 to 5-21 electrical components testing 3-14 electrical safety 1-3 to 1-10 End of Run screen, when a run completes 4-12 environment 1-11 error messages, display screen 8-3 to 8-5 F fields, selecting 2-3 firmware, upgrading 3-18 to 3-23 through serial port 3-18, 3-21 using PCMCIA card 3-22, 3-23 fuses changing for double-line operation 7-3 converting from single to double-line 3-5 to ?? precautions about 1-10 service configuration 3-4 Index-1 G GeneAmp PCR System 9700 Control Panel about 2-2 specifications A-4 copying methods 3-24 to 3-25 custom parameters, setting 3-7 to 3-11 baud rate, setting 3-10 Configuration Screen, displaying 3-7 date, setting 3-8 Idle State Setpoint temperature, setting 3-10 Pause Time Out, setting 3-9 printer, enabling/disabling 3-8 run-time beeper, tuning on/off 3-9 screen contrast/saver mode, setting 3-11 time, setting 3-8 diagnostic (tests), running CPU board, testing 3-15 Diagnostic screen, viewing 3-13 Display screen, testing 3-15 electrical components, testing 3-14 keypad, testing 3-16 fuses, converting from single to double-line fuse 3-5 to ?? laboratory, setting up 3-3 to 3-4 air vents, air circulation 3-3 choosing a location 3-3 fuse service configuration 3-4 input voltage, table of 3-4 interchangeable block module, about 3-4 operating temperature 3-3 what to avoid 3-3 overview 2-2 to 2-5 about the instrument 2-2 control panel keys, using 2-3 control panel, diagram 2-2 entering numeric values, how to 2-3 how differs from 9600 System 2-5 methods, transferring or storing 2-4 selecting a field, how to 2-3 upgrading the firmware 2-4 printer connecting and configuring 3-26 specifications A-4 system firmware upgrading 3-18 to 3-23 system specifications A-2 TM calculator, how to use 3-17 turning on instrument 3-6 unpacking 3-2 General PCR 4-2, B-2 General PCR, about supplied method B-3 grounding 1-10 H Hard soft key, function of 3-13 hazards and warnings 1-3 to 1-8, 1-9 to ?? burns, danger of 1-10 Index-2 instrument warnings 1-9 heated cover screen 4-7 heating, of samples 5-8 history of run, reviewing history file records 4-11 history formats 4-10 procedure 4-10 hold time converting from DNA Thermal Cycler parameters, defined 2-3 holds deleting 5-14 inserting 5-13 humidity 1-11 6-2 to 6-5 I Idle State Setpoint temperature, setting 3-10 input voltage, table of 3-4 inserting holds 5-13 K keyboard softkey, function of keypad, testing 3-16 3-14 L labels, safety 1-9 laboratory environmental requirements 1-11 laboratory, setting up 3-3 to 3-4 air vents, air circulation 3-3 choosing a location 3-3 fuse service configuration 3-4 input voltage, table of 3-4 interchangeable block module, about 3-4 operating temperature 3-3 what to avoid 3-3 LCD pixels, turning on and off 3-15 locking/unlocking methods, about 5-4 LSM2 4-2, B-2 M maintenance, routine 1-11 Memory Used field, definition of 4-3, 5-20 Method Not Stored screen, actions if displayed 4-12 methods adding or changing users 5-2 to 5-5 adding users 5-2 to 5-3 changing user name 5-5 deleting user name 5-5 protecting methods 5-3 to 5-4 copying using PCMCIA card 3-24 to 3-25 creating 5-6 to 5-10 basic parameters, to create method 5-6 Create Methods screen, displaying 5-7 default method, about 5-6 PCR holds, defining 5-9 to 5-10 post-PCR holds, defining 5-10 pre-PCR holds, defining 5-9 temperature control parameters, entering 5-8 editing or deleting methods 5-18 to 5-21 modifying cycling 5-11 to 5-17 AutoX function, using 5-11 to 5-12 cycles, inserting 5-14 deleting holds 5-14 naming and storing methods 5-16 to 5-17 programmed pauses 5-14, 5-16 ramp rates, modifying 5-12 to 5-13 printing a method 5-17 reviewing history of run 4-10 to 4-11 history file records 4-11 history formats 4-10 procedure 4-10 running 4-6 to 4-9 method information, viewing 4-8 pausing a run 4-8 Run Time screen, about 4-7 starting a run 4-6 to 4-7 stopping run before completion 4-9 selecting 4-2 to 4-4 method defined 4-2 method parameters, viewing 4-4 methods, searching for 4-4 methods, sorting 4-5 predefined methods, list of 4-2 procedure 4-3 supplied B-2 to B-5 AmpliCycle Sequencing B-2 AmpliTaq Gold B-2 BigDye B-1, B-3 BigDye™ B-1 LMS2 B-1 Touchdown PCR B-5 XL PCR B-5 transferring or storing, about 2-4 when a run completes 4-12 MSDSs 1-7 N naming methods 5-16 to 5-17 numeric keys, definition of 2-3 O operating precautions pauses, programmed editing 5-16 inserting 5-14 PCMCIA card using to copy methods 3-24 to 3-25 using to upgrade firmware 3-22, 3-23 PCR holds, defining 5-9 to 5-10 PCR samples, running methods running 4-6 to 4-9 selecting 4-2 to 4-4 PCR thermal profile, method defined 4-2 PIN#, entering 5-4 pollution 1-11 post-PCR holds, defining 5-10 power configurations A-2 power failure, what to do 8-2 precautions, operating 1-11 pre-PCR holds, defining 5-9 printer baud rate, setting 3-10 connecting and configuring 3-26 enabling/disabling 3-8 printer port, defining. See baud rate printing method 5-17 printer specifications A-4 programmed pauses editing 5-16 inserting 5-14 protecting methods 5-3 to 5-4 R RA number D-3 RA number. See return authorization number ramp rates, modifying 5-12 to 5-13 reaction volume entering 4-6 reporting, damages D-3 return authorization (RA) number D-3 returning damaged items D-3 returns D-3 RS-232C, serial interface board 3-26 Run softkey, function of 3-15 run-time beeper, turning on/off 3-9 1-11 S P parameters Hold Time 2-3 temperature control 5-11 temperature parameters 2-3 See Also custom parameters, setting parity bit 3-10, 3-26 part numbers for ordering accessories 3-2 fuse part number 3-5 Pause Time Out, setting 3-9 safety 1-1 to 1-8 sample temperature range A-4 Sanger sequencing B-2 screen contrast, setting 3-11 screen saver mode, setting 3-11 security code, entering 5-4 selecting fields 2-3 serial interface board specifications 3-10 serial port, upgrading firmware 3-18, 3-21 Size field, definition of 5-20 soft keys definition of 2-3 Index-3 Sort, function of 4-5, 5-20 SRAM card, using to copy methods 3-24 to 3-25 starting instrument 3-6 stop bit 3-10, 3-26 Stop key, definition of 2-3 storing methods 5-16 to 5-17 system firmware, upgrading 3-18 to 3-23 through serial port 3-18, 3-21 using PCMCIA card 3-22, 3-23 System soft key, function of 3-13 T technical support, for computers with altered configuration D-1 temperature entering values 2-3 Idle State Setpoint, setting 3-10 operating precautions 1-11 operating temperature 3-3 sample temperature information A-4 temperature control parameters entering 5-8 temperature control parameters entering 5-8 using AutoX function 5-11 to 5-12 Temperature Verification test part number 3-2 Time Release PCR 4-2, B-2 Time Release PCR, about supplied method B-4 time, setting 3-8 TM calculator, how to use 3-17 Tmp field, using to define temperature control parameters 5-9 TmpVer soft key, function of 3-13 ToCard softkey, function of 3-25 ToInst softkey, function of 3-25 Touchdown PCR 4-2, B-2 about supplied method B-5 troubleshooting 8-1 to 8-6 display screen error messages 8-3 to 8-5 power failure, what to do 8-2 table of information 8-6 turning on instrument 3-6 U unpacking the instrument 3-2 Upgrade soft key, function of 3-13 User, function of 4-4 users 5-2 to 5-5 adding users 5-2 to 5-3 changing user name 5-5 deleting user name 5-5 protecting methods 5-3 to 5-4 Util, function of 3-7 W warning Index-4 chemical hazard 1-6 chemical waste hazard 1-6 warranty damages, claims, returns D-3 exceptions D-2 for computers with altered configuration D-1 limitations D-2 period D-1 warranty claims D-2 warranty exceptions D-2 warranty period, effective date D-2 waste disposal 1-8 Win 3.1, downloading firmware using 3-21 Windows 95/Windows NT downloading firmware using 3-20 X XL PCR 4-2, B-2 about supplied method B-5 Headquarters 850 Lincoln Centre Drive Foster City, CA 94404 USA Phone: +1 650.638.5800 Toll Free (In North America): +1 800.345.5224 Fax: +1 650.638.5884 Worldwide Sales and Support Applied Biosystems vast distribution and service network, composed of highly trained support and applications personnel, reaches 150 countries on six continents. For sales office locations and technical support, please call our local office or refer to our Web site at www.appliedbiosystems.com. Applied Biosysstems is committed to providing the world’s leading technology and information for life scientists. 12/2010 Part Number 4304481 Rev. H