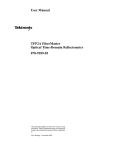
Download NetTek Analyzer OTDR Modules User Manual
Transcript
User Manual NetTekt Analyzer OTDR Modules 071-1213-02 This document supports software version 3.00 and above. www.tektronix.com Copyright © Tektronix, Inc. All rights reserved. Tektronix products are covered by U.S. and foreign patents, issued and pending. Information in this publication supercedes that in all previously published material. Specifications and price change privileges reserved. Tektronix, Inc., P.O. Box 500, Beaverton, OR 97077 TEKTRONIX, TEK, NETTEK, TARGET1, and INTELLITRACE PLUS are registered trademarks of Tektronix, Inc. WARRANTY Tektronix warrants that the products that it manufactures and sells will be free from defects in materials and workmanship for a period of one (1) year from the date of purchase from an authorized Tektronix distributor. If any such product proves defective during this warranty period, Tektronix, at its option, either will repair the defective product without charge for parts and labor, or will provide a replacement in exchange for the defective product. Batteries are excluded from this warranty. In order to obtain service under this warranty, Customer must notify Tektronix of the defect before the expiration of the warranty period and make suitable arrangements for the performance of service. Customer shall be responsible for packaging and shipping the defective product to the service center designated by Tektronix, shipping charges prepaid, and with a copy of customer proof of purchase. Tektronix shall pay for the return of the product to Customer if the shipment is to a location within the country in which the Tektronix service center is located. Customer shall be responsible for paying all shipping charges, duties, taxes, and any other charges for products returned to any other locations. This warranty shall not apply to any defect, failure or damage caused by improper use or improper or inadequate maintenance and care. Tektronix shall not be obligated to furnish service under this warranty a) to repair damage resulting from attempts by personnel other than Tektronix representatives to install, repair or service the product; b) to repair damage resulting from improper use or connection to incompatible equipment; c) to repair any damage or malfunction caused by the use of non-Tektronix supplies; or d) to service a product that has been modified or integrated with other products when the effect of such modification or integration increases the time or difficulty of servicing the product. THIS WARRANTY IS GIVEN BY TEKTRONIX WITH RESPECT TO THE LISTED PRODUCTS IN LIEU OF ANY OTHER WARRANTIES, EXPRESS OR IMPLIED. TEKTRONIX AND ITS VENDORS DISCLAIM ANY IMPLIED WARRANTIES OF MERCHANTABILITY OR FITNESS FOR A PARTICULAR PURPOSE. TEKTRONIX’ RESPONSIBILITY TO REPAIR OR REPLACE DEFECTIVE PRODUCTS IS THE SOLE AND EXCLUSIVE REMEDY PROVIDED TO THE CUSTOMER FOR BREACH OF THIS WARRANTY. TEKTRONIX AND ITS VENDORS WILL NOT BE LIABLE FOR ANY INDIRECT, SPECIAL, INCIDENTAL, OR CONSEQUENTIAL DAMAGES IRRESPECTIVE OF WHETHER TEKTRONIX OR THE VENDOR HAS ADVANCE NOTICE OF THE POSSIBILITY OF SUCH DAMAGES. Table of Contents General Safety Summary . . . . . . . . . . . . . . . . . . . . . . . . . . . . ix Preface . . . . . . . . . . . . . . . . . . . . . . . . . . . . . . . . . . . . . . . . . . . . Software Version . . . . . . . . . . . . . . . . . . . . . . . . . . . . . . . . . . . . Related Products . . . . . . . . . . . . . . . . . . . . . . . . . . . . . . . . . . . . Conventions . . . . . . . . . . . . . . . . . . . . . . . . . . . . . . . . . . . . . . . . About this Manual . . . . . . . . . . . . . . . . . . . . . . . . . . . . . . . . . . . Related Documentation . . . . . . . . . . . . . . . . . . . . . . . . . . . . . . . Contacting Tektronix . . . . . . . . . . . . . . . . . . . . . . . . . . . . . . . . xi xi xii xii xii xiii xiv Getting Started Product Description . . . . . . . . . . . . . . . . . . . . . . . . . . . . . . . . . . 1-- 1 Installing an Instrument Module . . . . . . . . . . . . . . . . . . . . . . . . 1-- 2 Removing an Instrument Module . . . . . . . . . . . . . . . . . . . . . . . 1-- 6 Using the Laser Optical Port and Connector Adapter . . . . . . . . 1-- 7 Install the Appropriate Connector Adapter . . . . . . . . . . . . . 1-- 9 Remove a Connector Adapter . . . . . . . . . . . . . . . . . . . . . . . 1-- 10 Operating Basics Using the Online Help . . . . . . . . . . . . . . . . . . . . . . . . . . . . . . . . 2-- 1 Elements of the Main Screen . . . . . . . . . . . . . . . . . . . . . . . . . . . 2-- 3 Main Screen Buttons . . . . . . . . . . . . . . . . . . . . . . . . . . . . . . 2-- 3 Viewing the Trace and Table . . . . . . . . . . . . . . . . . . . . . . . . . . . 2-- 5 Changing the Proportions of the Trace and Table Regions . 2-- 5 Setting Trace Display Options . . . . . . . . . . . . . . . . . . . . . . . 2-- 6 Zooming . . . . . . . . . . . . . . . . . . . . . . . . . . . . . . . . . . . . . . . . 2-- 7 Cursors . . . . . . . . . . . . . . . . . . . . . . . . . . . . . . . . . . . . . . . . . 2-- 11 Event Table Columns . . . . . . . . . . . . . . . . . . . . . . . . . . . . . . 2-- 12 Tutorial . . . . . . . . . . . . . . . . . . . . . . . . . . . . . . . . . . . . . . . . . . . 2-- 15 Take a Basic Measurement . . . . . . . . . . . . . . . . . . . . . . . . . . . . 2-- 15 Analyze the Results . . . . . . . . . . . . . . . . . . . . . . . . . . . . . . . . . . 2-- 16 NetTek Analyzer OTDR Modules User Manual i Table of Contents Examine the Trace Data . . . . . . . . . . . . . . . . . . . . . . . . . . . . Find the Length of the Fiber . . . . . . . . . . . . . . . . . . . . . . . . Examine the Two-Point Loss . . . . . . . . . . . . . . . . . . . . . . . . Examine an Event . . . . . . . . . . . . . . . . . . . . . . . . . . . . . . . . Examine the Event Table Data . . . . . . . . . . . . . . . . . . . . . . 2-- 16 2-- 18 2-- 18 2-- 19 2-- 19 Configuring the Settings and Saving and Opening Files . . . Configuring Settings . . . . . . . . . . . . . . . . . . . . . . . . . . . . . . . . . Settings that Affect How Data is Collected . . . . . . . . . . . . . Settings that Affect How Data is Displayed . . . . . . . . . . . . Copying Settings to Other Tabs . . . . . . . . . . . . . . . . . . . . . . Saving Tests and Settings . . . . . . . . . . . . . . . . . . . . . . . . . . . . . Save a Test . . . . . . . . . . . . . . . . . . . . . . . . . . . . . . . . . . . . . . Save Settings Only . . . . . . . . . . . . . . . . . . . . . . . . . . . . . . . . Opening Trace or Setting and Limit Files . . . . . . . . . . . . . . . . . Opening a Trace File . . . . . . . . . . . . . . . . . . . . . . . . . . . . . . Opening a Settings Only File . . . . . . . . . . . . . . . . . . . . . . . . Determine Which Settings Were Used for a Trace . . . . . . . . . . 2-- 21 2-- 21 2-- 24 2-- 26 2-- 28 2-- 29 2-- 29 2-- 31 2-- 33 2-- 33 2-- 34 2-- 36 Examine the Test1.SOR, Test2.SOR, and Test-- MM.SOR Files . . . . . . . . . . . . . . . . . . . . . . . . . . . . . . . . . . . . . . . . . . . 2-- 37 Reference Taking Measurements . . . . . . . . . . . . . . . . . . . . . . . . . . . . . . . 3-- 1 Performing Event Loss Measurements . . . . . . . . . . . . . . . . . . . 3-- 2 Event Loss Advanced Controls . . . . . . . . . . . . . . . . . . . . . . 3-- 3 Performing Two Point Measurements . . . . . . . . . . . . . . . . . . . . 3-- 4 Two Point Loss Advanced Controls . . . . . . . . . . . . . . . . . . 3-- 5 Performing Reflectance Measurements . . . . . . . . . . . . . . . . . . . 3-- 6 Reflectance Advanced Controls . . . . . . . . . . . . . . . . . . . . . 3-- 6 Performing ORL Measurements . . . . . . . . . . . . . . . . . . . . . . . . 3-- 7 Compare Two Traces . . . . . . . . . . . . . . . . . . . . . . . . . . . . . . . . . 3-- 8 Bidirectional Average Measurements . . . . . . . . . . . . . . . . . 3-- 8 Difference Measurements . . . . . . . . . . . . . . . . . . . . . . . . . . 3-- 8 Dual Trace Mode . . . . . . . . . . . . . . . . . . . . . . . . . . . . . . . . . 3-- 8 Performing Bidirectional Averages Measurement . . . . . . . . . . 3-- 9 Performing Difference Measurements . . . . . . . . . . . . . . . . . . . . 3-- 11 Auto Test and Save Dialog Box . . . . . . . . . . . . . . . . . . . . . . . . 3-- 12 Auto Sequence Wavelength Choices Dialog Box . . . . . . . . 3-- 13 ii NetTek Analyzer OTDR Modules User Manual Table of Contents Other Features . . . . . . . . . . . . . . . . . . . . . . . . . . . . . . . . . . . . . Increasing the Range . . . . . . . . . . . . . . . . . . . . . . . . . . . . . . . . . Finding the End When Grouped Events are Marked as “End” . Getting the Best Resolution on Multimode Tests . . . . . . . . . . . Printing . . . . . . . . . . . . . . . . . . . . . . . . . . . . . . . . . . . . . . . . . . . . Using with a Keyboard . . . . . . . . . . . . . . . . . . . . . . . . . . . . . . . Joining Cursors . . . . . . . . . . . . . . . . . . . . . . . . . . . . . . . . . . . . . Setting the Front Panel Loss Warning . . . . . . . . . . . . . . . . . . . . Setting the Distance Units . . . . . . . . . . . . . . . . . . . . . . . . . . . . . Setting Factory Defaults . . . . . . . . . . . . . . . . . . . . . . . . . . . . . . About File Types . . . . . . . . . . . . . . . . . . . . . . . . . . . . . . . . . . . . SOR Format . . . . . . . . . . . . . . . . . . . . . . . . . . . . . . . . . . . . . CFF Format . . . . . . . . . . . . . . . . . . . . . . . . . . . . . . . . . . . . . SET Format . . . . . . . . . . . . . . . . . . . . . . . . . . . . . . . . . . . . . WFM Format . . . . . . . . . . . . . . . . . . . . . . . . . . . . . . . . . . . . Making Notes on Events, Landmarks, and Fibers . . . . . . . . . . Event / Landmark Notes Dialog Box . . . . . . . . . . . . . . . . . Fiber Notes Dialog Box . . . . . . . . . . . . . . . . . . . . . . . . . . . . Adding, Moving, and Deleting, Events or Landmarks . . . . . . . Adding Events . . . . . . . . . . . . . . . . . . . . . . . . . . . . . . . . . . . Moving Events . . . . . . . . . . . . . . . . . . . . . . . . . . . . . . . . . . . Adding Landmarks . . . . . . . . . . . . . . . . . . . . . . . . . . . . . . . . Moving Landmarks . . . . . . . . . . . . . . . . . . . . . . . . . . . . . . . Deleting Events . . . . . . . . . . . . . . . . . . . . . . . . . . . . . . . . . . Deleting Landmarks . . . . . . . . . . . . . . . . . . . . . . . . . . . . . . . Deleting All Landmarks . . . . . . . . . . . . . . . . . . . . . . . . . . . . Freezing Events . . . . . . . . . . . . . . . . . . . . . . . . . . . . . . . . . . 3-- 15 3-- 16 3-- 17 3-- 18 3-- 19 3-- 20 3-- 21 3-- 21 3-- 21 3-- 21 3-- 22 3-- 22 3-- 22 3-- 22 3-- 22 3-- 23 3-- 23 3-- 25 3-- 26 3-- 26 3-- 27 3-- 28 3-- 29 3-- 29 3-- 30 3-- 30 3-- 30 Appendices Appendix A: Specifications . . . . . . . . . . . . . . . . . . . . . . . . . . . A-- 1 Appendix B: User-replaceable Parts, Options, and Accessories . . . . . . . . . . . . . . . . . . . . . . . . . . . . . . . . . . . . . B-- 1 Appendix C: Maintenance . . . . . . . . . . . . . . . . . . . . . . . . . . . Cleaning . . . . . . . . . . . . . . . . . . . . . . . . . . . . . . . . . . . . . . . . . . . Cleaning the Optical Port . . . . . . . . . . . . . . . . . . . . . . . . . . . Cleaning the Connector Adapter . . . . . . . . . . . . . . . . . . . . . Cleaning the Test Fiber Connector . . . . . . . . . . . . . . . . . . . Cleaning the Exterior of the Module . . . . . . . . . . . . . . . . . . Transporting the OTDR . . . . . . . . . . . . . . . . . . . . . . . . . . . . . . . C-- 1 C-- 1 C-- 2 C-- 2 C-- 3 C-- 3 C-- 4 NetTek Analyzer OTDR Modules User Manual iii Table of Contents Repackaging for Shipment . . . . . . . . . . . . . . . . . . . . . . . . . . . . C-- 5 Appendix D: Installing an OTDR Software Upgrade . . . . . D-- 1 Glossary Index iv NetTek Analyzer OTDR Modules User Manual Table of Contents Figures Figure 1-- 1: Removing the bus door . . . . . . . . . . . . . . . . . . . . 1-- 3 Figure 1-- 2: Install instrument module . . . . . . . . . . . . . . . . . 1-- 4 Figure 1-- 3: Laser optical connector . . . . . . . . . . . . . . . . . . . 1-- 8 Figure 1-- 4: Connector adapter installation . . . . . . . . . . . . . 1-- 9 Figure 2-- 1: Main screen . . . . . . . . . . . . . . . . . . . . . . . . . . . . . 2-- 3 Figure 2-- 2: Zoomed out trace . . . . . . . . . . . . . . . . . . . . . . . . 2-- 7 Figure 2-- 3: Zoomed in trace, with overview window showing whole trace . . . . . . . . . . . . . . . . . . . . . . . . . . . . . . 2-- 8 Figure 2-- 4: Event Table Only view . . . . . . . . . . . . . . . . . . . . 2-- 12 Figure 2-- 5: A Run tab of the Test Settings and Limits dialog box . . . . . . . . . . . . . . . . . . . . . . . . . . . . . . . . . . . . . . 2-- 22 Figure 2-- 6: A Trace tab (labeled with the file name) of the Test Settings and Limits dialog box . . . . . . . . . . . . . . . . . 2-- 23 Figure 2-- 7: Sample file Test1.SOR illustrates that different types of events can look similar . . . . . . . . . . . . . . . . . . . . 2-- 38 Figure 2-- 8: Compare the amounts of loss and reflectance in each of the events in the sample file Test1.SOR . . . . . . . 2-- 39 Figure 2-- 9: Event 2 is an FC regular connector . . . . . . . . . . 2-- 40 Figure 2-- 10: Event 3 is a fusion splice . . . . . . . . . . . . . . . . . . 2-- 41 Figure 2-- 11: Event 4 is a mechanical splice . . . . . . . . . . . . . 2-- 42 Figure 2-- 12: Event 5 is a bend . . . . . . . . . . . . . . . . . . . . . . . . 2-- 43 Figure 2-- 13: Event 6 is a fusion splice . . . . . . . . . . . . . . . . . . 2-- 44 Figure 2-- 14: Event 7 is the end of the fiber . . . . . . . . . . . . . 2-- 45 Figure 2-- 15: Sample file test2.SOR shows a worn angle-polished connector (Event 5) and several fusion splices . . . . . . . . . . . . . . . . . . . . . . . . . . . . . . . . . . . . . . . . . . 2-- 46 Figure 2-- 16: Sample file Test-- MM.SOR shows several types of events on a multimode fiber . . . . . . . . . . . . . . . . . . . . . 2-- 47 NetTek Analyzer OTDR Modules User Manual v Table of Contents Figure 2-- 17: Look at the event notes in the event table of sample file Test-- MM.SOR . . . . . . . . . . . . . . . . . . . . . . . . 2-- 48 Figure 2-- 18: Event 1 (the front panel) and Event 2 (a jumper cable) are grouped due to the short distance between them . . . . . . . . . . . . . . . . . . . . . . . . . . . . . . . . . . . 2-- 49 Figure 2-- 19: Events 3 and 4 are echoes of 1 and 2 and are grouped with each other . . . . . . . . . . . . . . . . . . . . . . . . . . 2-- 50 Figure 2-- 20: Event 5 (high loss) and Event 6 (low loss) are both patch panel connectors . . . . . . . . . . . . . . . . . . . . . . . 2-- 51 Figure 2-- 21: Event 7 is a good (low loss) fusion splice . . . . . 2-- 52 Figure 2-- 22: Event 8 (the start of a pigtail), Event 9 (a patch panel connector), and Event 10 (the end of the fiber) . . 2-- 53 vi Figure 3-- 1: Event Loss for Event 2 . . . . . . . . . . . . . . . . . . . . 3-- 2 Figure 3-- 2: Bidirectional Averages traces . . . . . . . . . . . . . . . 3-- 9 NetTek Analyzer OTDR Modules User Manual Table of Contents Tables Table i: NetTek Analyzer OTDR Modules . . . . . . . . . . . . . . xi Table 2-- 1: Help window buttons . . . . . . . . . . . . . . . . . . . . . . 2-- 2 Table 2-- 2: Main screen buttons . . . . . . . . . . . . . . . . . . . . . . . 2-- 4 Table 2-- 3: Event Table column definitions . . . . . . . . . . . . . 2-- 13 Table 2-- 4: Event Table symbols and highlights . . . . . . . . . . 2-- 14 Table 2-- 5: Choosing the Test Mode . . . . . . . . . . . . . . . . . . . 2-- 25 Table 3-- 1: Sample event table with grouped end events . . . 3-- 17 Table A-- 1: NetTek Analyzer OTDR Module characteristics . . . . . . . . . . . . . . . . . . . . . . . . . . . . . . . . . . A-- 1 Table A-- 2: General characteristics . . . . . . . . . . . . . . . . . . . . A-- 2 Table A-- 3: Transportation and storage . . . . . . . . . . . . . . . . A-- 4 Table A-- 4: Environmental characteristics . . . . . . . . . . . . . . A-- 5 Table A-- 5: Physical characteristics . . . . . . . . . . . . . . . . . . . A-- 7 Table A-- 6: Miscellaneous characteristics . . . . . . . . . . . . . . . A-- 7 Table A-- 7: Certifications and compliances . . . . . . . . . . . . . A-- 8 Table A-- 8: Safety compliance . . . . . . . . . . . . . . . . . . . . . . . . A-- 9 Table B-- 1: User-replaceable parts . . . . . . . . . . . . . . . . . . . . B-- 1 Table B-- 2: Connector options . . . . . . . . . . . . . . . . . . . . . . . . B-- 1 Table B-- 3: Optional accessories . . . . . . . . . . . . . . . . . . . . . . B-- 2 Table B-- 4: Standard accessories . . . . . . . . . . . . . . . . . . . . . . B-- 2 NetTek Analyzer OTDR Modules User Manual vii Table of Contents viii NetTek Analyzer OTDR Modules User Manual General Safety Summary Review the following safety precautions to avoid injury and prevent damage to this product or any products connected to it. To avoid potential hazards, use this product only as specified. Only qualified personnel should perform service procedures. While using this product, you may need to access other parts of the system. Read the General Safety Summary in other system manuals for warnings and cautions related to operating the system. To Avoid Fire or Personal Injury Observe All Terminal Ratings. To avoid fire or shock hazard, observe all ratings and markings on the product. Consult the product manual for further ratings information before making connections to the product. The common terminal is at ground potential. Do not connect the common terminal to elevated voltages. Do Not Operate Without Covers. Do not operate this product with covers or panels removed. Avoid Exposed Circuitry. Do not touch exposed connections and components when power is present. Wear Eye Protection. Wear eye protection if exposure to high-intensity rays or laser radiation exists. Do Not Operate With Suspected Failures. If you suspect there is damage to this product, have it inspected by qualified service personnel. Do Not Operate in Wet/Damp Conditions. Do Not Operate in an Explosive Atmosphere. Keep Product Surfaces Clean and Dry. Provide Proper Ventilation. Refer to the manual’s installation instructions for details on installing the product so it has proper ventilation. NetTek Analyzer OTDR Modules User Manual ix General Safety Summary Safety Terms and Symbols Terms in This Manual. These terms may appear in this manual: WARNING. Warning statements identify conditions or practices that could result in injury or loss of life. CAUTION. Caution statements identify conditions or practices that could result in damage to this product or other property. Terms on the Product. These terms may appear on the product: DANGER indicates an injury hazard immediately accessible as you read the marking. WARNING indicates an injury hazard not immediately accessible as you read the marking. CAUTION indicates a hazard to property including the product. Symbols on the Product. These symbols may appear on the product: CAUTION Refer to Manual Double Insulated Protective Ground (Earth) Terminal Laser Aperture Static Sensitive x NetTek Analyzer OTDR Modules User Manual Preface This manual contains operating instructions for several Tektronix NetTek Analyzer OTDR modules. See Table i. Table i: NetTek Analyzer OTDR Modules Module Fiber type Range Wavelengths YSS1310 Singlemode Standard 1310 nm YSS1315 Singlemode Standard 1310 nm / 1550 nm YSL1315 Singlemode Long 1310 nm / 1550 nm YSL1625 Singlemode Long 1625 nm YSL1516 Singlemode Long 1550 nm / 1625 nm YSU1315 Singlemode Ultra long 1310 nm / 1550 nm YSU1625 Singlemode Ultra long 1625 nm YM8513 Multimode Short 850 nm / 1300 nm Software Version This manual supports firmware version 3.0 and above of the NetTek Analyzer OTDR. To verify your software and firmware versions, do the following: 1. Open the OTDR application. 2. Select Help > About OTDR.... NetTek Analyzer OTDR Modules User Manual xi Preface Related Products The Y350C NetTek Analyzer Platform supports the NetTek Series of OTDR and base station instrument module test tools that you can add or remove from the analyzer platform. The NetTek analyzer platform accepts up to four modules at once, plus a PCMCIA module. You can mix and match modules to suit your needs. The platform is a full capability hand-held PC, running Windows CE. Conventions This book uses the following convention to represent menus: To open the help window and find information on a specific topic, you would be instructed to select Start > Help. To accomplish this, tap Start in the toolbar at the bottom of the desktop window; then tap Help in the resulting WindowsCE menu. Words in italics, such as event loss, indicate a glossary term. About this Manual Refer to this documentation for information such as the following: H Module installation instructions H Location of the laser on the OTDR H Overview of screen features H Tutorial for basic measurement and analysis tasks H Measurement descriptions H OTDR specifications, options and accessaries, and user maintenance information H OTDR terminology xii NetTek Analyzer OTDR Modules User Manual Preface Related Documentation For general help and content sensitive help for the OTDR, refer to the OTDR online help. H NetTek Analyzer OTDR Online Help (In the OTDR application, select Help > Help Topics... or tap the ? button in a dialog box.) The OTDR module attaches to and runs on the Y350C NetTek Analyzer platforms. For platform information, refer to the following resources: H Y350C NetTek Analyzer Platform User Manual H Y350C NetTek Analyzer Platform Online Help (Select Start > Help or tap the ? button in a dialog box.) H Windows CE Operating System Online Help (Select Start > Help or tap the ? button in a dialog box.) Refer to the platform resources listed above for information about the following topics: H Battery and AC power, Battery care H Platform power on and functional check H Touch-screen calibration H Platform operating instructions and menu descriptions H Memory resources, floppy disk storage, PCMCIA interface H Remote PC connection H Instructions for upgrading platform software and changing the language H Platform technical specifications H Platform accessories, maintenance, diagnostics NetTek Analyzer OTDR Modules User Manual xiii Preface Contacting Tektronix Phone 1-800-833-9200* Address Tektronix, Inc. Department or name (if known) 14200 SW Karl Braun Drive P.O. Box 500 Beaverton, OR 97077 USA Web site www.tektronix.com Sales support 1-800-833-9200, select option 1* Service support 1-800-833-9200, select option 2* Technical support Email: [email protected] 1-800-833-9200, select option 3* 6:00 a.m. - 5:00 p.m. Pacific time * xiv This phone number is toll free in North America. After office hours, please leave a voice mail message. Outside North America, contact a Tektronix sales office or distributor; see the Tektronix web site for a list of offices. NetTek Analyzer OTDR Modules User Manual Getting Started Getting Started Before using the NetTek Analyzer Platform for the first time, refer to the platform user manual for information on getting started, including the following: H Battery and power source information. (You must charge the batteries before you can operate the NetTek Analyzer Platform from internal battery power.) H Calibrating the touch screen. H Installing the tilt stand, shoulder strap, or strand hook. Product Description An optical time domain reflectometer (OTDR) measures and locates fiber characteristics by transmitting light pulses into a fiber and measuring the elapsed time and the amplitude of the received reflection. The OTDR measures the distance to an event by measuring the amount of time required to receive the reflection. With this OTDR, you can: H Document and verify installations of new fibers in a network. H Locate faults in the fiber. H Check bandwidth upgrade capability by measuring the return loss and end-to-end loss in the network. H Perform general preventive maintenance. NetTek Analyzer OTDR Modules User Manual 1- 1 Getting Started The NetTek Analyzer OTDR, with its easy-to-use interface, gives you good results with minimal training. The IntelliTrace Plus test mode automatically optimizes test parameters so you don’t have to. It gives you the best resolution on every section of the fiber while maximizing dynamic range. The NetTek Analyzer OTDR provides an IntelliTrace Plus multi-pulsewidth, single-result auto test function to significantly reduce dead zone effects on your tests. You can see close events, including the first connector, at the same time you see events 200 km away. Advanced wave-shape analysis software finds more events than other OTDRs can locate. All these features combine to give you more information on your cables, with precise accuracy. Installing an Instrument Module Use the following procedure to install an instrument module onto the rear of the NetTek Analyzer Platform or to attach one module onto another. Refer to Figure 1-- 2 throughout this procedure. CAUTION. The platform and modules contain static sensitive devices. Do not touch the connector pins. 1. Power off the NetTek Analyzer Platform: select Start > Shutdown. 2. Disconnect all cables to the NetTek Analyzer Platform and instrument modules. 1- 2 NetTek Analyzer OTDR Modules User Manual Getting Started 3. Place the NetTek Analyzer face down on a flat surface. Support the analyzer by its four corner bumpers only. 4. Remove the bus door from the rear of the NetTek Analyzer Platform or instrument module. See Figure 1-- 1 or 1-- 2. Bus door Bus connector NetTek Analyzer Platform Figure 1- 1: Removing the bus door 5. Carefully lower an Instrument module onto the NetTek Analyzer Platform or previously installed module to engage the bus connector. See Figure 1-- 2. NetTek Analyzer OTDR Modules User Manual 1- 3 Getting Started 6. Press down firmly to seat the connector and ensure electrical contact. 7. Locate the four thumb screws. See Figure 1-- 2. Bus door Thumb screw (4) Instrument module NetTek Analyzer Platform Bus connector Figure 1- 2: Install instrument module 1- 4 NetTek Analyzer OTDR Modules User Manual Getting Started 8. For each thumb screw, push down on the head and turn it in a counter-clockwise direction to extend the length. 9. Tighten the screws by turning them in a clockwise direction. Use the coin slot in the top of the thumb screw if you require additional torque. Be sure to tighten all screws evenly. 10. To recess the thumb screw heads, push and turn each screw head in a clockwise direction. 11. To maintain the enclosure seal integrity, reinstall the bus door into the rear of the instrument module. NetTek Analyzer OTDR Modules User Manual 1- 5 Getting Started Removing an Instrument Module Use the following procedure to remove an instrument module from the rear of the NetTek Analyzer Platform or to detach one module from another. Refer to Figure 1-- 2 throughout this procedure. CAUTION. The platform and modules contain static sensitive devices. Do not touch the connector pins. 1. Power off the NetTek Analyzer Platform: select Start > Shutdown. 2. Disconnect all cables from the NetTek Analyzer Platform and instrument modules. 3. Place the NetTek Analyzer face down on a flat, uncluttered surface. Support the analyzer by its four corner bumpers only. 4. To release the thumb-screw heads, push and turn each screw head in a counter-clockwise direction. 5. Disengage all four screws by turning them in a counter-clockwise direction. A tool or coin may be required if the screws are tight. 6. Pull up on the instrument module to remove it. 7. To maintain enclosure seal integrity, reinstall the bus door into the NetTek Analyzer Platform or instrument module. 1- 6 NetTek Analyzer OTDR Modules User Manual Getting Started Using the Laser Optical Port and Connector Adapter WARNING. The light emitted by the laser source is invisible to the human eye. Do not stare directly into the laser source. Doing so while the laser is on can damage your eye. Do not stare at the free end of a test fiber (the end not connected to the instrument). If possible, direct the free end toward a non-reflective surface. CAUTION. Do not touch the exposed end of the laser output port with anything but the proper cleaning materials. To maintain the performance of fiber optic connectors, clean them every time you use them. Refer to Cleaning beginning on page C-- 1. To protect against dust and damage, cover the optical port when not in use. The OTDR tests optical fibers by emitting short pulses of laser light. Figure 1-- 3 shows the location of the OTDR optical port. The optical port snaps out to a 45% angle. To return the optical port to the closed position, lift the release lever. NetTek Analyzer OTDR Modules User Manual 1- 7 Getting Started Optical port cover Release lever Optical port Release lever Lift the release lever to stow the optical connector. Figure 1- 3: Laser optical connector 1- 8 NetTek Analyzer OTDR Modules User Manual Getting Started Install the Appropriate Connector Adapter CAUTION. To avoid damage to the instrument, never connect a bare fiber adapter directly to the instrument. The connector adapter attaches the fiber to the laser optical port. Connector adapters are packaged separately with new instruments, and must be installed on the laser optical port before use. The connector adapter on the OTDR must match the connector on the test fiber. See page B-- 1 for a list of connector adapter options. Connector adapters are keyed for proper mating with the laser output port. To install a connector adapter, align the keyed elements, slide the connector adapter onto the laser output port, and turn clockwise until the connector adapter is finger tight (see Figure 1-- 4). Optical port Connector adapter Align the keys Figure 1- 4: Connector adapter installation NetTek Analyzer OTDR Modules User Manual 1- 9 Getting Started Remove a Connector Adapter To remove a connector adapter, unscrew it counterclockwise and pull it straight off the port. Refer to Figure 1-- 4 on page 1-- 9. 1- 10 NetTek Analyzer OTDR Modules User Manual Operating Basics Operating Basics Read this section to understand the online help system and the main screen features. Using the Online Help Refer to the online help for information on operating the NetTek Analyzer and the OTDR. You will find both general help topics and context-sensitive help topics. There are several ways to access online help: H For platform information, select Windows CE Start > Help. H For OTDR help, select Windows CE Start > Help > OTDR. H For OTDR help when the OTDR program is open, you can also select Help from the upper right corner of the screen. H For context-sensitive OTDR help when the OTDR program is open, select the ? button in any dialog box. To read a long help topic without having to scroll, select the button to increase the size of the help window to full screen size. To access related help topics, tap blue, underlined text. If the Input Panel covers the help window, tap the button at the bottom of the screen to close the Input Panel. Tap the button again to open the Input Panel. NetTek Analyzer OTDR Modules User Manual 2- 1 Operating Basics Table 2- 1: Help window buttons Tap this button To All Topics Display the NetTek Analyzer main table of contents. Back Return to the previous help screen. Contents Display the current program or local table of contents. Display full-screen help text. Display the help text in its own window. Tap and drag the Help window title bar to move the window. Minimize the Help window. To maximize the window, tap the Help icon in the taskbar. Close the Help window and quit help. Scroll the text towards the bottom of the screen. Scroll the text towards the top of the screen. Open and close the soft keypad Input Panel. The button is located in the lower right hand corner of the touch screen. (Tap this button to uncover the Help.) 2- 2 NetTek Analyzer OTDR Modules User Manual Operating Basics Elements of the Main Screen The features you need most often are available on the main screen. Main Screen Buttons The main screen buttons represent the tasks that you need to perform most often. Many of these buttons duplicate operations that are available in the main menus. Refer to Figure 2-- 1 for the layout of the main screen; Table 2-- 2 lists the function of each button. Figure 2- 1: Main screen NetTek Analyzer OTDR Modules User Manual 2- 3 Operating Basics Table 2- 2: Main screen buttons Change the display proportions. See Changing the Proportions of the Trace and Table Regions on page 2--5. Refresh the screen. Use this button if a screen element or the trace disappears. Use this button to center the trace around the active cursor when zoomed in. Toggle the active cursor. (Cursor A is active in this picture.) Move the active cursor left or right along the trace in large increments. Move the active cursor left or right along the trace in small increments. Jump the active cursor one event to the left or right. Control zooming. See Zooming on page 2--7. Save changes to the file. See Saving Tests and Settings on page 2--29. Open a dialog box, allowing you to automate taking and saving numerous, similar tests. See Auto Test and Save Dialog Box on page 3--12. Start an acquisition. Open a dialog box, allowing you to set up measurement thresholds and to flag out-of-limit data for the next trace you acquire. See Configuring Settings on page 2--21. 2- 4 NetTek Analyzer OTDR Modules User Manual Operating Basics Table 2- 2: Main screen buttons (Cont.) Open a dialog box, allowing you to set up measurement thresholds and to flag out-of-limit data for the active trace. See Configuring Settings on page 2--21. Open and close the soft keypad Input Panel, allowing you to enter alphanumeric characters with the touch screen. (This button is located in the lower right corner of the touch screen.) Viewing the Trace and Table There are several ways that you can change the appearance of the main screen to best see your data. Changing the Proportions of the Trace and Table Regions You can change the proportions of the trace and table regions using the icons in the upper right corner of the screen: . You can also use the View menu: H Select View > Maximize Trace to show the trace and only one row of event table data. H Select View > Split Trace and Table to show the trace and three rows of event table data. H Select View > Event Table Only to hide the trace and show only the event table. Additionally, you can select View > Display Settings to hide or show key settings at the bottom of the main screen. Hide the settings to increase the size of the trace and to see more rows of the event table. NetTek Analyzer OTDR Modules User Manual 2- 5 Operating Basics Setting Trace Display Options Select View > Trace Display Options. In this dialog box, you can change the appearance of the trace region of the main screen: H Select or clear Event Markers to show or hide the markings. H Select or clear Delta Readouts to show or hide the readouts that appear along the top of the trace region. H Select or clear Grid to show or hide grid lines on the trace region. 2- 6 NetTek Analyzer OTDR Modules User Manual Operating Basics Zooming Whenever the trace is visible, as in Figure 2-- 2, you can zoom in to take a closer look at an area of interest. The pink zoom box shows the area of the trace that will be zoomed in on. The zoom box will follow the active cursor. Zoom box Figure 2- 2: Zoomed out trace When you zoom in, the upper right corner of the screen displays an overview window showing the whole trace. As shown in Figure 2-- 3, the zoom box in the overview window indicates the part of the trace that you zoomed in on. You can show or hide the overview window by selecting View > Display Overview Window. NetTek Analyzer OTDR Modules User Manual 2- 7 Operating Basics To zoom: 1. Move a cursor to the point of interest on the trace. 2. Drag the corners of the zoom box to adjust its size and shape. 3. Tap to zoom in. 4. Tap trace again. to zoom out when you want to look at the whole Overview window Zoom box Figure 2- 3: Zoomed in trace, with overview window showing whole trace 2- 8 NetTek Analyzer OTDR Modules User Manual Operating Basics Sizing the Zoom Box with the Zoom Buttons. By changing the size of the zoom box, you can control the amount that you magnify the view of the trace, or you can change the scale of each axis independently. To change the size of the pink zoom box: H Drag the corners of the zoom box to adjust its size and shape. H Tap the button, and then use the arrow buttons: Toggles increases the height of the pink zoom box. decreases the height of the pink zoom box. increases the width of the pink zoom box. decreases the width of the pink zoom box. To better see the power loss or reflectance of an event, change the vertical scale by tapping the arrow several times. If the zoom box disappears, select View > Restore Zoom Box to bring it back. NetTek Analyzer OTDR Modules User Manual 2- 9 Operating Basics Moving the Zoomed View. When you are zoomed in, you can change the part of the trace that you see by: H Moving the active cursor. For example, tap one of the Cursor buttons. H Tapping the refresh button centers the view around the intersection of the active cursor and the trace. H Moving the zoom box with scroll bars. Select View > Zoom Scroll Bars to show or hide the scroll bars. Use the scroll bars to move the pink zoom box in the overview window. 2- 10 NetTek Analyzer OTDR Modules User Manual Operating Basics Cursors There are two cursors. Tap the buttons to toggle the active cursor. The active cursor appears in the center of the pink zoom box. Try these ways to move the cursors: H Touch and drag either cursor to move it along the trace. H Tap the buttons to jump the active cursor one event to the left or to the right. H Use the buttons to move the active cursor left or right along the trace in large increments. buttons to move the active cursor left or right H Use the along the trace in small increments. H Tap the event marker, H Tap the event row, , in the trace area. , in the event table. H Double-tap a location in the trace area. NetTek Analyzer OTDR Modules User Manual 2- 11 Operating Basics Event Table Columns In Split Trace and Event Table view, you can see six columns of data in the event table. In Event Table Only view, you can also see Loss ∆, Dist. ∆, and Event Notes (if you scroll to the right). For landmarks, data will only appear in the Event#, Dist., and Notes columns. Figure 2-- 4 below shows data in the Event Table Only view. Refer to Table 2-- 3 on page 2-- 13 for descriptions of the data in each event table column and Table 2-- 4 on page 2-- 14 for the meanings of marks, symbols, and highlights that appear in the event table. Figure 2- 4: Event Table Only view 2- 12 NetTek Analyzer OTDR Modules User Manual Operating Basics Table 2- 3: Event Table column definitions Column Definition Event# Event numbers correspond to event markers or landmarks in the trace area. Dist. Distance represents the distance from the front panel to the event or landmark. Loss Loss lists the loss of optical power at an event due to scattering, absorption, and bending. Reflectance Reflectance lists the ratio of reflected optical power to incident optical power for reflective events. Cuml. Loss Cumulative Loss lists the total loss from the front panel up to and including this event. Slope Slope lists the attenuation of the fiber between an event and the preceding event. Loss ∆ Loss Delta lists the loss between an event and the preceding event. Distance ∆ Distance Delta lists the distance between an event and the preceding event. Event Notes Event Notes displays the Comments field of the Event / Landmark Notes dialog box. NetTek Analyzer OTDR Modules User Manual 2- 13 Operating Basics Table 2- 4: Event Table symbols and highlights 2- 14 Mark Definition e An “e” appears next to an echo event. g A “g” appears next to a grouped event. * An asterisk (*) appears next to any manually adjusted values in the table. L An “L” appears next to landmarks that you have manually added to the table. End “End” marks the event at the end of the fiber. See page 3--17 for an explanation of grouped end events. OOR Out of Range. Occasionally, on very long fibers, the OTDR cannot detect the end of the fiber because the resolution is insufficient. The phrase “Out of range” will appear in the event table. If this happens, see page 3--16 for how to increase the range. Yellow Rows The active event data displays in yellow. Red Cells Any data that surpasses the thresholds you set on the Test Settings and Limits dialog window is flagged in red. NetTek Analyzer OTDR Modules User Manual Tutorial In this tutorial you will learn to take a basic measurement and to analyze the results. Italicized terms are defined in the glossary. Take a Basic Measurement CAUTION. To maintain the performance of fiber optic connectors, clean them every time you use them. Refer to Cleaning beginning on page C-- 1. 1. Clean the instrument connector and the fiber connector. CAUTION. To avoid damage to the instrument, never connect a bare fiber adapter directly to the instrument. 2. Connect the fiber. 3. Select the Run Settings button. 4. Select a wavelength that is appropriate for your system. 5. For Test Mode, select IntelliTrace Plus. 6. Enter an event loss threshold that is appropriate for your system. 7. Select OK. 8. Select the OTDR Run button. The hour-glass cursor appears and the status bar displays “Acquiring...” and the status bar displays the elapsed time in seconds.. NetTek Analyzer OTDR Modules User Manual 2- 15 Tutorial Analyze the Results In this section you will learn to understand trace data, find the length of the fiber, and examine two point loss. Examine the Trace Data Look at events in the trace region and in the event table. Beginning of fiber Event Trace End of fiber See Changing the Proportions of the Trace and Table Regions on page 2-- 5 for information on making either the trace or table area larger. 2- 16 NetTek Analyzer OTDR Modules User Manual Tutorial The trace is the line that visually represents the fiber. It typically slopes gently from the upper left of the trace region down to the lower right. From the shape and length of the trace, you can see the characteristics and length of the fiber. Sudden variations in the trace are marked as events. An event is an irregularity along the fiber such as a connector or a bend. Each event is marked with a numbered square at the appropriate distance along the horizontal axis of the trace region, representing its distance along the fiber. Each numbered square event marker correlates to a numbered row of data in the event table. The event table lists the distance, loss, reflectance, cumulative loss, and slope for each event on the fiber. The OTDR displays an event when the event loss (a drop in the power) or reflectance (an increase in the power) is greater than the Event Loss or Reflectance thresholds that you set. (See page 2-- 21 for information about setting thresholds.) NetTek Analyzer OTDR Modules User Manual 2- 17 Tutorial Find the Length of the Fiber The last event usually marks the end of the fiber; the distance of the end event is the length of the fiber. In the event table, look at the distance of the event marked “End.” Alternatively, in the trace region, look at the event where the trace drops abruptly and is followed by noise. Occasionally the OTDR may indicate that the end of the fiber is out of range. If this occurs, refer to Increasing the Range on page 3-- 16. Examine the Two-Point Loss Look at the loss between two points on the trace: Be sure both cursors are on backscatter regions of the trace. 1. Zoom in on the area of the trace. (Refer to Zooming on page 2-- 7.) 2. Select Measurements > Two Point.... 3. Drag a cursor or use the cursor buttons to place a cursor on backscatter to the left of an area of interest on the trace. 4. Use the cursor buttons to toggle the active cursor. 5. Place the second cursor on backscatter to the right of the area of interest on the trace. 6. Look at the top line of the trace region for the readouts of distance, two point loss, and slope between the two cursors. 2- 18 NetTek Analyzer OTDR Modules User Manual Tutorial Examine an Event Select an event to make it active. The active event will be highlighted in the event table and in the trace region so you can compare the event data to the visual representation of that event. To select an event, do one of the following: H Tap a row in the event table. H Tap the event marker in the trace region. H Move a cursor to the event marker in the trace region. Examine the Event Table Data Select View > Event Table Only to hide the trace and show only the event table. Examine the data in the event table. Take note of any data highlighted in red (black on monochrome screens) or event numbers marked with an “e”, “g”, or “*”. Refer to Event Table Columns on page 2-- 12 for more information about the table data and the meanings of symbols and highlighting. NetTek Analyzer OTDR Modules User Manual 2- 19 Tutorial 2- 20 NetTek Analyzer OTDR Modules User Manual Configuring the Settings and Saving and Opening Files Settings tabs (in the Test Settings and Limits dialog box) allow you to switch between different settings configurations as you acquire new traces. See Configuring Settings below. You can save a trace with settings, or you can save the settings alone. See page 2-- 29 for information about saving files. You can open a trace with settings, or you can open the settings alone. See page 2-- 33 for information about opening files. Configuring Settings The several settings tabs allow you to switch between different settings configurations as you acquire new traces. Open the Test Settings and Limits dialog box by selecting Settings > Test Setting and Limits, and then one of the following choices: H Run 1. Opens a tab displaying the settings that will be used by the next trace you acquire in the first mainscreen tab. (You will use this tab most of the time.) H Trace 1. Opens a tab displaying the settings used by the current trace in the first mainscreen tab. H Run 2. Opens a tab displaying the settings that will be used by the next trace that you acquire in the second mainscreen tab. (You can acquire traces in the second mainscreen tab when you turn Dual Trace mode on or when you use the Auto Test and Save feature for two wavelengths.) H Trace 2. Opens a tab displaying the settings used by the current trace in the second mainscreen tab. This choice is only available if a second trace is open. NetTek Analyzer OTDR Modules User Manual 2- 21 Configure the Settings and Saving and Opening Files The Run tabs show the test settings for the next trace you will acquire. See Figure 2-- 5. Figure 2- 5: A Run tab of the Test Settings and Limits dialog box 2- 22 NetTek Analyzer OTDR Modules User Manual Configure the Settings and Saving and Opening Files The trace tabs show the test settings for a trace that you have already acquired. See Figure 2-- 6. If you have saved the file, then the test tab is labeled with the file name. If you have not yet saved the file, then the tab is labeled either Trace 1 or Trace 2. Figure 2- 6: A Trace tab (labeled with the file name) of the Test Settings and Limits dialog box NetTek Analyzer OTDR Modules User Manual 2- 23 Configure the Settings and Saving and Opening Files Settings that Affect How Data is Collected In the Test Settings and Limits dialog box, you can set a number of parameters which will affect how test data is collected: NOTE. Because these settings affect how data is collected, you can not change these test settings in the trace tabs. The trace tabs represent the settings for traces that you have already acquired. H Test Mode. Refer to Table 2-- 5 for information about each test mode. You can also set the test mode from the main screen drop-down menu; however, to specially optimize IntelliTrace Plus mode for Fastest or Standard, you must use the Test Settings tab. H Pulsewidth. The duration in time (ns) that the laser pulses the fiber. Longer pulse widths provide greater range; shorter pulse widths provide shorter loss dead zones between events. H Range. From the drop-down box, select the shortest length that is greater than the length of the fiber you will test. H Test Time. Longer test times will give you more averaging which reduces noise and increases the usable range. H Wavelength. Select the wavelength of light with which to test. H End Detection. Enter the signal level threshold for End Detection. When the signal drops at a single point below this threshold, the OTDR will indicate the end of the fiber. 2- 24 NetTek Analyzer OTDR Modules User Manual Configure the Settings and Saving and Opening Files Table 2- 5: Choosing the Test Mode Test Mode Purpose IntelliTrace Plus To automate a measurement; the OTDR picks the best settings. You can optimize IntelliTrace Plus for different needs. In the IntelliTrace Plus Configuration field, choose from: Fastest1 For the shortest test time but not the best resolution Standard1 For fairly good resolution and a reasonably quick test Manual To control your own test settings. You must set Pulse Width, Range, and Test Time. End of Fiber To quickly measure the length of the fiber. Real Time To look at a signal that changes with time. In real time acquisition, there is no averaging. For example, you can see changes in the trace as you manipulate the fiber or as you adjust a connection. To stop acquisition, select the Stop button. When you have two trace files open, you cannot take Real Time measurements. Select Dual Trace > Remove Trace 2 to close the second tab. 1 These optimizations are only available from the Test Settings tab. NetTek Analyzer OTDR Modules User Manual 2- 25 Configure the Settings and Saving and Opening Files Settings that Affect How Data is Displayed In the Test Settings and Limits dialog box, you can set a number of parameters that affect how test data is displayed: NOTE. Because these settings do not change how you acquire the test data, you can change these settings in either Run or Trace tabs. H Refractive Index. Enter the refractive index specification of the fiber. H Cabling Factor. Enter the percent of extra fiber compared to the sheath measurements. (The OTDR measures the length of the fiber, which, because it twists, is longer than the length of the sheath.) H Backscatter Coefficient. Enter the backscatter coefficient specification of the fiber. (This affects only reflectance measurements.) H Zero Reference. Enter the Zero Reference (the length of optical fiber between the OTDR and the link you are testing). Select or clear the checkbox for each limit or threshold. The checkboxes are global; changing a checkbox in one tab (for example, Run 1) changes that checkbox in all the other tabs to the same state. When the checkbox is not checked, the associcated edit box is grayed out. Either check the box or tap the numeric keypad button next to the edit box to turn on the checkbox and then edit the checkbox contents. Limits. Select the limit settings to highlight in red the out-of-limit data in the event table or in the Link Loss display. You can set these limits: H Link Loss Limit. H Slope Limit. H Event Loss Limit. H Reflectance Limit. 2- 26 NetTek Analyzer OTDR Modules User Manual Configure the Settings and Saving and Opening Files Thresholds. Select the threshold settings to control whether a possible event will be displayed or not. All possible events are determined; the thresholds only control which of those events are displayed. If you want to display all possible events (regardless of loss or reflectance value), uncheck the Event Loss Threshold box. This disables (grays out) the Threshold value (indicating that it now has no effect on displayed events) and shows all events. You can set these thresholds: H Event Loss Threshold. Enter the Event Loss Threshold for displaying events. If the trace shows a loss of more than the Event Loss number, the OTDR will display an event. H Reflectance Threshold. Enter the Reflectance Threshold for displaying events. If the trace shows a reflectance more than the Reflectance number, the OTDR will display an event. NetTek Analyzer OTDR Modules User Manual 2- 27 Configure the Settings and Saving and Opening Files Copying Settings to Other Tabs In the Test Settings and Limits dialog box, you can copy the settings from the active tab to the other tabs by tapping the Copy to Run button or the Copy to Trace button. In the Test Settings and Limits dialog box, there can be as many as four tabs, as shown in Figures 2-- 5 and 2-- 6. You can designate the settings differently in each of these tabs. The checkboxes for the limits settings change globally for all four tabs, but the other fields change independently for each tab. You can change any setting in a Run tab and use these settings for your next acquisition. Each Trace tab represents the settings of a trace that you have taken or opened, so some of these settings cannot be changed; they are grayed out. When you tap the Copy to Trace button, some settings will only be applied to the target Trace tab if the wavelength is the same in both the active tab and the target tab. NOTE. Avoid copying a settings file with a wavelength that is not supported by your OTDR module. If you do, the wavelength dependent values listed below will change, but the default valid wavelength for your module will be used. Most likely, you would end up with settings that are different from what you had intended. The following settings are wavelength dependent: H Pulse-width (for manual test mode) H Averages (for manual test mode) H Refractive Index H Backscatter Coefficient H End Detection H Slope Limit H Link Loss Limit 2- 28 NetTek Analyzer OTDR Modules User Manual Configure the Settings and Saving and Opening Files Saving Tests and Settings You can save tests with test settings, or you can save the test settings alone. All files that you save are Telcordia compliant. For more information, refer to About File Types on page 3-- 22. Save a Test To save the test in the active trace tab, select File > Save As or press the disk icon. When you save a test, the following information is saved to a file: the trace, event table, test measurements, events, event notes, landmarks, landmark notes, fiber notes, test settings and limits, cursor positions, cursor selection, and zoom box size. NetTek Analyzer OTDR Modules User Manual 2- 29 Configure the Settings and Saving and Opening Files In the Save As dialog box, proceed as follows: NOTE. When storing files or creating folders in the BuiltInDisk folder, you should limit the number of files and folders within the root directory of the folder to between 30 and 40. When storing files and folders in a PCMCIA memory card, you should limit the number of files and folders in the root directory to about 60. Store files in subdirectories, in which there is effectively no limit to how many files can be stored. 1. In the Save in field, select the location where you want the file saved. Use the folder icons to navigate to a higher level of folder or to create a new folder. The list box below the field displays the names of existing files in the selected folder. NOTE. Save files in \BuiltInDisk, on a floppy disk, or on a PC card. Files saved anywhere else will be lost when you power off the NetTek Analyzer. 2. Enter a filename in the Filename field. 3. If you want to add or edit notes about the fiber, select the Fiber Notes... button, enter information about the fiber, and tap OK. 4. Tap the Save button. 2- 30 NetTek Analyzer OTDR Modules User Manual Configure the Settings and Saving and Opening Files Save Settings Only You can save frequently used test settings and limits to a file that you can reuse. Select Settings > Save Settings and then select the settings tab that you want to save: H Run 1 H Trace 1 H Run 2 H Trace 2 NOTE. When storing files or creating folders in the BuiltInDisk folder, you should limit the number of files and folders within the root directory of the folder to between 30 and 40. When storing files and folders in a PCMCIA memory card, you should limit the number of files and folders in the root directory to about 60. Store files in subdirectories, in which there is effectively no limit to how many files can be stored. NetTek Analyzer OTDR Modules User Manual 2- 31 Configure the Settings and Saving and Opening Files NOTE. Save files in \BuiltInDisk, on a floppy, or on a PC card. Files saved anywhere else will be lost when you power-off the NetTek Analyzer. Test data is not saved from this tab; use the Save Test tab instead. 1. In the Save in field, select the location where you want the file saved. Use the folder icons to navigate to a higher level of folder or to create a new folder. The list box below the Save In field displays the names of existing files in the selected folder. 2. In the Filename field, enter a filename. The file extension .set indicates that this file contains only settings and limits data (no test data). All the test settings and limits from the Test Settings and Limits dialog box are saved to your file. 2- 32 NetTek Analyzer OTDR Modules User Manual Configure the Settings and Saving and Opening Files Opening Trace or Setting and Limit Files You can open files from floppy disk, internal memory, or a storage card. You can open a trace file or a settings and limits file. For more information, refer to About File Types on page 3-- 22. Opening a Trace File Select File > Open. From this tab, you can open .SOR files containing settings, limits, and trace data. You can also open .CFF or .WFM files to view. 1. From the Look in: box, select the floppy disk, internal memory, or the storage card. The contents of the folder will appear in the box below. Tap a folder to open it. If you want to back up to a higher level of folder, use the folder icon. Tap the file name you want to open. The fields on the right side of the dialog box give you a preview of information related to the highlighted file. If you have trouble finding a file, use the Files of Type drop-down box to limit the files displayed to SOR Format or CFF Format, or you can expand the types of files that are visible by choosing All Files. NetTek Analyzer OTDR Modules User Manual 2- 33 Configure the Settings and Saving and Opening Files 2. Select Replace Run and Trace settings and limits to make the test settings and limits of the saved trace file the default ones used when you acquire the next trace and to apply the saved settings to the trace. If this box is not checked, none of the settings are changed from the last settings saved for the wavelength of the file (see About Trace to see the file settings). 3. Select Open as Trace 1 or Open as Trace 2. 4. Tap Open to open the highlighted file name. Opening a Settings Only File You can open .SET files. These .SET files are smaller than .SOR or .CFF files, which also contain trace data. Select Settings > Open Settings, and then select which tab to open the settings into: H Run 1. Select if you want the next trace you acquire in the first tab to use the settings that you open. H Trace 1. Select if you want the current trace in the first tab to use the settings that you open. 2- 34 NetTek Analyzer OTDR Modules User Manual Configure the Settings and Saving and Opening Files H Run 2. Select if you want the next trace you acquire in the second tab to use the settings that you open. (You can acquire traces in the second tab when you turn Dual Trace mode on or when you use the Auto Test and Save feature for two wavelengths.) H Trace 2. Select if you want the current trace in the second tab to use the settings that you open. 1. From the Look in: box, select the floppy disk, internal memory, or the storage card. The contents of the folder will appear in the box below this field. Tap a folder to open it. If you want to back up to a higher level of folder, use the folder icon. If you insert a floppy disk or a storage card, tap the Refresh button to see the contents. 2. Double-tap the file name you want to open. NetTek Analyzer OTDR Modules User Manual 2- 35 Configure the Settings and Saving and Opening Files Determine Which Settings Were Used for a Trace Select Settings menu > About Trace. This dialog box displays all the static settings that were used to acquire the trace and all the dynamic settings that were saved with the trace. 2- 36 NetTek Analyzer OTDR Modules User Manual Examine the Test1.SOR, Test2.SOR, and Test-- MM.SOR Files In this section you will look at three sample files provided with your OTDR: H Test1.SOR illustrates that different types of events can look similar. H Test2.SOR illustrates a damaged angle-polished splice. H Test-- MM.SOR illustrates a multimode fiber with a number of events, including echoes and grouped events. Starting with Test1.SOR, in the following steps, you will compare the appearances of each event in the trace and compare the amounts of loss and reflectance of each event in the event table. NetTek Analyzer OTDR Modules User Manual 2- 37 Examine the Test1.SOR, Test2.SOR, & Test-- MM.SOR Files 1. Open Test1.SOR from Internal Memory. (Select File > Open, then Look in: Internal Memory, and double-tap Test1.SOR.) 2. Look at the seven events. You will see something similar to Figure 2-- 7. Figure 2- 7: Sample file Test1.SOR illustrates that different types of events can look similar 2- 38 NetTek Analyzer OTDR Modules User Manual Examine the Test1.SOR, Test2.SOR, & Test-- MM.SOR Files 3. Switch to Event Table Only view to compare the event loss and reflectance values of each event. (Select View > Event Table Only.) You will see something similar to Figure 2-- 8. You can scroll to the right to view a description of each event in the Event Notes column. Figure 2- 8: Compare the amounts of loss and reflectance in each of the events in the sample file Test1.SOR 4. Switch back to the trace view again. (Select View > Maximize Trace.) The first event is the beginning of the fiber at the front panel. NetTek Analyzer OTDR Modules User Manual 2- 39 Examine the Test1.SOR, Test2.SOR, & Test-- MM.SOR Files 5. Starting with the second event, select each event in turn and zoom in. Tap to zoom in, and then tap to adjust the size of the zoom box. Tap the down arrow, , several times to maximize the appearance of small reflections and losses. Event 2, shown in Figure 2-- 9, is an FC regular connector. It has fairly large amounts of both loss and reflection. Figure 2- 9: Event 2 is an FC regular connector 2- 40 NetTek Analyzer OTDR Modules User Manual Examine the Test1.SOR, Test2.SOR, & Test-- MM.SOR Files Event 3, shown in Figure 2-- 10, is a fusion splice. It has a small amount of loss and no significant reflectance. Figure 2- 10: Event 3 is a fusion splice NetTek Analyzer OTDR Modules User Manual 2- 41 Examine the Test1.SOR, Test2.SOR, & Test-- MM.SOR Files Event 4, shown in Figure 2-- 11, is a mechanical splice. Like the FC regular connector, it has large amounts of both loss and reflection. Figure 2- 11: Event 4 is a mechanical splice 2- 42 NetTek Analyzer OTDR Modules User Manual Examine the Test1.SOR, Test2.SOR, & Test-- MM.SOR Files Event 5, shown in Figure 2-- 12, is a bend. Like the fusion splice, the bend has a very small amount of loss and no significant reflectance. On singlemode fiber, testing with multiple wavelengths is a good way to tell if an event is a bend. In contrast to fusion and mechanical splices, the slope and loss values of a bend will differ depending on the wavelength you use for testing. Figure 2- 12: Event 5 is a bend NetTek Analyzer OTDR Modules User Manual 2- 43 Examine the Test1.SOR, Test2.SOR, & Test-- MM.SOR Files Event 6, shown in Figure 2-- 13, is another fusion splice like Event 3. It has a large amount of loss but no reflectance. Figure 2- 13: Event 6 is a fusion splice 2- 44 NetTek Analyzer OTDR Modules User Manual Examine the Test1.SOR, Test2.SOR, & Test-- MM.SOR Files Event 7, shown in Figure 2-- 14, is the end of the fiber. Notice that it has large values for both loss and reflectance. The trace power level drops off into noise at the end of the fiber. Figure 2- 14: Event 7 is the end of the fiber NetTek Analyzer OTDR Modules User Manual 2- 45 Examine the Test1.SOR, Test2.SOR, & Test-- MM.SOR Files 6. Open Test2.SOR from Internal Memory. (Select File > Open, then Look in: Internal Memory, and double-tap Test2.SOR.) 7. Look at the 16 events. You will see something similar to Figure 2-- 15. In the sample file, Test2.SOR, events 1 and 16 represent the beginning and ending of the fiber, respectively. All the other events are fusion splices except event 7, which is an angle-polished splice. Usually angle-polished splices have no reflectance. In this case, however, the ends are worn. This damage accounts for the large amount of reflectance you see in Figure 2-- 15. You can switch to Event Table Only view and scroll to the right to view a description of each event in the Event Notes column. Figure 2- 15: Sample file test2.SOR shows a worn angle-polished connector (Event 5) and several fusion splices 2- 46 NetTek Analyzer OTDR Modules User Manual Examine the Test1.SOR, Test2.SOR, & Test-- MM.SOR Files 8. Open Test-- MM.SOR from Internal Memory. (Select File > Open, then Look in: Internal Memory, and double-tap Test-- MM.SOR.) 9. Look at the 10 events. You will see something similar to Figure 2-- 16. Figure 2- 16: Sample file Test- MM.SOR shows several types of events on a multimode fiber NetTek Analyzer OTDR Modules User Manual 2- 47 Examine the Test1.SOR, Test2.SOR, & Test-- MM.SOR Files 10. Switch to Event Table Only view and scroll to the right to view a description of each event in the Event Notes column. You will see something similar to Figure 2-- 17. Figure 2- 17: Look at the event notes in the event table of sample file Test- MM.SOR 2- 48 NetTek Analyzer OTDR Modules User Manual Examine the Test1.SOR, Test2.SOR, & Test-- MM.SOR Files 11. Select View > Split Trace and Event Table and zoom in on events 1 and 2. Events 1 and 2 are grouped (marked “g”) due to the short distance between them. Event 1 is the connector on the OTDR. Event 2 is a jumper cable. Often a jumper cable is used to connect the OTDR to the system patch panel. If the cable is short (it is 4 meters in this example), the loss measurement will be grouped with the front panel loss. Figure 2- 18: Event 1 (the front panel) and Event 2 (a jumper cable) are grouped due to the short distance between them NetTek Analyzer OTDR Modules User Manual 2- 49 Examine the Test1.SOR, Test2.SOR, & Test-- MM.SOR Files 12. Look at events 3 and 4 shown in Figure 2-- 19. Event 3 is an echo from Event 1, the front panel. Event 4 is an echo from Event 2, the jumper cable. Figure 2- 19: Events 3 and 4 are echoes of 1 and 2 and are grouped with each other 2- 50 NetTek Analyzer OTDR Modules User Manual Examine the Test1.SOR, Test2.SOR, & Test-- MM.SOR Files 13. Look at Events 5 and 6 shown in Figure 2-- 20. Event 5 is a patch panel connector with higher than normal loss. Event 6 is a patch panel connector with low loss. Figure 2- 20: Event 5 (high loss) and Event 6 (low loss) are both patch panel connectors NetTek Analyzer OTDR Modules User Manual 2- 51 Examine the Test1.SOR, Test2.SOR, & Test-- MM.SOR Files 14. Look at Event 7 shown in Figure 2-- 21. Event 7 is a good (low loss) fusion splice. Note that there is no reflection peak as with connectors. Fusion splices and bends have losses without reflections. Figure 2- 21: Event 7 is a good (low loss) fusion splice 2- 52 NetTek Analyzer OTDR Modules User Manual Examine the Test1.SOR, Test2.SOR, & Test-- MM.SOR Files 15. Look at events 8, 9, and 10. Event 8 is a pigtail fusion splice. Sometimes, instead of installing a connector on the fiber, a pigtailed connector is spliced onto the system. A pigtail is a jumper cable with a factory installed connector on a section of fiber. This section of fiber is fusion spliced onto the system as a way of installing the connector. Event 8 is the pigtail fusion splice that goes with the connector at Event 9. Note that you can see the fusion splice before the connector, but it is less likely to see a fusion splice after the large reflection of the connector (Event 9). Event 9 is a patch panel connector. It is grouped with the pigtail splice at event 8 due to the short distance between the two events. Event 10. This is the end of the fiber. If you look to the right of it, you can see several more peaks. These are echoes of the end. It is fairly common on multimode tests to have echoes after the end of the fiber. Figure 2- 22: Event 8 (the start of a pigtail), Event 9 (a patch panel connector), and Event 10 (the end of the fiber) NetTek Analyzer OTDR Modules User Manual 2- 53 Examine the Test1.SOR, Test2.SOR, & Test-- MM.SOR Files 2- 54 NetTek Analyzer OTDR Modules User Manual Reference Taking Measurements This section covers taking measurement menu measurements (see below), comparing two traces in various ways (see page 3-- 8), and setting up automatic testing and saving of measurements (see page 3-- 12). To perform advanced measurements, choose a measurement from the measurement menu. These measurements are taken on one trace: H Event Loss: Measures loss at a point on a fiber. See page 3-- 2. H Two Point: Measures the loss, slope, and distance between two points on a fiber. See page 3-- 4. H Reflectance: Measures the loss due to light reflected by a particular fiber feature, such as a connector or splice. See page 3-- 6. H ORL:(Optical Return Loss) Measures the reflected light from a section of fiber or from the whole fiber. See page 3-- 7. These measurements are taken on two traces in Dual Trace mode: H Bidirectional Averages: Averages the events of two traces taken from opposite ends of the same fiber. Some events may appear differently depending on which end of the fiber you test. Use this measurement for a more accurate representation of the fiber than either trace alone can give. See page 3-- 9. H Difference: Subtracts one trace from another. Use this measurement to compare two similar trace files. See page 3-- 11. NetTek Analyzer OTDR Modules User Manual 3- 1 Taking Measurements Performing Event Loss Measurements Select Measurements > Event Loss.... Measures loss at a point on a fiber. The loss appears as a readout at the top of the trace. The events that you add are marked in the event table with an asterisk (*). Figure 3-- 1 shows an example of an event loss measurement. Figure 3- 1: Event Loss for Event 2 3- 2 NetTek Analyzer OTDR Modules User Manual Taking Measurements Event Loss Advanced Controls Select Measurements > Event Loss... > Advanced Controls button. Advanced Controls allow you to manually adjust the slope cursor either to the Left or the Right of the event. Select Reset to return the slope cursor angles to match the backscatter slope. Select Update Table to update the event table with your manually adjusted loss data. Manually adjusted data in the event table are marked with an asterisk (*). NetTek Analyzer OTDR Modules User Manual 3- 3 Taking Measurements Performing Two Point Measurements Select Measurements > Two Point.... Measure the loss, slope, and distance between two points on a fiber. Be sure both cursors are on backscatter regions of the trace. Look at the loss between two points on the trace: 1. Zoom in on the area of the trace. 2. Select Measurements > Two Point.... 3. Drag a cursor or use the cursor buttons to place a cursor on backscatter to the left of an area of interest on the trace. 4. Use the A/B cursor buttons to toggle the active cursor. 5. Place the second cursor on backscatter to the right of the area of interest on the trace. 6. Look at the top line of the trace region for the readouts of distance, two point loss, and slope between the two cursors. 3- 4 NetTek Analyzer OTDR Modules User Manual Taking Measurements Two Point Loss Advanced Controls Select Measurements > Two Point... > Advanced Controls button. To manually adjust the cursors, select either Two Point Slope or LSA Slope: H Select Two Point Slope to measure the loss across a feature of the fiber. In two-point slope calculations, the two-point loss is divided by the two-point distance, using the data point at each intersection between the loss cursors and the waveform. This type of calculation is better if there are reflective events close to the one you are trying to measure. H Select LSA Slope to measure fiber loss on featureless sections of backscatter. In LSA slope calculations, the data points on the waveform between the distance cursors are used to determine the best-fitting straight line using the least-squares average algorithm. This type of calculation is better if the trace is noisy and there are no reflective events close to the one you are trying to measure. Using the scroll bar to move the cursor vertically and the knob buttons to rotate the cursor, match the angle and position of the cursor to the slope and level of the backscatter. Use the double arrow side of the knob to rotate the cursors by large increments. Use the single arrow side of the knob to rotate the cursors by small increments. Select Reset to return the loss cursor position to match the automatically determined level of the backscatter. NetTek Analyzer OTDR Modules User Manual 3- 5 Taking Measurements Performing Reflectance Measurements NOTE. Before performing reflectance measurements, be sure that the backscatter coefficient setting is correct in the Test Settings tab. Select Measurement > Reflectance.... Measure the reflectance at a point on a fiber, such as at a connector or splice. Place a cursor at the point of interest on the trace. The reflectance from that point appears as a readout at the top of the trace region. Reflectance Advanced Controls Select Measurements > Reflectance... > Advanced Controls button. Advanced Controls allow you to manually adjust the slope cursor either to the Left or the Right of the event. Select Reset to return the slope cursor angles to match the backscatter slope. Select Update Table to update the event table with your manually adjusted reflectance data. Manually adjusted data in the event table are marked with an asterisk (*). 3- 6 NetTek Analyzer OTDR Modules User Manual Taking Measurements Performing ORL Measurements NOTE. Before performing reflectance measurements, be sure that the backscatter coefficient setting is correct in the Test Settings tab. Select Measurements > ORL. Optical Return Loss measures the reflected light from a section of fiber or from the whole fiber. This measurement tells you how much noise is on the fiber. The ORL readout appears at the top of the trace region. NetTek Analyzer OTDR Modules User Manual 3- 7 Taking Measurements Compare Two Traces There are several ways you can compare two traces: Bidirectional Average Measurements This measurement averages the events of two traces taken from opposite ends of the same fiber. Use this measurement when you need especially precise splice loss measurements. Select Measurements > Bidirectional Averages. See page 3-- 9 for more information. Difference Measurements This measurement subtracts one trace from another. Use this measurement to compare two similar trace files. Select Measurements > Difference. See page 3-- 11 for more information. Dual Trace Mode Use Dual Trace mode to view and compare two trace files within one tab. 1. Open or acquire a trace. 2. Select Dual Trace > Dual Trace On. 3. Open or acquire a second trace. 4. Select the tab of the trace data you want to be active. (The two tabs above the trace region are each named for one of the traces.) The event markers of the active trace are dark and the event markers of the inactive trace are light. The event table shows the events of the active trace data. Select Dual Trace > Dual Trace Off to look at only one trace at a time within the same tab. Select Dual Trace > Remove Trace 2 to close the second tab. (When you have two trace files open, you cannot take Real Time measurements.) 3- 8 NetTek Analyzer OTDR Modules User Manual Taking Measurements Performing Bidirectional Averages Measurement Select Measurement > Bi-directional Averages. Events may appear differently depending on which end of the fiber you test. Take trace measurements from each end of a fiber, and then use the Bidirectional Averages function to view the average losses of the two trace files. The averaged event loss values yield a more accurate representation of the fiber than either trace alone. This measurement generates a third tab with a trace and event table showing the averages of the two trace files. Refer to Figure 3-- 2 for an example of a bidirectional averages measurement. Figure 3- 2: Bidirectional Averages traces NetTek Analyzer OTDR Modules User Manual 3- 9 Taking Measurements 1. Open or acquire a trace. 2. Select Measurement > Bi-directional Averages. 3. Open or acquire a second trace taken from the opposite end of the fiber from step 1. 4. View and interpret the bidirectional averages trace and event table data in the third tab. NOTE. You cannot save the third tab as a file. Instead, save the separate traces; you can regenerate the data at any time from the saved trace files. The Bidirectional Averages tab displays the two traces (taken from both ends of the same fiber) and the average of the two traces. The two traces are represented in opposite directions. The end of one trace is the beginning of the other trace, and the two traces meet in the middle. The trace from the first tab will appear as usual, starting in the upper left corner and sloping down to its end in the lower right corner. The trace from the second tab looks like a superimposed mirror image of the first. It starts in the upper right corner and slopes down to its end in the lower left, and its events should line up vertically with the events from the first trace. When the third tab is active, the event table shows the averages of each event. If an event appears on one of the traces but not at the corresponding distance on the other, “-- - ” appears in the table cell. 3- 10 NetTek Analyzer OTDR Modules User Manual Taking Measurements Performing Difference Measurements Select Measurement > Difference. NOTE. You must have two files open to create difference data. You cannot save the third tab as a file, but you can regenerate the data at any time from the saved trace files. The Difference function subtracts the second trace from the first and displays the results as a third trace. Look at the difference to compare two similar trace files, such as traces taken on the same fiber at different times, or traces taken on adjacent fibers in the same cable. This measurement generates a third tab with a trace and event table that show the difference between the two trace files. The difference in the event loss values show you changes in the fiber between the acquisitions or the differences between two adjacent fibers. The settings in the Trace 1 settings tab apply to both traces in difference measurements. To perform a difference measurement: 1. Open or acquire a trace. 2. Select Measurement > Difference. 3. Open or acquire a second trace. 4. Select the third tab to view the difference data. The tabs above the trace region are labeled with the file name of the trace data. Select the tab of the trace data you want to be active. The event markers of the active trace are dark and the event markers of the inactive trace are light. The event table shows the events of the active trace data. NetTek Analyzer OTDR Modules User Manual 3- 11 Taking Measurements Auto Test and Save Dialog Box Select Auto Test and Save button. Use this dialog box to automate taking and saving numerous, similar tests. The auto test will use the test settings on the main screen. Next Fiber Number: Tells you what fiber number the OTDR will assign to the next fiber it measures. Enter the fiber number you want the OTDR to start with. Back button. Decrements the Next Fiber Number. Next File Name: Press the keyboard icon to access the Next File Name dialog box (shown in part below) where you enter the first part of the fiber name into the field. 3- 12 NetTek Analyzer OTDR Modules User Manual Taking Measurements Wavelength to Test: If your module has multiple wavelength capability, select the wavelength icon to set up which wavelength or wavelengths to use. Close button. Clears and closes the dialog box. Fiber Notes... button. Opens the Fiber Notes dialog box where you can add to or edit notes before you save them with your test. Run button. Begins the first test. Auto Sequence Wavelength Choices Dialog Box Select Auto Test and Save button > λ button. Choose which wavelength to test in the Test First option list. If you want to test each fiber a second time with a different wavelength, select a wavelength in the Test Second option list. If you don’t want to test a second time, select none in the Test Second option list. If you choose a second wavelength to test, the second wavelength test will use the settings in the Run 2 tab. NetTek Analyzer OTDR Modules User Manual 3- 13 Taking Measurements 3- 14 NetTek Analyzer OTDR Modules User Manual Other Features This section includes instructions and reference information about features you may find useful: H Increasing the range H Finding the end when grouped events are marked as “End” H Getting the best resolution on multimode tests H Printing H Using the OTDR with a keyboard H Joining cursors H Setting the front panel loss warning H Setting the distance units H Setting Factory Defaults H Information about file types H Making notes on events, landmarks, and fibers H Adding, moving, and deleting, events or landmarks NetTek Analyzer OTDR Modules User Manual 3- 15 Other Features Increasing the Range Occasionally, on very long fibers, the OTDR cannot detect the end of the fiber because the range is insufficient. “OOR” (Out of Range) will appear in the last row of the event table. If this happens, change the test settings as follows: 1. Select Settings > Test Settings and Limits, and then either Run 1 or Run 2. 2. Select the Test Mode: IntelliTrace Plus or Manual. If you choose IntelliTrace Plus mode, select Standard configuration. If you choose Manual mode, you can do one or both of the following: H Use a longer pulse width. This increases the range by increasing the power, but it reduces resolution. H Increase the averaging. This increases the range slightly by lowering the noise floor, but the test will take much longer. 3- 16 NetTek Analyzer OTDR Modules User Manual Other Features Finding the End When Grouped Events are Marked as “End” For some test set ups, the end of the fiber may be marked as grouped events rather than an individual event. In the example in Table 3-- 1, the software cannot tell which of the last four events is the actual end of the fiber. Table 3- 1: Sample event table with grouped end events Event Distance Description 1 0.000 km 2 0.250 km 3gEnd 0.300 km (In this case, this is the actual end of the fiber.) 4geEnd 0.350 km Echo of event 2, grouped with event 3 5gEnd 0.400 km Double echo of event 2 which are sometimes not identified as an echo, grouped with events 3 and 4 6geEnd 0.600 km Echo of event 3, grouped with events 3, 4, and 5 If you know the length of the cable, check to see that the known length is listed as one of the events marked “End”. If you don’t know the length of the cable or if the known length is not listed, then try rerunning the test in one of the following ways: H Switch to a shorter pulse width (separates out the events better). H Use a matching gel or a fiber twist to dampen out the end reflection (reduces repeat echoes). H On multimode tests, if you first tested at 1300 nm, use 850 nm for higher resolution. NetTek Analyzer OTDR Modules User Manual 3- 17 Other Features Getting the Best Resolution on Multimode Tests The resolution of 850 nm tests is significantly better than the resolution of 1300 nm tests. Even on 1300 nm networks, consider testing at 850 nm, particularly when you need to resolve events that are close together. Compared to 1300 nm tests, 850 nm tests are more accurate on short networks because of the shorter dead zone. In 850 nm tests, the dead zones are half as long. Also, in 850 nm tests, a shorter pulse width is available; the shorter pulsewidth will give you a higher resolution test on a short fiber. Connector loss measurements do not vary as significantly between 850 nm and 1300 nm as they do between the two wavelengths used in singlemode. The variation between event loss measurements at the two multimode wavelengths is generally less than 10%. Though event loss does not vary significantly, fiber loss is different between the two wavelengths. Use 850 nm to: H Make more accurate connector and splice measurements H Resolve close together events H Reduce the effects of echoes and grouped events Use 1300 nm to: H Make section, link, or fiber loss measurements on 1300 nm networks H Double check event loss where you can resolve events separately H Show documentation at 1300 nm 3- 18 NetTek Analyzer OTDR Modules User Manual Other Features Printing Select File > Print. Select the fields you want to print: H Trace and Table. This choice prints both the trace and table. H Trace. The trace will print as it appears on screen. At least one line of the event table will print for the selected event. H Table. Under Table Options, indicate whether to print only the first five columns or all columns. For measurements with multiple tables, select under Measurement Options whether to print all the tables or only the bidirectional or difference table. H Notes. Select Notes to print your fiber, event, and landmark notes. Tap the Properties button to select a printer, port, network path, paper size, print mode, print range, orientation, and margins. (For additional information, select Properties > ?.) NetTek Analyzer OTDR Modules User Manual 3- 19 Other Features Using with a Keyboard You can operate the OTDR with an external keyboard as follows: Connect the keyboard to the keyboard port on the NetTek Analyzer. Access the main menus by holding down the Alt key and pressing the underlined letter of the menu name. Use the up and down arrows to move the highlight cursor to your drop-down menu selection and then press Enter. In a dialog box, use the tab or arrow keys to highlight the item or area of interest, and then press Enter to select it. For example, to change the appearance of the trace, use these steps: 1. Open the View drop-down submenu: hold down Alt and press V. 2. Open the Trace Display Options dialog box: press the down arrow until the Trace Display Options menu is highlighted, and then press Enter. 3. Use the tab or arrow keys to select one of the options and then press Enter to select or clear the checkbox. 3- 20 NetTek Analyzer OTDR Modules User Manual Other Features Joining Cursors Select View > Join Cursors. The inactive cursor jumps to the location of the active cursor. (The active cursor is the one labeled with white text in a black box.) Setting the Front Panel Loss Warning Select or clear the check in front of Settings > Front Panel Loss Warning to turn the Front Panel Loss Warning on or off, respectively. If you turn it off, you will not be warned before each acquisition if there is a problem with the front panel connection. Setting the Distance Units Select Settings > Distance Units, and then the unit of your choice. Setting Factory Defaults There are four ways to return settings to factory defaults: H Select Settings > Power On Settings > Factory Defaults. This affects only the settings in the Run 1 and Run 2 tabs at power on for all wavelengths. (You can also choose Last Used.) H Select Settings > System Factory Defaults. This sets all test parameters to their factory defaults, replacing any user-- changed values. H Tap the Run Settings... button > Factory Defaults button. This affects only the settings in the active Run tab for the currently selected wavelength. H Tap the Trace Settings... button > Factory Defaults button. This affects only the settings in the active Trace tab. NetTek Analyzer OTDR Modules User Manual 3- 21 Other Features About File Types SOR Format SOR format is a Telcordia format. When you save any file, the OTDR saves it in SOR format. This format works with the Tektronix NetTek Analyzer OTDR modules, Tektronix TARGET1 PC software, and in SOR-compliant instruments from other manufacturers. The file extension does not have to be .SOR; for example, you can use something like “.001” if you prefer. CFF Format CFF format is a Tektronix file format. You can read CFF files, which were created on Tektronix TFS3031 or TFP2A OTDR or with Tektronix FMTAP PC software. SET Format SET format includes only settings and limits; it does not include test data. Use this format to save and reuse settings and limits for multiple tests. This file type is an SOR file format; however, to reduce the file size, it contains no trace data. WFM Format WFM format is a Tektronix file format. You can read WFM files, which were created on early models of the Tektronix TFP2 FiberMaster OTDR. 3- 22 NetTek Analyzer OTDR Modules User Manual Other Features Making Notes on Events, Landmarks, and Fibers You can record notes about fibers or about individual events and landmarks on a trace. These notes are saved when you save the test file. Event / Landmark Notes Dialog Box Select Events > Event / Landmark Notes.... Use the buttons to jump to the event or landmark marker for which you want to examine or edit the notes. Any comments you enter in the Comments box will be visible from the Event Table Only view. Use Sheath Marker Info to record the sheath distance (as opposed to the fiber distance) between events or landmarks. Enter the number you read on the sheath cable at the event or landmark. Enter GPS (Global Positioning System) information into the Longitude: and Latitude: text boxes. GPS coordinates will help you easily locate an event or landmark again. NetTek Analyzer OTDR Modules User Manual 3- 23 Other Features If you have installed a standard GPS module with RS232 communication, you can press the Download from GPS button to automatically enter the data. NOTE. Remember that the GPS will enter the coordinates of the module location at the time you press this button. If you are not standing at the site of the landmark, enter the coordinates by hand or return to the site to enter them automatically. You can manually enter GPS coordinates using the following format: Longitude: Wddd°mm’ss” Latitude: Ndd°mm’ss” Where: dd = latitude degrees [0-- 90] ddd = longitude degrees [0-- 180] mm = minutes [0-- 59] ss = seconds [0-- 59] N = n = North latitude (may be replaced with S for South) W = w = West longitude (may be replaced with E for East) 3- 24 NetTek Analyzer OTDR Modules User Manual Other Features Fiber Notes Dialog Box Select File > Fiber Notes.... Fiber notes are saved with your trace file. Use the Fiber Notes dialog box to record information in the way that your company finds most useful. The most recently entered descriptions will appear in the drop-down menu of each field. For Cable Code, enter the Telcordia Suggested Optical Cable Code. Describe the beginning and ending locations of the trace in the Start Location: and Stop Location: fields. For Data Flags, the following codes are recommended: H BC - as-built condition H OT - other; describe the condition in the Comments: field H RC - as-repaired condition In the Comments field, make note of cable or fiber design or link issues. Describe how the link is used and record any construction or repair issues. NetTek Analyzer OTDR Modules User Manual 3- 25 Other Features Adding, Moving, and Deleting, Events or Landmarks From the Events menu, you can add, move, and delete both events and landmarks. You can also access Event/Landmark Notes or freeze events. Adding Events Select Events > Add Events.... Manually added events will appear in the event table with an asterisk (*). 1. Position the active cursor where you want to add an event. 2. Zoom in. 3. Select Events > Add Events.... 4. Use the cursor buttons to fine tune the position of the cursor where you want to add an event. Notice that the location of the cursor appears in the Location: field. 5. Tap Add Event to add an event. 6. Tap Event Notes... to describe the event. 7. Tap the Close button. 3- 26 NetTek Analyzer OTDR Modules User Manual Other Features Moving Events Select Events > Moving Events.... Manually added events will appear in the event table with an asterisk (*). 1. Select an event. 2. Zoom in. 3. Select Events > Move Events.... 4. Use the cursor buttons to move the cursor where you want to move the selected event. Notice that the selected event and the location of the cursor appear in the Location: field. 5. Tap Move Event to move the event. 6. Tap Event Notes... to edit the event notes. 7. Tap the Close button. NetTek Analyzer OTDR Modules User Manual 3- 27 Other Features Adding Landmarks Select Events > Add Landmarks.... Add a landmark to help you remember how the trace relates to real locations on the fiber such as a bridge. You can mark places where a failure might be likely to occur in the future. 1. Position the active cursor where you want to add a landmark. 2. Zoom in. 3. Select Events > Add Landmark.... 4. Use the cursor buttons to fine tune the position of the cursor where you want to add a landmark. Notice that the location of the cursor appears in the Location: field. 5. Tap Add Event to add an event. 6. Tap Landmark Notes... to describe the landmark. 7. Tap the Close button. 3- 28 NetTek Analyzer OTDR Modules User Manual Other Features Moving Landmarks Select Events > Moving Landmarks.... 1. Select a landmark. 2. Zoom in. 3. Select Events > Move Landmark.... 4. Use the cursor buttons to move the cursor where you want to move the selected landmark. Notice that the selected landmark and the location of the cursor appear in the Location: field. 5. Tap Move Landmark to move the landmark. 6. Tap Landmark Notes... to edit the landmark notes if you wish. 7. Tap the Close button. Deleting Events Select Events > Delete Events.... 1. Select an event. 2. Select Events > Delete Events.... 3. Tap the Delete Events button. 4. Tap the Close button. NetTek Analyzer OTDR Modules User Manual 3- 29 Other Features Deleting Landmarks Select Events > Delete Landmarks.... 1. Select a landmark. 2. Select Events > Delete Landmarks.... 3. Tap the Delete Landmark button. 4. Tap the Close button. Deleting All Landmarks Select Events > Delete All Landmarks.... All landmarks will be deleted. Freezing Events Select Events > Freeze Events. Consider freezing events if you are testing more than one fiber for which you expect the events to have the same locations. Freezing events allows you to use the current events as a template for subsequent acquisitions. This means that all of the current events will continue to be displayed as new traces are acquired, regardless of the Event Loss actually found at those distances. Additional events that exceed the thresholds will also be found, displayed, and included in the event table. 3- 30 NetTek Analyzer OTDR Modules User Manual Appendices Appendix A: Specifications The specifications in this section apply to the NetTek Analyzer OTDR Module, unless otherwise specified. For NetTek Analyzer Platform specifications, refer to the NetTek Analyzer Platform User Manual. All specifications are guaranteed unless labeled “typical”. Typical specifications are provided for your convenience and are not guaranteed. Table A- 1: NetTek Analyzer OTDR Module characteristics Event dead zone2 Loss dead zone2 Module Fiber type Wavelengths Dynamic range1 YM8513 Multimode 62.5/125 GI 850 nm ± 30 nm 1300 nm ± 30 nm 32 dB 34 dB 1m 2m 3m 10 m YSS1310 Singlemode 1310 nm ± 20 nm 38 dB 2m 8m YSS1315 Singlemode 1310 nm ± 20 nm 1550 nm ± 20 nm 38 dB 36 dB 2m 2m 8m 8m YSL1315 Singlemode 1310 nm ± 20 nm 1550 nm ± 20 nm 42 dB 40 dB 2m 2m 8m 8m YSL1625 Singlemode 1625 nm ± 20 nm 40 dB 2m 8m YSL1516 Singlemode 1550 nm ± 20 nm 1625 nm ± 20 nm 40 dB 40 dB 2m 2m 8m 8m YSU1315 Singlemode 1310 nm ± 20 nm 1550 nm ± 20 nm 44 dB 44 dB 2m 2m 8m 8m YSU1625 Singlemode 1625 nm ± 20 nm 44 dB 2m 8m 1 Typical at 23 °C, SNR = 1, 3 minutes averaging, maximum pulse width. 2 Typical at 23 °C, - 40dB reflectance, 3 minutes averaging, minimum pulse width. NetTek Analyzer OTDR Modules User Manual A- 1 Appendix A: Specifications Table A- 2: General characteristics Characteristics Description Accuracy Distance accuracy Zero offset ± 0.5 m Timebase ± 10- 5 Sample spacing ± 0.5 m (± 0.1 m YM8513) Loss accuracy (linearity) 0.02 dB/dB singlemode; 0.05 dB/dB multimode Reflectance accuracy ± 2 dB, typical ORL accuracy ± 4 dB, typical Vertical parameters Vertical scale 0.1 to 10.0 dB/div Readout resolution 0.001 dB Reflectance range --14 to --65 dB singlemode; --35 to --62 dB multimode Horizontal parameters Display range 0 to 320 km Readout resolution 0.001 m Measurement points 32,000 standard Length units meters, feet, miles, kilofeet, kilometers Pulse widths At 850 nm 5, 10, 20, 50, 100 ns At 1300 nm 10, 20, 50, 100, 200, 500, 1000 ns At 1310, 1550, and 1625 nm 10, 20, 50, 100, 200, 500, 1000 ns and 1, 2, 10, 20 µs Waveform scan parameters Loss threshold range 0.01 to 5.00 dB, 0.01 dB increments Reflectance threshold --14 to --65 dB, 1 dB increments Default save file format Telcordia SOR A- 2 NetTek Analyzer OTDR Modules User Manual Appendix A: Specifications Table A- 2: General characteristics (Cont.) Characteristics Description Test settings Test modes IntelliTrace, Manual, End of Fiber, Real-time Number of averages 1024 to 4,194,304, in increments of 1 Refractive index 1.40000 to 1.60000, in increments of 0.00001 Scattering coefficient --100 dB to --40 dB, in increments of 0.01 dB Cabling factor 0% to 100%, in 0.1% increments Zero offset 0 to end of data, in increments of one data point Absolute thresholds Reflectance --65 to --14 dB, in 1 dB increments Event loss 0.01 to 5 dB, in 0.01 dB increments Slope 0.1 to 5 dB/km, in 0.01 dB/km increments Optical Return Loss (ORL) 1 to 30 dB, in 1 dB increments End-to-end loss 0.1 dB to 50 dB, in 0.1 dB increments End-of-fiber 1 to 20 dB, in 1 dB increments Front panel connection 0.1 to 5 dB, in 0.1 dB increments Distance units meters, feet, miles, kilofeet, kilometers OTDR SOR documentation Cable ID ASCII string Operator ASCII string Originating location ASCII string Terminating location ASCII string Cable code ASCII string Fiber condition CC, BC, RC, OT Fiber comments ASCII string Event comments ASCII string Landmark category code ASCII string NetTek Analyzer OTDR Modules User Manual A- 3 Appendix A: Specifications Table A- 2: General characteristics (Cont.) Characteristics Description GPS information Longitude -- 0 to 180 degrees in increments of 1 degree, 0 to 60 minutes in increments of 1 minute, 0 to 60 seconds in increments of 1 second, east or west. Latitude -- 0 to 90 degrees in increments of 1 degree, 0 to 60 minutes in increments of 1 minute, 0 to 60 seconds in increments of 1 second, north or south. Sheath marker # entering land- 0 to 999,999 in increments of 1 mark Sheath marker # leaving landmark 0 to 999,999 in increments of 1 Units of sheath marker information km, feet, miles Landmark comments ASCII string Table A- 3: Transportation and storage Characteristics Description Transportation and storage Transportation and storage applies to the application modules assembled on the Y350C platform and individually. Packaged product The packaged product qualifies under the Distribution Transportation Cycle 1, Assurance Level I for packaged products 0--20 lbs. Recyclability The product transportation package meets the requirements for recyclability. A- 4 NetTek Analyzer OTDR Modules User Manual Appendix A: Specifications Table A- 4: Environmental characteristics Characteristic Description Temperature range without disk media installed in disk drives Operating --10 _C to +50 _C (+14 _F to 122 _F) Nonoperating --40 _C to +60 _C (--40 _F to +140 _F) Temperature range with floppy drive installed Operating +5 _C to +50 _C (+41 _F to +122 _F) Nonoperating --22 _C to +60 _C (--7 _F to +140 _F) Temperature range for floppy disk media Operating +10 _C to +50 _C (+50 _F to +122 _F) Nonoperating --40 _C to +60 _C (--40 _F to +140 _F) Temperature range for Li-ion batteries Discharge --10 _C to +50 _C (--14 _F to +122 _F) Charge 0 _C to +45 _C (+32 _F to +113 _F) Storage --40 _C to +50 _C (--40 _F to +122 _F) Humidity Operating up to +50 _C from 5 to 95% RH non-condencing Nonoperating up to +60 _C from 5 to 95% RH non-condencing Altitude Operating Up to 15,333 ft. (4600 m) Nonoperating Up to 50,000 ft. (12,192 m) Sine vibration Operating One 56 minute sinusoidal sweep at 1.5 g from 10 --500 Hz at 0.1 Octave/Min. sweep rate in each of the 3 major axes with the product operating. Nonoperating Random vibration NetTek Analyzer OTDR Modules User Manual A- 5 Appendix A: Specifications Table A- 4: Environmental characteristics (Cont.) Characteristic Description Operating 0.31 GRMS from 5-500 Hz, with power spectral density break-down points as follows: Constant 0.0002 g2/Hz from 5 to 350 Hz, then falls --3dB/octave to 0.00014 g2/Hz @500 Hz for 10 minute in each of the 3 major axes. Product continued to operate. Nonoperating 0.03 g2/Hz from 10 to 500 Hz. Mechanical shock, operating Half Sine Mechanical Shock, 50 g’s, 11 msec. duration, 3 drops on each face while operating for a total of 18 shocks. Product continued to operate. Bench handling, operating Product raised to 45 degrees with respect to bench top, 4 inch, or to the product’s point of balance, whichever occurs first -- then dropped freely to the horizontal bench top. Product continued to operate. Topple, operating Product placed on rear feet or other surface most likely to result in a topple if bumped. Tip the product over just past the point of balance in a direction that it could be reasonably be toppled and allow the product to fall freely onto a non-resilient hard floor surface. Repeat on other edges and surfaces deemed appropriate. Product continued to operate. Free-fall drop, operating Single drop from 30 inches onto each of the 6 faces, and 4 corner edges of the product onto a hard unyielding surface while operating. Floppy Drive Option to meet single drop on base (bottom down) as per Telcordia. Tilt Stand mounted on rear case is optional. Product continued to operate. A- 6 NetTek Analyzer OTDR Modules User Manual Appendix A: Specifications Table A- 5: Physical characteristics Characteristic Description Dimensions Height: 234 mm (9.2 in) Width: 190 mm (7.5 in) Depth: 33 mm (1.3 in) Weight less than 1.4 kg (less than 3 lbs.) Table A- 6: Miscellaneous characteristics Characteristic Description Recommended calibration interval 2 years NetTek Analyzer OTDR Modules User Manual A- 7 Appendix A: Specifications Table A- 7: Certifications and compliances Category Standards or description EC Declaration of Conformity -- EMC Meets intent of Directive 89/336/EEC for Electromagnetic Compatibility. Compliance was demonstrated to the following specifications as listed in the Official Journal of the European Communities: EN 61326 IEC 61000--4--2 Electrostatic discharge immunity (Performance criterion B) IEC 61000--4--3 RF electromagnetic field immunity (Performance criterion A) IEC 61000--4--4 Electrical fast transient / burst immunity (Performance criterion B) IEC 61000--4--5 Power line surge immunity (Performance criterion B) IEC 61000--4--6 Conducted RF immunity (Performance criterion A) IEC 61000--4--11 Voltage dips and interruptions immunity (Performance criterion B) EN 61000--3--2 Australia / New Zealand Declaration of C f i -- EMC Conformity A- 8 EMC requirements for Class A electrical equipment for measurement, control and laboratory use.1 AC power line harmonic emissions Complies with EMC provision of Radiocommunications Act per the following standard(s): AS/NZS 2064.1/2 Industrial, Scientific, and Medical Equipment: 1992 NetTek Analyzer OTDR Modules User Manual Appendix A: Specifications Table A- 7: Certifications and compliances (cont.) Category Standards or description FCC Emissions comply with FCC Code of Federal Regulations 47, Part 15, Subpart B, Class A Limits. 1 Emissions which exceed the levels required by this standard may occur when this equipment is connected to a test object. Table A- 8: Safety compliance Characteristic Description Laser Safety Per 21 CFR 1040.10 and IEC60825--1 Class I invisible laser products. NetTek Analyzer OTDR Modules User Manual A- 9 Appendix A: Specifications A- 10 NetTek Analyzer OTDR Modules User Manual Appendix B: User-replaceable Parts, Options, and Accessories You can order the items listed by part number below. Contact your Tektronix representative or distributor for ordering information. See page xiv for further information on contacting Tektronix. Table B- 1: User-replaceable parts Part number Description 200-4564-XX Optical Port Cover Table B- 2: Connector options Description Part number FC 119-5115-XX E2000 UCI 119-5164-XX ST 119-4513-XX Diamond3.5 119-4558-XX SC 119-5154-XX NetTek Analyzer OTDR Modules User Manual B- 1 Appendix B: User-replaceable Parts, Options, and Accessories Table B- 3: Optional accessories Part number Description 015-0684-XX Penlight Visual Fault Finder 015-0685-XX Bare Fiber Adapter 015-0686-XX Bare Fiber Adapter with Cleaver Table B- 4: Standard accessories B- 2 Quantity Part number Description 1 ea 016-1868-XX Pouch 1 ea 020-2357-XX Cleaning kit 1 ea 020-2484-XX English user manual and OTDR application CD--ROM NetTek Analyzer OTDR Modules User Manual Appendix C: Maintenance This section provides information on the following topics: H Cleaning H Transporting the OTDR H Repackaging for shipment Cleaning WARNING. To protect your eyes from laser exposure, power off the instrument and disconnect the power/charger adapter before beginning any cleaning procedure. Although the invisible laser output should not damage your eyes under normal use conditions, during cleaning, you may want to view the optical port or fiber connector closely and for a long duration, possibly using magnification. If the power is off, there will be no laser radiation to be concerned with. CAUTION. Do not touch the exposed end of the optical port or fiber connector with anything but a lint-free swab or paper wipe dampened with electronics-grade alcohol. Do not use index-matching fluid or gel on the optical port or fiber connector. It may cause contamination and a fatal error message. If index-matching material is used, clean the optical port and fiber connector thoroughly. Do not use acetone on any optical connectors. NetTek Analyzer OTDR Modules User Manual C- 1 Appendix C: Maintenance Clean the optical port, the connector adapter, and the test fiber adapter before you connect to them each time. As regular maintenance, clean the exterior of the application module to remove dust or oily build up. Cleaning the Optical Port Remove the connector adapter by unscrewing it counterclockwise. Pull the connector adapter off the optical port. When the connector adapter is removed, the optical port is accessible for cleaning. Dampen a lint-free swab or paper wipe with electronics-grade alcohol. Gently wipe across and around the port a couple of times. Cleaning the Connector Adapter 1. Blow through both ends of the connector adapter barrel with clean, canned air. 2. Dampen a lint-free pipe cleaner with electronics-grade alcohol. The pipe cleaner absorbent should be about 0.35 cm (0.15 inch) in diameter, and the wire part of the pipe cleaner should be less than 0.1 cm (0.04 inch) in diameter. 3. Gently insert the dampened pipe cleaner into the barrel of the connector adapter. Be careful not to scratch the barrel with the wire while inserting it. 4. Pull the pipe cleaner completely through the barrel only once. C- 2 NetTek Analyzer OTDR Modules User Manual Appendix C: Maintenance Cleaning the Test Fiber Connector Dampen a lint-free swab or paper wipe with electronics-grade alcohol. Gently wipe across the end of the fiber connector a couple of times. Cleaning the Exterior of the Module Remove accumulated dirt or oily residue with a mild detergent and water solution. Do not immerse the analyzer or use abrasive cleaners. 1. Close all NetTek Analyzer and module connector and battery doors. 2. Install the bus door on the rear of the NetTek Analyzer or instrument module. Review the instructions, Installing an Instrument Module, beginning on page 1-- 2. CAUTION. To prevent damage to external surfaces, avoid using chemicals that contain acetone, benzene, toluene, xylene, or similar solvents. Do not use bleach or ammonia solutions for cleaning. 3. Use a soft cloth dampened with a solution of water and mild detergent to clean the instrument. NetTek Analyzer OTDR Modules User Manual C- 3 Appendix C: Maintenance Transporting the OTDR The safest way to transport your OTDR is inside a factory-designed carrying case. Soft Case (standard accessory with the NetTek Analyzer) 1. Put the analyzer and module in the plastic bag to protect it from abrasion during shipping. 2. Place the analyzer and module in the foam cutout. 3. Restrain the analyzer and module with the built-in strap. 4. Close the case and secure the latch. Hard Cases (optional accessories with the NetTek Analyzer) 1. Put the analyzer and module in the plastic bag to protect it from abrasion during shipping. 2. Place the analyzer and module in the foam cutout. 3. Close the case and secure the latch. C- 4 NetTek Analyzer OTDR Modules User Manual Appendix C: Maintenance Repackaging for Shipment To ship the OTDR for repair, use the original packing container if possible. If the container is unfit for use or not available, use the metal carrying case or repackage the instrument as follows: 1. Use a carton with a test strength of no less than 80 kg (175 lbs). 2. Surround the instrument with protective polyethylene sheeting. 3. Cushion the instrument on all sides with at least two inches of tightly packed urethane foam or other packing material. 4. Seal the carton with shipping tape or an industrial stapler. NetTek Analyzer OTDR Modules User Manual C- 5 Appendix C: Maintenance C- 6 NetTek Analyzer OTDR Modules User Manual Appendix D: Installing an OTDR Software Upgrade You can reinstall or upgrade the OTDR module software using a serial cable to connect to the NetTek Analyzer Platform, or you can upgrade from a PC memory card using the Module Upgrade utility on the NetTek Analyzer Platform. To upgrade or reinstall the OTDR application software: 1. Insert the NetTek Analyzer OTDR CD-ROM into the PC. 2. Follow the on-screen instructions that appear. 3. If no instructions appear after you insert the CD-ROM, use Windows Explorer to display the contents of the CD-ROM and double-click the OTDR_install.htm file or open the file with a web browser. Follow the instructions that appear. NetTek Analyzer OTDR Modules User Manual D- 1 Appendix D: Installing Options and Upgrading Software D- 2 NetTek Analyzer OTDR Modules User Manual Glossary Glossary Attenuation The loss of optical signal power expressed in decibels. Attenuation Coefficient The attenuation of an optical fiber per unit length, typically expressed in dB/km. Averaging The number of times a trace is acquired and mathematically combined with previous tests to improve the resolution of low-loss features. Averaging increases the measurement accuracy and range. Backscatter The gently sloping part of the trace. Tiny imperfections in the fiber material cause a small, constant amount of light to reflect back to the OTDR over the whole distance of the fiber. See illustration. Backscatter Coefficient A specification from the fiber manufacturer for the amount of light reflected per distance of fiber. This parameter is used in OTDR reflectance calculations. If you do not know the correct backscatter coefficient, use the OTDR factory-default values. Cabling Factor The percent of extra fiber in the sheath of the cable. Because of the spiral wrap of the cable and snaking (side-to-side variations inside the cable sheath), the physical length of the fiber differs from the sheath length. The cabling factor is the percentage of difference between the two. This allows you to match up the OTDR readings (fiber length) with the printed sheath markings. Echo Event Marked with an “e” in the event table. An event caused by reflections off of reflective events in the fiber, usually NetTek Analyzer OTDR Modules User Manual Glossary- 1 Glossary mechanical connectors and the end of the fiber. These reflections create an echo of the real event at a distance that is a multiple of the real event. For example, if there is a strong reflection at 2 km, you might see an echo at 4 km. The OTDR identifies echoes and marks them, but it does not remove them because there could be a real connector. In the example, you might really have a connector a 4km. Pure echoes tend to have little or no loss. On shorter fibers with more reflective end connectors you might also see an echo of the entire fiber past the end. Event A square marker on the trace to indicate a change in fiber characteristics that exceeds the preset tolerance. Events can be marked by the OTDR or by the operator. See Reflective Event and Non-reflective Event. Event Dead Zone The minimum distance after an event that the OTDR can accurately measure the distance to the next event. See Loss dead zone. Event Threshold The minimum or maximum change in value before the OTDR indicates an event. GPS Global Positioning System. A navigational system which determines latitude and longitude coordinates from satellite signals. Grouped Events Marked with a “g” in the event table. Events located close enough together so that the OTDR analysis software can recognize that there are multiple events, but cannot measure the loss separately. Grouped events are wider apart than the event dead zone, but closer together than the loss dead zone. The OTDR will show the different distances for the multiple events, but only one loss measurement. Glossary- 2 NetTek Analyzer OTDR Modules User Manual Glossary Landmark A house-shaped marker on the trace that indicates a geographical location. Landmarks are added by the operator. Laser Acronym for Light Amplification by Stimulated Emission of Radiation. A device that produces an intense beam of light of a specific wavelength. Link Loss The power loss from the front panel to the end of the fiber. When the trace is visible, the link loss readout appears to the right of the event table data. Loss A decrease in the power measured by the OTDR between two points on the trace. Loss dead zone The minimum distance after an event where the OTDR can measure the loss of the next event as a distinct event. See Event dead zone. Macrobends A flexed fiber where the radius of the bend is greater than the core size of the fiber. Microbends A flexed fiber where the radius of the bend is less than the core size of the fiber. Multimode fiber An optical fiber that supports propagation of more than one bound mode. Non-reflective Event A point on the trace where the power level of the backscatter suddenly decreases. Caused by a break in the fiber, a fusion splice, a bend, or an unpolished end of the fiber. See Reflective Event. NetTek Analyzer OTDR Modules User Manual Glossary- 3 Glossary Optical Fiber A filament of transparent dielectric material, usually glass or plastic, and usually circular in cross section, that guides light. An optical fiber usually has a cylindrical core surrounded by, and in intimate contact with, a cladding of similar geometry. The refractive index of the core must be slightly higher than that of the cladding for the light to be guided by the fiber. OTDR Optical Time Domain Reflectometer; an optoelectronic device used to characterize an optical fiber. An OTDR injects a series of light pulses into the fiber under test. It then extracts, from the sending end of the fiber, light that is scattered and reflected back to the source. The intensity of the return pulses is measured and integrated as a function of time, and is plotted as a function of fiber length. An OTDR can tell you the length of a fiber, its overall attenuation, and the location and nature of faults in the fiber. Pulse Width The duration in time (ns) that the laser pulses the fiber. Longer pulse widths provide greater range; shorter pulse widths provide shorter loss dead zones between events. Reflectance Reflectance (or return loss) is defined as the ratio of returned power to input power, in dB. Typical values are - 20 dB (large reflectance) to - 50 dB (small reflectance). Reflective Event A point on the trace where the reflected power level suddenly raises above the backscatter. Caused by connectors, splices, or the end of the fiber. See Non-reflective Event. Refractive Index A specification of the fiber. The ratio of the speed of light in a vacuum to the speed of light in the fiber. Affects the OTDR distance measurements. Glossary- 4 NetTek Analyzer OTDR Modules User Manual Glossary Singlemode fiber An optical fiber that permits only the lowest order bound mode to propagate at the wavelength of interest. Splice The joining of two separate optical fibers. Splices can be mechanical (connectors) or fusion (melted). Splice Loss Any loss of optical power at a splice. A typical splice of optical fibers has losses for a number of reasons. Some losses are due to the fiber properties and others are due to the method or device used to make the splice. Wavelength A specification describing the type of light (the distance between two crests or troughs in a light wave), produced by the laser in the OTDR. The best wavelength to use for testing an optical system is generally the system’s operating wavelength. However, sometimes 1625 nm is used to measure active systems because it is outside the band used for communication. NetTek Analyzer OTDR Modules User Manual Glossary- 5 Glossary Glossary- 6 NetTek Analyzer OTDR Modules User Manual Index Index A About Trace, 2-- 36 Accelerator keys, operating with a keyboard, 3-- 20 Accessories optional, B-- 2 standard, B-- 2 Adapter installation of, 1-- 9 removal of, 1-- 10 Adding events, 3-- 26 landmarks, 3-- 28 Address, Tektronix, xiv Analysis, basic tutorial, 2-- 16 Asterisk, 2-- 14 Attenuation, Glossary-- 1 Attenuation coefficient, Glossary-- 1 Auto Test and Save, 3-- 12 Averaging, 2-- 24, Glossary-- 1 acquisition without. See Real Time test mode B Backscatter, Glossary-- 1 Backscatter coefficient definition, Glossary-- 1 setting the, 2-- 26 Basic tutorial, 2-- 15 Bend, macro or micro, Glossary-- 3 Bidirectional Averages measurement, 3-- 9 BuiltInDisk, 2-- 30 Bus door, 1-- 3 Buttons cursor, 2-- 11 help, 2-- 2 main screen, 2-- 4 refresh, 2-- 4 Run Settings, 2-- 4 soft keypad, 2-- 5 Trace Settings, 2-- 5 zoom sizing, 2-- 9 C Cabling factor definition, Glossary-- 1 setting the, 2-- 26 Calibration interval, A-- 7 Certifications, A-- 8 CFF file type, 3-- 22 Cleaning instructions, C-- 1 Closing the optical port, 1-- 7 Compare two traces, 3-- 8 Configuring settings, 2-- 21 Connector adapter installation, 1-- 9 removal, 1-- 10 Connector options, standard, B-- 1 Contacting Tektronix, xiv Conventions, xii Coordinates, GPS, 3-- 23 Copy buttons, 2-- 28 Cover bus, 1-- 3 optical port, 1-- 8, B-- 1 Cumulative Loss, 2-- 13 Cursor buttons, 2-- 4 NetTek Analyzer OTDR Modules User Manual Index- 1 Index Cursors, 2-- 11 join , 3-- 21 D Dead zone event, Glossary-- 2 loss, Glossary-- 3 Deleting events, 3-- 29 landmarks, 3-- 30 Delta readouts, showing or hiding, 2-- 6 Difference measurement, 3-- 11 Dimensions, A-- 7 Display Overview Window, 2-- 7 Distance columns, event table, 2-- 13 Distance Units, setting the, 3-- 21 Documentation conventions, xii Documentation set, xiii Documenting fibers, events, and landmarks, 3-- 23 Door instrument module bus, 1-- 3 optical port, 1-- 8, B-- 1 Dual Trace Mode, 3-- 8 E e, 2-- 14 Echo event, Glossary-- 1 End, 2-- 14 multiple events marked as, 3-- 17 End Detection, setting the, 2-- 24 End of Fiber basic tutorial, 2-- 18 test mode, 2-- 25 Index- 2 English units. See Distance Units, setting the Event, Glossary-- 2 dead zone, Glossary-- 2 non-reflective, Glossary-- 3 number, 2-- 13 reflective, Glossary-- 4 showing or hiding markers, 2-- 6 Event / Landmark Notes, 2-- 13, 3-- 23 Event Loss measurement, 3-- 2 setting the threshold, 2-- 27 Event Loss Limit, 2-- 26 Event table column definitions, 2-- 12 symbols and highlights, 2-- 14 Event threshold, Glossary-- 2 Events, freezing, 3-- 30 Events and landmarks, adding, moving, and deleting, 3-- 26 Extensions, 3-- 22 F Factory Defaults, 3-- 21 Feet, 3-- 21 Fiber Notes, 3-- 25 Fiber, optical, Glossary-- 4 FiberMaster files, 3-- 22 File types, 3-- 22 Find information, start Help, 2-- 1 Flagging events and link loss. See Limits FMTAP files, 3-- 22 Formats, file types, 3-- 22 Freezing events, 3-- 30 NetTek Analyzer OTDR Modules User Manual Index Front Panel Loss Warning, setting the, 3-- 21 G g, 2-- 14 GPS definition, Glossary-- 2 entering coordinates, 3-- 23 Grid lines, show or hide, 2-- 6 Grouped events definition, Glossary-- 2 marked as end, 3-- 17 H Help, find information, 2-- 1 Help buttons, 2-- 2 Hide or show main screen items delta readouts, 2-- 6 event markers, 2-- 6 event table columns, 2-- 12 grid lines, 2-- 6 Input Panel, 2-- 1 refresh button, 2-- 4 restoring the zoom box, 2-- 9 settings panel, 2-- 5 trace or table, 2-- 5 when printing, 3-- 19 zoom scroll bars, 2-- 10 Highlighting out-of-limit data, 2-- 26 Highlights and symbols, event table, 2-- 14 Hot keys, operating with a keyboard, 3-- 20 I Icons. See Buttons Higher resolution, multimode tests, 3-- 18 Increasing resolution, multimode tests, 3-- 18 Increasing the range, 3-- 16 Information, getting help, 2-- 1 Input Panel, opening and closing, 2-- 1 Installation connector adapter, 1-- 9 instrument module, 1-- 2 Installing the OTDR module software, D-- 1 IntelliTrace Plus special optimizations, 2-- 25 test mode, 2-- 25 J Join Cursors, 3-- 21 K Keyboard, operating the OTDR with, 3-- 20 Keypad, opening and closing the Input Panel, 2-- 1, 2-- 2 L L, 2-- 14 Landmark, Glossary-- 3 NetTek Analyzer OTDR Modules User Manual Index- 3 Index Landmarks and events adding, moving, and deleting, 3-- 26 making notes, 3-- 23 viewing notes in the event table, 2-- 13 Laser definition, Glossary-- 3 optical port location, 1-- 7 Latitude and longitude, 3-- 23 Length of the fiber basic tutorial, 2-- 18 End of Fiber test mode. See **Empty** Limits, 2-- 26 Link loss, Glossary-- 3 Link Loss Limit, 2-- 26 Locking events. See Freezing events Loss, 2-- 13, Glossary-- 3 Loss dead zone, Glossary-- 3 Loss delta, 2-- 13 LSA Slope, advanced calculations, 3-- 5 M Macrobends, Glossary-- 3 Main screen buttons, 2-- 4 elements, 2-- 3 Maintenance, C-- 1 Manual conventions, xii Manual test mode, 2-- 25 Markers, show or hide, 2-- 6 Maximizing the help screen, 2-- 2 Measurements, 3-- 1 Bidirectional Averages, 3-- 9 Difference, 3-- 11 Event Loss, 3-- 2 Index- 4 ORL (Optical Return Loss), 3-- 7 Reflectance, 3-- 6 basic tutorial, 2-- 15 Two Point, 3-- 4 Meters, 3-- 21 Microbend, Glossary-- 3 Miles, 3-- 21 Moving events, 3-- 27 landmarks, 3-- 29 Multimode fiber, Glossary-- 3 Multimode sample file, 2-- 47 Multimode tests, higher resolution, 3-- 18 N NetTek Analyzer documentation, xiii No averaging. See Real Time test mode Nomenclature, xi Non-reflective event, Glossary-- 3 Notes, 3-- 23 O Opening files, 2-- 33 Optical connector, stowing, 1-- 7 Optical fiber, Glossary-- 4 ORL (Optical Return Loss) measurement, 3-- 7 OTDR, Glossary-- 4 OTDR types, xi Out of Range, 2-- 14 Out of Range, 3-- 16 Out-of-limit data, highlighting. See Limits Overview window, 2-- 7 NetTek Analyzer OTDR Modules User Manual Index P Run tabs, 2-- 21 Packaging for shipment, C-- 5 Phone number, Tektronix, xiv Platform documentation, xiii Power-On Settings, setting the, 3-- 21 Printing, 3-- 19 Product support, contact information, xiv Products, xi Pulse width, 2-- 24, Glossary-- 4 S R Range increasing the, 3-- 16 setting the, 2-- 24 Readouts, show or hide, 2-- 6 Real Time test mode, 2-- 25 Recording fiber, event, and landmark notes, 3-- 23 Red highlighting, 2-- 14 Reflectance, 2-- 13, Glossary-- 4 Reflectance Limit, 2-- 26 Reflectance measurement, 3-- 6 Reflectance Threshold, setting the, 2-- 27 Reflective event, Glossary-- 4 Refractive index definition, Glossary-- 4 setting the, 2-- 26 Refresh the screen, 2-- 4 Related documentation, xiii Related products, xii Removal connector adapter, 1-- 10 instrument module, 1-- 6 Resolution, multimode tests, 3-- 18 Restore Zoom Box, 2-- 9 Sales support, contact information, xiv Sample files, 2-- 37 Test-- MM.SOR, 2-- 47 Test1.SOR, 2-- 38 Test2.SOR, 2-- 46 Saving, 2-- 29 information saved with a test, 2-- 29 settings only, 2-- 31 Screen proportions, trace and table regions, 2-- 5 Service support, contact information, xiv SET file type, 3-- 22 Settings, 2-- 21 copying to other tabs, 2-- 28 factory defaults, 3-- 21 information from a saved trace, 2-- 36 opening .SET files, 2-- 33 saving .SET files, 2-- 31 limits, 2-- 26 test settings, 2-- 21 thresholds, 2-- 27 Sheath marker information, 3-- 23 Shipping, how to package, C-- 5 Show or hide main screen items delta readouts, 2-- 6 event markers, 2-- 6 event table columns, 2-- 12 grid lines, 2-- 6 Input Panel, 2-- 1 refresh button, 2-- 4 restoring the zoom box, 2-- 9 settings panel, 2-- 5 NetTek Analyzer OTDR Modules User Manual Index- 5 Index trace or table, 2-- 5 when printing, 3-- 19 zoom scroll bars, 2-- 10 Singlemode fiber, definition, Glossary-- 5 Singlemode sample file, 2-- 38, 2-- 46 Sizing the zoom box, 2-- 9 Slope, 2-- 13 Slope Limit, 2-- 26 Software, version, xi Software upgrade, D-- 1 SOR file type, 3-- 22 Specifications, A-- 1 Splice, Glossary-- 5 Splice loss, Glossary-- 5 Symbols and highlights, event table, 2-- 14 System Factory Defaults, 3-- 21 T Table column definitions, 2-- 12 symbols and highlights, 2-- 14 TARGET1 files, 3-- 22 Technical support, contact information, xiv Tektronix, contacting, xiv Telcordia format, 3-- 22 Test Mode, 2-- 24, 2-- 25 Test settings, 2-- 21 Test time, 2-- 24 Test-- MM.SOR, 2-- 47 Test1.SOR, 2-- 38 Test2.SOR, 2-- 46 TFP2 FiberMaster files, 3-- 22 TFP2A files, 3-- 22 TFS3031 files, 3-- 22 Index- 6 Third tab Bidirectional Averages, 3-- 9 Difference measurements, 3-- 11 Thresholds, setting, 2-- 27 Thumb screw, 1-- 5 Trace display options, 2-- 6 Trace tabs, 2-- 21 Transporting the OTDR, C-- 4 Tutorial, 2-- 15 Two Point Loss, basic tutorial, 2-- 18 Two Point measurement, 3-- 4 Two Point Slope, advanced calculations, 3-- 5 U Units of distance, 3-- 21 Update the screen, 2-- 4 Upgrading the OTDR module software, D-- 1 URL, Tektronix, xiv V Version, software/hardware, xi Viewing the trace and table, 2-- 5 W Wavelength, Glossary-- 5 setting the, 2-- 24 Wavelength choice tradeoffs, multimode tests, 3-- 18 Web site address, Tektronix, xiv Weight, A-- 7 WFM file type, 3-- 22 NetTek Analyzer OTDR Modules User Manual Index Y Yellow highlighting, 2-- 14 Zooming, 2-- 7 moving the zoomed view, 2-- 10 restoring the zoom box, 2-- 9 sizing the zoom box, 2-- 9 Z Zero Reference, setting the, 2-- 26 Zoom Scroll Bars, 2-- 10 NetTek Analyzer OTDR Modules User Manual Index- 7 Index Index- 8 NetTek Analyzer OTDR Modules User Manual