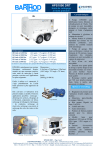
Download User Manual 3`` Dual Monoblock BOP OPS-5481
Transcript
Unit 12 Barratt Trading Estate, Denmore Road, Bridge of Don, Aberdeen AB23 8JW
User Manual
3’’ Dual Monoblock BOP
OPS-5481
This is a certified safety critical product and modifications or
changes not authorised by Phuel Oil Tools may compromise the
Safety, Functionality and Certification of the assembly.
OPS-5481 Rev A
User Manual
3’’ Dual Monoblock BOP
Table of Contents
Table of Contents.............................................................................................. i
Table of Tables ................................................................................................ ii
Table of Figures ............................................................................................... ii
Revision History .......................................................................................... iii
Safety.............................................................................................................. iv
1 Introduction ............................................................................................... 5
1.1
General .............................................................................................. 5
1.2
Product Identification ......................................................................... 6
2 Technical Description ............................................................................... 7
2.1
Basic Description ............................................................................... 7
2.2
Balanced Piston ................................................................................. 7
3 Basic Operation ........................................................................................ 8
3.1
Operating the Rams........................................................................... 8
3.2
Equalising across the rams................................................................ 9
3.3
Job Planning .................................................................................... 10
4 Operational Characteristics..................................................................... 12
4.1
Sealing Characteristics .................................................................... 12
4.2
Fatigue Testing ................................................................................ 12
4.3
Ram Access Testing ........................................................................ 13
4.4
Shearing Performance and limitations ............................................. 13
4.5
Performance of Ram Guides ........................................................... 13
4.6
Temperature and Pressure Limitations ............................................ 14
5 Maintenance ........................................................................................... 16
5.1
Introduction ...................................................................................... 16
5.2
Schedule.......................................................................................... 16
5.3
Safety .............................................................................................. 17
5.4
Ram Seal Redress........................................................................... 17
5.5
Maintenance Record Sheet ............................................................. 23
6 Testing .................................................................................................... 24
6.1
Hydraulic BOP ................................................................................. 24
7 Drawings and Bills of Material................................................................. 26
8 Spares .................................................................................................... 34
OPS-5481 Rev A
i
User Manual
3’’ Dual Monoblock BOP
Table of Tables
Table 1: Technical Data ................................................................................... 6
Table 2: Shearing performance and limitations .............................................. 13
Table 3: Maintenance Record ........................................................................ 23
Table 4: 3” Dual Monoblock BOP 192-5481-HV0 .......................................... 26
Table 4: Modular Hydraulic Actuator Assembly 190-4289-HV0 ..................... 28
Table 5: Wireline Ram Assy 190-4360-HH0 .................................................. 30
Table 6: Shear Ram Assy 190-4359-HH0 ...................................................... 30
Table 7: 192-5511-HV0 Injection Module....................................................... 31
Table 9: Modular BOP Hydraulic Fittings 190-4433-HS1 ............................... 33
Table 10: Hydraulic Actuator Redress Kit RDK-4289-HV0 ............................ 34
Table 11: Injection Module Redress Kit RDK-5511-HV0................................ 34
Table 11: Wireline Ram Redress Kit RDK-4360-HH0 .................................... 34
Table of Figures
Figure 1: 3’’ Dual Monoblock BOP .................................................................. iv
Figure 2: Typical identification tag.................................................................... 6
Figure 3: Section through BOP rams ............................................................... 7
Figure 4: Equalisation Valve Layout................................................................. 9
Figure 5: Correct lubrication for storage ......................................................... 11
Figure 6: Qualified Operating Envelope ......................................................... 15
Figure 7: Accessing the rams......................................................................... 17
Figure 8: BOP Wireline Rams ........................................................................ 18
Figure 9: BOP Shear Rams ........................................................................... 18
Figure 10: Hydraulic Actuator Assembly (Part 1) ........................................... 20
Figure 11: Hydraulic Actuator Assembly (Part 2) ........................................... 21
Figure 12: Instructions for greasing of the Piston Shaft ................................. 22
Figure 13: 3” Dual Monoblock BOP 192-5481-HV0 ....................................... 27
Figure 13: 3’’ Modular Actuator Hydraulic 190-4289-HV0 .............................. 29
Figure 14: Wireline Ram Assy 190-4360-HH0 ............................................... 30
Figure 15: Shear Rams 190-4359-HH0 ......................................................... 30
Figure 16: Injection Module 192-5511-HV0 ................................................... 32
OPS-5481 Rev A
ii
User Manual
3’’ Dual Monoblock BOP
Revision History
Issue, Release Date
Description
Rev A, 04 Sep 13
Initial Issue
OPS-5481 Rev A
iii
User Manual
3’’ Dual Monoblock BOP
Safety
WARNING: Trapped air requires considerable time to compress and
when it is compressed is highly dangerous. It has enough stored
energy to separate parts with considerable force.
This product contains high pressures, when in operation. Failure of any part
may cause injury. Welding, corrosion, rough handling, or other abuse may
affect the Integrity of this product.
All pressure equipment has a particular pressure rating and care must be
taken to ensure that no item is used in a situation that may cause its working
pressure to be exceeded.
All personnel involved in pressure testing must be formally trained, competent
and utilise the appropriate PPE.
Ensure the identification plate is fitted and is displaying the correct information
This equipment and the equipment it is attached to is heavy never position
yourself below a suspended load
Figure 1: 3’’ Dual Monoblock BOP
OPS-5481 Rev A
iv
User Manual
3’’ Dual Monoblock BOP
1 Introduction
1.1 General
The Blow Out Preventer (BOP) provides essential safety barriers against well
pressure during wireline operations. It is usually located directly above the
Xmas tree flange. The BOP has two sets of wireline rams for sealing against
well pressure on slick line and/or braided line,
This BOP is compatible with the Phuel 3” Modular BOP system with
interchangeable rams and actuators. A sets of shear and seal rams can be
fitted to this BOP, which are capable of cutting through the wire and then
sealing against the well pressure.
The ram is attached to a hydraulic piston that can be extended or retracted to
energise or retract the ram. The ram has a set of inner and horse shoe outer
seals that when compressed against the opposite ram forms a continuous
seal that is further energised by the application of pressure in one direction.
The ram consequently can be arranged so that it holds pressure from below
the BOP or from above.
Across the rams there is an equalisation valve assembly. This is used to
equalise pressure across the rams so that the rams can be withdrawn to open
up the well bore. The equalisation valve assembly consists of a cone seal set
on a screw. Unwinding the screw opens the valve and allows equalisation
across the rams. Tightening the screw closes the seal and prevents pressure
from passing through the valve assembly. There is also a circuit to allow the
injection of chemicals into the well or across the equalisation valves, and can
be used to prevent the valves freezing while bleeding down gas (by injecting
glycol for example). The injection port has a check valve to prevent well
pressure entering the injection system.
The BOP is mounted to a crash frame assembly that provides lifting points
and protection during transport.
This user manual serves as an introduction to the equipment and contains the
relevant specifications, operation, planning and maintenance instructions,
parts list and drawings.
OPS-5481 Rev A
5
User Manual
3’’ Dual Monoblock BOP
1.2 Product Identification
Phuel products are identified by a unique serial number that facilitates full
product traceability. Each product is supplied with a documentation pack that
contains product certification and material/inspection reports. The serial
number is always etched on the surface of the product but can sometimes be
difficult to find or read after painting. A customer identification number is also
included to allow the customer to track the asset in their system.
The nameplate tag that is stamped with the information shown below is
secured either by a stainless steel band or fixed directly onto the assembly.
This tag should be located in the first instance to ensure that this manual and
any other paperwork refers to the correct equipment.
Figure 2: Typical identification tag
1.3 Technical Specification
Working Pressure
Test Pressure
Service
Hydraulic Pressure
Stroke Volume
Weight
Crashframe SWL
10,000 Psi
15,000 Psi
H2S
2900 psi max (200 bar)
25 cu-in (0.41 Litre) Total Cycle
15.6 cu-in (0.26 Litre) to Close
9.4 cu-in (0.15 Litre) to Open
1057 lbs/ 479 kg
2 Tonne (2,000 Kg)
Table 1: Technical Data
OPS-5481 Rev A
6
User Manual
3’’ Dual Monoblock BOP
2 Technical Description
2.1
Basic Description
The Phuel BOP provides a positive barrier against well pressure while
performing intervention operations. The equipment consists of one or more
sets of rams, operated either manually or hydraulically, that can be individually
closed to form a seal against pressure. The orientation of the ram outer seal
determines whether the rams hold pressure from above or below. By
opposing adjacent ram sets it is possible to apply pressure between the rams
through a grease injection port, normally at a pressure greater than the well
pressure, and thus form a positive protection barrier. This technique is
particularly effective when sealing against braided wire-line as a leak tight seal
cannot be obtained due to the construction of the wire. The high viscosity of
the grease allows the pressure to be maintained even though a small leak (of
grease) still exists.
Figure 3: Section through BOP rams (closed position)
2.2 Balanced Piston
The actuator is designed with a balanced hydraulic piston that eliminates the
end load that can be created due to well pressure. This means that the torque
or closing pressure of the actuator is independent of the well pressure inside
the BOP. This feature has two major advantages:
The hydraulic volume requirements of the actuator are much less than
a conventional BOP, this reduces the requirements for accumulator
storage and charging.
The BOP can be closed with the same amount of effort no matter what
the well bore pressure exists in the bore. This is particularly useful with
a manual actuator and ensures quick and safe closure.
OPS-5481 Rev A
7
User Manual
3’’ Dual Monoblock BOP
3 Basic Operation
3.1
Operating the Rams
Note – Always ensure that the pressure across the rams has been
equalised before opening.
3.1.1 Hydraulic Operation
The BOP has two pairs of connections for each ram set for open and close. It
is important that both connections are connected, as the fluid displaced by the
movement of the piston must be allowed to pass through the valve system
back to the reservoir.
A Well Control Unit (WCU) is normally used to operate the BOP in an offshore
environment. Refer to the relevant manual for that equipment for details of
operation and connection. An alternative pump pack may be used for onshore
maintenance work but the operation of this equipment is out with the scope of
this manual.
3.1.2 Locking the Hydraulic Rams
After closing with hydraulic pressure the piston can be mechanically locked by
winding in the manual mechanism. Turning the drive shaft in a clockwise
direction will advance the locking mechanism by 3mm per turn. It is therefore
necessary to turn the hand wheel 20-25 turns to lock in the piston. Continue to
turn until the hand wheel stops, indicating that the piston is now against the
back-up lock.
For safety reasons and to reduce the mechanical effort required, Phuel
recommends that the hydraulic pressure be removed or reduced while
closing the mechanical back up. This reduces the risk of injury caused by
the failure of a seal under hydraulic pressure and decreases the time required
to implement the back-up feature.
It is important to remember that the manual lock must be fully withdrawn
before the rams can be opened.
3.1.3 Proper Use
In the event that the BOP is closed against wire during an operation, it is
essential that the Inner seals are replaced after that job has been completed.
Working practice and procedures must reflect this requirement.
Blind shear seals should always be fitted on the shear rams. They should be
tested regularly to verify that they are suitable for operation. If they are ever
OPS-5481 Rev A
8
User Manual
3’’ Dual Monoblock BOP
closed during a live well operation they should be replaced when the
operation is complete.
3.1.4 Bleed Down Rate in Gas Wells
To avoid explosive decompression in gas wells (or oil wells were there is a
large quantity of gas present) it is important to control the bleed down rate of
the pressure. The following procedure is recommended:
1. Reduce pressure from 10000 to 2000 Psi at a rate of 1000 psi per
minute
2. Reduce pressure from 2000 psi to 1000 psi at a rate of 100 psi every
one minute.
3. Reduce pressure from 1000 Psi to zero at a rate of 20 psi per minute.
3.2
Equalising across the rams
There is an external port that allow the connection of a pressure gauge or
dump valve if required. There is also an injection port that feature a check
valve.
There is an isolation valve for each opening into the BOP Body which allow
flow to either side of the rams. It is therefore possible to equalise across any
ram or combination of rams.
VALVE 1
VALVE 2
INJECT
GAUGE
VALVE 3
Figure 4: Equalisation Valve Layout (note ram orientation may differ)
OPS-5481 Rev A
9
User Manual
3’’ Dual Monoblock BOP
3.3 Job Planning
3.3.1 Before the Job
Note – Configuration will determine which processes are required
•
•
•
•
Check that the certification is within date and that the scheduled
maintenance is up to date.
All blind (shear) inner seals need to be inspected after 30 pressure cycles,
and replaced where necessary. Wire-line seals must be tested without the
use of test rods and must always be replaced after being closed on wire
during normal operations. Always inspect the wireline seals for signs of
wear or damage and replace if necessary.
Examine the BOP Assembly, to make sure that it is good operating order
and assembled with the Rams in the correct orientation for the desired
operation.
Functioning of the Rams may be checked, by running both Rams to the
closed position.
3.3.2 During the Job
•
•
•
•
•
Special care should be taken that the Rams are fully open when passing
any equipment through them. The impact of the tool string hitting a Ram
may damage the Ram to such an extent that the Ram may no longer Seal,
or prevents it from fully opening.
Only lift the BOP using suitable lift caps. Do not sling or attach lifting
equipment to the crash frame or bars to lift the BOP assembly.
Care should be taken to completely remove any residual pressure or
accumulated pressure existing on Lubricator equipment above the BOP,
before disconnecting the Lubricator.
Hydraulic Hose ends should never be allowed to drop in to dirt or grit, or
otherwise become contaminated with foreign matter. If end connections
become dirty, they should be cleaned thoroughly with solvent and dried.
Only clean Hydraulic fluid should be used (Shell Tellus 22 is
recommended) to operate the BOP. The use of mixed types, dirty, or very
old fluid of unknown origin is not recommended. When one of these
conditions is known or suspected, the hydraulic system should be flushed
and the hydraulic fluid replaced.
3.3.3 After the Job
After each job, the BOP should be thoroughly cleaned, repaired as required
and redressed.
The BOP should be protected against the effects of corrosion to ensure that
the expected functionality is achieved. The diagram overleaf highlights the key
areas to consider.
OPS-5481 Rev B
10
User Manual
3’’ Dual Monoblock BOP
Grease seal bore and threads
before fitting thread protectors
Cover the assembly when
in long term storage
With the actuators closed
pump grease to all grease
ports until it flows through the
other port
Smear grease on all bars
Touch up paint when it is
damaged or coat damaged
area with thick grease
Figure 5: Correct lubrication for storage
OPS-5481 Rev A
Grease before fitting
protectors. For long term
storage fit test stump and fill
with oil
11
User Manual
Modular BOP System
4 Operational Characteristics
4.1 Sealing Characteristics
4.1.1 Minimum Hydraulic Pressure
The actuator is pressure balanced and so it is possible to close the rams
against any well pressure with more than 500 psi. In order to ensure that the
BOP seals correctly it is recommended to apply the full closing pressure of
2900 psi (200 bar). In most cases the BOP will seal with pressures greater
than 1,000 psi (70 bar) applied.
4.1.2 Opening the BOP with differential pressure
It is not recommended that the BOP should be opened with differential
pressure across the rams. The pressure should always be equalised first,
using the equalising valves.
Even with differential pressure applied across the rams it is possible for the
BOP to be opened if the opening pressure is greater than 1400 psi. The
manual locking feature should therefore be used when the BOP is closed to
prevent accidental opening
4.2 Fatigue Testing
Testing has been performed to establish the fatigue limit of the actuators and
shear rams so that preventative maintenance can be scheduled to replace
worn seals or parts.
A total of 546 close/open cycles have been completed without failure including
78 pressure cycles to maximum working pressure. This test simulates closing
and opening the BOP once per day and testing well bore pressure at 300 psi
and 10,000 psi once per week for 1.5 years of service. Records must be
maintained to ensure that the seals are replaced before this limit is exceeded.
If records do not exist then the seals should be changed every year as a
minimum.
Fatigue life has not been defined on the wireline seals due to their less critical
function and the fact that these are to be replaced whenever they are closed
on the wire. Pre-job inspection to verify their condition is therefore required
and replacement if they are not in good physical condition.
OPS-5481 Rev A
12
User Manual
Modular BOP System
4.3 Ram Access Testing
Testing has been performed to determine the ability of the BOP to undergo
repeated ram changes without affecting operating characteristics. The tests
have shown that the rams were accessed a total of 200 times (test limit)
without failure of the sealing or locking mechanism. Records must be
maintained to ensure that the seals are replaced before this limit is exceeded.
If records do not exist then the seals should be changed every year as a
minimum.
4.4 Shearing Performance and limitations
Testing has been conducted to verify the shearing and sealing capabilities of
the shear rams. The minimum tool string weight must be achieved either by
direct weight or the combination of that and additional tension to ensure that
the cutting performance is achieved.
Wire Size
(dia)
No of
wires
Wire
Type
0.125”
1
Slick line
0.125”
6
0.160”
Minimum
Tool String
Weight
250 Kg
Hydraulic
Pressure needed
to shear at zero
bore pressure
1060 psi
Maximum
Wellbore
Pressure
(psi)
10,000 psi
Slick line
250 Kg
2120 psi
10,000 psi
1
Slick line
250 Kg
1670 psi
10,000 psi
7/32”
1
Braided
250 Kg
1060 psi
10,000 psi
7/32”
2
Braided
250 Kg
1700 psi
10,000 psi
9/32”
1
Braided
250 Kg
1670 psi
10,000 psi
5/16”
1
Braided
250 Kg
1700 psi
10,000 psi
7/16”
1
Braided
250 Kg
2970 psi
10,000 psi
15/32”
1
Braided
250 Kg
2970 psi
10,000 psi
Table 2: Shearing performance and limitations
Note – The shear rams are designed to cut only once. The rams must be
replaced once they are used to cut wire.
4.5 Performance of Ram Guides
Testing has been conducted to verify that the wireline rams can centralise the
cable without cutting – at extreme wire positions and with applied side
loadings. The rams always closed without incident or damage to the cable.
Operational planning and set up should still attempt to minimise the expected
side loading on the wire by ensuring the lubricators are vertical and that the
tool string is centralized as much as possible in the well bore.
OPS-5481 Rev A
13
User Manual
Modular BOP System
4.6 Temperature and Pressure Limitations
Testing has been conducted to verify the performance of the BOP at extreme
operating temperatures.
4.6.1 General Sealing
The BOP seals (typically O-Rings and T-Seals of 90 hard Viton material with
part numbers listed in this manual) have been qualified for operating
temperatures between -10C and 121C with no restrictions to the operating
pressure.
4.6.2 Blind Ram Shear Seals
The shear rams (using blind ram inner shear seals part number 190-4141-H80
& 190-4142-H80) have been qualified for operation between -10C and 121C
with no restrictions to the working pressure.
4.6.3 Wireline Multi-Seals
The wireline multi-seal (part number 190-4170-H80 & 190-4171-H80) are
qualified to be used within the operating envelope shown below. If operations
dictate that the expected surface temperatures and pressures exceed the
operating envelope then wire specific inner seals must be used instead of the
standard multi-seal. Consult Phuel Oil Tools for advice and part numbers.
OPS-5481 Rev A
14
User Manual
3’’ Dual Monoblock BOP
Figure 6: Qualified Operating Envelope
OPS-5481 Rev A
15
User Manual
3’’ Dual Monoblock BOP
5 Maintenance
All maintenance to be carried out by suitably qualified and competent
personnel
5.1
Introduction
Regular maintenance of the equipment using Phuel redress kits or approved
spares is essential to its continued safe operation. Ensure that the pre and
post job operating procedures are followed and that maintenance records are
kept.
5.2
Schedule
The maintenance schedule may be governed by international or company
standards and the following is considered to be the minimum requirements.
5.2.1 Pre & Post Job
Refer to Section 3.3.1 and Section 3.3.3 for details.
5.2.2 Yearly
• Visually inspect the BOP for signs of wear or damage
• Close the rams with 3,000 psi and hold for 10 minutes with no leaks
allowed. Open the rams with 3,000 psi and hold for 10 minutes with no
leaks allowed. If there are leaks then the actuators will need to be disassembled and the seals replaced.
• Disconnect the actuators and inspect the rams (guides and seals).
Replace the seals if they are worn or damaged. Re-assemble
• Re-apply grease to the balanced piston, ref Figure 13: Instructions for
greasing of the Piston Shaft
• Verify that the equalising valves are moving freely and smoothly
• Verify that the tie bolt nuts and all other screws are tight
• Remove external rust or treat using a non-toxic rust remover gel or liquid.
• Inspect the condition of quick union sealing surfaces and surface coatings,
repair/replace as necessary.
• If any of the above are showing signs of wear or damage then strip down
to investigate and replace parts or seals as necessary.
• Re-assemble and then pressure test according to Section 7
• Inspect paintwork and repair where necessary.
5.2.3 Five Yearly
• Recertification by Phuel Oil Tools in accordance with DNV-RP-E101
OPS-5481 Rev A
16
User Manual
3’’ Dual Monoblock BOP
6 Safety
•
•
•
•
This product contains high pressures, when in operation. Failure of any
part may cause injury. Welding, corrosion, rough handling, or other abuse
may affect the Integrity of this product.
Wear appropriate personal protective equipment.
Do not over exert yourself while using torque wrenches. Use appropriate
mechanical advantages when available.
Ensure that all tools and equipment are in good condition and are suitable
for intended use.
6.1
Ram Seal Redress
Note: If rams are required to be removed ensure they can be moved fully
forward when the time comes.
6.1.1 Access Rams
This procedure results in the disconnection of the actuator assembly from the
BOP body in order to gain access to the rams.
• Ensure Rams are fully opened.
• Back off the Actuator from the BOP using the extended 5/16” Allen Key in
the Cap Screw heads on the Locking Sleeve. Do not loosen the cap
screws during this process.
• Once the thread is fully disengaged, pull the Actuator fully back to the End
Stops.
Figure 7: Accessing the rams
(Note figure shows single modular BOP Body)
6.1.2 Ram Removal (not required to redress ram seals)
• Pump the actuator forward until the back of the ram is clear of the Collar
• Undo guide bar, ensuring the nordlok washer remains in the actuator
piston housing, and slide into ram
• Remove Ram from Actuator, by sliding the Ram off the Piston.
OPS-5481 Rev A
17
User Manual
3’’ Dual Monoblock BOP
6.1.3 Ram Seal Redress
• The Inner Ram Seals can be removed by simply sliding the seal out to
either side
• The Outer Seal can be removed by levering out one end with a suitable
instrument and simply pulling off.
• The Ram is now completely stripped down. Clean and inspect all parts for
evidence of damage or excessive wear. Check the seals and replace if
required. Repair or replace any damaged or worn parts. If the seals are to
be redressed use the parts from the specified redress kit.
• Assemble Outer Seals by pushing the tab into the slot in the ram and
working it around the radius of the ram. Tap home using a rubber or hide
mallet and if required use a screwdriver to lever the second tab over the
edge of the slot. Take care not to damage the Seal during assembly but
expect that some slithers of rubber will be produced as the corners of the
rubber seals are removed by the assembly operation. Tap all around the
circumference of the seal to ensure that it is bedded into the groove and
that the seal is not protruding above the ram diameter.
• Slide the Inner Seals into Ram taking care not to dislodge the outer seal in
the process. Ensure the Guided Inner Seal is fitted to the correct ram as
shown below.
Figure 8: BOP Wireline Rams
Figure 9: BOP Shear Rams
OPS-5481 Rev A
18
User Manual
3’’ Dual Monoblock BOP
6.1.4 Re-attach to BOP Body
•
If the rams were removed from the actuator (Section 6.1.2) then slide the
ram back onto the actuator and guide bar out of the ram and attach the bar
back to the piston housing taking careful note of the orientation of the rams
depending on its intended use for the BOP assembly. (i.e. if pressure is to
be held from below then the outer seal must be on top – otherwise it must
be on the bottom). Attach a hydraulic pump, if required, to the open port of
the actuator and pump the rams back into the recess in the actuator
ensuring that the ram does not hang up on the actuator front face. When
fully back remove the hydraulic pump.
Note - It is still possible to assemble the actuator to the BOP without pumping
back the rams but more effort may be required to allow the thread to make up.
•
•
•
Apply a generous coating of grease to the inner and outer seals.
Push the Actuator back into BOP Body taking care that the edges of the
guide pass into the seal bore and make-up the thread using a 5/16” hex
key in the cap head screws to provide the torque. Making up the thread will
drive the actuator assembly fully home.
The Ram Assembly is now fully made up. Repeat this procedure for each
ram seal that need to be replaced.
6.2 Special Tools
General workshop tools will be required to maintain, and assemble and
disassemble the BOP.
To undo and tighten the balanced piston from the hydraulic piston, two hex
keys are required, 3/8” and 1-1/8”. Phuel can supply a Hex bar to fit this piston
and allow a 1-1/8” socket to be connected.
Figure 10: 950-4656-316 - Piston Assembly Tool
OPS-5481 Rev A
19
User Manual
3’’ Dual Monoblock BOP
Figure 11: Hydraulic Actuator Assembly (Part 1)
OPS-5481 Rev A
20
User Manual
3’’ Dual Monoblock BOP
As an alternative to hex key, an
Assembly Tool (Part number:
950-4656-316) is available to
allow use of 1-1/8” socket.
Figure 12: Hydraulic Actuator Assembly (Part 2)
OPS-5481 Rev A
21
User Manual
3’’ Dual Monoblock BOP
Figure 13: Instructions for greasing of the Piston Shaft
OPS-5481 Rev A
22
User Manual
3’’ Dual Monoblock BOP
6.3 Maintenance Record Sheet
Type of
Performed
Date
Performed Maintenance
By
Verified
By
Comments
Table 3:Maintenance Record
OPS-5481 Rev A
23
User Manual
3’’ Dual Monoblock BOP
7 Testing
All testing is to be carried out in the designated test area and by suitably
qualified and competent personnel. Safety procedures must be followed.
WARNING: Trapped air requires considerable time to compress and when it is
compressed is highly dangerous. It has enough stored energy to separate
parts with considerable force.
7.1 Hydraulic BOP
Check the build configuration then test accordingly using the procedures laid out
below
7.1.1 Prepare BOP for pressure testing
•
•
•
•
•
•
•
•
•
•
•
•
Check the pressure rating for all test equipment is sufficient to allow testing to
be carried out.
Check / replace o-ring on the pin part of the BOP.
Ensure BOP is placed in an area suitable for pressure testing.
Fit the BOP to the test stump.
Fit the test hose to the Gauge port on the Equalising Block or if using the
Injection Port then first remove the check valve.
Makeup BOP (collar) on test stump by turning the "collar" all the way down, and
then back off ¼ turn
Fill BOP with test fluid.
Connect the hydraulic hoses from the BCU to BOP to operate the rams.
Check all connections / hoses that they are secured with safety wire before use
Vent BOP Rams by opening and closing the Rams a few times each.
On completion of venting the Rams fit test cap, ensuring the test cap valve is in
the open position to allow air to vent and top up the BOP with Test Fluid. Once
all air is expelled close test cap valve.
The BOP is now prepared for testing
OPS-5481 Rev A
24
User Manual
3’’ Dual Monoblock BOP
7.1.2 Body Test
•
•
•
•
•
•
Ensure that all the rams are in the open position
Open all the equalising valves.
Pump slowly up to 300 psi and observe for leaks. Hold Time 5 min
Bleed the pressure to zero
Pressurize to MWP of BOP and observe for leaks. Hold Time 15 min
Bleed of pressure to zero and drain BOP.
7.1.3 Ram test
•
•
•
•
•
•
•
•
•
Close the Ram, this is done by activating the BCU ram seal valve to "close"
position, then pressurize up to a maximum of 3,000 psi on the ram – Test fluid
may be observed coming out of the Test Cap valve.
Close all equalising valves except the bottom valve (5) so that pressure testing
is done from the underside of rams and up
Put up safety barrier in the work area.
Observe Test Cap valve during testing for fluid leaking out under pressure.
Pressurize up to 300 psi low pressure test - observe if there are leaks. Hold
Time 10 min
Bleed the pressure to zero
Press up to the MWP for the bop in accordance documentation – maintain the
pressure for 10 min without leakage.
Bleed the pressure to zero.
Open rams on bop by enabling BCU ram seal valve to "open" position.
7.1.4 Post Test Procedure
•
•
•
•
•
•
Disconnect All Hoses
Remove Test Cap
Drain out test fluid and circulate with water displacing fluid or lubricating oil
Re-fit the gauge to the Equalising Block if required or re-fit the check valve if
removed earlier.
Remove BOP from Test Stump
Grease end connections and fit oiled thread protectors
OPS-5481 Rev A
25
User Manual
3’’ Dual Monoblock BOP
8 Drawings and Bills of Material
Item
1
2
3
4
5
6
7
8
9
10
12
13
14
15
16
Part Number
192-5501-480
190-4289-HV0
190-4360-HH0
125-4945-HS0
192-5511-HV0
190-4433-HS1
190-4276-X90
190-1672-316
CSU-0585-3A4
900-3253-STL
125-3212-AL7
HNC-0750-A2H
192-5504-STL
SHC-0625-HTS
WNL-0620-316
Quantity
1
4
2
1
1
2
8
8
8
1
8
8
1
12
12
Description
DUAL BOP BODY 3" BX FLANGED
3" MOD PISTON ACTUATOR
MODULAR 3" GUIDE RAM ASSEMBLY
3 ID X-OVER 4-3/4-4 BOX X 3-1/16 BX FLG 10K
3" MONO DUAL INJECTION MODULE
3" Mod Hydraulic Kit (Snap Tite)
3" MOD SLIDER ROD (25MM)
END STOP
CSink Soc Hd Size 1/2 UNC Length 1 in
SEAL RING BX 154
STUD 1.00-8 UN X 5.50 LONG
Hex Nut 1.00 - UNC
3" DUAL MONOBLOCK BOP CRASHFRAME
Soc Hd Cap Size 5/8 Length 1.5
Nordlock Washer 5/8 (NL16)
Table 4: 3” Dual Monoblock BOP 192-5481-HV0
OPS-5481 Rev A
26
User Manual
3’’ Dual Monoblock BOP
Figure 14: 3” Dual Monoblock BOP 192-5481-HV0
OPS-5481 Rev A
27
User Manual
3’’ Dual Monoblock BOP
Item
1
2
3
4
5
6
7
8
9
10
11
12
13
14
15
16
17
18
19
20
21
22
23
24
25
26
27
28
29
30
32
33
34
35
36
37
Part Number Quantity
190-4277-480
1
190-4282-480
1
190-4281-480
1
190-4198-480
1
190-4278-480
1
190-4201-480
1
190-4279-480
1
190-4286-480
1
190-4287-480
1
190-4283-460
1
190-4284-316
1
190-4290-480
1
190-4202-ALU
1
190-4319-PEK
1
190-4335-316
8
801-0340-V90
1
190-3870-H85
1
190-4343-PEK
1
802-4340-H85
1
802-4339-H85
2
801-0231-V90
1
802-4341-H85
1
801-0235-V90
1
802-2505-H85
1
802-4342-H85
1
WNL-0540-316
8
SDU-0585-316
4
SDU-0505-HTS
3
SHC-0503-HTS
2
WNL-0500-316
2
WNL-3703-316
1
100-2209-316
2
190-1608-STL
2
190-4338-STL
1
190-1756-STL
4
190-2491-STL
1
Description
3" MOD PISTON HOUSING
3" MOD HYDRAULIC CYLINDER HOUSING
3" MOD CYLINDER CAP
3" MOD ACTUATOR COLLAR
3" MOD BALANCED PISTON
3" MOD SEAL RING
3" MOD HYDRAULIC PISTON
3" MOD DRIVE ROD
3" MOD DRIVE SLEEVE
3" MOD KEY PLATE
3" MOD INDICATOR ROD
3" RAM GUIDE BAR
3" MOD BEARING BRACKET
3" MOD KEY BUSH
COLLAR BOLT 3" MOD
O-Ring - B.S Size 340
ROD SEAL
GREASE SCRAPPER RING
PISTON T-SEAL 2.385
ROD T-SEAL 1.750
O-Ring - B.S Size 231
PISTON T-SEAL 2.750
O-Ring - B.S Size 235
ROD T-SEAL 0.825 DIA
ROD T-SEAL 0.245
Nord Lock Washer Size 3/8
Set Screw Dog Point 1/2 UNC X 1.000 in
Set Screw Dog Point Size 1/4 Length 0.75 in
Soc Hd Cap Size 1/4 Length 0.5 in
1/4" Nordlock Washer
NORDLOCK WASHER M4
NPT SOCKET HEAD PLUG 1/8
Ball Slide ( TK-25-UU)
Thrust Bearing (FAG 811 06)
EXTERNAL CIRCLIP (EXT-0400)
EXTERNAL CIRCLIP (SH-75)- 0.750 DIA
Table 5: Modular Hydraulic Actuator Assembly 190-4289-HV0
OPS-5481 Rev A
28
User Manual
3’’ Dual Monoblock BOP
Figure 15: 3’’ Modular Actuator Hydraulic 190-4289-HV0
OPS-5481 Rev A
29
User Manual
3’’ Dual Monoblock BOP
Item
1
2
3
4
5
Part Number Quantity
190-4363-480
1
190-4364-480
1
190-4171-H80
1
190-4170-H80
1
190-3107-H70
2
Description
MODULAR NO GUIDE RAM - 3.00"
MODULAR GUIDED RAM - 3.00"
3" GUIDING INNER MULTI-SEAL
3" POINTED INNER MULTI-SEAL
BOP OUTER SEAL - 3.50
Table 6: Wireline Ram Assy 190-4360-HH0
Figure 16: Wireline Ram Assy 190-4360-HH0
Item Number
1
2
3
4
5
Part Number
190-4362-480
190-4361-480
190-4141-H80
190-4142-H80
190-3107-H70
Quantity
Description
1
MODULAR 3" GUIDING SHEAR RAM BODY
1
1
1
2
MODULAR 3" SHEAR RAM BODY (NO FINS)
3" POINTED INNER BLINDSEAL
3" GUIDING INNER BLIND SEAL
BOP OUTER SEAL - 3.50
Table 7: Shear Ram Assy 190-4359-HH0 (for information not fitted upon supply)
Figure 17: Shear Rams 190-4359-HH0 (for information not fitted upon supply)
OPS-5481 Rev A
30
User Manual
3’’ Dual Monoblock BOP
Item
1
2
3
4
5
6
7
8
9
10
11
12
13
14
15
16
17
18
19
20
21
22
Part Number
190-4255-480
190-4285-480
190-4275-480
145-2176-480
900-3019-480
110-2979-316
190-2823-PEK
100-2114-PEK
190-2786-PEK
145-2185-STL
190-1749-STL
190-1703-STL
801-0119-V90
801-0108-V90
801-0110-V90
SHC-0583-3A4
SHC-0585-3A4
WNL-0580-316
SBC-0543-304
WNL-0540-316
SHC-0586-3A4
190-2821-316
Quantity
Description
1
MOD EQUALISATION BLOCK (LW)
1
MOD EQUALISING END VALVE SAVERSUB
1
3" MOD CONNECTING BAR
2
SAVER SUB PORT
1
CHECK HOUSING
3
VALVE
3
VALVE SEAT
1
CHECK VALVE SEAL
1
CHECK CONE SEAL
1
COMP SPRING (D22120)
1
COMP SPRING (C5515650)
1
Hollow Lock Screw 3/4-16 (MAC-765)
6
O-Ring - B.S Size 119
3
O-Ring - B.S Size 108
3
O-Ring - B.S Size 110
8
Soc Hd Cap 1/2 UNC Length 3/4 in
2
Soc Hd Cap Size 1/2 Length 1 in
14
WASHER NORDLOCK (M12)
3
Button Hd Screw Size 3/8 Length 0.625 in
3
Nord Lock Washer Size 3/8
4
Soc Hd Cap Size 1/2" UNC Length 1.25 in
1
PORT BLANK END
Table 8: 192-5511-HV0 Injection Module
OPS-5481 Rev A
31
User Manual
3’’ Dual Monoblock BOP
Figure 18: Injection Module 192-5511-HV0
OPS-5481 Rev A
32
User Manual
3’’ Dual Monoblock BOP
Item
1
2
3
4
Part Number
950-2558-316
950-2559-316
950-2587-316
950-4434-316
Quantity
2
2
4
4
Description
1/4 SNAPTITE COUPLER (PT.NO. SVHC44FV)
1/4 SNAPTITE NIPPLE (PT.NO. SVHN44FV)
MALE NIPPLE 1/4in NPT
NPT SOCKET HEAD PLUG 1/4
Table 9: Modular BOP Hydraulic Fittings 190-4433-HS1
OPS-5481 Rev A
33
User Manual
3’’ Dual Monoblock BOP
9 Spares
Use only spares supplied or approved by Phuel Oil Tools Ltd.
It is recommended that sufficient quantities of the following spares be
maintained to ensure that the equipment is always available when required.
Elastomeric spares are supplied in Viton material as standard. Other materials
are available please specify when ordering.
Part Number
Quantity
Description
190-4319-PEK
801-0340-V90
190-3870-H85
190-4343-PEK
802-4340-H85
802-4339-H85
801-0231-V90
802-4341-H85
801-0235-V90
802-2505-H85
802-4342-H85
1
1
1
1
1
2
1
1
1
1
1
3" MOD KEY BUSH
O-Ring - B.S Size 340
ROD SEAL
GREASE SCRAPPER RING
PISTON T-SEAL 2.385
ROD T-SEAL 1.750
O-Ring - B.S Size 231
PISTON T-SEAL 2.750
O-Ring - B.S Size 235
ROD T-SEAL 0.825 DIA
ROD T-SEAL 0.245
Table 10: Hydraulic Actuator Redress Kit RDK-4289-HV0
Part Number
Quantity
Description
190-2823-PEK
801-0119-V90
801-0108-V90
801-0110-V90
3
6
3
3
VALVE SEAT
O-Ring - B.S Size 119
O-Ring - B.S Size 108
O-Ring - B.S Size 110
Table 11: Injection Module Redress Kit RDK-5511-HV0
Part Number
Quantity
Description
190-4171-H80
190-4170-H80
190-3107-H70
1
1
2
3" GUIDING INNER MULTI-SEAL
3" POINTED INNER MULTI-SEAL
BOP OUTER SEAL - 3.50
Table 12: Wireline Ram Redress Kit RDK-4360-HH0
Individual seals and parts may be ordered as required. See the parts list in the
previous section for part numbers
9.1
Supporting Equipment
950-4656-316 - Piston Assembly Tool
OPS-5481 Rev A
34


