1
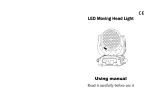
User Manual 37PCS*3W LED WASH MOVING HEAD LIGHT Thank you very much for using 37PCS*3W LED Wash Moving Head Beam Light, please read careful before using the light. 1.1 Electrical Power: AC100-240V, 50/60Hz Power Consumption: 160W Light source: 37pcs*3w high bright CREE RGB LEDs (13 Red +12 Green +12 Blue) Cooling mode: LED special cooling sheet Aluminium Optical System Electronics dimming Mechanical strobe: 0-12 F.P.S. Control Mode: DMX 512 Master-Slave/Auto/Custom/ Sound LCD display DMX 512 Channels: 14CH Pan/Tilt Pan 5400, Tilt 2700, Pan/Tilt speed adjustment Pan/Tilt Fine:8/16bit Pan/Tilt reverse RGB RGB color mixing, rainbow effect,White balance, RGB calibration Other characteristic Housing:High-impact flame-retardant thermoplastic Dimension: 400*380*280mm Weight: 6.5kg 1 1.2 Dimension (mm) 1.7 DMX Channel Channels: Value Function 1 0-255 Pan 0-5400 2 0-255 Pan Fine 3 0-255 Tilt 0-2700 4 0-255 Tilt Fine 5 0-255 Pan/Tilt Speed 6 0-255 7 0-3 4-250 251-255 Close Routine strobe,slow to fast Open 8 0-255 RED from dark to bright 9 0-255 GREEN from dark to bright 10 0-255 BLUE from dark to bright Electronics Linear dimming (from dark to bright) 11 12 13 14 2 0-255 Color Macro 0-255 Auto program lamps and lanterns reset 0-10 empty 11-80 Fixed color choose 81-123 rapidly change color effect1 124-166 gradually change color effect 1 167-209 rapidly change color effect 2 210-255 gradually change color effect 2 0-127 empty 128-255 Lamp on after 3 seconds 255 lamps and lanterns ID 7 1.6 LCD Display Screen Operation 1.3 View of Product 6 3 1.4 Safety Instruction 1.5 Installment 1) The guy who install and maintain the light must be act as following suggestion: 2) Instruction by experience technician. 3) Follow the instruction Attention: Water-proof, -proof and cut off the power before taken apart the machine. To avoid voltage shocking, be sure not to touch the instrument during voltage boosting. Insuring the items in good condition before sell. To confirm the safety, please control it under the instruction. 1) If any injury of the personnel and damage to the machine are caused by the action which does not follow this manual properly, our factory will not be in such responsibility. 2) Please do not mix the power wire with other wire! The power supply voltage must be consistent with machine’s. 3) Confirming the off bottom connect with the power, and the switch button is off before you connect with power. 4) Make sure that you are connecting this product to the proper voltage,. 5) Power off when it is not work or maintained.When you cut off power,pull up the plug not the wire to avoid the damage. 6) The level of protection is the first level,connect the green/yellow to the ground. The connection and maintainable should be done by the . 7) Don’t connect the machine to the lighting equipment. 8) Don’t press on or off frequently,or its working life span will be shorten. 9) It’s the common be smelling when the first using. 10) In order to protect our eyes, Avoid look into light source. Especially for the eye sicker. A: The fixture can be operated in any position at any angle. When mounted on a flat surface, the surface must be strong enough to support 10 times the weight of the fixture and stable so that there will be no damage caused to the fixture or surrounding people or objects because of movements of the fixture on the surface. B: When the unit is mounted in a hanging position, the fixture is attached using the mounting brackets and a standard truss clamp or other clamping device. The mounting brackets supplied are mounted using quick-release locks allowing simple mounting or removal. 4 Important Safety Note: Always use a safety cable when installing this fixture. Be sure that the safety cable is connected to a solid load-bearing structure. 2.2 Fuse Replacement A: Remove the safety cap by a screwdriver. B: Fetch the old fuse from safety cap. C: Install a new fuse. D: Install the safety cap. 3.1 Operating Instructions A: Connect all of the units in series using standard DMX512 signal cable. B: Set the DMX512 address in the DMX menu. C..LCD Display Screen Operation: 1. Go to MENU > INTRO > FUNC > FUNCTION; 2. <UP> or <DOWN> for selecting details functions 3. Press <FUNC> insuring the light working The operating instructions are as follows: 5