1
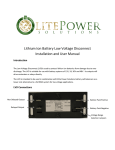
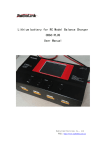
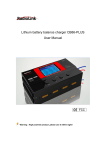
CB86--professional R/C Model Li Battery
Balance Charger
User Manual
RadioLink Electronic Limited
Http://www.radiolink.com.cn
CE FCC ROHS
MENU
1. Technical Data…………………………………………………… 1
2. Connections……………………………………………………… 1
3. Balancer Connection…………………………..………………… 2
4. Button Usage…………………………………………………….. 4
5. Screen Instruction……………………………………………….. 5
6. How To Use Button……………………………………………… 5
7. States Explain……………………………………………………. 7
8. How The Charger Work…………………………………………. 7
9. Discharge…………………….…………………………………..10
10.Battery Voltage………………………………………………......11
Technical Data
Demension
mm
188*104*57
weight
g
710
Input voltage
DC
10.5-15V
Charge capability
LiPo/LiFePo
1S-6S
Charge current
A
0.1-6.0A
Discharge current
mV
1.1A
Discharge battery type
Charge timer
LiPo/LiFePo
h
0-99 Hour
Charge mode
Cycle charge and parallel charge
Input wrong polarity protect
Yes
Voice
Buzzer(ON/OFF)
Standby Current
mA
100
Connections
Input connection: connect your balance charger to a suitable DC power
supply with 10.5-15V output voltage and minimum of 15.0A output
current, Caution: Be careful with correct polarity! When you connect
with wrong polarity the balance charger is safe, but it won’t work.
1
Input negative polarity (Black line) Input positive polarity(Red line)
Balancer Connection
Radiolink Patent design high performance integrated balancer for 1S to
6S LiPo and LiFePo-batteries using EHR balancing connector, and
CB86 balance charge has eight balancer, user can connect eight 6S
battery at one time, also, two 2S battery can connect at one balancer.
The balancer equalizes the cells, during charge which results in higher
performance and higher cycle life.
Please refer to drawing,
Caution: black line always at the right of the balancer. Avoid incorrect
2
connection as in the worst case this may result in damage to the battery
and/or charger! When put the EHR balance connector correct it will be
easy, and if you feel hard to connect, please check whether the balancer
needle is bended, or the EHR balance connector is incorrect.
The best connect way:
Black line(positive polarity)always left
Keep the black line(negative polarity) right, and connector at left of
balancer:
Black line(positive polarity)always left
Keep the black line(negative polarity) right, and connector at middle of
balancer:
Black line(positive polarity)always left
3
Two 2S battery connect at one balancer, keep black line at right.
Black line(positive polarity)always left
Button usage
CB86 balance charger has four buttons,
Start/Stop:
Set:
start or stop the function
invalid when discharging or
charging
“+/▲”
,“-/▼”:
add or minus data, invalid
when discharging4or charging.
Screen Instruction
Input voltage
Timer
Voice state
Balancer number
Charge/disch
Current
Voltage
Function
How to use button
CB86 full settings as follow:
Voice setting: On/Off;
Function: Cycle Charge/Parallel Charge/Discharge/Battery Voltage;
Charge voltage setting: 0.00~4.30V, Precision: 0.01V;
Discharge voltage setting: 2.00~4.30V, Precision: 0.01V;
Charge current setting: 0~6.0A, Precision: 0.1A.
Discharge current: 1.0A(fixed).
5
“START/STOP” button use to start or stop charger’s working, and this
button
is
valid
anytime
and
any
situation,
when
set
the
charge/discharge voltage or current, be sure all the setting is right, then
press the start button.
“SET” button: when charger have not process(charge, discharge or
battery voltage measure), the “SET” button is responseable. Press
“SET”
button
move
reverse
display
between
voice/balancer
number/function/voltage/current, and use “+/▲” or ”-/▼” button to
change the data.
How to set charge voltage and current
Press “SET” let reverse display move to function, press “+/▲”
or ”-/▼” change the function to “CYCLE CHARGE” OR
“PARALLEL CHARGE”, press “SET” move reverse display to voltage,
use “+/▲” or ”-/▼” set voltage value, and press
“SET” move reverse
display to current, then use “+/▲” or ”-/▼” set current value. Once the
charge voltage and current set, the setting is available for all the eight
balancer. No way to set different way for a single balancer.
Voice turn on or off:
Press “SET” let reverse display move to voice
6
States Explain
Voice state:
Voice On
Voice Off
Charge/Discharge state:
Parallel Charge/Cycle Charge ;
Discharge.
Balancer Number:
User can set function execute from which port
charge/discharge/measure voltage. When the battery charging finished ,
the number which connect that battery will reverse displaying.
How The Charger Work
Two Charge mode: Cycle Charge and Parallel Charge
Cycle charge:
Charge all the battery on balancer full one by one CYCLE charge
voltage and current setting are valid for every battery packs connected,
7
and notice that the voltage and current setting is for every single piece
cell battery, not the battery packs, so no need to care the battery is 2S.
3S or 6S, every single battery cell’s voltage are the same. And current
like voltage setting, valid for all the battery. Do not setting charge
current over 6.00A, CB86 charger use the EHR balance connector as
charge cable, over 6.00A current is unsafe for EHR balance connector.
When charge voltage and current is done, press “START/STOP” button,
charging start, on the left of the balancer red light on, means this
balancer is on charging, timer will run, voltage display on the screen is
actual battery cells voltage, and current is actual charging current.
Cycle charge,6S battery, charge current 5.30A
When one balancer’s battery cells charge finished, buzzer will sound
“didi..” ten times(silent if voice was off), and charge next balancer’s
battery.
If there are two 3S or three 2S battery capacity closely, there is a
way of connection to charge two 3S or three 2S at the same time:
Two 3S: one connects at the end of left, another one connects at end of
right next balancer:
8
Three 2S: two battery connect at one balancer, third one connect at the
middle of next balancer:
Under these two connection way the charger will auto link these two
balancers and charge at one the same time. Charger’s screen display as
below:
Note: one 4S and one 2S will not work under this connect way, only
suit for two 3S and three 2S battery.
Parallel charge:
First step charger will use cycle charge mode balance all the battery
cells voltage to a parallel level, then parallel connect all the battery and
9
charge. So when use the parallel charge mode, you will find it’s like the
CYCLE CHARGE at the beginning, unit all the battery cells voltage
are balanced, parallel charge process will start.
Parallel charge voltage and current setting are the same as cycle charge,
after setting voltage and current, press “START/STOP” button to
start(or stop) charging.
Warning: Please don’t use parallel charge mode to charge the
battery that not being discharged, that will make balance process
more difficult! If one of
battery cell’s voltage higher than 4.10V,
charger will do nothing on this battery packs to keep the charge
process safe.
Discharge
Discharge setting: voltage.
Discharge voltage is the value when discharge finished, so don’t set
discharge voltage too low cause battery over discharge, or set the
discharge voltage too high, the charger will not doing
anything. The
discharge current is fix and unadjustable: 1.1A. in the discharge
process the cooling fan will work.
10
Battery Voltage
Select function to BATTERY VOLTAGE, press “START/STOP”
button to start or stop, the charger will display every battery packs
every single battery cell voltage on the screen one by one. You will see
clearly about your battery situation.
Factory recommend charge current, charge voltage setting and
approximate charge time:
Battery Capacity
Charge Current
Charge Voltage
Charge time
500mhA
0,5A
4.20V
80Mins
1000mhA
1.0A
4.20V
80Mins
2200mhA
2.2A
4.20V
80Mins
4000mhA
4.0A
4.20V
80Mins
5600mhA
5.6A
4.20V
80Mins
11