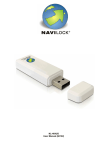
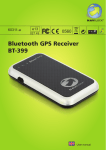
1
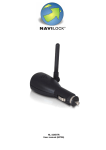
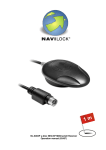
5
NL-125O Outdoor Tripper
User Manual (60118)
Thank you for choosing a Navilock product. We are sure that the use of the NL-125O will bring you much
pleasure. In order to avoid anything that could dampen your fun, please read this user manual carefully
before starting to use the device.
This manual will give you illustrated step-by-step explanations of all the functions of this device and of the
software. After reading these carefully, you can start operating the device.
1. Introduction and Safety Information
1.1 Introduction
The NL-125O GPS Tripper is an outdoor device that provides a leisure experience with pre-planned
routes or waypoints. The Sirf3 GPS-chipset allows the device to receive satisfactory signals even under
adverse conditions. The electronic compass compensates – if necessary – for signal loss and guides you
using compass directions to your destination.
1.2 Safety Information
Important Health and Safety Information
When using this product, you should take the following safety precautions in order to avoid possible
damage and legal consequences. Please comply carefully with all safety and operation instructions
and keep it safely. Please pay attention to all warnings in this user manual and on the product. In order
to avoid injury, electric shock, fire or damage to this product, please comply with the following
warnings.
ELECTRICAL SAFETY
This product is designed to be powered by a storage battery. Any other use can be dangerous and will
lead to a loss of any warranty claim for this product. Use only the original equipment and never charge
the storage battery with any charger not approved by the manufacturer.
Handle storage batteries with care.
If not handled properly, storage batteries can be a fire hazards and cause burns. You must not
disassemble, destroy, perforate or undercharge this battery. Never throw it into a fire or water, or
expose it to temperatures above 60°C (140°F).
6
PLEASE NOTE: PLEASE RECYCLE OR DISPOSE OF USED BATTERIES OR STORAGE BATTERY
CELLS ACCORDING TO THE LOCAL REGULATIONS OR IN COMPLIANCE WITH THE
INFORMATION ENCLOSED WITH THIS PRODUCT.
SAFETY INFORMATION CONCERNING DIRECT SUNLIGHT
Please avoid exposing the device to excessive dampness and extreme temperatures. Do not leave the
device, the battery or the storage battery cells in a vehicle or any place where the temperatures could rise
above 60°C (140°F), e.g. on a car dashboard, a windowsill or behind a pane of glass directly exposed to
the sun. This might damage the device or the vehicle and overheat the batteries or storage battery cells.
Damage requiring repairs
Under any of the following circumstances, disconnect the product from the power supply, also remove
the storage battery and contact an authorized maintenance specialist or the dealer:
• A liquid has seeped into, or an object has penetrated, the device.
• The product has been exposed to rain or dampness.
• The product has fallen to the ground or was damaged.
• There are visible signs of overheating.
• The product does not work properly when used correctly.
Please avoid using the device immediately after it has been subjected to large temperature
fluctuations.
When the device has been exposed fluctuations in temperature or humidity, condensation may occur
inside the casing. In order to avoid damage to the device, wait until the moisture has evaporated
before turning it on.
PLEASE NOTE: When bringing the device from a cold into a warm or from a warm into a cold
environment, let the device reach ambient temperature before turning it on.
7
2. Specifications
Electronic and mechanical details
Item
Max. waypoints
Max. routes
Display size
Display type
Pixels (h x w)
Weight
Protection class
NL-12OO
10
5
21.9 x 32.87 mm
LCD with 4 grey levels
96 x 128
90g
IPX4
Dimensions
76.5 x 61.5 x 17.5 mm
Background illumination
Working temperature
Humidity
Power supply
Charging connector
Battery
Power consumption
Battery life
PC connection mode
Charging time
Electronic compass
Ordinary
-10oC – +60 oC
5% to 95% non-condensing
via Mini USB port
DC 5 volt via Mini USB port
Rechargeable 1600 mAH Li-Polymer storage battery
GPS (3D Fix), illumination on
75mA
GPS (3D Fix), illumination off
50mA
GPS (3D Fix), illumination on
19 hours
GPS (3D Fix), illumination off
30 hours
USB interface
Mini USB 350mA, 3 hours to full charge
YAMAHA YAS52P 3 Axis
GPS parameters
GPS chip set
Frequency
C/A code
Channels
Antenna type
Position
Speed
Time
Date
New detection
Hot start
Warm start
Cold start
Height
Maximum speed
acceleration
Vibration
SiRF Star III LPx
L1, 1575.42 MHz
1.023 MHz chip rate
20
Built-in patch antenna
10 meters, 2D RMS
5 meters, 2D RMS, WAAS on
0.1 m/s
1µs synchronized to GPS time
WGS-84
0.1 seconds, on average
1 seconds, on average
38 seconds, on average
42 seconds, on average
18,000 meters (60,000 feet) max.
515 meters/second (1000 knots) max.
Less than 4g
20 m/sec3
8
3. Product Contents
3.1 Equipment
Please confirm that all these parts are included in the package before you start to use the device and
contact your specialized dealer in case anything should be damaged or missing.
Strap
NL-125O
USB cable
CD-ROM
9
3.2 Device Keys
Button
1.
2.
3.
4.
5.
6.
On/Off & Light
Marking Waypoint/
ESC
Find Waypoint
Back to Start
Scrolling
OK
Explanation
z
z
To switch On or Off and activate the backlight.
Mark points and leave the selected page
z
z
z
z
Go to the waypoint
Follow the travel route
Scroll key
Enter & Confirm
3.3 Position of the Antenna
The GPS antenna is located in the lower part of the
housing. This part should always have an
unobstructed view of the sky.
10
3.4 Battery Instructions
The NL-125O GPS Tripper works with a built-in
rechargeable Li-Polymer storage battery. An
indicator in the lower left corner of the display
shows the remaining storage battery power.
z
Charging the storage battery:
1.
Plug the Mini USB plug into the USB
slot of the NL-125O and the other end
into a USB slot on a PC, vehicle, or plug
charging adapter.
2.
It takes approximately 5-6 hours to fully
charge the storage battery.
Important: Charge the storage battery fully before using the NL-125O for the first time.
4. Startup
4.1 Startup of the NL-125O
Press the ON/OFF button for 2 seconds. You will then
see the startup screen with the welcome message.
The NL-125O will immediately begin to get a satellite fix.
This may take a few minutes, or up to 30 minutes,
depending on signal reception.
Press the "OK" key to leave the locating screen.
11
4.2 Explanation of the Symbols
The battery symbol shows the
remaining battery capacity.
If the symbol for the electronic
compass blinks it means there
is
too
much
magnetic
interference and it requires
recalibration.
GPS Status Display
z
z
z
z
z
z
Not available: No signal
Blinking: 2D fix
Without bar: 3D fix
1 bar: 3D fix/weak signal
2 bars: 3D fix/good signal
3 bars: 3D fix/excellent signal
5. Routes
5.1 Start of the Route
z
You can use the route for geocaching or for outdoor navigation.
1.
Press the
button to choose a route planned with
the PC and the NaviSport Tool.
2.
to select the desired route entry and confirm
Use
it with OK.
3.
You can now add, remove or change route waypoints.
If you do not want to perform any of these actions,
key repeatedly until the marker reaches
press the
"FOLLOW". Then press OK and choose if you want to
run towards the destination (Forwards) or from the
destination back to the originally planned starting point
(Backwards).
4.
The electronic compass shows the direction to be run
and the remaining time to the destination based on the
current speed.
5.
By pressing the OK key again, a kind of map of your
planned route will be shown. In this respect, the scale
you have chosen is important. The small arrow on the
route shows you the direction to the next route
waypoint. The arrow on the right hand side shows the
direction to the destination point. Changes to the map
view scale are made with the
(a)
(b)
key.
12
The point "ROUTE Setting" is located in the basic settings.
Here you have to set the distance indicator for the response
to the route waypoints you set. Over a distance of 1000m
with four waypoints for example, the setting must be 200m
to display the changes of direction correctly. Otherwise, the
NL-125O will only show the one at 1000m and you may run
in the wrong direction.
5.2 Finishing of the Route
1.
2.
Press the
button to finish route management.
Choose "YES" and the NL-125O ends active route
management. This will be indicated by a compass
with no needle.
6. Waypoints
6.1 Saving of Waypoints
z
In order to save a point of interest (POI) or the place you have parked your vehicle for example,
proceed as follows.
1.
Press the
button to select a waypoint icon. If
you do not like the one displayed, choose NO. You can
switch between YES and NO with the
key.
2.
By using the
key, you can switch from "Confirm"
to the designation (in this example 010) and the
picture for this waypoint (in this example the point
above the 010).
3.
Confirm with OK if you want to change the picture or
key for browsing
the designation. You can use the
within this selection. Always confirm this with OK.
4.
You have a total of 10 memory slots for waypoints.
13
Use the
key to change and confirm this with the
button. This waypoint will be saved when you
have a satellite fix.
7. Find a Waypoint
7.1 GO TO
z
In order to return to a point of interest (POI) or your parked vehicle, proceed as follows.
1.
Press the
button to display the list of already
saved POIs and select the one you want.
2.
Then press
3.
The electronic compass shows the direction to be run
and the remaining time to the destination based on the
current speed.
4.
By pressing the OK key again, a kind of map of your
planned route will be shown. In this respect, the scale
you have chosen is important. The small arrow on the
route shows you the direction to the next route
waypoint. The arrow on the right hand side shows the
direction to the destination point. Changes to the map
to activate the function "GOTO".
view scale are made with the
key.
7.2 Deletion of a Waypoint
1.
Press the
POIs.
2.
Change from GOTO to DELETE with the
button to display the selection of saved
button.
14
3.
Then press
to delete the waypoint permanently.
7.3 Ending the Function GO TO
1.
In order to cancel the function GOTO, press the
2.
key.
You will be asked “Exit GOTO”. Switch from NO to YES
with the
key.
3.
Pressing the OK key, will close the active route.
4.
When the function has been stopped the compass will
no longer display a needle.
8. Calibration of the Electronic Compass
z
Recalibrate the electronic compass if you think its data is incorrect or if the compass indicator on the
display blinks.
1.
If it is necessary to calibrate the compass, press the
and
buttons at the same time.
2.
Follow the instructions on the screen. First, put the
NL-125O flat on the table and turn it slowly until the
screen displays changes.
3.
Then place the NL-125O upright on the table and hold
it firmly. It will rotate slowly about its own axis.
4.
Upon completion of the calibration, the display will
15
show "CALIBRATION OK" Press the OK key to return
to the original page.
9. Settings
z
This function enables you to perform basic settings.
Press the
displayed.
and
buttons at the same time when the location text or the compass screen is
9.1 Compass Settings
z
Calibration
It is possible to calibrate the NL-125O at power on, manually
or automatically. Please select the desired action. We
recommend manual calibration.
z
Declination = angular distance of a star from the
celestial equator with +90° indicating the North and
-90° the South poles.
The NL-125O uses magnetic north. Geographical (true
north) and magnetic north are not exactly the same. In order
to display the exact point of the compass, you need to set
the deviation between the geographical and the magnetic
north; the default setting is "0".
The respective declination values can be seen in a map with
lines of equal magnetic declination (isogonic map). Because
the Earth’s magnetic field is constantly changing, the local
declination values also change. Therefore, updating these
values is necessary.
You can also ignore the declination and switch the setting to
OFF. This will lead to substantially incorrect information with
respect to direction, especially close to the poles.
Press the
button to return to the settings menu.
16
9.2 Time Setting
Use the
and
buttons to scroll within the settings.
Press OK when you have reached the item, you want to
set.
z [TIME ZONE]
To set the time zone.
z
[DAYLIGHT SAVING]
When set to YES, the time zone will be automatically
adjusted between summer and winter times.
z
[TIME FORMAT]
Setting of the clock’s display to 12 or 24-hour mode.
Press the
button to return to the settings menu.
9.3 Display Settings
z
[BACKLIGHT]
You can choose between permanently switched on and
automatic switch-off after xx seconds. Please note that if
you choose permanent illumination (at the touch of a button)
this will shorten the working time between battery charges
as it uses much more power.
z
[CONTRAST]
Use the
or
buttons to set the desired contrast
value. The display ages faster if you set high contrast
values and the time between battery charges will again be
shorter.
Press OK to confirm the desired contrast value.
17
Press
to return to the settings menu.
9.4 GPS Setting
z
[WAAS/EGNOS = GPS Data Correction]
This menu item allows the activation or deactivatation of the
EGNOS correction function which can be used in Europe. In
reality, the results are typically very different and the values
tend to become worse rather than better. Please decide for
yourself, based on tests, if you want to use the correction.
Press OK in the settings selection, choose the item with
key and press OK to confirm. Press
the
return to the settings menu.
to
9.5 Route Settings
z
[Switch Distance]
This item is used to set the distance indicator for response
to the route waypoints you have set. For example, over a
distance of 1000m with four waypoints, the setting must be
adjusted to 200m to allow the device to correctly display the
changes of direction. Otherwise, the NL-125O will only show
the one at 1000m and you may run in the wrong direction.
Press the OK key in the settings selection and then use
the
key to choose the desired value and press OK to
select. Press
to return to the settings menu.
9. 6 Set Units
You can choose between miles, kilometers and nautical
miles.
Press the OK key in the settings selection and then use
the
key to choose the desired value and press OK to
select. Press
to return to the settings menu.
9. 7 GPS Info
18
This GPS Info display shows an overhead view of the
satellites in sight, the signals that are being received and the
strength of each signal.
Press
to return to the settings menu.
9.8 Reset Default
In case your own settings do not achieve the desired
results you can reset the NL-125O to the factory default
settings. When you do this all User Settings will be
deleted.
Press the
button to return to the settings menu.
9.9 About
The About screen displays the firmware date and product
information.
Press
to return to the settings menu.
19
10. USB Driver Installation
10.1 Installation of the USB Driver
The USB driver must be installed before the NaviSport tool can be used between the NL-125O and a
computer.
1.
2.
3.
¾
¾
Place the Navilock product CD in the CD-ROM drive of your PC.
Press the button "Driver" and select "Installation".
Follow the instructions on the screen.
Step 1: The driver installation preparation screen will be displayed.
Step 2: Now, connect the NL-125O to the PC using the USB cable supplied. A ‘New Hardware
Found’ message will be displayed and the system will search for the driver. Please cancel this
process and click ‘Next’ in the InstallShield Wizard.
20
¾
Step 3: The driver installation is completed when you see this screen. After clicking on Finish,
unplug the NL-125O from the USB Port and plug it in again after a few seconds.
It may happen that even after the driver has been installed, ‘New Hardware’ will again be displayed. Allow
the computer to search for it automatically. The previously installed driver will be found and reinstalled.
10.2 Installation of the NaviSport Tool
1. Before installation check to see that Microsoft NET Framework is already installed in your PC.
21
You can find it under "Start/Settings/System Control/Software".
Note: Normally, a version of Microsoft NET Framework will already be installed in MS Windows XP SP2,
SP3 or Vista. If not, please install it from the NL-125O product CD ROM in the NaviSport Tool folder.
Install the NaviSport Tool from the NL-125O product CD ROM.
¾
Step 3: Click "Next".
¾
Step 4: Click "Next".
22
¾
Step 5: The installation will be carried out.
z
After a successful installation of the Navilock NaviSport Tool, the SQL Data Base will be
automatically set up.
23
¾
Step 6: Click "Close" to complete the installation and start the NaviSport Tool.
¾
Step 7 : Generate a user account
¾
Step 8: Log in using the account name you have just set up.
24
z
Connect the NL-125O to the PC with the Mini USB cable and allow the NaviSport Tool to find
the necessary COM port automatically.
¾
Step 9: The NaviSport Tool will now automatically start up for the first time.
25
10.3 Starting the NaviSport Tool from the Desktop
From now on you can start the Navilock NaviSport Tool using the Desktop
Icon or from Start/Programs/Navilock/NaviSport Tool.
11. PC Software
11.1 System Requirements
In order to achieve satisfactory performance, the following minimum hardware requirements must be met:
•
•
•
•
•
•
•
•
•
•
A Pentium III processor, or later
512 Mb RAM or more
Windows 2000, XP or Vista
Internet Explorer 6.0 or higher
Net Framework 2.0 or higher
A CD-ROM drive
16 Mb videocard
Keyboard/Mouse
VGA monitor
A free Mini USB port
11.2 Handling the NaviSport Tool
11.2-1 Data Import
In order to import a database, it has to be exported first, for example, as a backup. Please click on Data
Import and you will be informed that all data will be overwritten.
z
Select the folder, to which you have previously exported a travelbook data file, or saved one
received from another NL-125O user.
26
•
A successful import will displayed by the following screen.
11.3 Route Manager
1.
2.
3.
4.
5.
6.
7.
8.
11.3 – 1 Explanation of the Elements
Main Menus
Submenus which change depending on the selected main menu
Google Map, Waypoints, Routes
Route Planning
Route Planning Calendar
Route Details
Route List
Sofware Function Switchings
27
11.3 – 2 Switching Software Functions
Icon
Explanation
Open File
View in Google Earth
View in Google Map
Search
User Log Out
Finish
11.3 - 3 Menu Structure
Main Window
Files
Search File
Copy Google Map
Display in Google Map
Display in Google Earth
Export Data Base
Open
Save
Saves the current Google Map image in JPG or BMP format
Displays the selected route data in Google Map
Displays the selected route data in Google Earth
Export route information in Travelbook format.
Open File (gpx, kml format)
File (gpx, kml format)
Search by Date
Search for entries between start and final dates
Route Planning
Upload Route
Waypoint Planning
Waypoints
Upload Waypoint
Com Port Setting
Change Com port setting
Hardware Configuration Displays hardware information
Set Units
Switch between metric, statute and nautical miles
Switch between English, Traditional Chinese, Spanish,
Language
German, Italian, French and Japanese
Search Update
Search for newer program versions
Track Points
Data Transfer
Configuration
Help
About NaviSport
Link to the Navilock website
About Us
Navilock info
28
11.4 Main Menu
11.4 – 1 Screenshot of Google Map
z
Save the current screen content in JPG or BMP format.
11.4 – 2 Display in Google Map
z
View the planned route in Google Map.
11.4 – 3 Display in Google Earth
z
If Google Earth is installed, it displays the selected route directly in this application.
29
11.4 – 4 Export Data Base
Exports the complete database contents of NaviSport Tools as a backup "*.travelbook" file.
11.5 File Menu
11.5 - 1 Open File
¾
1st Step: Select the file you want to open in the NaviSport Tool. This is possible with .kml and .gpx
files. You will be asked if you want to save the data in the data base. Confirm this with YES.
¾
2nd Step: A progress bar will be displayed while the data is being opened and processed.
¾
3rd Step: The successful open file will be displayed.
30
11.5 - 2 Save File
¾
1st Step: Save your data as a gpx or kml file, depending on where it is to be used.
¾
2nd Step: The successful saving of the file will be confirmed
11.6 Search Data
z
If you have different data saved to the data base and recorded on different days or months
the function Search Data, will allow you to specifically search for data and activate it by using
the Calendar function.
11.7.1 Data Transfer
11.7.1 - 1 Route Planning
Click on Data Transfer and Route Planning in the NaviSport Tool. Now select the map area where you
want to plan a route. Zoom to a scale that will allow you to plan comfortably and click on Start Route.
Choose where you wish to start, using the red needle, and then input your route by clicking point by point.
As you do this, the map moves in the direction you are marking your route, and you do not have to
reposition the map.
31
At the end of your route, click on Route End. After you have clicked on the destination point you will be
asked to assign a name to the route.
11.7.1 - 2 Uploading a Route to the NL-125O
¾
1st Step: Connect the NL-125O to your PC with the USB cable. The display will show
"Connect TO PC". Please select "YES" and press the OK key.
32
¾
2nd Step: The display now shows "Synchronize to PC".
¾
3rd Step: Select the item Data Transfer and then Upload-Route in the NaviSport Tool. Follow
the instructions on the screen.
¾
4th Step: After transfer is complete, the display will show "Route data download OK".
¾
5th Step: The NaviSport Tool will now display "Upload of the route successful".
11.7.1 - 3 Delete Everything on the NL-125O
¾
1st Step: Connect the NL-125O to your PC using the USB cable. The display will show
"Connect TO PC". Please select "YES" and press the OK key. Now open Data Transfer and
click on " (Delete) everything on the device".
33
¾
2nd Step: As a precaution, you will be asked to confirm. If you really want to delete everything
on the device. Confirm this with YES.
¾
3rd Step: The successful deletion will be confirmed.
¾
4th Step: The route view in the NL-125O will now display no entries.
11.7.1 - 4 To Change Route Names
¾
1st Step: Select the route in the route list with the right mouse button and click on "Edit Route
Name".
34
¾
2nd Step: Edit the route name as desired, blanks may not be used.
¾
3rd Step: After saving, your route name will have been changed.
11.7.2 Waypoint
11.7.2 – 1 Adding a Waypoint
In the NaviSport Tool, under the menu item Data Transfer, you will find the choice "Add Waypoint". Click
on "Add Waypoint", and then click on the position you wish to add as a waypoint on Google Map.
End the addition of waypoints by clicking "Stop Adding".
11.7.2 – 2 Uploading Waypoints to the GH-561 device
¾
1st Step: Connect the NL-125O to your PC using the USB cable. The display will show "Connect TO
PC". Please select "YES" and press the OK key.
35
¾
2nd Step: The display will now show "Synchronize to PC".
¾
3rd Step: In the NaviSport Tool, please open Data Transfer and then click on Upload to the NaviSport
Tool.
¾
4th Step: After completion of the transfer, "Route data download OK" will be displayed.
¾
5th Step: "Upload of the route data successful" will also be displayed on the NaviSport Tool screen.
11.7.2 - 3 Changing Waypoint Names
•
Click on the Waypoints tab, to the right of Google Maps. You will see the available waypoints. When
you right-click on a waypoint it can be edited.
36
11.8 Configuration Menu
11.8 – 1 Com Port Setting
•
You can search for available COM ports for the connected NL-125O or enter the COM port name
manually.
11.8 – 2 System InformationShows device specifications for the NL-125O
11.8 – 3 Setting Units
•
The possible settings are: Metric (km), statute (miles) or nautical miles (nm)
11.8 – 4 Language
•
The NaviSport Tool Language may be set as: English, Traditional Chinese, Spanish, German, Italian,
French or Japanese.
11.9 Help Menu
37
11.9 – 1 Search Update
• A direct connection to the Update Server for updating of the NaviSport Tool software if necessary.
11.9 – 2 About the NaviSport Tool
• Displays the NaviSport Tool startup menu.
11.9 – 3 About Us
This selection connects directly to the Navilock Website. http://www.navilock.com
•
12. Maintenance
12.1 Safety Information
Explosion hazard upon contact with fire!
Do not expose the device to temperatures above 60°C/140°F!
12.2 Cleaning
•
•
•
Never clean the NL-125O with solvents or cleaners containing naphta, this will damage the housing.
Clean the NL-125O with a slightly moist piece of cloth and a drop of cleaning liquid. The cloth should
be just moist and not soaking wet.
Small scratches on the display can be removed with the polishing agents freely available on the
market. However, the company does not assume liability for any success or failure in this respect.
13. Possible Sources of Error
13.1 The device will not power on. Check that the storage battery has been charged. In order to do this,
please plug the NL-125O into the charger and connect it to the electrical socket. The "Battery Charging in
Progress" message will be displayed when the NL-125O battery is being charged.
13.2 If the storage battery has been charged and the NL-125O still does not power on please contact
Navilock Support.
13.3 Your PC does not support the auto-boot function and does not boot the CD ROM automatically.
Please find further information under http://msdn2.microsoft.com/en-us/library/Aa969329.aspx.
13.4. Your NL-125O does not find a FIX, or it takes too long to do so. An unobstructed view of the sky is
needed for the reception of the GPS signals. However, today’s highly sensitive chip sets make it
possible to get signals even without a satisfactory view of the sky. However, this is only possible when
the signals are sufficiently strong. Sometimes, even with clear blue skies, the satellite signals can be
distorted to such an extent that they cannot be used as working signals. This is not the fault of the
NL-125O, but the result of the physical laws of electromagnetic radiation. Switch the NL-125O off and
try it again later. Please look for a position that is not right beside the exterior walls of a building because
even these can cause reflections that may interfere with the signals.
13.5. When using the NL-125O for the first time, the first satellite fix might take up to 30 minutes. The
same might happen if you use the receiver on another continent.
13.6. Never connect the NL-125O receiver to the charger if it is moist or wet, as this can destroy the
device completely and make it irreparable. Send the receiver with a note indicating "Water Damage" to
our support department. Support will disassemble, dry and test the receiver for function.
13.7. If you have used the wrong charger for the NL-125O. In this case, only the Navilock Repair
Center can assess the extent of the damage and submit an estimate of repair costs. Send the device by
prepaid postage to us with a note indicating "KVA-Wrong Power Supply".
The Navilock Repair Center always tries to be as accommodating as possible, so please explain as
thoroughly as possible the actual cause of the defect. However, we can usually determine this during
38
error analysis if the reason is unauthorized interference, water damage, mechanical damage from
dropping, overcharging or incorrect use.
Malfunctions often have very small causes. It is not always necessary to replace a product. And this might
not even rectify the malfunction, which may not be in the GPS-hardware at all.
Please contact Navilock Support before setting off to your dealer. We will help you quickly and efficiently,
and without undue bureaucracy, so that you can avoid an unnecessary replacement.
A member of the support team will look into your problem and work out a solution.
We hope you have much fun with your Navilock product!
14. Certificates
• CE, FCC and R & TTE can be requested from [email protected] or can be viewed at
www.navilock.de in the section "Support."
15. Warranty/Support/Copyright
15.1. Period of Warranty
• We will repair the GPS-receiver within the statutory time of the warranty free of cost, as long as there
has been no unauthorized interference, damage by water or moisture, damage resulting from
dropping, or any damage resulting from incorrect use.
15.2. Support
• For further support requests, please contact our Support team: [email protected] /
www.navilock.com
You can also find up-to-date product information on our homepage: www.navilock.com
Please send products to be repaired, always by prepaid postage, to:
Tragant Handels- und Beteiligungs GmbH
Navilock Repair Center
Beeskowdamm 13/15
D-14167 Berlin-Zehlendorf
Enclose proof of your purchase and a detailed description of the malfunction, "Does not work" or
"defect" does not count as a detailed description of a malfunction. Time errors have to be especially
mentioned. For logistic reasons, we cannot accept carriage forward shipments.
15.3. Final Provisions
• The information and data given in this manual is subject to change without prior notice, errors and
misprints excepted.
15.4 Copyright
• Without explicit approval in writing from Navilock, no part of this user manual may be reproduced or
disseminated for any purpose whatever. This is irrespective of the kind and method or the means –
electronic or mechanical – this is used.
The brand label Navilock is a registered trademark and may not be used without the approval of the
holder of these rights in writing. Changes, amendments or additions are not allowed
15.5. Brands of Third Parties
• Brands, trademarks, product names and logos of third parties, which are shown in this documentation,
are possibly brands or registered brands of the respective rights holders.
39
Declaration of Conformity
The CE declaration of conformity can be found at http://www.navilock.de/support/ in the section "Declarations of Conformity" or can
be requested from Konformitä[email protected].
WEEE Note
The WEEE (Waste Electrical and Electronic Equipment) Directive, which became effective on February 13, 2003 as European Law,
led to comprehensive changes in regard to the disposal of waste electronic equipment. The main purpose of this directive is the
avoidance of waste electrical and electronic equipment (WEEE) and at the same time promotion of re-use, recycling and other forms
of reprocessing in order to reduce waste. The WEEE logo on the product and the packaging indicates that the product is not to be
disposed of with the normal household waste. You are responsible for delivering all used electrical and electronic equipment to the
authorized collection points. The separate collection and sensible reprocessing of your waste electrical and electronic equipment
supports more careful use of natural resources. Moreover, the reprocessing of the waste electrical and electronic equipment is a
contribution to preserve the natural environment and thus also human health. You can get further information concerning the
disposal of electrical and electronic equipment and the reprocessing and the collection points from the local administration, disposal
companies, from specialized dealers and the manufacturer of the equipment.
RoHS Compliance
This product complies with the Directive 2002/95/EC of the European Parliament and the Council of January 27, 2003 regarding the
limited use of hazardous substances in electrical and electronic devices (RoHS) as well as its modifications.
Date: 20.11.09
40