1
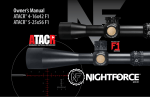
NXS and Precision Benchrest Models
Nightforce research and development teams, located in Central
Idaho, design technically advanced riflescopes to perform in
uncompromising situations.
The philosophy of the company is highly specialized and focused
on building the ultimate instrument for the application. Our
research and testing has developed new standards in
manufacturing and quality control. Every Nightforce scope
receives 100% individual inspection and must pass vigorous
testing prior to shipping. Our commitment to ultimate riflescope
performance by using cutting edge technology and advanced
optical/mechanical designs is unparalleled in the industry.
1
NIGHTFORCE
Owners Manual
NXS and Precision Benchrest Models
Every Nightforce riflescope is of exceptional quality and
designed to be the ultimate instrument for its application.
1
Important Information
FAILURE TO FOLLOW THIS MOUNTING
PROCEDURE MAY VOID WARRANTY.
Your riflescope and rifle are only as good as the link between
them. The mounting of your riflescope is as important as the
bedding of the rifle’s action to the stock. To ensure the highest
level of performance the following steps in the mounting
procedure must be followed as described.
Major concerns in riflescope mounting (materials/design).
(A) Aluminum - A quality aluminum ring and base combination
designed for competition rifle shooting are acceptable when
being used on benchrest or light recoil rifles.
(B) Steel - A high quality ring and base combination of the
weaver type design or similar is required for field use
and/or high recoil applications. See “ACCESSORIES” for
suggested base options.
Under no circumstances do we recommend the usage of turn in
style rotary/dove tail type ring and base designs, especially those
equipped with windage adjustment.
2
Ring Alignment
Most production rifle actions or ring and base combinations are not manufactured accurately enough to ensure proper alignment
out of the box. After properly securing bases and rings to the action, alignment and compression of the rings is required prior to
mounting the riflescope. To fulfill this requirement a 30mm lapping bar kit is available from Nightforce or other suppliers of
precision shooting products. This lapping bar kit consists of a steel bar 30mm in diameter with a handle attached and a nonimbedding lapping compound. This tool is used to remove unnecessary material from the lower halves of the rings eliminating
misalignment. This procedure allows both rings to align with one another, thus creating a stress-free platform for the riflescope.
Step One
With bases and lower halves of the rings securely mounted to the rifle, mount the 30mm steel lapping bar and tighten top ring
halves. This procedure will cause the rings to compress and take set to the lapping bar instead of the tube body of the riflescope.
Do not use the riflescope in place of the steel lapping bar.
Step Two
Remove the lapping bar and apply lapping compound to the lower ring halves. Perform lapping procedure until a maximum of 75% of
the surface area has been lapped of the lower ring halves. (Note: or until the bar moves freely. i.e. no binding halves.)
Step Three
Remove the lapping bar and clean all surfaces with alcohol or other solvent to ensure an oil free surface.
Step Four
Set the Nightforce riflescope to the highest magnification. Place the riflescope in the lower portion of the rings as far forward as
possible. Install the top ring halves evenly front and rear. Tighten ring screws with just enough tension to still allow the slight
movement of the riflescope. Hold the rifle in your normal shooting position and slowly move the riflescope back until the full field
of view is obtained. It is recommended to mount the riflescope at this position or slightly forward to ensure maximum eye relief.
Step Five
Focusing the eyepiece - this procedure focuses the reticle to your eye. (This has no effect on the image unless severely out of adjustment).
(1)
Check that the riflescope is set at the highest magnification.
(2)
Set the parallax adjustment to the infinity setting [ ∞ ] on the riflescope.
(3)
Look through the riflescope eyepiece to determine if the reticle is clear and in focus instantly. Note: All Nightforce
riflescopes are factory set for an average individual eye strength, thus adjustment may not be necessary. Looking at the
reticle for an extended period of time during this process will cause your eye to compensate, resulting in false indication of
reticle focus.
(4)
If adjustment is necessary grasp the eyepiece and rotate counter clockwise – loosening it away from the lock-ring while
holding the riflescope from turning in the rings. Several turns of the eyepiece are necessary to achieve any measurable
affect. Once reticle focus is achieved, lock the eyepiece by threading the lock-ring back to the eyepiece.
(5)
Fast focus eyepiece. Not all Nightforce riflescopes are equipped with a lock-ring on the eyepiece. If your riflescope model is
equipped with a fast focus eyepiece ie. No locking ring, simply perform steps 1, 2 & 3 above to set eyepiece focus.
Final Step
First, level the rifle, then hang a plumb by a line at 100 yards. Rotate the riflescope in the rings until the vertical portion of the
reticle is parallel with the plumb line. Tighten rings evenly both front and rear until riflescope is secure. Your Nightforce scope is
now properly mounted.
3
Establishing a Zero
Zero the rifle using the center aiming point of the reticle at your desired zero range. (A 200 yard zero is common). If your
Nightforce riflescope is equipped with target turret adjustments you may set them to zero with the supplied hex wrench and
record the rotation setting your zero is on for both windage and elevation. These are the horizontal indicator marks located below
the rotating dials. You have now established a zero to which you may return.
NF Target Turret Indicator Marks
NXS Target Turret Indicator Marks
Creating a Drop Chart
With your elevation and windage target turret adjustments zeroed and recorded, set up a target at the first distance you wish to
shoot beyond your established zero. From your zero, count the number of clicks up to hit the target. Record the number of clicks
and so on for each range. Now that you have compiled the number of clicks to hit the targets at all the various ranges, you can
simply convert the number of clicks to M.O.A. by determining the click value of your specific Nightforce riflescope. For 1/8 (.125)
M.O.A. click value, divide all click numbers by 8; this converts clicks to M.O.A. + clicks. For Nightforce riflescopes with 1/4 (.250)
M.O.A. click value divide by 4 to convert to M.O.A. This information is compiled to form a drop chart (see top of following page).
This drop chart provides you with the information needed to hit your target using M.O.A. plus clicks. Example: Utilizing the
target turret adjustments with a click value of 1/8 M.O.A. and your drop chart, you can determine the distance requires 8 M.O.A.
plus 2 clicks (8.2). Utilizing center aiming point at any power magnification, turn the elevation target turret 8 M.O.A. + 2 clicks
and shoot. For Nightforce riflescopes equipped with 1/4 M.O.A. click value, turn the elevation target turret adjustment 8 M.O.A. +
1 click from your zero.
NF Target turret adj. 1/8 (.125) M.O.A. click value
4
NXS turret adj. 1/4 (.250) M.O.A. click value
1/8 M.O.A. Drop Chart
Yards
Clicks
Elevation
M.O.A.+clicks
200
0
0
1/4 M.O.A. Drop Chart
Yards
Clicks
Elevation
M.O.A.+clicks
200
0
0
300
16
2.0
300
8
2.0
400
32
4.0
400
16
4.0
500
53
6.6
500
27
6.3
600
66
8.2
600
33
8.1
Note:
Divide clicks by 4 (.250) for 1/4 M.O.A. click value or 8 (.125) for 1/8 M.O.A. click value.
Example:
(A) 27 clicks divided by 4 equals 6.75 M.O.A. (27÷4=6.75 M.O.A.) or 6 M.O.A. + 3 clicks(6.3)
(B) 27 clicks divided by 8 equals 3.375 M.O.A. (27÷8=3.375 M.O.A.) or 3 M.O.A. + 3 clicks(3.3)
Parallax Adjustment
All Nightforce riflescopes feature an adjustment for eliminating parallax.
Parallax is the apparent movement of the reticle in relation to the target as the shooter moves his eye across the exit pupil of the
riflescope. A nod of the head up and down will quickly determine if parallax is present. If parallax has been eliminated the reticle
will remain stationary in relation to the target regardless of head placement. Thus not influencing the accuracy of the shot.
Nightforce has two different styles of parallax adjustments. Your Nightforce riflescope will be equipped with one of the two
depending on model.
Left – Adjustable objective located on the front objective end. Indicated in
yards from 25 to infinity [ ∞ ].
Right – Side focus adjustment located on the riflescope saddle opposite from
the windage adjustment turret.
Battery Installation
If your Nightforce riflescope is equipped with reticle illumination, it will be one of the two following options:
Left – NF rheostat battery compartment
(A) Variable rheostat mounted on eyepiece. To install the battery unscrew the battery compartment cap
counter clockwise using a coin or screwdriver while holding the rheostat to prevent it from rotating.
Place a new battery (CR2032 Panasonic or equivalent) positive (+) side up or facing you. Replace and
tighten the cap.
Left – NXS rheostat battery compartment
(B) Integrated reticle illumination/parallax adjustment system. To install the battery unscrew the battery
compartment cap counter clockwise while holding the parallax adjustment to prevent it from rotating.
Place a new battery (CR2032 Panasonic or equivalent) positive (+) side up or facing you. Replace and
tighten the cap.
Battery Duration: Depending on the intensity and conditions, your battery can last up to 720+ hours of continuous use.
5
Illumination System Operation
Variable rheostat mounted on eyepiece
To increase or decrease reticle illumination rotate numbered rheostat dial from one to ten.
Operation of NXS Integrated Illumination System
To activate reticle illumination pull outward on the parallax turret assembly.
To deactivate the reticle illumination push inward on the parallax turret assembly.
Adjusting the variable illumination
reticle intensity on the NXS riflescope.
When the Nightforce NXS reticle illumination system is activated it will illuminate at one
predetermined setting. You have the ability to change the reticle illumination intensity by turning a
small rheostat located inside the battery compartment. Using a small jewelers screwdriver, turn the
rheostat counter clockwise to increase the illumination intensity or turn the rheostat clockwise to
decrease the illumination intensity.
Care and Cleaning
Use a lens brush to remove loose particles of dust and a high-grade glass cleaner applied on a cotton swab. Do not apply excessive
pressure and begin moving in a circular motion from center to outer edge of the lens.
Mounting System
This mounting system offers unequalled machined precision and durability.
Nightforce bases are CNC machined from a single steel billet and are available
for Remington, Winchester, Weatherby and Savage actions. The one-piece and
two-piece mounting system can increase internal adjustment of the scope by
40 M.O.A. and 20 M.O.A. respectively.
Steel 30mm Picatinny or Mil-Spec rings position NXS scopes low on the rifle
and are sold in serialized matched pairs. Nightforce Rings are available in
.885", 1.0" and 1.125" heights.
Accessories
Visit www.nightforceoptics.com for complete information on these other fine Nightforce products, made in the U.S.A.:
Mirage Tube
6
Tripod
Drag Bag
Torque Wrench
Lapping Bar
Nightforce Owner Survey
Answering the following question will help us maintain the high level of quality and
service Nightforce owners have come to expect. We encourage your input.
What changes or modifications would you recommend be made to improve this product?
Other Comments:
Owner Registration Card
Please fill out and return this product registration card within 30 days of purchase.
Return to the address below. We retain this card for warranty eligibility.
Name:
Address:
City:
State:
Model No.:
Serial No.:
Date of Purchase:
Zip:
Phone No.:
Purchased From:
Where did you hear about our products?
Attach Proof of Purchase:
Lightforce USA Inc.
P.O. Box 9 • Orofino, Idaho 83544
7
Lightforce USA Inc.
P.O. Box 9
Orofino, Idaho 83544
PLACE
STAMP
HERE
1
NIGHTFORCE
Limited Lifetime Warranty
Your Nightforce Riflescope is unquestionably warranted to be free from
defects in materials and workmanship. Exclusions to this warranty
include/but are not limited to: abuse, mishandling or improper mounting.
In the event of a defect in materials or workmanship we will repair or
replace the instrument at our option, provided you return the scope
postage pre-paid along with a description of the defect with your
shipping address and phone number to the address below.
Lightforce, USA Inc.
P.O. Box 9 • Orofino, Idaho 83544 • 208-476-9814 (tel) • 208-476-9817 (fax)
www.nightforceoptics.com • www.nightforcescopes.com
9
Nightforce Precision Optics
www.nightforceoptics.com
•
www.nightforcescopes.com
North American Sales
Lightforce USA, Inc. • P.O. Box 9 • Orofino, Idaho 83544
208-476-9814 (tel) • 208-476-9817 (fax)
International Sales
Lightforce Australia Pty., Ltd.
28 Orsmond Street
Hindmarsh South Australia 5007


![2013 Gun List internet copy[2]](http://vs1.manualzilla.com/store/data/005851443_1-16b4e1bd3fc391c408d2005c48a2e336-150x150.png)