1
Quality Check Messages and Codes
(continued)
Message
Cause
Action
Analyzer Error, Use
Electronic
Simulator
Handheld detects
problem from which it
is likely to recover.
Insert the Electronic Simulator. If
PASS, continue to use handheld
Analyzer Error,
See Manual
Handheld detects
problem from which it
may not recover.
Insert Electronic Simulator. If PASS,
insert a cartridge with sample
or control. If the code does not
reappear, continue to use handheld.
No display
Disposable batteries
dead or rechargeable
battery fully
discharged. Keypad
not responding. Start
switch broken.
Change disposable batteries or
recharge battery. If still no display,
call Support Services.
Cartridge Locked
does not disappear
after test cycle
completed
Dead battery(s).
Mechanical
problem.
Wait until handheld turns off. Turn
handheld on. If resets, remove
cartridge. If not, change or recharge
battery(s) and turn handheld on.
(01)00054749001286
®
i-STAT 1
User Guide
Abbott Point of Care Inc.
Abbott Park, IL 60064 • USA
Emergo Europe
Molenstraat 15
2513 BH The Hague
The Netherlands
Tel: (31)70 345 8570
Fax: (31)70 346 7299
Art: 714254-00R
i-STAT
For information related to Article 33
of the EU REACH regulation
(EC No. 1907/2006), please refer
to PMIS.abbott.com. If you have
issues logging into the website,
contact Abbott at: .......................
[email protected].
Rev. Date: 16-OCT-12
©2012 Abbott Point of Care Inc. All rights reserved.
Printed in USA. i-STAT is a registered trademark of the
Abbott Group of Companies in various jurisdictions.
®
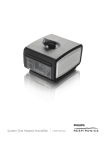
System Components
EG7+
Quality Check Messages and Codes
i-STAT cartridge
i-STAT 1 Analyzer
i-STAT 1
Downloader
Message
Cause
Action
Date Invalid,
Check Clock
Date outside six
month lifetime of
software.
Select 5-Clock Set from
Administration Menu. (Password
protected.)
Dead Batteries,
Replace Batteries
Insufficient power to
complete a test cycle.
Replace disposable batteries or
recharge the rechargeable battery.
Temperature Out of
Range, Check
Status page
Temperature outside
operating range of 16
to 30 °C.
Check handheld temperature by
pressing 1 for Analyzer Status under
the Administration Menu. Move
handheld to warmer area if below
operating range or to cooler area if
above the range.
Invalid or Expired
CLEW
Software expired or
corrupt.
Verify that the handheld’s date is
correct. Change software if expired.
Update again if not expired.
Analyzer Interrupted,
Use Another
Cartridge
Last cartridge run not
completed.
Check the battery pack inserted
properly. Check for Low Battery
startup warning.
Cartridge Error
Usually problem with
sample or cartridge
filling.
Use another cartridge. If same code
repeats more than twice, try another
handheld.
Cartridge Preburst
Calibrant pack burst
before cartridge inserted
into handheld.
Use another cartridge - do not press
on center of cartridge. Check that
cartridges have not been frozen.
Unable to Position
Sample
Cartridge not sealed.
Clot in sample.
Aberrant cartridge.
Use another cartridge.
Sample Positioned
Short of Fill Mark
Cartridge underfilled.
Use another cartridge - fill to Fill
Mark.
Sample Positioned
Beyond Fill Mark
Cartridge overfilled.
Use another cartridge - do not fill
beyond Fill Mark.
Test Cancelled by
Operator
User did not respond
to mandatory prompt
before handheld time
out.
No action required.
Cartridge Type Not
Recognized
Software does not
recognize cartridge.
Update software. Check to see if
cartridges are expired.
Electronic
Simulator
i-STAT 1
Downloader/Recharger
Martel Printer
For in vitro diagnostic use.
See System Manual for instructions.
Intended Use: The i-STAT 1 Analyzer is intended for use with i-STAT cartridges
for the in vitro quantification of various analytes in whole blood.
2
15
Replacing Paper in the i-STAT Printer
1.
Open the paper compartment lid by pulling up on the release lever and
remove any remaining paper.
2.
Reel off a few centimeters of paper from the new paper roll, with the
leading edge of the paper feeding forward from the bottom of the roll.
3.
Sit the new paper roll in the compartment such that the leading edge is
resting outside the compartment on the printer casing.
4.
Close the lid until it snaps into place.
Blood Collection
Acceptable Samples for Cartridges
■
Arterial: Plain syringe, heparinized syringe labeled for analytes to be tested and
filled to capacity, or syringe with minimum volume of heparin to prevent clotting
(10 U/mL of blood). For ionized calcium, use balanced heparin syringes. Mix
heparinized syringes by rolling between palms for at least 5 seconds in 2
directions, then invert the syringe repeatedly for at least 5 seconds. Test for
lactate immediately. Samples for pH, PCO2, PO2 , TCO2 and ionized calcium
should be tested within 10 minutes. Test for other analytes within 30 minutes.
• Avoid drawing air into syringes for blood gas and ionized calcium tests.
• If not tested immediately, remix and discard 2 drops of blood before
Troubleshooting
filling cartridge.
• Do not use iced samples.
Unexpected Results
When results do not reflect the patient’s condition, repeat the test using a fresh
cartridge and sample. If results are still suspect, test the lot of cartridges in use
with i-STAT control solutions. If the controls are in range, there may be an
interfering substance in the sample. Check the Cartridge and Test Information
sheets for the test in question. Test by another method to verify the result. If the
controls are out of range there may be a problem with the cartridge lot number.
Use another lot number or repeat the test using another method, and refer to
Support Services Information in the Technical Bulletin section of the i-STAT 1
System Manual.
■
Startup Messages
■
The handheld performs self-checks when it is turned on. If a condition that
should be corrected in the near future, but that will not affect results, is
detected, a warning is displayed. The operator presses the 1 key to access the
Test Menu. The handheld can be customized to lock out the operator until the
corrective action is taken.
Message
Action
Electronic Simulator Test Required
Insert Electronic Simulator.
Stored Memory Low
Place handheld in Downloader.
Stored Memory Full
Place handheld in Downloader.
Upload Required
Place handheld in Downloader.
Battery Low
Replace batteries or recharge battery.
CLEW Expiring, Update Required
Update software.
Venous: Collection tube with lithium or sodium heparin filled to capacity
and mixed by gentle inversion at least 10 times. Test within 10 minutes.
• Do not leave tourniquet on for more than 2 minutes.
• Do not draw above an I.V.
■
Skin puncture: Lithium heparin capillary tubes for testing all analytes but
ionized calcium. For all analytes including ionized calcium, use plain or
balanced heparin capillary tubes. Test immediately.
• Allow alcohol to dry over puncture site before collecting sample.
• Do not “milk” finger or heel while collecting sample.
Coagulation Tests:
• The ACT test can be performed using venous or arterial samples, while
the PT/INR test can be performed using capillary or venous samples.
• Use plain plastic syringes or plastic evacuated tubes with no
anticoagulant, activators, or serum separators.
• Test sample immediately upon draw.
• For venipuncture, some experts recommend drawing and discarding a
sample of at least 1 mL prior to drawing samples for coagulation testing.
• If a second measurement is needed, draw a fresh sample.
• For Indwelling line testing for ACT:
a.
Fluid drip through the line must be discontinued.
b.
If blood must be drawn from an indwelling line, possible heparin
contamination and specimen dilution should be considered. The
line should be flushed with 5 mL of saline and the first 5 mL of
blood or six dead space volumes should be discarded.
c.
Withdraw the sample into a fresh plastic syringe with no
anticoagulant, and test immediately.
• For extracorporeal line testing for ACT:
a.
14
Flush the extracorporeal blood access line by withdrawing 5 mL of
blood into a syringe and discard the syringe.
3
b.
■
Withdraw the sample into a fresh plastic syringe with no
anticoagulant, and test immediately.
CHEM8+ Cartridges
• CHEM8+ cartridges require the use of:
a.
■
whole blood collected in non-heparinized capillary tubes, evacuated
tubes, or syringes, as long as sample is tested immediately upon draw,
b.
heparinized whole blood collected in balanced heparin syringes or
capillary tubes, or
c.
heparinized whole blood collected in evacuated tubes containing
lithium or sodium heparin, as long as the tubes are filled to capacity.
Charging Rechargeable Battery in External Recharge Compartment
Placing a rechargeable battery into the recharging compartment will automatically
initiate trickle recharging. The indicator light near the recharging compartment will
be green when a rechargeable battery is placed in the compartment.
STEP
1
The battery pack has two labels: one for orientation in the handheld and
one for orientation in the Downloader/Recharger. With the label with the
Downloader facing up and the electrical contact end of the pack facing the
contacts in the battery compartment, insert the pack into the compartment
as shown on the label.
2
To remove the battery after it is charged, back the pack out of the
compartment.
Troponin I/cTnI and CK-MB Tests
• cTnI and CK-MB cartridges require the use of either:
a.
heparinized whole blood or plasma samples collected in syringes
or evacuated tubes containing lithium or sodium heparin, or
b.
non-heparinized whole blood or plasma samples tested within one
minute of drawing from a patient into a plastic syringe or plastic
evacuated tube containing no additives.
ACTION
Full recharge from a discharged state takes approximately 40 hours.
Caution
If you are using rechargeable batteries, use only rechargeable batteries and
recharging equipment supplied by your i-STAT distributor. Other batteries and
rechargers may affect test results and pose other hazards to operators and patients.
• The use of whole blood or plasma samples containing other anticoagulants
such as EDTA, oxalate, and citrate will cause deactivation of the alkaline
phosphatase, resulting in decreased cTnI or CK-MB readings.
• Capillary tubes and direct skin punctures (e.g. fingersticks) should not
be used with the cTnI or CK-MB cartridge.
■
Cleaning the Handheld and Downloader
Clean the display and case with a gauze pad moistened with a mild nonabrasive cleaner, detergent, soap and water, alcohol or 10% bleach solution.
Rinse with another pad moistened with water and dry.
Replacing Paper in the Martel Printer
BNP Tests
• BNP cartridges require the use of EDTA whole blood or plasma samples
collected in plastic syringes or evacuated tubes containing EDTA.
• The use of whole blood or plasma samples containing other
anticoagulants such as oxalate and citrate is not recommended.
• Capillary tubes and direct skin punctures (e.g. fingersticks) should not
1.
Squeeze the front and back of the paper cup to open.
2.
Remove remaining paper by pressing the Paper feed button. Do not
pull paper through printer mechanism.
3.
Reel off a few centimeters of paper from the new paper roll and check
that the end has a clean straight edge.
4.
Slide the leading edge of the paper through the paper entry slot until
you feel resistance. Paper feeds from underneath the roll.
5.
Press the Paper Feed button and feed the paper through the printer
mechanism.
6.
Keep the Paper Feed button depressed until the paper passes through
the paper exit slot.
7.
Sit the new paper roll in the paper cup and close the lid.
be used with the BNP cartridge.
Limitations
Interfering substances in the patient’s sample may cause an increase or
decrease in a result. Refer to the Cartridge and Test Information Sheets and
Technical Bulletins for substances and/or conditions that may interfere with
cartridge tests.
4
13
Procedure
Patient Test Procedures
1.
Turn the handheld on and press
2.
Press
3 for Quality Tests.
3.
Press
1
for Control.
• The i-STAT 1 handheld must be customized through the Central Data Station
(CDS) or through the handheld’s Customization menu for the following option(s):
Cartridge Information First Required AND Cartridge Lot Number Required.
4.
Press
1
for i-STAT Cartridge (if prompted).
• DO NOT insert cartridge to start test
5.
Scan or enter Operator ID.
6.
Enter the control lot number.
7.
Scan the lot number on the cartridge pouch.
8.
Fill a cartridge with the control and close the cover.
9.
Insert the cartridge into the cartridge port.
MENU
to access the Administration Menu.
• DO NOT open cartridge pouch before scanning the barcode (if applicable)
12. Remove and discard cartridge when Cartridge Locked message disappears.
1 for Next
Hardware Procedures
Replacing Batteries
Slide the battery compartment door off.
2.
Tilt the handheld slightly to slide out the battery
carrier.
3.
Remove the old batteries from the carrier and
replace with 2 new 9V lithium batteries.
4.
Insert the carrier back into the compartment –
label facing up and electrical contacts first.
5.
Slide the battery compartment door into place.
to turn on Handheld.
2. Press 2
i-STAT Cartridge
4. Scan the lot number on the cartridge pouch.
11. View results on handheld’s display.
1.
1. Press
3. Follow Handheld prompts.
10. Enter chart page information if applicable.
13. Press 1 for Test Options on the results page and press
Level if testing another level of control.
Cartridge Test Procedure
• Position barcode 3 - 9 inches from scanner
window on the Handheld.
• Press and hold
SCAN
to activate the scanner.
• Align the red laser light so it covers entire barcode.
• The Handheld will beep when it reads the
barcode successfully.
Note: If cartridge pouch does not have a barcode, enter lot number using numbered
keys or press
ENT
3
to bypass this prompt. You may ignore any letters.
Laser Radiation – Do not stare into beam. Class 2 laser product.
Laser Diode 650 nm Maximum Output 1.0 mW.
5. Continue normal procedures for preparing the
sample, filling and sealing the cartridge.
Charging the Rechargeable Battery
Placing a handheld in a Downloader/Recharger will automatically initiate
recharging of the rechargeable battery. The indicator light on top of the
Downloader/Recharger will be green (trickle charge), red (fast charge), or
blinking red (fast charge pending) when a handheld with a rechargeable battery
is placed in the Downloader/Recharger.
No damage will be caused if a handheld with disposable batteries installed is
placed in the Downloader/Recharger.
6. Push the sealed cartridge into the handheld port until it clicks into place. Wait for
the test to complete.
Note: For ACT, PT/INR, Hct and immunoassay testing, the handheld must remain
on a level surface with the display facing up during testing.
A level surface includes running the handheld in the Downloader/Recharger.
7. Review results.
12
5
Reviewing Test Results
■
Quality Assurance
■
Test results are displayed numerically and with
bar graphs. Tick marks indicate the reference
ranges on the bar graphs. (Blood gases and their
associated calculated values are not displayed
with bar graphs and reference ranges.)
■
Test results are displayed for 2 minutes or a
customized time. To recall the last set of results
to the screen, turn the handheld on and press 1
for Last Result.
■
■
Handheld
The 0 key can be used to backlight the display to
view results in dim lighting. (The backlight turns
off after 90 seconds or when the 0 key is pressed
again.)
Electronic Simulator
Perform an electronic check on each handheld in use once a day with either the
internal or external Electronic Simulator or as needed for regulatory compliance.
The internal simulator check is initiated, every 24 hours or according to a customized
schedule, when a cartridge is inserted into the cartridge port. If the internal simulator
result is PASS, the cartridge test proceeds and the simulator results are stored. If
FAIL is displayed for the internal simulator, reinsert the cartridge or use an external
simulator. The external simulator check is performed as follows:
To review results from the same patient, when
results are displayed, press 1 for Test Options
and then 3 for History. Scroll through test
records using the 1 and 2 keys.
To review another patient’s results, turn the
handheld on and press the Menu key followed by
the 2 key for Data Review and the 1 key for
patient. Scan or enter the Patient’s ID number.
Use the 1 and 2 keys to scroll through the test
records. Or, press the Menu key followed by the
7 key for List. Select the test record(s) to be
reviewed and press the Enter key.
1.
Turn the handheld on.
2.
Press
3.
Press 3
for Quality Tests.
4.
Press 4
for Simulator.
MENU
to access the Administration Menu.
5.
Scan or enter Operator ID.
6.
Enter the Simulator ID (serial number).
7.
Insert the simulator into the cartridge port.
8.
View results on handheld’s screen.
9.
If PASS is displayed, continue to use the handheld.
10. If FAIL is displayed for the external simulator, reinsert the simulator.
If FAIL is displayed a second time, do not use the handheld and contact
your Support Services representative.
Thermal Probes and Room Temperature Checks
Reportable and Reference Range
See System Manual for these quality assurance procedures that are performed
once or twice per year.
Measured:
Reportable
Range
Reference Range
(arterial)
(venous)
Test
Units
Sodium/Na
mmol/L (mEq/L)
100 – 180
138 – 146
138 – 146
Potassium/K
mmol/L (mEq/L)
2.0 – 9.0
3.5 – 4.9
3.5 – 4.9
Chloride/Cl
mmol/L (mEq/L)
65 – 140
98 – 109
98 – 109
Glucose/Glu
mmol/L
mg/dL
g/L
1.1 – 38.9
20 – 700
0.20 – 7.00
3.9 – 5.8
70 – 105
0.70 – 1.05
3.9 – 5.8
70 – 105
0.70 – 1.05
Lactate/Lac
mmol/L
mg/dL
0.30 – 20.00
2.7 – 180.2
0.36 – 1.25
3.2 – 11.3
0.90 – 1.70
8.1 – 15.3
Creatinine/Crea
mg/dL
µmol/L
0.2 – 20.0
18 – 1768
0.6 – 1.3
53 – 115
0.6 – 1.3
53 – 115
6
Cartridge
■
Immediately check temperature strip enclosed with each shipment of
cartridges. Follow the instructions on the card.
■
Verify the integrity of a new shipment of cartridges, on receipt, by analyzing
2 levels of i-STAT controls and RNA Medical controls for hematocrit using any
handheld that has passed the Electronic Simulator test and a representative
sample of the lot(s) of cartridges received. Use expected values published in
the Value Assignment Sheets to verify the integrity of the cartridges.
■
Verify that the storage conditions listed above have been maintained.
11
Reportable and Reference Range
Transmitting Results
1.
Place handheld in Downloader or Downloader/Recharger.
Measured:
2.
Do not move handheld until Communication in Progress
message disappears.
Test
Units
pH
PCO2
mmHg
kPa
TCO2
mmol/L (mEq/L)
Reportable
Range
Reference Range
(arterial)
(venous)
6.50 – 8.20
7.35 – 7.45
7.31 – 7.41
5 – 130
0.67 – 17.33
35 – 45
4.67 – 6.00
41 – 51
5.47 – 6.80
5-50
23 – 27
24 – 29
(on CHEM8+ cartridge only)
Storage Conditions and Preparation for Use
PO2
mmHg
kPa
5 – 800
0.7 – 106.6
80 – 105
10.7 – 14.0
Ionized Calcium/iCa
mmol/L
mg/dL
0.25 – 2.50
1.0 – 10.0
1.12 – 1.32
4.5 – 5.3
1.12 – 1.32
4.5 – 5.3
Urea Nitrogen/BUN
Urea
mg/dL
mmol/L
mg/dL
3 – 140
1 – 50
6 – 300
8 – 26
2.9 – 9.4
17 – 56
8 – 26
2.9 – 9.4
17 – 56
Hematocrit/Hct
%PCV
Fraction
10 – 75
0.10 – 0.75
38 – 51
0.38 – 0.51
38 – 51
0.38 – 0.51
Celite Activated
Clotting Time/
Celite
ACT
seconds
50 – 1000
74 – 125 (Prewarm)
84 – 139 (Nonwarm)
74– 125 (Prewarm)
84 – 139 (Nonwarm)
Cartridges
■
Store at temperatures between 2 and 8 °C (35-46°F). Do not use after
expiration date on cartridge pouch and box.
■
Equilibrate a single cartridge for 5 minutes or a box of cartridges for 1 hour
at room temperature before opening pouches.
■
Store cartridges at room temperature for the timeframe indicated on the cartridge
box. Mark the cartridge box or cartridge pouches with the room temperature
expiration date. Do not expose to temperatures above 30 °C (86°F). Do not
return cartridges to the refrigerator after room temperature equilibration.
■
Use cartridge immediately after opening pouch. If the pouch has been
punctured, the cartridge should not be used.
The range from 80 - 1000 seconds has been verified through method comparison studies.
Kaolin Activated
Clotting Time/
Kaolin
ACT
seconds
50 – 1000
74 – 137 (Prewarm)
82 – 152 (Nonwarm)
74 – 137 (Prewarm)
82 – 152 (Nonwarm)
The range from 77 - 1000 seconds has been verified through method comparison studies
Analyzer
■
Storage/Transport temperature: -10 to 46°C (14-115°F)
■
The handheld’s operating temperature range is 16 to 30 °C (61-86°F).
■
Store handhelds near the testing location or in an area close to the
temperature of the testing area. Do not store handhelds near equipment
that gives off heat or in direct sunlight.
Prothrombin Time / PT
INR
0.9 – 8.0
Performance characteristics have not been established for INRs above 6.0
Troponin I / cTnI
ng/mL (µg/L)
0.00 – 50.0
0.00 – 0.03*
0.00 – 0.08**
Performance characteristics have not been established for cTnI values above 35.00 ng/mL.
* Represents the 0 to 97.5% range of results.
** Represents the 0 to 99% range of results.
Creatinine Kinase MB
/ CK-MB
ng/mL (µg/L)
0.0 – 150.0
0.0 – 3.5***
15 – 5000
<15 – 50#
***Represents the 0 to 95% range of results.
β-Type Natriuretic
Peptide / BNP
pg/mL (ng/L)
# Represents the 0 to 95% range of results
Celite is a registered trademark of Celite Corporation, Santa Barbara, CA. for its diatomaceous earth products.
10
7
Calculated:
Reportable
Range
Printing Test Results from a
Martel Printer or i-STAT Printer
Reference Range
(arterial)
(venous)
Test
Units
Hemoglobin/Hb
g/dL
g/L
mmol/L
TCO2
(for all cartridges but
the CHEM8+ only)
mmol/L (mEq/L)
HCO3
mmol/L (mEq/L)
1.0 – 85.0
22 – 26
BE
mmol/L (mEq/L)
(-30) – (+30)
Anion Gap/AnGap
mmol/L (mEq/L)
sO2
%
Without Downloader or Downloader/Recharger
3.4 – 25.5
34 – 255
2.1 –15.8
12 – 17
120 – 170
7 – 11
12 – 17
120 – 170
7 – 11
5-50
23 – 27
24 – 29
1.
Turn printer on if green power light is not on.
2.
Align IR windows of handheld and printer.
3.
Display results.
4.
Press
23 – 28
5.
Do not move handheld or printer until printing is complete.
(-2) – (+3)
(-2) – (+3)
6.
If printer is not powered from a wall outlet, turn printer off.
(-10) – (+99)
10 – 20
10 – 20
N/A
95 – 98
Test Flags and Operator Action
■
***: Results that are not reportable due to sensor errors or interfering
substances. Draw a fresh sample and repeat test. If results are flagged
again, send sample to the lab.
■
< , > and < >: Results that are below or above the reportable range or
dependant on results that are outside the reportable range. Send sample to
the lab if necessary.
■
↑ and ↓: Results that are above or below the action range. Follow facility
procedure for samples with critical values.
.
With Downloader or Downloader/Recharger
1.
Place handheld in Downloader or Downloader/Recharger that is wired to printer.
2.
Display results.
3.
Press
4.
If printer is not powered from a wall unit using the AC adapter, turn printer off.
. Do not move handheld or printer until printing is complete.
Printing more than one result
1.
Turn the handheld on.
2.
Press
MENU
3.
Press
2
4.
Press 7
5.
Scroll through the test records using the ← and → keys.
6.
Press the numbered key for the test record(s). (Press the numbered key
again to deselect a record.)
7.
Align handheld and printer IR window or place in Downloader or
.
for Data Review.
for List.
Downloader/Recharger attached to printer. Press
8
.
8.
Do not move handheld or printer until printing is complete.
9.
If printer is not powered from a wall unit using the AC adapter, turn printer off.
9