1
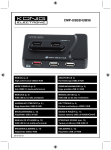
CMP-2DTO3DCONV 2D to 3D video converter MANUAL ANLEITUNG MODE D’EMPLOI GEBRUIKSAANWIJZING MANUALE MANUAL DE USO HASZNÁLATI ÚTMUTATÓ KÄYTTÖOHJE BRUKSANVISNING NÁVOD K POUŽITÍ 1 Introduction Welcome to the 3D Converter Box User Manual. To get the best results from the 3D Converter Box, it is recommended that you first read this manual. 2 Components and Contents 2.1 New 3D Converter Box Components 3D Converter Box Power Supply 3D Glasses Remote Control HDMI Cable 2 2.2 Other Components that are Required A Regular HD TV with at least one HDMI input An existing HDMI Cable Blu-ray Player, Set-Top-Box, Media player etc. 2.3 Converter Box – Front Panel 3 2.4 Converter Box – Back Panel 2.5 Converter Box – Remote Control A E F B G C D H 4 3 Installation 3.1 Connection Diagram – The View After Installation TV HDMI IN 1 Set Top Box Converter Box HDMI OUT Blu Ray Player HDMI OUT HDMI OUT 5 HDMI IN HDMI IN 1 2 The 3D Converter Box supports Hot-Plugging of Devices. Devices can be connected in any order and at any time. Follow the procedure below carefully to step through and view each stage of the installation. Please refer to the Appendix for more advanced connectivity options which handle multichannel audio and other compressed audio formats. 3.2 Step 1: Connect the 3D Converter Box Power Cable 1. Disconnect all cables and leads from the 3D Converter Box. Note that all LEDs on the Front Panel of the 3D Converter Box are off. 2. Connect the 3D Converter Box power cable to the 3D Converter Box and plug in to a mains outlet. Converter Box HDMI IN HDMI IN 1 2 HDMI OUT 3. All of the LEDs will light up briefly (self-test mode) and then they will turn off. Your 3D Converter Box is now plugged in and functioning. It is now time to connect your TV! 6 3.3 Step 2: Connect the 3D Converter Box Output to your TV 1. Connect one end of the first HDMI Cable to the “HDMI Out” port of the 3D Converter Box. 2. Connect the other end of this first HDMI Cable to one of the HDMI input channels on your TV. TV HDMI IN 1 Converter Box HDMI IN HDMI IN 1 2 HDMI OUT 3. Switch on your TV and change the video source to this particular HDMI Input channel on the TV. 4. Note that the first Source LED lights up. 7 5. On your TV note that a 3D Startup Message screen will appear immediately. Note that you can skip the 3D Startup Message screen by pressing “OK” on your remote control. 6. The screen will then show a message saying that ‘No Video Input Source Found’. Your TV is now connected. It is now time to connect a Video Source! 3.4 Step 3: Connect the 3D Converter Box Input Device 1. Connect one end of the second HDMI Cable to the HDMI Output port of your DVD Player, Set-Top-Box, Gaming Device or other video device. 2. Leave the input device switched off 3. Connect the other end of this second HDMI Cable to the “HDMI 1” input port of the 3D Converter Box. 8 TV HDMI IN 1 Set Top Box Converter Box HDMI OUT HDMI IN HDMI IN 1 2 HDMI OUT 4. Note the LEDs show: 5. Note the On-Screen Message remains as follows: 6. Switch on this Input Video Device. 7. The video from the source device will now appear on the screen. 9 Your 3D Converter Box is now connected and installed correctly and ready for action! 3.5 Step 4: Determining the Current Status of the Converter Box At any time when using the 3D Converter Box press “OK” on the remote control to display the information screen. This will show the current HDMI source that is selected, the mode of operation and the input and output resolutions of the converter box. 10 4 3D Converter Box Operation All the functions of the 3D Converter Box can be controlled using either the remote control or the 2 buttons on the 3D Converter Box (the Mode Button and the Source Button). 2DTV 2D Inputs 4.1 3D Inputs Using the 3D Converter Box with 3D Content (3D Auto Detect) 3D Source Devices include: 3D Blu-Ray Players, TV Set-Top-Box, Gaming Consoles 4.1.1 Getting Ready 1. Ensure all connections are correct as described in the Installation section and the TV is tuned to the appropriate HDMI channel. 2. This section is for playing 3D Content e.g. a 3D Blu-ray 4.1.2 Usage 1. In this case the 3D content is HDMI 1.4a compliant and the 3D Converter Box automatically detects the 3D format. 2. Insert a 3D Movie or 3D Game into the input device and start the movie/game playing in 3D mode. 3. There are 2 Modes on the 3D Converter Box: a. 3D to Anaglyph-3D Conversion allows you to watch 3D content in 3D on a 2DTV b. 3D to 2D allows you to watch 3D content as 2D on a 2DTV 11 4. Pressing the “Mode Button” on the Remote Control or on the 3D Converter Box moves through the available modes when playing 3D content. 5. There are 2 modes as shown below 6. Press the “OK” button to see the 3D Mode and Status 7. 3D to Anaglyph-3D Mode : When you connect first, the default mode is “3D to Anaglyph-3D Conversion Mode”. You can watch 3D content on your 2DTV using the supplied glasses and the LEDs will indicate the input content format as below. This allows the 3D movie to be watched on your 2DTV. Note that the on-screen message will indicate which mode you are in when you press the mode button. 12 Put on your 3D Glasses and enjoy the experience! 8. 3D-2D Mode : Press the “Mode Button” again. This changes the mode to “3D to 2D Mode”. This converts the 3D movie to 2D and you can watch it on your TV as normal 2D. You do not need to wear your glasses for this. 4.1.3 A Little More Information About 3D Formats Note: There are 3 3D Formats. The 3D Converter Box supports all 3 formats: • • • 3D Side-by-Side 3D Top-and-Bottom 3D Frame Packing The 3D Converter Box will automatically identify and switch to the correct format if the input source is HDMI 1.4a compliant. 13 The LEDs on the front of the 3D Converter Box will show different patterns depending on the 3D Format that is currently being used. 4.2 Using the 3D Converter Box with other 3D Content e.g. Media Players Other 3D Source Devices include: Media Players, some Set-Top-Boxes and some Gaming Consoles In this case the 3D Content may not be fully HDMI 1.4a compliant so the 3D Converter Box will be unable to detect the 3D format. The user must choose the correct setting manually on the 3D Converter Box to set the input 3D format. 4.2.1 Getting Ready 1. Ensure all connections are correct as described in the Installation section and the TV is tuned to the appropriate HDMI channel. 2. The video content will now be playing on the screen 4.2.2 Usage 1. There are 4 Modes on the 3D Converter Box: a. Bypass b. 2D to Anaglyph-3D Conversion c. 3D(Side-by-Side) to Anaglyph-3D Conversion d. 3D (Top-and-Bottom) to Anaglyph-3D Conversion 2. Pressing the “Mode” Button on the front panel or on the Remote Control will switch between a and b. 3. To access the other modes select the Mode option in the Main Menu. This allows the user to select one of these modes and preview the effect on screen. 14 Bypass (Default) 3D (TAB)->Anaglyph-3D Conversion 2D->Anaglyph-3D Conversion MODE 3D (SBS)->Anaglyph-3D Conversion 4. For example if you know the input content is in Side-by-Side 3D Format and the Converter Box does not Auto-Detect this mode, you can put the converter box into this mode using the mode button. 4.3 Using the 3D Converter Box with a 2D Source Device 2D Source Devices include: Blu-ray Players, DVD Players, TV Set-Top-Boxes, Game Consoles, Other Media Devices 4.3.1 Getting Ready 1. Ensure all connections are correct as described in the Installation section and the TV is tuned to the appropriate HDMI channel. 2. The video content will now be playing on the screen 4.3.2 Usage 1. Insert a 2D Movie or Game into the Input Device 2. There are 4 Modes on the 3D Converter Box: a. Bypass b. 2D to Anaglyph-3D Conversion c. 3D (Side-by-Side) to Anaglyph-3D Conversion d. 3D (Top-and-Bottom) to Anaglyph-3D Conversion 3. Pressing the “Mode Button” moves through each of these modes. (Pressing the Mode Button on the Remote Control also performs this function). 15 Bypass (Default) 3D (TAB)->Anaglyph-3D Conversion 2D->Anaglyph-3D Conversion MODE 3D (SBS)->Anaglyph-3D Conversion When the “Mode Button” is pressed the following Menu will appear with the mode options. 4. When you connect first, the default mode is “Bypass Mode”. You can watch TV as usual (without the glasses) and the LEDs will look like this: 5. Press the “Mode Button” once. This changes the mode to “2D to Anaglyph-3D Conversion Mode”. In this section we are assuming the input content is in 2D format. Put on your 3D glasses and enjoy the 3D experience. 16 Note that other modes are available via the Mode Button as described in the other sections. If other modes are selected with 2D content then the colors and video on the screen may look strange. 4.4 Changing the Input Video Source Input Video Source devices can be connected to either HDMI 1 input port or HDMI 2 Input Port or you can connect 2 devices to the ports simultaneously. Use the “Source Button” to select which input video source is active and is passed to the output of the 3D Converter Box for displaying on your TV. Input Video Source Priority Start HDMI 1 (Default) HDMI 2 SOURCE Use the “Source Button” on the Remote Control to also change the input video source. 4.5 Hot Plugging HDMI1.4a compliant 3D sources will be recognized automatically by the 3D Converter Box and the 3D Converter Box will automatically switch into 3D mode. 17 5 Using the Menu System to Navigate The 3D Converter Box has a menu system built-in to help the user navigate through the functions. This menu system can be operated using the supplied remote control or by using the “Mode Button” and “Source Button” on the 3D Converter Box. 5.1 Main Menu Screen 1. Call up the Main Menu by either pressing the “MENU” Button on the remote control or by holding down the “Mode Button” on the Front Panel of the 3D Converter Box for more than 3 seconds. MENU 2. The Menu Screen will look like this. 3. Navigate the Menu System using the “UP ARROW” and “DOWN ARROW” on the remote control or by pressing the “Mode Button” on the 3D Converter Box. 4. Select a highlighted option by pressing “OK” on the remote control or by pressing the “Source Button” on the 3D Converter Box. 18 5.2 Mode Menu Screen 1. Use the 3D Mode Menu to change the 3D mode depending on the type of source content. 2. Select a highlighted option by pressing “OK” on the remote control. 5.3 3D Adjust Menu Screen 1. Use the 3D Adjust Menu Screen to change the settings related to the 3D effect. 2. Select “Restore Defaults” to return to a balanced 3D mode that is recommended by the manufacturer. Sometimes if 3D Offset or 3D Strength are changed too much from the default positions the 3D picture can become unclear and hard to watch. Use the “Restore Defaults” to return to a balanced screen. 19 3. 5.4 Note that the 3D Adjust settings are only available in 3D Modes. If the user tries to select this option during any other mode the user will get an error message as shown below. 3D Brightness Menu Screen 1. Use the 3D Brightness Menu Screen to change the amount of 3D brightness in the scene. 2. Move the cursor to the right by pressing the “RIGHT ARROW” on the remote control to increase the amount of brightness in the video. 3. Move the cursor to the left by pressing the “LEFT ARROW” on the remote control to decrease the amount of brightness in the video 20 5.5 3D Strength Menu Screen Use the 3D Strength Menu Screen to change the strength of the 3D effect. 1. 2. 3. 5.6 Min3D, the total amount of 3D in the video is quite small Normal3D, a balanced amount of 3D appears in the scene Max3D, a large of amount of 3D, some objects look very near others look far away 3D Offset Menu Screen Use the 3D Offset Menu Screen to change the amount of 3D parallax in the scene. 1. 2. Move the cursor to the right by pressing the “RIGHT ARROW” on the remote control to increase the amount of negative parallax in the video. Negative parallax means that some of the objects appear to be ‘in front of’ your screen. Move the cursor to the left by pressing the “LEFT ARROW” on the remote control to decrease the amount of negative parallax in the video and increase the amount of positive parallax in the video. Positive parallax means that some of the objects appear to be ‘behind’ your screen. 21 5.7 1. 2. Language Menu Screen Select a language for all OSD messages on the Language Menu Screen. Select “Back” or press “LEFT ARROW” to return to the Main Menu. 22 5.8 Version Screen Show the Hardware and Software and Product Number of this 3D Converter Box. May be required if support is needed for your equipment. 6 Upgrading the 3D Converter Box Contact your 3D Converter Box distributor or local retail shop to find out where to download or access the latest USB Upgrade file for the 3D Converter Box. The 3D Converter Box software can be updated by the user using a very simple procedure. All you need is a USB Key (USB Stick) and a PC with an Internet Connection. 6.1 Find a New Upgrade File Download the latest software and copy the latest 3D Converter Box file onto a standard USB key. 6.2 1. 2. 3. 4. Upgrading the 3D Converter Box Simply push the USB Key into the USB slot on the side of the 3D Converter Box . The USB Upgrade begins immediately and will take about 20 seconds to complete. When 5 LEDs have lit up the Upgrade procedure has completed successfully. The USB Key must now be removed and the 3D Converter Box will return to normal operation. (The USB Key must be removed after the upgrade or the 3D Converter Box will not operate). WARNING: Do Not Unplug the Power Cable from the 3D Converter Box during the upgrade procedure as this can corrupt the software inside the 3D Converter Box 23 7 Troubleshooting The following table shows some problems you may encounter when installing and using the 3D Converter Box. If these suggestions do not fix your problems then please contact your 3D Converter Box sales agent or retailer. Problem Meaning How to Fix I get an “Unsupported Video Resolution” Message on the screen The Input Video Device (your DVD player, Blu-ray Player, Set-Top-Box etc.) is using a resolution that the 3D Converter Box does not recognize. Go into the settings menu of your Input Video Device and change the output resolution to one of the 3D Converter Box supported resolutions (see Appendix for a list). Do not choose ‘Auto’ as then the Input Video Device may choose an incompatible format. After Power-Up all the LEDs stay lighted up and do not change There is a fault in the 3D Converter Box Contact your retailer for support. After I do a USB Upgrade I get the correct LEDs lighting up but then nothing happens Normal Functionality cannot resume until the USB Key is removed. Remove the USB Key. 24 Appendix - Compatible Devices The 3D Converter Box is compatible with most major 2D and 3D input video devices. Compatible 2D Devices Compatible 3D Devices Blu-ray Players 3D Blu-ray Players TV Set-Top-Boxes 3D TV Set-Top-Boxes Gaming Consoles 3D Games on Gaming Consoles 2D Tablets Appendix - Notes on Resolutions The 3D Converter Box supports the resolutions listed in the table below. If the Input Video Device that you are using (DVD Player, Blu-Ray Player, Set-Top-Box etc.) is using a different resolution then the 3D Converter Box may not function correctly. In this case you must use the menu system of your input video device to set the output resolution to something in the list below. Supported Input Resolutions (Output of your Input Video Device) Meaning 1080p24 / 1080p23.98 1920x1080p @ 24/23.98 frames per second 1080i60 / 1080i59.94 1920x1080i @ 60/59.94 frames per second 1080i50 1920x1080i @ 50 frames per second 720p60 / 720p59.94 1280x720p @ 60/59.94 frames per second 720p50 1280x720p @ 50 frames per second 576p 720x576p @ 50 frames per second 576i 720x576p @ 50 frames per second 480p 720x480p @ 60 frames per second 480i 720x480p @ 60 frames per second 25 Appendix - Notes on 3D Terminology Meaning Positive Parallax The objects look like they are behind your screen or look like they are pushed into your screen Negative Parallax The objects look like they are in front of your screen or look like they are jumping out of your screen Appendix - Advanced Installation and Connectivity Options For received content that uses multichannel audio or compressed audio formats or non-PCM audio the converter box will not decode these audio formats so other home AV equipment can be used to perform this audio processing. Using a Home Surround Sound System (STB Digital Audio Output) for Audio TV HDMI IN 1 Set Top Box / Blu-ray Player / Media Player DIGITAL AUDIO Optical Converter Box HDMI OUT Coax HDMI OUT Surround Sound System 26 HDMI IN HDMI IN 1 2 Safety precautions: Some people may have problems watching 3D content which can cause headache or other effects. To reduce risk of electric shock, this product should ONLY be opened by an authorized technician when service is required. Disconnect the product from mains and other equipment if a problem should occur. Do not expose the product to water or moisture. Maintenance: Clean only with a dry cloth. Do not use cleaning solvents or abrasives. Warranty: No guarantee or liability can be accepted for any changes and modifications of the product or damage caused due to incorrect use of this product. General: Designs and specifications are subject to change without notice. All logos brands and product names are trademarks or registered trademarks of their respective holders and are hereby recognized as such. Keep this manual and packaging for future reference. Attention: This product is marked with this symbol. It means that used electrical and electronic products should not be mixed with general household waste. There is a separate collections system for these products. 27 Declaration of conformity / Konformitätserklärung / Déclaration de conformité / Conformiteitsverklaring / Dichiarazione di conformità / Declaración de conformidad Megfelelőségi nyilatkozat / Yhdenmukaisuusvakuutus / Överensstämmelseförklaring / Prohláení o shodě / Declaraţie de conformitate / Δήλωση συμφωνίας / Overensstemmelse erklæring / Overensstemmelse forklaring ______________________________________________________________________________________ We, / Wir, / Nous, / Wij, / Questa società, / La empresa infrascrita, / Mi, / Me, / Vi, / Společnost, / Noi, / Εμείς: Nedis B.V., De Tweeling 28, 5215MC, ’s-Hertogenbosch The Netherlands / Niederlande / Pays Bas / Nederland / Paesi Bassi / Países Bajos / Hollandia / Alankomaat / Holland / Nizozemí / Olanda / Ολλανδία: Tel. / Tél / Puh / Τηλ. : 0031 73 5991055 Email / Couriel / Sähköposti / e-post: [email protected] Declare that product: / erklären, dass das Produkt: / Déclarons que le produit: / verklaren dat het product: / Dichiara che il prodotto: / Declara que el producto: / Kijelentjük, hogy a termék, amelynek: / Vakuutamme, että: / Intygar att produkten: / prohlauje, e výrobek: / Declarăm că acest produs: / Δηλώνουμε ότι το προϊόν: / Forsikrer at produktet, / Forsikrer at produktet, Brand: / Marke: / Marque: / Merknaam: / Marca: / Márkája: / Merkki: / Märke: / Značka: / Μάρκα: / mærke: / merke: KÖNIG ELECTRONIC Model: / Modell: / Modèle: / Modello: / Modelo: / Típusa: / Malli: / Μοντέλο: CMP-2DTO3DCONV Description: / Beschreibung: / Description: / Omschrijving: / Descrizione: / Descripción: / Megnevezése: / Kuvaus: / Beskrivning: / Popis: / Descriere: / Περιγραφή: / Beskrivelse: EN: 2D to 3D video converter box DE: FR: NL: 2D naar 3D video converter box IT: ES: HU: FI: SE: CZ: RO: GR: DK : NO : Is in conformity with the following standards: / den folgenden Standards entspricht: / est conforme aux normes suivantes: / in overeenstemming met de volgende normen is: / è conforme ai seguenti standard: / es conforme a las siguientes normas: / Megfelel az alábbi szabványoknak: / Täyttää seuraavat standardit: / Överensstämmer med följande standarder: / splňuje následující normy: / Este în conformitate cu următoarele standarde: / Συμμορφώνεται με τις ακόλουθες προδιαγραφές: / Overensstemmelse med følgende standarder: / Overensstemmer med følgende standarder: EN55013:2001+A1+A2 / EN61000-3-3:2008 / EN55020:2007 / EN55022:2006:A1:2007 / EN55024:1998+A1:2001+A2:2003 / EN61000-3-2:2006 / EN61000-3-3:2008 / EN60950-1:2006+A11:2009 EU Directive(s) / EG-Richtlinie(n) / Directive(s) EU / EU richtlijn(en) / Direttiva(e) EU / Directiva(s) UE / EU direktívák / EU Toimintaohje(et) / Eu Direktiv(en) / Směrnice EU / Directiva(e) UE: / Οδηγία(ες) της ΕΕ / EU Direktiv(er): 2004/108/EC, 2002/95/EC, 2006/95/EC ‘s-Hertogenbosch, 18-11-2011 Ms./Frau/Mme./Mevrouw/Sig.ra/D./úrhölgy/Sl./Frøken/Fru./Dna./Κα: W. van Noorloos Purchase Manager / Einkaufsleiterin / Responsable des achats / Inkoopmanager / Responsabile degli acquisti / Administrador de compras / Beszerzési vezető / Inköpschef / Ostopäällikkö / Nákupní manažér / Innkjøpssjef / Indkøbschef / Manager achiziţii / Διευθύντρια Αγορών Copyright © 28